By Kathleen Juell and Manikandan Kurup

Introduction
WordPress is a free and open-source Content Management System (CMS) built on a MySQL database with PHP processing. Thanks to its extensible plugin architecture and templating system, most of its administration can be done through the web interface. This is a reason why WordPress is a popular choice when creating different types of websites, from blogs to product pages to eCommerce sites.
Running WordPress typically involves installing a LAMP (Linux, Apache, MySQL, and PHP) or LEMP (Linux, Nginx, MySQL, and PHP) stack, which can be time-consuming. However, by using tools like Docker and Docker Compose, you can streamline the process of setting up your preferred stack and installing WordPress. Instead of installing individual components by hand, you can use images, which standardize things like libraries, configuration files, and environment variables. Then, run these images in containers, isolated processes that run on a shared operating system. Additionally, by using Compose, you can coordinate multiple containers — for example, an application and database — to communicate with one another.
In this tutorial, you will build a multi-container WordPress installation. Your containers will include a MySQL database, an Nginx web server, and WordPress itself. You will also secure your installation by obtaining TLS/SSL certificates with Let’s Encrypt for the domain you want associated with your site. Finally, you will set up a cron job to renew your certificates so that your domain remains secure.
Key Takeaways:
- Docker Compose streamlines WordPress deployment by eliminating the need to manually install LAMP/LEMP stack components. Instead, you can use standardized images that bundle libraries, configurations, and environment variables into isolated containers.
- The setup requires four distinct services working together: a MySQL database container, a WordPress application container (with PHP-FPM), an Nginx web server container, and a Certbot container for SSL certificate management.-
- Sensitive credentials (MySQL root password, database username/password) are stored in a
.envfile that’s excluded from version control and Docker images via.gitignoreand.dockerignorefiles, preventing accidental exposure.- - The tutorial implements free TLS/SSL certificates through Let’s Encrypt’s Certbot, using the webroot plugin for domain validation. The process includes testing with staging certificates before obtaining production certificates.-
- Docker named volumes (
dbdata,wordpress,certbot-etc) store application data, database files, and SSL certificates on the host filesystem, ensuring data persists even when containers are recreated.- - The web server requires specific configuration for WordPress, including PHP processing via FastCGI, static asset caching, security headers (X-Frame-Options, Content-Security-Policy), and HTTP-to-HTTPS redirection.-
- All containers connect through a user-defined bridge network (
app-network), enabling inter-container communication while only exposing ports 80 and 443 to the outside world for security.- - A cron job runs a renewal script that uses
certbot renewto automatically refresh certificates before they expire (every 90 days), then reloads the Nginx configuration to apply the updated certificates without downtime.
Prerequisites
If you are using Ubuntu version 20.04 or below, we recommend you upgrade to a more latest version since Ubuntu no longer provides support for these versions. This collection of guides will help you in upgrading your Ubuntu version.
To follow this tutorial, you will need:
-
A server running Ubuntu, along with a non-root user with
sudoprivileges and an active firewall. For guidance on how to set these up, please refer to our Initial Server Setup with Ubuntu guide. -
Docker installed on your server, following Steps 1 and 2 of “How To Install and Use Docker on Ubuntu – Step-by-Step Guide”.
-
Docker Compose installed on your server, following Step 1 of “How To Install Docker Compose on Ubuntu”.
-
A registered domain name. This tutorial will use your_domain throughout.
-
Both of the following DNS records set up for your server. You can follow this introduction to DigitalOcean DNS for details on how to add them to a DigitalOcean account:
- An A record with
your_domainpointing to your server’s public IP address. - An A record with
www.your_domainpointing to your server’s public IP address.
- An A record with
Once you have everything set up, you’re ready to begin the first step.
Step 1 — Defining the Web Server Configuration
Before running any containers, your first step is to define the configuration for your Nginx web server. Your configuration file will include some WordPress-specific location blocks, along with a location block to direct Let’s Encrypt verification requests to the Certbot client for automated certificate renewals.
First, create a project directory for your WordPress setup. In this example, it is called wordpress. You can name this directory differently if you’d like to:
- mkdir wordpress
Then navigate to the directory:
- cd wordpress
Next, make a directory for the configuration file:
- mkdir nginx-conf
Open the file with nano or your favorite editor:
- nano nginx-conf/nginx.conf
In this file, add a server block with directives for your server name and document root, and location blocks to direct the Certbot client’s request for certificates, PHP processing, and static asset requests.
Add the following code into the file. Be sure to replace your_domain with your own domain name:
server {
        listen 80;
        listen [::]:80;

        server_name your_domain www.your_domain;

        index index.php index.html index.htm;

        root /var/www/html;

        location ~ /.well-known/acme-challenge {
                allow all;
                root /var/www/html;
        }

        location / {
                try_files $uri $uri/ /index.php$is_args$args;
        }

        location ~ \.php$ {
                try_files $uri =404;
                fastcgi_split_path_info ^(.+\.php)(/.+)$;
                fastcgi_pass wordpress:9000;
                fastcgi_index index.php;
                include fastcgi_params;
                fastcgi_param SCRIPT_FILENAME $document_root$fastcgi_script_name;
                fastcgi_param PATH_INFO $fastcgi_path_info;
        }

        location ~ /\.ht {
                deny all;
        }

        location = /favicon.ico {
                log_not_found off; access_log off;
        }
        location = /robots.txt {
                log_not_found off; access_log off; allow all;
        }
        location ~* \.(css|gif|ico|jpeg|jpg|js|png)$ {
                expires max;
                log_not_found off;
        }
}
Our server block includes the following information:
Directives:
-
listen: This tells Nginx to listen on port80, which will allow you to use Certbot’s webroot plugin for your certificate requests. Note that you are not including port443yet — you will update your configuration to include SSL once you have successfully obtained your certificates. -
server_name: This defines your server name and the server block that should be used for requests to your server. Be sure to replaceyour_domainin this line with your own domain name. -
index: This directive defines the files that will be used as indexes when processing requests to your server. You modified the default order of priority here, movingindex.phpin front ofindex.htmlso that Nginx prioritizes files calledindex.phpwhen possible. -
root: This directive names the root directory for requests to your server. This directory,/var/www/html, is created as a mount point at build time by instructions in your WordPress Dockerfile. These Dockerfile instructions also ensure that the files from the WordPress release are mounted to this volume.
Location Blocks:
-
location ~ /.well-known/acme-challenge: This location block will handle requests to the.well-knowndirectory, where Certbot will place a temporary file to validate that the DNS for your domain resolves to your server. With this configuration in place, you will be able to use Certbot’s webroot plugin to obtain certificates for your domain. -
location /: In this location block, atry_filesdirective is used to check for files that match individual URI requests. Instead of returning a 404 Not Found status as a default, however, you’ll pass control to WordPress’sindex.phpfile with the request arguments. -
location ~ \.php$: This location block will handle PHP processing and proxy these requests to yourwordpresscontainer. Because your WordPress Docker image will be based on thephp:fpmimage, you will also include configuration options that are specific to the FastCGI protocol in this block. Nginx requires an independent PHP processor for PHP requests. In this case, these requests will be handled by thephp-fpmprocessor that’s included with thephp:fpmimage. Additionally, this location block includes FastCGI-specific directives, variables, and options that will proxy requests to the WordPress application running in yourwordpresscontainer, set the preferred index for the parsed request URI, and parse URI requests. -
location ~ /\.ht: This block will handle.htaccessfiles since Nginx won’t serve them. Thedeny_alldirective ensures that.htaccessfiles will never be served to users. -
location = /favicon.ico,location = /robots.txt: These blocks ensure that requests to/favicon.icoand/robots.txtwill not be logged. -
location ~* \.(css|gif|ico|jpeg|jpg|js|png)$: This block turns off logging for static asset requests and ensures that these assets are highly cacheable, as they are typically expensive to serve.
For more information about FastCGI proxying, read Understanding and Implementing FastCGI Proxying in Nginx. For information about server and location blocks, check out Understanding Nginx Server and Location Block Selection Algorithms.
Save and close the file when you are finished editing. If you used nano, do so by pressing CTRL+X, Y, then ENTER.
With your Nginx configuration in place, you can move on to creating environment variables to pass to your application and database containers at runtime.
Step 2 — Defining Environment Variables
Your database and WordPress application containers will need access to certain environment variables at runtime in order for your application data to persist and be accessible to your application. These variables include both sensitive and non-sensitive information: sensitive values for your MySQL root password and application database user and password, and non-sensitive information for your application database name and host.
Rather than setting all of these values in your Docker Compose file — the main file that contains information about how your containers will run — set the sensitive values in an .env file and restrict its circulation. This will prevent these values from copying over to your project repositories and being exposed publicly.
In your main project directory, ~/wordpress, open a file called .env:
- nano .env
The confidential values that you set in this file include a password for the MySQL root user, and a username and password that WordPress will use to access the database.
Add the following variable names and values to the file. Remember to supply your own values here for each variable:
MYSQL_ROOT_PASSWORD=your_root_password
MYSQL_USER=your_wordpress_database_user
MYSQL_PASSWORD=your_wordpress_database_password
Included is a password for the root administrative account, as well as your preferred username and password for your application database.
Save and close the file when you are finished editing.
Because your .env file contains sensitive information, you want to ensure that it is included in your project’s .gitignore and .dockerignore files. This tells Git and Docker what files not to copy to your Git repositories and Docker images, respectively.
If you plan to work with Git for version control, initialize your current working directory as a repository with git init:
- git init
Then create and open a .gitignore file:
- nano .gitignore
Add .env to the file:
.env
Save and close the file when you are finished editing.
Likewise, it’s a good precaution to add .env to a .dockerignore file, so that it doesn’t end up on your containers when you are using this directory as your build context.
Open the file:
- nano .dockerignore
Add .env to the file:
.env
Below this, you can optionally add files and directories associated with your application’s development:
.env
.git
docker-compose.yml
.dockerignore
Save and close the file when you are finished.
With your sensitive information in place, you can now move on to defining your services in a docker-compose.yml file.
Step 3 — Defining Services with Docker Compose
Your docker-compose.yml file will contain the service definitions for your setup. A service in Compose is a running container, and service definitions specify information about how each container will run.
Using Compose, you can define different services to run multi-container applications since Compose allows you to link these services together with shared networks and volumes. This will be helpful for your current setup since you will create different containers for your database, WordPress application, and web server. You will also create a container to run the Certbot client to obtain certificates for your webserver.
To begin, create and open the docker-compose.yml file:
- nano docker-compose.yml
Add the following code to define your Compose file version and db database service:
version: '3'

services:
  db:
    image: mysql:8.0
    container_name: db
    restart: unless-stopped
    env_file: .env
    environment:
      - MYSQL_DATABASE=wordpress
    volumes:
      - dbdata:/var/lib/mysql
    command: '--default-authentication-plugin=mysql_native_password'
    networks:
      - app-network
The db service definition contains the following options:
-
image: This tells Compose what image to pull to create the container. You are pinning themysql:8.0image here to avoid future conflicts as themysql:latestimage continues to be updated. For more information about version pinning and avoiding dependency conflicts, read the Docker documentation on Dockerfile best practices. -
container_name: This specifies a name for the container. -
restart: This defines the container restart policy. The default isno, but you have set the container to restart unless it is stopped manually. -
env_file: This option tells Compose that you would like to add environment variables from a file called.env, located in your build context. In this case, the build context is your current directory. -
environment: This option allows you to add additional environment variables, beyond those defined in your.envfile. You will set theMYSQL_DATABASEvariable equal towordpressto provide a name for your application database. Because this is non-sensitive information, you can include it directly in thedocker-compose.ymlfile. -
volumes: Here, you’re mounting a named volume calleddbdatato the/var/lib/mysqldirectory on the container. This is the standard data directory for MySQL on most distributions. -
command: This option specifies a command to override the default CMD instruction for the image. In this particular case, you will add an option to the Docker image’s standardmysqldcommand, which starts the MySQL server on the container. This option,--default-authentication-plugin=mysql_native_password, sets the--default-authentication-pluginsystem variable tomysql_native_password, specifying which authentication mechanism should govern new authentication requests to the server. Since PHP and therefore your WordPress image won’t support MySQL’s newer authentication default, you must make this adjustment in order to authenticate your application database user. -
networks: This specifies that your application service will join theapp-networknetwork, which you will define at the bottom of the file.
Next, below your db service definition, add the definition for your wordpress application service:
...
  wordpress:
    depends_on:
      - db
    image: wordpress:5.1.1-fpm-alpine
    container_name: wordpress
    restart: unless-stopped
    env_file: .env
    environment:
      - WORDPRESS_DB_HOST=db:3306
      - WORDPRESS_DB_USER=$MYSQL_USER
      - WORDPRESS_DB_PASSWORD=$MYSQL_PASSWORD
      - WORDPRESS_DB_NAME=wordpress
    volumes:
      - wordpress:/var/www/html
    networks:
      - app-network
In this service definition, you’re naming your container and defining a restart policy, as you did with the db service. You’re also adding some options specific to this container:
-
depends_on: This option ensures that your containers will start in order of dependency, with thewordpresscontainer starting after thedbcontainer. Your WordPress application relies on the existence of your application database and user, so expressing this order of dependency will enable your application to start properly. -
image: For this setup, you are using the5.1.1-fpm-alpineWordPress image. As discussed in Step 1, using this image ensures that your application will have thephp-fpmprocessor that Nginx requires to handle PHP processing. This is also analpineimage, derived from the Alpine Linux project, which will help keep your overall image size down. For more information about the benefits and drawbacks of usingalpineimages and whether or not this makes sense for your application, review the full discussion under the Image Variants section of the Docker Hub WordPress image page. -
env_file: Again, you specify that you want to pull values from your.envfile, since this is where you defined your application database user and password. -
environment: Here, you’re using the values you defined in your.envfile, but are assigning them to the variable names that the WordPress image expects:WORDPRESS_DB_USERandWORDPRESS_DB_PASSWORD. You’re also defining aWORDPRESS_DB_HOST, which will be the MySQL server running on thedbcontainer that’s accessible on MySQL’s default port,3306. YourWORDPRESS_DB_NAMEwill be the same value you specified in the MySQL service definition for yourMYSQL_DATABASE:wordpress. -
volumes: You are mounting a named volume calledwordpressto the/var/www/htmlmountpoint created by the WordPress image. Using a named volume in this way will allow you to share your application code with other containers. -
networks: You’re also adding thewordpresscontainer to theapp-networknetwork.
Next, below the wordpress application service definition, add the following definition for your webserver Nginx service:
...
  webserver:
    depends_on:
      - wordpress
    image: nginx:1.15.12-alpine
    container_name: webserver
    restart: unless-stopped
    ports:
      - "80:80"
    volumes:
      - wordpress:/var/www/html
      - ./nginx-conf:/etc/nginx/conf.d
      - certbot-etc:/etc/letsencrypt
    networks:
      - app-network
Here, you’re naming your container and making it dependent on the wordpress container in starting order. You’re also using an alpine image — the 1.15.12-alpine Nginx image.
This service definition also includes the following options:
-
ports: This exposes port80to enable the configuration options you defined in yournginx.conffile in Step 1. -
volumes: Here, you are defining a combination of named volumes and bind mounts:wordpress:/var/www/html: This will mount your WordPress application code to the/var/www/htmldirectory, the directory you set as therootin your Nginx server block../nginx-conf:/etc/nginx/conf.d: This will bind mount the Nginx configuration directory on the host to the relevant directory on the container, ensuring that any changes you make to files on the host will be reflected in the container.certbot-etc:/etc/letsencrypt: This will mount the relevant Let’s Encrypt certificates and keys for your domain to the appropriate directory on the container.
You’ve also added this container to the app-network network.
Finally, below your webserver definition, add your last service definition for the certbot service. Be sure to replace the email address and domain names listed here with your own information:
  certbot:
    depends_on:
      - webserver
    image: certbot/certbot
    container_name: certbot
    volumes:
      - certbot-etc:/etc/letsencrypt
      - wordpress:/var/www/html
    command: certonly --webroot --webroot-path=/var/www/html --email sammy@your_domain --agree-tos --no-eff-email --staging -d your_domain -d www.your_domain
This definition tells Compose to pull the certbot/certbot image from Docker Hub. It also uses named volumes to share resources with the Nginx container, including the domain certificates and key in certbot-etc and the application code in wordpress.
Again, you’ve used depends_on to specify that the certbot container should be started once the webserver service is running.
You’ve also included a command option that specifies a subcommand to run with the container’s default certbot command. The certonly subcommand will obtain a certificate with the following options:
-
--webroot: This tells Certbot to use the webroot plugin to place files in the webroot folder for authentication. This plugin depends on the HTTP-01 validation method, which uses an HTTP request to prove that Certbot can access resources from a server that responds to a given domain name. -
--webroot-path: This specifies the path of the webroot directory. -
--email: Your preferred email for registration and recovery. -
--agree-tos: This specifies that you agree to ACME’s Subscriber Agreement. -
--no-eff-email: This tells Certbot that you do not wish to share your email with the Electronic Frontier Foundation (EFF). Feel free to omit this if you would prefer. -
--staging: This tells Certbot that you would like to use Let’s Encrypt’s staging environment to obtain test certificates. Using this option allows you to test your configuration options and avoid possible domain request limits. For more information about these limits, please read Let’s Encrypt’s rate limits documentation. -
-d: This allows you to specify domain names you would like to apply to your request. In this case, you’ve includedyour_domainandwww.your_domain. Be sure to replace these with your own domain.
Below the certbot service definition, add your network and volume definitions:
...
volumes:
  certbot-etc:
  wordpress:
  dbdata:

networks:
  app-network:
    driver: bridge
Your top-level volumes key defines the volumes certbot-etc, wordpress, and dbdata. When Docker creates volumes, the contents of the volume are stored in a directory on the host filesystem, /var/lib/docker/volumes/, that’s managed by Docker. The contents of each volume then get mounted from this directory to any container that uses the volume. In this way, it’s possible to share code and data between containers.
The user-defined bridge network app-network enables communication between your containers since they are on the same Docker daemon host. This streamlines traffic and communication within the application, as it opens all ports between containers on the same bridge network without exposing any ports to the outside world. Thus, your db, wordpress, and webserver containers can communicate with each other, and you only need to expose port 80 for front-end access to the application.
The following is docker-compose.yml file in its entirety:
version: '3'

services:
  db:
    image: mysql:8.0
    container_name: db
    restart: unless-stopped
    env_file: .env
    environment:
      - MYSQL_DATABASE=wordpress
    volumes:
      - dbdata:/var/lib/mysql
    command: '--default-authentication-plugin=mysql_native_password'
    networks:
      - app-network

  wordpress:
    depends_on:
      - db
    image: wordpress:5.1.1-fpm-alpine
    container_name: wordpress
    restart: unless-stopped
    env_file: .env
    environment:
      - WORDPRESS_DB_HOST=db:3306
      - WORDPRESS_DB_USER=$MYSQL_USER
      - WORDPRESS_DB_PASSWORD=$MYSQL_PASSWORD
      - WORDPRESS_DB_NAME=wordpress
    volumes:
      - wordpress:/var/www/html
    networks:
      - app-network

  webserver:
    depends_on:
      - wordpress
    image: nginx:1.15.12-alpine
    container_name: webserver
    restart: unless-stopped
    ports:
      - "80:80"
    volumes:
      - wordpress:/var/www/html
      - ./nginx-conf:/etc/nginx/conf.d
      - certbot-etc:/etc/letsencrypt
    networks:
      - app-network

  certbot:
    depends_on:
      - webserver
    image: certbot/certbot
    container_name: certbot
    volumes:
      - certbot-etc:/etc/letsencrypt
      - wordpress:/var/www/html
    command: certonly --webroot --webroot-path=/var/www/html --email sammy@your_domain --agree-tos --no-eff-email --staging -d your_domain -d www.your_domain

volumes:
  certbot-etc:
  wordpress:
  dbdata:

networks:
  app-network:
    driver: bridge
Save and close the file when you are finished editing.
With your service definitions in place, you are ready to start the containers and test your certificate requests.
Step 4 — Obtaining SSL Certificates and Credentials
Start your containers with the docker-compose up command, which will create and run your containers in the order you have specified. By adding the -d flag, the command will run the db, wordpress, and webserver containers in the background:
- docker-compose up -d
The following output confirms that your services have been created:
OutputCreating db ... done
Creating wordpress ... done
Creating webserver ... done
Creating certbot   ... done
Using docker-compose ps, check the status of your services:
- docker-compose ps
Once complete, your db, wordpress, and webserver services will be Up and the certbot container will have exited with a 0 status message:
Output  Name                 Command               State           Ports
-------------------------------------------------------------------------
certbot     certbot certonly --webroot ...   Exit 0
db          docker-entrypoint.sh --def ...   Up       3306/tcp, 33060/tcp
webserver   nginx -g daemon off;             Up       0.0.0.0:80->80/tcp
wordpress   docker-entrypoint.sh php-fpm     Up       9000/tcp
Anything other than Up in the State column for the db, wordpress, or webserver services, or an exit status other than 0 for the certbot container means that you may need to check the service logs with the docker-compose logs command:
- docker-compose logs service_name
You can now check that your certificates have been mounted to the webserver container with docker-compose exec:
- docker-compose exec webserver ls -la /etc/letsencrypt/live
Once your certificate requests succeed, the following is the output:
Outputtotal 16
drwx------    3 root     root          4096 May 10 15:45 .
drwxr-xr-x    9 root     root          4096 May 10 15:45 ..
-rw-r--r--    1 root     root           740 May 10 15:45 README
drwxr-xr-x    2 root     root          4096 May 10 15:45 your_domain
Now that you know your request will be successful, you can edit the certbot service definition to remove the --staging flag.
Open docker-compose.yml:
- nano docker-compose.yml
Find the section of the file with the certbot service definition, and replace the --staging flag in the command option with the --force-renewal flag, which will tell Certbot that you want to request a new certificate with the same domains as an existing certificate. The following is the certbot service definition with the updated flag:
...
  certbot:
    depends_on:
      - webserver
    image: certbot/certbot
    container_name: certbot
    volumes:
      - certbot-etc:/etc/letsencrypt
      - certbot-var:/var/lib/letsencrypt
      - wordpress:/var/www/html
    command: certonly --webroot --webroot-path=/var/www/html --email sammy@your_domain --agree-tos --no-eff-email --force-renewal -d your_domain -d www.your_domain
...
You can now run docker-compose up to recreate the certbot container. You will also include the --no-deps option to tell Compose that it can skip starting the webserver service, since it is already running:
- docker-compose up --force-recreate --no-deps certbot
The following output indicates that your certificate request was successful:
OutputRecreating certbot ... done
Attaching to certbot
certbot      | Saving debug log to /var/log/letsencrypt/letsencrypt.log
certbot      | Plugins selected: Authenticator webroot, Installer None
certbot      | Renewing an existing certificate
certbot      | Performing the following challenges:
certbot      | http-01 challenge for your_domain
certbot      | http-01 challenge for www.your_domain
certbot      | Using the webroot path /var/www/html for all unmatched domains.
certbot      | Waiting for verification...
certbot      | Cleaning up challenges
certbot      | IMPORTANT NOTES:
certbot      |  - Congratulations! Your certificate and chain have been saved at:
certbot      |    /etc/letsencrypt/live/your_domain/fullchain.pem
certbot      |    Your key file has been saved at:
certbot      |    /etc/letsencrypt/live/your_domain/privkey.pem
certbot      |    Your cert will expire on 2019-08-08. To obtain a new or tweaked
certbot      |    version of this certificate in the future, simply run certbot
certbot      |    again. To non-interactively renew *all* of your certificates, run
certbot      |    "certbot renew"
certbot      |  - Your account credentials have been saved in your Certbot
certbot      |    configuration directory at /etc/letsencrypt. You should make a
certbot      |    secure backup of this folder now. This configuration directory will
certbot      |    also contain certificates and private keys obtained by Certbot so
certbot      |    making regular backups of this folder is ideal.
certbot      |  - If you like Certbot, please consider supporting our work by:
certbot      |
certbot      |    Donating to ISRG / Let's Encrypt:   https://letsencrypt.org/donate
certbot      |    Donating to EFF:                    https://eff.org/donate-le
certbot      |
certbot exited with code 0
With your certificates in place, you can move on to modifying your Nginx configuration to include SSL.
Step 5 — Modifying the Web Server Configuration and Service Definition
Enabling SSL in your Nginx configuration will involve adding an HTTP redirect to HTTPS, specifying your SSL certificate and key locations, and adding security parameters and headers.
Since you are going to recreate the webserver service to include these additions, you can stop it now:
- docker-compose stop webserver
Before modifying the configuration file, get the recommended Nginx security parameter from Certbot using curl:
- curl -sSLo nginx-conf/options-ssl-nginx.conf https://raw.githubusercontent.com/certbot/certbot/master/certbot-nginx/certbot_nginx/_internal/tls_configs/options-ssl-nginx.conf
This command will save these parameters in a file called options-ssl-nginx.conf, located in the nginx-conf directory.
Next, remove the Nginx configuration file you created earlier:
- rm nginx-conf/nginx.conf
Create and open another version of the file:
- nano nginx-conf/nginx.conf
Add the following code to the file to redirect HTTP to HTTPS and to add SSL credentials, protocols, and security headers. Remember to replace your_domain with your own domain:
server {
        listen 80;
        listen [::]:80;

        server_name your_domain www.your_domain;

        location ~ /.well-known/acme-challenge {
                allow all;
                root /var/www/html;
        }

        location / {
                rewrite ^ https://$host$request_uri? permanent;
        }
}

server {
        listen 443 ssl http2;
        listen [::]:443 ssl http2;
        server_name your_domain www.your_domain;

        index index.php index.html index.htm;

        root /var/www/html;

        server_tokens off;

        ssl_certificate /etc/letsencrypt/live/your_domain/fullchain.pem;
        ssl_certificate_key /etc/letsencrypt/live/your_domain/privkey.pem;

        include /etc/nginx/conf.d/options-ssl-nginx.conf;

        add_header X-Frame-Options "SAMEORIGIN" always;
        add_header X-XSS-Protection "1; mode=block" always;
        add_header X-Content-Type-Options "nosniff" always;
        add_header Referrer-Policy "no-referrer-when-downgrade" always;
        add_header Content-Security-Policy "default-src * data: 'unsafe-eval' 'unsafe-inline'" always;
        # add_header Strict-Transport-Security "max-age=31536000; includeSubDomains; preload" always;
        # enable strict transport security only if you understand the implications

        location / {
                try_files $uri $uri/ /index.php$is_args$args;
        }

        location ~ \.php$ {
                try_files $uri =404;
                fastcgi_split_path_info ^(.+\.php)(/.+)$;
                fastcgi_pass wordpress:9000;
                fastcgi_index index.php;
                include fastcgi_params;
                fastcgi_param SCRIPT_FILENAME $document_root$fastcgi_script_name;
                fastcgi_param PATH_INFO $fastcgi_path_info;
        }

        location ~ /\.ht {
                deny all;
        }

        location = /favicon.ico {
                log_not_found off; access_log off;
        }
        location = /robots.txt {
                log_not_found off; access_log off; allow all;
        }
        location ~* \.(css|gif|ico|jpeg|jpg|js|png)$ {
                expires max;
                log_not_found off;
        }
}
The HTTP server block specifies the webroot for Certbot renewal requests to the .well-known/acme-challenge directory. It also includes a rewrite directive that directs HTTP requests to the root directory to HTTPS.
The HTTPS server block enables ssl and http2. To read more about how HTTP/2 iterates on HTTP protocols and the benefits it can have for website performance, please read the introduction to How To Set Up Nginx with HTTP/2 Support on Ubuntu 22.04.
This block also includes your SSL certificate and key locations, along with the recommended Certbot security parameters that you saved to nginx-conf/options-ssl-nginx.conf.
Additionally, included are some security headers that will enable you to get A ratings on things like the SSL Labs and Security Headers server test sites. These headers include X-Frame-Options, X-Content-Type-Options, Referrer Policy, Content-Security-Policy, and X-XSS-Protection. The HTTP Strict Transport Security (HSTS) header is commented out — enable this only if you understand the implications and have assessed its “preload” functionality.
Your root and index directives are also located in this block, as are the rest of the WordPress-specific location blocks discussed in Step 1.
Once you have finished editing, save and close the file.
Before recreating the webserver service, you will need to add a 443 port mapping to your webserver service definition.
Open your docker-compose.yml file:
- nano docker-compose.yml
In the webserver service definition, add the following port mapping:
...
  webserver:
    depends_on:
      - wordpress
    image: nginx:1.15.12-alpine
    container_name: webserver
    restart: unless-stopped
    ports:
      - "80:80"
      - "443:443"
    volumes:
      - wordpress:/var/www/html
      - ./nginx-conf:/etc/nginx/conf.d
      - certbot-etc:/etc/letsencrypt
    networks:
      - app-network
Here is the complete docker-compose.yml file after the edits:
version: '3'

services:
  db:
    image: mysql:8.0
    container_name: db
    restart: unless-stopped
    env_file: .env
    environment:
      - MYSQL_DATABASE=wordpress
    volumes:
      - dbdata:/var/lib/mysql
    command: '--default-authentication-plugin=mysql_native_password'
    networks:
      - app-network

  wordpress:
    depends_on:
      - db
    image: wordpress:5.1.1-fpm-alpine
    container_name: wordpress
    restart: unless-stopped
    env_file: .env
    environment:
      - WORDPRESS_DB_HOST=db:3306
      - WORDPRESS_DB_USER=$MYSQL_USER
      - WORDPRESS_DB_PASSWORD=$MYSQL_PASSWORD
      - WORDPRESS_DB_NAME=wordpress
    volumes:
      - wordpress:/var/www/html
    networks:
      - app-network

  webserver:
    depends_on:
      - wordpress
    image: nginx:1.15.12-alpine
    container_name: webserver
    restart: unless-stopped
    ports:
      - "80:80"
      - "443:443"
    volumes:
      - wordpress:/var/www/html
      - ./nginx-conf:/etc/nginx/conf.d
      - certbot-etc:/etc/letsencrypt
    networks:
      - app-network

  certbot:
    depends_on:
      - webserver
    image: certbot/certbot
    container_name: certbot
    volumes:
      - certbot-etc:/etc/letsencrypt
      - wordpress:/var/www/html
    command: certonly --webroot --webroot-path=/var/www/html --email sammy@your_domain --agree-tos --no-eff-email --force-renewal -d your_domain -d www.your_domain

volumes:
  certbot-etc:
  wordpress:
  dbdata:

networks:
  app-network:
    driver: bridge
Save and close the file when you are finished editing.
Recreate the webserver service:
- docker-compose up -d --force-recreate --no-deps webserver
Check your services with docker-compose ps:
- docker-compose ps
The output should indicate that your db, wordpress, and webserver services are running:
Output  Name                 Command               State                     Ports
----------------------------------------------------------------------------------------------
certbot     certbot certonly --webroot ...   Exit 0
db          docker-entrypoint.sh --def ...   Up       3306/tcp, 33060/tcp
webserver   nginx -g daemon off;             Up       0.0.0.0:443->443/tcp, 0.0.0.0:80->80/tcp
wordpress   docker-entrypoint.sh php-fpm     Up       9000/tcp
With your containers running, you can complete your WordPress installation through the web interface.
Step 6 — Completing the Installation Through the Web Interface
With your containers running, finish the installation through the WordPress web interface.
In your web browser, navigate to your server’s domain. Remember to substitute your_domain with your own domain name:
https://your_domain
Select the language you would like to use:
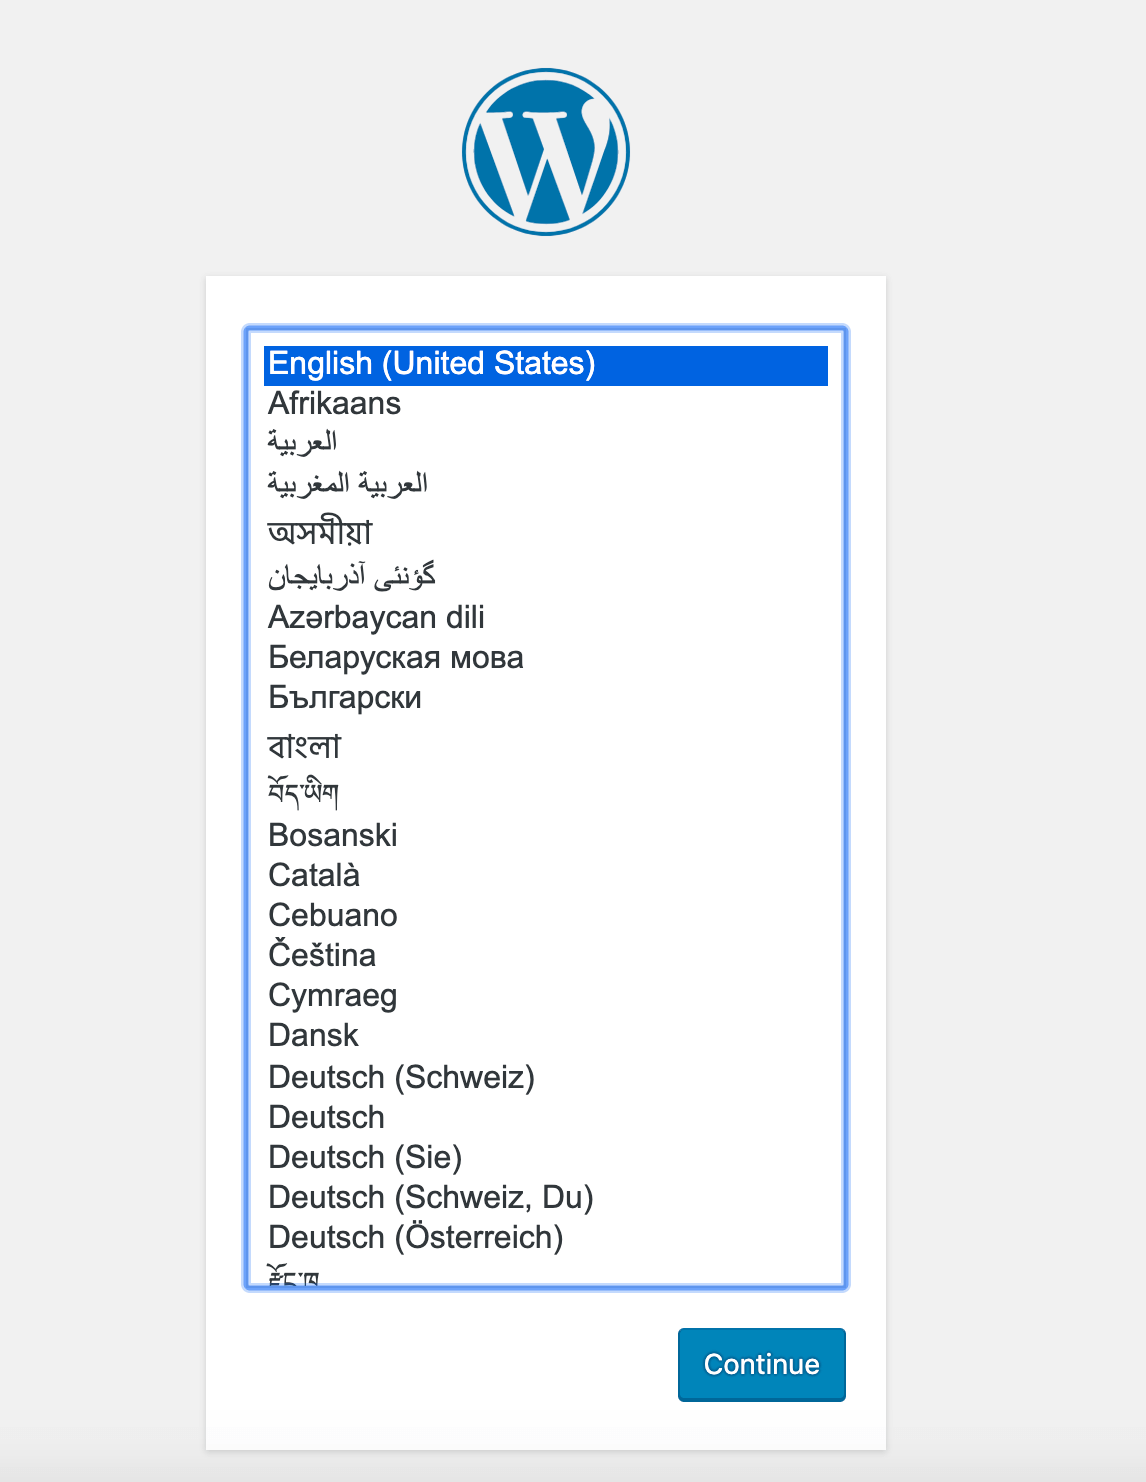
After clicking Continue, you will land on the main setup page, where you will need to pick a name for your site and a username. It’s a good idea to choose a memorable username here (rather than “admin”) and a strong password. You can use the password that WordPress generates automatically or create your own.
Finally, you will need to enter your email address and decide whether or not you want to discourage search engines from indexing your site:

Clicking on Install WordPress at the bottom of the page will take you to a login prompt:
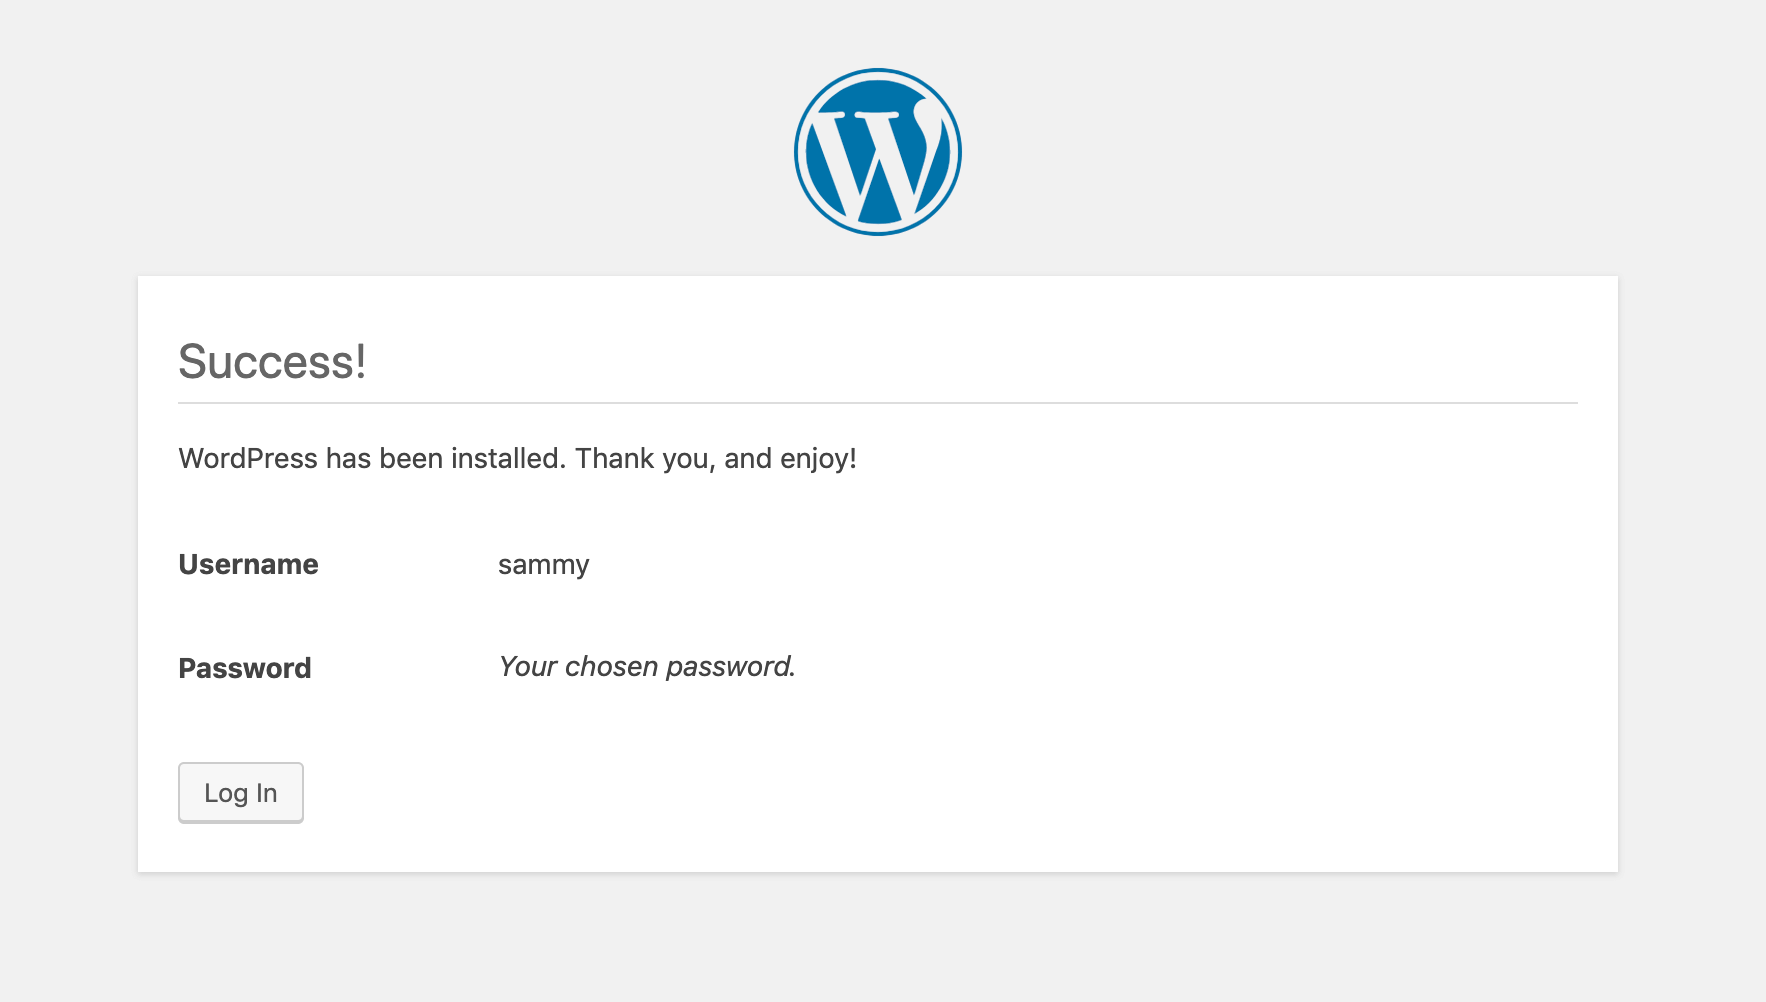
Once logged in, you will have access to the WordPress administration dashboard:
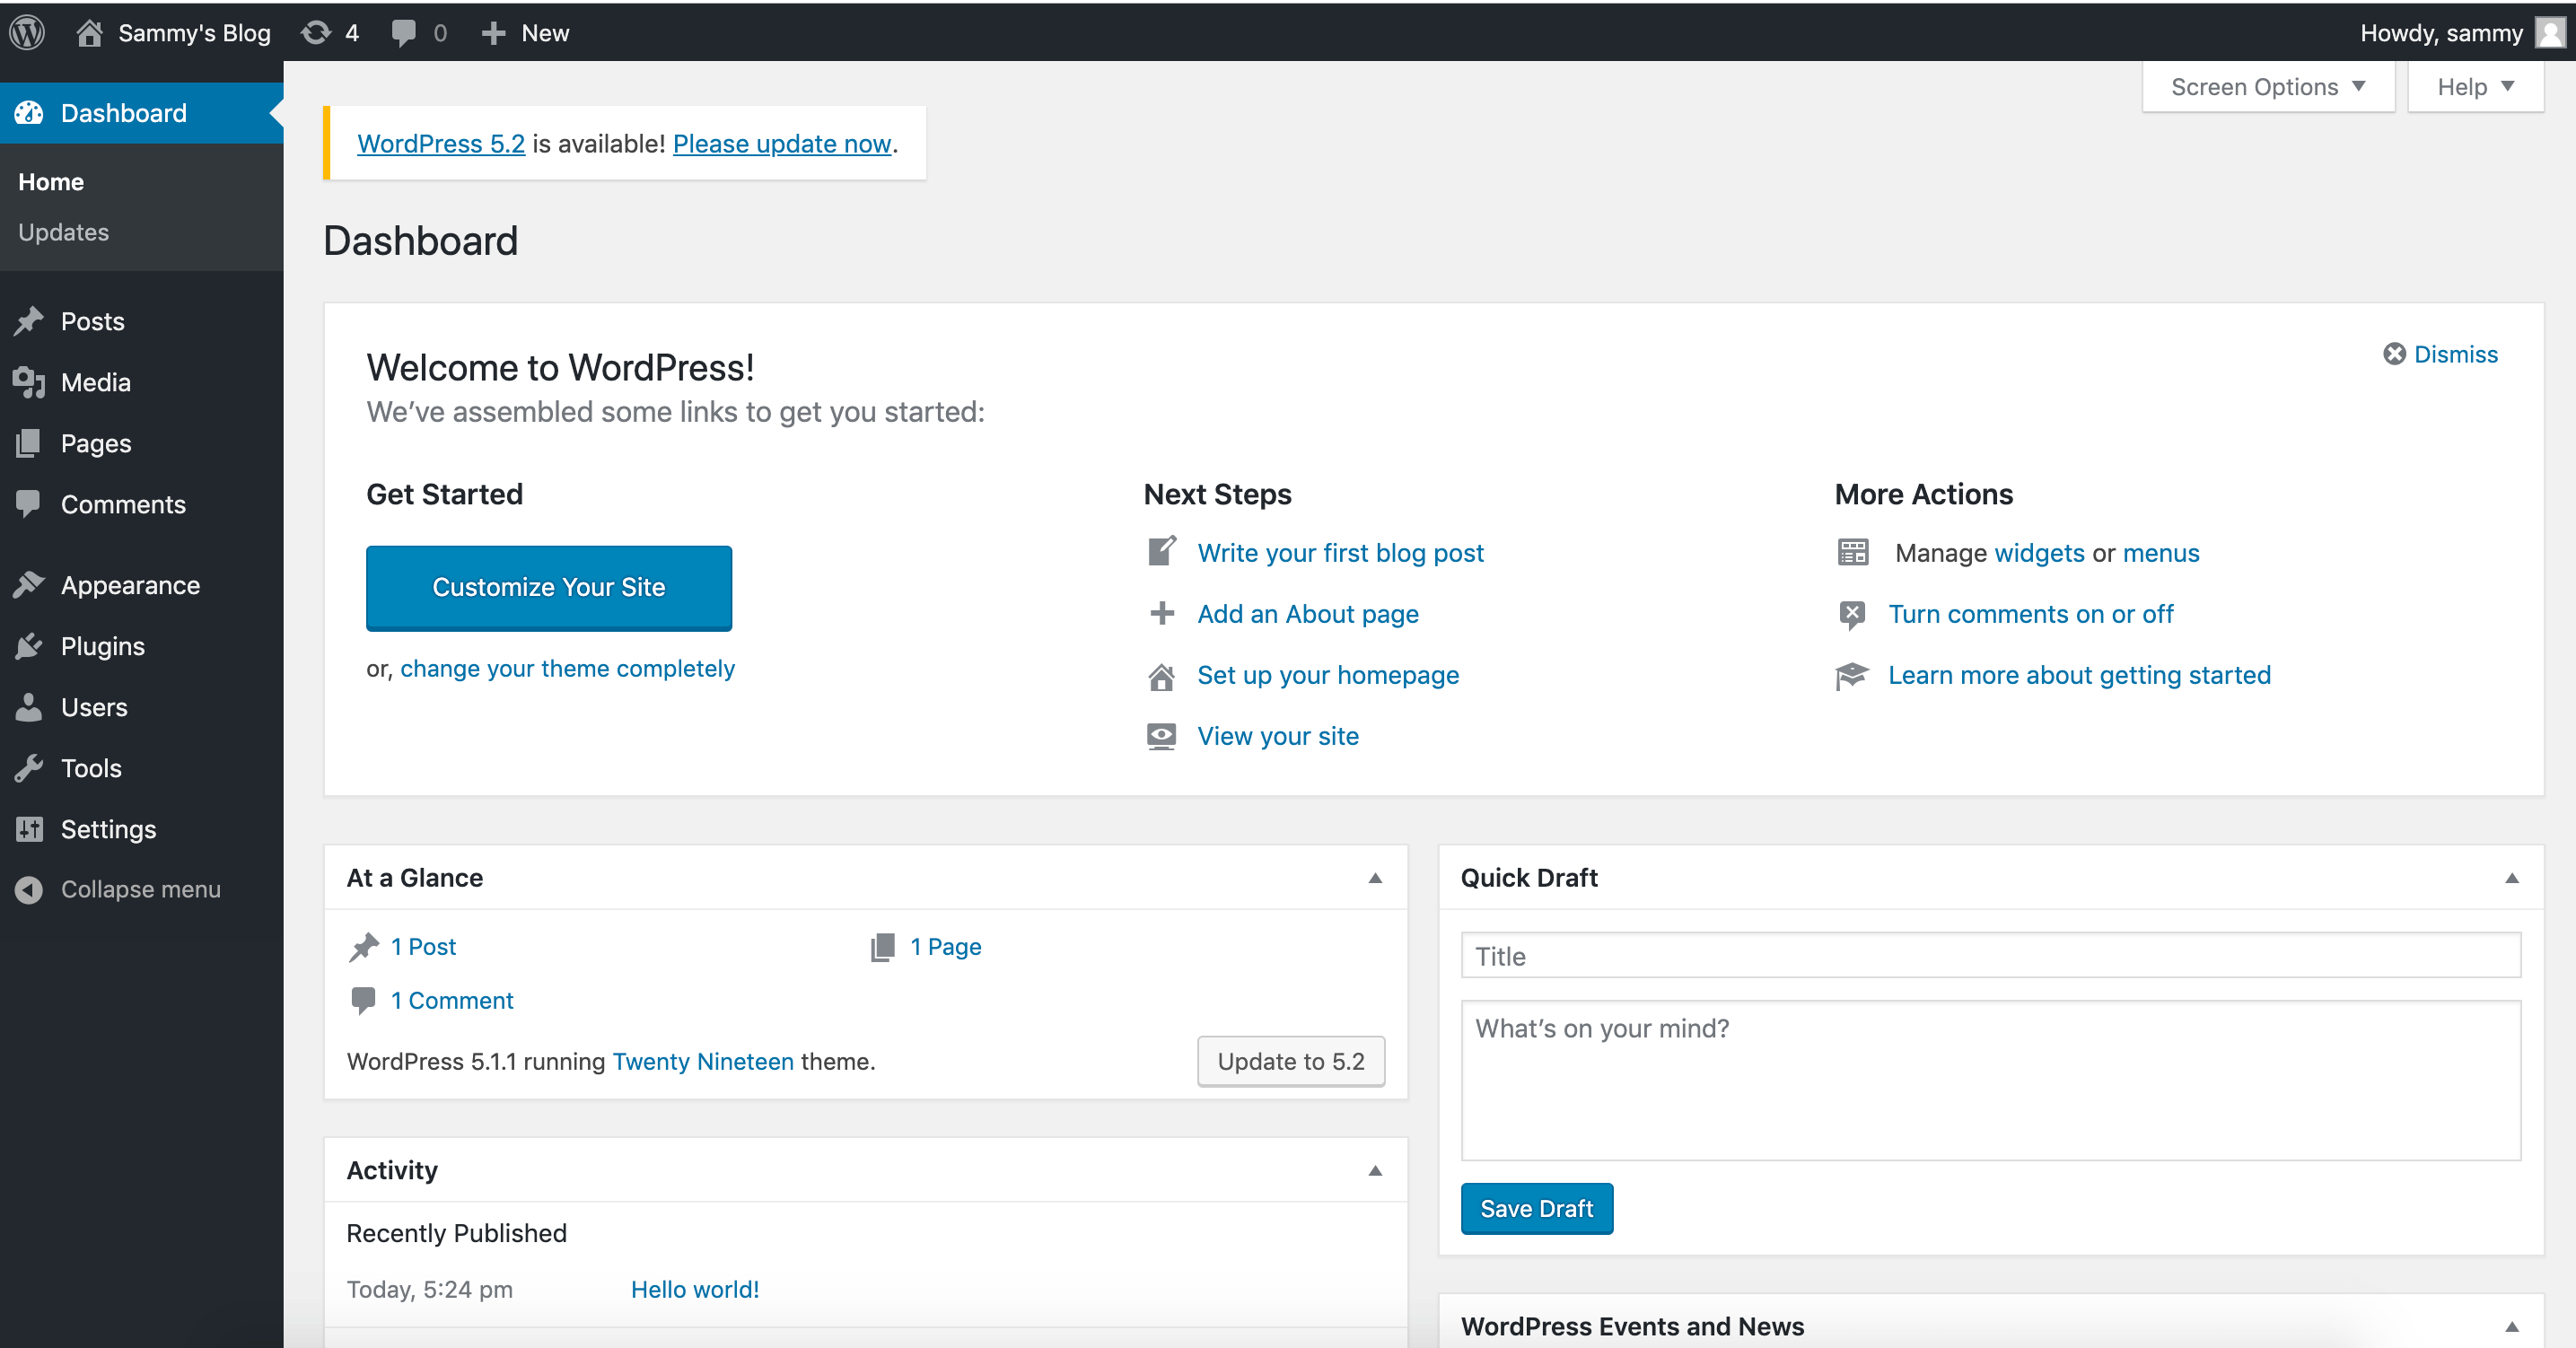
With your WordPress installation complete, you can take steps to ensure that your SSL certificates will renew automatically.
Step 7 — Renewing Certificates
Let’s Encrypt certificates are valid for 90 days. You can set up an automated renewal process to ensure that they do not lapse. One way to do this is to create a job with the cron scheduling utility. In the following example, you will create a cron job to periodically run a script that will renew your certificates and reload your Nginx configuration.
First, open a script called ssl_renew.sh:
- nano ssl_renew.sh
Add the following code to the script to renew your certificates and reload your web server configuration. Remember to replace the example username here with your own non-root username:
#!/bin/bash

COMPOSE="/usr/local/bin/docker-compose --no-ansi"
DOCKER="/usr/bin/docker"

cd /home/sammy/wordpress/
$COMPOSE run certbot renew --dry-run && $COMPOSE kill -s SIGHUP webserver
$DOCKER system prune -af
This script first assigns the docker-compose binary to a variable called COMPOSE, and specifies the --no-ansi option, which will run docker-compose commands without ANSI control characters. It then does the same with the docker binary. Finally, it changes to the ~/wordpress project directory and runs the following docker-compose commands:
docker-compose run: This will start acertbotcontainer and override thecommandprovided in yourcertbotservice definition. Instead of using thecertonlysubcommand, therenewsubcommand is used, which will renew certificates that are close to expiring. Also included is the--dry-runoption to test your script.docker-compose kill: This will send aSIGHUPsignal to thewebservercontainer to reload the Nginx configuration.
It then runs docker system prune to remove all unused containers and images.
Close the file when you are finished editing. Make it executable with the following command:
- chmod +x ssl_renew.sh
Next, open your root crontab file to run the renewal script at a specified interval:
- sudo crontab -e
If this is your first time editing this file, you will be asked to choose an editor:
Outputno crontab for root - using an empty one

Select an editor.  To change later, run 'select-editor'.
  1. /bin/nano        <---- easiest
  2. /usr/bin/vim.basic
  3. /usr/bin/vim.tiny
  4. /bin/ed

Choose 1-4 [1]:
...
At the very bottom of this file, add the following line:
...
*/5 * * * * /home/sammy/wordpress/ssl_renew.sh >> /var/log/cron.log 2>&1
This will set the job interval to every five minutes, so you can test whether or not your renewal request has worked as intended. A log file, cron.log, is created to record relevant output from the job.
After five minutes, check cron.log to confirm whether or not the renewal request has succeeded:
- tail -f /var/log/cron.log
The following output confirms a successful renewal:
Output- - - - - - - - - - - - - - - - - - - - - - - - - - - - - - - - - - - - - - - -
** DRY RUN: simulating 'certbot renew' close to cert expiry
**          (The test certificates below have not been saved.)

Congratulations, all renewals succeeded. The following certs have been renewed:
  /etc/letsencrypt/live/your_domain/fullchain.pem (success)
** DRY RUN: simulating 'certbot renew' close to cert expiry
**          (The test certificates above have not been saved.)
- - - - - - - - - - - - - - - - - - - - - - - - - - - - - - - - - - - - - - - -
Exit out by entering CTRL+C in your terminal.
You can modify the crontab file to set a daily interval. To run the script every day at noon, for example, you would modify the last line of the file like the following:
...
0 12 * * * /home/sammy/wordpress/ssl_renew.sh >> /var/log/cron.log 2>&1
You will also want to remove the --dry-run option from your ssl_renew.sh script:
#!/bin/bash

COMPOSE="/usr/local/bin/docker-compose --no-ansi"
DOCKER="/usr/bin/docker"

cd /home/sammy/wordpress/
$COMPOSE run certbot renew && $COMPOSE kill -s SIGHUP webserver
$DOCKER system prune -af
Your cron job will ensure that your Let’s Encrypt certificates don’t lapse by renewing them when they are eligible. You can also set up log rotation with the Logrotate utility on Ubuntu to rotate and compress your log files.
FAQs
1. Why should I use Docker Compose for WordPress?
Using Docker Compose simplifies the installation process for WordPress. Instead of manually installing a LAMP (Linux, Apache, MySQL, PHP) or LEMP (Linux, Nginx, MySQL, PHP) stack, you can define your entire multi-container environment in a single docker-compose.yml file. This file coordinates all the services your application needs; in this case, a MySQL database, the WordPress application, and an Nginx web server. This method is less time-consuming and allows you to standardize the setup using pre-built images.
2. How are the Nginx web server and WordPress application connected?
The Nginx webserver container and the wordpress container are connected via a custom bridge network defined in the Compose file, named app-network. This network allows the containers to communicate securely. The Nginx configuration (nginx.conf) is set up to handle PHP processing by proxying requests. Specifically, any request matching \.php$ is passed to the wordpress container using the fastcgi_pass wordpress:9000; directive. This works because the wordpress container is running the wordpress:5.1.1-fpm-alpine image, which includes the php-fpm processor that Nginx needs.
3. How does this setup handle sensitive information like database passwords?
This setup securely manages sensitive information by separating it from the main configuration. All credentials, such as the MYSQL_ROOT_PASSWORD, MYSQL_USER, and MYSQL_PASSWORD, are stored in an .env file. The db and wordpress services in the docker-compose.yml file then reference this file using the env_file: .env directive. This prevents sensitive data from being hard-coded, publicly exposed, or accidentally committed to a Git repository. To further this, the tutorial recommends adding .env to .gitignore and .dockerignore files.
4. What is the process for obtaining an SSL certificate?
The setup uses a dedicated certbot container to get certificates from Let’s Encrypt.
- Initial Test: First, you run
docker-compose up -d. Thecertbotservice in thedocker-compose.ymlfile initially includes the--stagingflag. This tells Certbot to request a test certificate from Let’s Encrypt’s staging environment, which helps you avoid rate limits while ensuring your configuration is correct. - Verification: You verify the test certificate was created by checking the
webservercontainer’s/etc/letsencrypt/livedirectory. - Live Certificate: Once you confirm the test was successful, you modify the
certbotservice command in yourdocker-compose.ymlfile. You remove the--stagingflag and add--force-renewal. - Final Request: You then run
docker-compose up --force-recreate --no-deps certbotto stop the oldcertbotcontainer, recreate it with the new command, and request the live, production-ready certificate.
5. How are the SSL certificates renewed automatically?
A shell script, ssl_renew.sh, is created on the host machine to automate the renewal process. This script:
- Changes to the project directory (
~/wordpress). - Runs
$COMPOSE run certbot renewto check if the certificates are near expiration and renew them if necessary. - Runs
$COMPOSE kill -s SIGHUP webserverto send aSIGHUPsignal to the Nginx container, which gracefully reloads its configuration and starts using the new certificate. - This script is then scheduled to run automatically by adding it to the root
crontabfile, which sets it to execute at a defined interval (e.g., daily).
6. Will I lose my database and WordPress files if I stop the containers?
No, the setup is designed for data persistence using named volumes.
- The
dbdatavolume is mounted to/var/lib/mysqlin thedbcontainer, storing all your MySQL database files. - The
wordpressvolume is mounted to/var/www/htmlin both thewordpressandwebservercontainers, storing your WordPress core files, themes, plugins, and uploads. - The
certbot-etcvolume stores your SSL certificates.
These volumes are managed by Docker on the host filesystem and are independent of the container’s lifecycle. This means you can stop, remove, or recreate the containers without losing any of your data.
7. What is the purpose of the command in the db service definition?
The db service uses the mysql:8.0 image, which has a newer default authentication method. The WordPress image, which relies on PHP, does not support this new method.
To fix this compatibility issue, the command: '--default-authentication-plugin=mysql_native_password' directive is added to the db service definition. This overrides the image’s default command and tells the MySQL server to use the older, compatible mysql_native_password authentication plugin, allowing WordPress to successfully connect to the database.
8. How does the Nginx container get the SSL certificates from the Certbot container?
Both the webserver (Nginx) and certbot containers share a named volume called certbot-etc.
- In the
certbotservice, this volume is mounted to/etc/letsencrypt. When Certbot obtains the certificates, it writes them into this directory. - In the
webserverservice, this same volume is also mounted to/etc/letsencrypt.
Because both containers are mounting the same volume, the webserver container has immediate access to the certificate files (fullchain.pem and privkey.pem) written by the certbot container. The Nginx configuration (nginx.conf) can then point directly to these files to enable SSL.
Conclusion
In this tutorial, you used Docker Compose to create a WordPress installation with an Nginx web server. As part of this workflow, you obtained TLS/SSL certificates for the domain you want associated with your WordPress site. Additionally, you created a cron job to renew these certificates when necessary.
As additional steps to improve site performance and redundancy, you can consult the following articles on delivering and backing up WordPress assets:
- How to Speed Up WordPress Asset Delivery Using DigitalOcean Spaces CDN.
- How To Back Up a WordPress Site to Spaces.
- How To Store WordPress Assets on DigitalOcean Spaces.
If you are interested in exploring a containerized workflow with Kubernetes, you can also check out How To Set Up WordPress with MySQL on Kubernetes Using Helm.
Thanks for learning with the DigitalOcean Community. Check out our offerings for compute, storage, networking, and managed databases.
About the author(s)
Former Developer at DigitalOcean community. Expertise in areas including Ubuntu, Docker, Ruby on Rails, Debian, and more.
With over 6 years of experience in tech publishing, Mani has edited and published more than 75 books covering a wide range of data science topics. Known for his strong attention to detail and technical knowledge, Mani specializes in creating clear, concise, and easy-to-understand content tailored for developers.
Still looking for an answer?
This textbox defaults to using Markdown to format your answer.
You can type !ref in this text area to quickly search our full set of tutorials, documentation & marketplace offerings and insert the link!
I noticed the certbot renewal process starts a new container each time it runs. How can we modify ssl_renew.sh to delete the stopped container and its associated volume?
First off, this is a fantastic tutorial. Thank you.
Question, what is the correct way to update wordpress? Should I use the wordpress GUI and upgrade that way, or should I update the docker-compose.yaml file to the latest version and rebuild?
What an excellent tutorial. It doesn’t just give the commands to follow, but explains what each command does. This allowed me to get up and running in no time. Thank you!
I’m curious as to why the UFW firewall isn’t blocking access to 80 and 443, since we never specifically open those ports on the host?
I have the doubt if using the docker image “https-portal” is more practical and efficient to handle the issue of SSL certificates. What do you think?
Anyone else getting Timeout during connect (likely firewall problem) in docker-compose logs certbot?
I went through all the prerequisite articles, but when my run curl --connect-timeout 10 -i domain.co.uk I get curl: (28) Connection timed out after 10005 milliseconds
My ufw status only has OpenSSH and OpenSSH (v6). All I have installed on my server is docker and docker-compose.
I already have a docker-compose.yml (for another container) file in my home directory. Can I simply add to it? Or does running docker-compose up -d from different locations work OK?
Hi, thanks for the tutorial.
I have been facing an issue of “413 request entity too large”. Could you please help me resolve it?
very nice and clean tutorial, I started my docker-compose as a freshhand.
One more question in the ssl renew script:
*#!/bin/bash
COMPOSE=“/usr/local/bin/docker-compose --no-ansi”
cd /home/sammy/wordpress/ $COMPOSE run certbot renew && $COMPOSE kill -s SIGHUP webserver*
How the value sammy defined? i know it was used as the email name before, could thisbe a random value?
This tutorial is great! I just have one issue that I’m stuck on. At the very end when I run docker-compose ps the webserver says restarting instead of up. My initial thought was this would eventually start up, but it continually says restarting.
Anyone know why that might be?
certbot     certbot certonly --webroot ...   Exit 0
db          docker-entrypoint.sh --def ...   Up           3306/tcp, 33060/tcp
webserver   nginx -g daemon off;             Restarting
wordpress   docker-entrypoint.sh php-fpm     Up           9000/tcp
adam@Docker:~/wordpress$ sudo docker-compose ps
  Name                 Command                 State             Ports
-----------------------------------------------------------------------------
 This work is licensed under a Creative Commons Attribution-NonCommercial- ShareAlike 4.0 International License.
Become a contributor for community
Get paid to write technical tutorials and select a tech-focused charity to receive a matching donation.

DigitalOcean Documentation
Full documentation for every DigitalOcean product.

Resources for startups and AI-native businesses
The Wave has everything you need to know about building a business, from raising funding to marketing your product.
The developer cloud
Scale up as you grow — whether you're running one virtual machine or ten thousand.

Start building today
From GPU-powered inference and Kubernetes to managed databases and storage, get everything you need to build, scale, and deploy intelligent applications.
