By Alex Garnett
Senior DevOps Technical Writer
Not using Ubuntu 22.04?
Choose a different version or distribution.
Introduction
When setting up a web server, there are often sections of the site that you wish to restrict access to. Web applications often provide their own authentication and authorization methods, but the web server itself can be used to restrict access if these are inadequate or unavailable. However, web server authentication also represents a very predictable attack surface or attack vector through which people can try to gain access.
Any service that is exposed to the network is a potential target in this way. If you review the logs for any widely trafficked web server, you will often see repeated, systematic login attempts that represent brute force attacks by users and bots alike.
Large-scale production deployments for whom this liability is completely unacceptable will usually implement a VPN such as WireGuard in front of any private endpoints, so that it is impossible to connect directly to these URLs from the outside internet without additional software abstraction or gateways. These VPN solutions are widely trusted, but will add complexity, and can break some automations or other small software hooks.
Prior to or in addition to committing to a full VPN setup, you can implement a tool called Fail2ban. Fail2ban can significantly mitigate brute force attacks by creating rules that automatically alter your firewall configuration to ban specific IPs after a certain number of unsuccessful login attempts. This will allow your server to harden itself against these access attempts without intervention from you.
In this guide, you will learn how to install fail2ban on a Ubuntu 22.04 server and configure it to monitor your Nginx logs for intrusion attempts.
Prerequisites
- Access to an Ubuntu 22.04 server environment with a non-root user with
sudoprivileges in order to perform administrative tasks. To learn how to create such a user, follow the Ubuntu 22.04 initial server setup guide. - Nginx installed on your system, following Steps 1 and 2 of this guide on how to install Nginx on Ubuntu 22.04.
- Nginx installed and configured with password authentication following How To Set Up Password Authentication with Nginx on Ubuntu 22.04.
Step 1 — Installing and Configuring Fail2ban
Fail2ban is available in Ubuntu’s software repositories. Begin by running the following commands as a non-root user to update your package listings and install Fail2ban:
- sudo apt update
- sudo apt install fail2ban
Fail2ban will automatically set up a background service after being installed. However, it is disabled by default, because some of its default settings may cause undesired effects. You can verify this by using the systemctl command:
- systemctl status fail2ban.service
Output○ fail2ban.service - Fail2Ban Service
     Loaded: loaded (/lib/systemd/system/fail2ban.service; disabled; vendor preset: enabled
     Active: inactive (dead)
       Docs: man:fail2ban(1)
You could enable Fail2ban right away, but first, you’ll review some of its features.
The fail2ban service keeps its configuration files in the /etc/fail2ban directory. There is a file with defaults called jail.conf. Go to that directory and print the first 20 lines of that file using head -20:
- cd /etc/fail2ban
- head -20 jail.conf
Output#
# WARNING: heavily refactored in 0.9.0 release.  Please review and
#          customize settings for your setup.
#
# Changes:  in most of the cases you should not modify this
#           file, but provide customizations in jail.local file,
#           or separate .conf files under jail.d/ directory, e.g.:
#
# HOW TO ACTIVATE JAILS:
#
# YOU SHOULD NOT MODIFY THIS FILE.
#
# It will probably be overwritten or improved in a distribution update.
#
# Provide customizations in a jail.local file or a jail.d/customisation.local.
# For example to change the default bantime for all jails and to enable the
# ssh-iptables jail the following (uncommented) would appear in the .local file.
# See man 5 jail.conf for details.
#
# [DEFAULT]
As you’ll see, the first several lines of this file are commented out – they begin with # characters indicating that they are to be read as documentation rather than as settings. As you’ll also see, these comments are directing you not to modify this file directly. Instead, you have two options: either create individual profiles for Fail2ban in multiple files within the jail.d/ directory, or create and collect all of your local settings in a jail.local file. The jail.conf file will be periodically updated as Fail2ban itself is updated, and will be used as a source of default settings for which you have not created any overrides.
In this tutorial, you’ll create jail.local. You can do that by copying jail.conf:
- sudo cp jail.conf jail.local
Now you can begin making configuration changes. Open the file in nano or your favorite text editor:
- sudo nano jail.local
Changing Defaults
You’ll start by evaluating the defaults set within the file. These will be found under the [DEFAULT] section within the file. These items set the general policy and can be overridden on a per-application basis. If you are using nano, you can search within the file by pressing Ctrl+W, entering a search string, then pressing enter.
One of the first items to look at is the list of clients that are not subject to the fail2ban policies. This is set by the ignoreip directive. It is sometimes a good idea to add your own IP address or network to the list of exceptions to avoid locking yourself out. This is less of an issue with web server logins than SSH, since if you are able to maintain shell access you can always reverse a ban. You can uncomment this line and add additional IP addresses or networks delimited by a space, to the existing list:
[DEFAULT]

. . .
#ignoreip = 127.0.0.1/8 your_home_IP
Another item that you may want to adjust is the bantime, which controls how many seconds an offending member is banned for. It is ideal to set this to a long enough time to be disruptive to malicious, automated efforts, while short enough to allow users to correct mistakes. By default, this is set to 10 minutes. You can increase or decrease this value:
[DEFAULT]

. . .
bantime = 10m
The next two items determine the scope of log lines used to determine an offending client. The findtime specifies an amount of time in seconds and the maxretry directive indicates the number of attempts to be tolerated within that time. If a client makes more than maxretry attempts within the amount of time set by findtime, they will be banned:
[DEFAULT]

. . .
findtime = 10m
maxretry = 5
Setting Up Mail Notifications (Optional)
You can optionally enable email notifications to receive mail whenever a ban takes place. You will have to first set up an MTA on your server so that it can send out email. To learn how to use Postfix for this task, follow How to Install and Configure Postfix on ubuntu 22.04.
Once you have your MTA set up, you will have to adjust some additional settings within the [DEFAULT] section of the /etc/fail2ban/jail.local file. Start by setting the mta directive. If you set up Postfix, like the above tutorial demonstrates, change this value to “mail”:
[DEFAULT]

. . .
mta = mail
Provide the email address that will receive mail in the destemail field. The sender option configures the address the mail will be sent from, and needs to be compatible with your Postfix configuration:
[DEFAULT]

. . .
destemail = youraccount@email.com
sendername = root@<fq-hostname>
The action parameter configures the action that Fail2ban takes when it wants to institute a ban. The value action_ is defined in the file shortly before this parameter. The default action is to update your firewall configuration to reject traffic from the offending host until the ban time elapses.
[DEFAULT]
. . .
action = $(action_)s
. . .
There are other action_ scripts provided by default which you can replace $(action_) with above:
…
# ban & send an e-mail with whois report to the destemail.
action_mw = %(action_)s
            %(mta)s-whois[sender="%(sender)s", dest="%(destemail)s", protocol="%(protocol)s", chain="%(chain)s"]

# ban & send an e-mail with whois report and relevant log lines
# to the destemail.
action_mwl = %(action_)s
             %(mta)s-whois-lines[sender="%(sender)s", dest="%(destemail)s", logpath="%(logpath)s", chain="%(chain)s"]
…
Both action_mw and action_mwl will handle sending email using the configuration you provided. In the next step, you’ll move on to Nginx-specific configuration.
Step 2 – Configuring Fail2Ban to Monitor Nginx Logs
Now that you have some of the general fail2ban settings in place, you can enable some Nginx-specific jails that will monitor your web server logs for specific patterns.
Each jail within the configuration file is marked by a header containing the jail name in square brackets – every section but the [DEFAULT] section indicates a specific jail’s configuration. By default, only the [ssh] jail is enabled.
To enable log monitoring for Nginx login attempts, enable the [nginx-http-auth] jail. Add an enabled = true directive within this section:
…
[nginx-http-auth]

enabled  = true
port     = http,https
logpath = %(nginx_error_log)s
. . .
When you are finished making modifications, save and close the file. If you are using nano, press Ctrl+X, then when prompted, Y and then Enter. Next, you’ll review the filter configuration for nginx-http-auth.
Step 3 – Reviewing Filters for Nginx Jails
You may have noticed that the [nginx-http-auth] block in jail.local does not contain any rules specific to Nginx. These rules are not automatically hardcoded inside of Fail2ban – in fact, the [nginx-http-auth] header corresponds directly to a filename inside Fail2ban’s filter.d directory of prepackaged filters. If you list the contents of this directory, you can see the other prepackaged filters available, should you ever need to use them:
- ls /etc/fail2ban/filter.d
Output3proxy.conf                freeswitch.conf         proftpd.conf
apache-auth.conf           froxlor-auth.conf       pure-ftpd.conf
apache-badbots.conf        gitlab.conf             qmail.conf
apache-botsearch.conf      grafana.conf            recidive.conf
apache-common.conf         groupoffice.conf        roundcube-auth.conf
apache-fakegooglebot.conf  gssftpd.conf            scanlogd.conf
apache-modsecurity.conf    guacamole.conf          screensharingd.conf
apache-nohome.conf         haproxy-http-auth.conf  selinux-common.conf
apache-noscript.conf       horde.conf              selinux-ssh.conf
apache-overflows.conf      ignorecommands          sendmail-auth.conf
apache-pass.conf           kerio.conf              sendmail-reject.conf
apache-shellshock.conf     lighttpd-auth.conf      sieve.conf
assp.conf                  mongodb-auth.conf       slapd.conf
asterisk.conf              monit.conf              softethervpn.conf
bitwarden.conf             murmur.conf             sogo-auth.conf
…
For now, take a look at nginx-http-auth.conf:
- cat /etc/fail2ban/filter.d/nginx-http-auth.conf
Output# fail2ban filter configuration for nginx


[Definition]


failregex = ^ \[error\] \d+#\d+: \*\d+ user "(?:[^"]+|.*?)":? (?:password mismatch|was not found in "[^\"]*"), client: <HOST>, server: \S*, request: "\S+ \S+ HTTP/\d+\.\d+", host: "\S+"(?:, referrer: "\S+")?\s*$

ignoreregex =

datepattern = {^LN-BEG}
…
These files contain regular expressions (a common shorthand for text parsing) that determine whether a line in the log is a failed authentication attempt. They can be modified directly as needed.
In the next steps, you’ll enable and test Fail2ban.
Step 4 – Activating your Nginx Jails
At this point, you can enable your Fail2ban service so that it will run automatically from now on. First, run systemctl enable:
- sudo systemctl enable fail2ban
Then, start it manually for the first time with systemctl start:
- sudo systemctl start fail2ban
You can verify that it’s running with systemctl status:
- sudo systemctl status fail2ban
Output● fail2ban.service - Fail2Ban Service
     Loaded: loaded (/lib/systemd/system/fail2ban.service; enabled; vendor preset: enabled
     Active: active (running) since Fri 2022-07-08 17:19:38 UTC; 7s ago
       Docs: man:fail2ban(1)
   Main PID: 5962 (fail2ban-server)
      Tasks: 7 (limit: 2327)
     Memory: 12.6M
        CPU: 195ms
     CGroup: /system.slice/fail2ban.service
             └─5962 /usr/bin/python3 /usr/bin/fail2ban-server -xf start
Note: To implement any future configuration changes, you’ll need to restart the fail2ban service. You can do that by using sudo systemctl restart fail2ban
Getting Info About Enabled Jails
You can see all of your enabled jails by using the fail2ban-client command:
- sudo fail2ban-client status
You should see a list of the enabled jails:
OutputStatus
|- Number of jail:      2
`- Jail list:           nginx-http-auth, sshd
If you want to see the details of the bans being enforced by any one jail, use the fail2ban-client again:
- sudo fail2ban-client status nginx-http-auth
OutputStatus for the jail: nginx-http-auth
|- filter
|  |- File list:        /var/log/nginx/error.log
|  |- Currently failed: 0
|  `- Total failed:     0
`- action
   |- Currently banned: 0
   |  `- IP list:
   `- Total banned:     0
In the last step of this tutorial, you’ll deliberately test getting banned to verify that your Fail2ban configuration is working.
Step 5 – Testing Fail2Ban Policies
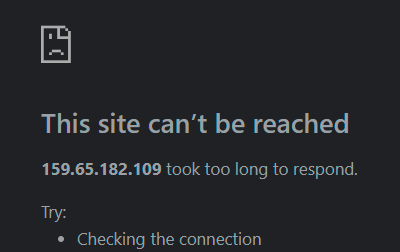
It is important to test your Fail2ban policies to ensure they block traffic as expected. To do this, navigate to your server in a local web browser. At the Nginx authentication prompt, repeatedly enter incorrect credentials. After several tries, the server should stop responding to you entirely, as though your connection is down:
If you look at the status of the nginx-http-auth configuration with fail2ban-client, you will see your IP address being banned from the site:
- sudo fail2ban-client status nginx-http-auth
OutputStatus for the jail: nginx-http-auth
|- Filter
|  |- Currently failed: 0
|  |- Total failed:     5
|  `- File list:        /var/log/nginx/error.log
`- Actions
   |- Currently banned: 1
   |- Total banned:     1
   `- Banned IP list:   108.172.85.62
You can also see the new rule by checking your iptables output. iptables is a command for interacting with low-level port and firewall rules on your server. If you followed DigitalOcean’s guide to initial server setup, you will be using ufw to manage firewall rules at a higher level. Running iptables -S will show you all of the firewall rules that ufw already created:
- sudo iptables -S
Output-P INPUT DROP
-P FORWARD DROP
-P OUTPUT ACCEPT
-N f2b-nginx-http-auth
-N ufw-after-forward
-N ufw-after-input
-N ufw-after-logging-forward
-N ufw-after-logging-input
-N ufw-after-logging-output
-N ufw-after-output
-N ufw-before-forward
-N ufw-before-input
-N ufw-before-logging-forward
-N ufw-before-logging-input
-N ufw-before-logging-output
…
If you pipe the output of iptables -S to grep to search within those rules for the string f2b, you can see the rules that have been added by fail2ban:
- sudo iptables -S | grep f2b
Output-N f2b-nginx-http-auth
-A INPUT -p tcp -m multiport --dports 80,443 -j f2b-nginx-http-auth
-A f2b-nginx-http-auth -s 108.172.85.62/32 -j REJECT --reject-with icmp-port-unreachable
-A f2b-nginx-http-auth -j RETURN
The line containing REJECT --reject-with icmp-port-unreachable has been added by Fail2ban and should reflect the IP address of your local machine. When you are satisfied that your rules are working, you can manually un-ban your IP address with the fail2ban-client by typing:
- sudo fail2ban-client set nginx-http-auth unbanip 108.172.85.62
You should now be able to attempt authentication again.
Conclusion
Fail2ban provides a great deal of flexibility to construct policies that will suit your specific security needs. By taking a look at the variables and patterns within the /etc/fail2ban/jail.local file, and the files it depends on within the /etc/fail2ban/filter.d and /etc/fail2ban/action.d directories, you can find many pieces to tweak and change as your needs evolve. Protecting your server with fail2ban can provide you with a useful security baseline.
To discover more ways to use fail2ban, check out How Fail2Ban Works to Protect Services on a Linux Server and How To Protect SSH with Fail2Ban on Ubuntu 22.04.
Thanks for learning with the DigitalOcean Community. Check out our offerings for compute, storage, networking, and managed databases.
About the author
Former Senior DevOps Technical Writer at DigitalOcean. Expertise in topics including Ubuntu 22.04, Linux, Rocky Linux, Debian 11, and more.
Still looking for an answer?
This textbox defaults to using Markdown to format your answer.
You can type !ref in this text area to quickly search our full set of tutorials, documentation & marketplace offerings and insert the link!
I has a question :-
If we follow this tutorial and make a copy of the jail.conf, calling it jail.local as suggested in this step:
sudo cp /etc/fail2ban/jail.conf /etc/fail2ban/jail.local
Wouldn’t Fail2ban will stop working if we do so ?
Shouldn’t we would want just things that aren’t included in jail.conf or that are different from the defaults In jail.conf in our jail.local file.
Kindly confirm with explanation.
 This work is licensed under a Creative Commons Attribution-NonCommercial- ShareAlike 4.0 International License.
Become a contributor for community
Get paid to write technical tutorials and select a tech-focused charity to receive a matching donation.

DigitalOcean Documentation
Full documentation for every DigitalOcean product.

Resources for startups and AI-native businesses
The Wave has everything you need to know about building a business, from raising funding to marketing your product.
The developer cloud
Scale up as you grow — whether you're running one virtual machine or ten thousand.

Start building today
From GPU-powered inference and Kubernetes to managed databases and storage, get everything you need to build, scale, and deploy intelligent applications.
