By Erika Heidi
Developer Advocate
")
If you’ve been following along with all parts of this series so far, you should have the application’s database and commands upgraded to include lists of links.
The application main route currently shows all links in the database, with no information about lists. In this section, you’ll update the main front end view in order to reflect the new architecture.
One of the biggest advantages of using an ORM system is the ability to manipulate rows in a database table as objects within your codebase. Eloquent provides several methods that can be accessed directly from models to query the database and filter results without having to write SQL statements. A typical SELECT query to obtain all rows from a table, which in pure SQL looks something like SELECT * FROM links, can be accomplished in Eloquent with code like this:
$links = Link::all();
The result set is returned as an Eloquent Collection, an iterable object that behaves similarly to an array, but provides extended functionality such as map / reduce methods and the ability to “hydrate” (pull in fresh data) referenced objects only when needed, which helps with overall performance while interacting with the database.
Updating the Index Route
If you examine the main application route file, where the index route is defined, you’ll notice that the current application code queries all links using a Link::all() call. Open the routes/web.php file in your code editor:
routes/web.php
This is how the / route is currently defined in this file:
…
Route::get('/', function () {
    $links = Link::all()->sortDesc();
    return view('index', [
        'links' => $links
    ]);
});
…
As the name suggests, the sortDesc() method is used for ordering results in descending order, from last to first. This is not the same as an ORDER BY clause in an SQL query, since the sortDesc method works at code level, reordering the collection. You can ignore this method for now, as we’ll talk more about ordering results in an upcoming section of this series.
You’ll now edit this code to obtain a collection of all lists currently registered within the database, so that you can use it later on in the front end view to show all list names.
First, include a use declaration at the beginning of the file, referencing the LinkList model. This declaration is used to make sure that you don’t need to type the full class name each time you reference that class.
<?php

use Illuminate\Support\Facades\Route;
use App\Models\Link;
use App\Models\LinkList;
...
Then, change the return of the main route definition to include a lists variable containing all registered lists:
…
    return view('index', [
        'links' => $links,
        'lists' => LinkList::all()
    ]);
…
This is how the finished file should look. Note the highlighted changes:
<?php

use Illuminate\Support\Facades\Route;
use App\Models\Link;
use App\Models\LinkList;

/*
|--------------------------------------------------------------------------
| Web Routes
|--------------------------------------------------------------------------
|
| Here is where you can register web routes for your application. These
| routes are loaded by the RouteServiceProvider within a group which
| contains the "web" middleware group. Now create something great!
|
*/

Route::get('/', function () {
    $links = Link::all()->sortDesc();
    return view('index', [
        'links' => $links,
        'lists' => LinkList::all()
    ]);
});
Don’t forget to save the file when you’re done updating it.
Updating the Index View
Once you get the main route updated to also provide information about lists, you can edit the referenced view file. Open the resources/views/index.blade.php file in your code editor:
resources/views/index.blade.php
This file contains the single front end view file that the application uses in its main index page. Within this file, locate the @foreach blade block that loops over the $links variable. It will look like this:
...
            @foreach ($links as $link)
                <div class="box link">
                    <h3><a href="{{ $link->url }}" target="_blank" title="Visit Link: {{ $link->url }}">{{ $link->description }}</a></h3>
                    <p>{{$link->url}}</p>
                </div>
            @endforeach
...
The code in the loop does not include any information about lists yet. You’ll now include a new line right after the link URL that contains the title of the list where that link is saved. You can use the tag CSS class from Bulma to style this information as a tag:
…
<p>{{$link->url}}</p>
<p class="mt-2"><a href="#" title="{{ $list->title }}" class="tag is-info">{{ $link->link_list->title }}</a></p>
…
Add the highlighted line to your file. The links will be adjusted later on, when you set up individual list pages in an upcoming part of this series.
Next, locate the paragraph that has the class subtitle, which comes right after the <h1> tag and before the section containing your links. You’ll replace the generic text used in that area with a menu based on your link lists, which you made available previously in a lists variable when you edited the default route in routes/web.php.
Replace the text in the subtitle section with the highlighted content:
        <p class="subtitle">
            @foreach ($lists as $list)<a href="#" title="{{ $list->title }}" class="tag is-info is-light">{{ $list->title }}</a> @endforeach
        </p>
The list tags are styled just slightly differently than before, with an is-light additional CSS class to invert the colors of each tag.
This is how your index.blade.php file should look like after you’re done editing. The highlighted lines indicate the changes:
<!DOCTYPE html>
<html>
<head>
    <meta charset="utf-8">
    <meta name="viewport" content="width=device-width, initial-scale=1">
    <title>My Awesome Links</title>
    <link rel="stylesheet" href="https://cdn.jsdelivr.net/npm/bulma@0.9.1/css/bulma.min.css">

    <style>
        html {
            background: url("https://i.imgur.com/BWIdYTM.jpeg") no-repeat center center fixed;
            -webkit-background-size: cover;
            -moz-background-size: cover;
            -o-background-size: cover;
            background-size: cover;
        }

        div.link h3 {
            font-size: large;
        }

        div.link p {
            font-size: small;
            color: #718096;
        }
    </style>
</head>
<body>
<section class="section">
    <div class="container">
        <h1 class="title">
            Check out my awesome links
        </h1>
        <p class="subtitle">
            @foreach ($lists as $list)<a href="#" title="{{ $list->title }}" class="tag is-info is-light">{{ $list->title }}</a> @endforeach
        </p>

        <section class="links">
            @foreach ($links as $link)
                <div class="box link">
                    <h3><a href="{{ $link->url }}" target="_blank" title="Visit Link: {{ $link->url }}">{{ $link->description }}</a></h3>
                    <p>{{$link->url}}</p>
                    <p class="mt-2"><a href="#" title="{{ $list->title }}" class="tag is-info">{{ $link->link_list->title }}</a></p>
                </div>
            @endforeach
        </section>
    </div>
</section>
</body>
</html>
Save the file when you’re done. The main front end view is now ready to show updated information about link lists.
If you’d like, you can use the link:new Artisan command now to include new links and test your updated application:
- docker-compose exec app php artisan link:new
[secondary_label Output
Link URL:
> https://laravel.com/docs/8.x/

Link Description:
> Laravel Docs

Link List (leave blank to use default):
> laravel

New Link:
https://laravel.com/docs/8.x/ - Laravel Docs
Listed in: laravel

Is this information correct? (yes/no) [no]:
> yes

Saved.
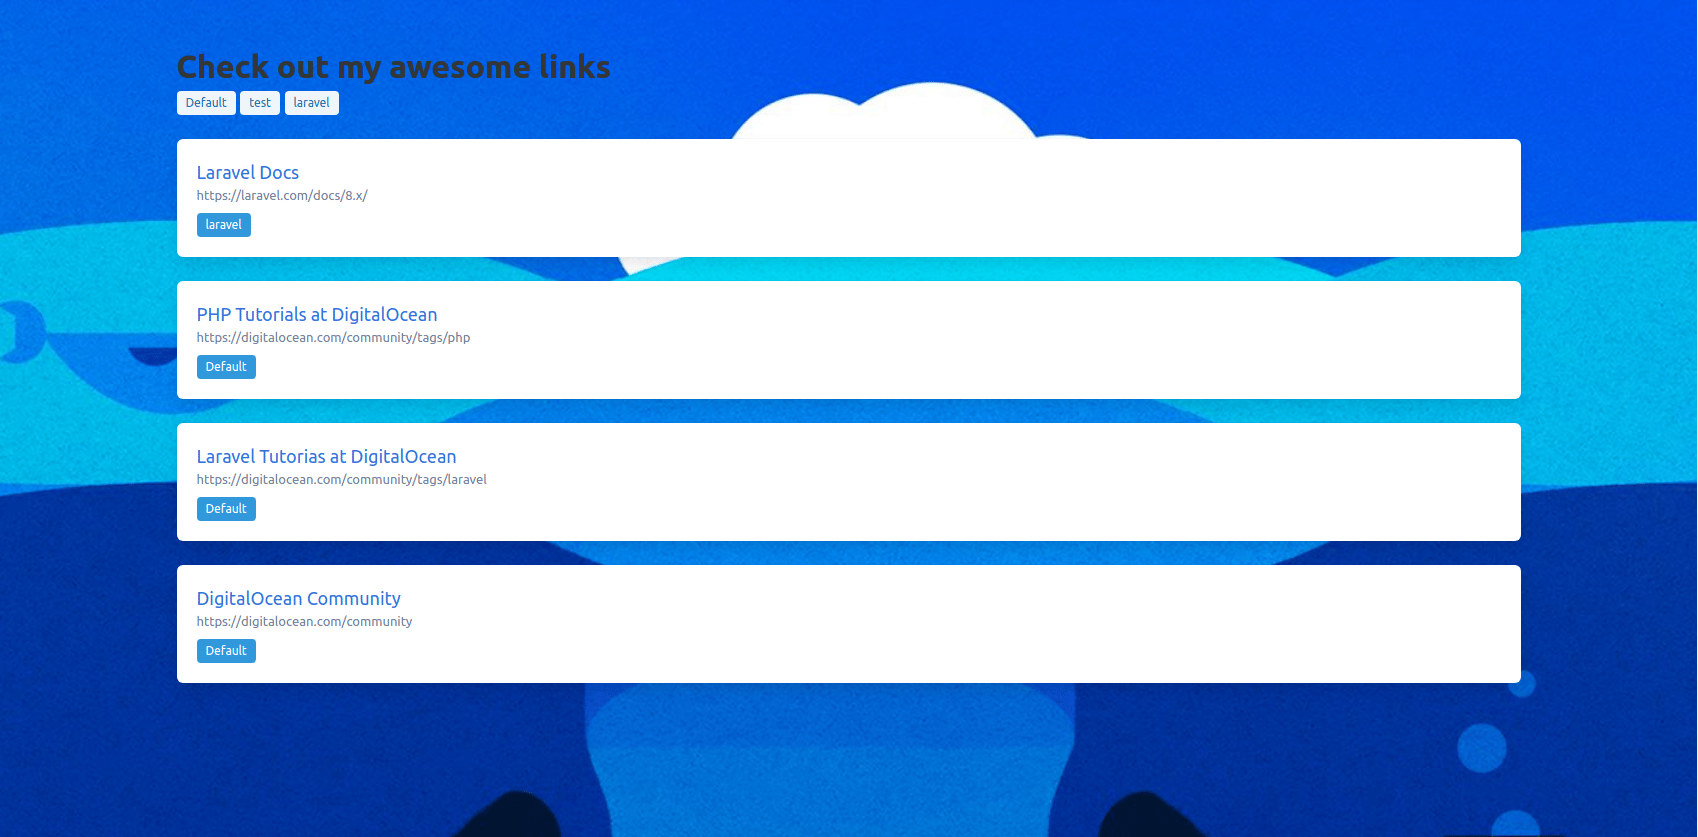
Then, reload the application page on your browser. If you’re using the included Docker Compose setup, the application should be available on the following local address:
http://localhost:8000
You’ll obtain a page similar to this:
In the next part of this series, you’ll set up individual pages for link lists and learn how to make queries to the database using the where() method, for more fine-grained results.
Thanks for learning with the DigitalOcean Community. Check out our offerings for compute, storage, networking, and managed databases.
Tutorial Series: A Practical Introduction to Laravel Eloquent ORM
Eloquent is an object relational mapper (ORM) that is included by default within the Laravel framework. In this project-based series, you’ll learn how to make database queries and how to work with relationships in Laravel Eloquent. To follow along with the examples demonstrated throughout the series, you’ll improve a demo application with new models and relationships. Visit the series introduction page for detailed instructions on how to download and set up the project.
About the author
Dev/Ops passionate about open source, PHP, and Linux. Former Senior Technical Writer at DigitalOcean. Areas of expertise include LAMP Stack, Ubuntu, Debian 11, Linux, Ansible, and more.
Still looking for an answer?
This textbox defaults to using Markdown to format your answer.
You can type !ref in this text area to quickly search our full set of tutorials, documentation & marketplace offerings and insert the link!
 This work is licensed under a Creative Commons Attribution-NonCommercial- ShareAlike 4.0 International License.
Become a contributor for community
Get paid to write technical tutorials and select a tech-focused charity to receive a matching donation.

DigitalOcean Documentation
Full documentation for every DigitalOcean product.

Resources for startups and AI-native businesses
The Wave has everything you need to know about building a business, from raising funding to marketing your product.
The developer cloud
Scale up as you grow — whether you're running one virtual machine or ten thousand.

Start building today
From GPU-powered inference and Kubernetes to managed databases and storage, get everything you need to build, scale, and deploy intelligent applications.
