
Introduction
Contributing to open-source projects is a rewarding experience as you work to make software better for end users like yourself. Once you submit a pull request, the process of contributing to a project can require some rebasing and reworking of code prior to acceptance, followed by a general cleanup of your branches.
This tutorial will guide you through some of the next steps you may need to take after you submit a pull request to an open-source software project.
Prerequisites
This tutorial will walk you through the steps you’ll take after making a pull request, so you should already have Git installed, and either have made or are thinking about creating a pull request.
As of November 2020, GitHub removed password-based authentication. For this reason, you will need to create a personal access token or add your SSH public key information in order to access GitHub repositories through the command line.
To learn more about contributing to open-source projects, you can read this introduction. To learn about making pull requests, you can read “How To Create a Pull Request on GitHub.”
Rebasing Code and Cleaning Up Comments
While you contribute to open source, you may find that there are conflicts between your branch or pull request and the upstream code. You may get an error like this in your shell:
OutputCONFLICT (content): Merge conflict in your-file.py
Automatic merge failed; fix conflicts and then commit the result.
Or like this on your pull request via GitHub’s website:
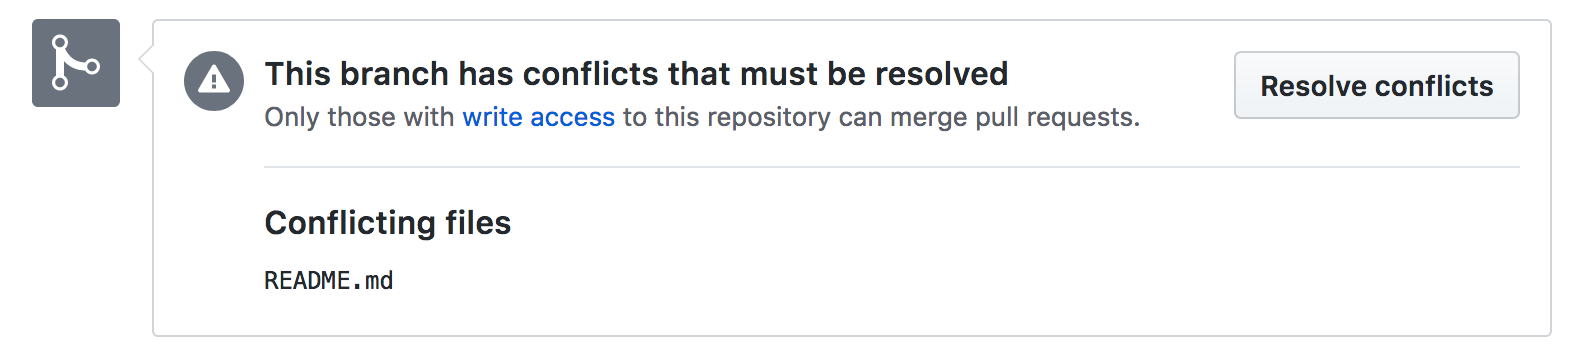
This may happen if the maintainers do not respond to your pull request for a while, or if many people are contributing to the project at once. When this happens and you still want to merge your pull request, you will have to resolve conflicts and rebase your code.
A rebase allows us to move branches around by changing the commit that they are based on. This way, we can rebase our code to make them based on the main branch’s more recent commits. Rebasing should be done with care, and you should make sure you are working with the right commits and on the right branch throughout the process. We’ll also go over using the git reflog command below in case you make an error.
As we did in the pull request tutorial, we’ll move into the code directory:
- cd repository
Next, you want to ensure you’re in the correct branch by navigating to it with the git checkout command:
- git checkout new-branch
Then, run git fetch for the most recent upstream version of the code:
- git fetch origin
Once you have the upstream version of the project fetched, you can clean up your comments by either squashing or rewording your commit messages to make them more digestible to the project maintainers. If you did not do many small commits, this may not be necessary.
To begin this process, you’ll perform an interactive rebase. An interactive rebase can be used to edit previous commit messages, combine several commits into one, or delete or revert commits that are not necessary any longer. To do this, we will need to be able to reference the commits that we have made either by number or by a string that references the base of our branch.
To find out the number of commits we have made, we can inspect the total number of commits that have been made to the project with the following command:
- git log
This will provide you with output that looks similar to this:
Outputcommit 46f196203a16b448bf86e0473246eda1d46d1273
Author: username-2 <email-2>
Date:   Mon Dec 14 07:32:45 2015 -0400

    Commit details

commit 66e506853b0366c87f4834bb6b39d941cd034fe3
Author: username1 <email-1>
Date:   Fri Nov 27 20:24:45 2015 -0500

    Commit details
The log shows all the commits made to the given project’s repository, so your commits will be listed along with commits made by others. For projects that have an extensive history of commits by multiple authors, you’ll want to specify yourself as author in the command:
- git log --author=your-username
By specifying this parameter, you should be able to count up the commits you’ve made. If you’re working on multiple branches you can add --branches[=<branch>] to the end of your command to limit by branch.
Now if you know the number of commits you’ve made on the branch that you want to rebase, you can run the git rebase command like so:
- git rebase -i HEAD~x
Here, -i refers to the rebase being interactive, and HEAD refers to the latest commit from the main branch. The x will be the number of commits you have made to your branch since you initially fetched it.
If, however, you don’t know how many commits you have made on your branch, you’ll need to find which commit is the base of your branch, which you can do by running the following command:
- git merge-base new-branch main
This command will return a long string known as a commit hash, something that looks like the following:
Output66e506853b0366c87f4834bb6b39d341cd094fe9
We’ll use this commit hash to pass to the git rebase command:
git rebase -i 66e506853b0366c87f4834bb6b39d341cd094fe9
For either of the above commands, your command-line text editor will open with a file that contains a list of all the commits in your branch, and you can now choose whether to squash commits or reword them.
Squash Commits
When we squash commit messages, we are squashing or combining several smaller commits into one larger one.
In front of each commit you’ll see the word “pick,” so your file will look similar to this if you have two commits:
pick a1f29a6 Adding a new feature
pick 79c0e80 Here is another new feature

# Rebase 66e5068..79c0e80 onto 66e5068 (2 command(s))
Now, for each line of the file except for the first line, you should replace the word “pick” with the word “squash” to combine the commits:
pick a1f29a6 Adding a new feature
squash 79c0e80 Here is another new feature
At this point, you can save and close the file, which will open a new file that combines all the commit messages of all of the commits. You can reword the commit message as you see fit, and then save and close the file.
You’ll receive feedback once you have closed the file:
OutputSuccessfully rebased and updated refs/heads/new-branch.
You now have combined all of the commits into one by squashing them together.
Reword Commits
Rewording commit messages is great for when you notice a typo, or you realize you were not using parallel language for each of your commits.
Once you perform the interactive rebase as described above with the git rebase -i command, you’ll have a file open up that looks like this:
pick a1f29a6 Adding a new feature
pick 79c0e80 Here is another new feature

# Rebase 66e5068..79c0e80 onto 66e5068 (2 command(s))
Now, for each of the commits that you would like to reword, replace the word “pick” with “reword”:
pick a1f29a6 Adding a new feature
reword 79c0e80 Adding a second new feature

# Rebase 66e5068..79c0e80 onto 66e5068 (2 command(s))
Once you save and close the file, a new text file will appear in your terminal editor that shows the modified wording of the commit message. If you would like to edit the file again, you can do so before saving and closing the file. Doing this can ensure that your commit messages are useful and uniform.
Complete the Rebase
Once you are satisfied with the number of commits you are making and the relevant commit messages, you should complete the rebase of your branch on top of the latest version of the project’s upstream code. To do this, you should run this command from your repository’s directory:
- git rebase origin/main
At this point, Git will begin replaying your commits onto the latest version of main. If you get conflicts while this occurs, Git will pause to prompt you to resolve conflicts prior to continuing. If there is nothing to resolve, your output will state the following:
OutputCurrent branch new-branch is up to date.
Once you have fixed the conflicts, you’ll run:
- git rebase --continue
This command will indicate to Git that it can now continue replaying your commits.
If you previously combined commits through using the squash command, you will only need to resolve conflicts once.
Update Pull Request with Force-Push
Once you perform a rebase, the history of your branch changes, and you are no longer able to use the git push command because the direct path has been modified.
We will have to instead use the --force or -f flag to force-push the changes, informing Git that you are fully aware of what you are pushing.
Let’s first ensure that our push.default is simple, which is the default in Git 2.0+, by configuring it:
- git config --global push.default simple
At this point, we should ensure that we are on the correct branch by checking out the branch we are working on:
- git checkout new-branch
OutputAlready on 'new-branch'
. . .
Now we can perform the force-push:
- git push -f
Now you should receive feedback of your updates along with the message that this was a forced update. Your pull request is now updated.
Recovering Lost Commits
If at some point you threw out a commit that you really wanted to integrate into the larger project, you should be able to use Git to restore commits you may have thrown away by accident.
We’ll be using the git reflog command to find our missing commits and then create a new branch from that commit.
Reflog is short for reference logs which record when the tips of branches and other references were last updated within the local repository.
From the local directory of the code repository we are working in, we’ll run the command:
- git reflog
Once you run this command, you’ll receive output that looks like the following:
Output46f1962 HEAD@{0}: checkout: moving from branch-1 to new-branch
9370d03 HEAD@{1}: commit: code cleanups
a1f29a6 HEAD@{2}: commit: brand new feature
38f2fc2 HEAD@{3}: commit: remove testing methods
. . .
Your commit messages will let you know which of the commits is the one that you left behind, and the relevant string will be before the HEAD@{x} information on the left-hand side of your terminal window.
Now you can take that information and create a new branch from the relevant commit:
git checkout -b new-new-branch a1f29a6
In the example above, we made a new branch from the third commit displayed above, the one that rolled out a “brand new feature,” represented by the string a1f29a6.
Depending on what you need to do from here, you can follow the steps on setting up your branch in this tutorial on pull requests, or return to the top of the current tutorial to work through rebasing the new branch.
Note: If you recently ran the git gc command to clean up unnecessary files and optimize the local repository you may be unable to restore lost commits.
What To Expect In a Code Review
When you submit a pull request, you are in dialogue with a larger project. Submitting a pull request is inviting others to talk about your work, just as you yourself are talking about and engaging with a bigger project. For you to have a successful conversation, it is important for you to be able to communicate why you are making the pull request through your commit messages, so it is best to be as precise and clear as possible.
The pull request review may be lengthy and detailed, depending on the project. It is best to think of the process as a learning experience, and a good way for you to improve your code and make the pull request better and more in line with the needs of the software project. The review should allow you to make the changes yourself through the maintainers’ advice and direction.
The pull request will keep a log of notes from reviewers and any updates and discussions you have together. You may need to make several extra commits throughout this process before the pull request is accepted. This is completely normal and provides a good opportunity for you to work on revision as part of a team.
Your pull request will continue to be maintained through Git, and be auto-updated throughout the process as long as you keep adding commits to the same branch and pushing those to your fork.
Though you are putting your code out there into the larger world for review by your peers, you should never be made to feel like the review is getting personal, so be sure to read relevant CONTRIBUTION.md files or Codes of Conduct. It is important to make sure that your commits are aligning with the guidelines specified by the project, but if you begin to feel uncomfortable, the project you are working on may not be deserving of your contribution. There are many welcoming spaces in the open-source community and while you can expect your code to be looked at with a critical eye, all feedback you receive should be professional and courteous.
Pull Request Acceptance and Deleting Your Branch
If your pull request has been accepted, you have successfully made a contribution to an open-source software project!
At this point, you will need to pull the changes you made back into your fork through your local repository. This is what you have already done when you went through the process to sync your fork. You can do this with the following commands in your terminal window:
- git checkout main
- git pull --rebase origin main
- git push -f origin main
Now, you should clean up both your local and remote branches by removing the branch you created in both places as they are no longer needed. First, let’s remove the local branch:
- git branch -d new-branch
The -d flag added to the git branch command will delete the branch that you pass to the command. In the example above, it is called new-branch.
Next, we’ll remove the remote branch:
- git push origin --delete new-branch
With the branches deleted you have cleaned up the repository and your changes now live in the main repository. You should keep in mind that because the changes you made through your pull request are now part of the main repository, they may not be available to the average end user who is downloading public releases. Generally speaking, software maintainers will bundle several new features and fixes together into a single public release.
Conclusion
This tutorial took you through some of the next steps you may need to complete after submitting a pull request to an open-source software repository.
Contributing to open-source projects — and becoming an active open-source developer — is often a rewarding experience. Making regular contributions to software you frequently use helps to ensure that it is valuable and useful to its community of users.
Thanks for learning with the DigitalOcean Community. Check out our offerings for compute, storage, networking, and managed databases.
Tutorial Series: Introduction to GitHub and Open-Source Projects
Open-source projects that are hosted in public repositories benefit from contributions made by the broader developer community, and are typically managed through Git. This tutorial series will guide you through selecting an open-source project to contribute to, making a pull request to a Git repository through the command line, and taking steps to follow up on your pull request.
Browse Series: 6 tutorials
About the author
Community and Developer Education expert. Former Senior Manager, Community at DigitalOcean. Focused on topics including Ubuntu 22.04, Ubuntu 20.04, Python, Django, and more.
Still looking for an answer?
This textbox defaults to using Markdown to format your answer.
You can type !ref in this text area to quickly search our full set of tutorials, documentation & marketplace offerings and insert the link!
Thank you very much, Lisa I have just signed up to say it, cos I do rebase last days a lot and this post saves all my mistakes from happening, it is amazing! Cheers :-)
Hi Lisa, Thanks for article. I think it would be better if you use forced push with lease, so that it won’t remove others’ work. Vincent
Under “Complete the Rebase”, shouldn’t it be
git rebase upstream/main
instead of
git rebase origin/main
to rebase your branch on top of the latest version of the project’s upstream code?
Excellent article, I spent some days trying to identify the issue. Thanks…
 This work is licensed under a Creative Commons Attribution-NonCommercial- ShareAlike 4.0 International License.
Become a contributor for community
Get paid to write technical tutorials and select a tech-focused charity to receive a matching donation.

DigitalOcean Documentation
Full documentation for every DigitalOcean product.

Resources for startups and AI-native businesses
The Wave has everything you need to know about building a business, from raising funding to marketing your product.
The developer cloud
Scale up as you grow — whether you're running one virtual machine or ten thousand.

Start building today
From GPU-powered inference and Kubernetes to managed databases and storage, get everything you need to build, scale, and deploy intelligent applications.
