
Status: Deprecated
This article covers an older method of configuring GitLab with Let’s Encrypt manually. As of GitLab version 10.5, Let’s Encrypt support is available natively within Gitlab.
Our guide on How To Install and Configure GitLab on Ubuntu 16.04 has been updated to include the relevant configuration settings within GitLab. We recommend referring to that guide moving forward.
Introduction
GitLab, specifically GitLab CE (Community Edition), is an open source application primarily used to host Git repositories, with additional development-related features like issue tracking. The GitLab project makes it relatively straight forward to set up a GitLab instance on your own hardware with an easy installation mechanism.
By default, GitLab serves pages over plain, unencrypted HTTP. Like any web application that handles sensitive information like login credentials, GitLab should be configured to serve pages over TLS/SSL to encrypt data in transit. This is extremely important with GitLab since your project’s code base could be altered by someone able to intercept your login credentials.
The Let’s Encrypt project can be used to easily obtain trusted SSL certificates for any website or web application. Let’s Encrypt offers certificates signed by their certificate authority, which is trusted by all modern web browsers, if you can prove that you own the domain you are requesting a certificate for.
In this guide, we will demonstrate how to configure a GitLab instance installed on Ubuntu 16.04 to use a trusted SSL certificate obtained from Let’s Encrypt. This will secure all outgoing communication to users and ensure that passwords, code, and any other communications are protected from being read or tampered with by outside parties.
Prerequisites
To complete this guide, you will need to have a GitLab instance installed on an Ubuntu 16.04 server. We will assume that you have followed our how to install and configure GitLab on Ubuntu 16.04 guide to get this set up.
In order to obtain a certificate from Let’s Encrypt, your server must be configured with a fully qualified domain name (FQDN). If you do not already have a registered domain name, you may register one with one of the many domain name registrars out there (e.g. Namecheap, GoDaddy, etc.).
If you haven’t already, be sure to create an A Record that points your domain to the public IP address of your server. This is required because of how Let’s Encrypt validates that you own the domain it is issuing a certificate for. For example, if you want to obtain a certificate for gitlab.example.com, that domain must resolve to your server for the validation process to work. You will need a real domain with valid DNS records pointing to your server to successfully complete this guide.
Install Certbot, the Let’s Encrypt Client
Before we can obtain an SSL certificate for our GitLab installation, we will need to download and install Certbot, the official Let’s Encrypt client.
The Certbot developers maintain their own Ubuntu software repository with up-to-date versions of the software. Because Certbot is in such active development it’s worth using this repository to install a newer Certbot than provided by Ubuntu.
First, add the repository:
- sudo add-apt-repository ppa:certbot/certbot
You’ll need to press ENTER to accept. Afterwards, update the package list to pick up the new repository’s package information:
- sudo apt-get update
And finally, install Certbot with apt-get:
- sudo apt-get install certbot
Now that Certbot is installed, we can can prepare our server so that it can respond successfully to the domain ownership verification tests that Let’s Encrypt requires before issuing a certificate.
Prepare for the Let’s Encrypt Web Root Domain Verification
In order to receive an SSL certificate from the Let’s Encrypt certificate authority, we must prove that we own the domain that the certificate will be provided for. There are multiple methods of proving domain ownership, each of which require root or administrator access to the server.
GitLab contains an internally managed Nginx web server for serving the application itself. This makes the installation rather self-contained, but it does add an additional layer of complexity when attempting to modify the web server itself.
Since the embedded Nginx is currently being utilized to serve GitLab itself, the best domain validation method is the web root method. Certbot will use the existing web server to serve a known file from the server on port 80. This proves to the certificate authority that the person requesting the certificate has administrative control over the web server, which effectively proves ownership over the server and domain.
To set up web root domain validation for GitLab, our first step will be to create a dummy document root:
- sudo mkdir -p /var/www/letsencrypt
This will be unused by normal Nginx operations, but will be used by Certbot for domain verification.
Next, we need to adjust GitLab’s Nginx configuration to use this directory. Open up the main GitLab configuration file by typing:
- sudo nano /etc/gitlab/gitlab.rb
Inside, we need to add a line that will inject a custom directive into GitLab’s Nginx configuration file. It’s probably best to scroll down to the GitLab Nginx section of the file, but the line can be placed anywhere.
Paste in the following line:
. . .
nginx['custom_gitlab_server_config'] = "location ^~ /.well-known { root /var/www/letsencrypt; }"
. . .
The Let’s Encrypt web root verification method places a file within a .well-known directory in a document root so that the certificate authority can validate it. This line tells Nginx to serve requests for /.well-known from the web root we created a moment ago.
When you are finished, save and close the file.
Next, apply the changes to GitLab’s Nginx configuration by reconfiguring the application again:
- sudo gitlab-ctl reconfigure
The server should now be set up to successfully validate your domain.
Request a Certificate with Certbot
Now that GitLab’s Nginx instance is configured with the necessary location block, we can use Certbot to validate our domain name and request a certificate.
Because we only want a certificate and do not wish to automatically reconfigure the web server, we will use the certonly subcommand. We will specify three options. We need choose the web root authenticator (--webroot), pass in the document root (--webroot-path=/var/www/letsencrypt), and use the -d command to pass our domain name:
- sudo certbot certonly --webroot --webroot-path=/var/www/letsencrypt -d your_domain
You will be asked to provide an email address. It is important to include a valid email address as this is the only way to reliably receive emails about certificate expirations and other important information. You will also be prompted to accept the Let’s Encrypt terms of service.
Once you are finished, Let’s Encrypt should issue you a certificate for the domain if it was able to correctly validate ownership. You should see output that looks similar to this:
OutputIMPORTANT NOTES:
 - Congratulations! Your certificate and chain have been saved at
   /etc/letsencrypt/live/gitlab.example.com/fullchain.pem. Your cert
   will expire on 2017-07-26. To obtain a new or tweaked version of
   this certificate in the future, simply run certbot again. To
   non-interactively renew *all* of your certificates, run "certbot
   renew"
 - If you lose your account credentials, you can recover through
   e-mails sent to sammy@example.com.
 - Your account credentials have been saved in your Certbot
   configuration directory at /etc/letsencrypt. You should make a
   secure backup of this folder now. This configuration directory will
   also contain certificates and private keys obtained by Certbot so
   making regular backups of this folder is ideal.
 - If you like Certbot, please consider supporting our work by:

   Donating to ISRG / Let's Encrypt:   https://letsencrypt.org/donate
   Donating to EFF:                    https://eff.org/donate-le
You can find all of the certificates and keys that were created by looking at the /etc/letsencrypt/live/your_domain directory with sudo privileges:
- sudo ls /etc/letsencrypt/live/your_domain
Outputcert.pem chain.pem fullchain.pem privkey.pem
For our configuration, we will only need to know the full path to the fullchain.pem and privkey.pem files.
Configure GitLab to Use the Let’s Encrypt Certificates
Now that we have obtained trusted certificates from Let’s Encrypt, we can configure GitLab to use TLS/SSL for all of its traffic.
Edit the GitLab configuration
Start by opening up the GitLab configuration file again:
- sudo nano /etc/gitlab/gitlab.rb
At the top, change the external_url. Currently, it is likely pointing to http://your_domain. We just need to change the http to https:
. . .
external_url 'https://your_domain'
. . .
Next, scroll back down to the GitLab Nginx section. Uncomment and modify, or simply add, the following lines.
The redirect line tells Nginx to automatically redirect requests made to the HTTP port 80 to the HTTPS port 443. The ssl_certificate line should point to the full path of the fullchain.pem file, while the ssl_certificate_key line should point to the full path of the privkey.pem file:
. . .
nginx['redirect_http_to_https'] = true
. . .
nginx['ssl_certificate'] = "/etc/letsencrypt/live/your_domain/fullchain.pem"
nginx['ssl_certificate_key'] = "/etc/letsencrypt/live/your_domain/privkey.pem"
. . .
Save and close the file when you are finished.
Permit HTTPS Traffic Through the Firewall
Next, before reloading GitLab’s Nginx configuration, make sure that HTTPS traffic is allowed through your server’s firewall. You can open up port 443 for this purpose by typing:
- sudo ufw allow https
OutputRule added
Rule added (v6)
Check that port 443 is open by typing:
- sudo ufw status
OutputStatus: active

To                         Action      From
--                         ------      ----
OpenSSH                    ALLOW       Anywhere
80                         ALLOW       Anywhere
443                        ALLOW       Anywhere
OpenSSH (v6)               ALLOW       Anywhere (v6)
80 (v6)                    ALLOW       Anywhere (v6)
443 (v6)                   ALLOW       Anywhere (v6)
As you can see, port 443 is now exposed.
Reconfigure GitLab To Enable SSL
Now, reconfigure GitLab again to implement your changes:
- sudo gitlab-ctl reconfigure
Your GitLab instance should now be accessible over HTTPS using your trusted Let’s Encrypt certificate. You can test this by visiting your GitLab server’s domain name. Since we redirect HTTP to HTTPS, this should work without explicitly specifying a protocol:
http://your_domain
Your browser should automatically redirect you to use HTTPS. You should see some indication that the site is secured in the address bar:
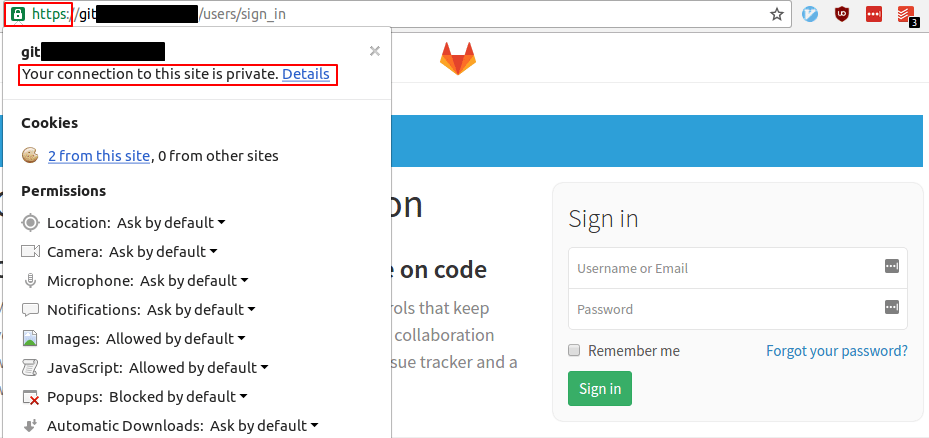
Your GitLab installation is now protected with a TLS/SSL certificate.
Verifying Certbot Auto-Renewal
Let’s Encrypt’s certificates are only valid for ninety days. This is to encourage users to automate their certificate renewal process. The certbot package we installed takes care of this for us by running ‘certbot renew’ twice a day via a systemd timer. On non-systemd distributions this functionality is provided by a script placed in /etc/cron.d. This task runs twice a day and will renew any certificate that’s within thirty days of expiration.
To test the renewal process, you can do a dry run with certbot:
- sudo certbot renew --dry-run
If you see no errors, you’re all set. When necessary, Certbot will renew your certificates and reload Nginx to pick up the changes. If the automated renewal process ever fails, Let’s Encrypt will send a message to the email you specified, warning you when your certificate is about to expire.
Conclusion
Your GitLab instance should now be protected by a secure TLS/SSL certificate that is trusted by all modern browsers. While configuring the embedded Nginx instance is a bit more complex than setting up a stand alone Nginx web server, because GitLab exposes the functionality to customize location blocks in its configuration file, it is easy to work around.
Now that your GitLab instance is secure, it can be safely used to manage projects, host code repositories, and configure continuous integration. You can learn about using GitLab to automatically test each commit to your repository in our article on setting up continuous integration pipelines with GitLab CI.
Thanks for learning with the DigitalOcean Community. Check out our offerings for compute, storage, networking, and managed databases.
About the author
Former Senior Technical Writer at DigitalOcean, specializing in DevOps topics across multiple Linux distributions, including Ubuntu 18.04, 20.04, 22.04, as well as Debian 10 and 11.
Still looking for an answer?
This textbox defaults to using Markdown to format your answer.
You can type !ref in this text area to quickly search our full set of tutorials, documentation & marketplace offerings and insert the link!
Which version of gitlab is this targeting? The omnibus or the source install as I’m unable to locate the gitlab.rb config
Hello
I tried to configure Gitlab with letsencrypt using this tutorial. When I run the command
sudo letsencrypt certonly -a webroot -w /var/www/letsencrypt -d your_domain
I receive the following error:
Failed authorization procedure. git.alternitiv.ch (http-01): urn:acme:error:unauthorized :: The client lacks sufficient authorization :: Invalid response from http://git.alternitiv.ch/.well-known/acme-challenge/6oU_QuiaYZOgCHDrqSuVyMqRXEixgZVvvQ-s-UwU8Fk: "<html>
<head><title>403 Forbidden</title></head>
<body bgcolor="white">
<center><h1>403 Forbidden</h1></center>
<hr><center>"

IMPORTANT NOTES:
 - The following errors were reported by the server:

   Domain: git.alternitiv.ch
   Type:   unauthorized
   Detail: Invalid response from http://git.alternitiv.ch/.well-known
   /acme-challenge/6oU_QuiaYZOgCHDrqSuVyMqRXEixgZVvvQ-s-UwU8Fk:
   "<html>
   <head><title>403 Forbidden</title></head>
   <body bgcolor="white">
   <center><h1>403 Forbidden</h1></center>
   <hr><center>"

   To fix these errors, please make sure that your domain name was
   entered correctly and the DNS A record(s) for that domain
   contain(s) the right IP address.
When I open the suggested URL in a browser, I get a 403 Forbidden error.
I am sure that my domain points to the droplet’s IP address. The Gitlab web application itself is running perfectly (well, without https until now).
I installed Gitlab myself on a Ubuntu 16.04 droplet using the omnibus installer.
Thank you very much for any suggestion or support!
Hello!
Nice article, but there are some not very nice things in the automatic renewal procedure:
- crontab is used instead of /etc/cron.d/letsencrypt
- nginx should be reloaded, not restarted
- nginx should be reloaded only if the certificate has really changed
- the renewal check is made at the same time and when this is massive, letsencrypt servers get a lot of requests at the same time
/etc/cron.d/letsencrypt
0 */12 * * * root perl -e 'sleep int(rand(3600))' && /usr/bin/letsencrypt -renew --renew-hook="/usr/bin/gitlab-ctl hup nginx" >> /var/log/letsencrypt-renew.log
If you run into issues with Let’s Encrypt not issuing a certificate please refer to this issue on GitLab, https://gitlab.com/gitlab-org/omnibus-gitlab/issues/1096 . About halfway down Tobias Brunner goes into enabling a custom Nginx config that fixed it for me.
Hello, I’m able to create all the cerficate data but when I set everything up I get “ERR_CONNECTION_REFUSED” and I don’t know why, I tested different fixes but none of them worked… at one point I had the suspect that “gitlab.rb” wasn’t modifying the “gitlab-http.conf” automatically but that’s not the case… so I ran out of options. Any help is appreciated
Is there a good encryption tool for Gitlab hosted on Redhat Linux servers? I dont find in this topic where Certbot can support multiple Linux flavors. Please suggest a good and secured tool available for data packet access across gitlab.
Appreciate your contribution.
@jellingwood renewing the certificates won’t work because gitlab redirects all requests to https. How could we solve this little problem? I tried in a lot of ways, but still didn’t find a solution yet.
Hi, I am working on providing SSL certificate following this tutorial and receiving this error. " Failed authorization procedure. xx.xxxxx.com (http-01): urn:acme:error:unauthorized :: The client lacks sufficient authorization :: Invalid response from http ".
What I am doing is providing SSL certificate to subdomain. This is registered on other server and pointed to digitalocean IP address.
 This work is licensed under a Creative Commons Attribution-NonCommercial- ShareAlike 4.0 International License.
Become a contributor for community
Get paid to write technical tutorials and select a tech-focused charity to receive a matching donation.

DigitalOcean Documentation
Full documentation for every DigitalOcean product.

Resources for startups and AI-native businesses
The Wave has everything you need to know about building a business, from raising funding to marketing your product.
The developer cloud
Scale up as you grow — whether you're running one virtual machine or ten thousand.

Start building today
From GPU-powered inference and Kubernetes to managed databases and storage, get everything you need to build, scale, and deploy intelligent applications.
