By Tamal Chowdhury and Manikandan Kurup

The author selected Code.org to receive a donation as part of the Write for DOnations program.
Introduction
Typically, you might create a new project using Create React App, but it can take a lot of time to install over 140 MB of dependencies. Vite is a lightweight tool that takes up 31 MB of dependencies, which will save time in starting a new project. Vite also uses the browser-native ES (ECMAScript) modules for linking to JavaScript files, which doesn’t rebuild the entire bundle after each file change. These differences result in a faster experience when creating, updating, and building a React App with Vite.
This tutorial will scaffold a new React App using the Vite tool. You will create a basic app with a new component, CSS, and an image file, and prepare an optimized bundle for deployment.
Simplify deploying React applications with DigitalOcean App Platform. Deploy React directly from GitHub in minutes.
Prerequisites
To follow this tutorial, you will need the following:
- Node.js version 12.2.0 or higher installed on your machine. You can install the latest version of Node.js with our tutorial on How To Install Node.js.
- Yarn package manager version 1.22.0 or higher installed on your machine. You can install Yarn by following Step 1 in How To Install and Use the Yarn Package Manager for Node.js.
- Familiarity with HTML, CSS, and modern JavaScript. It also helps to know modern JS used in React.
- A foundational knowledge of React, which you can learn with the How To Code in React series.
- A mobile phone connected to the same Wifi network as your computer so you can preview your app from mobile.
Step 1 — Creating a Vite Project
In this step, you will create a new React project using the Vite tool from the command line. You will use the yarn package manager to install and run the scripts.
Run the following command in your terminal to scaffold a new Vite project:
- yarn create vite
This command will run the Vite executable from the remote npm repository. It will configure the necessary tools to scaffold a React local development environment. Finally, it will open a command-line menu for project settings and language type.
After the script finishes, you will be prompted to enter a project name:
Outputyarn create v1.22.10
[1/4] Resolving packages...
[2/4] Fetching packages...
[3/4] Linking dependencies...
[4/4] Building fresh packages...

success Installed "create-vite@2.9.0" with binaries:
- create-vite
- cva
? Project name: » vite-project
Type your project name (this tutorial will use digital-ocean-vite as the example name):
- digital-ocean-vite
After entering your project name, Vite will prompt you to select a framework:
Output? Select a framework: » - Use arrow-keys. Return to submit.
Vanilla
Vue
> React
Preact
Lit
Svelte
Solid
Qwik
Angular
Marko
Others
Vite allows you to bootstrap a range of project types, not just React. Currently, it supports React, Preact, Vue, Lit, Svelte, and vanilla JavaScript projects.
Use your keyboard arrow key to select React.
After selecting the React framework, Vite will prompt you to choose the language type. You can use JavaScript or TypeScript to work on your project.
Use your arrow keys to select JavaScript:
Output? Select a variant: » - Use arrow-keys. Return to submit.
TypeScript
TypeScript + SWC
> JavaScript
JavaScript + SWC
React Router v7
TanStack Router
RedwoodSDK
SWC is a JavaScript/TypeScript compiler used in Vite for transforming JavaScript and TypeScript code. It is a fast and low-level JavaScript/TypeScript compiler written in Rust to provide faster build times and better performance.
After setting up the framework, you will see an output that the project has been scaffolded. Vite will then instruct you to install dependencies using Yarn:
OutputDone:
Scaffolding project in path\to\digital-ocean-vite...

Done. Now run:

cd digital-ocean-vite
yarn
yarn dev

Done in 129.89s.
Navigate to your project folder as directed:
- cd digital-ocean-vite
Then, use the yarn command to install the dependencies of the project:
- yarn
When finished, the dependency installation will return an output with how long it took to install dependencies:
Outputsuccess Saved lockfile.
Done in 43.26s.
You have now set up a new React project using Vite and installed the packages required by React and Vite.
Next, you will start the development server to test the application.
Step 2 — Starting the Development Server
In this step, you will start the development server to verify that everything is working.
From inside the digital-ocean-vite folder, use the following command to run the development server:
- yarn run dev
This command is an alias of the vite command. It will run your project in development mode.
You will receive the following output:
OutputVITE v4.0.4 ready in 847 ms

➜ Local: http://localhost:5173/
➜ Network: use --host to expose
➜ press h to show help
Next, open your browser and visit http://localhost:5173/. The default React project will be running on port 5173:
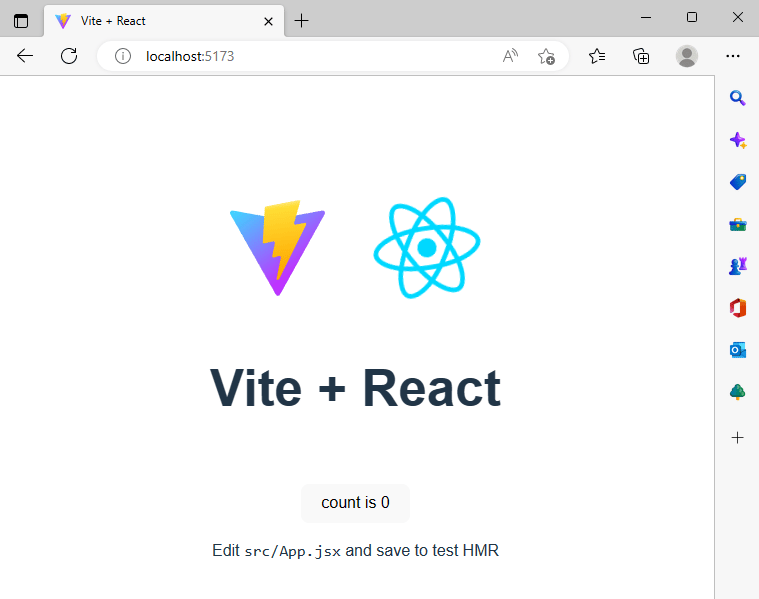
When you see this app running, you have successfully installed React with Vite. Next, you will preview your app from your mobile phone.
Step 3 — Previewing Your App from Mobile Phone
Vite does not expose your development application to your network by default. In this step, you will expose the app to your local network to preview it from your mobile phone.
To run your app in your local network, you have to stop the current server first. In your terminal, use CTRL+C to terminate the currently running development server.
Next, use the following command to run your project:
- yarn run dev --host
The --host flag tells Vite to expose your app to the local network.
You will receive this output in your terminal:
OutputVITE v4.0.4 ready in 747 ms

➜ Local: http://localhost:5173/
➜ Network: http://your_ip_address:5173/
➜ press h to show help
This is a local IP address, unique to your computer network or router.
Open a browser on your mobile phone, then type in the above IP address and port to access the preview of your Vite app from your mobile phone:
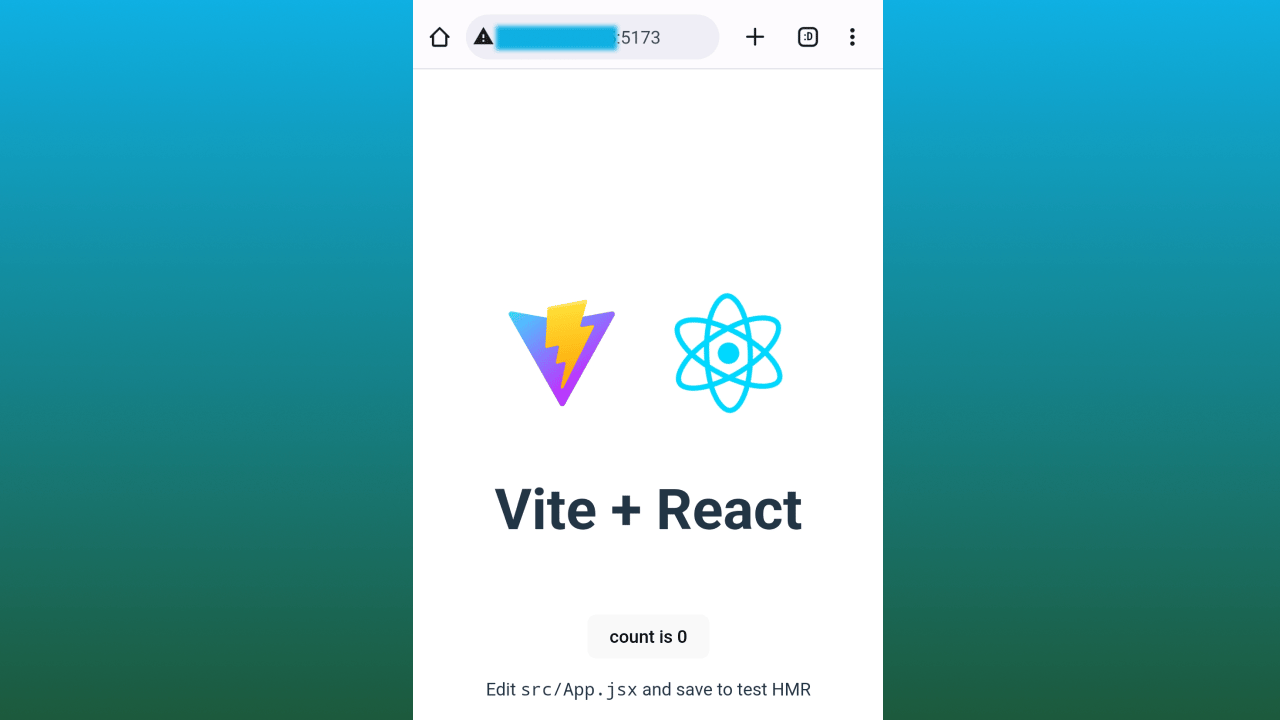
You have now run your app in the development environment and verified it works. In the next step, you will remove the boilerplate code that came with Vite.
Step 4 — Removing the Default Boilerplate
In this step, you will remove the boilerplate files of the Vite project from the src/ directory, which will allow you to set up a new application. You will also familiarize yourself with the default project structure of the current app.
Use the following command to view the contents of your src/ directory:
- ls src/
The output will list all available files:
OutputApp.css
App.jsx
assets
index.css
main.jsx
Use the rm command to delete a file or directory. Use the following commands to delete the default files from the project:
- rm src/App.css
- rm src/App.jsx
- rm src/index.css
Delete the assets directory using the following command:
- rm -r src/assets
The -r flag is a recursive operation, required when deleting a directory along with its contents.
After deleting these files, only main.jsx remains in the src/ directory. Run the ls src/ command again to see the remaining files:
- ls src/
Now, the directory will only contain the main.jsx file:
Outputmain.jsx
Because you have removed all other files, you now need to remove a reference in main.jsx to a deleted CSS file.
Open main.jsx for editing with the following command:
- nano src/main.jsx
Remove the highlighted line to unlink the reference to the CSS file:
import React from 'react'
import ReactDOM from 'react-dom/client'
import App from './App'
import "./index.css"

ReactDOM.createRoot(document.getElementById('root')).render(
<React.StrictMode>
<App />
</React.StrictMode>,
)
Save and close the main.jsx file.
Create a new file named App.jsx under the src/ directory with the following command:
- nano src/App.jsx
Add the following code to the App.jsx file:
export default function App() {
return (
<>
<div>Hello World</div>
</>
);
}
This code creates a new functional React component called App. The export default prefix tells JavaScript to export this function as a default export. The function body contains a <div> with Hello World text.
Save and close the App.jsx file.
Use the following command to run the development server again:
- yarn run dev --host
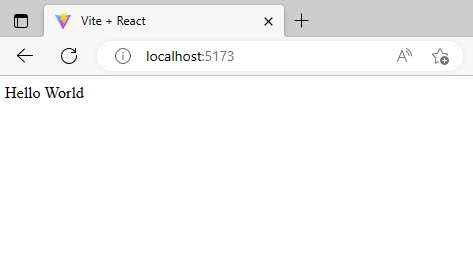
Now, open or refresh http://localhost:5173 in your browser to access a blank page displaying the Hello World text:
In this step, you removed some of the default files from the Vite project. Next, you will build a basic app with new components, CSS files, and image files.
Step 5 — Creating a Basic App
In this step, you will create components, add CSS files, and link to images by creating a basic app. Start by exiting the development server.
In the following sub-section, you will create a new component for your React App.
Creating a Component
Creating a new component adds modularity to your project. You will add all of the components into the components directory to keep things organized.
Use the following command to make a new directory called components within src/:
- mkdir src/components
Next, create a new file called Welcome.jsx inside the src/components/ directory with the command:
- nano src/components/Welcome.jsx
Add the following code to the Welcome.jsx file:
export default function Welcome() {
return (
<>
<div className="wrapper">
<h1>Welcome To My App</h1>
<p>This is going to be the coolest app in the world!</p>
</div>
</>
);
}
The above code will create a new functional React component called Welcome. The export default prefix tells JavaScript to export this function as a default export.
The div tag with a class name of wrapper allows you to target this section in the CSS. The h1 and p tags will display the message on the screen.
Save and close the file.
Next, you will reference this new component in your App.jsx file.
Open App.jsx with the following command:
- nano src/App.jsx
Update the contents of App.jsx with the highlighted code:
import Welcome from "./components/Welcome"

export default function App() {
return (
<>
<Welcome />
</>
)
}
This line of code will import Welcome.jsx into the app and link the new component into the function body. When finished, save and close the file.
In the following sub-section, you will add an image to your app.
Adding an Image
Adding images in React is a common use case in app development.
Create a new directory called img under the src/ directory with the following command:
- mkdir src/img
Navigate to your src/img directory with this command:
- cd src/img
You will download this image of Sammy into src/img.

Download the image with wget:
- wget https://html.sammy-codes.com/images/small-profile.jpeg
Rename the image with the following command:
- mv small-profile.jpeg sammy.jpeg
This command renames the image file from small-profile.jpeg to sammy.jpeg, which will be easier to reference later.
Return to your root directory with this command:
- cd ../../
Next, you will update the Welcome.jsx file to link to this image. Open the file:
- nano src/components/Welcome.jsx
Update your Welcome.jsx file by adding the highlighted lines:
import Sammy from "../img/sammy.jpeg"

export default function Welcome() {
return (
<>
<div className="wrapper">
<h1>Welcome To My App</h1>
<p>This is going to be the coolest app in the world!</p>
<img src={Sammy} alt="Sammy Image" width={200} height={200} />
</div>
</>
)
}
The first line will import the image into React as a module.
The other line inside the function body will create a new <img> tag and link the src attribute to the image component you just imported. The width and height props will set the corresponding image attributes to 200 pixels.
Save and close the Welcome.jsx file.
Next, you will add CSS to your project.
Adding CSS
In this sub-section, you will add a custom CSS file to your project to style your app.
Create a new directory called css under the src/ directory using the following command:
- mkdir src/css
Now, create a new CSS file called main.css in src/css:
- nano src/css/main.css
Add the following code to the main.css file:
body {
display: grid;
place-items: center;
background-color: #b4a7d6;
font-family: Arial, Helvetica, sans-serif;
}

.wrapper {
background-color: #fff9e6;
padding: 20px;
border-radius: 10px;
}

h1 {
color: #8873be;
}
In the above CSS, you set a grid display and place items in the center for the body. You also set a font family and background color.
The .wrapper class will select the wrapper div in your Welcome.jsx file. Styles for this class will do the following:
- Set a background color.
- Add padding of 20 pixels.
- Add rounder corners of 10 pixels.
The h1 selector will target the tag in HTML, setting its color to a shade of purple.
When finished, save and close the main.css file.
Next, you will reference the new CSS file from the Welcome.jsx component. Open the Welcome.jsx file:
- nano src/components/Welcome.jsx
Update the contents of the file with the highlighted line:
import Sammy from "../img/sammy.jpeg"
import "../css/main.css"

export default function Welcome() {
return (
<>
<div className="wrapper">
<h1>Welcome To My App</h1>
<p>This is going to be the coolest app in the world!</p>
<img src={Sammy} alt="Sammy Image" width={200} height={200} />
</div>
</>
)
}
This line will import the CSS file as a module in your component. You may need to update the line with the correct file path for your project folder.
When finished, save and close the Welcome.jsx file.
In the following sub-section, you will change the app title bar of your app.
Changing the App Title Bar
By default, the Vite app displays the text Vite + React in the browser window title bar. In this step, you will change it to a descriptive title.
Open index.html in your root directory:
- nano index.html
Update the <title> tag with the highlighted text:
<!DOCTYPE html>
<html lang="en">
<head>
<meta charset="UTF-8" />
<link rel="icon" type="image/svg+xml" href="/vite.svg" />
<meta name="viewport" content="width=device-width, initial-scale=1.0" />
<title>My Cool App</title>
</head>
<body>
<div id="root"></div>
<script type="module" src="/src/main.jsx"></script>
</body>
</html>
This text replaces the default Vite App title bar with your custom app title.
Save and close the index.html file.
If you need to rerun the development server, run this command:
- yarn run dev --host
After all these changes, visit http://localhost:5173 to view your app. You will see a new version of your app.

You can close the development server when you’re ready to move on to building.
You have now added an image, changed styles, and made a polished UI. In the next and final step, you will build an optimized app bundle for deployment.
Step 6 — Building for Production
In this step, you will build an optimized app bundle ready to deploy to a server. To create a build, run the following command into the terminal:
- yarn run build
This command creates a new dist folder with minified source files that you can deploy to your server for production.
You will receive an output similar to this:
Outputvite v4.0.4 building for production...
✓ 34 modules transformed.
dist/index.html 0.45 kB
dist/assets/sammy-9cb83ad5.jpeg 6.74 kB
dist/assets/index-d1c95597.css 0.19 kB │ gzip: 0.16 kB
dist/assets/index-e0751083.js 143.19 kB │ gzip: 46.04 kB
✨ Done in 1.63s.
You can now deploy the contents of the dist folder to a server online. If you have an Apache or Nginx server, you can upload the contents manually. You can also use an app platform to run the build script and generate the build files automatically. To deploy your React App to DigitalOcean’s App Platform, follow our tutorial on How To Deploy a React Application to DigitalOcean App Platform.
Customizing vite.config.js for React Applications
Vite provides a highly customizable configuration file, vite.config.js, which allows you to tailor your development and build processes to your project’s specific needs. Here, we’ll explore some essential configurations for React applications.
Basic Configuration
A basic vite.config.js file for a React project might look like this:
import { defineConfig } from 'vite';
import react from '@vitejs/plugin-react';

// https://vitejs.dev/config/
export default defineConfig({
  plugins: [react()]
});
This configuration enables the React plugin, which provides JSX and React-specific features like automatic JSX transformation and React Fast Refresh.
Adding CSS Preprocessors
To use CSS preprocessors like Sass or Less, you can add the corresponding plugins to your configuration. For example, to use Sass:
import { defineConfig } from 'vite';
import react from '@vitejs/plugin-react';
import sass from 'vite-plugin-sass';

export default defineConfig({
  plugins: [react(), sass()]
});
This configuration adds the Sass plugin, allowing you to use Sass files in your project.
Configuring the Build
You can customize the build process by specifying the output directory, minifying files, and more. Here’s an example:
import { defineConfig } from 'vite';
import react from '@vitejs/plugin-react';

export default defineConfig({
  plugins: [react()],
  build: {
    outDir: 'dist', // Output directory
    minify: 'terser', // Minify files using Terser
    sourcemap: true // Generate source maps
  }
});
This configuration sets the output directory to dist, enables minification using Terser, and generates source maps for easier debugging.
Advanced Configurations
For more advanced configurations, you can explore Vite’s extensive plugin ecosystem. For example, to use TypeScript, you can add the @vitejs/plugin-react-ts plugin:
import { defineConfig } from 'vite';
import react from '@vitejs/plugin-react';
import reactTs from '@vitejs/plugin-react-ts';

export default defineConfig({
  plugins: [react(), reactTs()]
});
This configuration enables TypeScript support for your React project.
Remember to consult the official Vite documentation and plugin repositories for the most up-to-date information on available configurations and plugins.
Adding plugins for Enhanced Development Experience
To further enhance your development experience with Vite, you can add various plugins to your configuration. Here are a few examples of popular plugins and how to integrate them:
React Refresh
React Refresh is a plugin that enables Fast Refresh, a feature that allows your application to automatically reload when you make changes to your code. To add React Refresh to your project, install the @vitejs/plugin-react-refresh plugin and include it in your configuration:
import { defineConfig } from 'vite';
import react from '@vitejs/plugin-react';
import reactRefresh from '@vitejs/plugin-react-refresh';

export default defineConfig({
  plugins: [react(), reactRefresh()]
});
ESLint
ESLint is a popular tool for linting your JavaScript code to ensure it adheres to a set of rules and best practices. To integrate ESLint with Vite, install the vite-plugin-eslint plugin and configure it in your vite.config.js file:
import { defineConfig } from 'vite';
import react from '@vitejs/plugin-react';
import eslint from 'vite-plugin-eslint';

export default defineConfig({
  plugins: [react(), eslint()]
});
Prettier
Prettier is a code formatter that helps maintain a consistent coding style across your project. To use Prettier with Vite, install the vite-plugin-prettier plugin and include it in your configuration:
import { defineConfig } from 'vite';
import react from '@vitejs/plugin-react';
import prettier from 'vite-plugin-prettier';

export default defineConfig({
  plugins: [react(), prettier()]
});
These are just a few examples of the many plugins available for Vite. By incorporating these plugins into your project, you can streamline your development workflow and ensure your codebase adheres to best practices and coding standards.
FAQs
1. How do I create a React project with Vite?
To create a React project with Vite, you can use the yarn create vite command and follow the prompts to select React as the framework. Here’s an example of how to do it:
yarn create vite
When prompted, select react as the framework and react as the variant. This will create a new React project with Vite configured.
2. What are the benefits of using Vite with React?
The benefits of using Vite with React include:
- Faster Development Cycles: Vite provides instant server restarts, which means that as you make changes to your code, the server will automatically restart, allowing you to see the changes in real-time.
- Optimized Builds: Vite uses Rollup under the hood, which provides optimized builds for your application.
- Support for Modern Web Technologies: Vite supports modern web technologies like ES modules and CSS preprocessors, making it easy to use the latest features in your React project.
3. How do I add TypeScript to a Vite React project?
To add TypeScript to a Vite React project, you can install the typescript and @types/react packages, then configure Vite to use TypeScript by adding the typescript plugin to your vite.config.js file. Here’s an example of how to do it:
First, install the required packages:
yarn add typescript @types/react
Then, update your vite.config.js file to include the typescript plugin:
import { defineConfig } from 'vite';
import react from '@vitejs/plugin-react';
import typescript from 'vite-plugin-typescript';

export default defineConfig({
  plugins: [react(), typescript()]
});
4. Can I use Tailwind CSS with Vite and React?
Yes, you can use Tailwind CSS with Vite and React by installing Tailwind CSS and adding it to your project’s CSS files. Vite supports CSS preprocessors like PostCSS, which is required for Tailwind CSS.
To use Tailwind CSS with Vite and React, first install Tailwind CSS:
yarn add tailwindcss
Then, create a tailwind.config.js file to configure Tailwind CSS:
module.exports = {
  mode: 'jit',
  purge: ['./index.html', './src/**/*.{vue,js,ts,jsx,tsx}'],
  darkMode: false, // or 'media' or 'class'
  theme: {
    extend: {},
  },
  variants: {
    extend: {},
  },
  plugins: [],
}
Finally, add Tailwind CSS to your project’s CSS files as needed.
5. How do I configure environment variables in Vite?
To configure environment variables in Vite, you can use the define option in your vite.config.js file to define environment variables that can be accessed in your application code. Here’s an example of how to do it:
import { defineConfig } from 'vite';
import react from '@vitejs/plugin-react';

export default defineConfig({
  plugins: [react()],
  define: {
    'process.env.NODE_ENV': process.env.NODE_ENV
  }
});
In this example, the process.env.NODE_ENV environment variable is defined and can be accessed in your application code.
Conclusion
In this tutorial, you created a new React App using the Vite tool. You scaffolded a fresh React App with the yarn create vite command. After removing the boilerplate code, you created your components by adding a custom image, a CSS file, and changing the title bar. Finally, you created an optimized bundle using the yarn run build command, ready to deploy.
Now that you have a React App built with Vite, see what else you can do with React in the How To Code in React.js series and explore other React tutorials. For further learning, check out these additional resources:
Thanks for learning with the DigitalOcean Community. Check out our offerings for compute, storage, networking, and managed databases.
About the author(s)
Helping you to become a modern web developer
With over 6 years of experience in tech publishing, Mani has edited and published more than 75 books covering a wide range of data science topics. Known for his strong attention to detail and technical knowledge, Mani specializes in creating clear, concise, and easy-to-understand content tailored for developers.
Still looking for an answer?
This textbox defaults to using Markdown to format your answer.
You can type !ref in this text area to quickly search our full set of tutorials, documentation & marketplace offerings and insert the link!
 Nodejs requirement needs to be updated.
Hi! I just deploy react + vite on DO app but it always ended with failed deployment. Please help?
Hi.
Testing out the react project, and I’m looking to test the “dev” process in an actual apache2 server running on a test DO droplet. This would require the actual apache2 conf virtualhost setup.
Any ideas/pointers on this process??
Most of the sites/articles I’ve seen discuss using the vite dev server to run the test app. Running the “build” process is used for an apache server in the examples.
Thanks
 This work is licensed under a Creative Commons Attribution-NonCommercial- ShareAlike 4.0 International License.
Become a contributor for community
Get paid to write technical tutorials and select a tech-focused charity to receive a matching donation.

DigitalOcean Documentation
Full documentation for every DigitalOcean product.

Resources for startups and AI-native businesses
The Wave has everything you need to know about building a business, from raising funding to marketing your product.
The developer cloud
Scale up as you grow — whether you're running one virtual machine or ten thousand.

Start building today
From GPU-powered inference and Kubernetes to managed databases and storage, get everything you need to build, scale, and deploy intelligent applications.
