Not using Debian 8?
Choose a different version or distribution.
Introduction
Django is a powerful web framework that can help you get your Python application or website off the ground. Django includes a simplified development server for testing your code locally, but for anything even slightly production related, a more secure and powerful web server is required.
In this guide, we will demonstrate how to install and configure some components on Debian 8 to support and serve Django applications. We will be setting up a PostgreSQL database instead of using the default SQLite database. We will configure the Gunicorn application server to interface with our applications. We will then set up Nginx to reverse proxy to Gunicorn, giving us access to its security and performance features to serve our apps.
Prerequisites and Goals
In order to complete this guide, you should have a fresh Debian 8 server instance with a non-root user with sudo privileges configured. You can learn how to set this up by running through our initial server setup guide.
We will be installing Django within a virtual environment. Installing Django into an environment specific to your project will allow your projects and their requirements to be handled separately.
Once we have our database and application up and running, we will install and configure the Gunicorn application server. This will serve as an interface to our application, translating client requests in HTTP to Python calls that our application can process. We will then set up Nginx in front of Gunicorn to take advantage of its high performance connection handling mechanisms and its easy-to-implement security features.
Let’s get started.
Install the Packages from the Debian Repositories
To begin the process, we’ll download and install all of the items we need from the Debian repositories. We will use the Python package manager pip to install additional components a bit later.
We need to update the local apt package index and then download and install the packages. The packages we install depend on which version of Python your project will use.
If you are using Python 2, type:
- sudo apt-get update
- sudo apt-get install python-pip python-dev libpq-dev postgresql postgresql-contrib nginx
If you are using Python 3, type:
- sudo apt-get update
- sudo apt-get install python3-pip python3-dev libpq-dev postgresql postgresql-contrib nginx
This will install pip, the Python development files needed to build Gunicorn later, the Postgres database system and the libraries needed to interact with it, and the Nginx web server.
Create the PostgreSQL Database and User
We’re going to jump right in and create a database and database user for our Django application.
By default, Postgres uses an authentication scheme called “peer authentication” for local connections. Basically, this means that if the user’s operating system username matches a valid Postgres username, that user can login with no further authentication.
During the Postgres installation, an operating system user named postgres was created to correspond to the postgres PostgreSQL administrative user. We need to use this user to perform administrative tasks. We can use sudo and pass in the username with the -u option.
Log into an interactive Postgres session by typing:
- sudo -u postgres psql
You will be given a PostgreSQL prompt where we can set up our requirements.
First, create a database for your project:
Note
Every Postgres statement must end with a semi-colon, so make sure that your command ends with one to avoid issues.
- CREATE DATABASE myproject;
OutputCREATE DATABASE
Next, create a database user for our project. Make sure to select a secure password:
- CREATE USER myprojectuser WITH PASSWORD 'password';
OutputCREATE ROLE
Next, we’ll modify a few of the connection parameters for the user we just created. This will speed up database operations so that the correct values do not have to be queried and set each time a connection is established.
We are setting the default encoding to UTF-8, which Django expects. We are also setting the default transaction isolation scheme to “read committed”, which blocks reads from uncommitted transactions. Lastly, we are setting the timezone. By default, our Django projects will be set to use UTC. These are all recommendations from the Django project itself:
- ALTER ROLE myprojectuser SET client_encoding TO 'utf8';
- ALTER ROLE myprojectuser SET default_transaction_isolation TO 'read committed';
- ALTER ROLE myprojectuser SET timezone TO 'UTC';
OutputALTER ROLE
ALTER ROLE
ALTER ROLE
Now, we can give our new user access to administer our new database:
- GRANT ALL PRIVILEGES ON DATABASE myproject TO myprojectuser;
OutputGRANT
When you are finished, exit out of the PostgreSQL prompt by typing:
- \q
You should be returned to your shell session.
Create a Python Virtual Environment for your Project
Now that we have our database, we can begin getting the rest of our project requirements ready. We will be installing our Python requirements within a virtual environment for easier management.
To do this, we first need access to the virtualenv command. We can install this with pip.
If you are using Python 2, type:
- sudo pip install virtualenv
If you are using Python 3, type:
- sudo pip3 install virtualenv
With virtualenv installed, we can start forming our project. Create and move into a directory where we can keep our project files:
- mkdir ~/myproject
- cd ~/myproject
Within the project directory, create a Python virtual environment by typing:
- virtualenv venv
This will create a directory called venv within your myproject directory. Inside, it will install a local version of Python and a local version of pip. We can use this to install and configure an isolated Python environment for our project.
Before we install our project’s Python requirements, we need to activate the virtual environment. You can do that by typing:
- source venv/bin/activate
Your prompt should change to indicate that you are now operating within a Python virtual environment. It will look something like this: (venv)user@host:~/myproject$.
With your virtual environment active, install Django, Gunicorn, and the psycopg2 PostgreSQL adaptor with the local instance of pip:
Note
Regardless of which version of Python you are using, when the virtual environment is activated, you should use the pip command (not pip3).
- pip install django gunicorn psycopg2
These components will be installed within our virtual environment, isolated from our global packages.
Create and Configure a New Django Project
With our Python components installed, we can create the actual Django project files.
Create the Django Project
Since we already have a project directory, we will tell Django to install the files here. We can now start a Django project within our myproject directory. This will create a child directory of the same name to hold the code itself, and will create a management script within the current directory:
Note: Make sure to add the dot at the end of the command so that this is set up correctly. Since we already created a parent project directory to hold our virtual environment directory, we do not want the extra directory level that will be created if we leave off the dot.
- django-admin.py startproject myproject .
Your current directory structure should look something like this:
.
└── ./myproject/
    ├── manage.py
    ├── myproject/
    │   ├── __init__.py
    │   ├── settings.py
    │   ├── urls.py
    │   └── wsgi.py
    └── venv/
        └── . . .
As you can see, we have a parent project directory that holds a manage.py script, an inner project directory, and the venv virtual environment directory we created earlier.
Adjust the Project Settings
The first thing we should do with our newly created project files is adjust the settings. Open the settings file in your text editor:
- nano ~/myproject/myproject/settings.py
Start by locating the ALLOWED_HOSTS directive. This defines a whitelist of addresses or domain names that may be used to connect to the Django instance. Any incoming requests with a Host header that is not in this list will raise an exception. Django requires that you set this to prevent a certain class of security vulnerability.
In the square brackets, list the IP addresses or domain names that are associated with your Django server. Each item should be listed in quotations with entries separated by a comma. If you wish to respond to requests for a domain and any subdomains, prepend a period to the beginning of the entry. In the snippet below, there are a few commented out examples used to demonstrate the correct way to format entries:
. . .
# The simplest case: just add the domain name(s) and IP addresses of your Django server
# ALLOWED_HOSTS = [ 'example.com', '203.0.113.5']
# To respond to 'example.com' and any subdomains, start the domain with a dot
# ALLOWED_HOSTS = ['.example.com', '203.0.113.5']
ALLOWED_HOSTS = ['your_server_domain_or_IP', 'second_domain_or_IP', . . .]
Next, find the section that configures database access. It will start with DATABASES. The configuration in the file is for a SQLite database. We already created a PostgreSQL database for our project, so we need to adjust the settings.
Change the settings with your PostgreSQL database information. We tell Django to use the psycopg2 adaptor we installed with pip. We need to give the database name, the database username, the database user’s password, and then specify that the database is located on the local computer. You can leave the PORT setting as an empty string:
. . .

DATABASES = {
    'default': {
        'ENGINE': 'django.db.backends.postgresql_psycopg2',
        'NAME': 'myproject',
        'USER': 'myprojectuser',
        'PASSWORD': 'password',
        'HOST': 'localhost',
        'PORT': '',
    }
}

. . .
Next, move down to the bottom of the file and add a setting indicating where the static files should be placed. This is necessary so that Nginx can handle requests for these items. The following line tells Django to place them in a directory called static in the base project directory:
. . .

STATIC_URL = '/static/'
STATIC_ROOT = os.path.join(BASE_DIR, 'static/')
Save and close the file when you are finished.
Complete Initial Project Setup
Now, we can migrate the initial database schema to our PostgreSQL database using the management script:
- cd ~/myproject
- ./manage.py makemigrations
- ./manage.py migrate
Create an administrative user for the project by typing:
- ./manage.py createsuperuser
You will have to select a username, provide an email address, and choose and confirm a password.
We can collect all of the static content into the directory location we configured by typing:
- ./manage.py collectstatic
You will have to confirm the operation. The static files will then be placed in a directory called static within your project directory.
Note: Before you try the development server, make sure you open the port in your firewall.
If you happen to be running a ufw firewall, you can open the appropriate port by typing:
- sudo ufw allow 8000
If you are running an iptables firewall, the exact command you need depends on your current firewall configuration. For most configurations, this command should work:
- sudo iptables -I INPUT -p tcp --dport 8000 -j ACCEPT
Finally, you can test your project by starting up the Django development server with this command:
- ./manage.py runserver 0.0.0.0:8000
In your web browser, visit your server’s domain name or IP address followed by :8000:
http://server_domain_or_IP:8000
You should see the default Django index page:

If you append /admin to the end of the URL in the address bar, you will be prompted for the administrative username and password you created with the createsuperuser command:
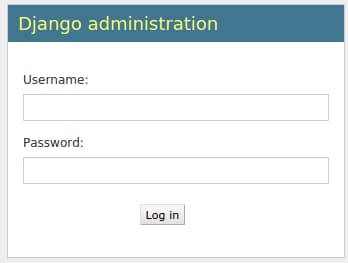
After authenticating, you can access the default Django admin interface:

When you are finished exploring, hit CTRL-C in the terminal window to shut down the development server.
Testing Gunicorn’s Ability to Serve the Project
The last thing we want to do before leaving our virtual environment is test Gunicorn to make sure that it can serve the application. We can do this easily by typing:
- cd ~/myproject
- gunicorn --bind 0.0.0.0:8000 myproject.wsgi:application
This will start Gunicorn on the same interface that the Django development server was running on. You can go back and test the app again.
Note: The admin interface will not have any of the styling applied since Gunicorn does not know about the static CSS content responsible for this.
We passed Gunicorn a module by specifying the relative directory path to Django’s wsgi.py file, which is the entry point to our application, using Python’s module syntax. Inside of this file, a function called application is defined, which is used to communicate with the application. To learn more about the WSGI specification, click here.
When you are finished testing, hit CTRL-C in the terminal window to stop Gunicorn.
We’re now finished configuring our Django application. We can back out of our virtual environment by typing:
- deactivate
The virtual environment prefix should be removed from your shell prompt, indicating that you are no longer in the virtual environment.
Create a Gunicorn systemd Service File
We have tested that Gunicorn can interact with our Django application, but we should implement a more robust way of starting and stopping the application server. To accomplish this, we’ll make a systemd service file.
Create and open a systemd service file for Gunicorn with sudo privileges in your text editor:
- sudo nano /etc/systemd/system/gunicorn.service
Start with the [Unit] section, which is used to specify metadata and dependencies. We’ll put a description of our service here and tell the init system to only start this after the networking target has been reached:
[Unit]
Description=gunicorn daemon
After=network.target
Next, we’ll open up the [Service] section. We’ll specify the user and group that we want to process to run under. We will give our regular user account ownership of the process since it owns all of the relevant files. We’ll give group ownership to the www-data group so that Nginx can communicate easily with Gunicorn.
We’ll then map out the working directory and specify the command to use to start the service. In this case, we’ll have to specify the full path to the Gunicorn executable, which is installed within our virtual environment. We will bind it to a Unix socket within the project directory since Nginx is installed on the same computer. This is safer and faster than using a network port. We can also specify any optional Gunicorn tweaks here. For example, we specified 3 worker processes in this case:
[Unit]
Description=gunicorn daemon
After=network.target

[Service]
User=sammy
Group=www-data
WorkingDirectory=/home/sammy/myproject
ExecStart=/home/sammy/myproject/venv/bin/gunicorn --workers 3 --bind unix:/home/sammy/myproject/myproject.sock myproject.wsgi:application
Finally, we’ll add an [Install] section. This will tell systemd what to link this service to if we enable it to start at boot. We want this service to start when the regular multi-user system is up and running:
[Unit]
Description=gunicorn daemon
After=network.target

[Service]
User=sammy
Group=www-data
WorkingDirectory=/home/sammy/myproject
ExecStart=/home/sammy/myproject/venv/bin/gunicorn --workers 3 --bind unix:/home/sammy/myproject/myproject.sock myproject.wsgi:application

[Install]
WantedBy=multi-user.target
With that, our systemd service file is complete. Save and close it now.
We can now start the Gunicorn service we created and enable it so that it starts at boot:
- sudo systemctl start gunicorn
- sudo systemctl enable gunicorn
OutputCreated symlink from /etc/systemd/system/multi-user.target.wants/gunicorn.service to /etc/systemd/system/gunicorn.service.
Check the status of the service by typing:
- sudo systemctl status gunicorn
Output● gunicorn.service - gunicorn daemon
Loaded: loaded (/etc/systemd/system/gunicorn.service; disabled)
Active: active (running) since Wed 2016-12-21 21:05:07 UTC; 49s ago
Main PID: 10154 (gunicorn)
CGroup: /system.slice/gunicorn.service
├─10154 /home/sammy/myproject/venv/bin/python3 /home/sammy/myproject/venv/bin/gunicorn --workers 3 --bind unix:/home/sammy/myproject/myproject.sock myproject.wsgi:application
├─10157 /home/sammy/myproject/venv/bin/python3 /home/sammy/myproject/venv/bin/gunicorn --workers 3 --bind unix:/home/sammy/myproject/myproject.sock myproject.wsgi:application
├─10158 /home/sammy/myproject/venv/bin/python3 /home/sammy/myproject/venv/bin/gunicorn --workers 3 --bind unix:/home/sammy/myproject/myproject.sock myproject.wsgi:application
└─10159 /home/sammy/myproject/venv/bin/python3 /home/sammy/myproject/venv/bin/gunicorn --workers 3 --bind unix:/home/sammy/myproject/myproject.sock myproject.wsgi:application
Dec 21 21:05:07 debian-512mb-nyc3-01 systemd[1]: Started gunicorn daemon.
Dec 21 21:05:07 debian-512mb-nyc3-01 gunicorn[10154]: [2016-12-21 21:05:07 +0000] [10154] [INFO] Starting gunicorn 19.6.0
Dec 21 21:05:07 debian-512mb-nyc3-01 gunicorn[10154]: [2016-12-21 21:05:07 +0000] [10154] [INFO] Listening at: unix:/home/sammy/myproject/myproject.sock (10154)
Dec 21 21:05:07 debian-512mb-nyc3-01 gunicorn[10154]: [2016-12-21 21:05:07 +0000] [10154] [INFO] Using worker: sync
Dec 21 21:05:07 debian-512mb-nyc3-01 gunicorn[10154]: [2016-12-21 21:05:07 +0000] [10157] [INFO] Booting worker with pid: 10157
Dec 21 21:05:07 debian-512mb-nyc3-01 gunicorn[10154]: [2016-12-21 21:05:07 +0000] [10158] [INFO] Booting worker with pid: 10158
Dec 21 21:05:07 debian-512mb-nyc3-01 gunicorn[10154]: [2016-12-21 21:05:07 +0000] [10159] [INFO] Booting worker with pid: 10159
The most important thing to look for is that the unit is active.
This is also now a good time to check that the socket file was created. If you list the contents of your ~/myproject directory, you should see the Unix socket file:
- ls -l ~/myproject
Outputtotal 16
-rwxr-xr-x 1 sammy sammy 807 Dec 21 20:46 manage.py
drwxr-xr-x 3 sammy sammy 4096 Dec 21 20:54 myproject
srwxrwxrwx 1 sammy www-data 0 Dec 21 21:05 myproject.sock
drwxr-xr-x 3 sammy sammy 4096 Dec 21 20:54 static
drwxr-xr-x 5 sammy sammy 4096 Dec 21 20:41 venv
As you can see, the socket is there and the www-data group has group ownership.
Configure Nginx to Proxy Pass to Gunicorn
Now that Gunicorn is set up, we need to configure Nginx to pass traffic to the process.
Start by creating and opening a new server block in Nginx’s sites-available directory:
- sudo nano /etc/nginx/sites-available/myproject
Inside, open up a new server block. We will start by specifying that this block should listen on the normal port 80 and that it should respond to our server’s domain name or IP address:
server {
listen 80;
server_name server_domain_or_IP;
}
Next, we can tell Nginx to ignore errors if a favicon cannot be found. We will also tell it where to find the static assets that we collected in our ~/myproject/static directory. All of these files have a standard URI prefix of “/static”, so we can create a location block to match those requests:
server {
listen 80;
server_name server_domain_or_IP;
location = /favicon.ico { access_log off; log_not_found off; }
location /static/ {
root /home/sammy/myproject;
}
}
Finally, we’ll create a location / {} block to match all other requests. Inside of this location, we’ll include the standard proxy_params file included with the Nginx installation and then we will pass the traffic to the socket that our Gunicorn process created:
server {
listen 80;
server_name server_domain_or_IP;
location = /favicon.ico { access_log off; log_not_found off; }
location /static/ {
root /home/sammy/myproject;
}
location / {
include proxy_params;
proxy_pass http://unix:/home/sammy/myproject/myproject.sock;
}
}
Save and close the file when you are finished. Now, we can enable the file by linking it to the sites-enabled directory:
- sudo ln -s /etc/nginx/sites-available/myproject /etc/nginx/sites-enabled
Test your Nginx configuration for syntax errors by typing:
- sudo nginx -t
Outputnginx: the configuration file /etc/nginx/nginx.conf syntax is ok
nginx: configuration file /etc/nginx/nginx.conf test is successful
If no errors are reported, go ahead and restart Nginx by typing:
- sudo systemctl restart nginx
Note: If you have a firewall enabled, adjust it to remove port 8000 again and allow normal access to port 80.
If you happen to be running a ufw firewall, you can open the appropriate port by typing:
- sudo ufw delete allow 8000
- sudo ufw allow 'WWW'
If you are running an iptables firewall, the exact commands you need depends on your current firewall configuration. For most configurations, these command should work:
- sudo iptables -D INPUT -p tcp --dport 8000 -j ACCEPT
- sudo iptables -I INPUT -p tcp --dport 80 -j ACCEPT
You should now be able to go to your server’s domain or IP address to view your application without specifying a port.
Note
After configuring Nginx, the next step should be securing traffic to the server using SSL/TLS. This is important because without it, all information, including passwords are sent over the network in plain text.
If you have a domain name, the easiest way get an SSL certificate to secure your traffic is using Let’s Encrypt. Follow this guide to set up Let’s Encrypt with Nginx on Debian 8.
If you do not have a domain name, you can still secure your site for testing and learning with a self-signed SSL certificate.
Conclusion
In this guide, we’ve set up a Django project in its own virtual environment. We’ve configured Gunicorn to translate client requests so that Django can handle them. Afterwards, we set up Nginx to act as a reverse proxy to handle client connections and serve the correct project depending on the client request.
Django makes creating projects and applications simple by providing many of the common pieces, allowing you to focus on the unique elements. By leveraging the general tool chain described in this article, you can easily serve the applications you create from a single server.
Thanks for learning with the DigitalOcean Community. Check out our offerings for compute, storage, networking, and managed databases.
About the author
Former Senior Technical Writer at DigitalOcean, specializing in DevOps topics across multiple Linux distributions, including Ubuntu 18.04, 20.04, 22.04, as well as Debian 10 and 11.
Still looking for an answer?
This textbox defaults to using Markdown to format your answer.
You can type !ref in this text area to quickly search our full set of tutorials, documentation & marketplace offerings and insert the link!
Hi, thanks for the tutorial Justin. It worked perfectly. I moved on to the next suggested step and implemented a self-signed SSL/TLS certificate, and there was a small glitch when adding an SSL server block to the sites available file…I ended up with a file that reads like so, and I’m wondering if this is the correct way to do it at first:
username@myserver:/etc/nginx/sites-available$ cat myproject
server {
listen 80 default_server;
listen [::]:80 default_server;
server_name xx.xx.xxx.xxx; # IP address here
return 302 https://$server_name$request_uri;
}
server {
# SSL configuration
listen 443 ssl default_server;
listen [::]:443 ssl default_server;
include snippets/self-signed.conf;
include snippets/ssl-params.conf;
location = /favicon.ico { access_log off; log_not_found off; }
location /static/ {
root /home/username/myproject;
}
location / {
include proxy_params;
proxy_pass http://unix:/home/username/myproject/myproject.sock;
}
}
This worked after I converted ‘default’ to default.bak in the same sites-available directory, to avoid an “[emerg]” error of redundant default servers. Curious if I’m making any fundamental errors here, thanks for any tips!
Hello. I have a problem with configurating gunicorn.service. When I do
sudo systemctl start gunicorn
sudo systemctl enable gunicorn
sudo systemctl status gunicorn
I get
● gunicorn.service - gunicorn daemon
   Loaded: loaded (/etc/systemd/system/gunicorn.service; enabled)
   Active: failed (Result: exit-code) since Sat 2017-05-13 11:47:49 MSK; 29s ago
 Main PID: 56584 (code=exited, status=203/EXEC)

May 13 11:47:49 debian systemd[1]: Starting gunicorn daemon...
May 13 11:47:49 debian systemd[1]: Started gunicorn daemon.
May 13 11:47:49 debian systemd[56584]: Failed at step EXEC spawning /opt/bl...ry
May 13 11:47:49 debian systemd[1]: gunicorn.service: main process exited, c...EC
May 13 11:47:49 debian systemd[1]: Unit gunicorn.service entered failed state.
Hint: Some lines were ellipsized, use -l to show in full.
My structure of the project
s@debian:/opt/blog$ tree
.
├── myproject
│   ├── manage.py
│   ├── myproject
│   │   ├── gunicorn.config.py
│   │   ├── __init__.py
│   │   ├── __init__.pyc
│   │   ├── settings.py
│   │   ├── settings.pyc
│   │   ├── urls.py
│   │   └── wsgi.py
│   └── static
│       └── admin
│           ├── css
│           etc
└── venv
    ├── bin
    │   ├── activate
        etc
My gunicorn.service
[Unit]
Description=gunicorn daemon
After=network.target

[Service]
User=splitpoint
Group=www-data
WorkingDirectory=/opt/blog/
ExecStart=/opt/blog/venv/bin/gunicorn --workers 3 --bind unix:/opt/blog/myproje$


[Install]
WantedBy=multi-user.target
How can I fix gunicorn to activate(running) it?
Thanks for the tutorial Justin. This setup worked perfectly for me. Is there a way to autoreload gunicorn on source change?
Thanks.
This comment has been deleted
 This work is licensed under a Creative Commons Attribution-NonCommercial- ShareAlike 4.0 International License.
Become a contributor for community
Get paid to write technical tutorials and select a tech-focused charity to receive a matching donation.

DigitalOcean Documentation
Full documentation for every DigitalOcean product.

Resources for startups and AI-native businesses
The Wave has everything you need to know about building a business, from raising funding to marketing your product.
The developer cloud
Scale up as you grow — whether you're running one virtual machine or ten thousand.

Start building today
From GPU-powered inference and Kubernetes to managed databases and storage, get everything you need to build, scale, and deploy intelligent applications.
