By Karl Hughes and Kathryn Hancox

The author selected Code Org to receive a donation as part of the Write for DOnations program.
Introduction
Rancher is a popular open-source container management platform. Released in early 2018, Rancher 2.X works on Kubernetes and has incorporated new tools such as multi-cluster management and built-in CI pipelines. In addition to the enhanced security, scalability, and straightforward deployment tools already in Kubernetes, Rancher offers a graphical user interface that makes managing containers easier. Through Rancher’s GUI, users can manage secrets, securely handle roles and permissions, scale nodes and pods, and set up load balancers and volumes without needing a command line tool or complex YAML files.
In this tutorial, you will deploy a multi-node Rancher 2.1 server using Docker Machine on Ubuntu 18.04. By the end, you’ll be able to provision new DigitalOcean Droplets and container pods via the Rancher UI to quickly scale up or down your hosting environment.
Note: As of December 15, 2022, DigitalOcean no longer supports the creation of new RancherOS Droplets through the Control Panel or API. However, any existing RancherOS Droplets created prior to December 15, 2022, will be functional despite the change in offerings. Additionally, you can still spin up RancherOS Droplets using a custom image. Learn how to import a custom image to DigitalOcean by following our product documentation.
Prerequisites
Before you start this tutorial, you’ll need a DigitalOcean account, in addition to the following:
-
A DigitalOcean Personal Access Token, which you can create following the instructions in this tutorial. This token will allow Rancher to have API access to your DigitalOcean account.
-
A fully registered domain name with an A record that points to the IP address of the Droplet you create in Step 1. You can learn how to point domains to DigitalOcean Droplets by reading through DigitalOcean’s Domains and DNS documentation. Throughout this tutorial, substitute your domain for
example.com.
Step 1 — Creating a Droplet With Docker Installed
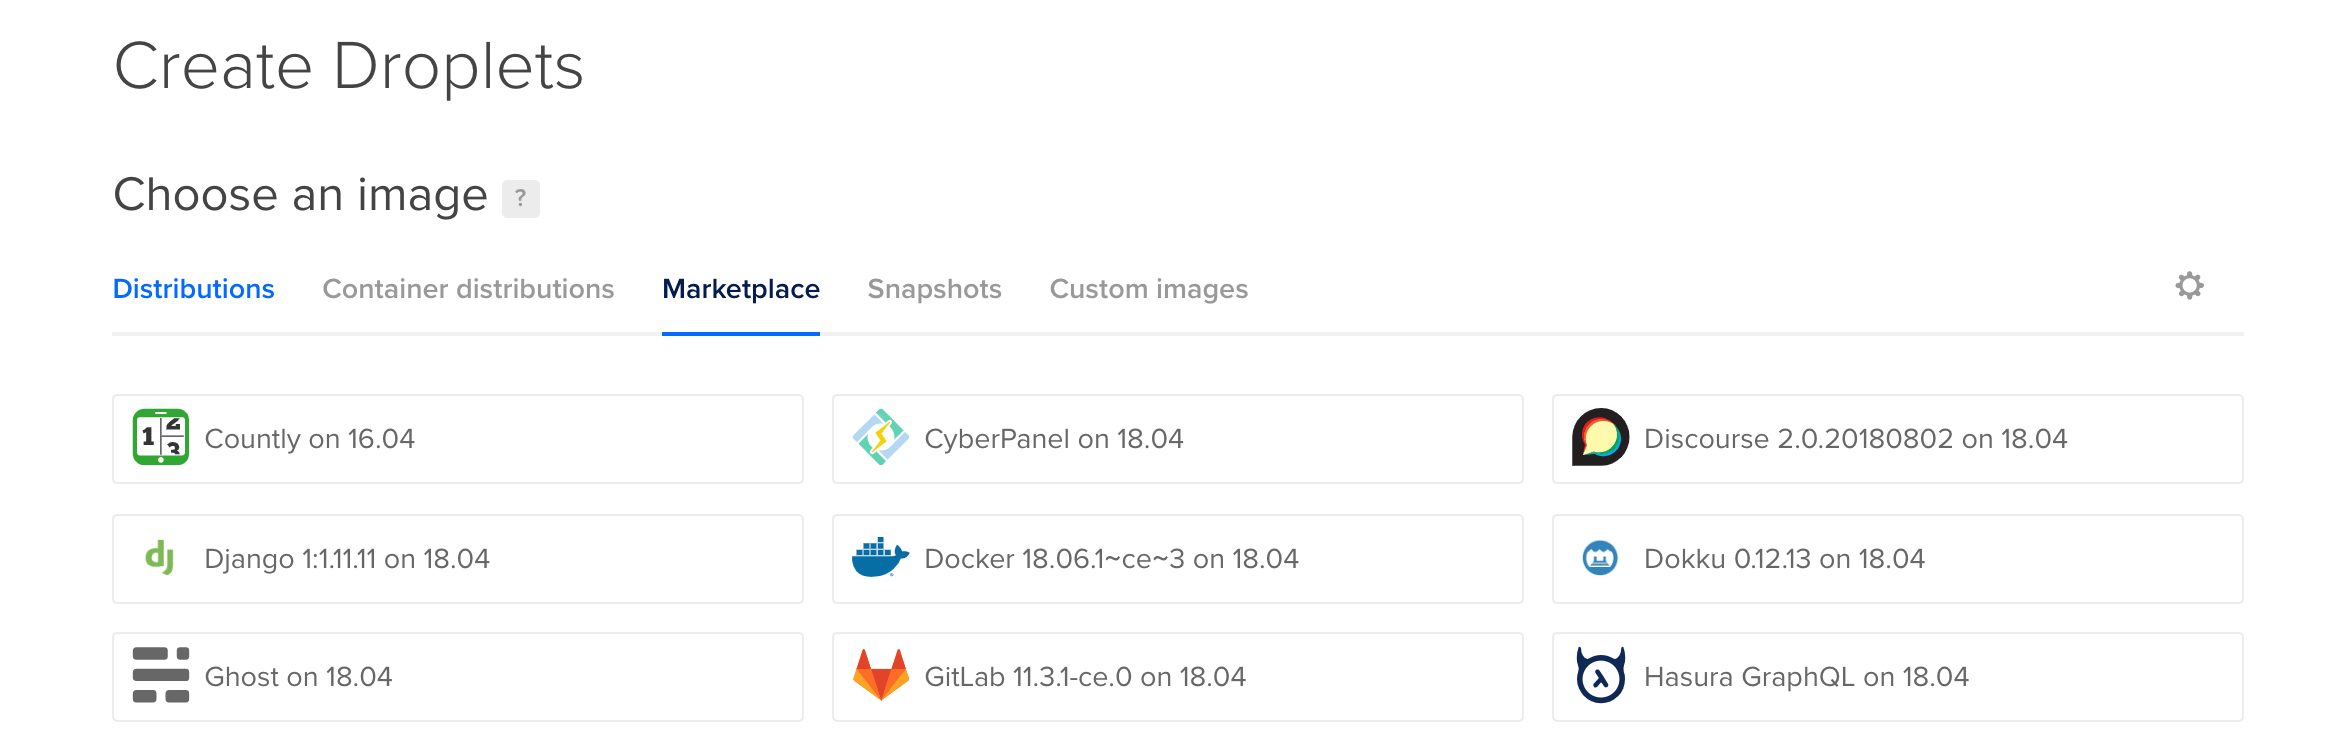
To start and configure Rancher, you’ll need to create a new Droplet with Docker installed. To accomplish this, you can use DigitalOcean’s Docker image.
First, log in to your DigitalOcean account and choose Create Droplet. Then, under the Choose an Image section, select the Marketplace tab. Select Docker 18.06.1~ce~3 on 18.04.
Next, select a Droplet no smaller than 2GB and choose a datacenter region for your Droplet.
Finally, add your SSH keys, provide a host name for your Droplet, and press the Create button.
It will take a few minutes for the server to provision and for Docker to download. Once the Droplet deploys successfully, you’re ready to start Rancher in a new Docker container.
Step 2 — Starting and Configuring Rancher
The Droplet you created in Step 1 will run Rancher in a Docker container. In this step, you will start the Rancher container and ensure it has a Let’s Encrypt SSL certificate so that you can securely access the Rancher admin panel. Let’s Encrypt is an automated, open-source certificate authority that allows developers to provision ninety-day SSL certificates for free.
Log in to your new Droplet:
- ssh root@your_server_ip
To make sure Docker is running, enter:
- docker -v
Check that the listed Docker version is what you expect. You can start Rancher with a Let’s Encrypt certificate already installed by running the following command:
- docker run -d --restart=unless-stopped -p 80:80 -p 443:443 -v /host/rancher:/var/lib/rancher rancher/rancher --acme-domain example.com
The --acme-domain option installs an SSL certificate from Let’s Encrypt to ensure your Rancher admin is served over HTTPS. This script also instructs the Droplet to fetch the rancher/rancher Docker image and start a Rancher instance in a container that will restart automatically if it ever goes down accidentally. To ease recovery in the event of data loss, the script mounts a volume on the host machine (at /host/rancher) that contains the Rancher data.
To see all the running containers, enter:
- docker ps
You’ll see output similar to the following (with a unique container ID and name):
OutputCONTAINER ID        IMAGE               COMMAND             CREATED             STATUS              PORTS                                      NAMES
7b2afed0a599        rancher/rancher     "entrypoint.sh"     12 seconds ago      Up 11 seconds       0.0.0.0:80->80/tcp, 0.0.0.0:443->443/tcp   wizardly_fermat
If the container is not running, you can execute the docker run command again.
Before you can access the Rancher admin panel, you’ll need to set your admin password and Rancher server URL. The Rancher admin interface will give you access to all of your running nodes, pods, and secrets, so it is important that you use a strong password for it.
Go to the domain name that points to your new Droplet in your web browser. The first time you visit this address, Rancher will let you set a password:
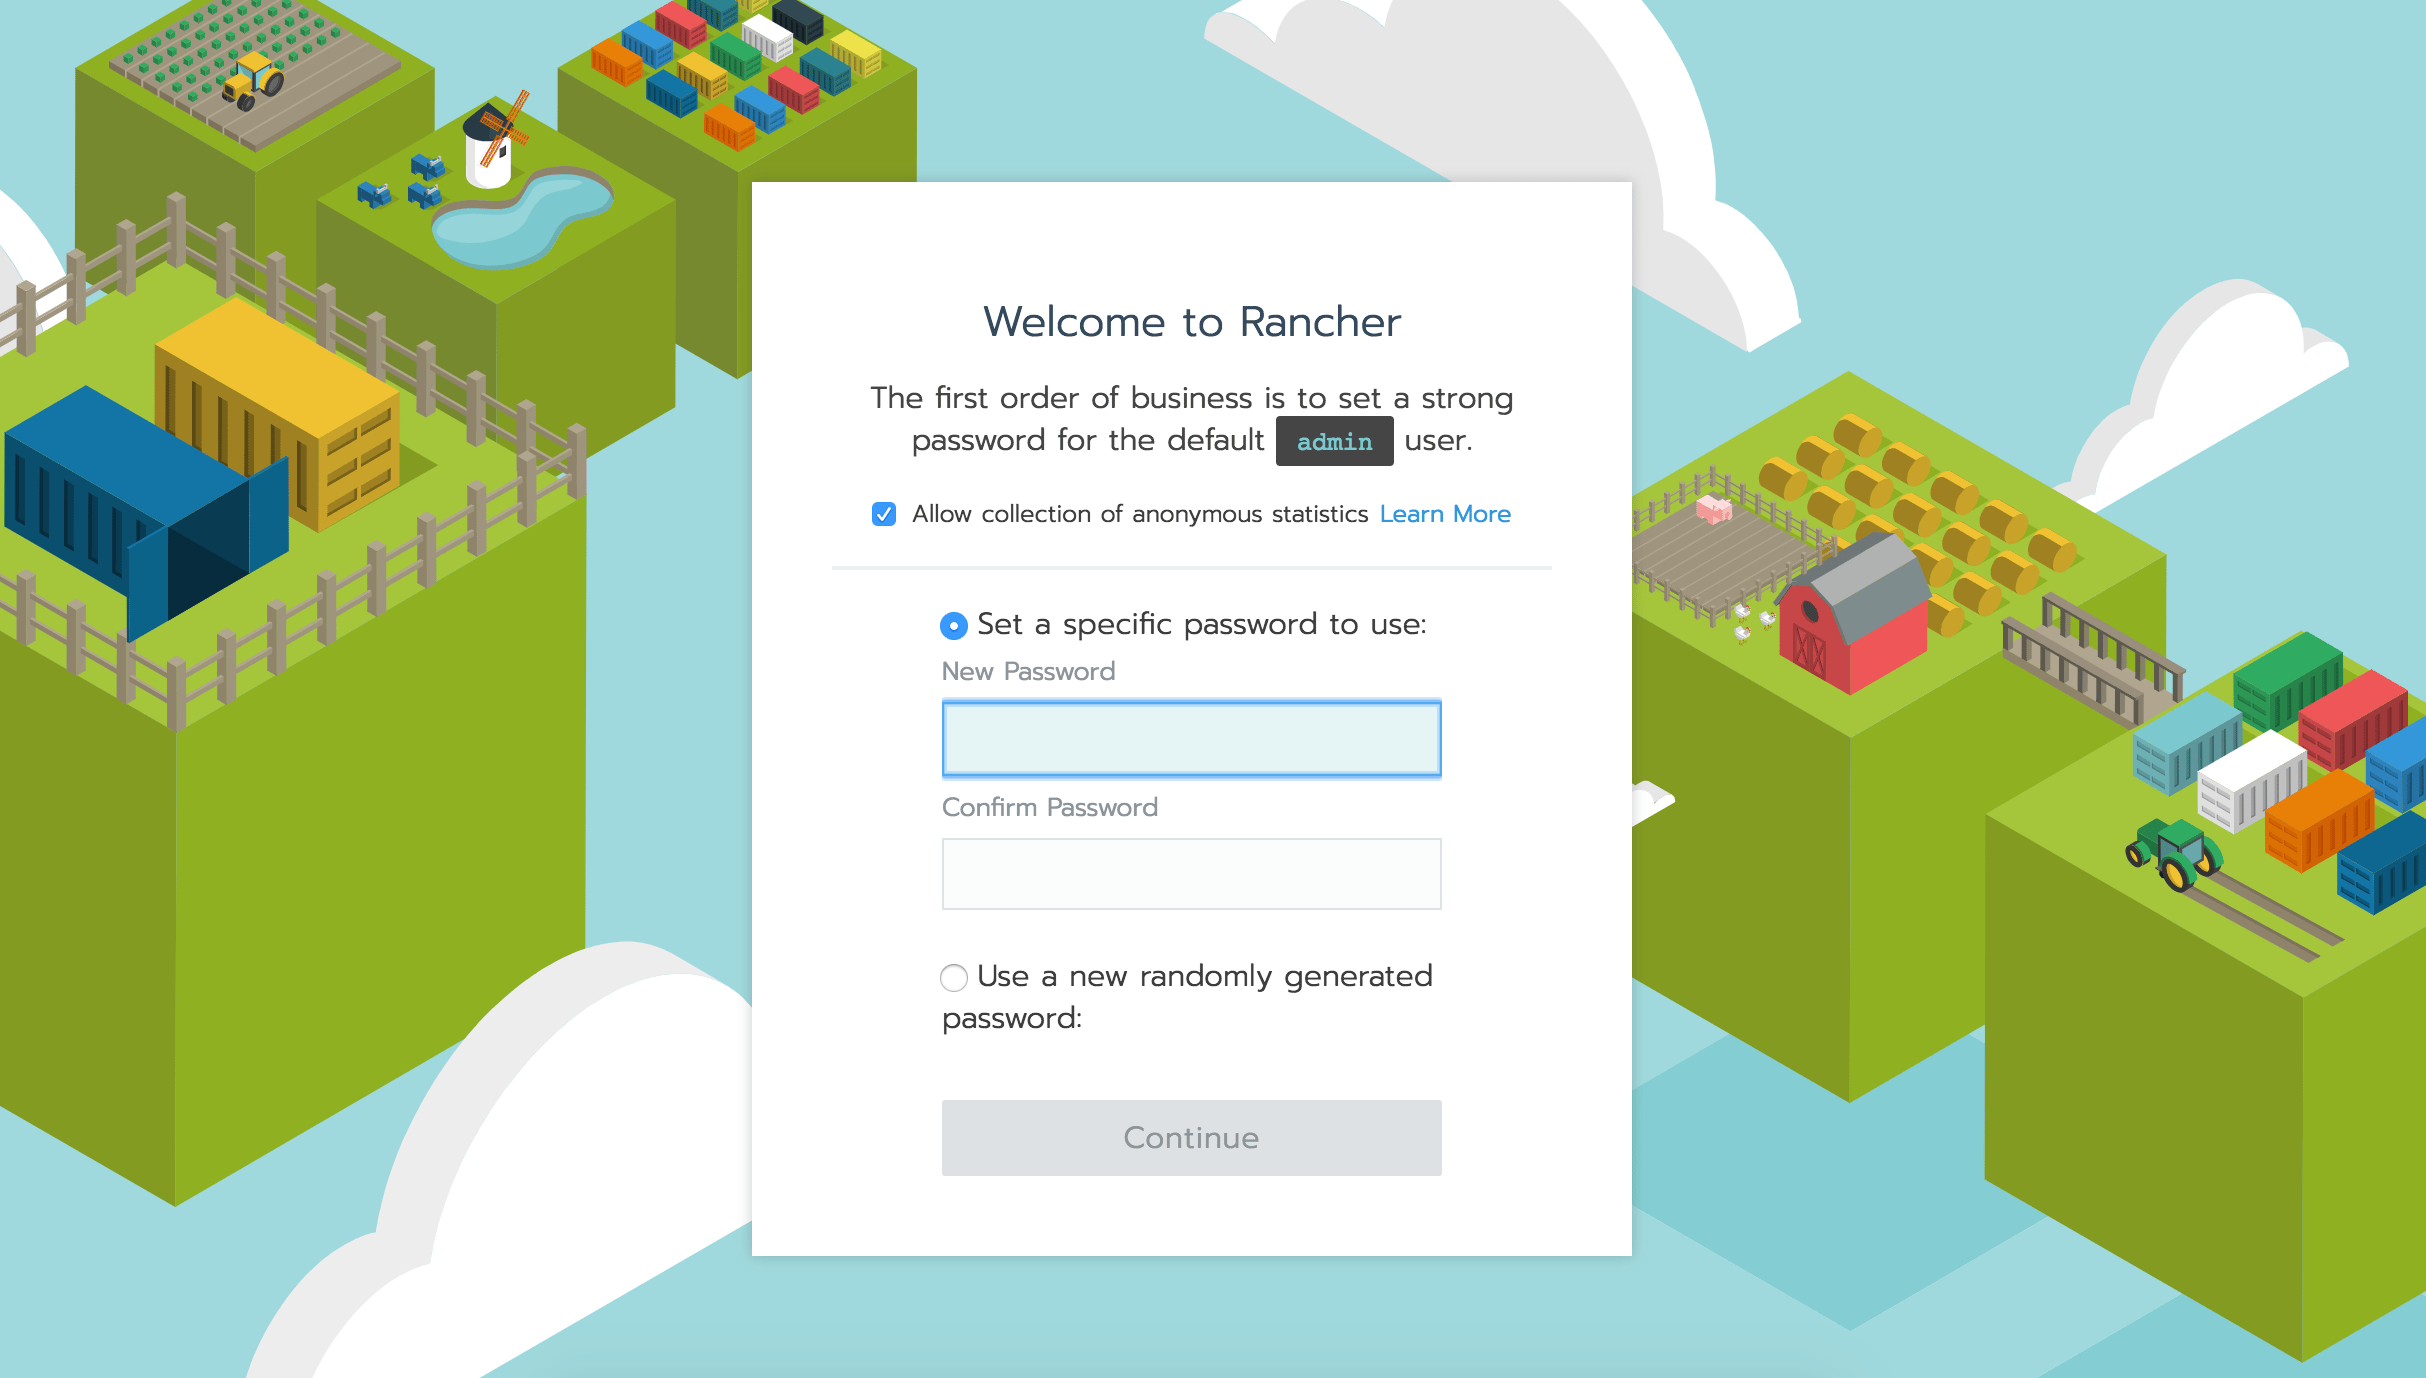
When asked for your Rancher server URL, use the domain name pointed at your Droplet.
You have now completed your Rancher server setup, and you will see the Rancher admin home screen:
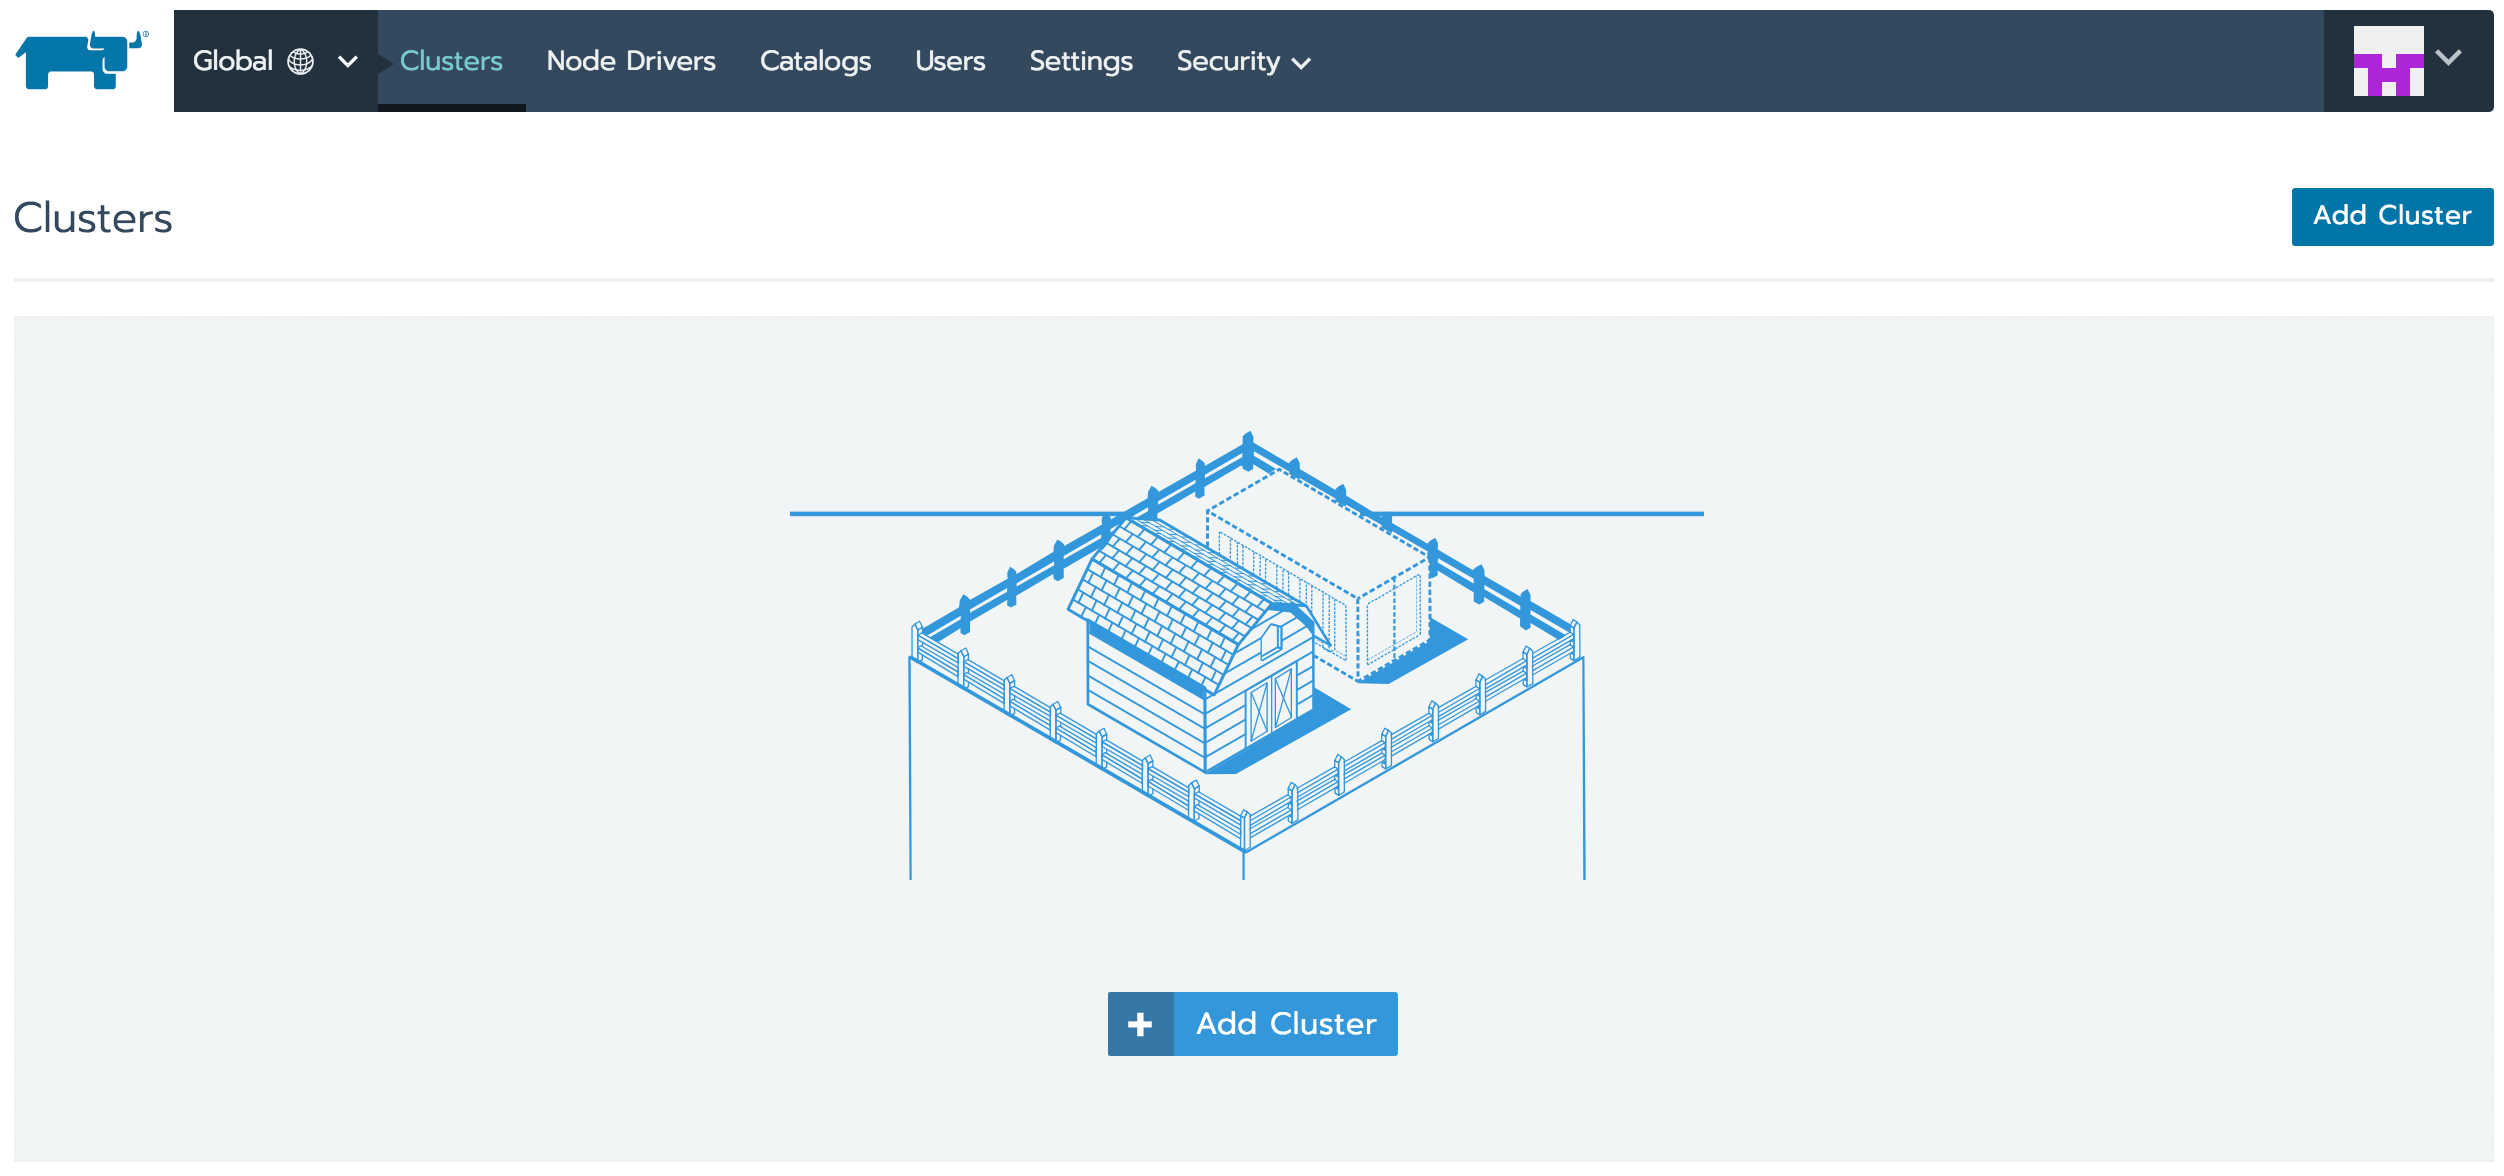
You’re ready to continue to the Rancher cluster setup.
Step 3 — Configuring a Cluster With a Single Node
To use Rancher, you’ll need to create a cluster with at least one node. A cluster is a group of one or more nodes. This guide will give you more information about the Kubernetes Architecture. In this tutorial, nodes correspond to Droplets that Rancher will manage. Pods represent a group of running Docker containers within the Droplet. Each node can run many pods. Using the Rancher UI, you can set up clusters and nodes in an underlying Kubernetes environment.
By the end of this step, you will have set up a cluster with a single node ready to run your first pod.
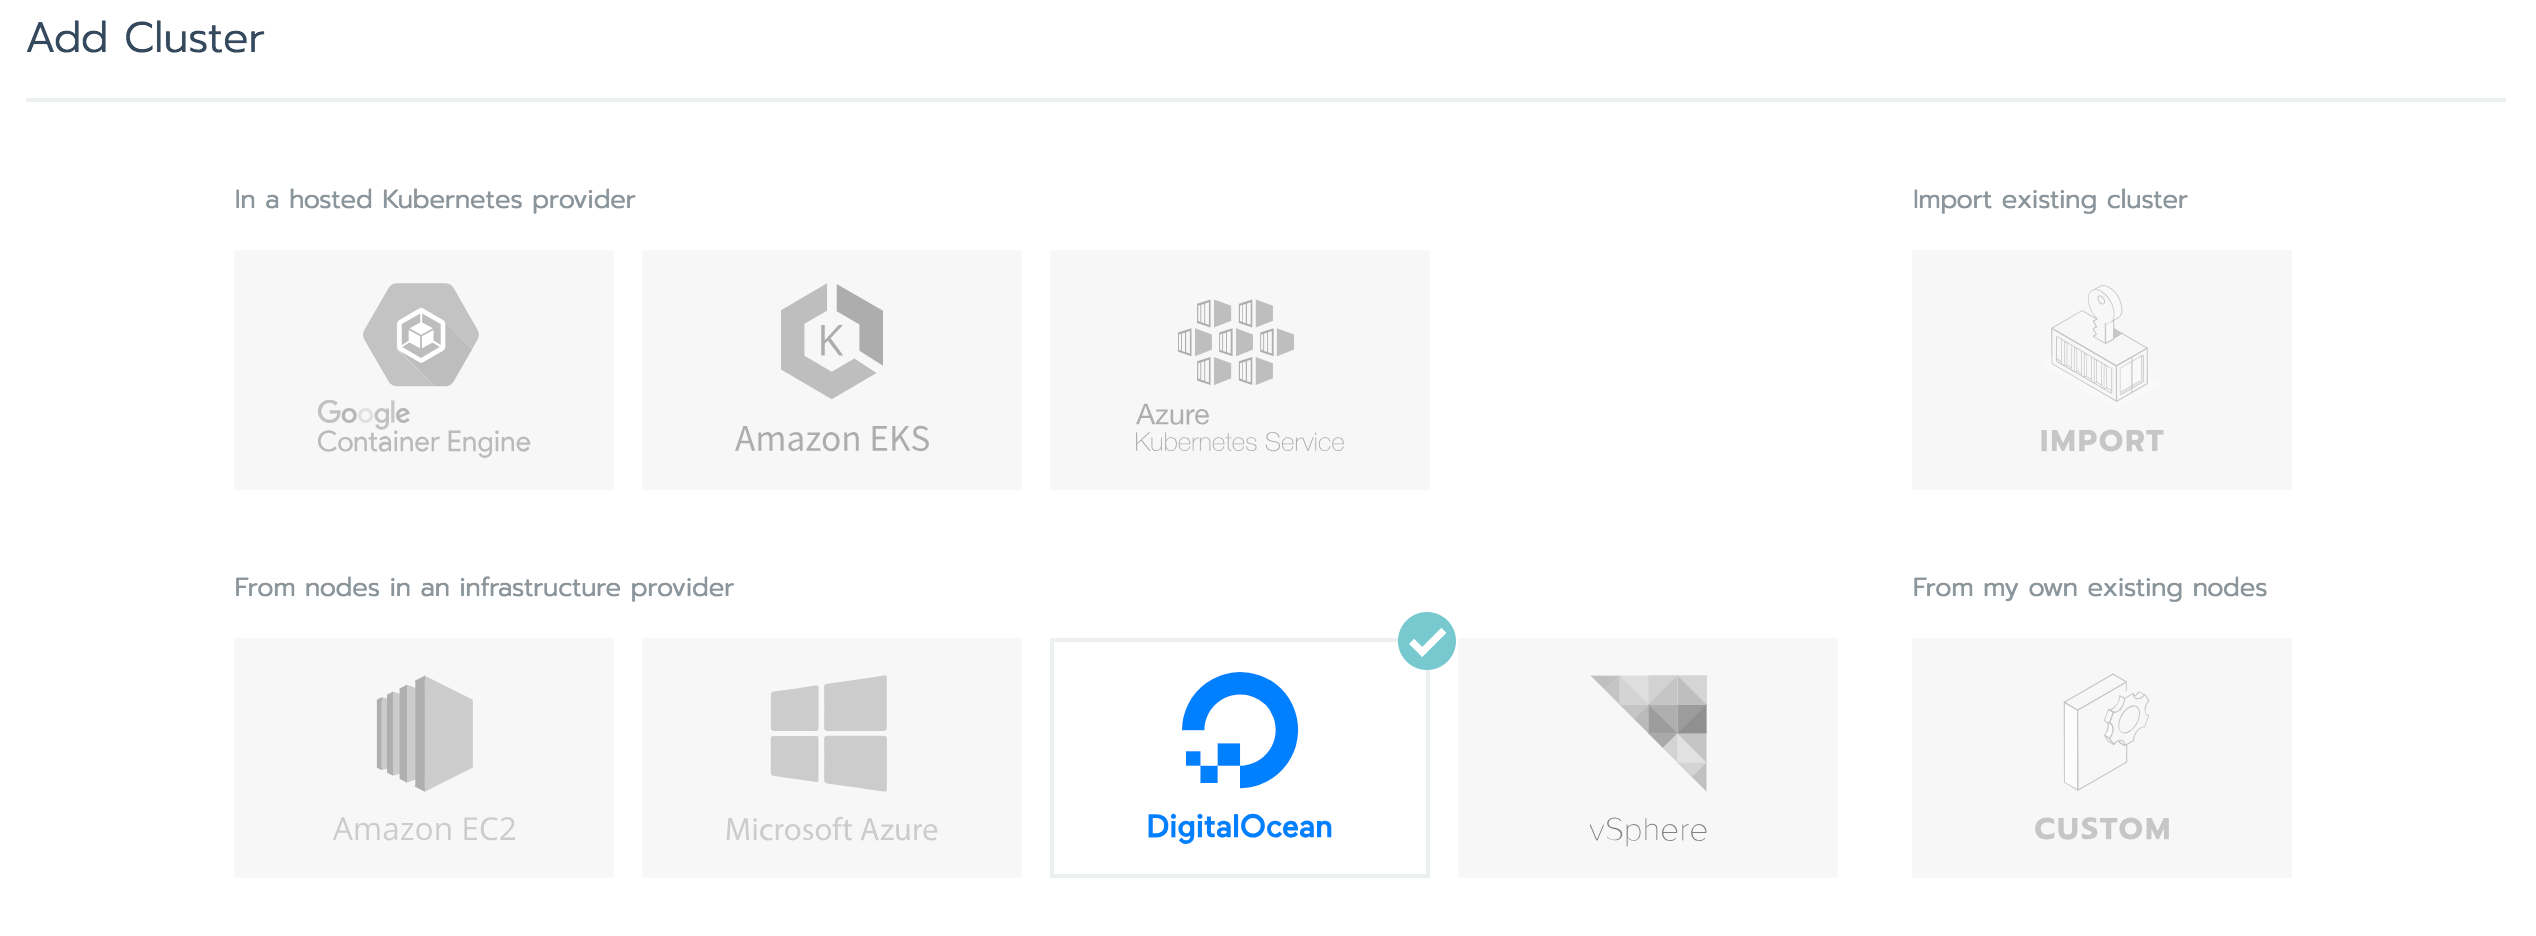
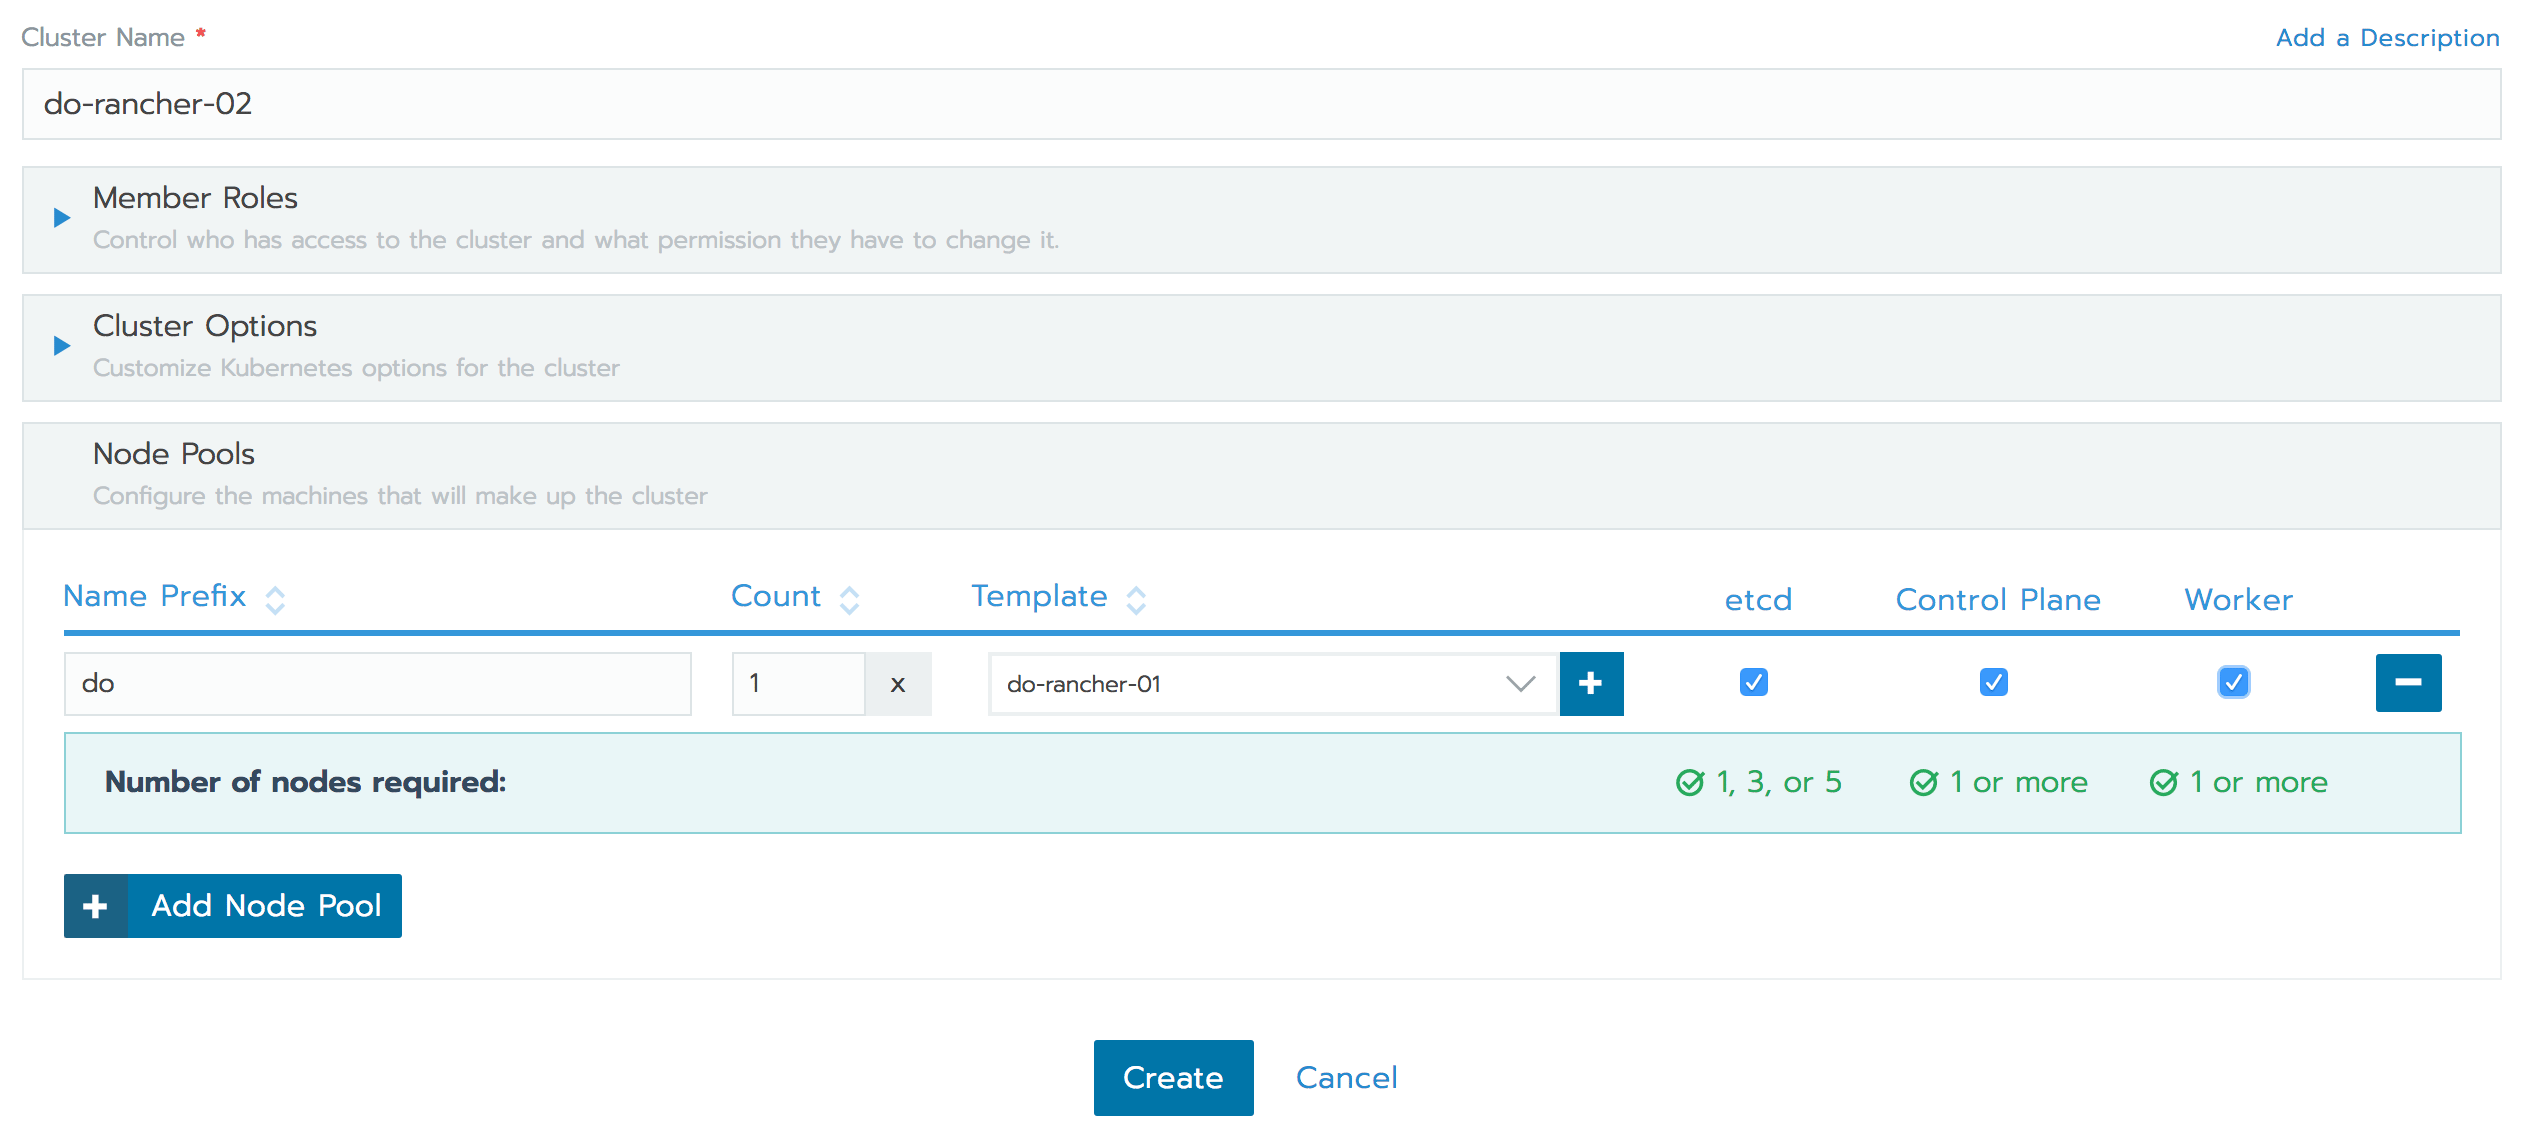
In Rancher, click Add Cluster, and select DigitalOcean as the infrastructure provider.
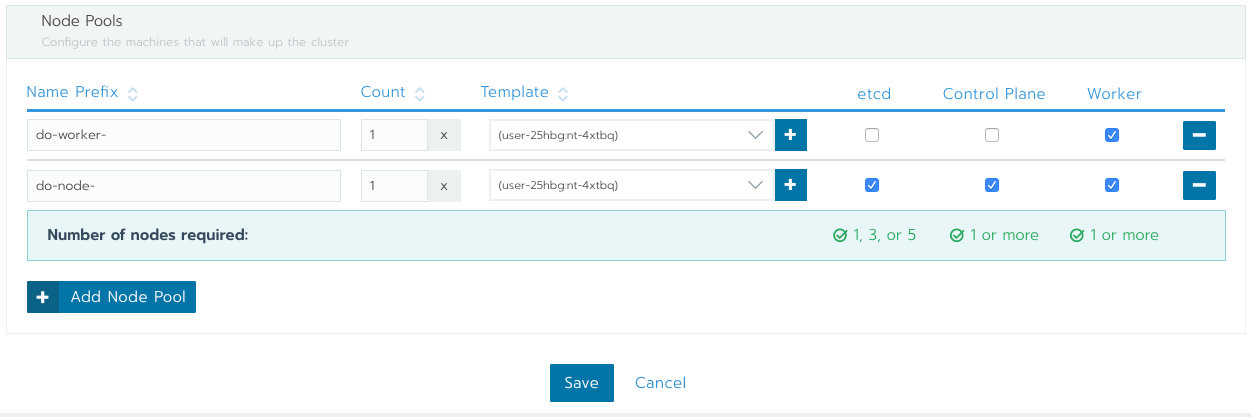
Enter a Cluster Name and scroll down to the Node Pools section. Enter a Name Prefix, leave the Count at 1 for now, and check etcd, Control Plane, and Worker.
- etcd is Kubernetes’ key value storage system for keeping your entire environment’s state. In order to maintain high availability, you should run three or five etcd nodes so that if one goes down your environment will still be manageable.
- Control Plane checks through all of the Kubernetes Objects — such as pods — in your environment and keeps them up to date with the configuration you provide in the Rancher admin interface.
- Workers run the actual workloads and monitoring agents that ensure your containers stay running and networked. Worker nodes are where your pods will run the software you deploy.
Before creating the cluster, click Add Node Template to configure the specific options for your new node.
Enter your DigitalOcean Personal Access Token in the Access Token input box and click Next: Configure Droplet.
Next, select the same Region and Droplet Size as Step 1. For Image, be sure to select Ubuntu 16.04.5 x64 as there’s currently a compatibility issue with Rancher and Ubuntu 18.04. Hit Create to save the template.
Finally, click Create at the Add Cluster page to kick off the provisioning process. It will take a few minutes for Rancher to complete this step, but you will see a new Droplet in your DigitalOcean Droplets dashboard when it’s done.
In this step, you’ve created a new cluster and node onto which you will deploy a workload in the next section.
Step 4 — Deploying a Web Application Workload
Once the new cluster and node are ready, you can deploy your first pod in a workload. A Kubernetes Pod is the smallest unit of work available to Kubernetes and by extension Rancher. Workloads describe a single group of pods that you deploy together. For example, you may run multiple pods of your webserver in a single workload to ensure that if one pod slows down with a particular request, other instances can handle incoming requests. In this section, you’re going to deploy a Nginx Hello World image to a single pod.
Hover over Global in the header and select Default. This will bring you to the Default project dashboard. You’ll focus on deploying a single project in this tutorial, but from this dashboard you can also create multiple projects to achieve isolated container hosting environments.
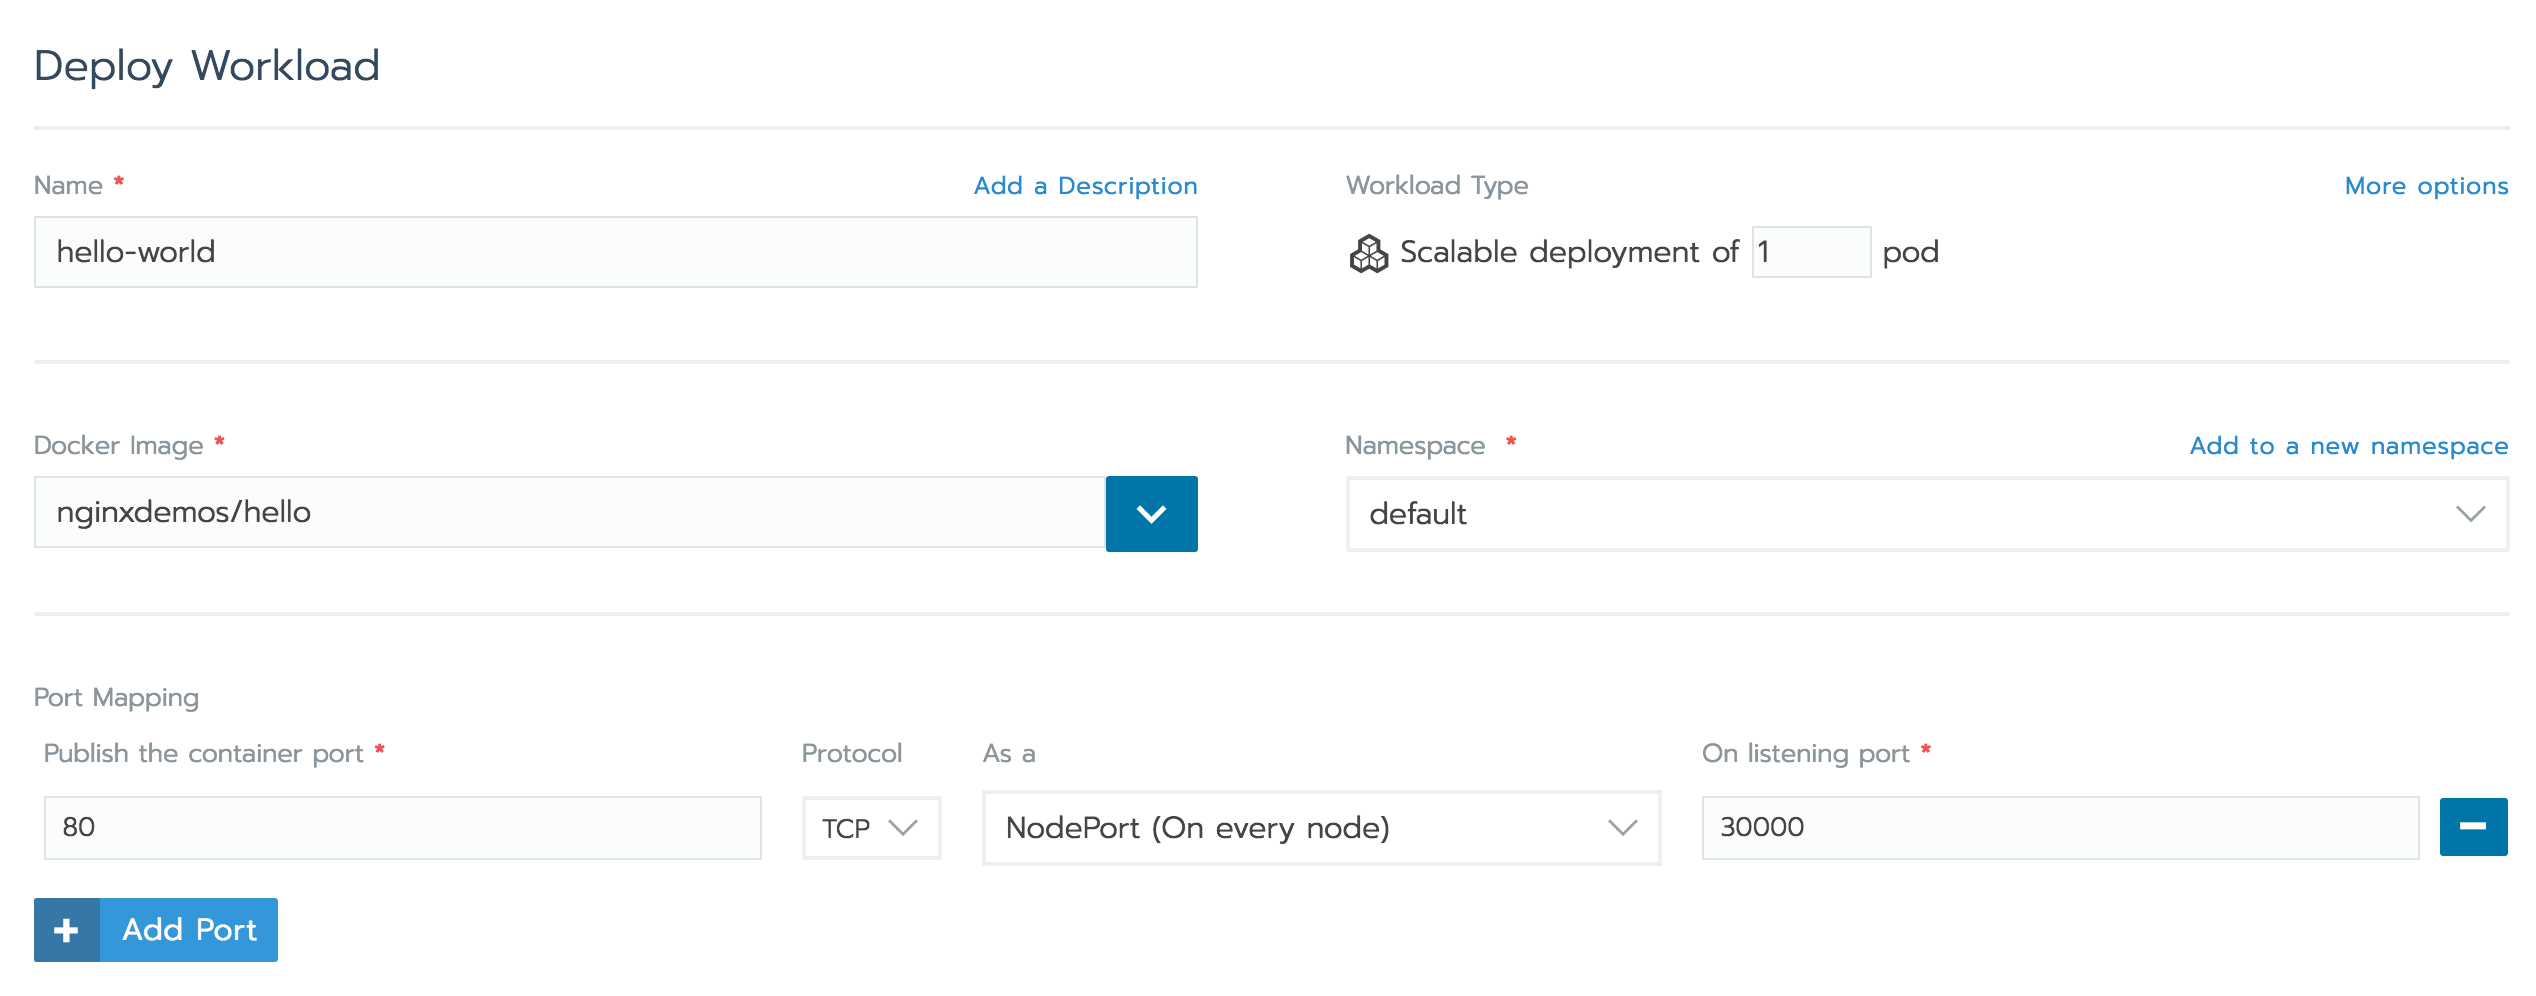
To start configuring your first pod, click Deploy.
Enter a Name, and put nginxdemos/hello in the Docker Image field. Next, map port 80 in the container to port 30000 on the host nodes. This will ensure that the pods you deploy are available on each node at port 30000. You can leave Protocol set to TCP, and the next dropdown as NodePort.
Note: While this method of running the pod on every node’s port is easier to get started, Rancher also includes Ingress to provide load balancing and SSL termination for production use.
To launch the pod, scroll to the bottom and click Launch.
Rancher will take you back to the default project home page, and within a few seconds your pod will be ready. Click the link 30000/tcp just below the name of the workload and Rancher will open a new tab with information about the running container’s environment.
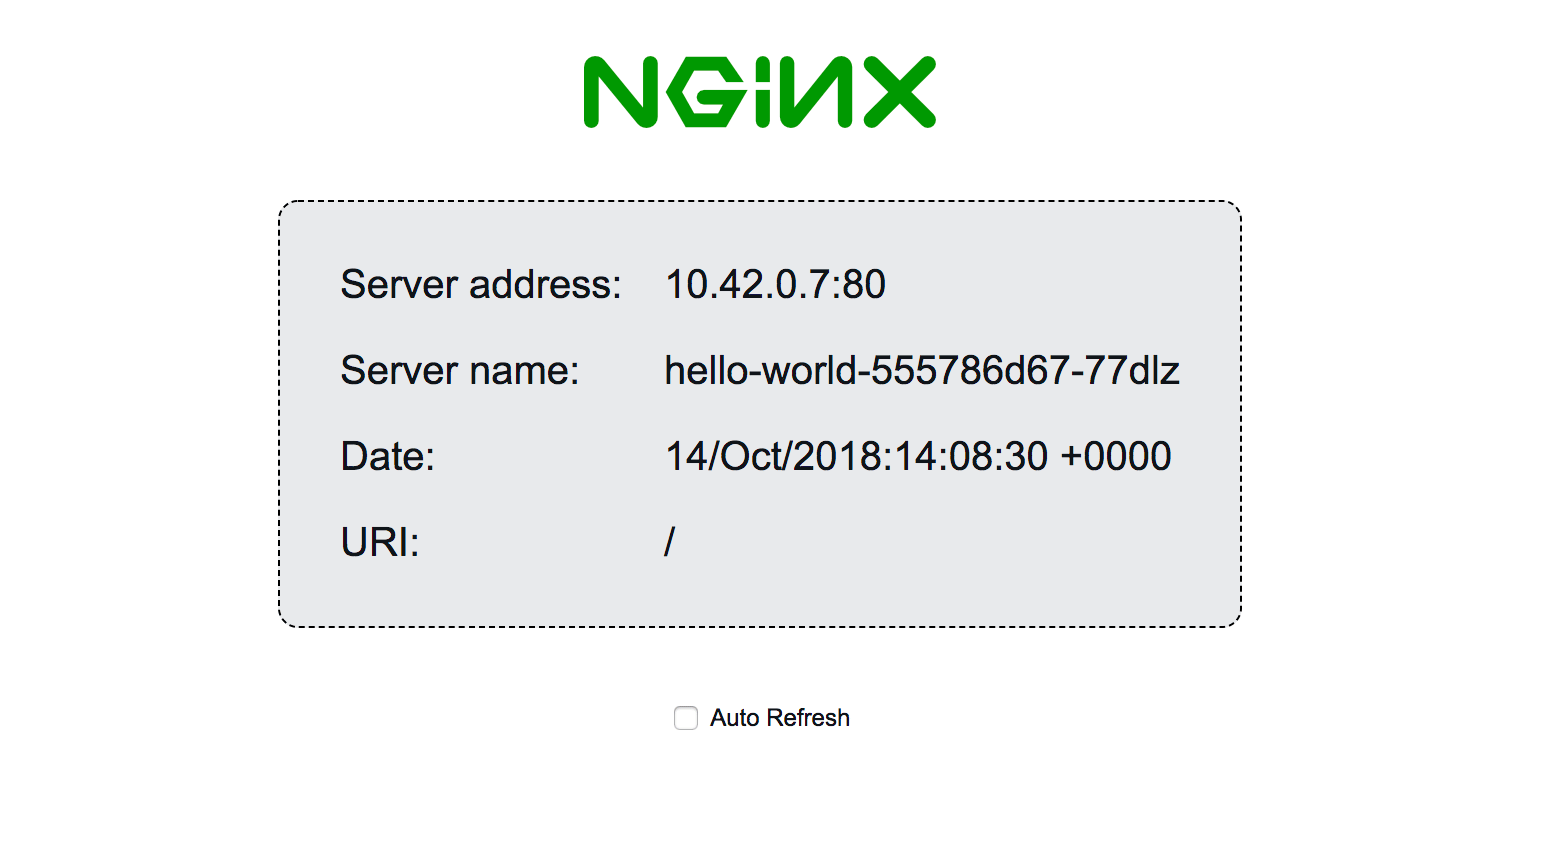
The Server address and port you see on this page are those of the internal Docker network, and not the public IP address you see in your browser. This means that Rancher is working and routing traffic from http://first_node_ip:30000/ to the workload as expected.
At this point, you’ve successfully deployed your first workload of one pod to a single Rancher node. Next, you’ll see how to scale your Rancher environment.
Step 5 — Scaling Nodes and Pods
Rancher gives you two ways to scale your hosting resources: increasing the number of pods in your workload or increasing the number of nodes in your cluster.
Adding pods to your workload will give your application more running processes. This will allow it to handle more traffic and enable zero-downtime deployments, but each node can handle only a finite number of pods. Once all your nodes have hit their pod limit, you will have to increase the number of nodes if you want to continue scaling up.
Another consideration is that while increasing pods is typically free, you will have to pay for each node you add to your environment. In this step, you will scale up both nodes and pods, and add another node to your Rancher cluster.
Note: This part of the tutorial will provision a new DigitalOcean Droplet automatically via the API, so be aware that you will incur extra charges while the second node is running.
Navigate to the cluster home page of your Rancher installation by selecting Cluster: your-cluster-name from the top navigation bar. Next click Nodes from the top navigation bar.
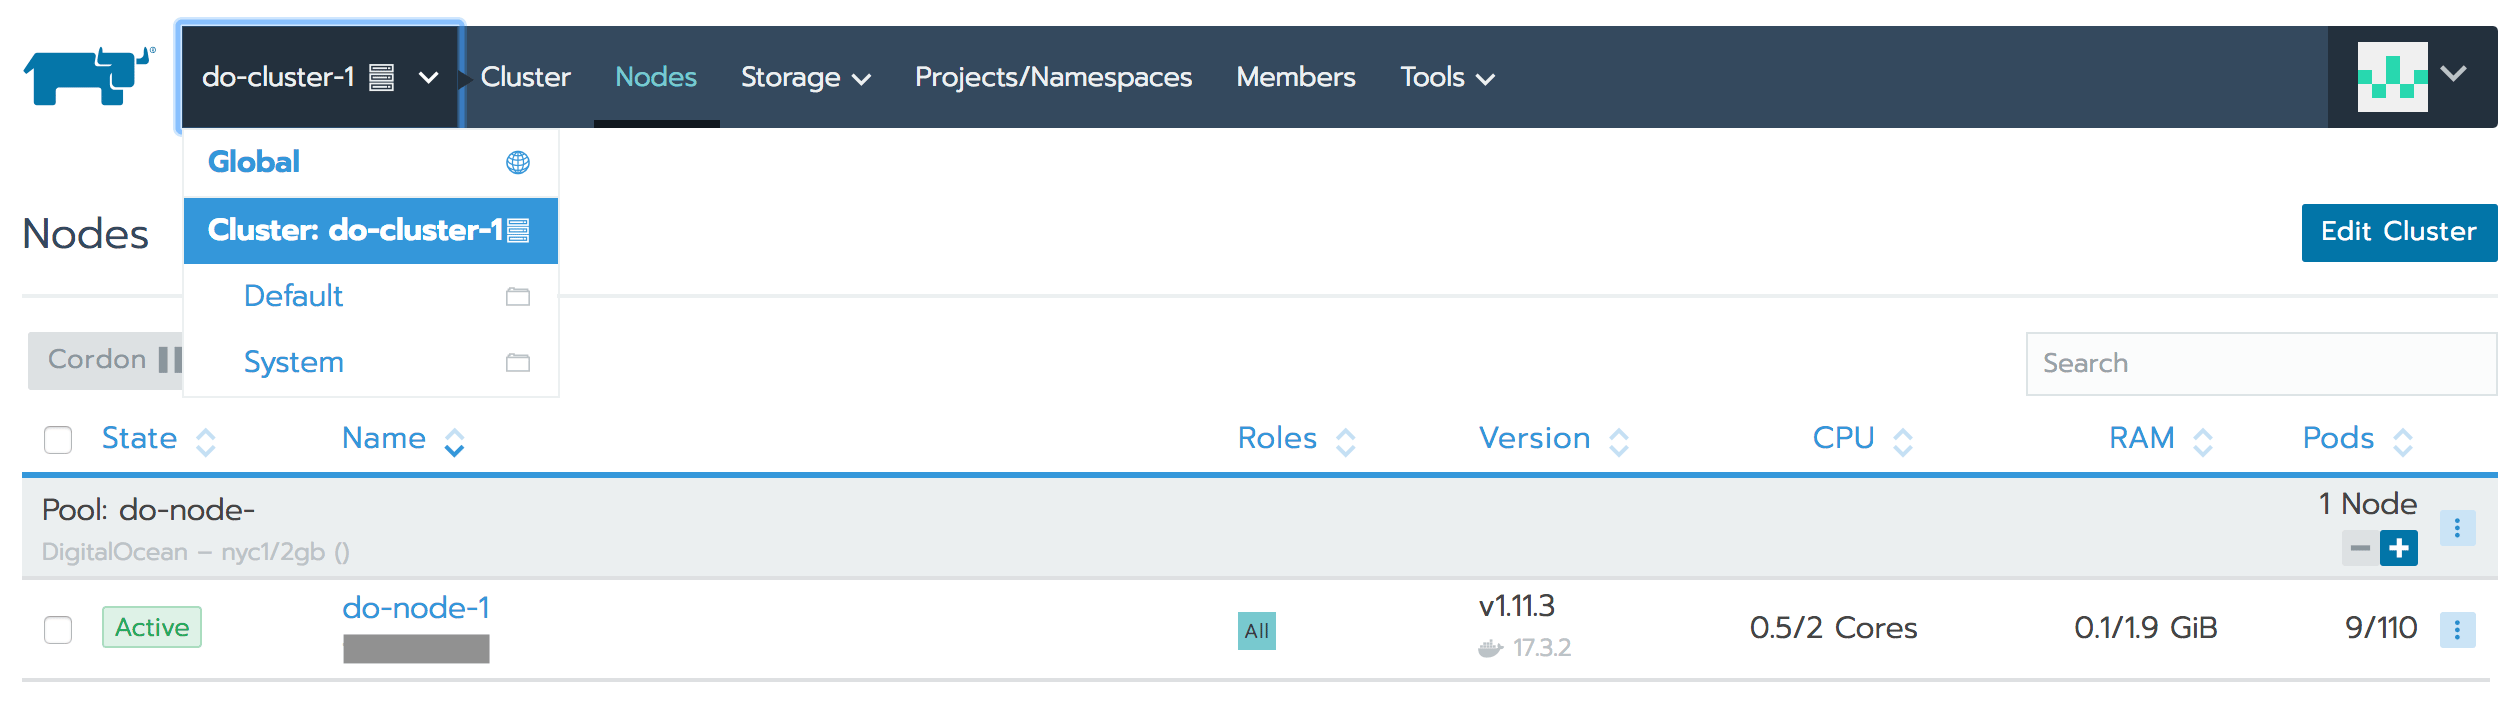
This page shows that you currently have one running node in the cluster. To add more nodes, click Edit Cluster, and scroll to the Node Pools section at the bottom of the page. Click Add Node Pool, enter a prefix, and check the Worker box. Click Save to update the cluster.
Within 2–5 minutes, Rancher will provision a second droplet and indicate the node as Active in the cluster’s dashboard. This second node is only a worker, which means it will not run the Rancher etcd or Control Plane containers. This allows the Worker more capacity for running workloads.
Note: Having an uneven number of etcd nodes will ensure that they can always reach a quorum (or consensus). If you only have one etcd node, you run the risk of your cluster being unreachable if that one node goes down. In a production environment it is a better practice to run three or five etcd nodes.
When the second node is ready, you will be able to see the workload you deployed in the previous step on this node by navigating to http://second_node_ip:30000/ in your browser.
Scaling up nodes gives you more Droplets to distribute your workloads on, but you may also want to run more instances of each pod within a workload. To add more pods, return to the Default project page, press the arrow to the left of your hello-world workload, and click + twice to add two more pods.

Rancher will automatically deploy more pods and distribute the running containers to each node depending on where there is availability.
You can now scale your nodes and pods to suit your application’s requirements.
Conclusion
You’ve now set up multi-node deployments using Rancher 2.1 on Ubuntu 18.04, and have scaled up to two running nodes and multiple pods within a workload. You can use this strategy to host and scale any kind of Docker container that you need to run in your application and use Rancher’s dashboard and alerts to help you maximize the performance of your workloads and nodes within each cluster.
Thanks for learning with the DigitalOcean Community. Check out our offerings for compute, storage, networking, and managed databases.
About the author(s)
Former startup CTO turned writer. Helping build high-quality software engineering blogs as the founder of https://draft.dev (he/him)
Former Senior Technical Editor at DigitalOcean, with a strong focus on DevOps and System Administration content. Areas of expertise include Terraform, PyTorch, Python, and Django.
Still looking for an answer?
This textbox defaults to using Markdown to format your answer.
You can type !ref in this text area to quickly search our full set of tutorials, documentation & marketplace offerings and insert the link!
What a wonderful article! Thanks a lot for writing this.
And that’s what I encountered: After creating a cluster, the worker node droplet created successfully, but the state changed from active to provisioning again, and shows messages below:
Exit status 1, unable to recognize "management-statefile_path_redacted": Get https://localhost:443/k8s/clusters/c-ksv54/api?timeout=32s: remote error: tls: internal error unable to recognize "management-statefile_path_redacted": Get https://localhost:443/k8s/clusters/c-ksv54/api?timeout=32s: remote error: tls: internal error unable to recognize "management-statefile_path_redacted": Get https://localhost:443/k8s/clusters/c-ksv54/api?timeout=32s: remote error: tls: internal error unable to recognize "management-statefile_path_redacted": Get https://localhost:443/k8s/clusters/c-ksv54/api?timeout=32s: remote error: tls: internal error unable to recognize "management-statefile_path_redacted": Get https://localhost:443/k8s/clusters/c-ksv54/api?timeout=32s: remote error: tls: internal error unable to recognize "management-statefile_path_redacted": Get https://localhost:443/k8s/clusters/c-ksv54/api?timeout=32s: remote error: tls: internal error unable to recognize "management-statefile_path_redacted": Get https://localhost:443/k8s/clusters/c-ksv54/api?timeout=32s: remote error: tls: internal error unable to recognize "management-statefile_path_redacted": Get https://localhost:443/k8s/clusters/c-ksv54/api?timeout=32s: remote error: tls: internal error
How can I deal with this?
Hi, thanks for this well written article. Now i got some question regarding this.
*I want to create Multiple (minimum 3 master nodes) Master node (using Stacked etcd topology) under one kubernetes Cluster using Rancher UI. So the question is do i need to have any load balancer/HA machanism for these master nodes for inter-communication or Rancher is going do it us?
Do you have any document with these precise steps to provision this kind of architecture?
if trying on ubtunu 20 ERROR: Rancher must be ran with the --privileged flag when running outside of Kubernetes so add this parameter to rancher command! ;-)
New to Docker, I am trying to follow this example. Early on, when I do a docker ps, the status says that it is restarting over and over again.
The docker event output says that the container died:
2022-06-19T03:50:52.859633321Z container die 1b881a72f256ec7d4811f41d7c2a546dc3e0b3946fffd600edd75ecbe111139d (com.suse.eula=sle-bci, com.suse.image-type=sle-bci, com.suse.lifecycle-url=https://www.suse.com/lifecycle, com.suse.release-stage=released, com.suse.sle.base.created=2022-05-10T14:29:00.558310205Z, com.suse.sle.base.description=Image for containers based on SUSE Linux Enterprise Server 15 SP3., com.suse.sle.base.disturl=obs://build.suse.de/SUSE:SLE-15-SP3:Update:CR/images/ba5146d67e172d2a4c3541b3b996cf08-sles15-image, com.suse.sle.base.eula=sle-bci, com.suse.sle.base.image-type=sle-bci, com.suse.sle.base.lifecycle-url=https://www.suse.com/lifecycle, com.suse.sle.base.reference=registry.suse.com/suse/sle15:15.3.17.14.10, com.suse.sle.base.release-stage=released, com.suse.sle.base.source=https://sources.suse.com/SUSE:SLE-15-SP3:Update:CR/sles15-image/ba5146d67e172d2a4c3541b3b996cf08/, com.suse.sle.base.supportlevel=l3, com.suse.sle.base.title=SUSE Linux Enterprise Server 15 SP3 Base Container Image, com.suse.sle.base.url=https://www.suse.com/products/server/, com.suse.sle.base.vendor=SUSE LLC, com.suse.sle.base.version=15.3.17.14.10, com.suse.supportlevel=l3, exitCode=1, image=rancher/rancher, name=admiring_spence, org.openbuildservice.disturl=obs://build.suse.de/SUSE:SLE-15-SP3:Update:CR/images/ba5146d67e172d2a4c3541b3b996cf08-sles15-image, org.opencontainers.image.created=2022-05-12T21:37:13Z, org.opencontainers.image.description=Image for containers based on SUSE Linux Enterprise Server 15 SP3., org.opencontainers.image.revision=c4d59fa88e2313e1446ba542a21c39e15a17f375, org.opencontainers.image.source=https://github.com/rancher/rancher.git, org.opencontainers.image.title=SUSE Linux Enterprise Server 15 SP3 Base Container Image, org.opencontainers.image.url=https://github.com/rancher/rancher, org.opencontainers.image.vendor=SUSE LLC, org.opencontainers.image.version=15.3.17.14.10, org.opensuse.reference=registry.suse.com/suse/sle15:15.3.17.14.10)
Can you easily spot what is going wrong? I think I got everything covered. Thanks.
 This work is licensed under a Creative Commons Attribution-NonCommercial- ShareAlike 4.0 International License.
Become a contributor for community
Get paid to write technical tutorials and select a tech-focused charity to receive a matching donation.

DigitalOcean Documentation
Full documentation for every DigitalOcean product.

Resources for startups and AI-native businesses
The Wave has everything you need to know about building a business, from raising funding to marketing your product.
The developer cloud
Scale up as you grow — whether you're running one virtual machine or ten thousand.

Start building today
From GPU-powered inference and Kubernetes to managed databases and storage, get everything you need to build, scale, and deploy intelligent applications.
