By Vinícius Zavam and Hazel Virdó

Introduction
SmokePing is a network latency tracking tool. Tracking your server’s network latency can give you a useful picture of the overall health and availability of your server. For example, it can help you determine if your network is overloaded or alert you to packet loss, which may indicate an incorrect router configuration or downed device.
SpokePing’s creator, Tobias Oetiker, also created a data logging and time series graphing utility called RDDtool. SmokePing uses RDDtool, so you have access to its sophisticated graphing capabilities too.
This tutorial will show you how to install and configure SmokePing with Apache on FreeBSD.
Note: As of July 1, 2022, DigitalOcean no longer supports FreeBSD Droplets through the Control Panel or API. However, you can still spin up FreeBSD Droplets using a custom image. Learn how to import a custom image to DigitalOcean by following our product documentation.
Prerequisites
To follow this tutorial, you will need:
- One FreeBSD 11 server with a root user. For the purposes of this tutorial, the user is referred to as freebsd.
A FreeBSD server requires an SSH key for remote access. For help on setting up an SSH key, read How To Configure SSH Key-Based Authentication on a FreeBSD Server. To learn more about FreeBSD servers and basic management, check out the Getting Started with FreeBSD tutorial series.
Step 1 — Installing Apache with FastCGI Support
To begin, we’ll install the Apache web server and its FastCGI module, which SmokePing uses to power its web interface.
First, update your server’s repository information.
- sudo pkg update
To install Apache with FastCGI support, you can just tell pkg to install the FastCGI module. pkg will handle all dependencies needed by the module itself, so it will automatically install the main Apache package as well.
- sudo pkg install ap24-mod_fcgid
Confirm the installation by pressing Y. Once Apache is installed, we’ll need to customize it to get it working.
Step 2 — Configuring Apache
There are two small changes we’ll need to make to Apache: updating some server information in httpd.conf and enabling the FastCGI module.
First, open /usr/local/etc/apache24/httpd.conf for editing.
- sudo ee /usr/local/etc/apache24/httpd.conf
Edit the two directives below. Set ServerAdmin to your email address, and uncomment (by deleting the preceeding #) and edit ServerName to your server’s IP address.
. . .
# ServerAdmin: Your address, where problems with the server should be
# e-mailed.  This address appears on some server-generated pages, such
# as error documents.  e.g. admin@your-domain.com
#
ServerAdmin your_email_address

#
# ServerName gives the name and port that the server uses to identify itself.
# This can often be determined automatically, but we recommend you specify
# it explicitly to prevent problems during startup.
#
# If your host doesn't have a registered DNS name, enter its IP address here.
#
ServerName your_server_ip
. . .
Save and close the file.
FastCGI is not a default module, so we have to add it to Apache’s configuration to load it. To load the module, we’ll need to create a new configuration file in /usr/local/etc/apache24/modules.d/ and add the module information.
The module README, found in /usr/local/etc/apache24/modules.d/README_modules.d, says “files are automatically included if the name begins with a three digit number followed by _ and ending in .conf”. To comply with this, we’ll create a file called 001_fcgid.conf.
- sudo ee /usr/local/etc/apache24/modules.d/001_fcgid.conf
Paste the following into the file, which tells Apache to load the module and where to find it.
LoadModule fcgid_module libexec/apache24/mod_fcgid.so
Save and close the file.
Now that Apache with FastCGI is set up, we can install SmokePing itself.
Step 3 — Installing and Configuring SmokePing
Installing SmokePing is straightforward because it’s in the package repository.
- sudo pkg install smokeping
SmokePing’s configuration is in /usr/local/etc/smokeping/config by default. You’ll need to edit this file to customize a few fields.
- sudo ee /usr/local/etc/smokeping/config
You’ll need to edit four fields in the ***General*** section:
owner, which should have your namecontact, which should have your email addressimgurl, which should be updated to use your server’s IP addresscgiurl, which should also be updated to use your server’s IP address
Here’s what the file will look like when you’re done:
*** General ***

owner    = your_name
contact  = your_email_address
mailhost = my.mail.host
. . .
imgcache = /usr/local/smokeping/htdocs/img
imgurl   = http://your_server_ip/smokeping/img
datadir  = /usr/local/var/smokeping
piddir  = /usr/local/var/smokeping
cgiurl   = http://your_server_ip/smokeping.fcgi
. . .
SmokePing has support for a master/slave architecture, to use their terminology. In this tutorial, we’re only setting up SmokePing on one machine. Consequently, comment out the *** Slaves *** section of the configuration by prefacing each line with a #.
. . .
# *** Slaves ***
# secrets=/usr/local/etc/smokeping/smokeping_secrets
# +boomer
# display_name=boomer
# color=0000ff
#
# +slave2
# display_name=another
# color=00ff00
. . .
Keep this file open, as we’ll continue editing it in the next step to set up SmokePing’s targets.
Step 4 — Defining Targets
The last thing we’ll add to SmokePing’s configuration file are targets. To paraphrase SmokePing’s explanation, targets are a hierarchical list of hosts which mark the endpoints of the network connections the system should monitor. Every target will specify what kind of probe to use, which integrate an external ping command into SmokePing (like fping).
In this tutorial, we’ll set up a configuration that monitors the latency between your server and two FreeBSD pkg mirrors. We’ll create three graphs: two that shows the latency for each of the two mirror servers independently, and one that shows the latency of both mirror servers at once.
Targets are configured In the *** Targets *** section of SmokePing’s configuration file. There are many variables you can use to customize your targets, but here, we’ll just use the following:
- probe: The ping command to use to probe for latency.
- menu: The default menu to show in the GUI.
- title: The title of the corresponding SmokePing page.
- remark: The text that will appear on the page.
- host: The IP address or hostname endpoint.
First, delete the existing sample configuration so the end of your file looks like this:
. . .
*** Targets ***

probe = FPing

menu = Top
title = Network Latency Grapher
remark = Welcome to the SmokePing website of xxx Company. \
         Here you will learn all about the latency of our network
Then, copy and paste the following configuration under the existing default settings.
. . .
*** Targets ***

probe = FPing

menu = Top
title = Network Latency Grapher
remark = Welcome to the SmokePing website of xxx Company. \
         Here you will learn all about the latency of our network

+ targets
menu = Targets
title = Targets' Latency Probed with fping

    ++ pkgmir_nyi
    menu = FreeBSD pkg Mirror (NYI)
    title = FreeBSD pkg Mirror Hosted by New York Internet, USA
    host = pkg0.nyi.freebsd.org

    ++ pkgmir_ydx
    menu = FreeBSD pkg Mirror (YDX)
    title = FreeBSD pkg Mirror Hosted by Yandex, Russia
    host = pkg0.ydx.freebsd.org
Let’s explain what this is doing.
Targets are hierarchical, meaning you can nest levels of targets to help with organization. Each nested level of targets will create a new submenu in the SmokePing GUI showing different graphs.
In our configuration, the + targets line means we’re defining a nested level of targets. Nested targets will inherent the values of their parent configuration, so we don’t need to include the probe = FPing line again if we want these targets to use the same probe. However, we updated the title and menu variables for the new subsection, so the page on the site will have a different title and menu.
The ++ pkgmir_xxx lines mean we’re defining a second nested level which includes two targets. These have a host variable for the address of the endpoint, which are our two FreeBSD pkg mirror servers.
The above configuration will create one graph per target. Below it, add one more section to combine multiple targets into one graph.
. . .
    ++ pkgmir_ydx
    menu = FreeBSD pkg Mirror (YDX)
    title = FreeBSD pkg Mirror Hosted by Yandex, Russia
    host = pkg0.ydx.freebsd.org

+ multi
menu = Multi Targets
title = Multi Targets

    ++ multi_pkgmir
    menu = FreeBSD pkg Mirrors
    title = FreeBSD pkg Mirrors
    host = /targets/pkgmir_nyi /targets/pkgmir_ydx
Note that this section uses the two targets we already configured (/targets/pkgmir_nyi and /targets/pkgmir_ydx).
Finally, save and close the file. SmokePing’s configuration is all set up, so let’s connect Apache and SmokePing and start the respective services.
Step 5 — Connecting and Enabling the Services
Create a configuration file for Apache in /usr/local/etc/apache24/Includes/ called smokeping.conf.
- sudo ee /usr/local/etc/apache24/Includes/smokeping.conf
Here, we’ll add the information Apache needs to handle requests to SmokePing’s web interface. Copy and paste the following into the new file:
ScriptAlias	/smokeping.fcgi	/usr/local/smokeping/htdocs/smokeping.fcgi
Alias		/smokeping		/usr/local/smokeping/htdocs/
<Directory "/usr/local/smokeping/htdocs/">
        AddHandler      fcgid-script .fcgi
        AllowOverride   None
        DirectoryIndex  index.html smokeping.fcgi
        Options         FollowSymLinks ExecCGI
        Require         all granted
</Directory>
This tells Apache where to find SmokePing’s files and makes sure it uses FastCGI.
The default service configuration for Apache and SmokePing will not start the processes at boot. To change that, execute the following two commands.
- sudo sysrc apache24_enable="YES"
- sudo sysrc smokeping_enable="YES"
The output for the aforementioned two commands should look like this:
Outputapache24_enable:  -> YES
smokeping_enable:  -> YES
Now, you can start the Apache service.
sudo service apache24 start
If it starts successfully, you will see:
OutputPerforming sanity check on apache24 configuration:
Syntax OK
Starting apache24.
If not, you’ll see an error which you can use to debug any issues in the configuration file. Finally, start the SmokePing service.
- sudo service smokeping start
OutputStarting smokeping.
Note: logging to syslog as local0/info.
Daemonizing /usr/local/bin/smokeping ...
Everything is running, so let’s see our graphs in action.
Step 6 — Accessing SmokePing’s Web Interface
You can access SmokePing’s web interface by visiting http://your_server_ip/smokeping in your favorite browser. You’ll see a page with the title and remark you specified in step 5. If you didn’t change any of the values, it will look like this:
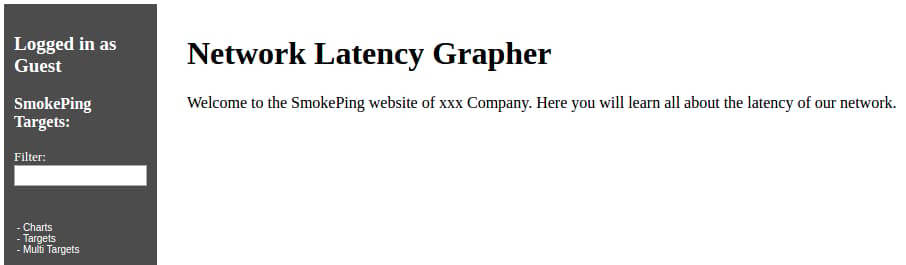
You can see your graphs by navigating the menu on the left. Notice the Targets and Multi Targets options in the menu; these are the targets we defined in Step 5.
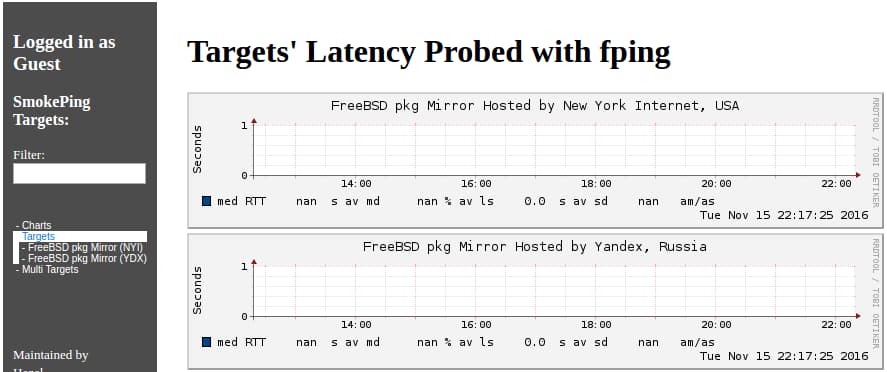
Click on Targets. You’ll see the first two graphs we defined, one for each mirror server. On the left, you’ll see the nested list of targets, which mirrors our configuration file.
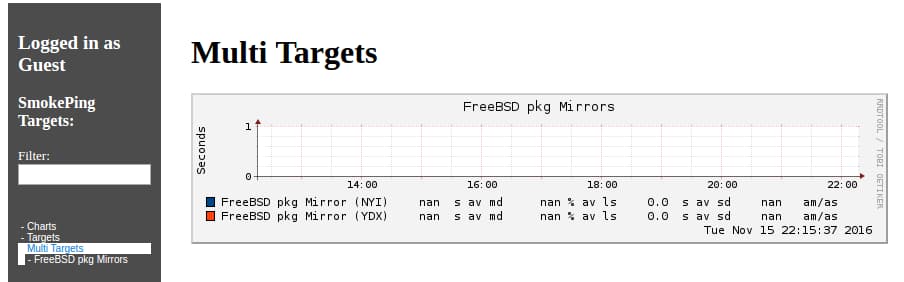
Next, click on Multi Targets. You’ll see the combined graph here.
If you run into trouble, you can check the logs for help in diagnosing the problem. Apache records its logs in two files: /var/log/httpd-access.log and /var/log/httpd-error.log. SmokePing has one log file, which is /var/log/smokeping.log. Remember that if you change SmokePing’s configuration, you’ll need to reload the daemon with sudo service smokeping reload.
Conclusion
In this tutorial, you set up SmokePing with Apache and created some example probes to test logging and graphing. From here, you can customize your probes and graphs to whatever you’d like to track. SmokePing has a lot of other features, like slaves, alerts, and support for your own mail server. Check out SmokePing’s official documentation for more detail.
Thanks for learning with the DigitalOcean Community. Check out our offerings for compute, storage, networking, and managed databases.
About the author(s)
former DO tech editor publishing articles here with the community, then founded the DO product docs team (https://do.co/docs). to all of my authors: you are incredible. working with you was a gift. love is what makes us great.
Still looking for an answer?
This textbox defaults to using Markdown to format your answer.
You can type !ref in this text area to quickly search our full set of tutorials, documentation & marketplace offerings and insert the link!
 This work is licensed under a Creative Commons Attribution-NonCommercial- ShareAlike 4.0 International License.
Become a contributor for community
Get paid to write technical tutorials and select a tech-focused charity to receive a matching donation.

DigitalOcean Documentation
Full documentation for every DigitalOcean product.

Resources for startups and AI-native businesses
The Wave has everything you need to know about building a business, from raising funding to marketing your product.
The developer cloud
Scale up as you grow — whether you're running one virtual machine or ten thousand.

Start building today
From GPU-powered inference and Kubernetes to managed databases and storage, get everything you need to build, scale, and deploy intelligent applications.
