
Introduction
Foreman is an open source tool that can help with the management of servers, by providing an easy way to interact with Puppet (or Chef) to automate tasks and application deployment. Foreman provides a robust web user interface, API, and CLI which can be used to provision, configure, and monitor your servers. It is suitable for infrastructures of all sizes, and works with most distributions of Linux.
In this tutorial, we will show you how to install Foreman with Puppet, and start using it to manage your servers. We will use Foreman for its reporting and External Node Classifier (ENC) capabilities, to ease the management of Puppet.
Prerequisites
This tutorial assumes you will install Foreman on a fresh server, called which will also act as the Puppet master server. If you already have a Puppet master server, you may install Foreman on it but keep in mind that your default site.pp will be overwritten (leaving your existing Puppet agent nodes in an unmanaged state), and you will need to configure Foreman to manage your existing Puppet agent nodes.
Because Foreman depends on Puppet to perform the configuration management of hosts, it requires everything that is needed for a Puppet agent/master setup. The following list covers the things you will need before starting this tutorial:
- Root Access:
sudoaccess to all of the servers you want to manage - Private Network DNS: Forward and reverse DNS must be configured, and every server must have a unique hostname. Here is a tutorial to configure your own private network DNS server. If you do not have DNS configured, you must use your hosts file for name resolution. We will assume that you will use your private network for communication within your infrastructure.
- Firewall Open Ports: The Puppet master must be reachable on port 8140. If your firewall is too restrictive, check out this UFW Tutorial for instructions on how to allow incoming requests on port 8140.
Once you have all of the prerequisites, let’s move on to creating the Foreman (and Puppet master) server!
Create Foreman Server
Create a new Ubuntu 14.04 x64 server, using “foreman.nyc2.example.com” as its hostname. Add its private network to your DNS with the following details:
| Hostname | Role | Private FQDN |
|---|---|---|
| foreman | Foreman / Puppet Master | foreman.nyc2.example.com |
If you just set up your DNS and are unsure how to add your host to DNS, refer to the Maintaining DNS Records section of the DNS tutorial. Essentially, you need to add an “A” and “PTR” record, and allow the new host to perform recursive queries. Also, ensure that you configure your search domain so your servers can use short hostnames to look up each other.
Ensure Hostname is Set to FQDN
To check your server’s full hostname, type in the following command:
hostname -f
You should see the long version of your server’s name, e.g. “foreman.nyc2.example.com”. If your hostname is set to your FQDN, you may continue to the next section.
Otherwise, if a short name is returned e.g. “foreman”, you need to set your hostname to the long name. To do so, edit your hosts file:
sudo vi /etc/hosts
Find the first entry for your short hostname, and add the FQDN before it. For example:
127.0.1.1 foreman
Should be changed to:
127.0.1.1 foreman.nyc2.example.com foreman
Then save and exit.
Next, edit your hostname file:
sudo vi /etc/hostname
Change the entry in the file to your server’s FQDN, e.g. “foreman.nyc2.example.com”. Then save and exit.
Then run the following command to immediately read in the configuration change you just made:
sudo hostname --file /etc/hostname
Your long hostname has been set. Continue to install Foreman!
Install Foreman
The easiest way to install Foreman is to use the Foreman Installer. The Foreman Installer installs and configures all of the necessary components to run Foreman, including the following:
- Foreman
- Puppet master and agent
- Apache Web Server with SSL and Passenger module
Download the Foreman Installer with the following commands:
sudo sh -c 'echo "deb http://deb.theforeman.org/ trusty 1.5" > /etc/apt/sources.list.d/foreman.list'
sudo sh -c 'echo "deb http://deb.theforeman.org/ plugins 1.5" >> /etc/apt/sources.list.d/foreman.list'
wget -q http://deb.theforeman.org/pubkey.gpg -O- | sudo apt-key add -
sudo apt-get update && sudo apt-get install foreman-installer
Then run the Foreman Installer with the following command:
sudo foreman-installer
You should see the following output:
 Your puppet version does not support progress bar
Preparing installation Done
  Success!
  * Foreman is running at https://foreman.nyc2.example.com
      Default credentials are 'admin:changeme'
  * Foreman Proxy is running at https://foreman.nyc2.example.com:8443
  * Puppetmaster is running at port 8140
  The full log is at /var/log/foreman-installer/foreman-installer.log
If your output looks similar to the above, Foreman and its required components have been installed!
Enable Diffs
Before continuing, we will make a slight configuration change to enable “diffs”. This change will allow you to view diffs, which will allow you to see configuration file changes from within Foreman’s Reports view.
Edit puppet.conf:
sudo vi /etc/puppet/puppet.conf
Find the line that sets show_diff and change its value to true:
show_diff = true
Save and exit.
Add Foreman Host to Foreman’s Database
To add the Foreman host to Foreman’s database by running the puppet agent command like so:
sudo puppet agent --test
This adds the Foreman host as the first Puppet agent node that is managed by Foreman.
Log In To Foreman Web Interface
Log into the Foreman and change the admin password. The Foreman web interface can be accessed by the public network interface of your VPS (either its public FQDN or public IP address). Look at Infrastructure -> Smart proxies. Created automatically (and shows available features).
By default, Foreman uses your Puppet certificates, which are probably not trusted by your browser. Accept the warning about the certificate and proceed. Alternatively, you can replace the certificate with one that matches your domain name and is signed by a trusted CA authority. After you accept the certificate and proceed, you will see the following login page:
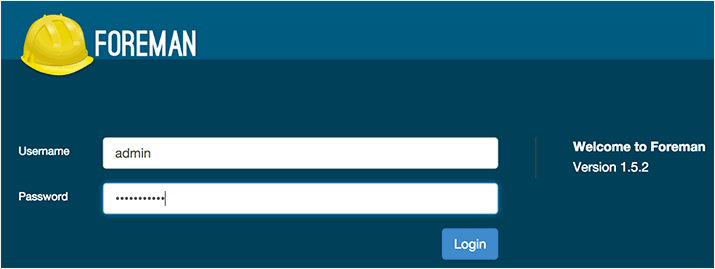
As you may have noticed when running foreman-installer, these are the default credentials:
- Username: admin
- Password: changeme
Foreman Dashboard
When you first log in, you will see the Foreman dashboard, which shows an overview of your Puppet environment. Here you will see a summary of “Host Configuration Status”, which shows the number of Puppet agent nodes and their respective statuses. When you first start Foreman, you should see a single server in the “good host” section:
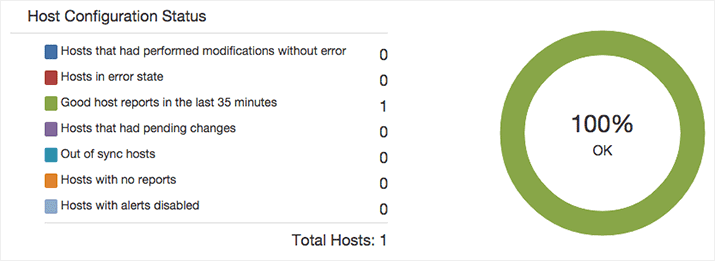
Below this, you will see a summary of recent events and a graph with the number of “clients” that have run their Puppet job within the last 30 minutes. This information can help give you an idea of how your overall Puppet setup is working.
Change Admin Password
Before doing anything else, you will want to change your admin user password. To do so, mouse over the Admin User item in the top-right corner, and click My Account:
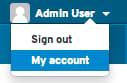
Find the Password form. Update your password to something secure, then click submit.
Add NTP Module To Foreman
Puppet requires accurate time-keeping, so we will use Foreman to manage the NTP service on the Foreman host (which is also the Puppet master).
In a web browser, go to https://forge.puppetlabs.com/. Search for an NTP module. The first result should be puppetlabs/ntp. Click on the module and read about it to see what it does.
Now we will install it in the Production environment of our Puppet master with the following command:
sudo puppet module install -i /etc/puppet/environments/production/modules puppetlabs/ntp
You should see output like the following, which indicates the module was installed properly:
Notice: Preparing to install into /etc/puppet/environments/production/modules ...
Notice: Downloading from https://forge.puppetlabs.com ...
Notice: Installing -- do not interrupt ...
/etc/puppet/environments/production/modules
└─┬ puppetlabs-ntp (v3.1.2)
  └── puppetlabs-stdlib (v4.3.2)
The module has been installed in the Puppet master, but it must be added to Foreman before we can use it.
In the Foreman web UI, mouse over Configure, then click on Puppet classes:
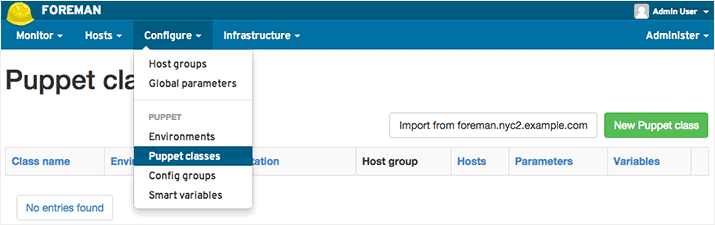
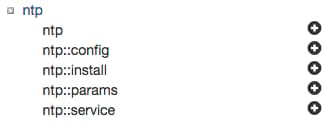
Click on the Import from foreman.nyc2.example.com button. Then you will see a screen that looks like this:

Tick the checkbox next to the item and click the Update button. The ntp module is now imported into Foreman, and ready to be used with a host.
Override Default NTP Pool
Now, we want to override the NTP module’s default settings, and configure the NTP module to use the US NTP pool by default. Feel free to look up an NTP pool of your choice at the NTP Pool Project.
You should be in the “Puppet Classes” screen. Click the “ntp” class to enter edit mode. Now click on the “Smart Class Parameter” tab.
Scroll down, find the “servers” item in the left sidebar, and select it:

Find and tick the “Override” checkbox. Change the Parameter type drop down to “array”. Then change the “Default value” from the default NTP pool to one of your choosing, in array form. We will use the US NTP pool:
["0.us.pool.ntp.org","1.us.pool.ntp.org","2.us.pool.ntp.org","3.us.pool.ntp.org"]
Scroll to the bottom and click the green “Submit” button. Now any hosts or hosts groups that use this module will use the US NTP pool by default.
Configure Foreman Host to Use NTP Module
Now we are ready to use the NTP module to manage NTP on the Foreman host.
Go to the Hosts screen (mouse over Hosts, then click All Hosts). Click on the “Edit” button on the far right of your Foreman host.
Click on the Puppet Classes tab . Under Available Classes, click on the ntp class to expand it, then click the plus sign next to “ntp”:
This moves the ntp class to the Included Classes section. This means that the next time the Foreman host’s Puppet agent checks in, it will have this Puppet module applied to it.
Click the Submit button to apply the changes.
View Puppet Configuration
After editing the Foreman host’s configuration, you will be directed to the Foreman host’s summary page.
To see the information given to Puppet when an agent node checks in, click on the YAML button:
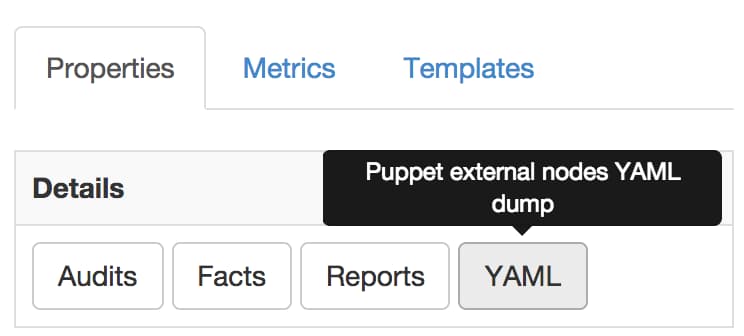
You will see a page with output similar to this:
---
classes:
  ntp:
    server_list:
    - 0.us.pool.ntp.org
    - 1.us.pool.ntp.org
    - 2.us.pool.ntp.org
    - 3.us.pool.ntp.org
parameters:
  puppetmaster: foreman.nyc2.example.com
  root_pw:
  foreman_env: production
  owner_name: Admin User
  owner_email: root@nyc2.example.com
environment: production
Run Puppet Agent
Let’s apply this change now, so we can see what it does.
On the Foreman server, run the Puppet agent:
sudo puppet agent --test
In the web UI, go back to your Foreman host, then click on the Reports button (next to the YAML button). You should see a new report entry that indicates some changes were applied and a service was restarted; click on the report. Here you will see several notices that indicate that the NTP package was installed, configured, and restarted.
Note that you just used Foreman to configure the Foreman server. Managing any other host works the same way.
If you wish, click on the “View Diff” link next to the ntp.conf/content item. This is useful if you want to see how Puppet is changing the configuration files that it manages.
Adding New Hosts to Foreman
Now that you have your Foreman server set up, you will probably want to add more hosts to be managed by it. The process of adding more hosts is the same as adding more Puppet agent nodes to a master. Detailed instructions to do this can be found in the first tutorial in this series. Be sure to configure the agent to point to your Puppet master (Foreman) server.
After you install and run the agent, you must sign its certificate on the Foreman server. You can sign the certificates via the command line, as with a normal Puppet setup, or you can use the Foreman web interface.
To use the web interface to sign the certificates, go to Infrastructure, then click Smart Proxies, then click on the Certificates button:

Here you will see all of the certificates in the PuppetCA. Click the Sign button (on the far right) next to the new hosts that you set to use this Puppet master.
Your new hosts are ready to be managed by Foreman!
Conclusion
Now that you have a working Foreman instance, you have an easy way to leverage Puppet modules to manage your server infrastructure. Feel free to browse the publicly available Puppet modules, or write your own (see the previous tutorial in this series) to manage your environment.
Good luck!
Thanks for learning with the DigitalOcean Community. Check out our offerings for compute, storage, networking, and managed databases.
Tutorial Series: How To Use Puppet To Manage Your Servers
Puppet, from Puppet Labs, is a configuration management tool that helps system administrators automate the provisioning, configuration, and management of a server infrastructure. This series shows you how to install a Puppet master-agent setup, write Puppet manifests (code), and use Foreman to manage your Puppet nodes.
About the author
Software Engineer @ DigitalOcean. Former Señor Technical Writer (I no longer update articles or respond to comments). Expertise in areas including Ubuntu, PostgreSQL, MySQL, and more.
Still looking for an answer?
This textbox defaults to using Markdown to format your answer.
You can type !ref in this text area to quickly search our full set of tutorials, documentation & marketplace offerings and insert the link!
This comment has been deleted
A couple of tuning tips if you’ve got >1000 hosts reporting complex puppet runs: Check the SQL backend’s tuning. Most modern databases have archaic default memory footprints. Also, Passenger only spins up a couple of worker threads by default, and these can get swamped, blocking on IO without actually stressing the CPU. I’ve run 12-14 threads on an 8 core server just fine, but depending on load type, ymmv.
Hi - Somewhere along the foreman initial setup the author used forman.nyc2.example.com, and then in the code referred to puppet.nyc2.example.com. For someone else, this might be confusing… Thanks!
This comment has been deleted
This is really good, thanks. We’ve added it to the list of articles in theforeman.org, I hope that will bring some people here to read this awesome tutorial :)
By the way, we have recently released a DigitalOcean compute resource plugin, so you can auto associate your hosts with DigitalOcean images and so on. I hope you find it useful and give us some feedback about it!!
Thank you. I’ve read all 3 articles and successfully setup my puppet test servers without issue. I’ve been followed other instructions before, also got errors.
Be warned if you are trying this with the smallest droplet it might run out of memory and the installation will fail.
Solution : Add some swap.
dd if=/dev/zero of=/swapfile bs=1024 count=512k
mkswap /swapfile
swapon /swapfile
Hi, I found this write up useful in deploying puppet with foreman. However, I am having some problems with puppet 3.7.5 (Not much of a problem though) with the warning message that comes with running puppet commands:
Warning: Sections other than main, master, agent, user are deprecated in puppet.conf. Please use the directory environments feature to specify environments. (See http://docs.puppetlabs.com/puppet/latest/reference/environments.html) (at /usr/lib/ruby/vendor_ruby/puppet/settings/config_file.rb:82:in `block in unique_sections_in’)
The issue is that the present configuration uses config file environment, and it seems that will be discontinued soon. I will like to stop this warning message by switching to directory environment.
I tried changing the puupet.conf file to support environment by adding the following under the [main] section
environmentpath = $confdir/environments basemodulepath = $confdir/modules:/usr/share/puppet/modules
while I removed (commented out) the [development], [test] and [production] sections. Then I created the manifests directory and environment.conf file in every existing (development,test and prod). Foreman automatically suggested deleting those directories and by that could no longer retrieve the modules in those environments.
my environment.conf looks like this: modulepath = /etc/puppet/environments/prod/modules manifest = /etc/puppet/environments/prod/manifests config_version = /usr/bin/true
sudo puppet apply --noop modules/mytest/manifests/init.pp Warning: Invalid settings in environment.conf at ‘/etc/puppet/environments/production/environment.conf’. The following unknown setting(s) are being ignored: manifests Warning: Invalid settings in environment.conf at ‘/etc/puppet/environments/production/environment.conf’. The following unknown setting(s) are being ignored: manifests Warning: Invalid settings in environment.conf at ‘/etc/puppet/environments/production/environment.conf’. The following unknown setting(s) are being ignored: manifests Warning: Invalid settings in environment.conf at ‘/etc/puppet/environments/production/environment.conf’. The following unknown setting(s) are being ignored: manifests
Question: Any Idea what I am doing wrong? Thanks in advance.
Great tutorial !
But for us Debian lovers we will have a problem since the version default on debian is still 2.7
But if we install the puppetlabs puppet before, we’re ok cd ~; wget https://apt.puppetlabs.com/puppetlabs-release-wheezy.deb sudo dpkg -i puppetlabs-release-wheezy.deb
i am a beginner at using puppet. just wanted to confirm if this will work for mac osx agents also. please provide some more tutorials on how to manage servers and node using puppet with foreman.
 This work is licensed under a Creative Commons Attribution-NonCommercial- ShareAlike 4.0 International License.
Become a contributor for community
Get paid to write technical tutorials and select a tech-focused charity to receive a matching donation.

DigitalOcean Documentation
Full documentation for every DigitalOcean product.

Resources for startups and AI-native businesses
The Wave has everything you need to know about building a business, from raising funding to marketing your product.
The developer cloud
Scale up as you grow — whether you're running one virtual machine or ten thousand.

Start building today
From GPU-powered inference and Kubernetes to managed databases and storage, get everything you need to build, scale, and deploy intelligent applications.
