
Introduction
Web frameworks provide a quick and easy way to jump start a web application. Almost every web framework adheres to the MVC software pattern. MVC stands for model, view, and controller. It is a way of distinguishing and separating the different functions of an application to simplify its design and allow each piece to be changed independently of the other components.
Pyramid is a lightweight web framework for Python applications. It allows you to get a basic web application up and running quickly. In fact, it can create the entire framework layout in a single file if you would like.
In this guide, we will introduce you to how to set up Pyramid on your Ubuntu system. We will then walk you through the basic commands and processes that will allow you to successfully launch an application with this framework.
Install the Prerequisite Tools
Before you begin, you must have some prerequisite packages installed. Since Pyramid is a Python framework, you will need the version of Python that your application was running.
We will be using Python 3 in this guide. Depending on the version of Ubuntu you have installed, this may be included by default.
Either way, you should run the following command to install the development header files needed by some Pyramid extensions. If you do not have Python 3 installed, this will be pulled in as a dependency. Additionally, we will download the setuptools package:
sudo apt-get update
sudo apt-get install python3-dev python3-setuptools
We will also need the virtualenv package. You can do this through the easy_install command:
sudo easy_install virtualenv
You should now have the basic components necessary to start working with Pyramid.
Configure the Application Environment
Now that we have the Python version we need and the bootstrapping tools necessary to build our application, we can configure our application environment.
The virtualenv package allows us to set up an isolated Python environment. We will set this up first, and then install the Pyramid files within this environment.
Begin by navigating to your home directory. From here, we will make a directory to house our project files:
cd ~
mkdir pyramid_sites
cd pyramid_sites
Within this directory, we will create our virtual environment. This will create an isolated bubble where we can install Python tools and libraries without affecting our system’s tools.
virtualenv --no-site-packages env
This creates a directory called “env” in our current folder. This is where the environment files are installed.
We can activate our virtual environment, changing the installation context, with this command:
source env/bin/activate
This will change the prompt to include the virtual environment. This makes it easy to know if you are in the virtual environment or not. If you need to deactivate the environment later, you can type:
deactivate
Do not deactivate the environment yet though. We can install Pyramid in the virtual environment by typing:
easy_install pyramid
This will install all of the necessary files for our framework.
Set Up a Sample Application
One of the benefits of the Pyramid framework is that it can be extremely lightweight. The web framework can be implemented within a single file.
Breaking Down a One File Configuration
We can create a one file configuration using an example from the Pyramid project. This will be a simple ‘hello world’ application. We will mainly use it to show some different parts of a general configuration file:
First, create a directory for your application.
mkdir ~/pyramid_sites/hello_world
cd ~/pyramid_sites/hello_world
Inside, we can create an application.py file and fill it with the following contents:
nano application.py
from wsgiref.simple_server import make_server
from pyramid.config import Configurator
from pyramid.response import Response

def hello_world(request):
    return Response('<h1>Hello world!</h1>')

if __name__ == '__main__':
    config = Configurator()
    config.add_view(hello_world)
    app = config.make_wsgi_app()
    server = make_server('0.0.0.0', 8080, app)
    server.serve_forever()
Let’s examine this file in chunks so we can see how Pyramid works.
At the head of the file, we have the import statements:
from wsgiref.simple_server import make_server
from pyramid.config import Configurator
from pyramid.response import Response
The first line imports the make_server function, which can create a simple web server when it is passed an application. The second and third line import the Configurator and Response functions from Pyramid.
These functions are used to configure details and set parameters for the application and respond to requests, respectively.
Next, we have a function definition called hello_world:
def hello_world(request):
    return Response('<h1>Hello world!</h1>')
This function represents a “view” for our application. Remember, most web frameworks implement an MVC (model, view, controller) paradigm. A function that fulfills the requirements of a view is responsible for rendering the text that will be passed back to the requesting entity.
In this case, the function, when called, uses the Response function we imported earlier. This passes back a value that should be given to the client. In our simple app, this is a very trivial view implementation.
The main portion of the program happens next. It starts with a common Python convention for calling the main executable portion of a program:
if __name__ == '__main__':
This line specifies that if the file is the “main” file being run (meaning it is not being imported and called by another file), the following commands should be run.
    config = Configurator()
    config.add_view(hello_world)
    app = config.make_wsgi_app()
    server = make_server('0.0.0.0', 8080, app)
    server.serve_forever()
The first line here creates a variable called config out of the object created by the Configurator function that we imported at the top of the program.
The next line calls the add_view method of this object. This method is used to define a view that can be used by the application. As you can see, we pass in the hello_world function we defined earlier. This is where that function is actually incorporated as a view.
The following line actually creates the WSGI application by calling the make_wsgi_app method of the config object. This uses the object’s attributes, such as the view we added, to create an application.
This application is then passed to the make_server function we imported in order to create an object that can launch a web server to serve our application. The last line launches this server.
Save and close the file when you are finished.
To launch the application, you simply need to point Python at it:
python application.py
Now, if you navigate to the port you defined in the configuration (‘8080’), you will see the text you put in your view function:
<pre> http://<span class=“highlight”>your_ip_address</span>:8080 </pre>

Create a Sample Pyramid Application With Scaffolding
In the previous example, we did everything through a single file. While this is a good way to show how compact and simple the process of creating an MVC application with Pyramid is, it isn’t always the easiest way of going about things.
Like most popular frameworks, Pyramid can use “scaffolding” to quickly create a complex project directory structure. We can use the scaffolding through a tool called pcreate.
Back into the Pyramid directory and check what scaffolding we have available:
cd ~/pyramid_sites
pcreate -l
Available scaffolds:
  alchemy:  Pyramid SQLAlchemy project using url dispatch
  starter:  Pyramid starter project
  zodb:     Pyramid ZODB project using traversal
The first option creates a project with SQL integration. The second creates a basic project with no persistence between application instances. The third can create an application to run with ZODB if you are using Python 2.
We can create a scaffolded project by choosing the template and naming the project:
pcreate -s starter first_project
This will create a directory named after the project, go inside to see the files that were created:
cd first_project
ls
CHANGES.txt development.ini first_project MANIFEST.in production.ini README.txt setup.cfg setup.py
This is a much larger set of files than our last example. The files directly in this folder are mainly used for configuration. The program itself is mainly contained within the sub-folder with the project’s name.
To see what the scaffolding accomplished, run the setup script to configure the application for a development environment.
python setup.py develop
This will read configure your application using the parameters available within the development.ini file.
Afterwards, we can serve the project by typing:
pserve development.ini
If you visit your IP address followed by the port number specified on the command line (it should be “6543”), you will see the default application:
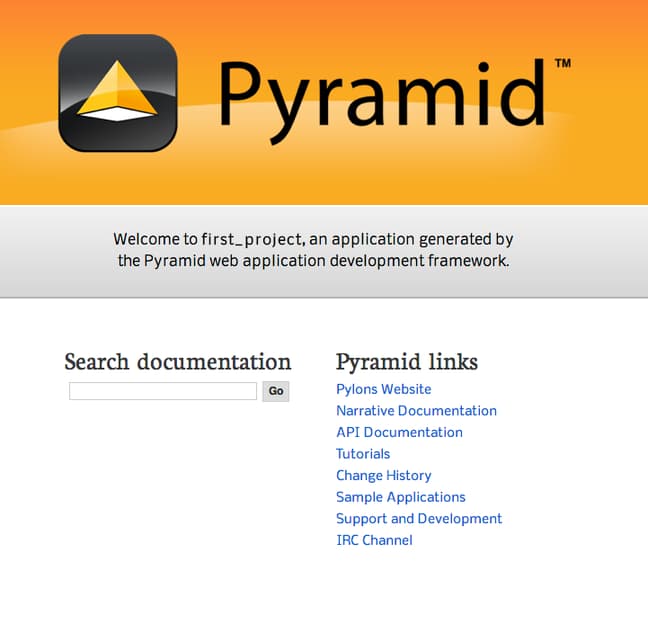
Press “Ctrl-C” in the terminal to stop the web server.
We can enable a debugging panel within the configuration file to allow us to get valuable information about our application.
Edit the development.ini file:
nano development.ini
Inside, at the bottom of the [app:main] section, add this line to allow any connecting hosts to view the debugging toolbar:
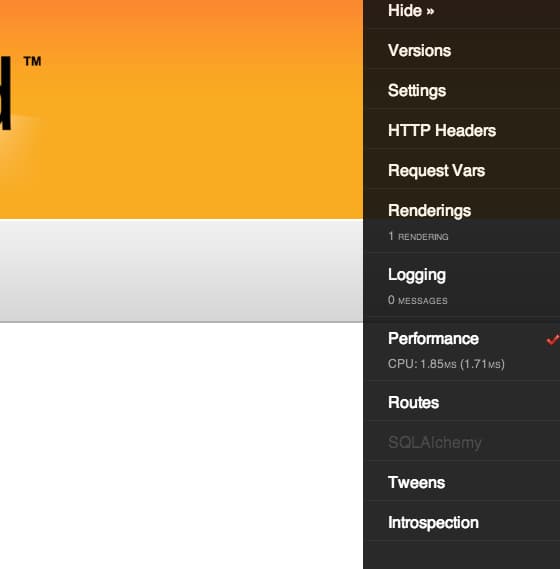
<pre> [app:main] . . . . . . pyramid.includes = pyramid_debugtoolbar <span class=“highlight”>debugtoolbar.hosts = 0.0.0.0/0</span> </pre>
Save and close the file. Now, if you restart the server and reload the web page, you will see a debugging toolbar on the right-hand side:
pserve development.ini
Within this project’s structure, you can configure complex MVC interactions.
Conclusion
We have just scratched the surface of what Pyramid can do. Hopefully, by this point you can see that it has a simple structure built upon Python’s conventions and it is flexible enough to scale from extremely easy sites to more complete designs requiring complex interactions.
Explore the documentation for Pyramid in order to get a better understanding of how to implement larger applications. The framework provides many tools in order to take your application through the development cycle (including incorporated testing), and into production.
<div class=“author”>By Justin Ellingwood</div>
Thanks for learning with the DigitalOcean Community. Check out our offerings for compute, storage, networking, and managed databases.
About the author
Former Senior Technical Writer at DigitalOcean, specializing in DevOps topics across multiple Linux distributions, including Ubuntu 18.04, 20.04, 22.04, as well as Debian 10 and 11.
Still looking for an answer?
This textbox defaults to using Markdown to format your answer.
You can type !ref in this text area to quickly search our full set of tutorials, documentation & marketplace offerings and insert the link!
is this still good / accurate? Meaning I won’t get stuck halfway through because I have Ubuntu 15.04?
 This work is licensed under a Creative Commons Attribution-NonCommercial- ShareAlike 4.0 International License.
Become a contributor for community
Get paid to write technical tutorials and select a tech-focused charity to receive a matching donation.

DigitalOcean Documentation
Full documentation for every DigitalOcean product.

Resources for startups and AI-native businesses
The Wave has everything you need to know about building a business, from raising funding to marketing your product.
The developer cloud
Scale up as you grow — whether you're running one virtual machine or ten thousand.

Start building today
From GPU-powered inference and Kubernetes to managed databases and storage, get everything you need to build, scale, and deploy intelligent applications.
