By Mason Egger and Brian Hogan

Introduction
Visual Studio Code is a popular Integrated Developer Environment (IDE) for developers. Its large selection of plugins, minimal design, and cross-platform support make it a great choice for developers of all levels. This tutorial focuses on using the Remote-SSH plugin to enable remote software development. With this plugin you can edit files on your local workstation, but run development tasks such as program execution, unit tests, or static analysis on a remote server.
There are many reasons why this may be beneficial to you. For example, you may have a Windows workstation and want to develop on Windows, but your code will eventually run on Linux. You may need more RAM or processing power than your current machine has available, or you want to keep code off of your personal machine due to a company policy, or the desire to keep your workstation prestine.
In this tutorial, you’ll enable the Remote-SSH plugin, configure Visual Studio Code to execute code on the remote server, and execute code from your local Visual Studio Code installation on the remote server.
Prerequisites
In order to follow along with this guide, you’ll need:
- A local development machine running Windows, MacOSX, or Linux. This tutorial will not work on ChromeOS devices.
- Visual Studio Code, which you can download and install from the official web site.
- An SSH key pair generated:
- If you’re using macOS or Linux, you can follow Step 1 from How to Set Up SSH Keys on Ubuntu 20.04. The commands are the same, so don’t worry that the tutorial says it is for Ubuntu 18.04.
- If you’re using Windows, follow the tutorial How to Create SSH Keys with PuTTY on Windows to create your SSH Key.
- If you’re using DigitalOcean, you can follow the How to Upload SSH Public Keys to a DigitalOcean Account guide.
- One Ubuntu 18.04 server set up by following the Ubuntu 18.04 initial server setup guide, including a non-root
sudo-enabled user and a firewall.
Step 1 — Installing the Remote-SSH Plugin
The Extensions Marketplace is where you can download supported and third-party extensions for a variety of different tools and programming languages. This is where you will search for the Remote-SSH plugin and install it.
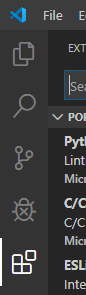
On the left-hand side of the IDE there is a vertical row of five icons. The bottom icon, which looks like four squares in a box with the top right square exploding out, is the icon for the Extensions Marketplace:
You can also access this section by pressing Ctrl+Shift+X. When you open this page you will see suggested plugins to download and install.
Once you have the Extensions Marketplace open, type Remote-SSH in the Search Extensions in Marketplace search bar. When you find the plugin, select it and then click the green Install button to install the extension.

The extension is now installed. Next, you’ll configure the extension so you can connect to your server.
Step 2 — Configuring the Remote-SSH Plugin and Connecting To Your Server
Now that you have the plugin installed you can configure it to connect to a server. To do so, you’ll need the following pieces of information:
- The server’s IP or hostname.
- The username you’ll connect with.
- The private key you’ll use to authenticate your user.
You’ll use this information to create an SSH configuration file that Visual Studio Code can use to SSH to the server to sync files and execute code on your behalf. You will create this configuration using Visual Studio Code.
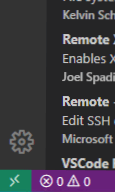
Now that you have the Remote-SSH plugin installed, you’ll see a small green box in the bottom left-hand corner of the Visual Studio Code interface. If you hover over the box with your mouse pointer, the popup will say Open a remote window. The button looks like a greater than sign slightly under a less than sign ><, like the one in the following image:
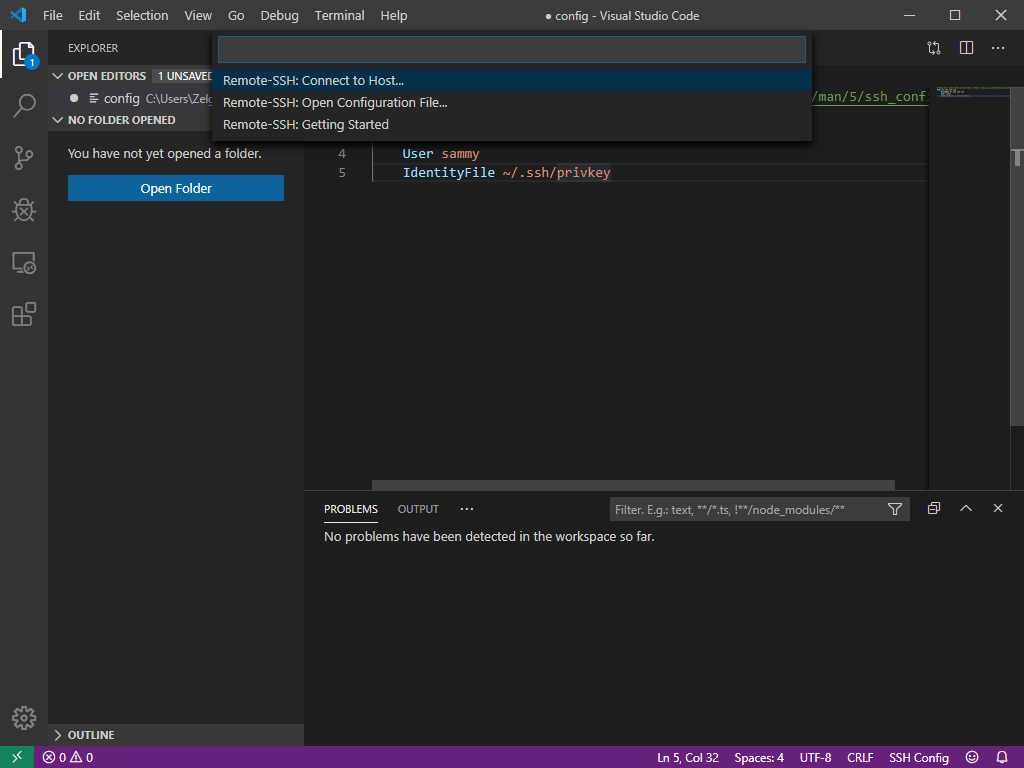
Click the button, and a dialog box appears in the top center. Select Remote-SSH: Open Configuration File… from the list:

The next prompt will ask you which configuration file you want to open. If you’re on Windows, you’ll see two locations: one in your personal user directory, and one in the installation location for SSH. You should use the file in your user directory when configuring the server.
Select the file and your editor will open the config file. Add the following code to the file to define the connection to your server, replacing the highlighted sections with the information for your server:
Host my_remote_server
    HostName your_server_ip_or_hostname
    User sammy
    IdentityFile /location/of/your/private/key
Here’s how this configuration file works:
Host: This specifies a name for your host. This lets you use a short name or abbreviation instead of the full IP address or host name when connecting to the server.HostName: The actual hostname of the server, which is either an IP address or a fully qualified domain name.User: The user you want to use to connect with.IdentityFile: The path to your SSH private key. On Mac and Linux systems, you’ll find this in your home directory in a hidden.sshdirectory, typically calledid_rsa. If you are on Windows you will have specified a location to save this file when you created it usingputty-gen.
Specify the appropriate values in your file and save the file.
Visual Studio Code is now configured and ready to connect to your server. Click on the green Open a remote window button in the bottom left-hand corner and select Remote-SSH: Connect to Host…
Once you’ve done this all the availble and configured servers will appear in the dropdown menu. Select the server that you want to connect to from this list.
If this is the first time you have connected to this server from your machine, you’ll likely be prompted with the SSH Fingerprint verification dialog, like the one in the following image:

This is to ensure that you are really connecting to the server you think you are. You can verify this by logging in to your server manually and running ssh-keygen -l -f /etc/ssh/ssh_host_key.pub to view the fingerprint of the server. If this fingerprint is the same as the one being presented to you in Visual Studio Code, then you are indeed connecting to the server you think you are so you can click Continue.
Visual Studio Code defaults to opening a new window when a new connection is made. A new window will appear with the welcome screen. You’ll know that your connection was successful if you see SSH: your_ip_address_or_hostname in the green box in the bottom left-hand corner. This means that Visual Studio Code is connected and communicating with your remote server.

Now that you’re connected, you can run commands and code from your editor.
Step 3 — Executing Code on the Remote Server
The Remote-SSH plugin is configured, and it’s time to run some code on your remote machine. Open a terminal window by selecting Terminal from the navigation bar at the top of the Visual Studio window and clicking New Terminal. You can also open a terminal by pressing CTRL+Shift+`. The terminal that is opened is a terminal on your remote server, not one on your local machine.
When the terminal opens, issue the following command to view the IP address of your server to verify that you are connected to your remote server:
- ip addr
You’ll see the following output in your terminal:
Output1: lo: <LOOPBACK,UP,LOWER_UP> mtu 65536 qdisc noqueue state UNKNOWN group default qlen 1000
    link/loopback 00:00:00:00:00:00 brd 00:00:00:00:00:00
    inet 127.0.0.1/8 scope host lo
       valid_lft forever preferred_lft forever
    inet6 ::1/128 scope host
       valid_lft forever preferred_lft forever
2: eth0: <BROADCAST,MULTICAST,UP,LOWER_UP> mtu 1500 qdisc fq_codel state UP group default qlen 1000
    link/ether 16:cb:05:5b:30:f1 brd ff:ff:ff:ff:ff:ff
    inet your_server_ip brd your_broadcast_address scope global eth0
       valid_lft forever preferred_lft forever
    ...
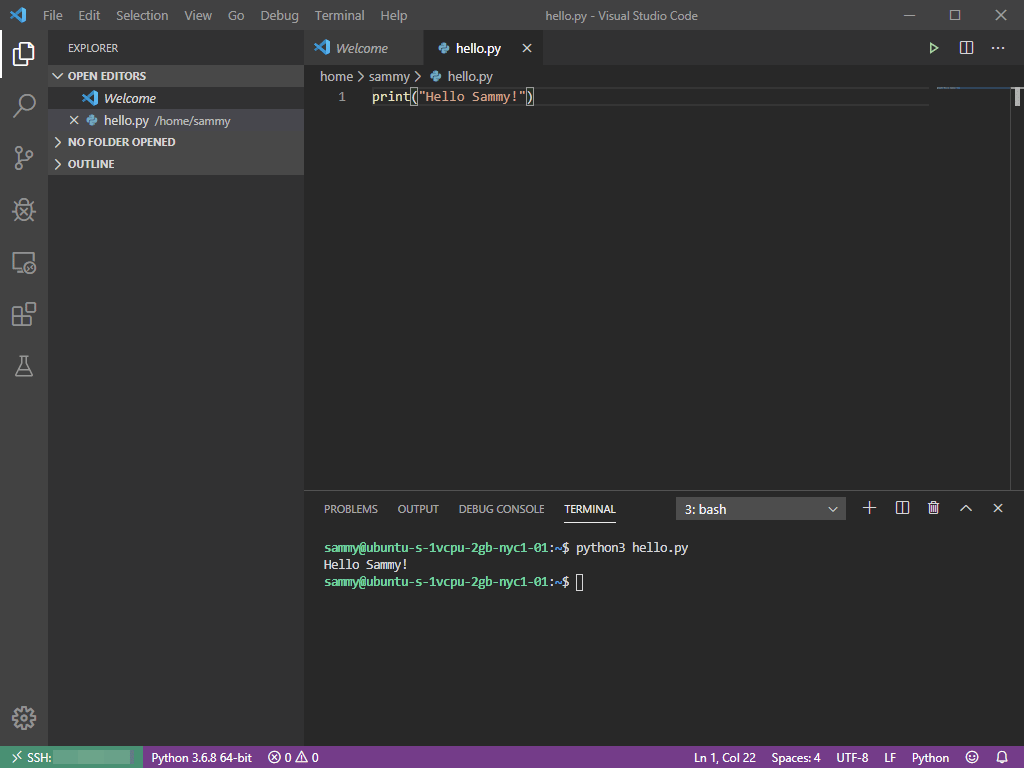
To test out the ability to run remote code, create a new Python file called hello.py in your editor. When you are connected to your remote server, all files created through Visual Studio Code will be saved to that server, not on your local machine.
Add the following contents to the file:
print("Hello Sammy!")
To run this program on your server, open a terminal in Visual Studio Code from the navigation menu or by pressing the key sequence CTRL+Shift+`. Since this terminal session is connected to your remote server, run the following command in the terminal to execute your hello.py program:
- python3 hello.py
Your program’s output will be displayed.
You can also execute the file from the Debug context menu by selecting Run without Debugging.
Note: If you have any development extensions installed in Visual Studio Code, like the Python extension, you will have to reinstall these extensions on your server through the Extension Marketplace. If you have previously installed these plugins in Visual Studio Code, when you search for them again, the Marketplace will say Install on SSH: hostname. Always pay attention to what devlopment context you are in, because this is where Visual Studio Code will install your plugins and create your files. If you try to run your code without these plugins installed, error dialog boxes will appear in the bottom right-hand corner of the screen prompting you to install them on your remote server. After you have installed these they will likely require you to reload Visual Studio Code. When you relaunch it, it will continue working on the remote server without you having to manually reconnect.
Conclusion
You now have Visual Studio Code configured for development on a remote server using SSH. Remote execution with an IDE provides many benefits, including the ability to quickly test how your code runs on different operating systems and different hardware specifications. As long as you have an internet connection you could connect to your server and work on your code from any computer, and you’ll be able to develop using a Linux environment even if you run Windows as your primary operating system.
Thanks for learning with the DigitalOcean Community. Check out our offerings for compute, storage, networking, and managed databases.
About the author(s)
Mason is currently a Sr. Developer Advocate at DigitalOcean who specializes in cloud infrastructure, distributed systems, and Python.
Managed the Write for DOnations program, wrote and edited community articles, and makes things on the Internet. Expertise in DevOps areas including Linux, Ubuntu, Debian, and more.
Still looking for an answer?
This textbox defaults to using Markdown to format your answer.
You can type !ref in this text area to quickly search our full set of tutorials, documentation & marketplace offerings and insert the link!
Be aware that though the RemoteSSH plugin will install into the telemetry-free VSC fork VSCodium, it will not work due to licensing issues. See https://github.com/VSCodium/vscodium/issues/196
Great post!
I’m a big fan of the remote experience with VS Code, I’ve been using it for a while and like it more and more. I wrote an open source VS Code extension to do the same thing you describe + code synchronization for Kubernetes. Would love to hear what you think!
Just a tip for the Windows users out there, old habits die hard so you still see a lot of tutorials saying to use PuTTY, but since the April 2018 update Windows 10 has had OpenSSH included. In other words, no more need for PuTTY. See how to natively setup your SSH key here: https://docs.microsoft.com/en-us/windows-server/administration/openssh/openssh_keymanagement
And of course Windows has had WSL for a few years too, so you could use that and just follow the Linux instructions for SSH key generation.
Thank you for this tutorial, however, I am having some issues getting key authentication working. I can access a local server using a username/password combination but for some reason key authent. just does not work. The target server is Ubuntu 18.04.
I can access the server fine through PS when I specify the key file with “-i”, so I know the key is correct, and -p as I also have to use a custom port to get through our cloud perimeter FW.
[08:20:09.621] > OpenSSH_for_Windows_7.7p1, LibreSSL 2.6.5 [08:20:09.626] Running script with connection command: ssh -T -D 64699 -p 8022 [correct IP] bash [08:20:09.638] Terminal shell path: C:\WINDOWS\System32\cmd.exe [08:20:10.059] > [08:20:10.060] Got some output, clearing connection timeout [08:20:10.488] > [user-here but not the one configured]@[correct IP]: Permission denied (publickey).
Any ideas on how I can progress this further before I open an issue on the project’s GitHub?
I currently use VSCode with an SSHFS plugin (which works perfectly) to modify files directly on the server, and then have a separate SSH session to execute the code, and was just trying to consolidate this into one tool.
PuTTY is not supported in VSCode, but this article mentions it is.
So, which is it?
algo a tener en cuenta es que se le puede cambiar el puerto de ssh entre hostname y user se le puede agregar port y el numero de puerto por ejemploHost my_remote_server HostName your_server_ip_or_hostname Port 24 User sammy IdentityFile /location/of/your/private/key
 This work is licensed under a Creative Commons Attribution-NonCommercial- ShareAlike 4.0 International License.
Become a contributor for community
Get paid to write technical tutorials and select a tech-focused charity to receive a matching donation.

DigitalOcean Documentation
Full documentation for every DigitalOcean product.

Resources for startups and AI-native businesses
The Wave has everything you need to know about building a business, from raising funding to marketing your product.
The developer cloud
Scale up as you grow — whether you're running one virtual machine or ten thousand.

Start building today
From GPU-powered inference and Kubernetes to managed databases and storage, get everything you need to build, scale, and deploy intelligent applications.
