
Introduction
Migrating between VPS providers can seem like a daunting task. Many of our customers have experience with other VPS services, such as Amazon EC2. While almost all of the actual VPS usage is the same, the management interfaces can differ significantly between providers.
In this article, we’ll examine the differences between the Amazon EC2 interface and the DigitalOcean Droplet Interface. This will make transitioning to DigitalOcean servers easy and hassle-free. We also have an article on migrating content between VPS providers.
Main Interface
Amazon
The main management portal for Amazon EC2 is called the EC2 Dashboard:

This top-level management page gives a summary of all of the current instances and associated options that you have running and available.
The “Instances” link on the left-hand side will open up the available instances that are launched with the service.

DigitalOcean
These two screens are analogous to the DigitalOcean’s Droplets page, which serves as a hub for VPS management.
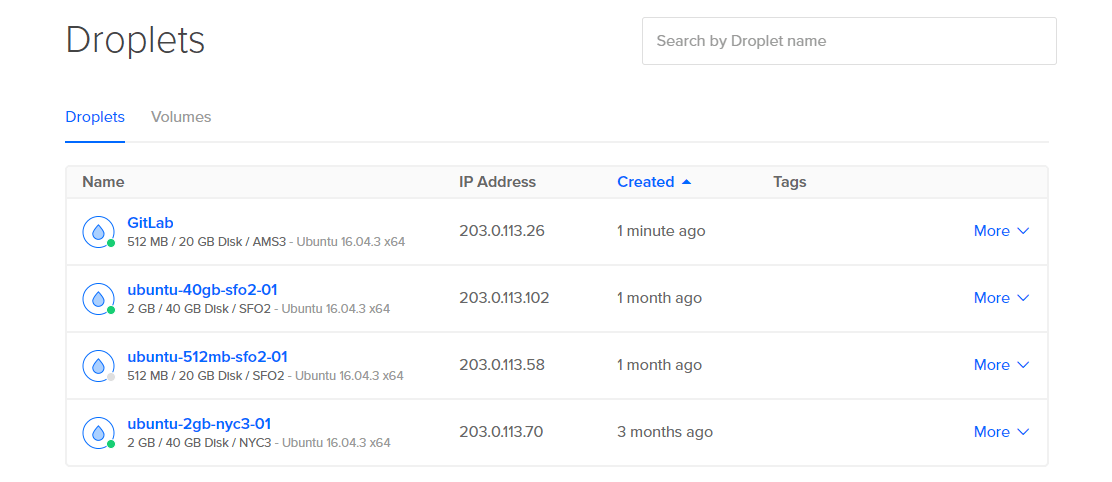
The Droplets page gives you quick access to the IP addresses of all of your active servers, allowing you to SSH into any booted instance.
It also allows you to see, at a glance, the hardware configuration and the distribution loaded on the machine.
VPS Creation
On the surface, instance creation looks very different between Amazon EC2 and DigitalOcean. However, they are fairly similar in their function.
Amazon
Using Amazon’s interface, you can click the “Launch Instance” button from within the EC2 Dashboard or the Instances tab.
In Amazon’s interface, you can choose between the Classic Wizard, the Quick Launch Wizard, and the AWS Marketplace to spin up your server. Each choice gives you many different options.

Depending on the kind of instance creation you decided on, you can configure your options by either going through a few pages of details, or clicking the “Edit details” button on the bottom. This allows you to customize some aspects of the service.

DigitalOcean
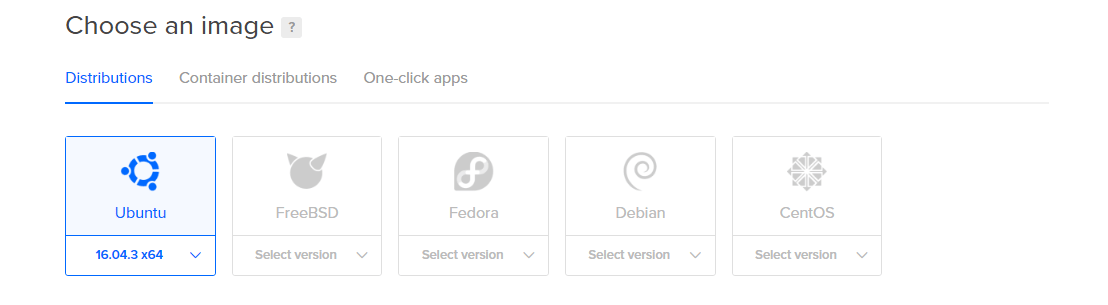
DigitalOcean’s VPS creation mechanism can be accessed by clicking the Create button in the upper-left corner of the control panel.
You will choose a hostname, the Droplet size and region, the base image for the install, and (optionally) the key files you would like to use to log in.


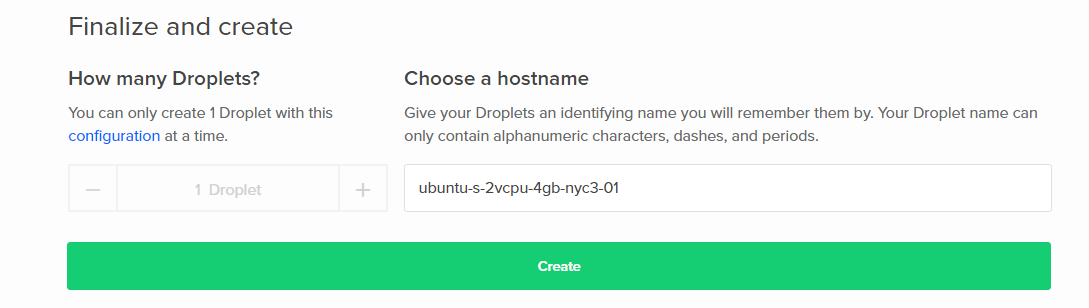
After clicking the Create button at the bottom, your instance will be created.
Images
Both Amazon and DigitalOcean allow you to take snapshots of your VPS at any point in time. These can be used to restore at a later point or as a base image for building new cloud server instances.
Amazon
Amazon manages its snapshots through the Snapshots link on the left-hand side, under “Elastic Block Store”.

DigitalOcean
On DigitalOcean, this feature can be reached from the Images link on the main navigation. You will be able to view all of the snapshots that you have saved.
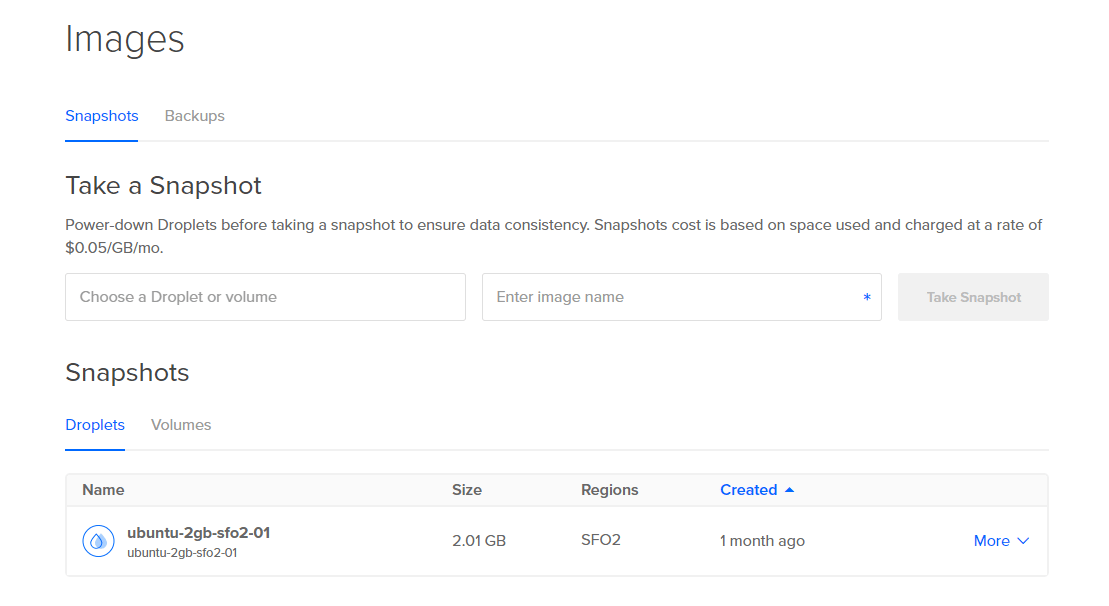
You will also see any Droplet backups that are available for your systems. This allows you to manage all of your automatic and deliberate images from one centralized location.
SSH Key Management
Amazon
Amazon stores the SSH key pairs used to securely log into your VPS under a link called “Key Pairs” within the Network & Security section of the menu.
Using this panel, you can create or import SSH key pairs to use within your VPS servers.

DigitalOcean
DigitalOcean controls key pairs on the account Security tab.
Here, you can add, modify, or delete the public key strings that will allow you to access the virtual private server after booting.
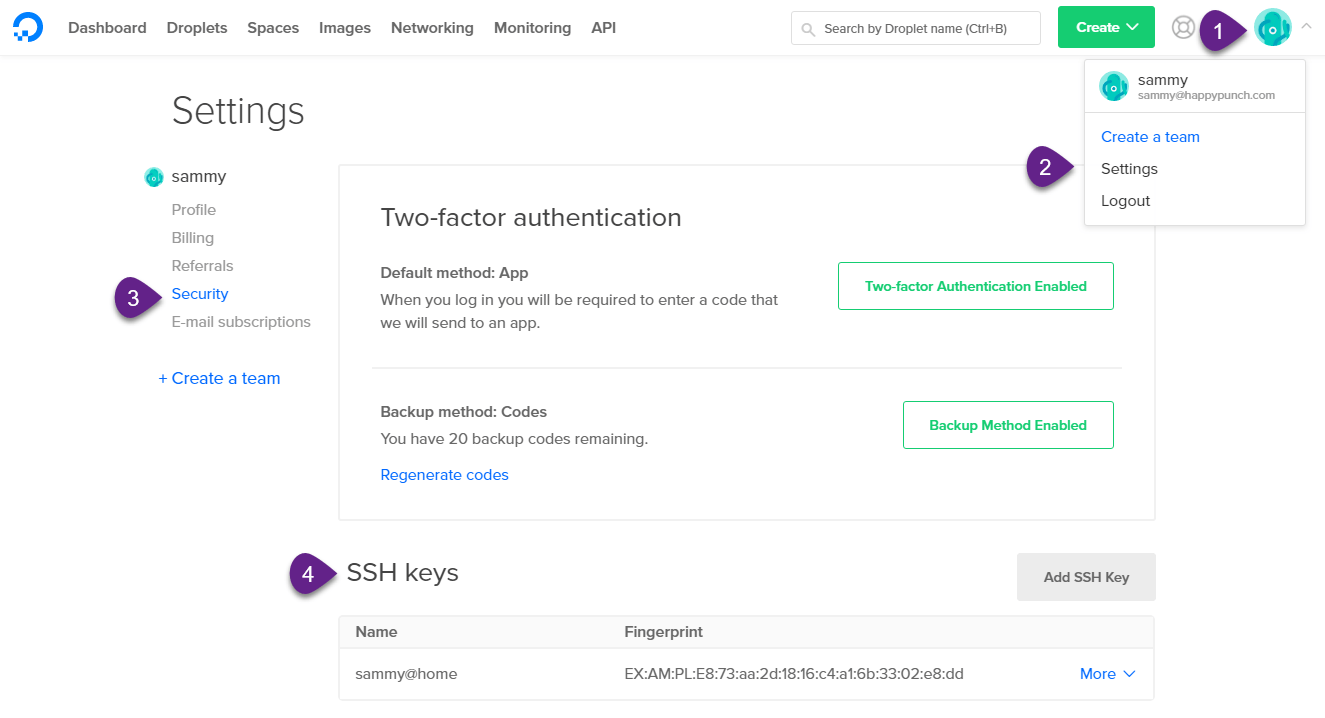
DigitalOcean can also create Droplets without Key management in case you are forced to create a Droplet while you do not have access to your home computer.
DNS Configuration
Amazon
DNS settings can be configured with Amazon’s Route 53 service, accessed through the “Services” menu in the upper-left corner.

DigitalOcean
The main navigation’s Networking leads to the main DNS page, where you can add a domain or manage existing domains:
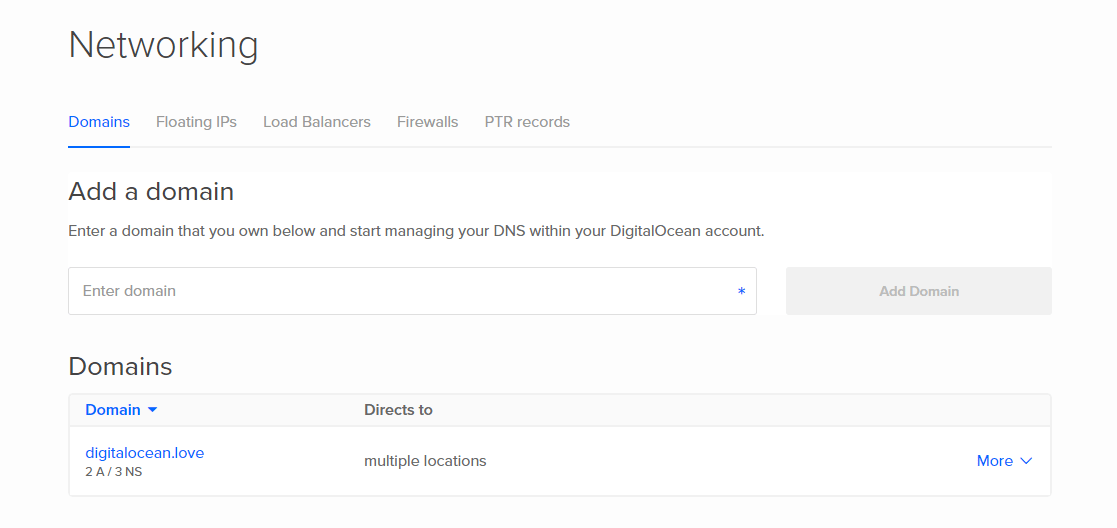
You can add domains and manage which VPS they point to from this location.
Billing Information
Amazon
Billing information for your current usage on Amazon can be found under “Your Name” at the top-right corner of the page. Click on “Account Activity” to see what kind of usage you have for the month so far:

DigitalOcean
With DigitalOcean, you can view your current billing information by opening the Profile menu, selecting Settings, then navigating to Billing on the side navigation:
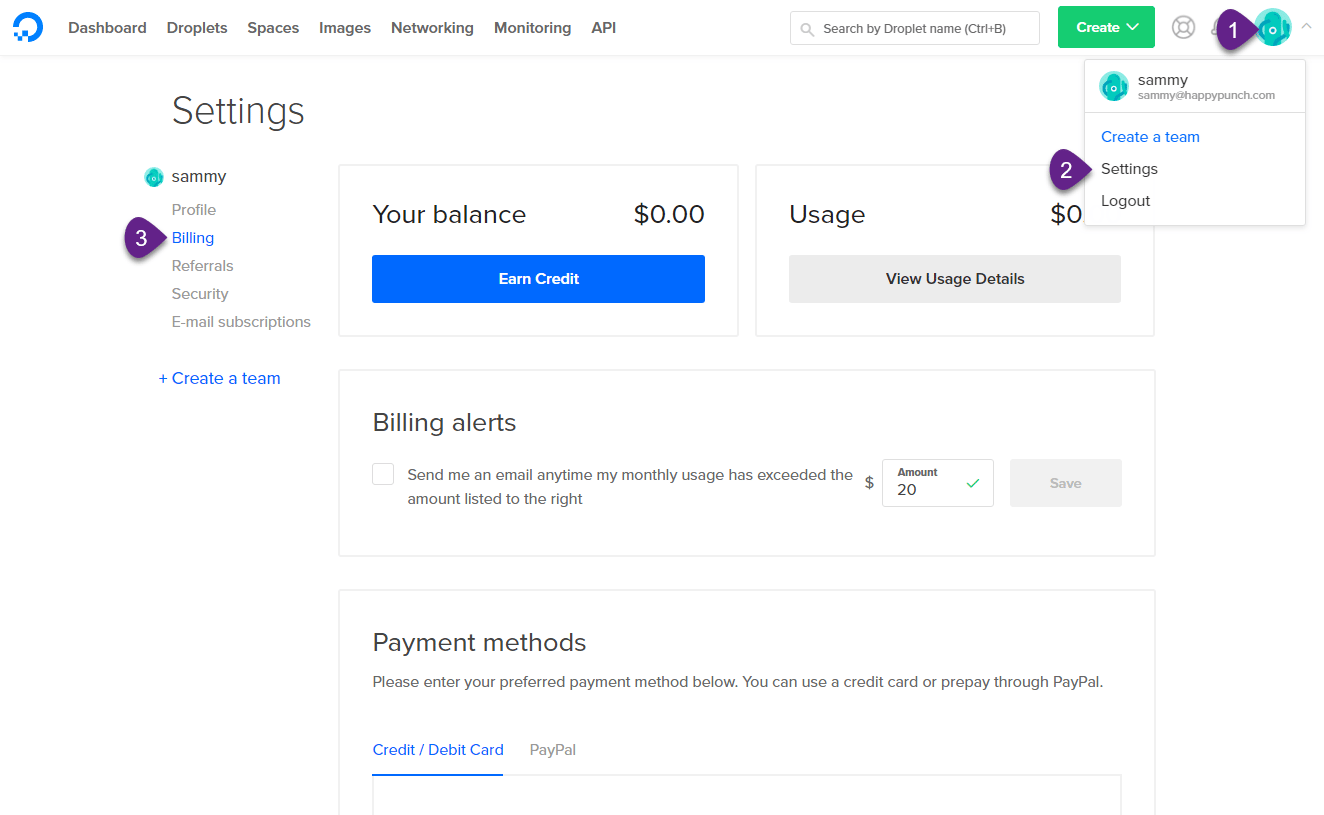
You can see your billing and payment history, make a payment, or add a credit card. You can get an itemized invoice for the month so far by clicking on “View this month’s usage and charges”.
Getting Help
Amazon
If you run into a problem using Amazon’s EC2 servers, your course of action will depend on what kind of issue you are having and what kind of plan you are on.
If you believe the issue is site-wide, you can report it by clicking “Report an Issue” under the “Additional Information” section on the right side of the interface.

However, if it is an issue with your specific VPS server, you should either post in their developer forums, or use the paid support system if you have selected to add that option to your plan.
DigitalOcean
With DigitalOcean, you can open a ticket from within the administration interface by clicking the Support link from the main navigation. This opens the Support site:
You can create a new ticket with the support team, or track your current tickets on the same page.
Conclusion
As you can see, there are a number of basic differences between Amazon’s EC2 Management Console and DigitalOcean’s Control Panel. However, all of the important account and VPS management information is easily accessible and intuitive to navigate.
We believe that after exploring DigitalOcean’s menus for a few moments, you will feel right at home.
Thanks for learning with the DigitalOcean Community. Check out our offerings for compute, storage, networking, and managed databases.
About the author
Former Senior Technical Writer at DigitalOcean, specializing in DevOps topics across multiple Linux distributions, including Ubuntu 18.04, 20.04, 22.04, as well as Debian 10 and 11.
Still looking for an answer?
This textbox defaults to using Markdown to format your answer.
You can type !ref in this text area to quickly search our full set of tutorials, documentation & marketplace offerings and insert the link!
 This work is licensed under a Creative Commons Attribution-NonCommercial- ShareAlike 4.0 International License.
Become a contributor for community
Get paid to write technical tutorials and select a tech-focused charity to receive a matching donation.

DigitalOcean Documentation
Full documentation for every DigitalOcean product.

Resources for startups and AI-native businesses
The Wave has everything you need to know about building a business, from raising funding to marketing your product.
The developer cloud
Scale up as you grow — whether you're running one virtual machine or ten thousand.

Start building today
From GPU-powered inference and Kubernetes to managed databases and storage, get everything you need to build, scale, and deploy intelligent applications.
