By Janakiram MSV and Brian Hogan

This article supplements a webinar series on deploying and managing containerized workloads in the cloud. The series covers the essentials of containers, including managing container lifecycles, deploying multi-container applications, scaling workloads, and working with Kubernetes. It also highlights best practices for running stateful applications.
This tutorial includes the concepts and commands in the fifth session of the series, Deploying and Scaling Microservices in Kubernetes.
Introduction
Kubernetes is an open-source container orchestration tool for managing containerized applications. In the previous tutorial in this series, A Closer Look at Kubernetes you learned the building blocks of Kubernetes.
In this tutorial, you will apply the concepts from the previous tutorials to build, deploy, and manage an end-to-end microservices application in Kubernetes. The sample web application you’ll use in this tutorial is a “todo list” application written in Node.js that uses MongoDB as a database. This is the same application we used in the tutorial Building Containerized Applications.
You’ll build a container image for this app from a Dockerfile, push the image to Docker Hub, and then deploy it to your cluster. Then you’ll scale the app to meet increased demand.
Prerequisites
To complete this tutorial, you’ll need:
-
A Kubernetes cluster, which you can configure in the third part of this tutorial series, Getting Started with Kubernetes.
-
An active Docker Hub account to store the image.
-
Git installed on your local machine. You can follow the tutorial Contributing to Open Source: Getting Started with Git to install and set up Git on your computer.
Step 1 – Build an Image with Dockerfile
We will begin by containerizing the web application by packaging it into a Docker image.
Start by changing to your home directory, then use Git to clone this tutorial’s sample web application from its official repository on GitHub.
- cd ~
- git clone https://github.com/janakiramm/todo-app.git
Build the container image from the Dockerfile. Use the -t switch to tag the image with the registry username, image name, and an optional tag.
- docker build -t sammy/todo .
The output confirms that the image was successfully built and tagged appropriately.
OutputSending build context to Docker daemon  8.238MB
Step 1/7 : FROM node:slim
 ---> 286b1e0e7d3f
Step 2/7 : LABEL maintainer = "jani@janakiram.com"
 ---> Using cache
 ---> ab0e049cf6f8
Step 3/7 : RUN mkdir -p /usr/src/app
 ---> Using cache
 ---> 897176832f4d
Step 4/7 : WORKDIR /usr/src/app
 ---> Using cache
 ---> 3670f0147bed
Step 5/7 : COPY ./app/ ./
 ---> Using cache
 ---> e28c7c1be1a0
Step 6/7 : RUN npm install
 ---> Using cache
 ---> 7ce5b1d0aa65
Step 7/7 : CMD node app.js
 ---> Using cache
 ---> 2cef2238de24
Successfully built 2cef2238de24
Successfully tagged sammy/todo-app:latest
Verify that the image is created by running the docker images command.
- docker images
You can see the size of the image along with the time since it was created.
OutputREPOSITORY                                       TAG                 IMAGE ID            CREATED             SIZE
sammy/todo-app                                   latest              81f5f605d1ca        9 minutes ago       236MB
Next, push your image to the public registry on Docker Hub. To do this, log in to your Docker Hub account:
- docker login
Once you provide your credentials, tag your image using your Docker Hub username:
- docker tag your_docker_hub_username/todo-app
Then push your image to Docker Hub:
- docker push
You can verify that the new image is available by searching Docker Hub in your web browser.
With the Docker image pushed to the registry, let’s package the application for Kubernetes.
Step 2 – Deploy MongoDB Pod in Kubernetes
The application uses MongoDB to store to-do lists created through the web application. To run MongoDB in Kubernetes, we need to package it as a Pod. When we launch this Pod, it will run a single instance of MongoDB.
Create a new YAML file called db-pod.yaml:
- nano db-pod.yaml
Add the following code which defines a Pod with one container based on MongoDB. We expose port 27017, the standard port used by MongoDB. Notice that the definition contains the labels name and app. We’ll use those labels to identify and configure specific Pods.
apiVersion: v1
kind: Pod
metadata:
  name: db
  labels:
    name: mongo
    app: todoapp

spec:
      containers:
      - image: mongo
        name: mongo
        ports:
        - name: mongo
          containerPort: 27017

        volumeMounts:
          - name: mongo-storage
            mountPath: /data/db

      volumes:
          - name: mongo-storage
            hostPath:
              path: /data/db
The data is stored in the volume called mongo-storage which is mapped to the /data/db location of the node. For more information on Volumes, refer to the official Kubernetes volumes documentation.
Run the following command to create a Pod.
- kubectl create -f db-pod.yml
You’ll see this output:
Outputpod "db" created
Now verify the creation of the Pod.
- kubectl get pods
The output shows the Pod and indicates that it is running:
OutputNAME      READY     STATUS    RESTARTS   AGE
db   1/1       Running   0          2m
Let’s make this Pod accessible to the internal consumers of the cluster.
Create a new file called db-service.yaml that contains this code which defines the Service for MongoDB:
apiVersion: v1
kind: Service
metadata:
  name: db
  labels:
    name: mongo
    app: todoapp

spec:
  selector:
    name: mongo

  type: ClusterIP
  ports:
    - name: db
      port: 27017
      targetPort: 27017
The Service discovers all the Pods in the same Namespace that match the Label with name: db. The selector section of the YAML file explicitly defines this association.
We specify that the Service is visible within the cluster through the declaration type: ClusterIP .
Save the file and exit the editor. Then use kubectl to submit it to the cluster.
- kubectl create -f db-service.yml
You’ll see this output indicating the Service was created successfully:
Outputservice "db" created
Let’s get the port on which the Pod is available.
- kubectl get services
You’ll see this output:
OutputNAME         TYPE        CLUSTER-IP       EXTERNAL-IP   PORT(S)     AGE
db           ClusterIP   10.109.114.243   <none>        27017/TCP   14s
kubernetes   ClusterIP   10.96.0.1        <none>        443/TCP     47m
From this output, you can see that the Service is available on port 27017. The web application can reach MongoDB through this service. When it uses the hostname db, the DNS service running within Kubernetes will resolve the address to the ClusterIP associated with the Service. This mechanism allows Pods to discover and communicate with each other.
With the database Pod and Service in place, let’s create a Pod for the web application.
Step 3 – Deploy the Node.JS Web App as a Pod
Let’s package the Docker image you created in the first step of this tutorial as a Pod and deploy it to the cluster. This will act as the front-end web application layer accessible to end users.
Create a new YAML file called web-pod.yaml:
- nano web-pod.yaml
Add the following code which defines a Pod with one container based on the sammy/todo-app Docker image. It is exposed on port 3000 over the TCP protocol.
apiVersion: v1
kind: Pod

metadata:
  name: web
  labels:
    name: web
    app: todoapp

spec:
  containers:
    - image: sammy/todo-app
      name: myweb
      ports:
        - containerPort: 3000
Notice that the definition contains the labels name and app. A Service will use these labels to route inbound traffic to the appropriate ports.
Run the following command to create the Pod:
- kubectl create -f web-pod.yaml
Outputpod "web" created
Let’s verify the creation of the Pod:
- kubectl get pods
OutputNAME      READY     STATUS    RESTARTS   AGE
db        1/1       Running   0          8m
web       1/1       Running   0          9s
Notice that we have both the MongoDB database and web app running as Pods.
Now we will make the web Pod accessible to the public Internet.
Services expose a set of Pods either internally or externally. Let’s define a Service that makes the web Pod publicly available. We’ll expose it through a NodePort, a scheme that makes the Pod accessible through an arbitrary port opened on each Node of the cluster.
Create a new file called web-service.yaml that contains this code which defines the Service for the app:
apiVersion: v1
kind: Service
metadata:
  name: web
  labels:
    name: web
    app: todoapp

spec:
  selector:
    name: web
  type: NodePort
  ports:
   - name: http
     port: 3000
     targetPort: 3000
     protocol: TCP
The Service discovers all the Pods in the same Namespace that match the Label with the name web. The selector section of the YAML file explicitly defines this association.
We specify that the Service is of type NodePort through the type: NodePort declaration.
Use kubectl to submit this to the cluster.
- kubectl create -f web-service.yml
You’ll see this output indicating the Service was created successfully:
Outputservice "web" created
Let’s get the port on which the Pod is available.
- kubectl get services
OutputNAME         TYPE        CLUSTER-IP       EXTERNAL-IP   PORT(S)          AGE
db           ClusterIP   10.109.114.243   <none>        27017/TCP        12m
kubernetes   ClusterIP   10.96.0.1        <none>        443/TCP          59m
web          NodePort    10.107.206.92    <none>        3000:30770/TCP   12s
From this output, we see that the Service is available on port 30770. Let’s try to connect to one of the Worker Nodes.
Obtain the public IP address for one of the Worker Nodes associated with your Kubernetes Cluster by using the DigitalOcean console.
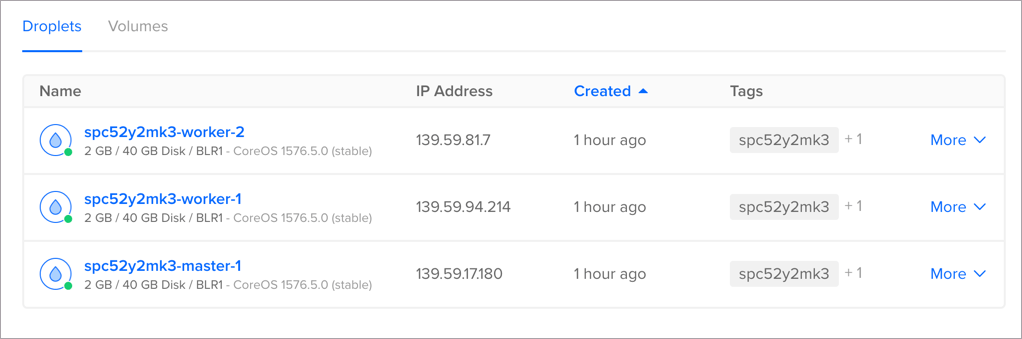
Once you’ve obtained the IP address, use the curl command to make an HTTP request to one of the nodes on port 30770:
- curl http://your_worker_ip_address:30770
You’ll see output similar to this:
Output<!DOCTYPE html>
<html>
  <head>
    <title>Containers Todo Example</title>
    <link rel='stylesheet' href='/stylesheets/screen.css' />
    <!--[if lt IE 9]>
    <script src="http://html5shiv.googlecode.com/svn/trunk/html5.js"></script>
    <![endif]-->
  </head>
  <body>
    <div id="layout">
<h1 id="page-title">Containers Todo Example</h1>
<div id="list">
  <form action="/create" method="post" accept-charset="utf-8">
    <div class="item-new">
      <input class="input" type="text" name="content" />
    </div>
  </form>
</div>
      <div id="layout-footer"></div>
    </div>
    <script src="/javascripts/ga.js"></script>
  </body>
</html>
You’ve defined the web Pod and a Service. Now let’s look at scaling it with Replica Sets.
Step 5 – Scaling the web application
A Replica Set ensures that a minimum number of Pods are running in the cluster at all times. When a Pod is packaged as a Replica Set, Kubernetes will always run the minimum number of Pods defined in the specification.
Let’s delete the current Pod and recreate two Pods through the Replica Set. If we leave the Pod running it will not be a part of the Replica Set. Thus, it’s a good idea to launch Pods through a Replica Set, even when the count is just one.
First, delete the existing Pod.
- kubectl delete pod web
Outputpod "web" deleted
Now create a new Replica Set declaration. The definition of the Replica Set is identical to a Pod. The key difference is that it contains the replica element which defines the number of Pods that need to run. Like a Pod, it also contains Labels as metadata that help in Service discovery.
Create the file web-rs.yaml and add this code to the file:
apiVersion: extensions/v1beta1
kind: ReplicaSet
metadata:
  name: web
  labels:
    name: web
    app: todoapp

spec:
  replicas: 2
  template:
    metadata:
      labels:
        name: web
    spec:
      containers:
      - name: web
        image: sammy/todo-app
        ports:
        - containerPort: 3000
Save and close the file.
Now create the Replica Set:
- kubectl create -f web-rs.yaml
Outputreplicaset "web" created
Then check the number of Pods:
- kubectl get pods
OutputNAME        READY     STATUS    RESTARTS   AGE
db          1/1       Running   0          18m
web-n5l5h   1/1       Running   0          25s
web-wh6nf   1/1       Running   0          25s
When we access the Service through the NodePort, the request will be sent to one of the Pods managed by the Replica Set.
Let’s test the functionality of a Replica Set by deleting one of the Pods and seeing what happens:
- kubectl delete pod web-wh6nf
Outputpod "web-wh6nf" deleted
Look at the Pods again:
- kubectl get pods
OutputNAME        READY     STATUS              RESTARTS   AGE
db          1/1       Running             0          19m
web-n5l5h   1/1       Running             0          1m
web-wh6nf   1/1       Terminating         0          1m
web-ws59m   0/1       ContainerCreating   0          2s
As soon as the Pod is deleted, Kubernetes has created another one to ensure the desired count is maintained.
We can scale the Replica Set to run additional web Pods.
Run the following command to scale the web application to 10 Pods.
- kubectl scale rs/web --replicas=10
Outputreplicaset "web" scaled
Check the Pod count:
- kubectl get pods
You’ll see this output:
OutputNAME        READY     STATUS              RESTARTS   AGE
db          1/1       Running             0          22m
web-4nh4g   1/1       Running             0          21s
web-7vbb5   1/1       Running             0          21s
web-8zd55   1/1       Running             0          21s
web-f8hvq   0/1       ContainerCreating   0          21s
web-ffrt6   1/1       Running             0          21s
web-k6zv7   0/1       ContainerCreating   0          21s
web-n5l5h   1/1       Running             0          3m
web-qmdxn   1/1       Running             0          21s
web-vc45m   1/1       Running             0          21s
web-ws59m   1/1       Running             0          2m
Kubernetes has initiated the process of scaling the web Pod. When the request comes to the Service via the NodePort, it gets routed to one of the Pods in the Replica Set.
When the traffic and load subsides, we can revert to the original configuration of two Pods.
kubectl scale rs/web --replicas=2
Outputreplicaset "web" scaled
This command terminates all the Pods except two.
- kubectl get pods
OutputNAME        READY     STATUS        RESTARTS   AGE
db          1/1       Running       0          24m
web-4nh4g   1/1       Terminating   0          2m
web-7vbb5   1/1       Terminating   0          2m
web-8zd55   1/1       Terminating   0          2m
web-f8hvq   1/1       Terminating   0          2m
web-ffrt6   1/1       Terminating   0          2m
web-k6zv7   1/1       Terminating   0          2m
web-n5l5h   1/1       Running       0          5m
web-qmdxn   1/1       Terminating   0          2m
web-vc45m   1/1       Terminating   0          2m
web-ws59m   1/1       Running       0          4m
To verify the availability of the Replica Set, try deleting one of the Pods and check the count.
- kubectl delete pod web-ws59m
Outputpod "web-ws59m" deleted
- kubectl get pods
OutputNAME        READY     STATUS              RESTARTS   AGE
db          1/1       Running             0          25m
web-n5l5h   1/1       Running             0          7m
web-ws59m   1/1       Terminating         0          5m
web-z6r2g   0/1       ContainerCreating   0          5s
As soon as the Pod count changes, Kubernetes adjusts it to match the count defined in the YAML file. When one of the web Pods in the Replica Set is deleted, another Pod is immediately created to maintain the desired count. This ensures high availability of the application by ensuring that the minimum number of Pods are running all the time.
You can delete all the objects created during this tutorial with the following command:
- kubectl delete -f db-pod.yaml -f db-service.yaml -f web-rs.yaml -f web-service.yaml
Outputpod "db" deleted
service "db" deleted
replicaset "web" deleted
service "web" deleted
Conclusion
In this tutorial, you applied all the concepts covered in the series to package, deploy, and scale a microservices applications.
In the next part of this series, you will learn how to make MongoDB highly available by running it as a StatefulSet.
Thanks for learning with the DigitalOcean Community. Check out our offerings for compute, storage, networking, and managed databases.
Tutorial Series: Webinar Series: Deploying & Managing Containerized Workloads in the Cloud
This series covers the essentials of containers, including container lifecycle management, deploying multi-container applications, scaling workloads, and understanding Kubernetes, along with highlighting best practices for running stateful applications. These tutorials supplement the by the same name.
Browse Series: 6 tutorials
About the author(s)
Cloud Computing Enthusiast
Managed the Write for DOnations program, wrote and edited community articles, and makes things on the Internet. Expertise in DevOps areas including Linux, Ubuntu, Debian, and more.
Still looking for an answer?
This textbox defaults to using Markdown to format your answer.
You can type !ref in this text area to quickly search our full set of tutorials, documentation & marketplace offerings and insert the link!
Hey great guide guys! When I was running through the examples a couple said to create files with the .yaml extension but the commands had files with .yml extensions.
After correcting those small issues I was able to run through the tutorial without any issues!
First of all, thank you for the webinar series! I would like to know when the next part of this series will be released? I have been looking for an updated tutorial for running highly available databases by running them as a StatefulSet. I am really looking forward to it!
Great series of articles - thanks for the contribution! There seems to be a critical element missing from the series though - horizontally scaling the underlying hardware.
For example, this article shows some great examples of how to scale the number of pods with two fixed worker nodes, but it doesn’t discuss how to scale the application when the underlying worker nodes become oversaturated and additional compute/memory/etc capacity is needed - likely by means of horizontally scaling the number of worker nodes.
Any thoughts?
 This work is licensed under a Creative Commons Attribution-NonCommercial- ShareAlike 4.0 International License.
Become a contributor for community
Get paid to write technical tutorials and select a tech-focused charity to receive a matching donation.

DigitalOcean Documentation
Full documentation for every DigitalOcean product.

Resources for startups and AI-native businesses
The Wave has everything you need to know about building a business, from raising funding to marketing your product.
The developer cloud
Scale up as you grow — whether you're running one virtual machine or ten thousand.

Start building today
From GPU-powered inference and Kubernetes to managed databases and storage, get everything you need to build, scale, and deploy intelligent applications.
