By neependrakhare and Timothy Nolan

Webinar Series
This article supplements a webinar series on doing CI/CD with Kubernetes. The series discusses how to take a cloud native approach to building, testing, and deploying applications, covering release management, cloud native tools, service meshes, and CI/CD tools that can be used with Kubernetes. It is designed to help developers and businesses that are interested in integrating CI/CD best practices with Kubernetes into their workflows.
This tutorial includes the concepts and commands from the second session of the series, Kubernetes Package Management with Helm and CI/CD with Jenkins X.
Warning: The procedures in this tutorial are meant for demonstration purposes only. As a result, they don’t follow the best practices and security measures necessary for a production-ready deployment.
Introduction
In order to reduce error and organize complexity when deploying an application, CI/CD systems must include robust tooling for package management/deployment and pipelines with automated testing. But in modern production environments, the increased complexity of cloud-based infrastructure can present problems for putting together a reliable CI/CD environment. Two Kubernetes-specific tools developed to solve this problem are the Helm package manager and the Jenkins X pipeline automation tool.
Helm is a package manager specifically designed for Kubernetes, maintained by the Cloud Native Computing Foundation (CNCF) in collaboration with Microsoft, Google, Bitnami, and the Helm contributor community. At a high level, it accomplishes the same goals as Linux system package managers like APT or YUM: managing the installation of applications and dependencies behind the scenes and hiding the complexity from the user. But with Kubernetes, the need for this kind of management is even more pronounced: Installing applications requires the complex and tedious orchestration of YAML files, and upgrading or rolling back releases can be anywhere from difficult to impossible. In order to solve this problem, Helm runs on top of Kubernetes and packages applications into pre-configured resources called charts, which the user can manage with simple commands, making the process of sharing and managing applications more user-friendly.
Jenkins X is a CI/CD tool used to automate production pipelines and environments for Kubernetes. Using Docker images, Helm charts, and the Jenkins pipeline engine, Jenkins X can automatically manage releases and versions and promote applications between environments on GitHub.
In this second article of the CI/CD with Kubernetes series, you will preview these two tools by:
-
Managing, creating, and deploying Kubernetes packages with Helm.
-
Building a CI/CD pipeline with Jenkins X.
Though a variety of Kubernetes platforms can use Helm and Jenkins X, in this tutorial you will run a simulated Kubernetes cluster, set up in your local environment. To do this, you will use Minikube, a program that allows you to try out Kubernetes tools on your own machine without having to set up a true Kubernetes cluster.
By the end of this tutorial, you will have a basic understanding of how these Kubernetes-native tools can help you implement a CI/CD system for your cloud application.
Prerequisites
To follow this tutorial, you will need:
-
An Ubuntu 16.04 server with 16 GB of RAM or above. Since this tutorial is meant for demonstration purposes only, commands are run from the root account. Note that the unrestrained privileges of this account do not adhere to production-ready best practices and could affect your system. For this reason, it is suggested to follow these steps in a test environment such as a virtual machine or a DigitalOcean Droplet.
-
A GitHub account and GitHub API token. Be sure to record this API token so that you can enter it during the Jenkins X portion of this tutorial.
-
Familiarity with Kubernetes concepts. Please refer to the article An Introduction to Kubernetes for more details.
Step 1 — Creating a Local Kubernetes Cluster with Minikube
Before setting up Minikube, you will have to install its dependencies, including the Kubernetes command line tool kubectl, the bidirectional data transfer relay socat, and the container program Docker.
First, make sure that your system’s package manager can access packages over HTTPS with apt-transport-https:
- apt-get update
- apt-get install apt-transport-https
Next, in order to ensure the kubectl download is valid, add the GPG key for the official Google repository to your system:
- curl -s https://packages.cloud.google.com/apt/doc/apt-key.gpg | apt-key add -
Once you have added the GPG key, create the file /etc/apt/sources.list.d/kubernetes.list by opening it in your text editor:
- nano /etc/apt/sources.list.d/kubernetes.list
Once this file is open, add the following line:
deb http://apt.kubernetes.io/ kubernetes-xenial main
This will show your system the source for downloading kubectl. Once you have added the line, save and exit the file. With the nano text editor, you can do this by pressing CTRL+X, typing y, and pressing ENTER.
Finally, update the source list for APT and install kubectl, socat, and docker.io:
- apt-get update
- apt-get install -y kubectl socat docker.io
Note: For Minikube to simulate a Kubernetes cluster, you must download the docker.io package rather than the newer docker-ce release. For production-ready environments, docker-ce would be the more appropriate choice, since it is better maintained in the official Docker repository.
Now that you have installed kubectl, you can proceed with installing Minikube. First, use curl to download the program’s binary:
- curl -Lo minikube https://storage.googleapis.com/minikube/releases/v0.28.0/minikube-linux-amd64
Next, change the access permissions of the file you just downloaded so that your system can execute it:
- chmod +x minikube
Finally, copy the minikube file to the executable path at /usr/local/bin/ and remove the original file from your home directory:
- cp minikube /usr/local/bin/
- rm minikube
With Minikube installed on your machine, you can now start the program. To create a Minikube Kubernetes cluster, use the following command:
- minikube start --vm-driver none
The flag --vm-driver none instructs Minikube to run Kubernetes on the local host using containers rather than a virtual machine. Running Minikube this way means that you do not need to download a VM driver, but also means that the Kubernetes API server will run insecurely as root.
Warning: Because the API server with root privileges will have unlimited access to the local host, it is not recommended to run Minikube using the none driver on personal workstations.
Now that you have started Minikube, check to make sure that your cluster is running with the following command:
- minikube status
You will receive the following output, with your IP address in place of your_IP_address:
minikube: Running
cluster: Running
kubectl: Correctly Configured: pointing to minikube-vm at your_IP_address
Now that you have set up your simulated Kubernetes cluster using Minikube, you can gain experience with Kubernetes package management by installing and configuring the Helm package manager on top of your cluster.
Step 2 — Setting Up the Helm Package Manager on your Cluster
In order to coordinate the installation of applications on your Kubernetes cluster, you will now install the Helm package manager. Helm consists of a helm client that runs outside the cluster and a tiller server that manages application releases from within the cluster. You will have to install and configure both to successfully run Helm on your cluster.
To install the Helm binaries, first use curl to download the following installation script from the official Helm GitHub repository into a new file named get_helm.sh:
- curl https://raw.githubusercontent.com/kubernetes/helm/master/scripts/get > get_helm.sh
Since this script requires root access, change the permission of get_helm.sh so that the owner of the file (in this case, root) can read, write, and execute it:
- chmod 700 get_helm.sh
Now, execute the script:
- ./get_helm.sh
When the script finishes, you will have helm installed to /usr/local/bin/helm and tiller installed to /usr/local/bin/tiller.
Though tiller is now installed, it does not yet have the correct roles and permissions to access the necessary resources in your Kubernetes cluster. To assign these roles and permissions to tiller, you will have to create a service account named tiller. In Kubernetes, a service account represents an identity for processes that run in a pod. After a process is authenticated through a service account, it can then contact the API server and access cluster resources. If a pod is not assigned a specific service account, it gets the default service account. You will also have to create a Role-Based access control (RBAC) rule that authorizes the tiller service account.
In Kubernetes RBAC API, a role contains rules that determine a set of permissions. A role can be defined with a scope of namespace or cluster, and can only grant access to resources within a single namespace. ClusterRole can create the same permissions on the level of a cluster, granting access to cluster-scoped resources like nodes and namespaced resources like pods. To assign the tiller service account the right role, create a YAML file called rbac_helm.yaml and open it in your text editor:
- nano rbac_helm.yaml
Add the following lines to the file to configure the tiller service account:
apiVersion: v1
kind: ServiceAccount
metadata:
  name: tiller
  namespace: kube-system
---
apiVersion: rbac.authorization.k8s.io/v1beta1
kind: ClusterRoleBinding
metadata:
  name: tiller
roleRef:
  apiGroup: rbac.authorization.k8s.io
  kind: ClusterRole
  name: cluster-admin
subjects:
  - kind: ServiceAccount
    name: tiller
    namespace: kube-system

  - kind: User
    name: "admin"
    apiGroup: rbac.authorization.k8s.io

  - kind: User
    name: "kubelet"
    apiGroup: rbac.authorization.k8s.io

  - kind: Group
    name: system:serviceaccounts
    apiGroup: rbac.authorization.k8s.io
In the preceding file, ServiceAccount allows the tiller processes to access the apiserver as an authenticated service account. ClusterRole grants certain permissions to a role, and ClusterRoleBinding assigns that role to a list of subjects, including the tiller service account, the admin and kubelet users, and the system:serviceaccounts group.
Next, deploy the configuration in rbac_helm.yaml with the following command:
- kubectl apply -f rbac_helm.yaml
With the tiller configuration deployed, you can now initialize Helm with the --service-acount flag to use the service account you just set up:
- helm init --service-account tiller
You will receive the following output, representing a successful initialization:
OutputCreating /root/.helm
Creating /root/.helm/repository
Creating /root/.helm/repository/cache
Creating /root/.helm/repository/local
Creating /root/.helm/plugins
Creating /root/.helm/starters
Creating /root/.helm/cache/archive
Creating /root/.helm/repository/repositories.yaml
Adding stable repo with URL: https://kubernetes-charts.storage.googleapis.com
Adding local repo with URL: http://127.0.0.1:8879/charts
$HELM_HOME has been configured at /root/.helm.

Tiller (the Helm server-side component) has been installed into your Kubernetes Cluster.

Please note: by default, Tiller is deployed with an insecure 'allow unauthenticated users' policy.
To prevent this, run `helm init` with the --tiller-tls-verify flag.
For more information on securing your installation see: https://docs.helm.sh/using_helm/#securing-your-helm-installation
Happy Helming!
This creates a tiller pod in the kube-system namespace. It also creates the .helm default repository in your $HOME directory and configures the default Helm stable chart repository at https://kubernetes-charts.storage.googleapis.com and the local Helm repository at http://127.0.0.1:8879/charts.
To make sure that the tiller pod is running in the kube-system namespace, enter the following command:
- kubectl --namespace kube-system get pods
In your list of pods, tiller-deploy will appear, as is shown in the following output:
OutputNAME                                    READY   STATUS    RESTARTS   AGE
etcd-minikube                           1/1     Running   0          2h
kube-addon-manager-minikube             1/1     Running   0          2h
kube-apiserver-minikube                 1/1     Running   0          2h
kube-controller-manager-minikube        1/1     Running   0          2h
kube-dns-86f4d74b45-rjql8               3/3     Running   0          2h
kube-proxy-dv268                        1/1     Running   0          2h
kube-scheduler-minikube                 1/1     Running   0          2h
kubernetes-dashboard-5498ccf677-wktkl   1/1     Running   0          2h
storage-provisioner                     1/1     Running   0          2h
tiller-deploy-689d79895f-bggbk          1/1     Running   0          5m
If the tiller pod’s status is Running, it can now manage Kubernetes applications from inside your cluster on behalf of Helm.
To make sure that the entire Helm application is working, search the Helm package repositiories for an application like MongoDB:
- helm search mongodb
In the output, you will see a list of possible applications that fit your search term:
OutputNAME                                    CHART VERSION   APP VERSION     DESCRIPTION
stable/mongodb                          5.4.0           4.0.6           NoSQL document-oriented database that stores JSON-like do...
stable/mongodb-replicaset               3.9.0           3.6             NoSQL document-oriented database that stores JSON-like do...
stable/prometheus-mongodb-exporter      1.0.0           v0.6.1          A Prometheus exporter for MongoDB metrics
stable/unifi                            0.3.1           5.9.29          Ubiquiti Network's Unifi Controller
Now that you have installed Helm on your Kubernetes cluster, you can learn more about the package manager by creating a sample Helm chart and deploying an application from it.
Step 3 — Creating a Chart and Deploying an Application with Helm
In the Helm package manager, individual packages are called charts. Within a chart, a set of files defines an application, which can vary in complexity from a pod to a structured, full-stack app. You can download charts from the Helm repositories, or you can use the helm create command to create your own.
To test out the capabilities of Helm, create a new Helm chart named demo with the following command:
- helm create demo
In your home directory, you will find a new directory called demo, within which you can create and edit your own chart templates.
Move into the demo directory and use ls to list its contents:
- cd demo
- ls
You will find the following files and directories in demo:
charts Chart.yaml templates values.yaml
Using your text editor, open up the Chart.yaml file:
- nano Chart.yaml
Inside, you will find the following contents:
apiVersion: v1
appVersion: "1.0"
description: A Helm chart for Kubernetes
name: demo
version: 0.1.0
In this Chart.yaml file, you will find fields like apiVersion, which must be always v1, a description that gives additional information about what demo is, the name of the chart, and the version number, which Helm uses as a release marker. When you are done examining the file, close out of your text editor.
Next, open up the values.yaml file:
- nano values.yaml
In this file, you will find the following contents:
# Default values for demo.
# This is a YAML-formatted file.
# Declare variables to be passed into your templates.

replicaCount: 1

image:
  repository: nginx
  tag: stable
  pullPolicy: IfNotPresent

nameOverride: ""
fullnameOverride: ""

service:
  type: ClusterIP
  port: 80

ingress:
  enabled: false
  annotations: {}
    # kubernetes.io/ingress.class: nginx
    # kubernetes.io/tls-acme: "true"
  paths: []
  hosts:
    - chart-example.local
  tls: []
  #  - secretName: chart-example-tls
  #    hosts:
  #      - chart-example.local

resources: {}
  # We usually recommend not to specify default resources and to leave this as a conscious
  # choice for the user. This also increases chances charts run on environments with little
  # resources, such as Minikube. If you do want to specify resources, uncomment the following
  # lines, adjust them as necessary, and remove the curly braces after 'resources:'.
  # limits:
  #  cpu: 100m
  #  memory: 128Mi
  # requests:
  #  cpu: 100m
  #  memory: 128Mi

nodeSelector: {}

tolerations: []

affinity: {}
By changing the contents of values.yaml, chart developers can supply default values for the application defined in the chart, controlling replica count, image base, ingress access, secret management, and more. Chart users can supply their own values for these parameters with a custom YAML file using helm install. When a user provides custom values, these values will override the values in the chart’s values.yaml file.
Close out the values.yaml file and list the contents of the templates directory with the following command:
- ls templates
Here you will find templates for various files that can control different aspects of your chart:
deployment.yaml _helpers.tpl ingress.yaml NOTES.txt service.yaml tests
Now that you have explored the demo chart, you can experiment with Helm chart installation by installing demo. Return to your home directory with the following command:
- cd
Install the demo Helm chart under the name web with helm install:
- helm install --name web ./demo
You will get the following output:
OutputNAME:   web
LAST DEPLOYED: Wed Feb 20 20:59:48 2019
NAMESPACE: default
STATUS: DEPLOYED

RESOURCES:
==> v1/Service
NAME      TYPE       CLUSTER-IP     EXTERNAL-IP  PORT(S)  AGE
web-demo  ClusterIP  10.100.76.231  <none>       80/TCP   0s

==> v1/Deployment
NAME      DESIRED  CURRENT  UP-TO-DATE  AVAILABLE  AGE
web-demo  1        0        0           0          0s

==> v1/Pod(related)
NAME                       READY  STATUS             RESTARTS  AGE
web-demo-5758d98fdd-x4mjs  0/1    ContainerCreating  0         0s


NOTES:
1. Get the application URL by running these commands:
  export POD_NAME=$(kubectl get pods --namespace default -l "app.kubernetes.io/name=demo,app.kubernetes.io/instance=web" -o jsonpath="{.items[0].metadata.name}")
  echo "Visit http://127.0.0.1:8080 to use your application"
  kubectl port-forward $POD_NAME 8080:80
In this output, you will find the STATUS of your application, plus a list of relevant resources in your cluster.
Next, list the deployments created by the demo Helm chart with the following command:
- kubectl get deploy
This will yield output that will list your active deployments:
OutputNAME       DESIRED   CURRENT   UP-TO-DATE   AVAILABLE   AGE
web-demo   1         1         1            1           4m
Listing your pods with the command kubectl get pods would show the pods that are running your web application, which would look like the following:
OutputNAME                        READY   STATUS    RESTARTS   AGE
web-demo-5758d98fdd-nbkqd   1/1     Running   0          4m
To demonstrate how changes in the Helm chart can release different versions of your application, open up demo/values.yaml in your text editor and change replicaCount: to 3 and image:tag: from stable to latest. In the following code block, you will find what the YAML file should look like after you have finished modifying it, with the changes highlighted:
# Default values for demo.
# This is a YAML-formatted file.
# Declare variables to be passed into your templates.

replicaCount: 3

image:
  repository: nginx
  tag: latest
  pullPolicy: IfNotPresent

nameOverride: ""
fullnameOverride: ""

service:
  type: ClusterIP
  port: 80
. . .
Save and exit the file.
Before you deploy this new version of your web application, list your Helm releases as they are now with the following command:
- helm list
You will receive the following output, with the one deployment you created earlier:
OutputNAME    REVISION        UPDATED                         STATUS          CHART           APP VERSION     NAMESPACE
web     1               Wed Feb 20 20:59:48 2019        DEPLOYED        demo-0.1.0      1.0             default
Notice that REVISION is listed as 1, indicating that this is the first revision of the web application.
To deploy the web application with the latest changes made to demo/values.yaml, upgrade the application with the following command:
- helm upgrade web ./demo
Now, list the Helm releases again:
- helm list
You will receive the following output:
OutputNAME    REVISION        UPDATED                         STATUS          CHART           APP VERSION     NAMESPACE
web     2               Wed Feb 20 21:18:12 2019        DEPLOYED        demo-0.1.0      1.0             default
Notice that REVISION has changed to 2, indicating that this is the second revision.
To find the history of the Helm releases for web, use the following:
- helm history web
This will show both of the revisions of the web application:
REVISION        UPDATED                         STATUS          CHART           DESCRIPTION
1               Wed Feb 20 20:59:48 2019        SUPERSEDED      demo-0.1.0      Install complete
2               Wed Feb 20 21:18:12 2019        DEPLOYED        demo-0.1.0      Upgrade complete
To roll back your application to revision 1, enter the following command:
- helm rollback web 1
This will yield the following output:
OutputRollback was a success! Happy Helming!
Now, bring up the Helm release history:
- helm history web
You will receive the following list:
OutputREVISION        UPDATED                         STATUS          CHART           DESCRIPTION
1               Wed Feb 20 20:59:48 2019        SUPERSEDED      demo-0.1.0      Install complete
2               Wed Feb 20 21:18:12 2019        SUPERSEDED      demo-0.1.0      Upgrade complete
3               Wed Feb 20 21:28:48 2019        DEPLOYED        demo-0.1.0      Rollback to 1
By rolling back the web application, you have created a third revision that has the same settings as revision 1. Remember, you can always tell which revision is active by finding the DEPLOYED item under STATUS.
To prepare for the next section, clean up your testing area by deleting your web release with the helm delete command:
- helm delete web
Examine the Helm release history again:
- helm history web
You will receive the following output:
OutputREVISION        UPDATED                         STATUS          CHART           DESCRIPTION
1               Wed Feb 20 20:59:48 2019        SUPERSEDED      demo-0.1.0      Install complete
2               Wed Feb 20 21:18:12 2019        SUPERSEDED      demo-0.1.0      Upgrade complete
3               Wed Feb 20 21:28:48 2019        DELETED         demo-0.1.0      Deletion complete
The STATUS for REVISION 3 has changed to DELETED, indicating that your deployed instance of web has been deleted. However, although this does delete the release, it does not delete it from store. In order to delete the release completely, run the helm delete command with the --purge flag.
- helm delete web --purge
In this step, you have managed application releases on Kubernetes with the Helm. If you would like to study Helm further, check out our An Introduction to Helm, the Package Manager for Kubernetes tutorial, or review the official Helm documentation.
Next, you will set up and test the pipeline automation tool Jenkins X by using the jx CLI to create a CI/CD-ready Kubernetes cluster.
Step 4 — Setting Up the Jenkins X Environment
With Jenkins X, you can create your Kubernetes cluster from the ground up with pipeline automation and CI/CD solutions built in. By installing the jx CLI tool, you will be able to efficiently manage application releases, Docker images, and Helm charts, in addition to automatically promoting your applications across environments in GitHub.
Since you will be using jx to create your cluster, you must first delete the Minikube cluster that you already have. To do this, use the following command:
- minikube delete
This will delete the local simulated Kubernete cluster, but will not delete the default directories created when you first installed Minikube. To clean these off your machine, use the following commands:
- rm -rf ~/.kube
- rm -rf ~/.minikube
- rm -rf /etc/kubernetes/*
- rm -rf /var/lib/minikube/*
Once you have completely cleared Minikube from your machine, you can move on to installing the Jenkins X binary.
First, download the compressed jx file from the official Jenkins X GitHub repository with the curl command and uncompress it with the tar command:
- curl -L https://github.com/jenkins-x/jx/releases/download/v1.3.781/jx-linux-amd64.tar.gz | tar xzv
Next, move the downloaded jx file to the executable path at /usr/local/bin:
- mv jx /usr/local/bin
Jenkins X comes with a Docker Registry that runs inside your Kubernetes cluster. Since this is an internal element, security measures such as self-signed certificates can cause trouble for the program. To fix this, set Docker to use insecure registries for the local IP range. To do this, create the file /etc/docker/daemon.json and open it in your text editor:
- nano /etc/docker/daemon.json
Add the following contents to the file:
{
  "insecure-registries" : ["0.0.0.0/0"]
}
Save and exit the file. For these changes to take effect, restart the Docker service with the following command:
- systemctl restart docker
To verify that you have configured Docker with insecure registries, use the following command:
- docker info
At the end of the output, you should see the following highlighted line:
OutputContainers: 0
 Running: 0
 Paused: 0
 Stopped: 0
Images: 15
Server Version: 18.06.1-ce
Storage Driver: overlay2
 Backing Filesystem: extfs
 Supports d_type: true
 Native Overlay Diff: true

. . .

Registry: https://index.docker.io/v1/
Labels:
Experimental: false
Insecure Registries:
 0.0.0.0/0
 127.0.0.0/8
Live Restore Enabled: false
Now that you have downloaded Jenkins X and configured the Docker registry, use the jx CLI tool to create a Minikube Kubernetes cluster with CI/CD capabilities:
- jx create cluster minikube --cpu=5 --default-admin-password=admin --vm-driver=none --memory=13314
Here you are creating a Kubernetes cluster using Minikube, with the flag --cpu=5 to set 5 CPUs and --memory=13314 to give your cluster 13314 MBs of memory. Since Jenkins X is a robust but large program, these specifications will ensure that Jenkins X works without problems in this demonstration. Also, you are using --default-admin-password=admin to set the Jenkins X password as admin and --vm-driver=none to set up the cluster locally, as you did in Step 1.
As Jenkins X spins up your cluster, you will receive various prompts at different times throughout the process that set the parameters for your cluster and determine how it will communicate with GitHub to manage your production environments.
First, you will receive the following prompt:
Output? disk-size (MB) 150GB
Press ENTER to continue. Next, you will be prompted for the name you wish to use with git, the email address you wish to use with git, and your GitHub username. Enter each of these when prompted, then press ENTER.
Next, Jenkins X will prompt you to enter your GitHub API token:
OutputTo be able to create a repository on GitHub we need an API Token
Please click this URL https://github.com/settings/tokens/new?scopes=repo,read:user,read:org,user:email,write:repo_hook,delete_repo

Then COPY the token and enter in into the form below:

? API Token:
Enter your token here, or create a new token with the appropriate permissions using the highlighted URL in the preceding code block.
Next, Jenkins X will ask:
Output? Do you wish to use GitHub as the pipelines Git server: (Y/n)

? Do you wish to use your_GitHub_username as the pipelines Git user for GitHub server: (Y/n)
Enter Y for both questions.
After this, Jenkins X will prompt you to answer the following:
Output? Select Jenkins installation type:   [Use arrows to move, type to filter]
>Static Master Jenkins
  Serverless Jenkins

? Pick workload build pack:   [Use arrows to move, type to filter]
> Kubernetes Workloads: Automated CI+CD with GitOps Promotion
  Library Workloads: CI+Release but no CD
For the prior, select Static Master Jenkins, and select Kubernetes Workloads: Automated CI+CD with GitOps Promotion for the latter. When prompted to select an organization for your environment repository, select your GitHub username.
Finally, you will receive the following output, which verifies successful installation and provides your Jenkins X admin password.
OutputCreating GitHub webhook for your_GitHub_username/environment-horsehelix-production for url http://jenkins.jx.your_IP_address.nip.io/github-webhook/

Jenkins X installation completed successfully


        ********************************************************

             NOTE: Your admin password is: admin

        ********************************************************


Your Kubernetes context is now set to the namespace: jx
To switch back to your original namespace use: jx namespace default
For help on switching contexts see: https://jenkins-x.io/developing/kube-context/

To import existing projects into Jenkins:       jx import
To create a new Spring Boot microservice:       jx create spring -d web -d actuator
To create a new microservice from a quickstart: jx create quickstart
Next, use the jx get command to receive a list of URLs that show information about your application:
- jx get urls
This command will yield a list similar to the following:
Name                      URL
jenkins                   http://jenkins.jx.your_IP_address.nip.io
jenkins-x-chartmuseum     http://chartmuseum.jx.your_IP_address.nip.io
jenkins-x-docker-registry http://docker-registry.jx.your_IP_address.nip.io
jenkins-x-monocular-api   http://monocular.jx.your_IP_address.nip.io
jenkins-x-monocular-ui    http://monocular.jx.your_IP_address.nip.io
nexus                     http://nexus.jx.your_IP_address.nip.io
You can use the URLs to view Jenkins X data about your CI/CD environment via a UI by entering the address into your browser and entering your username and password. In this case, this will be “admin” for both.
Next, in order to ensure that the service accounts in the namespaces jx, jx-staging, and jx-production have admin privileges, modify your RBAC policies with the following commands:
- kubectl create clusterrolebinding jx-staging1 --clusterrole=cluster-admin --user=admin --user=expose --group=system:serviceaccounts --serviceaccount=jx-staging:expose --namespace=jx-staging
- kubectl create clusterrolebinding jx-staging2 --clusterrole=cluster-admin --user=admin --user=expose --group=system:serviceaccounts --serviceaccount=jx-staging:default --namespace=jx-staging
- kubectl create clusterrolebinding jx-production1 --clusterrole=cluster-admin --user=admin --user=expose --group=system:serviceaccounts --serviceaccount=jx-production:expose --namespace=jx-productions
- kubectl create clusterrolebinding jx-production2 --clusterrole=cluster-admin --user=admin --user=expose --group=system:serviceaccounts --serviceaccount=jx-production:default --namespace=jx-productions
- kubectl create clusterrolebinding jx-binding1 --clusterrole=cluster-admin --user=admin --user=expose --group=system:serviceaccounts --serviceaccount=jx:expose --namespace=jx
- kubectl create clusterrolebinding jx-binding2 --clusterrole=cluster-admin --user=admin --user=expose --group=system:serviceaccounts --serviceaccount=jx:default --namespace=jx
Now that you have created your local Kubernetes cluster with Jenkins X functionality built in, you can move on to creating an application on the platform to test its CI/CD capabilities and experience a Jenkins X pipeline.
Step 5 — Creating a Test Application in Your Jenkins X Environment
With your Jenkins X environment set up in your Kubernetes cluster, you now have CI/CD infrastructure in place that can help you automate a testing pipeline. In this step, you will try this out by setting up a test application in a working Jenkins X pipeline.
For demonstration purposes, this tutorial will use a sample RSVP application created by the CloudYuga team. You can find this application, along with other webinar materials, at the DO-Community GitHub repository.
First, clone the sample application from the repository with the following command:
- git clone https://github.com/do-community/rsvpapp.git
Once you’ve cloned the repository, move into the rsvpapp directory and remove the git files:
- cd rsvpapp
- rm -r .git/
To initialize a git repository and a Jenkins X project for a new application, you can use jx create to start from scratch or a template, or jx import to import an existing application from a local project or git repository. For this tutorial, import the sample RSVP application by running the following command from within the application’s home directory:
- jx import
Jenkins X will prompt you for your GitHub username, whether you’d like to initialize git, a commit message, your organization, and the name you would like for your repository. Answer yes to initialize git, then provide the rest of the prompts with your individual GitHub information and preferences. As Jenkins X imports the application, it will create Helm charts and a Jenkinsfile in your application’s home directory. You can modify these charts and the Jenkinsfile as per your requirements.
Since the sample RSVP application runs on port 5000 of its container, modify your charts/rsvpapp/values.yaml file to match this. Open the charts/rsvpapp/values.yaml in your text editor:
- nano charts/rsvpapp/values.yaml
In this values.yaml file, set service:internalPort: to 5000. Once you have made this change, your file should look like the following:
# Default values for python.
# This is a YAML-formatted file.
# Declare variables to be passed into your templates.
replicaCount: 1
image:
  repository: draft
  tag: dev
  pullPolicy: IfNotPresent
service:
  name: rsvpapp
  type: ClusterIP
  externalPort: 80
  internalPort: 5000
  annotations:
    fabric8.io/expose: "true"
    fabric8.io/ingress.annotations: "kubernetes.io/ingress.class: nginx"
resources:
  limits:
    cpu: 100m
    memory: 128Mi
  requests:
    cpu: 100m
    memory: 128Mi
ingress:
  enabled: false
Save and exit your file.
Next, change the charts/preview/requirements.yaml to fit with your application. requirements.yaml is a YAML file in which developers can declare chart dependencies, along with the location of the chart and the desired version. Since our sample application uses MongoDB for database purposes, you’ll need to modify the charts/preview/requirements.yaml file to list MongoDB as a dependency. Open the file in your text editor with the following command:
- nano charts/preview/requirements.yaml
Edit the file by adding the mongodb-replicaset entry after the alias: cleanup entry, as is highlighted in the following code block:
# !! File must end with empty line !!
dependencies:
- alias: expose
  name: exposecontroller
  repository: http://chartmuseum.jenkins-x.io
  version: 2.3.92
- alias: cleanup
  name: exposecontroller
  repository: http://chartmuseum.jenkins-x.io
  version: 2.3.92
- name: mongodb-replicaset
  repository: https://kubernetes-charts.storage.googleapis.com/
  version: 3.5.5

  # !! "alias: preview" must be last entry in dependencies array !!
  # !! Place custom dependencies above !!
- alias: preview
  name: rsvpapp
  repository: file://../rsvpapp
Here you have specified the mongodb-replicaset chart as a dependency for the preview chart.
Next, repeat this process for your rsvpapp chart. Create the charts/rsvpapp/requirements.yaml file and open it in your text editor:
- nano charts/rsvpapp/requirements.yaml
Once the file is open, add the following, making sure that there is a single line of empty space before and after the populated lines:
dependencies:
- name: mongodb-replicaset
  repository: https://kubernetes-charts.storage.googleapis.com/
  version: 3.5.5
Now you have specified the mongodb-replicaset chart as a dependency for your rsvpapp chart.
Next, in order to connect the frontend of the sample RSVP application to the MongoDB backend, add a MONGODB_HOST environment variable to your deployment.yaml file in charts/rsvpapp/templates/. Open this file in your text editor:
- nano charts/rsvpapp/templates/deployment.yaml
Add the following highlighted lines to the file, in addition to one blank line at the top of the file and two blank lines at the bottom of the file. Note that these blank lines are required for the YAML file to work:
apiVersion: extensions/v1beta1
kind: Deployment
metadata:
  name: {{ template "fullname" . }}
  labels:
    draft: {{ default "draft-app" .Values.draft }}
    chart: "{{ .Chart.Name }}-{{ .Chart.Version | replace "+" "_" }}"
spec:
  replicas: {{ .Values.replicaCount }}
  template:
    metadata:
      labels:
        draft: {{ default "draft-app" .Values.draft }}
        app: {{ template "fullname" . }}
{{- if .Values.podAnnotations }}
      annotations:
{{ toYaml .Values.podAnnotations | indent 8 }}
{{- end }}
    spec:
      containers:
      - name: {{ .Chart.Name }}
        image: "{{ .Values.image.repository }}:{{ .Values.image.tag }}"
        env:
        - name: MONGODB_HOST
          value: "mongodb://{{.Release.Name}}-mongodb-replicaset-0.{{.Release.Name}}-mongodb-replicaset,{{.Release.Name}}-mongodb-replicaset-1.{{.Release.Name}}-mongodb-replicaset,{{.Release.Name}}-mongodb-replicaset-2.{{.Release.Name}}-mongodb-replicaset:27017"
        imagePullPolicy: {{ .Values.image.pullPolicy }}
        ports:
        - containerPort: {{ .Values.service.internalPort }}
        resources:
{{ toYaml .Values.resources | indent 12 }}
With these changes, Helm will be able to deploy your application with MongoDB as its database.
Next, examine the Jenkinsfile generated by Jenkins X by opening the file from your application’s home directory:
- nano Jenkinsfile
This Jenkinsfile defines the pipeline that is triggered every time you commit a version of your application to your GitHub repository. If you wanted to automate your code testing so that the tests are triggered every time the pipeline is triggered, you would add the test to this document.
To demonstrate this, add a customized test case by replacing sh "python -m unittest" under stage('CI Build and push snapshot') and stage('Build Release') in the Jenkinsfile with the following highlighted lines:
. . .
  stages {
    stage('CI Build and push snapshot') {
      when {
        branch 'PR-*'
      }
      environment {
        PREVIEW_VERSION = "0.0.0-SNAPSHOT-$BRANCH_NAME-$BUILD_NUMBER"
        PREVIEW_NAMESPACE = "$APP_NAME-$BRANCH_NAME".toLowerCase()
        HELM_RELEASE = "$PREVIEW_NAMESPACE".toLowerCase()
      }
      steps {
        container('python') {
          sh "pip install -r requirements.txt"
          sh "python -m pytest tests/test_rsvpapp.py"
          sh "export VERSION=$PREVIEW_VERSION && skaffold build -f skaffold.yaml"
          sh "jx step post build --image $DOCKER_REGISTRY/$ORG/$APP_NAME:$PREVIEW_VERSION"
          dir('./charts/preview') {
            sh "make preview"
            sh "jx preview --app $APP_NAME --dir ../.."
          }
        }
      }
    }
    stage('Build Release') {
      when {
        branch 'master'
      }
      steps {
        container('python') {

          // ensure we're not on a detached head
          sh "git checkout master"
          sh "git config --global credential.helper store"
          sh "jx step git credentials"

          // so we can retrieve the version in later steps
          sh "echo \$(jx-release-version) > VERSION"
          sh "jx step tag --version \$(cat VERSION)"
          sh "pip install -r requirements.txt"
          sh "python -m pytest tests/test_rsvpapp.py"
          sh "export VERSION=`cat VERSION` && skaffold build -f skaffold.yaml"
          sh "jx step post build --image $DOCKER_REGISTRY/$ORG/$APP_NAME:\$(cat VERSION)"
        }
      }
    }
. . .
With the added lines, the Jenkins X pipeline will install dependencies and carry out a Python test whenever you commit a change to your application.
Now that you have changed the sample RSVP application, commit and push these changes to GitHub with the following commands:
- git add *
- git commit -m update
- git push
When you push these changes to GitHub, you will trigger a new build of your application. If you open the Jenkins UI by navigating to http://jenkins.jx.your_IP_address.nip.io and entering “admin” for your username and password, you will find information about your new build. If you click “Build History” from the menu on the left side of the page, you should see a history of your committed builds. If you click on the blue icon next to a build then select “Console Ouput” from the lefthand menu, you will find the console output for the automated steps in your pipeline. Scrolling to the end of this output, you will find the following message:
Output. . .
Finished: SUCCESS
This means that your application has passed your customized tests and is now successfully deployed.
Once Jenkins X builds the application release, it will promote the application to the staging environment. To verify that your application is running, list the applications running on your Kubernetes cluster by using the following command:
- jx get app
You will receive output similar to the following:
OutputAPPLICATION STAGING PODS URL
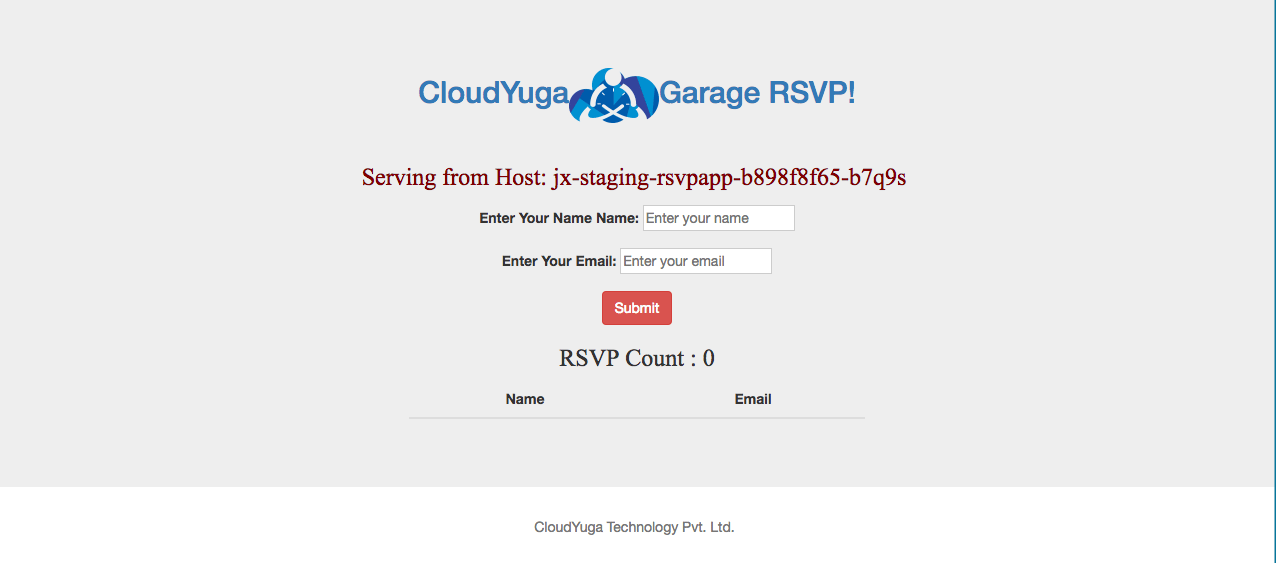
rsvpapp 0.0.2 1/1 http://rsvpapp.jx-staging.your_IP_address.nip.io
From this, you can see that Jenkins X has deployed your application in your jx-staging environment as version 0.0.2. The output also shows the URL that you can use to access your application. Visiting this URL will show you the sample RSVP application:
Next, check out the activity of your application with the following command:
- jx get activity -f rsvpapp
You will receive output similar to the following:
OutputSTEP                                        STARTED      AGO DURATION STATUS
your_GitHub_username/rsvpappv/master #1    3h42m23s    4m51s Succeeded Version: 0.0.1
  Checkout Source                          3h41m52s       6s Succeeded
  CI Build and push snapshot               3h41m46s          NotExecuted
  Build Release                            3h41m46s      56s Succeeded
  Promote to Environments                  3h40m50s    3m17s Succeeded
  Promote: staging                         3h40m29s    2m36s Succeeded
    PullRequest                            3h40m29s    1m16s Succeeded  PullRequest: https://github.com/your_GitHub_username/environment-horsehelix-staging/pull/1 Merge SHA: dc33d3747abdacd2524e8c22f0b5fbb2ac3f6fc7
    Update                                 3h39m13s    1m20s Succeeded  Status: Success at: http://jenkins.jx.your_IP_address.nip.io/job/your_GitHub_username/job/environment-horsehelix-staging/job/master/2/display/redirect
    Promoted                               3h39m13s    1m20s Succeeded  Application is at: http://rsvpapp.jx-staging.your_IP_address.nip.io
  Clean up                                 3h37m33s       1s Succeeded
your_GitHub_username/rsvpappv/master #2      28m37s    5m57s Succeeded Version: 0.0.2
  Checkout Source                            28m18s       4s Succeeded
  CI Build and push snapshot                 28m14s          NotExecuted
  Build Release                              28m14s      56s Succeeded
  Promote to Environments                    27m18s    4m38s Succeeded
  Promote: staging                           26m53s     4m0s Succeeded
    PullRequest                              26m53s     1m4s Succeeded  PullRequest: https://github.com/your_GitHub_username/environment-horsehelix-staging/pull/2 Merge SHA: 976bd5ad4172cf9fd79f0c6515f5006553ac6611
    Update                                   25m49s    2m56s Succeeded  Status: Success at: http://jenkins.jx.your_IP_address.nip.io/job/your_GitHub_username/job/environment-horsehelix-staging/job/master/3/display/redirect
    Promoted                                 25m49s    2m56s Succeeded  Application is at: http://rsvpapp.jx-staging.your_IP_address.nip.io
  Clean up                                   22m40s       0s Succeeded
Here you are getting the Jenkins X activity for the RSVP application by applying a filter with -f rsvpapp.
Next, list the pods running in the jx-staging namespace with the following command:
- kubectl get pod -n jx-staging
You will receive output similar to the following:
NAME                                 READY     STATUS    RESTARTS   AGE
jx-staging-mongodb-replicaset-0      1/1       Running   0          6m
jx-staging-mongodb-replicaset-1      1/1       Running   0          6m
jx-staging-mongodb-replicaset-2      1/1       Running   0          5m
jx-staging-rsvpapp-c864c4844-4fw5z   1/1       Running   0          6m
This output shows that your application is running in the jx-staging namespace, along with three pods of the backend MongoDB database, adhering to the changes you made to the YAML files earlier.
Now that you have run a test application through the Jenkins X pipeline, you can try out promoting this application to the production environment.
Step 6 — Promoting your Test Application to a Different Namespace
To finish up this demonstration, you will complete the CI/CD process by promoting the sample RSVP application to your jx-production namespace.
First, use jx promote in the following command:
- jx promote rsvpapp --version=0.0.2 --env=production
This will promote the rsvpapp application running with version=0.0.2 to the production environment. Throughout the build process, Jenkins X will prompt you to enter your GitHub account information. Answer these prompts with your individual responses as they appear.
After successful promotion, check the list of applications:
- jx get app
You will receive output similar to the following:
OutputAPPLICATION STAGING PODS URL PRODUCTION PODS URL
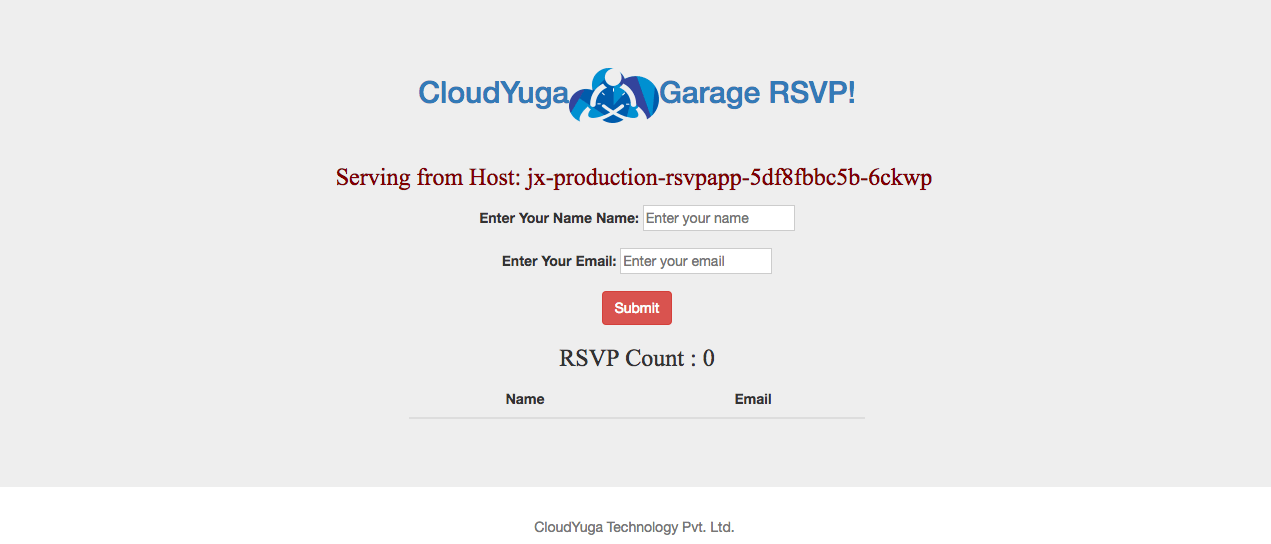
rsvpapp 0.0.2 1/1 http://rsvpapp.jx-staging.your_IP_address.nip.io 0.0.2 1/1 http://rsvpapp.jx-production.your_IP_address.nip.io
With this PRODUCTION information, you can confirm that Jenkins X has promoted rsvpapp to the production environment. For further verification, visit the production URL http://rsvpapp.jx-production.your_IP_address.nip.io in your browser. You should see the working application, now runnning from “production”:
Finally, list your pods in the jx-production namespace.
- kubectl get pod -n jx-production
You will find that rsvpapp and the MongoDB backend pods are running in this namespace:
NAME                                     READY     STATUS    RESTARTS   AGE
jx-production-mongodb-replicaset-0       1/1       Running   0          1m
jx-production-mongodb-replicaset-1       1/1       Running   0          1m
jx-production-mongodb-replicaset-2       1/1       Running   0          55s
jx-production-rsvpapp-54748d68bd-zjgv7   1/1       Running   0          1m
This shows that you have successfully promoted the RSVP sample application to your production environment, simulating the production-ready deployment of an application at the end of a CI/CD pipeline.
Conclusion
In this tutorial, you used Helm to manage packages on a simulated Kubernetes cluster and customized a Helm chart to package and deploy your own application. You also set up a Jenkins X environment on your Kubernetes cluster and run a sample application through a CI/CD pipeline from start to finish.
You now have experience with these tools that you can use when building a CI/CD system on your own Kubernetes cluster. If you’d like to learn more about Helm, check out our An Introduction to Helm, the Package Manager for Kubernetes and How To Install Software on Kubernetes Clusters with the Helm Package Manager articles. To explore further CI/CD tools on Kubernetes, you can read about the Istio service mesh in the next tutorial in this webinar series.
Thanks for learning with the DigitalOcean Community. Check out our offerings for compute, storage, networking, and managed databases.
Tutorial Series: Webinar Series: CI/CD on Kubernetes
The series discusses how to take a Cloud Native approach to building, testing, and deploying applications, covering release management, Cloud Native tools, Service Meshes, and CI/CD tools that can be used with Kubernetes. It is designed to help developers and businesses that are interested in integrating CI/CD best practices with Kubernetes into their worflows.
About the author(s)
Former Senior Technical Editor at DigitalOcean, fiction writer and podcaster elsewhere, always searching for the next good nautical pun! Areas of expertise include Node.js, PostgreSQL, CSS, JavaScript.
Still looking for an answer?
This textbox defaults to using Markdown to format your answer.
You can type !ref in this text area to quickly search our full set of tutorials, documentation & marketplace offerings and insert the link!
Has anyone gotten Jenkins x running in managed kubernetes cluster of digital ocean? I can install it but can’t get a pipeline working.
would it be possible to update this for helm 3.x which no longer uses tiller or the ‘helm init’ command?
 This work is licensed under a Creative Commons Attribution-NonCommercial- ShareAlike 4.0 International License.
Become a contributor for community
Get paid to write technical tutorials and select a tech-focused charity to receive a matching donation.

DigitalOcean Documentation
Full documentation for every DigitalOcean product.

Resources for startups and AI-native businesses
The Wave has everything you need to know about building a business, from raising funding to marketing your product.
The developer cloud
Scale up as you grow — whether you're running one virtual machine or ten thousand.

Start building today
From GPU-powered inference and Kubernetes to managed databases and storage, get everything you need to build, scale, and deploy intelligent applications.
