By Austin Roy

Introduction
Adobe After Effects can be an intuitive way to generate web animations, but there have historically been problems converting these animations to web apps. It is usually necessary to use a third-party program to import an animation from After Effects.
One such program is Lottie, developed by Airbnb Design. It allows you to use these animations in real-time in a lightweight and flexible format. Lottie takes JSON data from an After Effects extension called Bodymovin and turns it into a usable animation for the web.

In this article, we’ll explore how to use Lottie to add animations to our React applications. To accomplish this, we’ll be using an npm package called react-lottie to generate viewable animations from JSON files exported by Bodymovin.
Note: Since we’ll be focusing on the app side of things, we won’t cover how these animations are created in After Effects, but rather use animations created and open-sourced by designers on LottieFiles. If you have animations on After Effects that you would like to use, you can export them to JSON using the Bodymovin plugin for After Effects.
For this tutorial, we’ll build a React application that consists of two types of Lotties, one regular one and another with controlled animations depending on certain values in state.
If you would like to look at the finalized code, take a look at this CodeSandbox example.
Prerequisites
To complete this tutorial, you will need:
- Node.js installed locally, which you can do by following How to Install Node.js and Create a Local Development Environment.
Downloading Lottie JSON files from LottieFiles will require creating a free account.
This tutorial was verified with Node v14.4.0, npm v6.14.4, react v16.13.1, and react-lottie v1.2.3.
Step 1 — Setting Up the Project
We’ll be using create-react-app to create our app:
- npx create-react-app lottie-demo
This will create some boilerplate code for our app and configure our React development environment. Open up the lottie-demo directory and let’s get coding:
- cd lottie-demo
Now, let’s install the dependency, react-lottie. To do this run this command in the terminal:
- npm install react-lottie
Now, let’s add our animations.
Step 2 — Downloading Sample Lotties
We’ll be getting our sample animations from LottieFiles. Navigate to that site and create a free account.
LottieFiles gives you access to a curated library of animations from designers all over the globe. It also provides a platform to test, upload, and share your own animations.
Browse through the animations, tweak the settings if necessary, and when you are happy with what you have click Download JSON to get the animation.
Inside the src directory of our application, create a lotties subdirectory. Place the downloaded JSON files inside the lotties directory.
Now, we are ready to create components that display these animations.
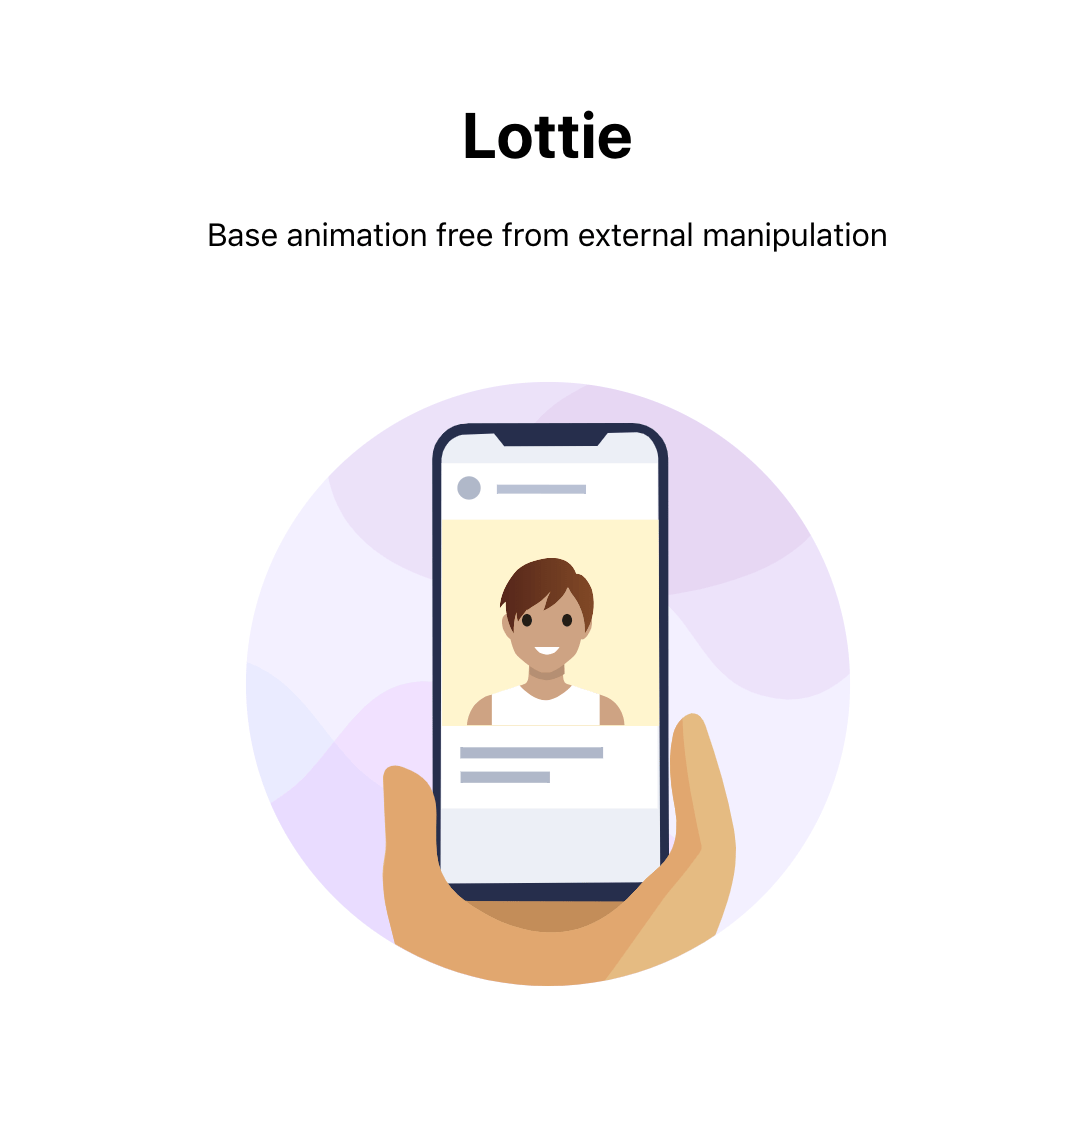
Step 3 — Creating Uncontrolled Lotties
Animations can be allowed to run freely or be manipulated by data in state. First, let’s look at the first case and create an animation that imports and renders a Lottie.
Inside the src directory of our application, create a components subdirectory.
Create a file called UncontrolledLottie.jsx inside the components directory and place the following code inside it:
import React, { Component } from 'react';
import Lottie from 'react-lottie';
import animationData from '../lotties/4203-take-a-selfie.json';

class UncontrolledLottie extends Component {
  render() {
    const defaultOptions = {
      loop: true,
      autoplay: true,
      animationData: animationData,
      rendererSettings: {
        preserveAspectRatio: 'xMidYMid slice',
      },
    };

    return (
      <div>
        <h1>Lottie</h1>
        <p>Base animation free from external manipulation</p>
        <Lottie
          options={defaultOptions}
          height={400}
          width={400}
        />
      </div>
    );
  }
}

export default UncontrolledLottie;
In this case, 4204-take-a-selfie.json is the JSON file of the Lottie downloaded. Replace that file with whichever image you downloaded.
Now, let’s explore the information provided in the configuration. You will notice we pass an options prop to the Lottie component; this contains the configuration data for the animation to be rendered. This consists of:
animationData- an Object with the exported animation data, in our case, the JSON fileautoplay- a boolean determining if it will start playing as soon as it is readyloop- a boolean or number that determines if the animation will repeat or how many times it should repeatrendererSettings- configuration data for the renderer
These are just some of the options you can provide.
We also provide the dimensions (width and height) of our animation as props to Lottie.
Now, let’s add our controlled Lottie.
Step 4 — Creating Controlled Lotties
Lotties can be manipulated in React to change some of their properties using data in state. In our case, we’ll create buttons to control the animations in our Lottie.
Let’s create a file in components and name it ControlledLottie.jsx. Place the following code in that file:
import React, { Component } from 'react';
import Lottie from 'react-lottie';
import animationData from '../lotties/77-im-thirsty.json';

class ControlledLottie extends Component {
  state = { isStopped: false, isPaused: false };

  render() {
    const buttonStyle = {
      display: 'inline-block',
      margin: '10px auto',
      marginRight: '10px',
      border: 'none',
      color: 'white',
      backgroundColor: '#647DFF',
      borderRadius: '2px',
      fontSize: '15px',
    };

    const defaultOptions = {
      loop: true,
      autoplay: true,
      animationData: animationData,
      rendererSettings: {
        preserveAspectRatio: 'xMidYMid slice',
      },
    };

    return (
      <div className="controlled">
        <h1>Controlled Lottie</h1>
        <p>Uses state manipulation to start, stop and pause animations</p>
        <Lottie
          options={defaultOptions}
          height={400}
          width={400}
          isStopped={this.state.isStopped}
          isPaused={this.state.isPaused}
        />
        <button
          style={buttonStyle}
          onClick={() => this.setState({ isStopped: true })}
        >
          Stop
        </button>
        <button
          style={buttonStyle}
          onClick={() => this.setState({ isStopped: false, isPaused: false })}
        >
          Play
        </button>
        <button
          style={buttonStyle}
          onClick={() => this.setState({ isPaused: !this.state.isPaused })}
        >
          Pause
        </button>
      </div>
    );
  }
}

export default ControlledLottie;
Let’s analyze this code. There are a few key differences between this and UncontrolledLottie.jsx. We’ve added three buttons at the bottom along with their styling. These buttons are used to toggle the values of the data in state.
The Lottie component also has two more props:
isStopped- a boolean indicating whether the animation is active or notisPaused- a boolean that indicates if the animation is paused or not
Both our animations are ready to use now, so let’s import them into App.js and display them in our app.
Edit the code in App.js, importing our components and adding them inside the render function:
import React, { Component } from 'react';
import './App.css';
import UncontrolledLottie from './components/UncontrolledLottie';
import ControlledLottie from './components/ControlledLottie';

class App extends Component {
  render() {
    return (
      <div className="App">
        <h1>REACT LOTTIES</h1>
        <div className="lotties">
          <UncontrolledLottie />
          <ControlledLottie />
        </div>
      </div>
    );
  }
}

export default App;
Let’s style our app to make it mobile responsive. We can do this using CSS grid. Add the following code to your App.css file.
.lotties {
  display: grid;
  grid-template-columns: auto;
}

@media only screen and (min-width: 800px) {
  .lotties {
    display: grid;
    grid-template-columns: auto auto;
  }
}
This places our Lotties in two columns that will be reduced to a single column on devices with a smaller width.
Now, fire up the application:
- npm start
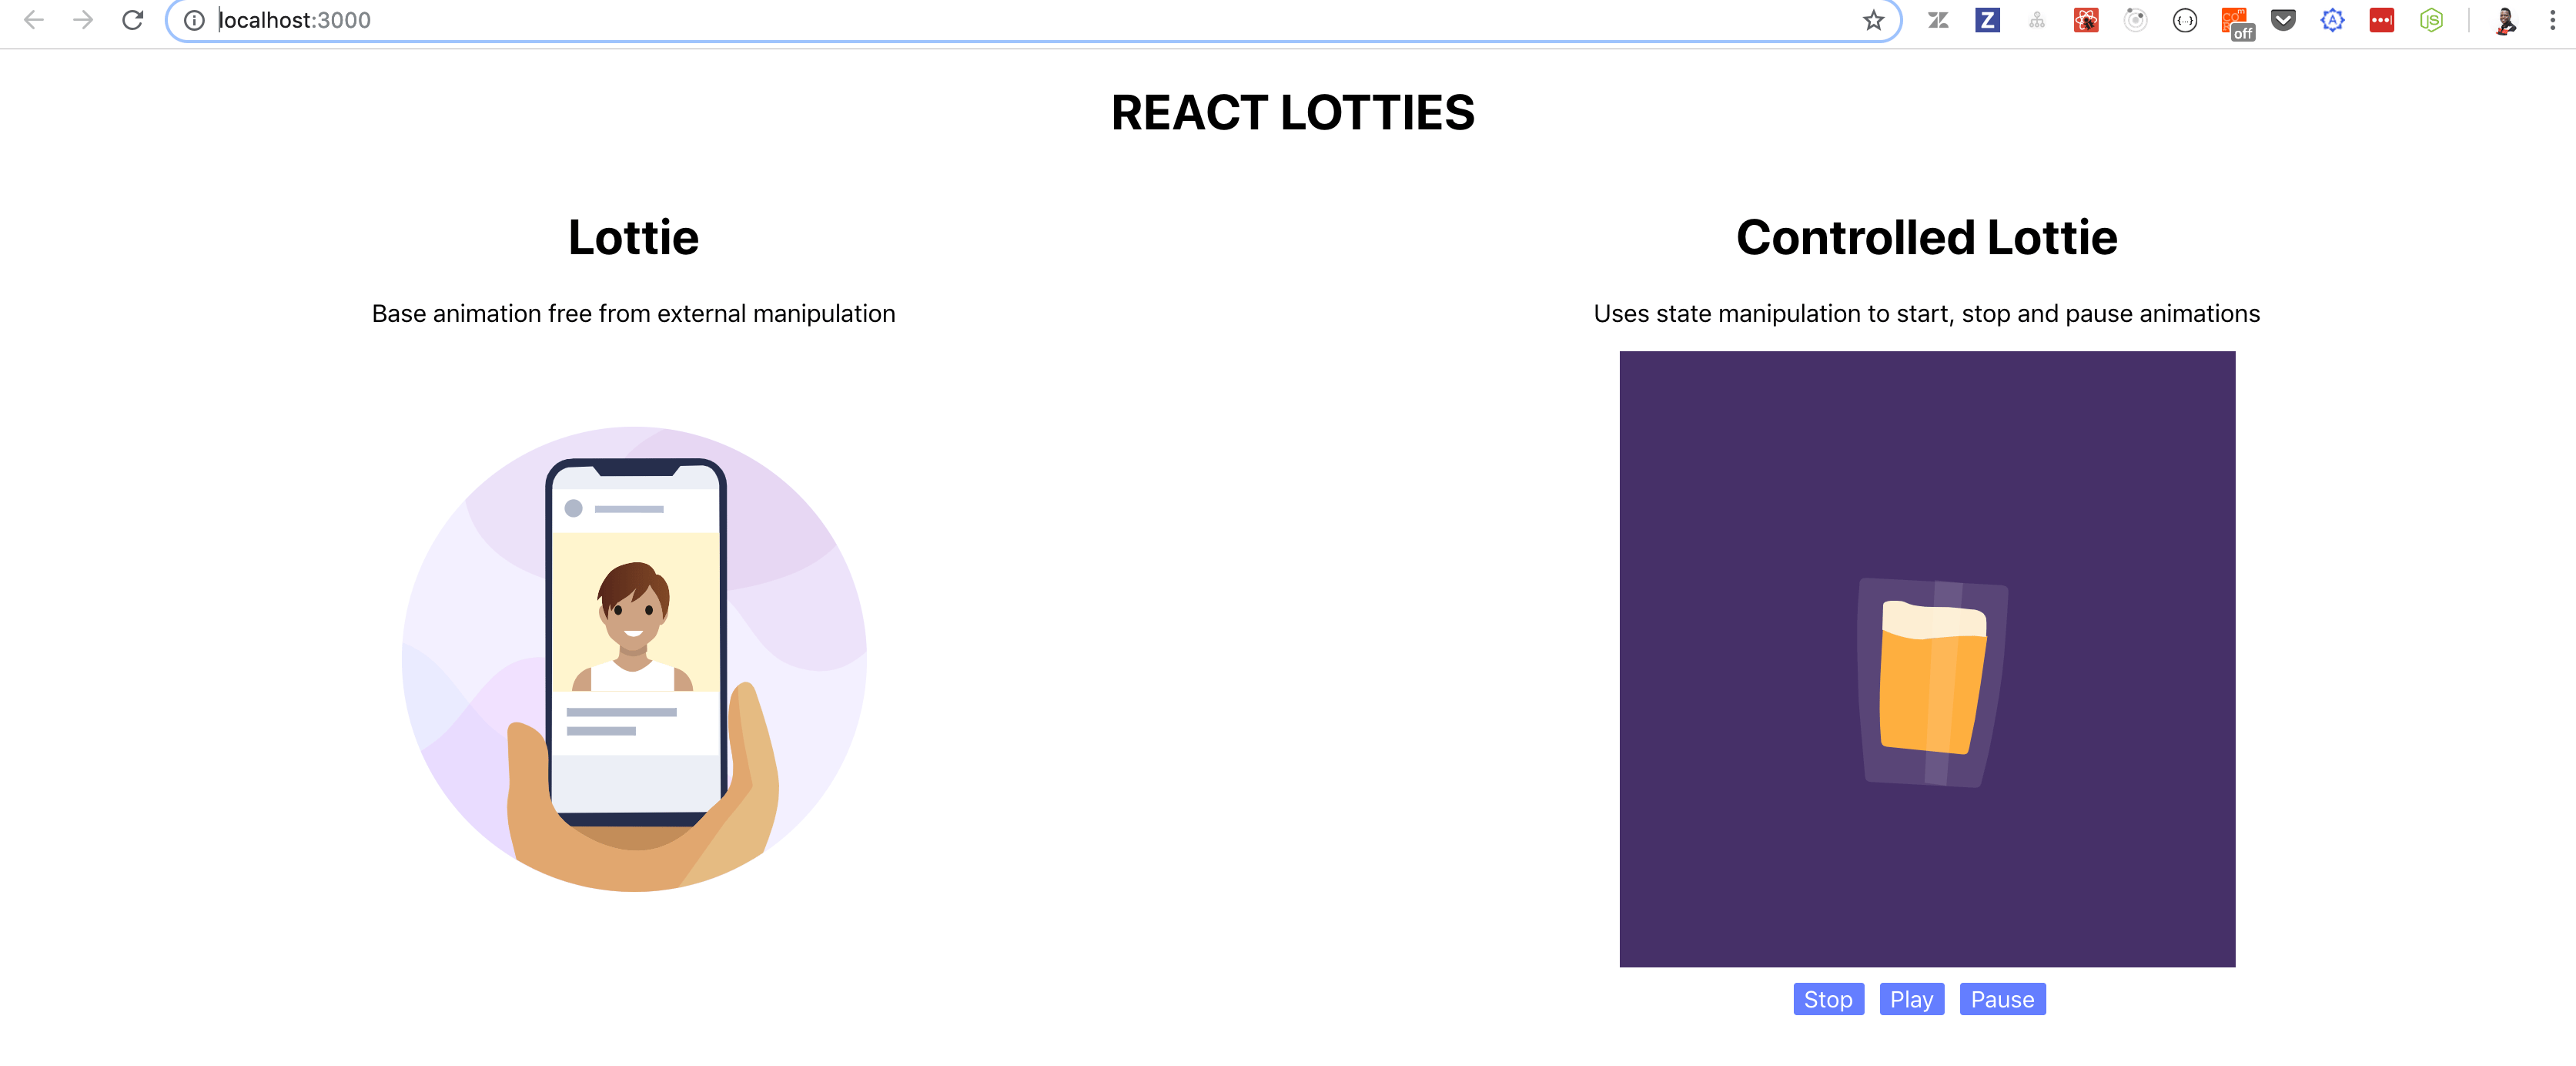
Your browser will open up and you will be able to observe the two animations active.
The Uncontrolled Lottie will autoplay:
The Controlled Lottie will have three buttons:
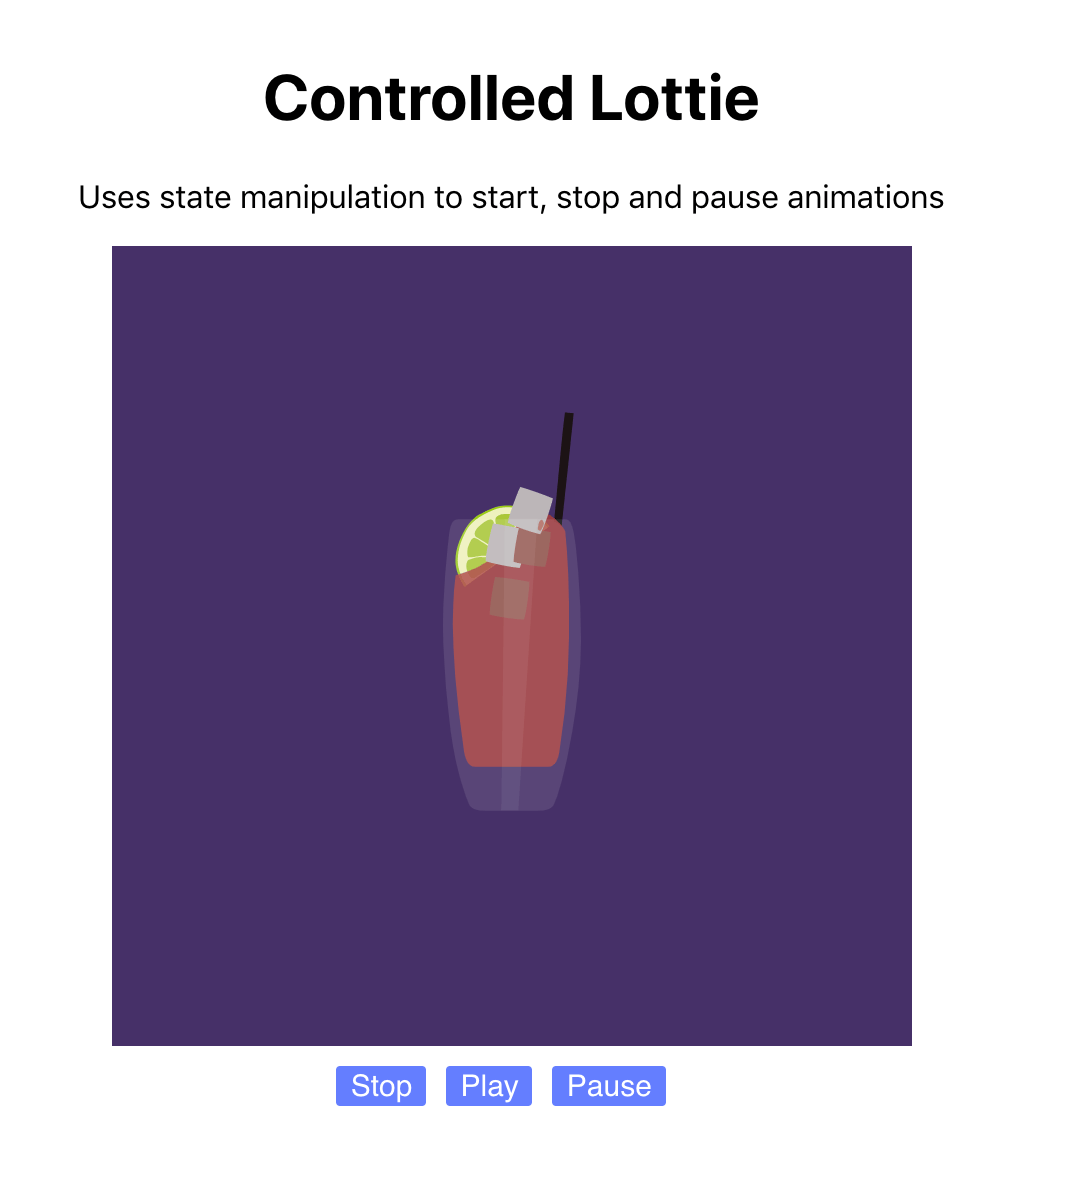
Clicking Pause will have the controlled animation freeze in its current frame. Clicking Stop returns the animation to its default position and holds it there.
Conclusion
Lottie can be used as a lightweight method to add animations to your web app. It can be used to make applications more interactive and provide visually appealing feedback, like animations indicating the state of certain processes. Lotties are performant, and will not put a heavy load on your application.
Thanks for learning with the DigitalOcean Community. Check out our offerings for compute, storage, networking, and managed databases.
About the author
Still looking for an answer?
This textbox defaults to using Markdown to format your answer.
You can type !ref in this text area to quickly search our full set of tutorials, documentation & marketplace offerings and insert the link!
 This work is licensed under a Creative Commons Attribution-NonCommercial- ShareAlike 4.0 International License.
Become a contributor for community
Get paid to write technical tutorials and select a tech-focused charity to receive a matching donation.

DigitalOcean Documentation
Full documentation for every DigitalOcean product.

Resources for startups and AI-native businesses
The Wave has everything you need to know about building a business, from raising funding to marketing your product.
The developer cloud
Scale up as you grow — whether you're running one virtual machine or ten thousand.

Start building today
From GPU-powered inference and Kubernetes to managed databases and storage, get everything you need to build, scale, and deploy intelligent applications.
