By Hanif Jetha

Introduction
Regular database backups are a crucial step in guarding against unintended data loss events. Designing an effective backup and recovery strategy often involves trading off performance impact, implementation costs, and data storage costs with recovery speed, data integrity, and backup coverage. The optimal solution will depend on your recovery point and time objectives and database scale and architecture.
In this guide we’ll demonstrate how to perform a live (or “hot”) physical backup of a running MySQL database using LVM snapshots. We’ll then compress and store the data in a DigitalOcean Space.
The procedure presented in this tutorial is well suited for large MySQL databases, databases using a mixture of storage engines (such as InnoDB, TokuDB, and MyISAM), and database servers with multiple block storage volumes attached, managed using LVM.
We’ll begin by ensuring that our Ubuntu 16.04 server can take and mount an LVM snapshot. Next, we’ll take an LVM snapshot of the logical volume containing MySQL’s data directory. We’ll then mount this snapshot volume (frozen logical volume), and compress and ship the MySQL data directory to DigitalOcean Spaces for storage. To conclude, we’ll briefly run through a sample recovery scenario.
Prerequisites
To use this guide, you’ll need to have the following prerequisites available to you:
-
An Ubuntu 16.04 Droplet with a non-root user that has sudo privileges, as detailed in Initial Server Setup with Ubuntu 16.04
-
A running MySQL 5.7+ installation, as detailed in How To Install MySQL on Ubuntu 16.04
-
An LVM logical volume used to store your MySQL database’s data directory:
- To learn more about LVM and how to set up a logical volume, consult An Introduction to LVM Concepts, Terminology, and Operations
- To learn more about moving MySQL’s data directory from its default
/var/lib/mysqllocation, consult How To Move a MySQL Data Directory to a New Location on Ubuntu 16.04
-
A DigitalOcean Space and set of API credentials, as detailed in How To Create a DigitalOcean Space and API Key.
-
The
s3cmdcommand-line file transfer client (2.X) installed as detailed in Step 1 of How To Use Logrotate and S3cmd to Archive Logs to Object Storage on Ubuntu 16.04 -
s3cmdconfigured to access your Space, as detailed in How To Configure s3cmd 2.x To Manage DigitalOcean Spaces
Once you have all of this set up, you’re ready to begin with this guide.
Step 1 — Investigate MySQL and LVM Configuration
To begin, we’ll locate our MySQL data directory and note those details about our LVM configuration.
Locate MySQL datadir
To find the path to your MySQL data directory, run the following command:
- mysqladmin -u root -p variables | grep datadir
Enter your MySQL root password when prompted. You should see output similar to the following:
Output| datadir | /data/mysql/
For the MySQL installation used in this guide, the data directory is /data/mysql.
We now need to confirm that /data/mysql lives on an LVM logical volume. To confirm this, we’ll run lsblk:
- lsblk
You should see output similar to the following:
OutputNAME             MAJ:MIN RM   SIZE RO TYPE MOUNTPOINT
sda                8:0    0   600G  0 disk
└─vg1-mysql_data 252:0    0   475G  0 lvm  /data
vda              253:0    0   160G  0 disk
├─vda1           253:1    0 159.9G  0 part /
├─vda14          253:14   0     4M  0 part
└─vda15          253:15   0   106M  0 part /boot/efi
From this we observe that /data is in fact the mount point for an LVM logical volume called mysql_data. It is a member of the volume group vg1.
We now need to ensure that we have enough free space available in our volume group vg1 to take an LVM snapshot.
Explore LVM Configuration
It’s important to note that output from the commands described in this section will vary depending on your server’s hardware and LVM configuration. Let’s quickly investigate the hardware and LVM configuration for the Ubuntu 16.04 server used in this guide.
To begin, let’s find out how many physical volumes we have using pvscan:
- sudo pvscan
You should see output similar to the following:
Output  PV /dev/sda   VG vg1             lvm2 [500.00 GiB / 25.00 GiB free]
  Total: 1 [500.00 GiB] / in use: 1 [500.00 GiB] / in no VG: 0 [0   ]
We observe that we have one 500GB physical volume (/dev/sda) which is in one volume group (vg1). 475GB of this physical volume has been allocated off to logical volumes, while 25GB remains free for use by the volume group.
We can confirm this by taking a deeper look into the vg1 volume group using the vgdisplay command:
- sudo vgdisplay
You should see output that resembles the following:
Output--- Volume group ---
  VG Name               vg1
  System ID
  Format                lvm2
  Metadata Areas        1
  Metadata Sequence No  2
  VG Access             read/write
  VG Status             resizable
  MAX LV                0
  Cur LV                1
  Open LV               1
  Max PV                0
  Cur PV                1
  Act PV                1
  VG Size               500.00 GiB
  PE Size               4.00 MiB
  Total PE              127999
  Alloc PE / Size       121600 / 475.00 GiB
  Free  PE / Size       6399 / 25.00 GiB
  VG UUID               KEsoDE-zON7-NdyO-ioxb-6FSl-CB4m-S3QCRj
From the Alloc PE / Size and Free PE / Size lines, we observe that we have 475GB allocated, and 25GB free in the vg1 volume group. The Cur PV line shows us that we have 1 physical volume in this volume group. The Cur LV line indicates that we’ve used the pool of space in this volume group to create 1 logical volume.
Let’s now take a look at this logical volume using lvdisplay:
- sudo lvdisplay
You should see output similar to the following:
Output  --- Logical volume ---
  LV Path                /dev/vg1/mysql_data
  LV Name                mysql_data
  VG Name                vg1
  LV UUID                T98x9c-zvC1-f0Rw-4ipn-Cxo2-duwk-KUwQQc
  LV Write Access        read/write
  LV Creation host, time LVM, 2018-04-18 20:11:48 +0000
  LV Status              available
  # open                 1
  LV Size                475.00 GiB
  Current LE             121600
  Segments               1
  Allocation             inherit
  Read ahead sectors     auto
  - currently set to     256
  Block device           252:0
From LV Size we see that we have one 475GB logical volume, mysql_data, found at /dev/vg1/mysql_data (recall that vg1 was the name of mysql_data’s volume group).
To summarize, on the Ubuntu 16.04 server used for this tutorial, we have one 500GB physical volume (/dev/sda) used to back one volume group (vg1), from which we’ve created a single 475GB logical volume (mysql_data). This leaves 25GB of free space in the volume group which can be used to create further logical volumes (and snapshots).
Your hardware and LVM configuration will likely be different; you may have several block storage devices attached, pooling into single or multiple volume groups. The procedure for taking a snapshot of a given logical volume will nevertheless be the same.
Using the series of commands presented in this section, you should now have a general sense of your LVM and hardware configuration.
In the next step, we’ll prepare your database server for LVM snapshotting.
Step 2 — Prepare Your Server for LVM Snapshots
To ensure that we can safely take an LVM snapshot, we need to provision enough disk space to cover any writes or changes that may occur during the backup and file transfer to Spaces. Depending on the size of your database, this backup may take several hours to complete, so it’s best to err on the side of caution here. If your snapshot volume runs out of space while performing the backup, the snapshot volume will become invalid and you will no longer have a consistent backup.
In the previous step we observed that the volume group (vg1) containing our principal logical volume (mysql_data) only had 25GB free. Although it may be the case that 25GB of changes won’t be written to disk in the time it takes to back up our database, we’d ideally like a margin of safety of at least 100GB. In a production setting, it would be best practice to measure the average amount of data being written to disk during the scheduled backup window and scale the snapshot volume size accordingly.
To add an additional 75GB of space to the vg1 volume group, we can either attach a block storage device, or increase the size of the volume currently attached to the Droplet. In this tutorial, we’ll expand the already attached block storage volume; to learn more about attaching an additonal block storage volume, you can consult An Introduction to DigitalOcean Block Storage.
Note: Some regions do not yet support Block Storage and you may not be able to attach a Block Storage volume to your Droplet. A reasonable workaround in this case would be to Snapshot your Droplet and create a new Droplet using this Snapshot image, to which you can then add Block Storage.
Let’s expand the block storage volume attached to this Droplet.
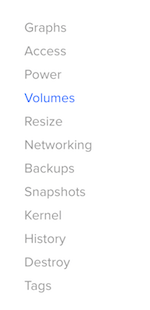
Navigate to DigitalOcean’s web control panel and from the Dashboard, navigate to your Droplet.
In the sidebar, click into Volumes:
From this pane, you should see any block storage volumes attached to your Droplet. For the Ubuntu Droplet used in this guide, we have one attached block storage volume:
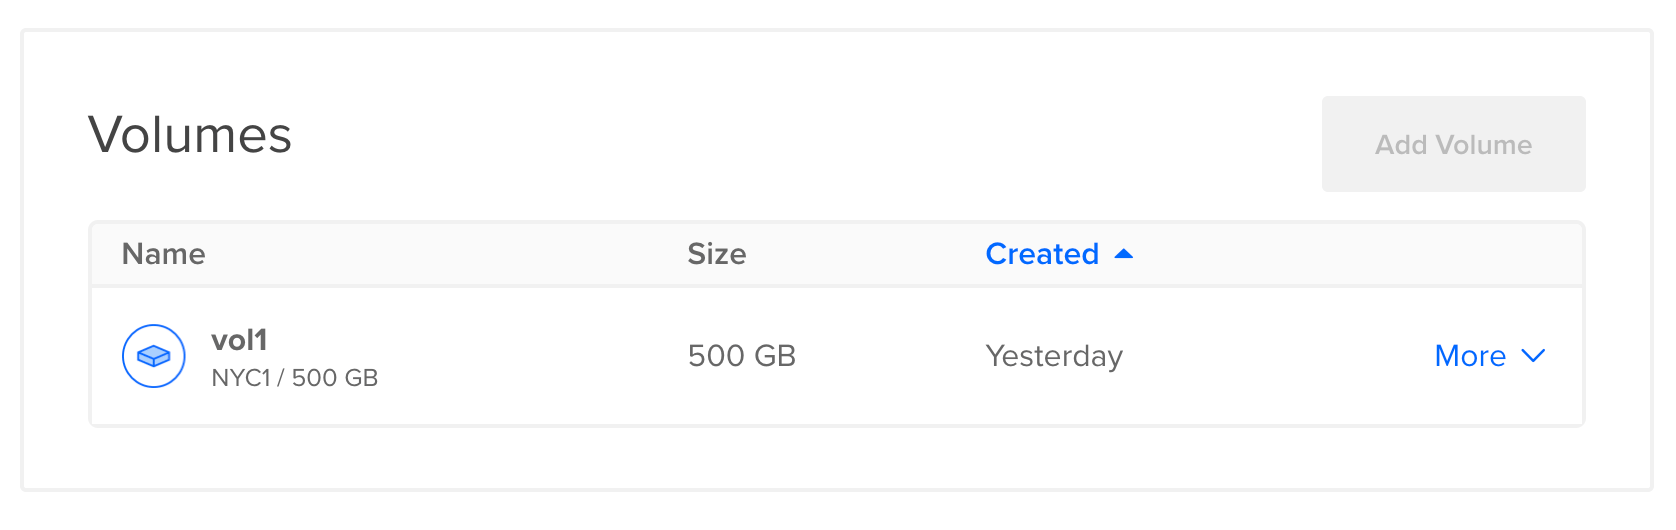
Click on More and then Resize volume.
From here, you can select one of several predefined volume sizes, or choose your own volume size. Let’s increase the 500GB volume by 100GB to 600GB:
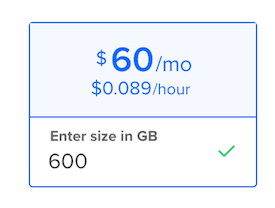
Press Continue. Your attached block storage volume has now been increased by 100GB.
To propagate this device change to LVM, we need to run pvresize.
Log in to your server, and run pvscan again to scan for physical volumes:
- sudo pvscan
You should see the same output as before for our /dev/sda physical volume:
Output PV /dev/sda   VG vg1             lvm2 [500.00 GiB / 25.00 GiB free]
  Total: 1 [500.00 GiB] / in use: 1 [500.00 GiB] / in no VG: 0 [0   ]
Now, run pvresize on the volume to fill out the extra space that we just added:
- sudo pvresize /dev/sda
You should see the following output:
OutputPhysical volume "/dev/sda" changed
1 physical volume(s) resized / 0 physical volume(s) not resized
Let’s confirm that our physical volume is now 100GB larger by running another pvscan:
- sudo pvscan
We observe that the /dev/sda physical volume is now 600GB:
Output PV /dev/sda   VG vg1             lvm2 [600.00 GiB / 125.00 GiB free]
 Total: 1 [600.00 GiB] / in use: 1 [600.00 GiB] / in no VG: 0 [0   ]
Let’s now confirm that our volume group’s free space has also increased by 100GB:
- sudo vgdisplay
You should then see the following output:
Output  --- Volume group ---
  VG Name               vg1
  System ID
  Format                lvm2
  Metadata Areas        1
  Metadata Sequence No  3
  VG Access             read/write
  VG Status             resizable
  MAX LV                0
  Cur LV                1
  Open LV               1
  Max PV                0
  Cur PV                1
  Act PV                1
  VG Size               600.00 GiB
  PE Size               4.00 MiB
  Total PE              153599
  Alloc PE / Size       121600 / 475.00 GiB
  Free  PE / Size       31999 / 125.00 GiB
  VG UUID               KEsoDE-zON7-NdyO-ioxb-6FSl-CB4m-S3QCRj
This indicates that we now have 125GB of free space available from which to create our snapshot volume.
For the purposes of this tutorial, 125GB will be plenty for absorbing writes and changes during the backup and upload procedure, but in a production setting the snapshot volume size should be scaled proportionally to anticipated disk usage during the backup window.
Now that we have enough space available in our volume group to cover any writes or changes that may occur during the snapshot and backup, we can move on to creating the snapshot volume.
Step 3 — Create and Mount LVM Snapshot
Warning: While the LVM snapshot is active, there will be some performance degradation when writing to disk. You should test this procedure first using a non-production database with simulated load to verify that this method will work in your production deployment.
We’ll now create a snapshot of the mysql_data logical volume using lvcreate. Before we do this, we need to freeze writes to the database using FLUSH TABLES WITH READ LOCK so that we can guarantee data consistency. The tables only need to be read locked until we run lvcreate , at which point they can be unlocked. If you script this series of commands, the total lock time should be very small depending on currently executing write queries.
Read Lock MySQL Database
Let’s begin by flushing tables. From the terminal on your database server, use mysql to log into your MySQL database:
- mysql -u root -p
From the MySQL shell, run the FLUSH TABLES command to read-lock your database.
Warning: After running the following command, all open tables will be closed and all tables for all databases will be locked with a global read lock. If running this on a production database, it’s best practice to execute this command on a replica or as part of a script to minimize the amount of time the database will be locked.
- FLUSH TABLES WITH READ LOCK;
You should see the following output:
OutputQuery OK, 0 rows affected (0.00 sec)
Which indicates that your database has been read-locked. Don’t exit the MySQL prompt, we’ll need to keep it open.
We’ll now create and mount an LVM snapshot of the logical volume used to house our MySQL data.
###Create and Mount Snapshot Volume
Keeping this MySQL client connection open, log in to your database server from a new terminal window.
Warning: If you close this connection, the lock will be discarded and writes will resume, rendering the snapshot inconsistent.
We can now take a snapshot of the mysql_data logical volume. We’ll allocate 100GB of buffer space to absorb writes and other changes as we perform the physical backup. To create the LVM snapshot, run the following lvcreate command:
sudo lvcreate -L 100G -s -n mysql_data_snap /dev/vg1/mysql_data
The -L flag specifies the size of the logical volume, in this case 100GB. -s indicates that the logical volume will be a snapshot, in this case of the /dev/vg1/mysql_data logical volume. We’ve chosen to name this snapshot volume mysql_data_snap.
You should see the following result:
OutputLogical volume "mysql_data_snap" created.
This indicates that we now have a copy of the mysql_data logical volume from which we can perform a backup.
Now that we’ve essentially “frozen” our MySQL data files at a point in time, we can unlock our database tables and resume writes. From your open MySQL connection, run the following command:
- UNLOCK TABLES;
You should see the following result:
OutputQuery OK, 0 rows affected (0.00 sec)
The tables have been unlocked and you can now safely close this connection.
At this point, your database is still live and accepting incoming connections and writes, but we have a consistent snapshot of the data at the point in time when we ran FLUSH TABLES WITH READ LOCK (or to be completely accurate, the point in time when the last write query after the FLUSH completed).
The final step consists of mounting this snapshot so that we can access these frozen data files.
First, we’ll create a mount point called /backup_src:
- sudo mkdir /backup_src
Now, we’ll mount the snapshot volume to /backup_src:
- sudo mount /dev/vg1/mysql_data_snap /backup_src
We can now access the frozen data files. Let’s take a look:
- cd /backup_src
- ls
You should see your MySQL data directory:
Outputlost+found mysql
Now that we have access to a consistent snapshot of our data, we can back it up to a DigitalOcean Space.
Step 4 — Compress and Upload Files to DigitalOcean Spaces
To upload this backup to our DigitalOcean Space, we’ll use the s3cmd tool which we installed and configured in the prerequisite steps.
We’ll first test our s3cmd configuration and attempt to access our backups Space (in this tutorial our space is named mysql-backup-demo):
- s3cmd info s3://mysql-backup-demo/
You should see the following output:
Outputs3://mysql-backup-demo/ (bucket):
   Location:  nyc3
   Payer:     BucketOwner
   Expiration Rule: none
   Policy:    none
   CORS:      none
   ACL:       3587522: FULL_CONTROL
This output indicates that the connection was successful and s3cmd can transfer objects to the Space.
We’ll now compress and upload our MySQL data directory to the mysql-backup-demo space:
- sudo tar -czvf - /backup_src/mysql | s3cmd put - s3://mysql-backup-demo/mysql_backup_180423.tar.gz
Here, we use tar to compress and archive the MySQL data directory, and pipe the output to s3cmd, which we use to transfer the compressed archive to Spaces. We’ve named the compressed archive mysql_backup_180423.tar.gz.
Since we used tar in verbose mode, you’ll see the list of files being compressed (to hide this output, omit the -v flag in the above command).
The output will conclude with the following file transfer information:
Output...
upload: '<stdin>' -> 's3://mysql-backup-demo/mysql_backup_180423.tar.gz'  [part 1, 1417kB]
 1451996 of 1451996   100% in    0s  1993.41 kB/s  done
Once the transfer completes, we’ll verify that the file was successfully transferred to our Space by listing the Space contents:
- s3cmd ls s3://mysql-backup-demo/
You should see the backup archive file:
Output2018-04-23 20:39 297 s3://mysql-backup-demo/mysql_backup_180423.tar.gz
At this point, we’ve successfully completed a physical MySQL backup to DigitalOcean Spaces.
We’ll now unmount and drop the snapshot volume, restoring the used space to our volume group vg1.
Step 5 — Unmount and Drop Snapshot Volume
Now that our data has been backed up, we no longer have any use for the snapshot volume we created earlier in this tutorial and can safely drop it.
To unmount the volume, run the following command:
- sudo umount /backup_src
Replace /backup_src with your snapshot volume’s mount point.
We can now drop the snapshot volume. To do so, run the following command:
- sudo lvremove vg1/mysql_data_snap
Here, vg1 corresponds to your volume group name, and mysql_data_snap to your snapshot volume name.
You’ll be prompted to confirm removal, to which you should respond Y.
You should see the following output:
Output Logical volume "mysql_data_snap" successfully removed
The snapshot volume has successfully been dropped. You’ve now completed a full MySQL physical backup and uploaded it to your DigitalOcean Space.
We’ll conclude this tutorial by quickly running through a recovery scenario.
Step 6 — Test Restore from Physical Backup
To restore our MySQL database from the physical backup we previously uploaded to Spaces, we’ll transfer the backup to our database server, and then use the extracted files as our restored MySQL data directory.
Let’s first transfer the backup from our Space back to the user’s home directory on the database server:
- s3cmd get s3://mysql-backup-demo/mysql_backup_180423.tar.gz ~/mysql_backup_180423.tar.gz
You should see some file transfer output:
Outputdownload: 's3://mysql-backup-demo/mysql_backup_180423.tar.gz' -> '~/mysql_backup_180423.tar.gz'  [1 of 1]
 1451889 of 1451889   100% in    0s    38.49 MB/s  done
We’ll now stop the running database server and purge the existing data directory, as we’d like to test a clean restore from the physical backup files.
First, stop the MySQL server:
- sudo service mysql stop
Now, delete the contents of your MySQL data directory:
- sudo rm -rf /data/*
Recall that in this tutorial, the non-default MySQL data directory path is /data .
Now, extract the physical backup archive to your MySQL data directory:
- sudo tar -xzvf ~/mysql_backup_180423.tar.gz -C /data
Now that the data files have been restored, we can restart the MySQL database and allow it to recover:
- sudo service mysql start
Finally, we can log in to our database server to verify that the restore completed successfully:
- mysql -u root -p
After entering your password, you should see the MySQL client prompt:
OutputWelcome to the MySQL monitor.  Commands end with ; or \g.
Your MySQL connection id is 4
Server version: 5.7.21-0ubuntu0.16.04.1 (Ubuntu)

Copyright (c) 2000, 2018, Oracle and/or its affiliates. All rights reserved.

Oracle is a registered trademark of Oracle Corporation and/or its
affiliates. Other names may be trademarks of their respective
owners.

Type 'help;' or '\h' for help. Type '\c' to clear the current input statement.

mysql>
From here you can scan some tables to verify that your data is intact.
Conclusion
In this tutorial, we’ve demonstrated how to leverage LVM’s snapshot feature to freeze the filesystem and perform a full physical backup and restore of a running MySQL instance. If you use LVM to manage one or more storage volumes that contain your MySQL data, this feature provides a convenient method for backing up your production database.
In a production setting, this procedure should ideally be scripted and scheduled with proper logging, monitoring, and alerting. In addition, a FLUSH TABLES WITH READ LOCK (no matter how brief) should not be run on the master server but on a minimally loaded replica. Note that with slight modifications, you can also adapt the above procedure to quickly spin up replicas from a master physical backup.
If your MySQL instance exclusively uses InnoDB as its storage engine, you can also use Percona XtraBackup to perform physical backups of your database in a similar fashion. To learn more, consult our tutorial on How To Back Up MySQL Databases to Object Storage with Percona on Ubuntu 16.04.
A reasonable alternative to uploading physical backup files to Spaces would be to use LVM snapshots in combination with Droplet Snapshots. To learn more about Droplet Snapshots, consult DigitalOcean Backups and Snapshots Explained.
To learn more about DigitalOcean Spaces, the object store used in this guide, consult An Introduction To DigitalOcean Spaces.
Thanks for learning with the DigitalOcean Community. Check out our offerings for compute, storage, networking, and managed databases.
About the author
DevOps Engineer, Former Technical Writer and Editor at DigitalOcean. Expertise in topics including Ubuntu, Kubernetes, Docker, CentOS.
Still looking for an answer?
This textbox defaults to using Markdown to format your answer.
You can type !ref in this text area to quickly search our full set of tutorials, documentation & marketplace offerings and insert the link!
 This work is licensed under a Creative Commons Attribution-NonCommercial- ShareAlike 4.0 International License.
Become a contributor for community
Get paid to write technical tutorials and select a tech-focused charity to receive a matching donation.

DigitalOcean Documentation
Full documentation for every DigitalOcean product.

Resources for startups and AI-native businesses
The Wave has everything you need to know about building a business, from raising funding to marketing your product.
The developer cloud
Scale up as you grow — whether you're running one virtual machine or ten thousand.

Start building today
From GPU-powered inference and Kubernetes to managed databases and storage, get everything you need to build, scale, and deploy intelligent applications.
