By Alvin Wan and Kathryn Hancox

The author selected Code Org to receive a donation as part of the Write for DOnations program.
Introduction
Computer vision is a subfield of computer science that aims to extract a higher-order understanding from images and videos. This powers technologies such as fun video chat filters, your mobile device’s face authenticator, and self-driving cars.
In this tutorial, you’ll use computer vision to build an American Sign Language translator for your webcam. As you work through the tutorial, you’ll use OpenCV, a computer-vision library, PyTorch to build a deep neural network, and onnx to export your neural network. You’ll also apply the following concepts as you build a computer-vision application:
- You’ll use the same three-step method as used in How To Apply Computer Vision to Build an Emotion-Based Dog Filter tutorial: preprocess a dataset, train a model, and evaluate the model.
- You’ll also expand each of these steps: employ data augmentation to address rotated or non-centered hands, change learning rate schedules to improve model accuracy, and export models for faster inference speed.
- Along the way, you’ll also explore related concepts in machine learning.
By the end of this tutorial, you’ll have both an American Sign Language translator and foundational deep learning know-how. You can also access the complete source code for this project.
Prerequisites
To complete this tutorial, you will need the following:
- A local development environment for Python 3 with at least 1GB of RAM. You can follow How to Install and Set Up a Local Programming Environment for Python 3 to configure everything you need.
- A working webcam to do real-time image detection.
- (Recommended) Build an Emotion-Based Dog Filter; this tutorial is not explicitly used but the same ideas are reinforced and built upon.
Step 1 — Creating the Project and Installing Dependencies
Let’s create a workspace for this project and install the dependencies we’ll need.
On Linux distributions, start by preparing your system package manager and install the Python3 virtualenv package. Use:
- apt-get update
- apt-get upgrade
- apt-get install python3-venv
We’ll call our workspace SignLanguage:
- mkdir ~/SignLanguage
Navigate to the SignLanguage directory:
- cd ~/SignLanguage
Then create a new virtual environment for the project:
- python3 -m venv signlanguage
Activate your environment:
- source signlanguage/bin/activate
Then install PyTorch, a deep-learning framework for Python that we’ll use in this tutorial.
On macOS, install Pytorch with the following command:
- python -m pip install torch==1.2.0 torchvision==0.4.0
On Linux and Windows, use the following commands for a CPU-only build:
- pip install torch==1.2.0+cpu torchvision==0.4.0+cpu -f https://download.pytorch.org/whl/torch_stable.html
- pip install torchvision
Now install prepackaged binaries for OpenCV, numpy, and onnx, which are libraries for computer vision, linear algebra, AI model exporting, and AI model execution, respectively. OpenCV offers utilities such as image rotations, and numpy offers linear algebra utilities such as a matrix inversion:
- python -m pip install opencv-python==3.4.3.18 numpy==1.14.5 onnx==1.6.0 onnxruntime==1.0.0
On Linux distributions, you will need to install libSM.so:
- apt-get install libsm6 libxext6 libxrender-dev
With the dependencies installed, let’s build the first version of our sign language translator: a sign language classifier.
Step 2 — Preparing the Sign Language Classification Dataset
In these next three sections, you’ll build a sign language classifier using a neural network. Your goal is to produce a model that accepts a picture of a hand as input and outputs a letter.
The following three steps are required to build a machine learning classification model:
- Preprocess the data: Apply one-hot encoding to your labels and wrap your data in PyTorch Tensors. Train your model on augmented data to prepare it for “unusual” input, like an off-center or rotated hand.
- Specify and train the model: Set up a neural network using PyTorch. Define training hyper-parameters—such as how long to train for—and run stochastic gradient descent. You’ll also vary a specific training hyper-parameter, which is learning rate schedule. These will boost model accuracy.
- Run a prediction using the model: Evaluate the neural network on your validation data to understand its accuracy. Then, export the model to a format called ONNX for faster inference speeds.
In this section of the tutorial, you will accomplish step 1 of 3. You will download the data, create a Dataset object to iterate over your data, and finally apply data augmentation. At the end of this step, you will have a programmatic way of accessing images and labels in your dataset to feed to your model.
First, download the dataset to your current working directory:
Note: On macOS, wget is not available by default. To do so, install Homebrew by following this DigitalOcean tutorial. Then, run brew install wget.
- wget https://assets.digitalocean.com/articles/signlanguage_data/sign-language-mnist.tar.gz
Unzip the zip file, which contains a data/ directory:
- tar -xzf sign-language-mnist.tar.gz
Create a new file, named step_2_dataset.py:
- nano step_2_dataset.py
As before, import the necessary utilities and create the class that will hold your data. For data processing here, you will create the train and test datasets. You’ll implement PyTorch’s Dataset interface, allowing you to load and use PyTorch’s built-in data pipeline for your sign language classification dataset:
from torch.utils.data import Dataset
from torch.autograd import Variable
import torch.nn as nn
import numpy as np
import torch

import csv


class SignLanguageMNIST(Dataset):
    """Sign Language classification dataset.

    Utility for loading Sign Language dataset into PyTorch. Dataset posted on
    Kaggle in 2017, by an unnamed author with username `tecperson`:
    https://www.kaggle.com/datamunge/sign-language-mnist

    Each sample is 1 x 1 x 28 x 28, and each label is a scalar.
    """
    pass
Delete the pass placeholder in the SignLanguageMNIST class. In its place, add a method to generate a label mapping:
    @staticmethod
    def get_label_mapping():
        """
        We map all labels to [0, 23]. This mapping from dataset labels [0, 23]
        to letter indices [0, 25] is returned below.
        """
        mapping = list(range(25))
        mapping.pop(9)
        return mapping
Labels range from 0 to 25. However, letters J (9) and Z (25) are excluded. This means there are only 24 valid label values. So that the set of all label values starting from 0 is contiguous, we map all labels to [0, 23]. This mapping from dataset labels [0, 23] to letter indices [0, 25] is provided by this get_label_mapping method.
Next, add a method to extract labels and samples from a CSV file. The following assumes that each line starts with the label and is then followed by 784 pixel values. These 784 pixel values represent a 28x28 image:
    @staticmethod
    def read_label_samples_from_csv(path: str):
        """
        Assumes first column in CSV is the label and subsequent 28^2 values
        are image pixel values 0-255.
        """
        mapping = SignLanguageMNIST.get_label_mapping()
        labels, samples = [], []
        with open(path) as f:
            _ = next(f)  # skip header
            for line in csv.reader(f):
                label = int(line[0])
                labels.append(mapping.index(label))
                samples.append(list(map(int, line[1:])))
        return labels, samples
For an explanation of how these 784 values represent an image, see Build an Emotion-Based Dog Filter, Step 4.
Note that each line in the csv.reader iterable is a list of strings; the int and map(int, ...) invocations cast all strings to integers. Directly beneath our static method, add a function that will initialize our data holder:
    def __init__(self,
            path: str="data/sign_mnist_train.csv",
            mean: List[float]=[0.485],
            std: List[float]=[0.229]):
        """
        Args:
            path: Path to `.csv` file containing `label`, `pixel0`, `pixel1`...
        """
        labels, samples = SignLanguageMNIST.read_label_samples_from_csv(path)
        self._samples = np.array(samples, dtype=np.uint8).reshape((-1, 28, 28, 1))
        self._labels = np.array(labels, dtype=np.uint8).reshape((-1, 1))

        self._mean = mean
        self._std = std
This function starts by loading the samples and labels. Then it wraps the data in NumPy arrays. The mean and standard deviation information will be explained shortly, in the __getitem__ section following.
Directly after the __init__ function, add a __len__ function. The Dataset requires this method to determine when to stop iterating over data:
...
    def __len__(self):
        return len(self._labels)
Finally, add a __getitem__ method, which returns a dictionary containing the sample and the label:
    def __getitem__(self, idx):
        transform = transforms.Compose([
            transforms.ToPILImage(),
            transforms.RandomResizedCrop(28, scale=(0.8, 1.2)),
            transforms.ToTensor(),
            transforms.Normalize(mean=self._mean, std=self._std)])

        return {
            'image': transform(self._samples[idx]).float(),
            'label': torch.from_numpy(self._labels[idx]).float()
        }
You use a technique called data augmentation, where samples are perturbed during training, to increase the model’s robustness to these perturbations. In particular, randomly zoom in on the image by varying amounts and on different locations, via RandomResizedCrop. Note that zooming in should not affect the final sign language class; thus, the label is not transformed. You additionally normalize the inputs so that image values are rescaled to the [0, 1] range in expectation, instead of [0, 255]; to accomplish this, use the dataset _mean and _std when normalizing.
Your completed SignLanguageMNIST class will look like the following:
from torch.utils.data import Dataset
from torch.autograd import Variable
import torchvision.transforms as transforms
import torch.nn as nn
import numpy as np
import torch

from typing import List

import csv


class SignLanguageMNIST(Dataset):
    """Sign Language classification dataset.

    Utility for loading Sign Language dataset into PyTorch. Dataset posted on
    Kaggle in 2017, by an unnamed author with username `tecperson`:
    https://www.kaggle.com/datamunge/sign-language-mnist

    Each sample is 1 x 1 x 28 x 28, and each label is a scalar.
    """

    @staticmethod
    def get_label_mapping():
        """
        We map all labels to [0, 23]. This mapping from dataset labels [0, 23]
        to letter indices [0, 25] is returned below.
        """
        mapping = list(range(25))
        mapping.pop(9)
        return mapping

    @staticmethod
    def read_label_samples_from_csv(path: str):
        """
        Assumes first column in CSV is the label and subsequent 28^2 values
        are image pixel values 0-255.
        """
        mapping = SignLanguageMNIST.get_label_mapping()
        labels, samples = [], []
        with open(path) as f:
            _ = next(f)  # skip header
            for line in csv.reader(f):
                label = int(line[0])
                labels.append(mapping.index(label))
                samples.append(list(map(int, line[1:])))
        return labels, samples

    def __init__(self,
            path: str="data/sign_mnist_train.csv",
            mean: List[float]=[0.485],
            std: List[float]=[0.229]):
        """
        Args:
            path: Path to `.csv` file containing `label`, `pixel0`, `pixel1`...
        """
        labels, samples = SignLanguageMNIST.read_label_samples_from_csv(path)
        self._samples = np.array(samples, dtype=np.uint8).reshape((-1, 28, 28, 1))
        self._labels = np.array(labels, dtype=np.uint8).reshape((-1, 1))

        self._mean = mean
        self._std = std

    def __len__(self):
        return len(self._labels)

    def __getitem__(self, idx):
        transform = transforms.Compose([
            transforms.ToPILImage(),
            transforms.RandomResizedCrop(28, scale=(0.8, 1.2)),
            transforms.ToTensor(),
            transforms.Normalize(mean=self._mean, std=self._std)])

        return {
            'image': transform(self._samples[idx]).float(),
            'label': torch.from_numpy(self._labels[idx]).float()
        }
As before, you will now verify our dataset utility functions by loading the SignLanguageMNIST dataset. Add the following code to the end of your file after the SignLanguageMNIST class:
def get_train_test_loaders(batch_size=32):
    trainset = SignLanguageMNIST('data/sign_mnist_train.csv')
    trainloader = torch.utils.data.DataLoader(trainset, batch_size=batch_size, shuffle=True)

    testset = SignLanguageMNIST('data/sign_mnist_test.csv')
    testloader = torch.utils.data.DataLoader(testset, batch_size=batch_size, shuffle=False)
    return trainloader, testloader
This code initializes the dataset using the SignLanguageMNIST class. Then for the train and validation sets, it wraps the dataset in a DataLoader. This will translate the dataset into an iterable to use later.
Now you’ll verify that the dataset utilities are functioning. Create a sample dataset loader using DataLoader and print the first element of that loader. Add the following to the end of your file:
if __name__ == '__main__':
    loader, _ = get_train_test_loaders(2)
    print(next(iter(loader)))
You can check that your file matches the step_2_dataset file in this (repository). Exit your editor and run the script with the following:
- python step_2_dataset.py
This outputs the following pair of tensors. Our data pipeline outputs two samples and two labels. This indicates that our data pipeline is up and ready to go:
Output{'image': tensor([[[[ 0.4337,  0.5022,  0.5707,  ...,  0.9988,  0.9646,  0.9646],
          [ 0.4851,  0.5536,  0.6049,  ...,  1.0502,  1.0159,  0.9988],
          [ 0.5364,  0.6049,  0.6392,  ...,  1.0844,  1.0844,  1.0673],
          ...,
          [-0.5253, -0.4739, -0.4054,  ...,  0.9474,  1.2557,  1.2385],
          [-0.3369, -0.3369, -0.3369,  ...,  0.0569,  1.3584,  1.3242],
          [-0.3712, -0.3369, -0.3198,  ...,  0.5364,  0.5364,  1.4783]]],


        [[[ 0.2111,  0.2796,  0.3481,  ...,  0.2453, -0.1314, -0.2342],
          [ 0.2624,  0.3309,  0.3652,  ..., -0.3883, -0.0629, -0.4568],
          [ 0.3309,  0.3823,  0.4337,  ..., -0.4054, -0.0458, -1.0048],
          ...,
          [ 1.3242,  1.3584,  1.3927,  ..., -0.4054, -0.4568,  0.0227],
          [ 1.3242,  1.3927,  1.4612,  ..., -0.1657, -0.6281, -0.0287],
          [ 1.3242,  1.3927,  1.4440,  ..., -0.4397, -0.6452, -0.2856]]]]), 'label': tensor([[24.],
        [11.]])}
You’ve now verified that your data pipeline works. This concludes the first step—preprocessing your data—which now includes data augmentation for increased model robustness. Next you will define the neural network and optimizer.
Step 3 — Building and Training the Sign Language Classifier Using Deep Learning
With a functioning data pipeline, you will now define a model and train it on the data. In particular, you will build a neural network with six layers, define a loss, an optimizer, and finally, optimize the loss function for your neural network predictions. At the end of this step, you will have a working sign language classifier.
Create a new file called step_3_train.py:
- nano step_3_train.py
Import the necessary utilities:
from torch.utils.data import Dataset
from torch.autograd import Variable
import torch.nn as nn
import torch.nn.functional as F
import torch.optim as optim
import torch

from step_2_dataset import get_train_test_loaders
Define a PyTorch neural network that includes three convolutional layers, followed by three fully connected layers. Add this to the end of your existing script:
class Net(nn.Module):
    def __init__(self):
        super(Net, self).__init__()
        self.conv1 = nn.Conv2d(1, 6, 3)
        self.pool = nn.MaxPool2d(2, 2)
        self.conv2 = nn.Conv2d(6, 6, 3)
        self.conv3 = nn.Conv2d(6, 16, 3)
        self.fc1 = nn.Linear(16 * 5 * 5, 120)
        self.fc2 = nn.Linear(120, 48)
        self.fc3 = nn.Linear(48, 24)

    def forward(self, x):
        x = F.relu(self.conv1(x))
        x = self.pool(F.relu(self.conv2(x)))
        x = self.pool(F.relu(self.conv3(x)))
        x = x.view(-1, 16 * 5 * 5)
        x = F.relu(self.fc1(x))
        x = F.relu(self.fc2(x))
        x = self.fc3(x)
        return x
Now initialize the neural network, define a loss function, and define optimization hyperparameters by adding the following code to the end of the script:
def main():
    net = Net().float()
    criterion = nn.CrossEntropyLoss()
    optimizer = optim.SGD(net.parameters(), lr=0.01, momentum=0.9)
Finally, you’ll train for two epochs:
def main():
    net = Net().float()
    criterion = nn.CrossEntropyLoss()
    optimizer = optim.SGD(net.parameters(), lr=0.01, momentum=0.9)

    trainloader, _ = get_train_test_loaders()
    for epoch in range(2):  # loop over the dataset multiple times
        train(net, criterion, optimizer, trainloader, epoch)
    torch.save(net.state_dict(), "checkpoint.pth")
You define an epoch to be an iteration of training where every training sample has been used exactly once. At the end of the main function, the model parameters will be saved to a file called "checkpoint.pth".
Add the following code to the end of your script to extract image and label from the dataset loader and then wrap each in a PyTorch Variable:
def train(net, criterion, optimizer, trainloader, epoch):
    running_loss = 0.0
    for i, data in enumerate(trainloader, 0):
        inputs = Variable(data['image'].float())
        labels = Variable(data['label'].long())
        optimizer.zero_grad()

        # forward + backward + optimize
        outputs = net(inputs)
        loss = criterion(outputs, labels[:, 0])
        loss.backward()
        optimizer.step()

        # print statistics
        running_loss += loss.item()
        if i % 100 == 0:
            print('[%d, %5d] loss: %.6f' % (epoch, i, running_loss / (i + 1)))
This code will also run the forward pass and then backpropagate through the loss and neural network.
At the end of your file, add the following to invoke the main function:
if __name__ == '__main__':
    main()
Double-check that your file matches the following:
from torch.utils.data import Dataset
from torch.autograd import Variable
import torch.nn as nn
import torch.nn.functional as F
import torch.optim as optim
import torch

from step_2_dataset import get_train_test_loaders


class Net(nn.Module):
    def __init__(self):
        super(Net, self).__init__()
        self.conv1 = nn.Conv2d(1, 6, 3)
        self.pool = nn.MaxPool2d(2, 2)
        self.conv2 = nn.Conv2d(6, 6, 3)
        self.conv3 = nn.Conv2d(6, 16, 3)
        self.fc1 = nn.Linear(16 * 5 * 5, 120)
        self.fc2 = nn.Linear(120, 48)
        self.fc3 = nn.Linear(48, 25)

    def forward(self, x):
        x = F.relu(self.conv1(x))
        x = self.pool(F.relu(self.conv2(x)))
        x = self.pool(F.relu(self.conv3(x)))
        x = x.view(-1, 16 * 5 * 5)
        x = F.relu(self.fc1(x))
        x = F.relu(self.fc2(x))
        x = self.fc3(x)
        return x


def main():
    net = Net().float()
    criterion = nn.CrossEntropyLoss()
    optimizer = optim.SGD(net.parameters(), lr=0.01, momentum=0.9)

    trainloader, _ = get_train_test_loaders()
    for epoch in range(2):  # loop over the dataset multiple times
        train(net, criterion, optimizer, trainloader, epoch)
    torch.save(net.state_dict(), "checkpoint.pth")


def train(net, criterion, optimizer, trainloader, epoch):
    running_loss = 0.0
    for i, data in enumerate(trainloader, 0):
        inputs = Variable(data['image'].float())
        labels = Variable(data['label'].long())
        optimizer.zero_grad()

        # forward + backward + optimize
        outputs = net(inputs)
        loss = criterion(outputs, labels[:, 0])
        loss.backward()
        optimizer.step()

        # print statistics
        running_loss += loss.item()
        if i % 100 == 0:
            print('[%d, %5d] loss: %.6f' % (epoch, i, running_loss / (i + 1)))


if __name__ == '__main__':
    main()
Save and exit. Then, launch our proof-of-concept training by running:
- python step_3_train.py
You’ll see output akin to the following as the neural network trains:
Output[0,     0] loss: 3.208171
[0,   100] loss: 3.211070
[0,   200] loss: 3.192235
[0,   300] loss: 2.943867
[0,   400] loss: 2.569440
[0,   500] loss: 2.243283
[0,   600] loss: 1.986425
[0,   700] loss: 1.768090
[0,   800] loss: 1.587308
[1,     0] loss: 0.254097
[1,   100] loss: 0.208116
[1,   200] loss: 0.196270
[1,   300] loss: 0.183676
[1,   400] loss: 0.169824
[1,   500] loss: 0.157704
[1,   600] loss: 0.151408
[1,   700] loss: 0.136470
[1,   800] loss: 0.123326
To obtain lower loss, you could increase the number of epochs to 5, 10, or even 20. However, after a certain period of training time, the network loss will cease to decrease with increased training time. To sidestep this issue, as training time increases, you will introduce a learning rate schedule, which decreases learning rate over time. To understand why this works, see Distill’s visualization at “Why Momentum Really Works”.
Amend your main function with the following two lines, defining a scheduler and invoking scheduler.step. Furthermore, change the number of epochs to 12:
def main():
    net = Net().float()
    criterion = nn.CrossEntropyLoss()
    optimizer = optim.SGD(net.parameters(), lr=0.01, momentum=0.9)
    scheduler = optim.lr_scheduler.StepLR(optimizer, step_size=10, gamma=0.1)

    trainloader, _ = get_train_test_loaders()
    for epoch in range(12):  # loop over the dataset multiple times
        train(net, criterion, optimizer, trainloader, epoch)
        scheduler.step()
    torch.save(net.state_dict(), "checkpoint.pth")
Check that your file matches the step 3 file in this repository. Training will run for around 5 minutes. Your output will resemble the following:
Output[0,     0] loss: 3.208171
[0,   100] loss: 3.211070
[0,   200] loss: 3.192235
[0,   300] loss: 2.943867
[0,   400] loss: 2.569440
[0,   500] loss: 2.243283
[0,   600] loss: 1.986425
[0,   700] loss: 1.768090
[0,   800] loss: 1.587308
...
[11,     0] loss: 0.000302
[11,   100] loss: 0.007548
[11,   200] loss: 0.009005
[11,   300] loss: 0.008193
[11,   400] loss: 0.007694
[11,   500] loss: 0.008509
[11,   600] loss: 0.008039
[11,   700] loss: 0.007524
[11,   800] loss: 0.007608
The final loss obtained is 0.007608, which is 3 orders of magnitude smaller than the starting loss 3.20. This concludes the second step of our workflow, where we set up and train the neural network. With that said, as small as this loss value is, it has little meaning. To put the model’s performance in perspective, we will compute its accuracy—the percentage of images the model correctly classified.
Step 4 — Evaluating the Sign Language Classifier
You will now evaluate your sign language classifier by computing its accuracy on the validation set, a set of images the model did not see during training. This will provide a better sense of model performance than the final loss value did. Furthermore, you will add utilities to save our trained model at the end of training and load our pre-trained model when performing inference.
Create a new file, called step_4_evaluate.py.
- nano step_4_evaluate.py
Import the necessary utilities:
from torch.utils.data import Dataset
from torch.autograd import Variable
import torch.nn as nn
import torch.nn.functional as F
import torch.optim as optim
import torch
import numpy as np

import onnx
import onnxruntime as ort

from step_2_dataset import get_train_test_loaders
from step_3_train import Net
Next, define a utility to evaluate the neural network’s performance. The following function compares the neural network’s predicted letter to the true letter, for a single image:
def evaluate(outputs: Variable, labels: Variable) -> float:
    """Evaluate neural network outputs against non-one-hotted labels."""
    Y = labels.numpy()
    Yhat = np.argmax(outputs, axis=1)
    return float(np.sum(Yhat == Y))
outputs is a list of class probabilities for each sample. For example, outputs for a single sample may be [0.1, 0.3, 0.4, 0.2]. labels is a list of label classes. For example, the label class may be 3.
Y = ... converts the labels into a NumPy array. Next, Yhat = np.argmax(...) converts the outputs class probabilities into predicted classes. For example, the list of class probabilities [0.1, 0.3, 0.4, 0.2] would yield the predicted class 2, because the index 2 value of 0.4 is the largest value.
Since both Y and Yhat are now classes, you can compare them. Yhat == Y checks if the predicted class matches the label class, and np.sum(...) is a trick that computes the number of truth-y values. In other words, np.sum will output the number of samples that were classified correctly.
Add the second function batch_evaluate, which applies the first function evaluate to all images:
def batch_evaluate(
        net: Net,
        dataloader: torch.utils.data.DataLoader) -> float:
    """Evaluate neural network in batches, if dataset is too large."""
    score = n = 0.0
    for batch in dataloader:
        n += len(batch['image'])
        outputs = net(batch['image'])
        if isinstance(outputs, torch.Tensor):
            outputs = outputs.detach().numpy()
        score += evaluate(outputs, batch['label'][:, 0])
    return score / n
batch is a group of images stored as a single tensor. First, you increment the total number of images you’re evaluating (n) by the number of images in this batch. Next, you run inference on the neural network with this batch of images, outputs = net(...). The type check if isinstance(...) converts the outputs in a NumPy array if needed. Finally, you use evaluate to compute the number of correctly-classified samples. At the conclusion of the function, you compute the percent of samples you correctly classified, score / n.
Finally, add the following script to leverage the preceding utilities:
def validate():
    trainloader, testloader = get_train_test_loaders()
    net = Net().float()

    pretrained_model = torch.load("checkpoint.pth")
    net.load_state_dict(pretrained_model)

    print('=' * 10, 'PyTorch', '=' * 10)
    train_acc = batch_evaluate(net, trainloader) * 100.
    print('Training accuracy: %.1f' % train_acc)
    test_acc = batch_evaluate(net, testloader) * 100.
    print('Validation accuracy: %.1f' % test_acc)


if __name__ == '__main__':
    validate()
This loads a pretrained neural network and evaluates its performance on the provided sign language dataset. Specifically, the script here outputs accuracy on the images you used for training and a separate set of images you put aside for testing purposes, called the validation set.
You will next export the PyTorch model to an ONNX binary. This binary file can then be used in production to run inference with your model. Most importantly, the code running this binary does not need a copy of the original network definition. At the end of the validate function, add the following:
    trainloader, testloader = get_train_test_loaders(1)

    # export to onnx
    fname = "signlanguage.onnx"
    dummy = torch.randn(1, 1, 28, 28)
    torch.onnx.export(net, dummy, fname, input_names=['input'])

    # check exported model
    model = onnx.load(fname)
    onnx.checker.check_model(model)  # check model is well-formed

    # create runnable session with exported model
    ort_session = ort.InferenceSession(fname)
    net = lambda inp: ort_session.run(None, {'input': inp.data.numpy()})[0]

    print('=' * 10, 'ONNX', '=' * 10)
    train_acc = batch_evaluate(net, trainloader) * 100.
    print('Training accuracy: %.1f' % train_acc)
    test_acc = batch_evaluate(net, testloader) * 100.
    print('Validation accuracy: %.1f' % test_acc)
This exports the ONNX model, checks the exported model, and then runs inference with the exported model. Double-check that your file matches the step 4 file in this repository:
from torch.utils.data import Dataset
from torch.autograd import Variable
import torch.nn as nn
import torch.nn.functional as F
import torch.optim as optim
import torch
import numpy as np

import onnx
import onnxruntime as ort

from step_2_dataset import get_train_test_loaders
from step_3_train import Net


def evaluate(outputs: Variable, labels: Variable) -> float:
    """Evaluate neural network outputs against non-one-hotted labels."""
    Y = labels.numpy()
    Yhat = np.argmax(outputs, axis=1)
    return float(np.sum(Yhat == Y))


def batch_evaluate(
        net: Net,
        dataloader: torch.utils.data.DataLoader) -> float:
    """Evaluate neural network in batches, if dataset is too large."""
    score = n = 0.0
    for batch in dataloader:
        n += len(batch['image'])
        outputs = net(batch['image'])
        if isinstance(outputs, torch.Tensor):
            outputs = outputs.detach().numpy()
        score += evaluate(outputs, batch['label'][:, 0])
    return score / n


def validate():
    trainloader, testloader = get_train_test_loaders()
    net = Net().float().eval()

    pretrained_model = torch.load("checkpoint.pth")
    net.load_state_dict(pretrained_model)

    print('=' * 10, 'PyTorch', '=' * 10)
    train_acc = batch_evaluate(net, trainloader) * 100.
    print('Training accuracy: %.1f' % train_acc)
    test_acc = batch_evaluate(net, testloader) * 100.
    print('Validation accuracy: %.1f' % test_acc)

    trainloader, testloader = get_train_test_loaders(1)

    # export to onnx
    fname = "signlanguage.onnx"
    dummy = torch.randn(1, 1, 28, 28)
    torch.onnx.export(net, dummy, fname, input_names=['input'])

    # check exported model
    model = onnx.load(fname)
    onnx.checker.check_model(model)  # check model is well-formed

    # create runnable session with exported model
    ort_session = ort.InferenceSession(fname)
    net = lambda inp: ort_session.run(None, {'input': inp.data.numpy()})[0]

    print('=' * 10, 'ONNX', '=' * 10)
    train_acc = batch_evaluate(net, trainloader) * 100.
    print('Training accuracy: %.1f' % train_acc)
    test_acc = batch_evaluate(net, testloader) * 100.
    print('Validation accuracy: %.1f' % test_acc)


if __name__ == '__main__':
    validate()
To use and evaluate the checkpoint from the last step, run the following:
- python step_4_evaluate.py
This will yield output similar to the following, affirming that your exported model not only works, but also agrees with your original PyTorch model:
Output========== PyTorch ==========
Training accuracy: 99.9
Validation accuracy: 97.4
========== ONNX ==========
Training accuracy: 99.9
Validation accuracy: 97.4
Your neural network attains a train accuracy of 99.9% and a 97.4% validation accuracy. This gap between train and validation accuracy indicates your model is overfitting. This means that instead of learning generalizable patterns, your model has memorized the training data. To understand the implications and causes of overfitting, see Understanding Bias-Variance Tradeoffs.
At this point, we have completed a sign language classifier. In essence, our model can correctly disambiguate between signs correctly almost all the time. This is a reasonably good model, so we move on to the final stage of our application. We will use this sign language classifier in a real-time webcam application.
Step 5 — Linking the Camera Feed
Your next objective is to link the computer’s camera to your sign language classifier. You will collect camera input, classify the displayed sign language, and then report the classified sign back to the user.
Now create a Python script for the face detector. Create the file step_6_camera.py using nano or your favorite text editor:
- nano step_5_camera.py
Add the following code into the file:
"""Test for sign language classification"""
import cv2
import numpy as np
import onnxruntime as ort

def main():
    pass

if __name__ == '__main__':
    main()
This code imports OpenCV, which contains your image utilities, and the ONNX runtime, which is all you need to run inference with your model. The rest of the code is typical Python program boilerplate.
Now replace pass in the main function with the following code, which initializes a sign language classifier using the parameters you trained previously. Additionally add a mapping from indices to letters and image statistics:
def main():
    # constants
    index_to_letter = list('ABCDEFGHIKLMNOPQRSTUVWXY')
    mean = 0.485 * 255.
    std = 0.229 * 255.

    # create runnable session with exported model
    ort_session = ort.InferenceSession("signlanguage.onnx")
You will use elements of this test script from the official OpenCV documentation. Specifically, you will update the body of the main function. Start by initializing a VideoCapture object that is set to capture live feed from your computer’s camera. Place this at the end of the main function:
def main():
    ...
    # create runnable session with exported model
    ort_session = ort.InferenceSession("signlanguage.onnx")

    cap = cv2.VideoCapture(0)
Then add a while loop, which reads from the camera at every timestep:
def main():
    ...
    cap = cv2.VideoCapture(0)
    while True:
        # Capture frame-by-frame
        ret, frame = cap.read()
Write a utility function that takes the center crop for the camera frame. Place this function before main:
def center_crop(frame):
    h, w, _ = frame.shape
    start = abs(h - w) // 2
    if h > w:
        frame = frame[start: start + w]
    else:
        frame = frame[:, start: start + h]
    return frame
Next, take the center crop for the camera frame, convert to grayscale, normalize, and resize to 28x28. Place this inside the while loop within the main function:
def main():
    ...
    while True:
        # Capture frame-by-frame
        ret, frame = cap.read()

        # preprocess data
        frame = center_crop(frame)
        frame = cv2.cvtColor(frame, cv2.COLOR_RGB2GRAY)
        x = cv2.resize(frame, (28, 28))
        x = (frame - mean) / std
Still within the while loop, run inference with the ONNX runtime. Convert the outputs to a class index, then to a letter:
        ...
        x = (frame - mean) / std

        x = x.reshape(1, 1, 28, 28).astype(np.float32)
        y = ort_session.run(None, {'input': x})[0]

        index = np.argmax(y, axis=1)
        letter = index_to_letter[int(index)]
Display the predicted letter inside the frame, and display the frame back to the user:
        ...
        letter = index_to_letter[int(index)]

        cv2.putText(frame, letter, (100, 100), cv2.FONT_HERSHEY_SIMPLEX, 2.0, (0, 255, 0), thickness=2)
        cv2.imshow("Sign Language Translator", frame)
At the end of the while loop, add this code to check if the user hits the q character and, if so, quit the application. This line halts the program for 1 millisecond. Add the following:
        ...
        cv2.imshow("Sign Language Translator", frame)

        if cv2.waitKey(1) & 0xFF == ord('q'):
            break
Finally, release the capture and close all windows. Place this outside of the while loop to end the main function.
...

    while True:
        ...
        if cv2.waitKey(1) & 0xFF == ord('q'):
            break


    cap.release()
    cv2.destroyAllWindows()
Double-check your file matches the following or this repository:
import cv2
import numpy as np
import onnxruntime as ort


def center_crop(frame):
    h, w, _ = frame.shape
    start = abs(h - w) // 2
    if h > w:
        return frame[start: start + w]
    return frame[:, start: start + h]


def main():
    # constants
    index_to_letter = list('ABCDEFGHIKLMNOPQRSTUVWXY')
    mean = 0.485 * 255.
    std = 0.229 * 255.

    # create runnable session with exported model
    ort_session = ort.InferenceSession("signlanguage.onnx")

    cap = cv2.VideoCapture(0)
    while True:
        # Capture frame-by-frame
        ret, frame = cap.read()

        # preprocess data
        frame = center_crop(frame)
        frame = cv2.cvtColor(frame, cv2.COLOR_RGB2GRAY)
        x = cv2.resize(frame, (28, 28))
        x = (x - mean) / std

        x = x.reshape(1, 1, 28, 28).astype(np.float32)
        y = ort_session.run(None, {'input': x})[0]

        index = np.argmax(y, axis=1)
        letter = index_to_letter[int(index)]

        cv2.putText(frame, letter, (100, 100), cv2.FONT_HERSHEY_SIMPLEX, 2.0, (0, 255, 0), thickness=2)
        cv2.imshow("Sign Language Translator", frame)

        if cv2.waitKey(1) & 0xFF == ord('q'):
            break

    cap.release()
    cv2.destroyAllWindows()

if __name__ == '__main__':
    main()
Exit your file and run the script.
- python step_5_camera.py
Once the script is run, a window will pop up with your live webcam feed. The predicted sign language letter will be shown in the top left. Hold up your hand and make your favorite sign to see your classifier in action. Here are some sample results showing the letter L and D.
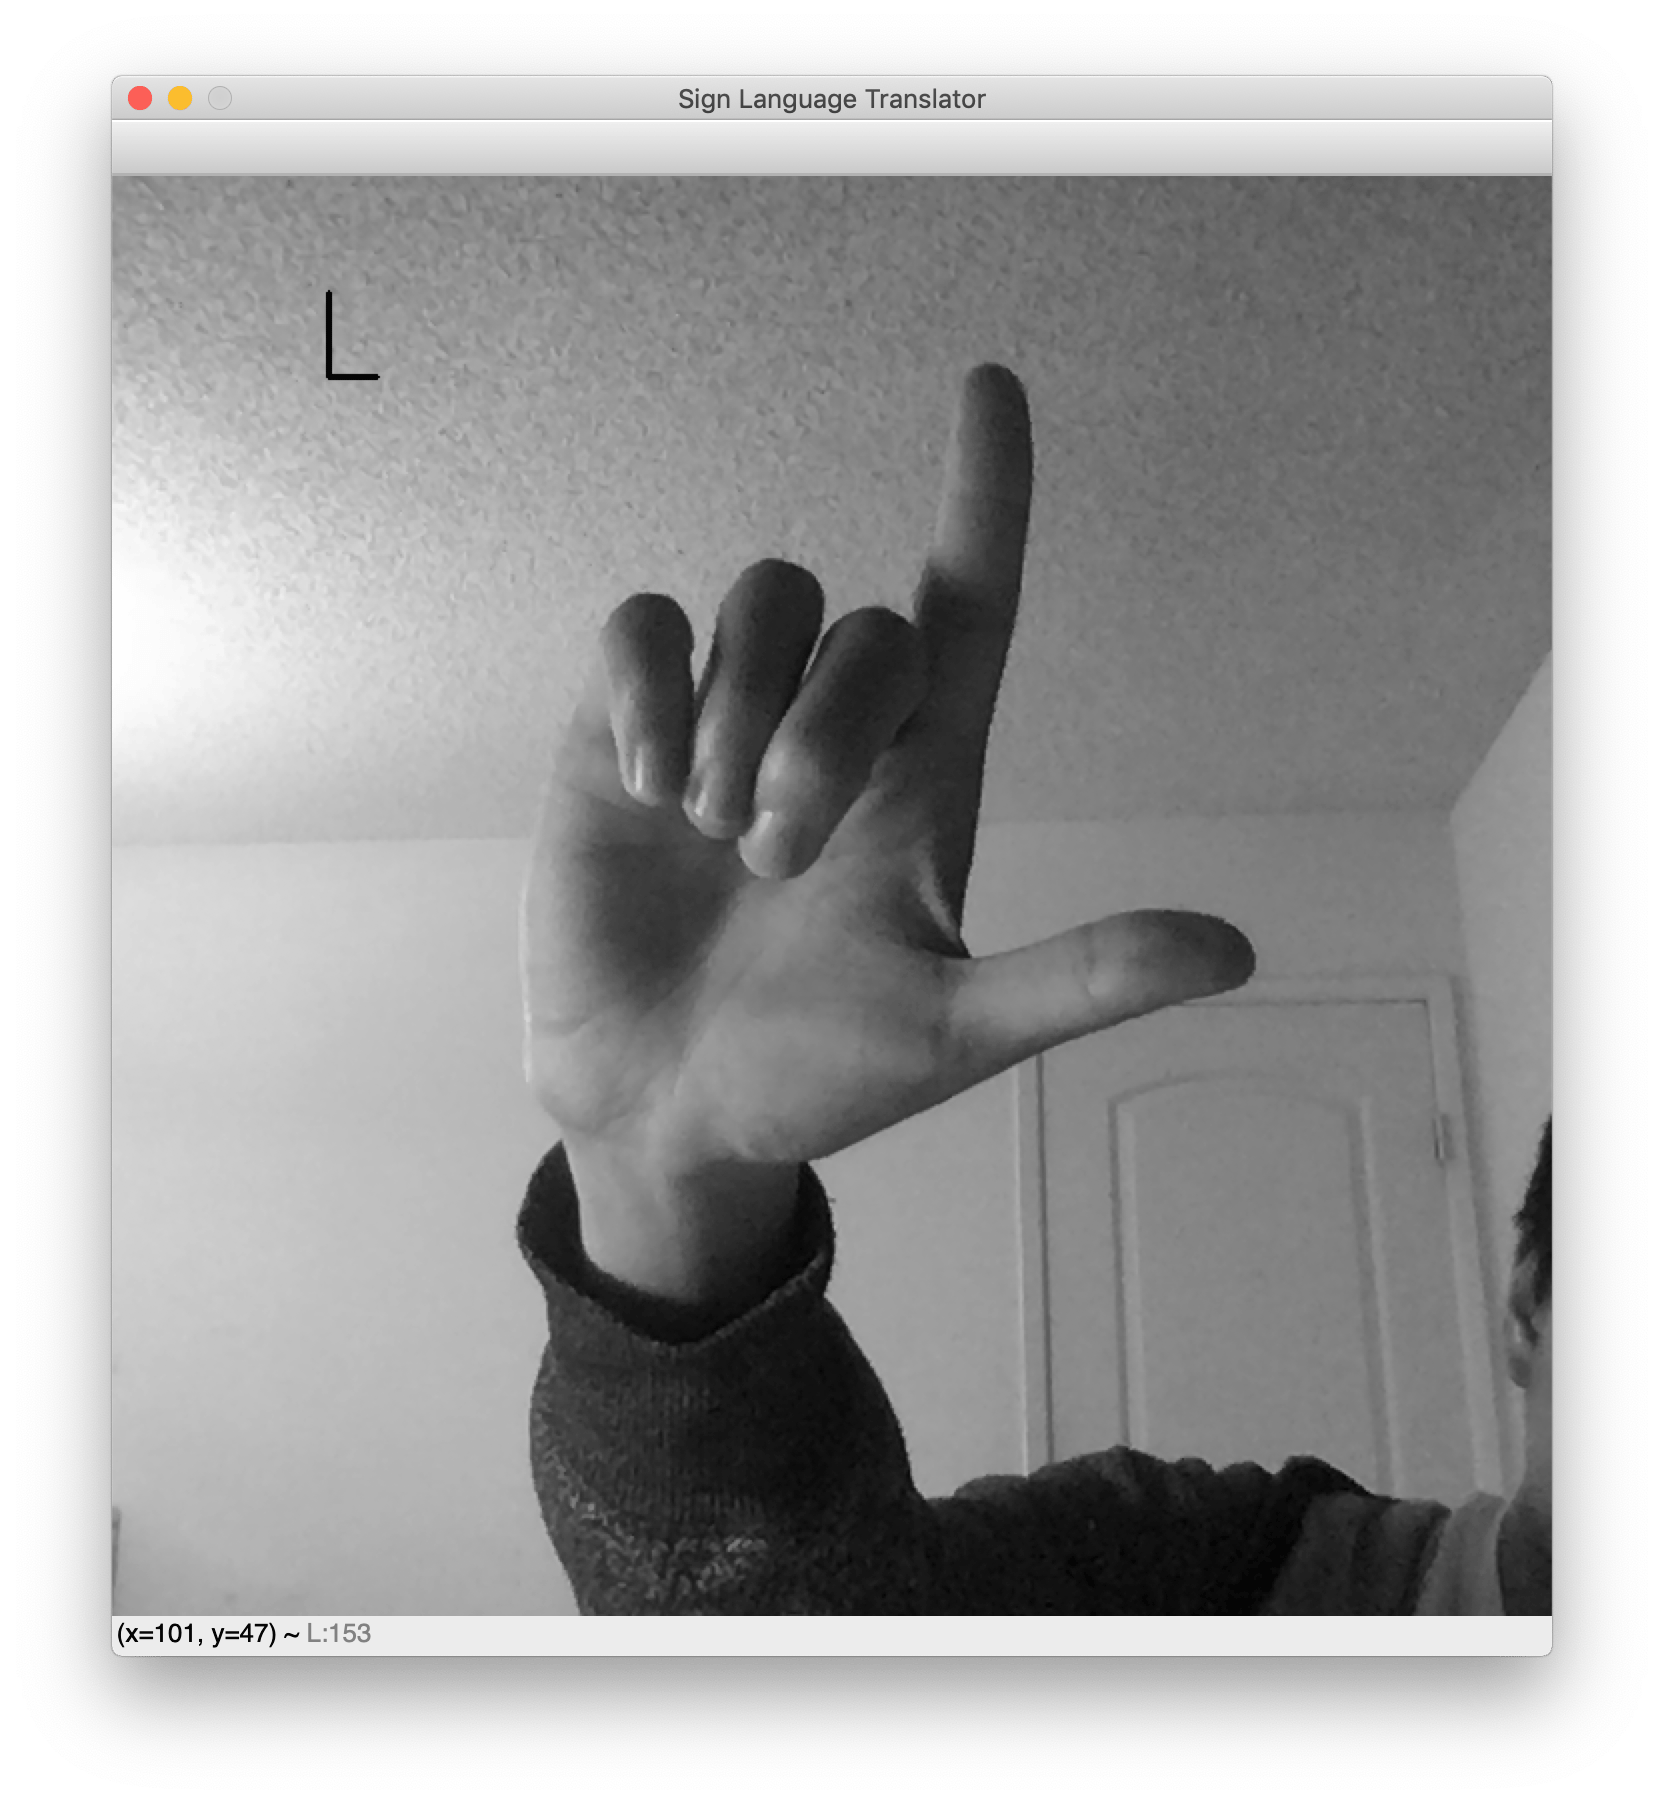
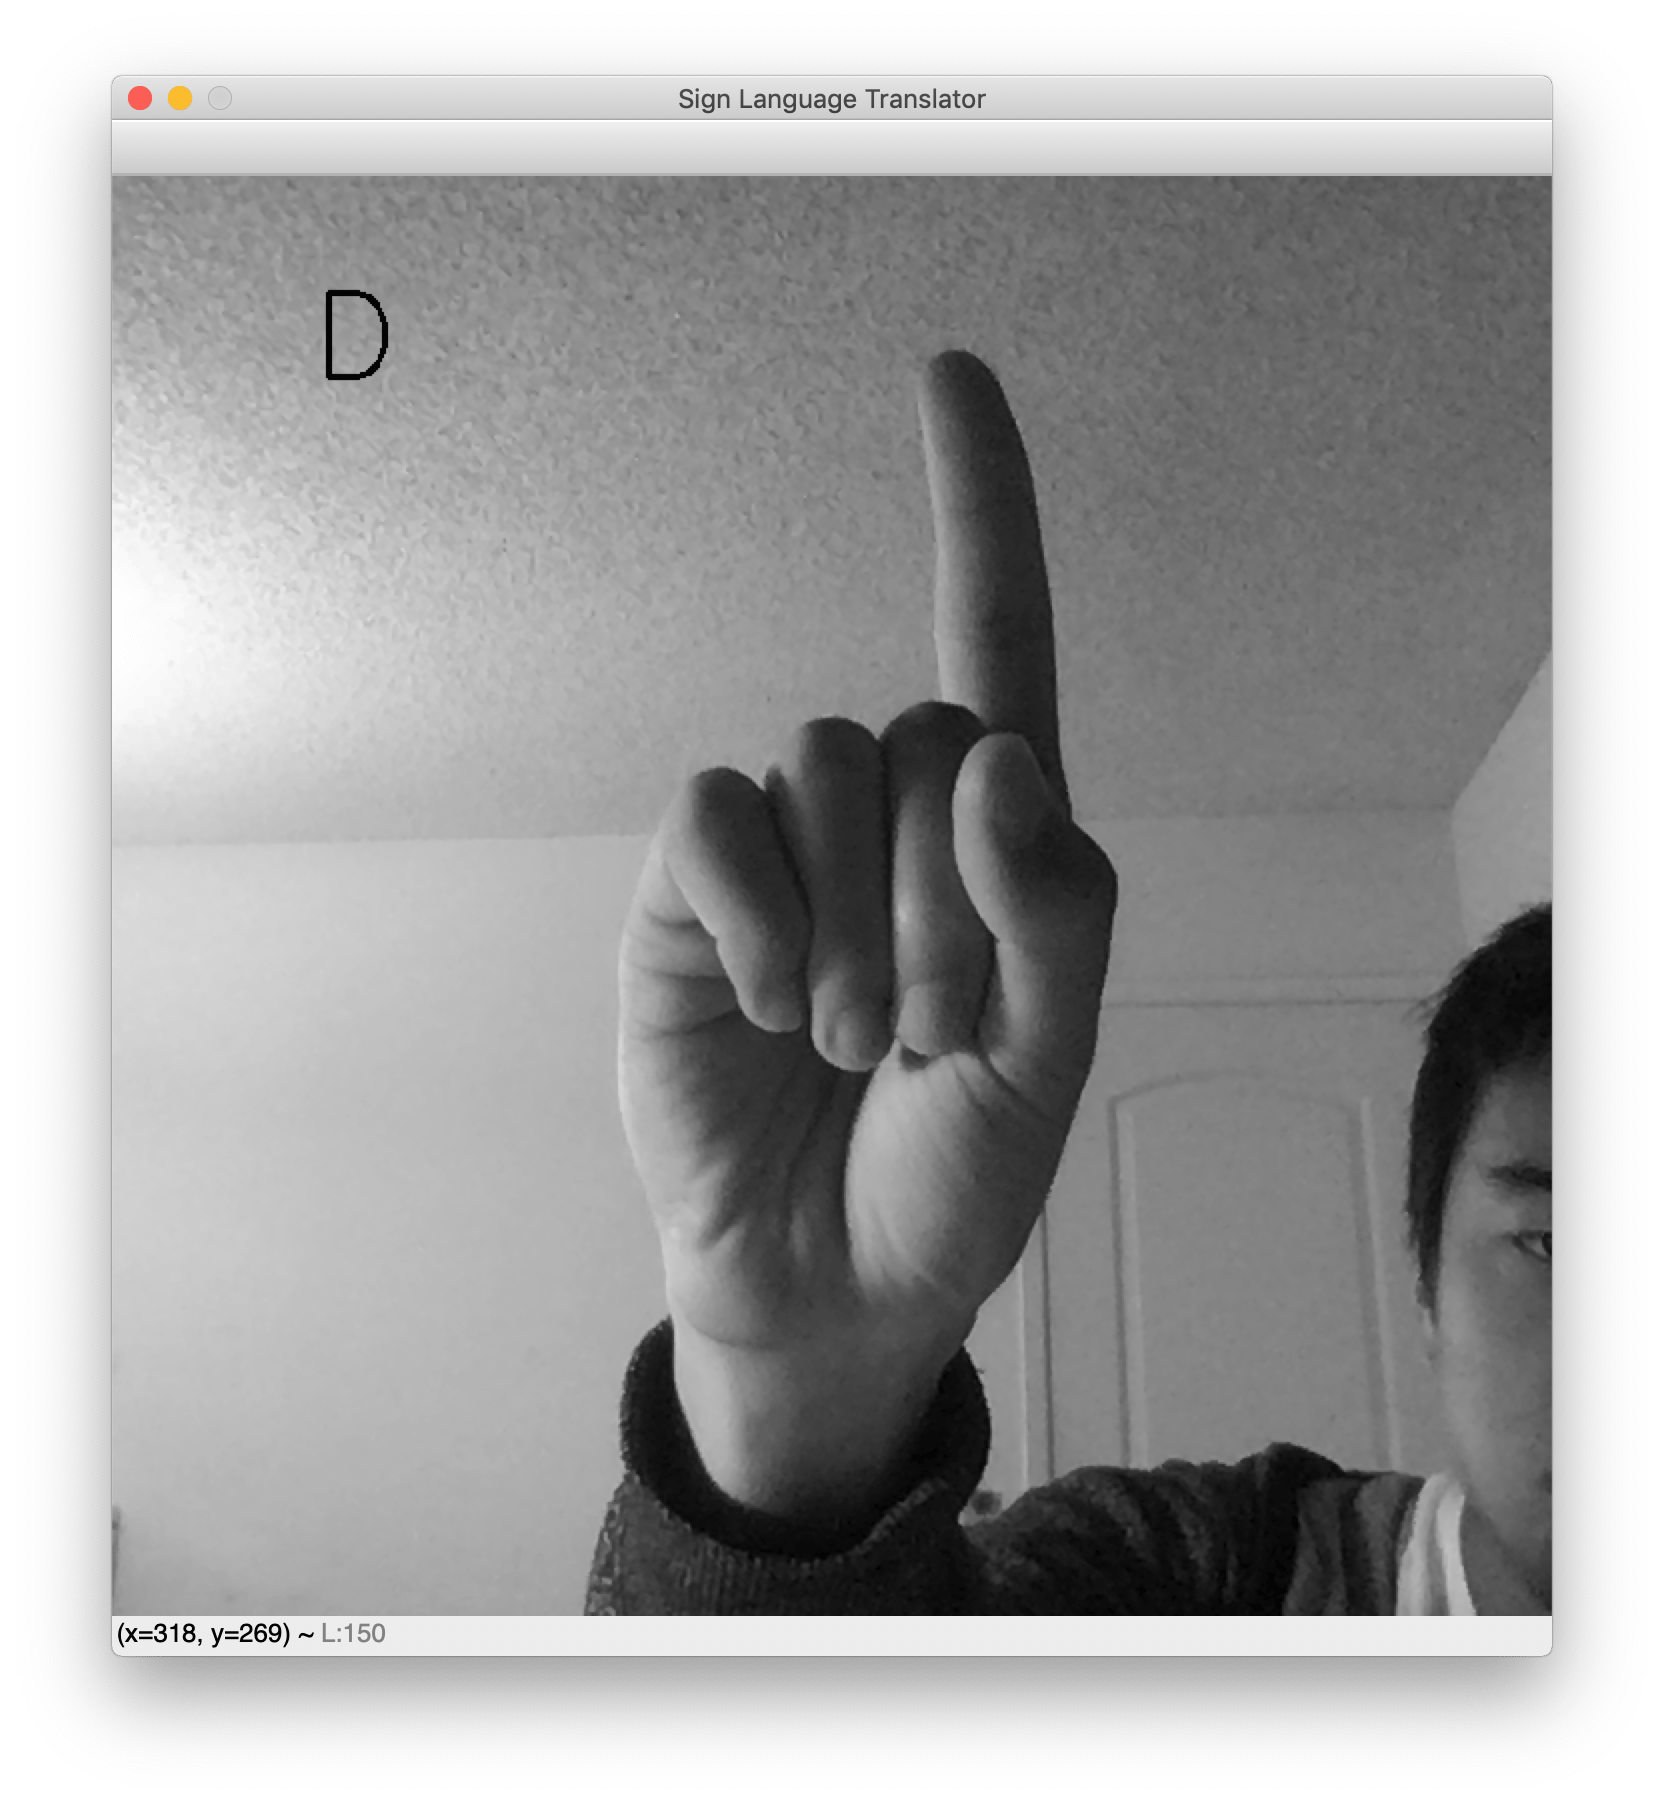
While testing, note that the background needs to be fairly clear for this translator to work. This is an unfortunate consequence of the dataset’s cleanliness. Had the dataset included images of hand signs with miscellaneous backgrounds, the network would be robust to noisy backgrounds. However, the dataset features blank backgrounds and nicely centered hands. As a result, this webcam translator works best when your hand is likewise centered and placed against a blank background.
This concludes the sign language translator application.
Conclusion
In this tutorial, you built an American Sign Language translator using computer vision and a machine learning model. In particular, you saw new aspects of training a machine learning model—specifically, data augmentation for model robustness, learning rate schedules for lower loss, and exporting AI models using ONNX for production use. This then culminated in a real-time computer vision application, which translates sign language into letters using a pipeline you built. It’s worth noting that combatting the brittleness of the final classifier can be tackled with any or all of the following methods. For further exploration try the following topics to in improve your application:
- Generalization: This isn’t a sub-topic within computer vision, rather, it’s a constant problem throughout all of machine learning. See Understanding Bias-Variance Tradeoffs.
- Domain Adaptation: Say your model is trained in domain A (for example, sunny environments). Can you adapt the model to domain B (for example, cloudy environments) quickly?
- Adversarial Examples: Say an adversary is designing images intentionally to fool your model. How can you design such images? How can you combat such images?
Thanks for learning with the DigitalOcean Community. Check out our offerings for compute, storage, networking, and managed databases.
About the author(s)
I'm a diglot by definition, lactose intolerant by birth but an ice-cream lover at heart. Call me wabbly, witling, whatever you will, but I go by Alvin
Former Senior Technical Editor at DigitalOcean, with a strong focus on DevOps and System Administration content. Areas of expertise include Terraform, PyTorch, Python, and Django.
Still looking for an answer?
This textbox defaults to using Markdown to format your answer.
You can type !ref in this text area to quickly search our full set of tutorials, documentation & marketplace offerings and insert the link!
I think this will be of great help if integrated with soon-to-come AR/VR devices. If such neural tech was to be used in AR headset, it would solve the typing issue we got nowadays with these. I foresee a future where to “type” a text using a headset device, we’ll have to use sign language - or other gestures.
 This work is licensed under a Creative Commons Attribution-NonCommercial- ShareAlike 4.0 International License.
Become a contributor for community
Get paid to write technical tutorials and select a tech-focused charity to receive a matching donation.

DigitalOcean Documentation
Full documentation for every DigitalOcean product.

Resources for startups and AI-native businesses
The Wave has everything you need to know about building a business, from raising funding to marketing your product.
The developer cloud
Scale up as you grow — whether you're running one virtual machine or ten thousand.

Start building today
From GPU-powered inference and Kubernetes to managed databases and storage, get everything you need to build, scale, and deploy intelligent applications.
