By harshil1712 and Rachel Lee

The author selected the Mozilla Foundation to receive a donation as part of the Write for DOnations program.
Introduction
A blog is a medium to share your knowledge, experience, or news with others. Ghost is an open-source platform that allows you to build and run a modern blog or publication.
While Ghost provides templates you can use for your frontend, there is limited flexibility for designing and adding custom functionalities. Next.js is a React framework that provides solutions to problems like production optimization, performance, and SEO. Next.js provides an advantage over developer experience for building applications with React. You can use Next.js with Ghost to build a statically generated blog with better performance and SEO. You can also customize your design and add the functionalities you want.
In this tutorial, you’ll use Ghost to manage articles and Next.js to build the frontend of your blog. This approach allows you to be in control of your blog’s content, design, and functionality. You’ll self-host Ghost on an Ubuntu server, which you can deploy using a Ghost One-Click Droplet on DigitalOcean Marketplace.
Prerequisites
To complete this tutorial, you will need:
- A DigitalOcean account. If you do not have one, sign up for a new account.
- Ghost installed on an Ubuntu server with at least 1 GB of memory. You can deploy a Ghost One-Click Droplet on DigitalOcean or follow the Ghost documentation for manual setup.
- A registered domain name to point to your Ghost blog. You can find instructions on setting your domain on DigitalOcean nameserver in the How To Point to DigitalOcean Nameservers From Common Domain Registrars guide.
- A local development environment for Node.js. Follow How to Install Node.js and Create a Local Development Environment.
- A Next.js project on your local machine. You can create a Next.js project through the library’s Setup step in the Getting Started guide. Use
create-next-appand accept the configuration defaults.
Note: You can create the Next.js project with either TypeScript or JavaScript. This tutorial uses JavaScript, but either will work.
- Tailwind installed on your local machine and configured for Next.js. After installing Next.js, follow the instructions in the Install Tailwind CSS with Next.js guide.
- A text editor like Visual Studio Code. This tutorial uses
nano. - Familiarity with React, which you can gain through the How To Code in React.js series.
Step 1 — Publishing Posts on Ghost
In this step, you will create an account on Ghost and publish some sample articles so that you have content to render in future steps.
With Ghost installed and set up, you will need an admin account to manage your blog. Navigate to YOUR_DOMAIN/ghost, where YOUR_DOMAIN is the URL you entered during the Ghost installation process.
You’ll see a Welcome to Ghost page, where you’ll be invited to create an account. Enter a title for your site, your name, email address, and a password. Then press Create account & start publishing.
In the left sidebar, under What do you want to do first?, select the Write your first post option. Enter a title and the body for your blog post and click Publish on the top right corner. Press Continue, final review and then click the Publish post, right now button.
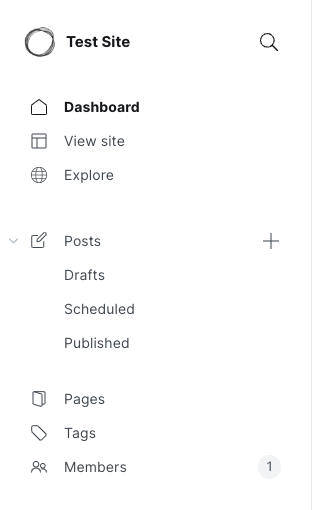
Navigate to YOUR_DOMAIN/ghost to view your dashboard. In the left sidebar, select View site to see the live preview of your site:
Later in this tutorial, you will render several blog posts on your website. From the dashboard, select Posts in the left sidebar to create two more blog posts. Give them unique names so you can recognize them later.
In this step, you set up your admin page on Ghost and published blog posts. Your blog is currently using the default template provided by Ghost. In the next step, you’ll create a Next.js project that will give you more design flexibility. You will use Ghost as a content management system (CMS) and Next.js to build the frontend.
Step 2 — Creating a Next.js Project
You now have Ghost ready for your blog. In this step, you will create the frontend for your blog using Next.js and add style to it using Tailwind CSS.
Open the Next.js project you created in your preferred code editor. Open the pages/index.js file:
- nano pages/index.js
In the file, delete the existing code and add the following to import the Head component from next/head and create a React component:
import Head from 'next/head';

export default function Home() {
	return (
	);
}
The Head component allows you to add the tags such as <title> and <meta> that you use within HTML.
To build upon the Head component, add a return statement that contains a <div> tag. Within the <div> tag, add a <Head> tag that takes a <title> and a <meta> tag:
...
return (
	<div>
	     <Head>
	            <title>My First Blog</title>
	            <meta name="description" content="My personal blog created with Next.js and Ghost" />
            </Head>
	</div>
);
...
The <title> tag sets the title of your webpage as My First Blog. The <meta> tag has the name attribute set as "description", and the content attribute set as "My personal blog created with Next.js and Ghost". This title and description will get displayed in the preview of your website.
Now that you have set the title and the description, you’ll display a list of articles. This code snippet uses mock data for the time being. You will fetch the blog posts from Ghost in the next section. Below the <Head> tag, add a list of articles using <li> tags:
...
<div>
	<Head>
	...
	</Head>
	<main className="container mx-auto py-10">
		<h1 className="text-center text-3xl">My Personal Blog</h1>
		<div className="flex justify-center mt-10 ">
			<ul className="text-xl">
				<li>How to build and deploy your blog on DigitalOcean</li>
				<li>How to style a Next.js website</li>
				<li>How to cross-post your articles automatically</li>
			</ul>
		</div>
	</main>
</div>
...
You’ve now added a <main> tag that contains a header and a <div> tag. The <div> tag contains an unordered list with several mock article titles. The <main>, <h1>, <div>, and the <ul> tags each include the className attribute. These contain the Tailwind style classes.
The index.js file should now look as follows:
import Head from 'next/head';

export default function Home() {
	return (
		<div>
			<Head>
				<title>My First Blogp</title>
				<meta
					name="description"
					content="My personal blog created with Next.js and Ghost"
				/>
			</Head>
			<main className="container mx-auto py-10">
				<h1 className="text-center text-3xl">My Personal Blog</h1>
				<div className="flex justify-center mt-10 ">
					<ul className="text-xl">
						<li>How to build and deploy your blog on DigitalOcean</li>
						<li>How to style a Next.js website</li>
						<li>How to cross-post your articles automatically</li>
					</ul>
				</div>
			</main>
		</div>
	);
}
Save and close the file.
Start the web server locally. If you are using Yarn, run the following command:
- yarn dev
If you are using npm, run the following command:
- npm run dev
Navigate to https://localhost:3000 in your browser and you should find a list of blog articles from the mock data. Your homepage will display similar to the following:

In this step, you created your blog’s Home page and added a list of mock articles. In the next step, you will fetch your blog posts from Ghost.
Step 3 — Fetching All Blog Posts from Ghost
In this step, you will fetch the blog posts you created in Ghost and render them on the browser.
To fetch your articles from Ghost, you must first install the JavaScript library for the Ghost Content API. Stop the server using the keyboard shortcut CTRL+C. Run the following command in the terminal to install the library:
If you are using Yarn, run the following command:
- yarn add @tryghost/content-api
If you are using npm, run the following command:
- npm i @tryghost/content-api
With the library successfully installed, you’ll now create a file to store the logic to fetch your blog posts. In the pages directory, create a new folder named utils:
- mkdir utils
Create a new file within that folder named ghost.js:
- nano pages/utils/ghost.js
In the ghost.js file, import the GhostContentAPI module from the Ghost Content API library. Initialize a new object for the GhostContentAPI and store the value in a constant variable api. You will have to pass the values for the host, API Key, and version. The code looks as follows:
import GhostContentAPI from "@tryghost/content-api";

const api = new GhostContentAPI({
	url: `YOUR_URL`,
	key: `YOUR_API_KEY`,
	version: 'v5.0'
});
The value of YOUR_URL is the domain name you configured when you installed Ghost, including the protocol, most likely https://.
To find your Ghost API key, follow these steps:
- Navigate to
YOUR_DOMAIN/ghost(whereYOUR_DOMAINis the URL you configured) and log in with your admin credentials. - Press the gear icon at the bottom of the left sidebar to access the Settings page.
- In the Advanced Category, click Integrations on the left sidebar. The Integrations page appears, showing a list of possible integrations, and custom integrations at the bottom.
- Press + Add custom integration. A pop-up appears asking you to name your integration.
- Enter a name for your integration in the Name field and click Create. This will take you to a page to configure your custom integration.
- Copy the displayed Content API Key (not the Admin API key).
- Press Save to save the custom integration.
In the ghost.js file, replace YOUR_API_KEY with the copied API key.
Now that you’ve initialized GhostContentAPI, you will write an asynchronous function to fetch all the articles from your Ghost installation. This function fetches the blog posts without regard to their tags. Copy and paste the following code into your ghost.js file:
...
export async function getPosts() {
  return await api.posts
    .browse({
        include:"tags",
        limit: "all"
    })
    .catch(err => {
      console.error(err);
    });
}
After the promise is resolved, the getPosts() async function will return the blog posts. It uses the posts.browse() method from GhostContentAPI and takes include and limit parameters. You’ve set the value of include to tags to fetch the tags along with the content. The value of limit is set to all to fetch all the blog posts. If an error occurs, it gets logged on the browser console.
At this point, the api/ghost.js file contains the following code:
import GhostContentAPI from '@tryghost/content-api';

const api = new GhostContentAPI({
	url: `YOUR_URL`,
	key: `YOUR_API_KEY`,
	version: 'v5.0',
});

export async function getPosts() {
	return await api.posts
		.browse({
			include: 'tags',
			limit: 'all',
		})
		.catch((err) => {
			console.error(err);
		});
}
Save and close the file.
To display the list of posts, open your index.js file. Add the following highlighted line to import the getPosts function above the Head import:
import { getPosts } from './utils/ghost';
import Head from 'next/head';

…
You’ll now create an async function (getStaticProps()) that will allow Next.js to pre-render the page at build time. This function is useful when you want to take advantage of static generation.
After the Home component, create the async function getStaticProps() and call the getPosts() method within the function body. Return the value props from the getPosts() method. The code should look as follows:
...
export async function getStaticProps() {
	const posts = await getPosts();
	return { props: { posts } };
}
Save the file.
With your getStaticProps() method now defined, restart the server using npm run dev or yarn dev if using Yarn.
In your browser, the page still shows the static data. The page doesn’t display the data you fetched from Ghost. That is because you are fetching the values but not rendering them.
You’ll make some changes to index.js so that your Home component can consume the values you retrieve from Ghost.
Press CTRL-C to stop the server, then open index.js for editing:
- nano pages/index.js
Make the following highlighted changes to index.js:
export default function Home({posts}) {
	return (
		<div>
			<Head>
				<title>My First Blog</title>
				<meta
					name="description"
					content="My personal blog created with Next.js and Ghost"
				/>
			</Head>
			<main className="container mx-auto py-10">
				<h1 className="text-center text-3xl">My Personal Blog</h1>
				<div className="flex justify-center mt-10 ">
					<ul className="text-xl">
						{posts.map((post) => (
							<li key={post.title}>{post.title}</li>
						))}
					</ul>
				</div>
			</main>
		</div>
	);
}
In this code, first you destructure and pass posts as a parameter to the Home component. Then you replace the <li> tags containing the static content you used for mocking with a function to fetch the blog post titles.
You use the array.map() method to iterate over the posts collection that you retrieved from props to get the title of each post. Finally, you return an <li> tag containing the post’s title.
Save and close the file. Restart the server using npm run dev or yarn dev if using Yarn.
Navigate back to localhost:3000. Now your blog renders the list of articles from Ghost.
The code for your index.js file will match the following:
import { getPosts } from './utils/ghost';
import Head from 'next/head';

export default function Home({ posts }) {
	return (
		<div>
			<Head>
				<title>My First Blog</title>
				<meta
					name="description"
					content="My personal blog created with Next.js and Ghost"
				/>
			</Head>
			<main className="container mx-auto py-10">
				<h1 className="text-center text-3xl">My Personal Blog</h1>
				<div className="flex justify-center mt-10 ">
					<ul className="text-xl">
						{posts.map((post) => (
							<li key={post.title}>{post.title}</li>
						))}
					</ul>
				</div>
			</main>
		</div>
	);
}

export async function getStaticProps() {
	const posts = await getPosts();
	return { props: { posts } };
}
Your homepage will appear similar to the following:
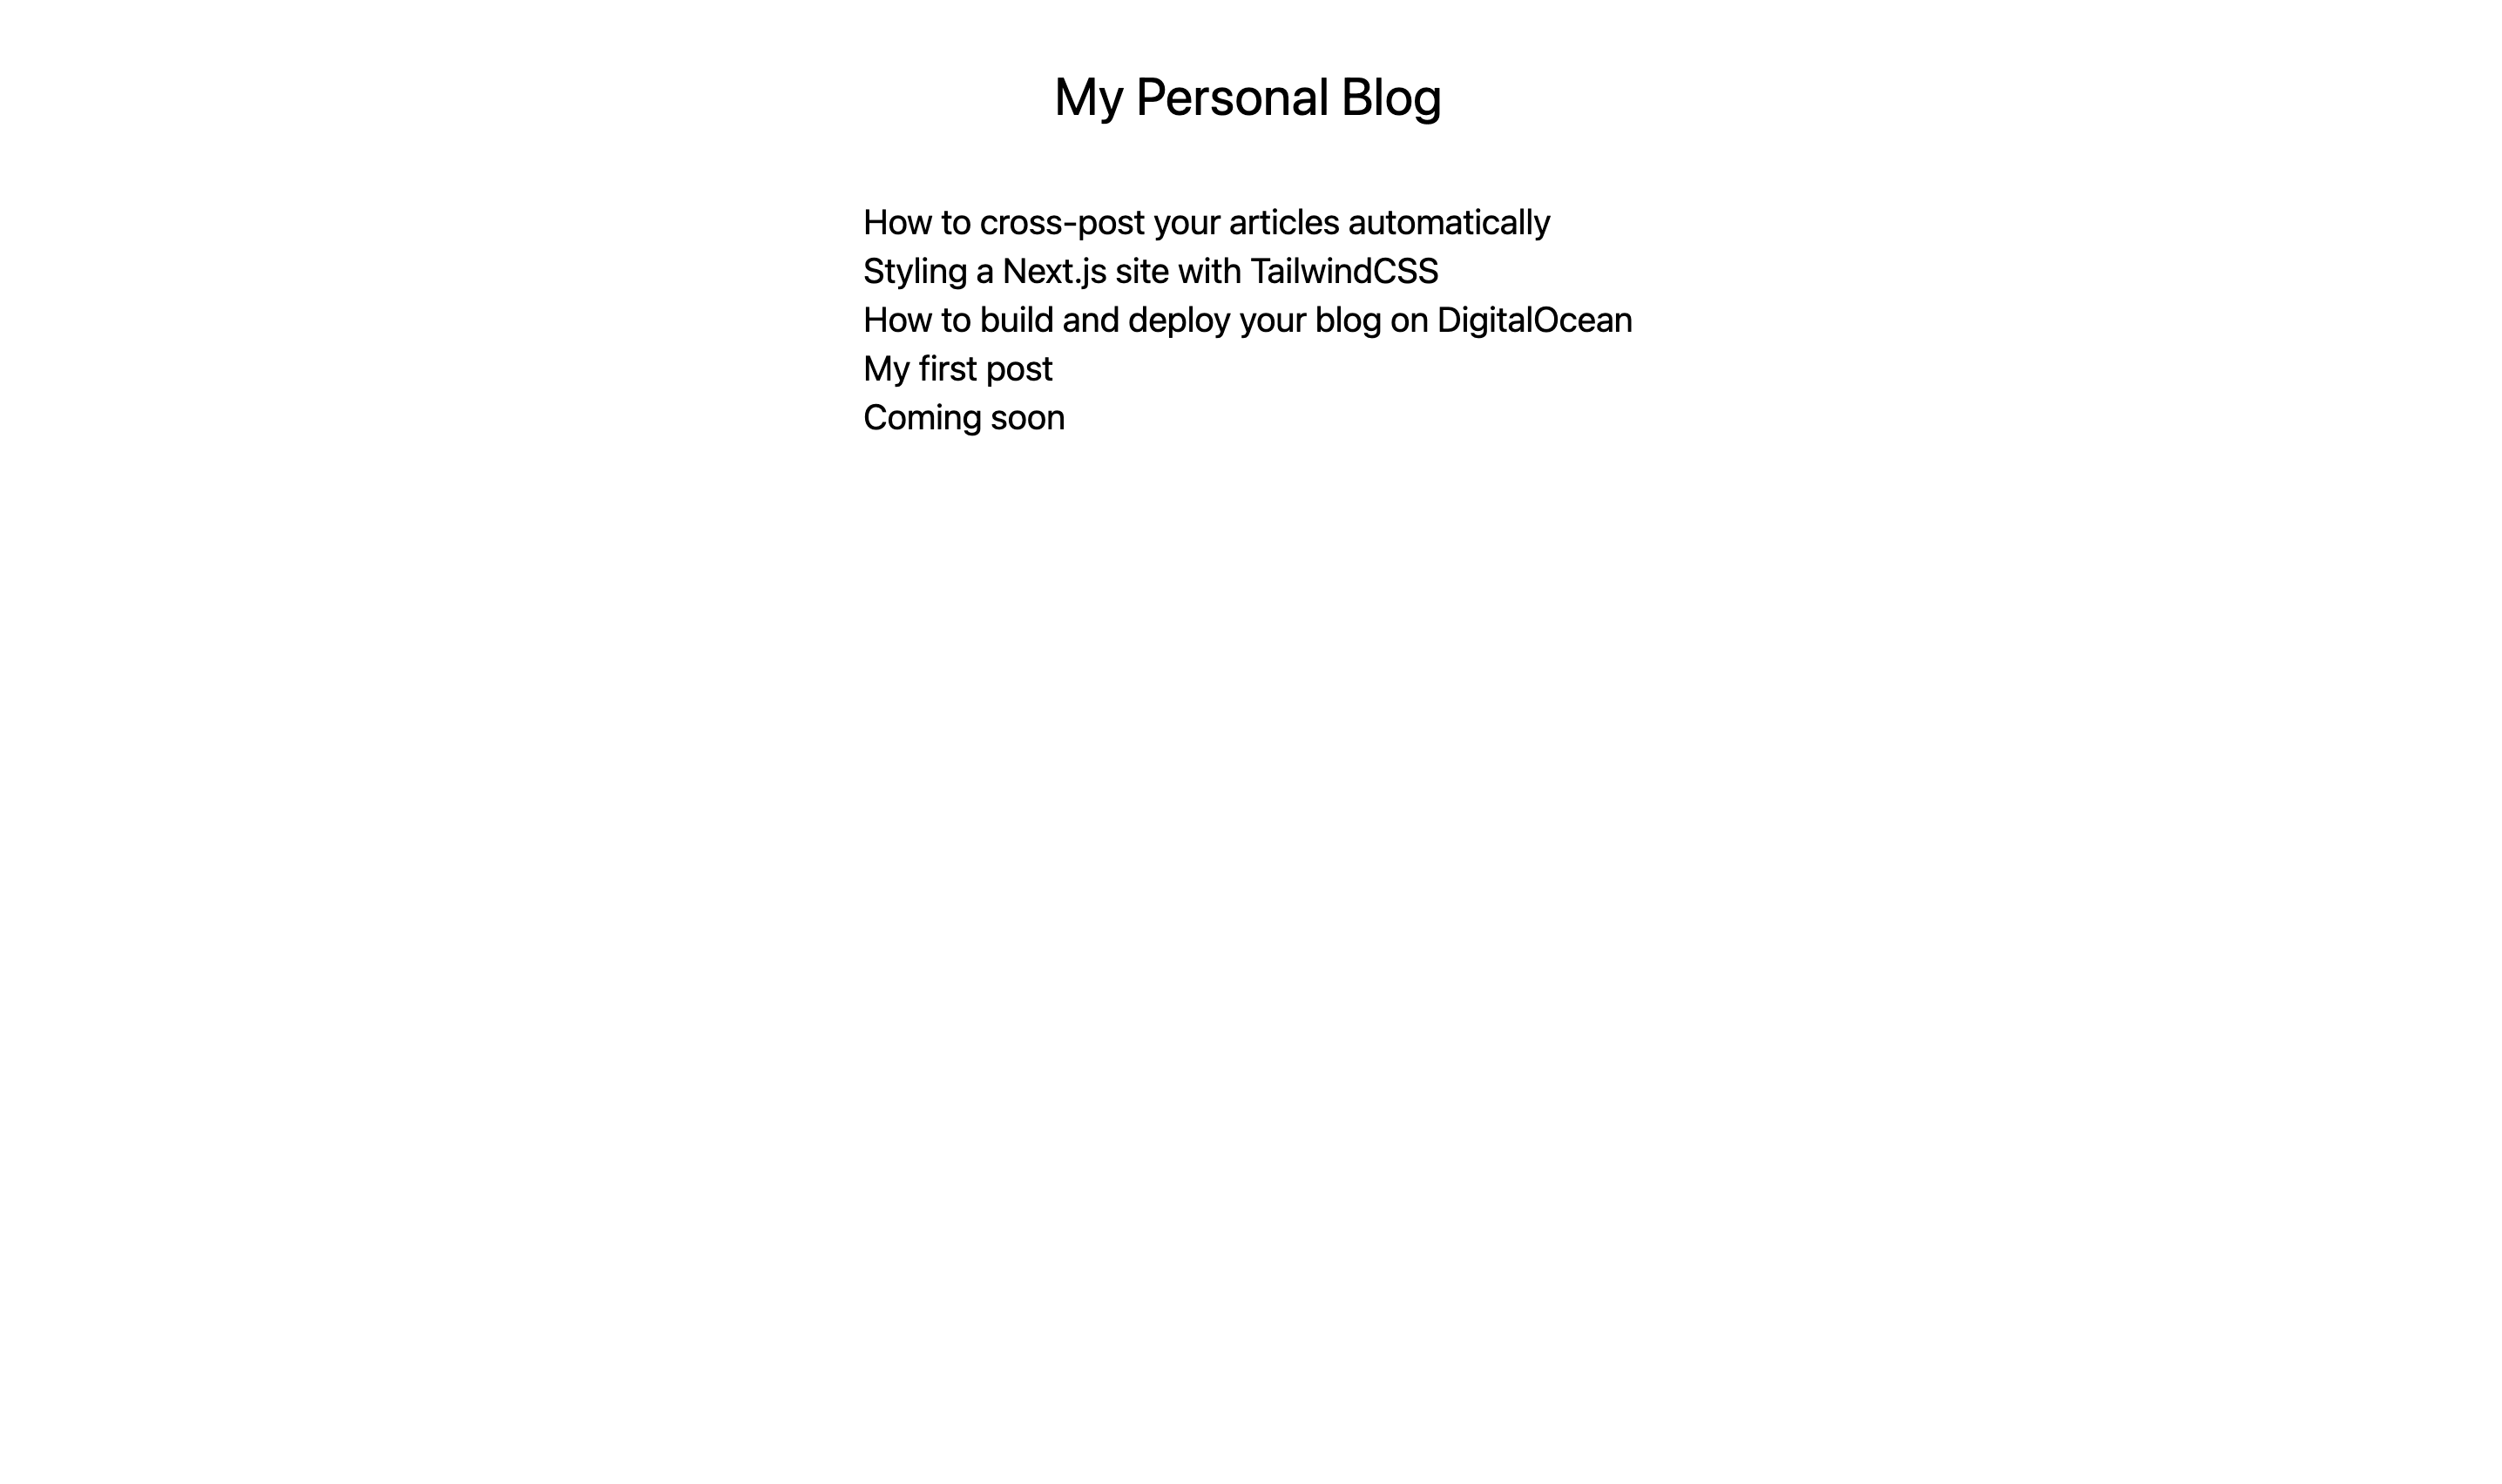
Your blog has now retrieved and displayed the post titles from the CMS. However, it still doesn’t display individual posts. In the next section, you will create dynamic routes and render the content of your posts.
Step 4 — Rendering Each Individual Post
In this step, you will write code to fetch the content of each blog post from Ghost, create dynamic routes, and add the post title as a link on the home page.
In Next.js, you can create dynamic routes that allow you to render pages with the same layout. Dynamic routes help to reduce code redundancy by reusing components. Once you have created a dynamic route, all your posts will use the same file for rendering. You don’t have to create a page for every post.
To create dynamic routes and render individual posts, you need to:
- Write a function to fetch the content of a blog post.
- Create dynamic routes.
- Add blog links to the list of items.
In the ghost.js file, you wrote the function getPosts() to get the list of all your blog posts. You will now write a function getSinglePost() that fetches the content of your post based on a slug.
Ghost automatically generates a slug for your article using the title. For example, if your article is titled “My First Post,” Ghost will generate my-first-post as the slug. This slug helps to identify the article and can be appended to your domain URL to display the content.
The getSinglePost() function will take postSlug as a parameter and return the content of the corresponding blog post.
Stop the server if it’s still running, then open pages/utils/ghost.js for editing.
Below the getPosts() function in your ghost.js file, add and export the async function getSinglePost().
...
export async function getSinglePost(postSlug) {
    return await api.posts
      .read({
        slug: postSlug
      })
      .catch(err => {
        console.error(err);
      });
  }
The getSinglePost() function uses the posts.read() method of the GhostContentAPI and passes the postSlug parameter to the posts.read() method.
The final /utils/ghost.js file contains the following code:
import GhostContentAPI from '@tryghost/content-api';

const api = new GhostContentAPI({
	url: `YOUR_URL`,
	key: `YOUR_API_KEY`,
	version: 'v5.0',
});

export async function getPosts() {
	return await api.posts
		.browse({
			include: 'tags',
			limit: 'all',
		})
		.catch((err) => {
			console.error(err);
		});
}

export async function getSinglePost(postSlug) {
    return await api.posts
      .read({
        slug: postSlug
      })
      .catch(err => {
        console.error(err);
      });
  }
Save and close the file.
In Next.js, you can add brackets to a filename ([param]) to create a dynamic route. For example, /post/[slug].js will create dynamic routes.
Within the pages directory, create a new file called /post/[slug].js:
nano pages/post/\[slug\].js
Note: The nano command shows the brackets escaped with a backslash (\), which is required for bash to create a file with brackets in the name.
The filename [slug].js will be matched by any string of characters after the path /post/. Next.js will create the pages for all your posts during build time.
In your /post/[slug].js file, import both the getPosts() and getSinglePost() functions from the ../utils/ghost.js file.
The /post/[slug].js file also contains the template for the posts. Add the following code to the /post/[slug].js file:
import { getPosts, getSinglePost } from '../utils/ghost';

export default function PostTemplate(props) {
	const { post } = props;
	const { title, html, feature_image } = post;
	return (
		<main className="container mx-auto py-10">
			<h1 className="text-center text-3xl">{title}</h1>
			<article
				className="mt-10 leading-7 text-justify"
				dangerouslySetInnerHTML={{ __html: html }}
			/>
		</main>
	);
}

export const getStaticProps = async ({ params }) => {
	const post = await getSinglePost(params.slug);
	return {
		props: { post },
	};
};
The PostTemplate() function creates a functional component. In the function, you extract the post object from props, and pull the title, html, and feature_image from the post object. The component returns the HTML that gets used to create the pages.
Because the Ghost API returns the blog content in HTML, the <article> tag contains the dangerouslySetInnerHTML attribute with the HTML value extracted from the post object. The dangerouslySetInnerHTML attribute is React’s replacement for using innerHTML in the browser DOM. If the HTML is coming from an untrusted source, you should sanitize the HTML before passing it to the dangerouslySetInnerHTML attribute.
The getStaticProps() async function fetches the blog post’s content corresponding to the slug.
To correctly map the content with the URL, Next.js needs to know the value of the paths (slug in your case). You can do this using the getStaticPaths() function. Similar to the getStaticProps() function, write an async function called getStaticPaths() to return a list of slugs. Add the following function to the end of the [slug].js file:
...
export const getStaticPaths = async () => {
	const allPosts = await getPosts();
	return {
		paths: allPosts.map(({ slug }) => {
			return {
				params: { slug },
			};
		}),
		fallback: false,
	};
};
Note: By setting the value of fallback to false, any paths that do not get returned by getStaticPaths() will result in a 404 page.
The /post/[slug].js file should look as follows:
import { getPosts, getSinglePost } from '../utils/ghost';

export default function PostTemplate(props) {
	const { post } = props;
	const { title, html, feature_image } = post;
	return (
		<main className="container mx-auto py-10">
			<h1 className="text-center text-3xl">{title}</h1>
			<article
				className="mt-10 leading-7 text-justify"
				dangerouslySetInnerHTML={{ __html: html }}
			/>
		</main>
	);
}

export const getStaticProps = async ({ params }) => {
	const post = await getSinglePost(params.slug);
	return {
		props: { post },
	};
};

export const getStaticPaths = async () => {
	const allPosts = await getPosts();
	return {
		paths: allPosts.map(({ slug }) => {
			return {
				params: { slug },
			};
		}),
		fallback: false,
	};
};
Save and close the file. Restart the server using npm run dev or yarn dev if using Yarn.
Navigate to localhost:3000/post/SLUG, replacing SLUG with a slug corresponding to one of your blog posts. Now you can access the blog content for the post corresponding to the <^<SLUG<^> rendered in the browser.
Right now, you have to enter the URL manually to access a post, which is inconvenient. You can fix that by adding hyperlinks to the list of items that will allow you to navigate to a post from the home page.
Stop the server if it’s still running, and reopen pages/index.js for editing.
Edit the highlighted section of index.js as follows, adding an import and a Link component:
import { getPosts } from './utils/ghost';
import Head from 'next/head';
import Link from 'next/link';

export default function Home(props) {
	return (
		<div>
			<Head>
				<title>My First Blog</title>
				<meta
					name="description"
					content="My personal blog created with Next.js and Ghost"
				/>
			</Head>
			<main className="container mx-auto py-10">
				<h1 className="text-center text-3xl">My Personal Blog</h1>
				<div className="flex justify-center mt-10 ">
				<ul className="text-xl">
					{props.posts.map((post) => (
						<li key={post.title}>
							<Link href={`post/${post.slug}`}>{post.title}</Link>
						</li>
					))}
				</ul>
				</div>
			</main>
		</div>
	);
}

export async function getStaticProps() {
	const posts = await getPosts();
	return { props: { posts } };
}
Next.js provides a Link component that allows client-side routing. In your index.js file, you import the Link component from next/link. Within the <li> tag, you nest the post title in the Link component. Like the anchor tag in HTML, the Link tag also takes an href attribute. You pass the slug as the href attribute value.
Save the file and restart the development server by running the command npm run dev or yarn dev.
Navigate to localhost:3000 in your browser. Now, if you click any post title, you will navigate to the corresponding blog post. Your blog page will appear like the following:
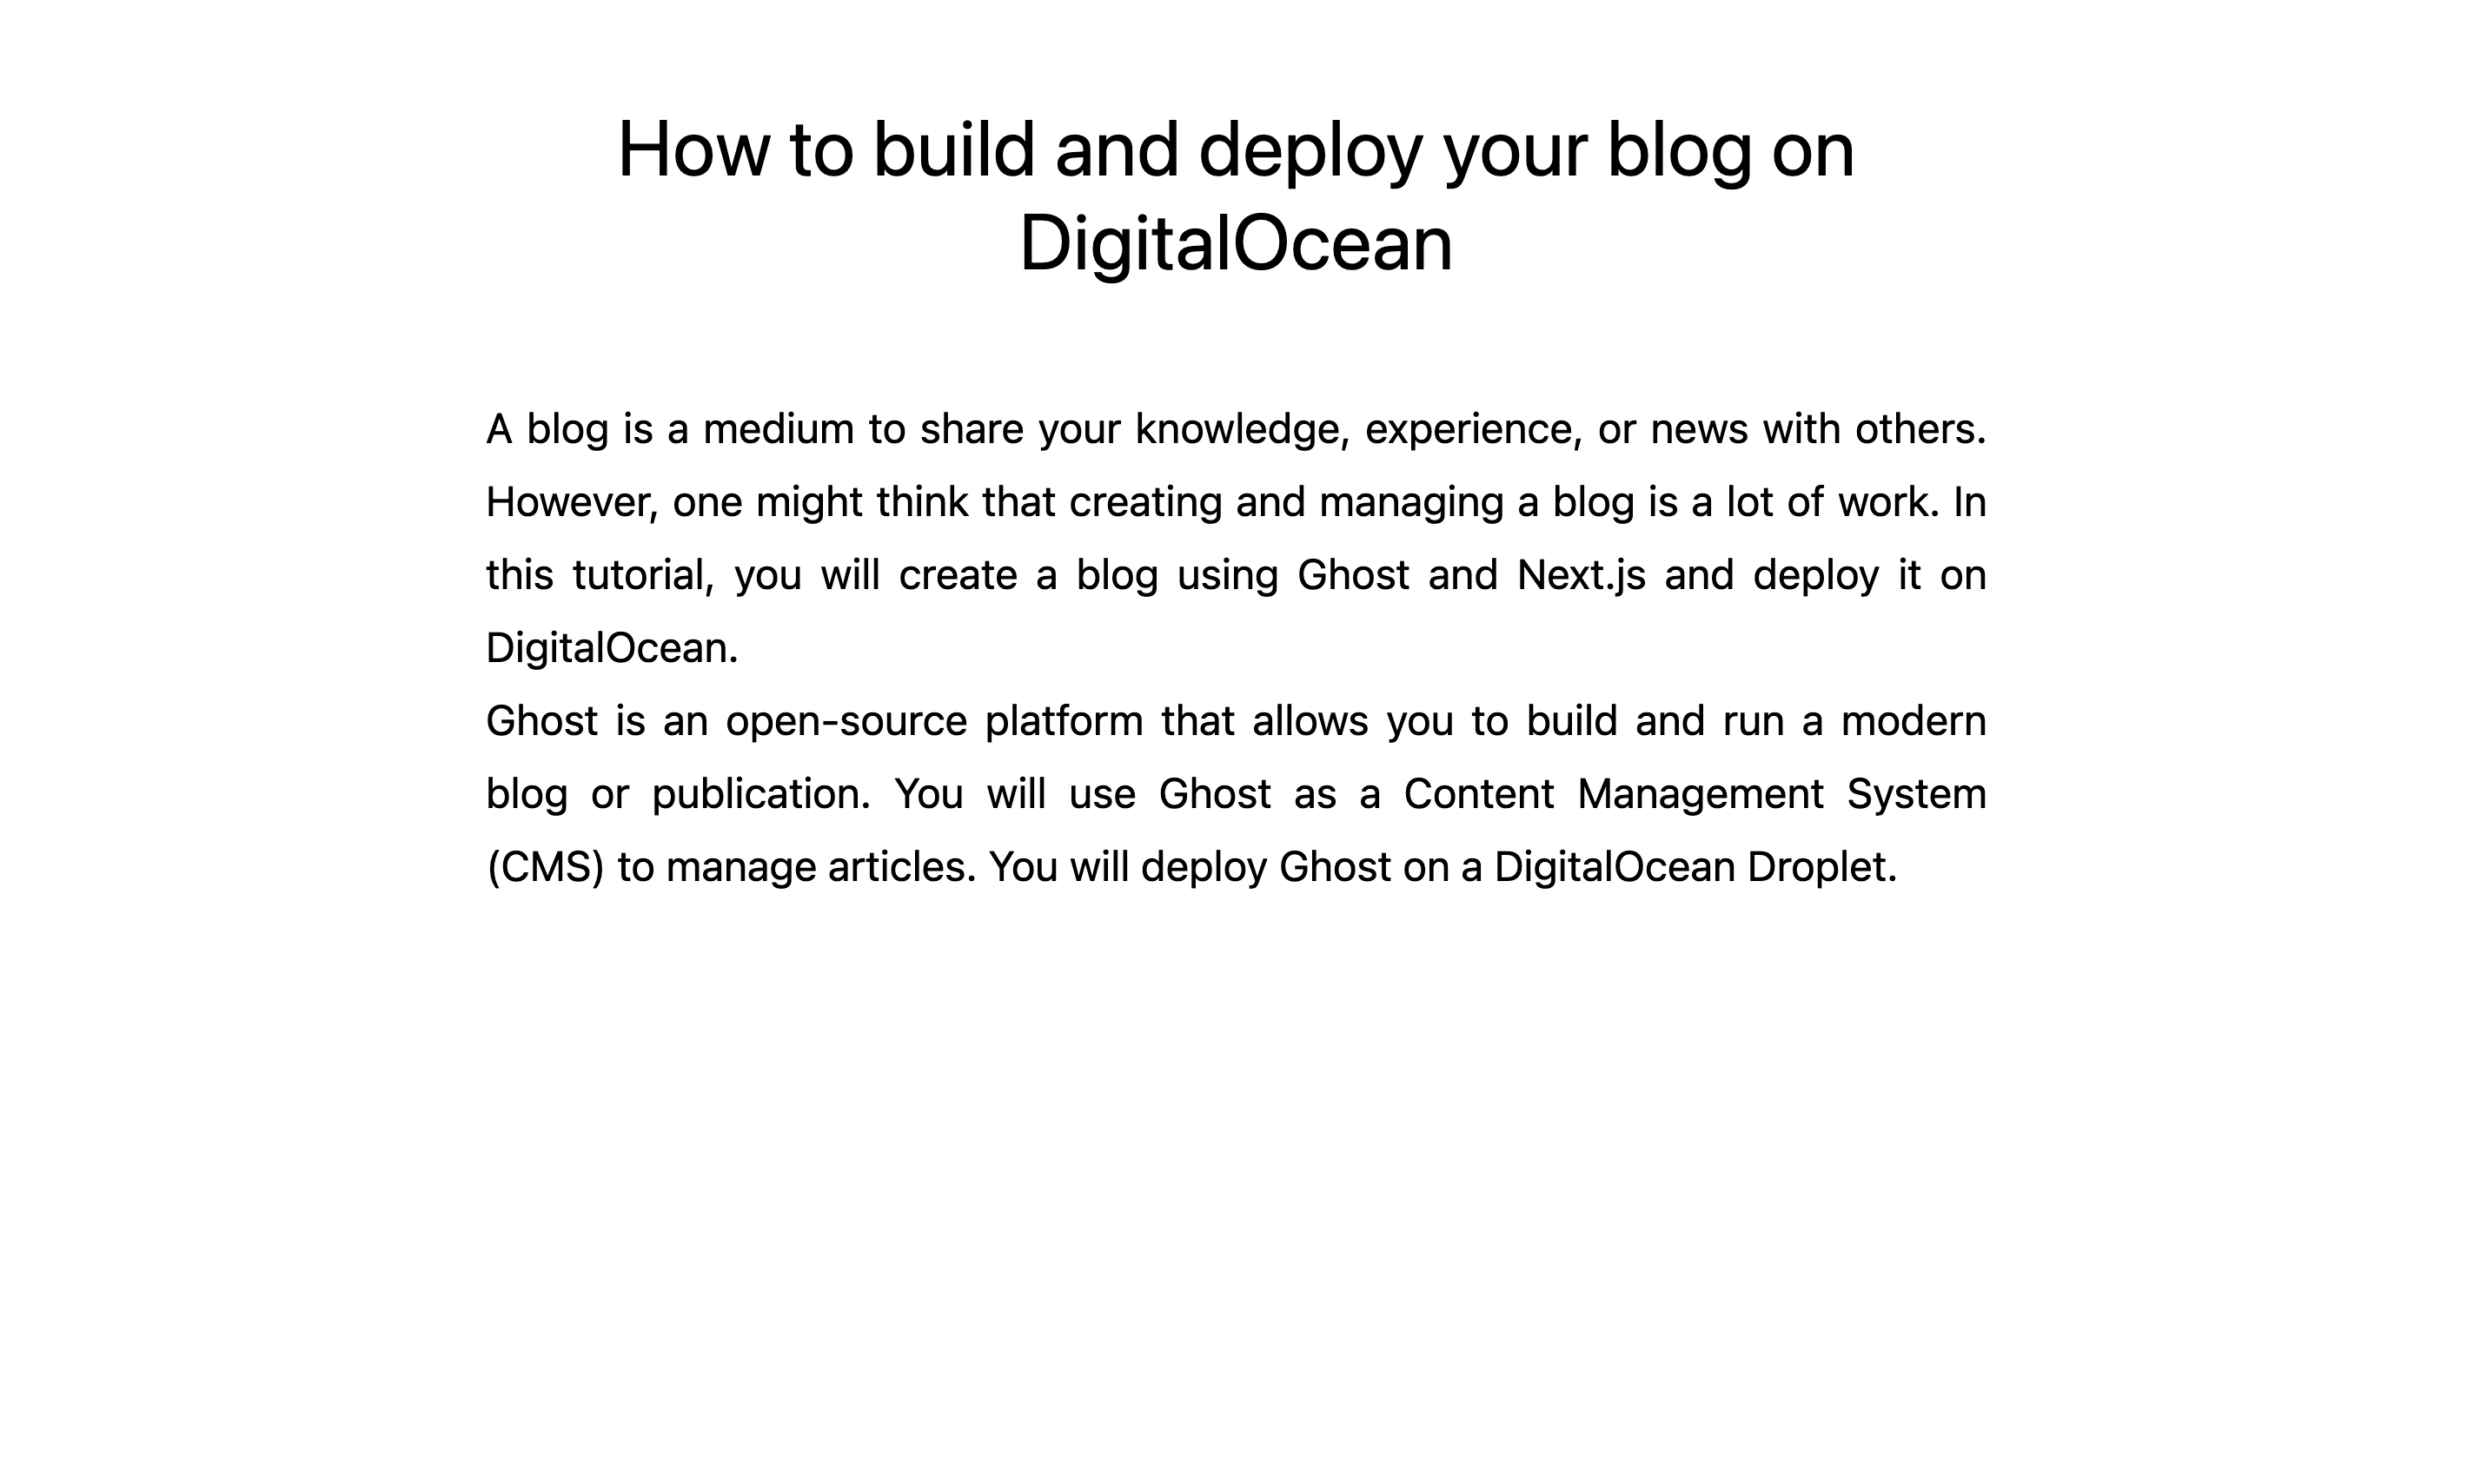
Your post page will appear with the title and body content you provided in Step 1. The sample shown here is titled “How to build and deploy your blog on DigitalOcean” with a content from this tutorial’s introduction.
In this step, you added functionality to retrieve individual post content from the Ghost CMS, rendered them as individual pages, and linked to each post from the index page. You’ve now created a complete blog that fetches articles from Ghost.
Conclusion
In this article, you deployed Ghost as a CMS on a DigitalOcean Droplet. You created your own statically generated site with Next.js and connected your Ghost CMS to provide the content for your Next.js website. Since it’s a statically generated website, you are shipping less JavaScript on the client-side, resulting in better performance and SEO. You also used TailwindCSS to add custom design your blog.
Currently, your blog is running locally on your machine. As a next step, you can deploy it on DigitalOcean App Platform so that others can view it. To get started, follow the tutorial on Deploying a Next.js App to App Platform.
You can also add more features to your blog. For example, you could implement search functionality using Algolia, automate the post publishing processes with n8n, or add the functionality to list articles based on tags.
Thanks for learning with the DigitalOcean Community. Check out our offerings for compute, storage, networking, and managed databases.
About the author(s)
Harshil is a Junior Developer Advocate at n8n. He is an Auth0 Ambassador and a Mozilla Representative. Harshil enjoys experimenting with new tools and
Still looking for an answer?
This textbox defaults to using Markdown to format your answer.
You can type !ref in this text area to quickly search our full set of tutorials, documentation & marketplace offerings and insert the link!
Great tutorial. I just setup my ghost instance today and had problems using a 1GB RAM droplet. It kept hanging during the ghost-cli update. Once I created a new droplet at 2GB it worked fine (trying to upgrade the RAM without destroying the droplet also didn’t work).
 This work is licensed under a Creative Commons Attribution-NonCommercial- ShareAlike 4.0 International License.
Become a contributor for community
Get paid to write technical tutorials and select a tech-focused charity to receive a matching donation.

DigitalOcean Documentation
Full documentation for every DigitalOcean product.

Resources for startups and AI-native businesses
The Wave has everything you need to know about building a business, from raising funding to marketing your product.
The developer cloud
Scale up as you grow — whether you're running one virtual machine or ten thousand.

Start building today
From GPU-powered inference and Kubernetes to managed databases and storage, get everything you need to build, scale, and deploy intelligent applications.
