By Mark Drake
Manager, Developer Education

Introduction
Managed databases have a number of benefits over self-managed databases, including automated updates, simplified scaling, and high availability. If you’re new to working with managed databases, the best way to perform certain tasks — like connecting to the database — may not be self-evident.
This guide outlines how to install client programs for a variety of database management systems (DBMSs) — including PostgreSQL, MySQL, Redis, and MongoDB — on an Ubuntu 18.04 server. It will also explain how to use these programs to connect to a managed database instance.
Note: The instructions outlined in this guide were tested with DigitalOcean Managed Databases, but they should generally work for managed databases from any cloud provider. If, however, you run into issues connecting to a database provisioned from another provider, you should consult their documentation for help.
Prerequisites
To follow the instructions detailed in this guide, you will need:
- Access to a server running Ubuntu 18.04. This server should have a non-root user with administrative privileges and a firewall configured with
ufw. To set this up, follow our Initial Server Setup Guide for Ubuntu 18.04. - A managed database instance. This tutorial provides instructions on how to connect to a variety of database management systems, specifically PostgreSQL, MySQL, Redis, and MongoDB. To provision a DigitalOcean Managed Database, review our documentation for the DBMS of your choice:
- PostgreSQL
Once you have these prerequisites in place, jump to whichever section aligns with your Database Management System (DBMS).
Connecting to a Managed PostgreSQL Database
To connect to a managed PostgreSQL database, you can use psql, the standard command line client for Postgres. It’s open-source, maintained by the PostgreSQL Development Group, and is typically included when you install the PostgreSQL server.
You can install psql by itself by installing the postgresql-client package with APT, but if you install it from the default Ubuntu 18.04 repositories it will install version 10 of psql, while the latest major version of PostgreSQL is version 13. Some managed database providers offer various options for which version of PostgreSQL you want your database to use. As of this writing, DigitalOcean offers versions 10 through 13 for its Managed PostgreSQL Databases.
In general, you can still use a version of psql that doesn’t match the version of your database. However, if your version of psql is older than the version of your Postgres database, you may not be able to use certain features included in the newer database version.
One way to install a specific version of the psql client is to add the official PostgreSQL APT repository to your computer’s list of APT resources. To do this, first import the repository’s signing key by running the following cURL command.
cURL is a command line tool available on many operating systems used to transfer data. It reads whatever data is stored at the URL passed to it and prints the content to the system’s output. In the following example, cURL prints the content of the GPG key file and then pipes it into the following sudo apt-key add - command, thereby adding the GPG key to your list of trusted keys.
Also, note that this curl command uses the options -fsSL which, together, essentially tell cURL to fail silently. This means that if for some reason cURL isn’t able to contact the GPG server or the GPG server is down, it won’t accidentally add the resulting error code to your list of trusted keys:
- curl -fsSL https://www.postgresql.org/media/keys/ACCC4CF8.asc | sudo apt-key add -
This command will return OK if the key was added successfully:
OutputOK
If you’d like to double check that the key was added correctly, you can do so with the following command:
- apt-key list
This will return the PostgreSQL key somewhere in the output:
Output/etc/apt/trusted.gpg
--------------------
pub   rsa4096 2011-10-13 [SC]
      B97B 0AFC AA1A 47F0 44F2  44A0 7FCC 7D46 ACCC 4CF8
uid           [ unknown] PostgreSQL Debian Repository
. . .
At this point, your APT installation only has the signing key for the PostgreSQL repository. It doesn’t know where to find the repository or the packages it hosts.
There are two places on your server where APT looks for online sources of packages to download and install: the sources.list file and the sources.list.d directory, both of which can be found in the /etc/apt/ directory. sources.list is a file that lists active sources of APT data, with one source per line and the most preferred sources listed first. The sources.list.d directory allows you to add such sources.list entries as separate files.
Run the following command, which creates a file in the sources.list.d directory named pdgd.list. The only content in this file is a single line reading deb https://apt.postgresql.org/pub/repos/apt bionic-pgdg main:
- echo "deb https://apt.postgresql.org/pub/repos/apt bionic-pgdg main" | sudo tee /etc/apt/sources.list.d/pgdg.list
This single line tells APT everything it needs to know about what the source is and where to find it:
deb: This means that the source entry references a regular Debian architecture. In other cases, this part of the line might readdeb-src, which means the source entry represents a Debian distribution’s source code.https://apt.postgresql.org/pub/repos/apt: This is a URI pointing to the location where the APT data can be found. In this case, the URI points to the HTTPS address where the official PostgreSQL repository is located.bionic-pgdg: Ubuntu repositories can contain packages for multiple releases. This portion of the line specifies that APT should only download files from thebionicrelease of Ubuntu (“Bionic Beaver” being the codename of Ubuntu 18.04). Also, note that this repository appends-pgdg(short for “PostgreSQL Global Development Group”) to the end of every release name.main: This part points APT to one of the four Ubuntu repository components. In this case, it’s pointing to themaincomponent.
After running this command, update your server’s local package index so APT knows where to find the packages that install the psql shell:
- sudo apt update
After updating your machine’s local package index, you’re ready to install your chosen version of psql. The packages that provide the psql client all begin with postgresql-client, so you can find information about all of them by running the following command:
- apt-cache search postgresql-client
This will return a list of all the available packages whose name includes postgresql-client, as well as a brief description of each:
Outputpostgresql-client - front-end programs for PostgreSQL (supported version)
postgresql-client-10 - front-end programs for PostgreSQL 10
postgresql-client-common - manager for multiple PostgreSQL client versions
postgresql-client-10-dbgsym - debug symbols for postgresql-client-10
postgresql-client-11 - front-end programs for PostgreSQL 11
postgresql-client-11-dbgsym - debug symbols for postgresql-client-11
postgresql-client-12 - front-end programs for PostgreSQL 12
postgresql-client-12-dbgsym - debug symbols for postgresql-client-12
postgresql-client-13 - front-end programs for PostgreSQL 13
postgresql-client-13-dbgsym - debug symbols for postgresql-client-13
postgresql-client-8.2 - front-end programs for PostgreSQL 8.2
postgresql-client-8.3 - front-end programs for PostgreSQL 8.3
postgresql-client-8.4 - front-end programs for PostgreSQL 8.4
postgresql-client-9.0 - front-end programs for PostgreSQL 9.0
postgresql-client-9.1 - front-end programs for PostgreSQL 9.1
postgresql-client-9.2 - front-end programs for PostgreSQL 9.2
postgresql-client-9.3 - front-end programs for PostgreSQL 9.3
postgresql-client-9.4 - front-end programs for PostgreSQL 9.4
postgresql-client-9.5 - front-end programs for PostgreSQL 9.5
postgresql-client-9.6 - front-end programs for PostgreSQL 9.6
Find the package that best aligns with the version your managed Postgres database is running, and then install it with the apt install command. The following example will install version 13 of the client:
- sudo apt install postgresql-client-13
APT will ask you to confirm that you want to install the package. Do so by pressing ENTER.
Once that operation completes the installation, you can connect to your managed Postgres database without any need for further configuration. To do so, you might invoke psql with the following flags:
-U, the PostgreSQL user you want to connect as-h, the managed database’s hostname or IP address-p, the TCP port on which the managed database is listening for connections-d, the specific database you want to connect to--set, precedes other connection variables and the variables’ values. For example, if you want to validate the database’s CA certificate when you connect, you would include--set=sslmode=requirein your command-W, which tellspsqlto prompt you for the PostgreSQL user’s password. Note that you could precede thepsqlcommand withPGPASSWORD=password, but it’s generally considered more secure to not include passwords on the command line
With these flags included, the psql command’s syntax would look like this:
- psql -U user -h host -p port -d database --set=variable=value -W
Alternatively, if your managed database provider offers a uniform resource identifer (URI) for connecting, you might use the following syntax:
- psql postgresql://username:password@host:port/database?option_1=value&option_n=value
If you’re connecting to a DigitalOcean Managed PostgreSQL Database, you can find all of this connection information in your Cloud Control Panel. Click on Databases in the left-hand sidebar menu, then click on the database you want to connect to and scroll down to find its Connection Details section. From there, you do one of the following:
- Select the Connection parameters option and copy the relevant fields individually into the
psqlsyntax detailed previously - Select the Connection String option and copy a ready-made connection URI you can paste into the connection URI syntax outlined above
- Select the Flags option and copy a ready-to-use
psqlcommand that you can paste into your terminal to make the connection
With that, you’re ready to begin using your managed PostgreSQL instance. For more information on how to interact with PostgreSQL, follow our guide on How to Manage an SQL Database. You may also find our Introduction to Queries in PostgreSQL useful.
Connecting to a Managed MySQL Database
To access a managed MySQL database, you will need to install a MySQL client on the machine from which you plan to make the connection. It’s possible to connect using the mysql command, as provided by the MySQL Command-Line Client, but this command doesn’t support connection strings. For greater flexibility with how you connect, we recommend that you instead use the mysqlsh command which allows you to use the official MySQL Shell, as it gives you the freedom to connect with either flags or a connection URI.
In order to access a DigitalOcean Managed MySQL database, you will need to install version 8.0 or above of the MySQL shell. To do so, you must first add the MySQL software repository before installing the mysql-shell package.
Begin by navigating to the MySQL APT Repository page in your web browser. Find the Download button in the lower-right corner and click through to the next page. This page will prompt you to log in or sign up for an Oracle web account. You can skip that and instead look for the link that says No thanks, just start my download. Right-click the link and select Copy Link Address (this option may be worded differently, depending on your browser).
You’re now ready to download the file. On your server, move to a directory you can write to. /tmp/ is a temporary directory found on Linux systems and is usually universally writable, by default:
- cd /tmp
Download the file using curl, remembering to paste the address you just copied in place of the highlighted portion of the following command. You also need to pass two command line flags to curl. -O instructs curl to output to a file instead of standard output. The L flag makes curl follow HTTP redirects, which is necessary in this case because the address you copied actually redirects to another location before the file downloads:
- curl -OL https://dev.mysql.com/get/mysql-apt-config_0.8.17-1_all.deb
This command will download the file to your current working directory. List the files to make sure:
- ls
This command will list the newly-downloaded file:
Outputmysql-apt-config_0.8.17-1_all.deb
. . .
Now you can add the MySQL APT repository to your system’s repository list. The dpkg command is used to install, remove, and inspect .deb software packages. The following command includes the -i flag, indicating that you’d like to install from the specified file:
- sudo dpkg -i mysql-apt-config*
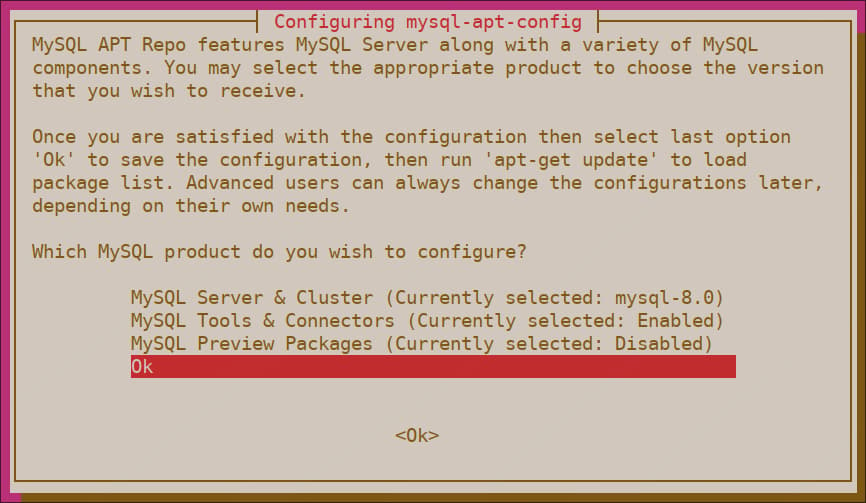
During the installation, you’ll be presented with a configuration screen where you can specify which version of MySQL you’d prefer, along with an option to install repositories for other MySQL-related tools. The defaults will add the repository information for the latest stable version of MySQL and nothing else. This is what we want, so use the down arrow to navigate to the Ok menu option and hit ENTER.
Following that, the package will finish adding the repository. Refresh your apt package cache to make the new software packages available:
- sudo apt update
Next, you can clean up your system a bit and delete the file you downloaded, as you won’t need it in the future. This isn’t strictly necessary, as any files written to the /tmp/ directory will be automatically deleted after ten days, but you can delete the file now with this command:
- rm mysql-apt-config*
Note: If you ever need to update the configuration of these repositories, run the following command to select your new options:
- sudo dpkg-reconfigure mysql-apt-config
After selecting your new options, run the following command to refresh your package cache:
- sudo apt update
Now that you’ve added the MySQL repositories, you’re ready to install the actual MySQL Shell software. Do so with the following apt command:
- sudo apt install mysql-shell
Once that command finishes, check the software version number to ensure that you have the latest release:
- mysqlsh --version
Outputmysqlsh Ver 8.0.25 for Linux on x86_64 - for MySQL 8.0.25 (MySQL Community Server (GPL))
After you’ve installed the mysql-shell package, you can access your managed database by running the mysqlsh command with the following flags as arguments:
-u, the MySQL user you want to connect as-p, tellsmysqlshto prompt for the user’s password. You could include your password directly in the connection command following the-pflag (without a space, as in-ppassword) but, for security reasons, this is generally not recommended-h, the database’s hostname or IP address-P, the TCP port on which MySQL is listening for connections-D, the specific database you want to connect to
Additionally, you may want to include the --sql option. When the MySQL Shell opens a new session, it does so in one of three modes: SQL, JavaScript, or Python. The SQL mode opens a session in which you can use SQL to query and manipulate data, as well as create databases, tables, groups, or anything else you need to store and manage your data. The JavaScript and Python modes allow you to use functions available in those respective languages to create a number of session objects. This lets you employ multiple MySQL server instances from the same MySQL Shell instance.
MySQL Shell will open sessions in the JavaScript mode by default. Thus, if you want to run SQL queries as one would typically do with the MySQL command line client, you’ll need to specify the --sql option to establish a connection in the SQL mode.
Using these flags, the mysqlsh syntax will look like this:
- mysqlsh -u user -p -h host -P port -D database --sql
Alternatively, if you have a connection URI you can use to connect, you would use a syntax like this:
- mysqlsh --sql mysql://user:password@host:port/database?option_1=value&option_n=value
If you’re connecting to a DigitalOcean Managed Database, you can find all of this connection information in your Cloud Control Panel. Click on Databases in the left-hand sidebar menu, then click on the database you want to connect to and scroll down to find its Connection Details section. From there, you do one of the following:
- Select the Connection parameters option and copy the relevant fields individually into the
mysqlshsyntax outlined previously - Select the Connection String option and copy a ready-made connection URI you can paste into the connection string command detailed above
With that, you’re ready to begin using your managed MySQL instance.
If you’re new to working with the MySQL Shell, one thing to note is that, in order to close the connection, the exit command used in other MySQL clients won’t work. Instead, you can run the \q shortcut:
- \q
OutputBye!
For more information on how to interact with MySQL, we encourage you to read our guide on How to Manage an SQL Database. You may also find our Introduction to Queries in MySQL useful.
A Note Regarding Password Authentication in MySQL 8
In MySQL 8.0 and newer, the default authentication plugin is caching_sha2_password. As of this writing, though, PHP does not support caching_sha2_password. If you plan on using your managed MySQL database with an application that uses PHP, such as WordPress or phpMyAdmin, this may lead to issues when the application attempts to connect to the database.
If you have access to the database’s configuration file, you could add a setting to force it to use a PHP-supported authentication plugin — for example, mysql_native_password — by default:
[mysqld]
default-authentication-plugin=mysql_native_password
However, some managed database providers — including DigitalOcean — do not make the database configuration file available to end users. In this case, you could connect to the database and run an ALTER USER command for any existing MySQL users which need to connect to the database, but can’t do so with the caching_sha2_password plugin:
- ALTER USER user IDENTIFIED WITH mysql_native_password BY 'password';
Of course, you can set new users to authenticate with mysql_native_password by specifying the plugin in their respective CREATE USER statements:
- CREATE USER user IDENTIFIED WITH mysql_native_password BY 'password';
If you’re using a DigitalOcean Managed Database, be aware that if you configure a user to authenticate with a plugin other than caching_sha2_password then you won’t be able to find that user’s password in your Cloud Control Panel. For this reason, you should make sure you note down the passwords of any users that authenticate with mysql_native_password or other plugins in a secure location.
Connecting to a Managed Redis Database
When you install Redis locally, it comes with redis-cli, the Redis command line interface. You can use redis-cli to connect to a remote, managed Redis instance, but it doesn’t natively support TLS/SSL connections. There are ways you can configure redis-cli to securely connect to a managed Redis instance (for example, by configuring a TLS tunnel), but there are alternative Redis clients that have built-in TLS support.
For DigitalOcean Managed Redis Databases, we recommend that you install Redli, an open-source, interactive Redis terminal. To do so, navigate to the Releases Page on the Redli GitHub project and locate the Assets table for the latest release. As of this writing, this will be version 0.5.2.
There, find the link for the file ending in linux_amd64.tar.gz. This link points to an archive file known as a tarball that, when extracted, will create a few files on your system. Right-click this link and select Copy link address (this option may differ depending on your web browser).
On your server, move to a directory you can write to:
- cd /tmp
Then, paste the link into the following wget command, replacing the highlighted URL. This command will download the file to your server:
- wget https://github.com/IBM-Cloud/redli/releases/download/v0.5.2/redli_0.5.2_linux_amd64.tar.gz
Once the file has been downloaded to your server, extract the tarball:
- tar xvf redli_0.5.2_linux_amd64.tar.gz
This will create the following files on your server:
OutputLICENSE.txt
README.md
redli
The redli file is the Redli binary file. Move it to the /usr/local/bin directory, the location where Ubuntu looks for executable files:
sudo mv redli /usr/local/bin/
At this point, you can clean up your system a bit and remove the tarball:
- rm redli_0.5.2_linux_amd64.tar.gz
Now you can use Redli to connect to your managed Redis instance. You could do so by running the redli command followed by these flags:
-h, the host to connect to. This can either be a hostname or an IP address-a, the password used to authenticate to the Redis instance-p, the port to connect to
With these flags included, the redli syntax would be as follows. Note that this example also includes the --tls option, which allows you to connect to a managed Redis database over TLS/SSL without the need for a tunnel:
- redli --tls -h host -a password -p port
One benefit that Redli has over redis-cli is that it understands the rediss protocol, which is used to designate a URI pointing to a Redis database. This allows you to use a connection string to access your database:
- redli --tls -u rediss://user:password@host:port
Note that this example includes the -u flag, which specifies that the following argument will be a connection URI.
If you’re connecting to a DigitalOcean Managed Database, you can find all of this connection information in your Cloud Control Panel. Click on Databases in the left-hand sidebar menu, then click on the database you want to connect to and scroll down to find the Connection Details section. From there, you do one of the following:
- Select the Connection parameters option and copy the relevant fields individually into the
redlisyntax detailed previously - Select the Connection String option and copy a ready-made connection URI that you can use with the connection string syntax outlined above
- Select the Flags option and copy a ready-to-use
redlicommand that you can paste into your terminal to make the connection
Following that, you can begin interacting with your managed Redis instance. For more information on how to work with Redis, check out our series of cheat sheets on How To Manage a Redis Database.
Connecting to a Managed MongoDB Database
When you set up a MongoDB server locally, it comes installed along with a package that provides a program known as the mongo shell. The mongo shell is a JavaScript-based shell interface which you can use to manage and interact with your Mongo data.
You can install the mongo shell, along with the full MongoDB server, by downloading and installing the mongodb package from the default Ubuntu repositories. However, as of this writing, the version of MongoDB available from the default APT repositories is version 3.6.1. This release is significantly different from the latest stable release at the time of this writing, version 4.4.6.
In general, an older version of the mongo shell will still work with a newer version of the MongoDB server, but such a version mismatch can lead to issues with certain commands that are only available in the newer release.
DigitalOcean Managed MongoDB Databases run version 4.4 of Mongo, and other cloud vendors that offer managed Mongo databases as a service also typically only offer a more recent release than version 3.6. If you’re using a DigitalOcean Managed MongoDB Database or any managed MongoDB database that runs a newer version than what’s available in the default Ubuntu repositories, it’s recommended that you install a matching version of the mongo shell.
One way to obtain the most recent version of the mongo shell software is to add MongoDB’s dedicated package repository to your APT sources. To do this, start by importing the public GPG key for the latest stable version of MongoDB by running the following command. If you intend to use a version of MongoDB other than 4.4, be sure to change 4.4 in the URL portion of this command to align with the version you want to install:
- curl -fsSL https://www.mongodb.org/static/pgp/server-4.4.asc | sudo apt-key add -
cURL is a command line tool available on many operating systems used to transfer data. It reads whatever data is stored at the URL passed to it and prints the content to the system’s output. In the previous example, cURL prints the content of the GPG key file and then pipes it into the subsequent sudo apt-key add - command, thereby adding the GPG key to your list of trusted keys.
Also, note that this curl command uses the options -fsSL which, together, essentially tell cURL to fail silently. This means that if for some reason cURL isn’t able to contact the GPG server or the GPG server is down, it won’t accidentally add the resulting error code to your list of trusted keys.
This command will return OK if the key was added successfully:
OutputOK
If you’d like to double check that the key was added correctly, you can do so with the following command:
- apt-key list
This will return the MongoDB key somewhere in the output:
Output/etc/apt/trusted.gpg
--------------------
pub   rsa4096 2019-05-28 [SC] [expires: 2024-05-26]
      2069 1EEC 3521 6C63 CAF6  6CE1 6564 08E3 90CF B1F5
uid           [ unknown] MongoDB 4.4 Release Signing Key <packaging@mongodb.com>
. . .
At this point, your APT installation still doesn’t know where to find the package you need to install the latest version of the mongo shell.
There are two places on your server where APT looks for online sources of packages to download and install: the sources.list file and the sources.list.d directory. sources.list is a file that lists active sources of APT data, with one source per line and the most preferred sources listed first. The sources.list.d directory allows you to add such sources.list entries as separate files.
Run the following command, which creates a file in the sources.list.d directory named mongodb-org-4.4.list. The only content in this file is a single line reading deb [ arch=amd64,arm64 ] https://repo.mongodb.org/apt/ubuntu bionic/mongodb-org/4.4 multiverse:
- echo "deb [ arch=amd64,arm64 ] https://repo.mongodb.org/apt/ubuntu bionic/mongodb-org/4.4 multiverse" | sudo tee /etc/apt/sources.list.d/mongodb-org-4.4.list
Because this file is in the /etc/apt/sources.list.d/ directory, APT knows to read it any time it searches for packages. The single line in this file tells APT what it needs to know to find packages on the remote repository:
deb: This means that the source entry references a regular Debian architecture. In other cases, this part of the line might readdeb-src, which means the source entry represents a Debian distribution’s source code.[ arch=amd64,arm64 ]: This specifies which architectures the APT data should be downloaded to. In this case, it specifies theamd64andarm64architectures.https://repo.mongodb.org/apt/ubuntu: This is a URI representing the location where the APT data can be found. In this case, the URI points to the HTTPS address where the official MongoDB repository is located.bionic/mongodb-org/4.4: Ubuntu repositories can contain several different releases. This specifies that you only want version4.4of themongodb-orgpackages available for thebionicrelease of Ubuntu (“Bionic Beaver” being the code name of Ubuntu 18.04).multiverse: This part points APT to one of the four Ubuntu repository categories, or components. In this case, it’s pointing to themultiversecomponent.
After running this command, update your server’s local package index so APT knows where to find the package which installs the mongo shell:
- sudo apt update
Following that, you can install the mongodb-org-shell package to install the mongo shell:
- sudo apt install mongodb-org-shell
Once you’ve installed it, you can use the mongo shell to connect to your managed MongoDB instance. One way to do this is to invoke the mongo command and follow it with a connection URI as an argument. It’s important to note, though, that if you’re using a connection URI to access your managed MongoDB instance, you must wrap the connection string in quotes like this example:
- mongo "mongodb://username:password@managed_db_hostname_or_URL:port/connection_options"
This example MongoDB connection URI consists of the following elements:
mongodb://: this prefix specifies that the elements following it adhere to MongoDB’s connection URI formatusername: the name of your MongoDB userpassword: your MongoDB user’s passwordmanaged_db_hostname_or_URL: the host where your MongoDB database can be accessedport: the port number on which your managed MongoDB instance is running. It’s only necessary to include this if your database is running on a port other than Mongo’s default,27017connection_options: additional connection options
Additionally, some cloud providers (including DigitalOcean) require you to connect to a managed MongoDB database using an encrypted TLS connection. To do this, you must follow your connection URI with the --tls option — which tells the MongoDB client to connect to the managed database using TLS encryption — as well as the --tlsCAFile option which must be followed by a file path pointing to a valid CA certificate.
With these additional options included, the mongo syntax would look like this:
- mongo "mongodb://username:password@managed_db_hostname_or_URL:port/connection_options" --tls --tlsCAFile /path/to/CA/file
If you’re connecting to a Managed MongoDB Database from DigitalOcean, you can find all of this connection information in your Cloud Control Panel. Click on Databases in the left-hand sidebar menu, then click on the Mongo database you want to connect to and scroll down to find the Connection Details section. From there, you do one of the following:
- Select the Connection parameters option and copy the relevant fields individually into the
mongosyntax detailed previously - Select the Connection String option and copy a ready-made connection URI that you can use with the connection string syntax outlined previously
- Select the Flags option and copy a ready-to-use
mongocommand that you can paste into your terminal to make the connection
You must also add your Managed MongoDB Database’s CA Certificate to the machine from which you want to connect. To do this, click the ⤓ Download CA certificate link in the Connection Details section, which will download the certificate to your local machine. If you want to connect to your database from a virtual private server, you can then transfer the certificate to the server using a tool like scp:
- scp ~/local/path/to/CA/certificate sammy@your_server_ip
From whatever machine you use to connect to your Managed MongoDB Database, follow the connection URI with the --tls option, the --tlsCAFile option, and the CA certificate’s file path as outlined in the previous example.
Following that, you can begin interacting with your managed MongoDB instance. For more information on how to work with Mongo, we encourage you to check out our complete collection of MongoDB-related content.
Conclusion
As a relatively new development in cloud services, many practices that are well known for self-managed databases aren’t widely or comprehensively documented for databases managed by cloud providers. One of the most fundamental of these practices, accessing the database, may not be immediately clear to those new to working with managed databases. Our goal for this tutorial is that it helps get you started as you begin using a managed database for storing data.
For more information on working with databases, we encourage you to check out our variety of database-related content, including tutorials focused directly on PostgreSQL, MySQL, Redis, and MongoDB.
To learn more about DigitalOcean Managed Databases, check out our Managed Databases product documentation.
Thanks for learning with the DigitalOcean Community. Check out our offerings for compute, storage, networking, and managed databases.
About the author
Former Technical Writer at DigitalOcean. Focused on SysAdmin topics including Debian 11, Ubuntu 22.04, Ubuntu 20.04, Databases, SQL and PostgreSQL.
Still looking for an answer?
This textbox defaults to using Markdown to format your answer.
You can type !ref in this text area to quickly search our full set of tutorials, documentation & marketplace offerings and insert the link!
Can you update this article for the required usage of SSL with certificates on MySQL?
Install MySQL. Install the MySQL server by using the Ubuntu operating system package manager: Sudo apt-get update Sudo apt-get install MySQL-server. … Allow remote access. … Start the MySQL service. … Launch at reboot. … Configure interfaces. … Start the MySQL shell. … Set the root password. … View users.
 This work is licensed under a Creative Commons Attribution-NonCommercial- ShareAlike 4.0 International License.
Become a contributor for community
Get paid to write technical tutorials and select a tech-focused charity to receive a matching donation.

DigitalOcean Documentation
Full documentation for every DigitalOcean product.

Resources for startups and AI-native businesses
The Wave has everything you need to know about building a business, from raising funding to marketing your product.
The developer cloud
Scale up as you grow — whether you're running one virtual machine or ten thousand.

Start building today
From GPU-powered inference and Kubernetes to managed databases and storage, get everything you need to build, scale, and deploy intelligent applications.
