By Scarlz and Hazel Virdó

Introduction
Hexo is a static blogging framework built on Node.js. Using Hexo, you can publish Markdown documents in the form of blog posts. Blog posts and content are processed and converted into HTML/CSS, which is sourced from the default or custom template theme files (much like other static blogging generators, like Jekyll and Ghost). All of the software in Hexo is modular, so you can install and set up exactly what you need.
This tutorial will set up Hexo with deployment supported by GitHub and Nginx.
Prerequisites
To follow this tutorial, you will need:
-
One Ubuntu 14.04 Droplet with a sudo non-root user, which you can set up by following this initial server setup guide.
-
Git installed on your server, which you can do by following the “How To Install Git with Apt” and “How To Set Up Git” sections of this Git tutorial.
-
Node.js installed on your server, which you can set up by following the “How To Install Using NVM” section of this Node.js tutorial.
-
Nginx installed on your server, which you can set up by following this Nginx tutorial.
Step 1 — Installing and Initializing Hexo
This initial section contains everything you need to get Hexo up and running on your server.
First, ensure the system packages are up to date.
- sudo apt-get update && sudo apt-get upgrade
Several software packages and components make up the Hexo blogging framework. Here, we’ll pull down two of the most essential ones using npm, the Node.js package manager.
The first, hexo-cli, is the most important and provides the core Hexo commands.
- npm install hexo-cli -g
The second, hexo-server, is the built-in server which can be used to preview and test your blog before deploying.
- npm install hexo-server -g
There are many more packages available; these are simply the bare essentials you need to get your Hexo blog up and running. You can browse more packages available as part of the Hexo framework on npm search.
Next, we need to set up the base files for your new blog. Fortunately, Hexo does all the groundwork with a single command. All you need to do is provide a path or folder in which you want the blog config files to reside.
A convenient option is your user’s home directory.
- hexo init ~/hexo_blog
Within a second or two you’ll get some output:
Output. . .

INFO  Copying data to ~/hexo_blog
INFO  You are almost done! Don't forget to run 'npm install' before you start blogging with Hexo!

. . .
Next, move to the directory with your config files.
- cd ~/hexo_blog
Then run the aforementioned installation command.
- npm install
You can ignore any optional dependency warnings from npm. After several seconds of processing time, we’ll have our base config files.
Step 2 — Setting Up Hexo’s Main Configuration File
Let’s take a look at base config files in our Hexo directory.
- ls -l
Output-rw-rw-r--   1 sammy sammy 1483 Jan 11 12:30 _config.yml
drwxrwxr-x 191 sammy sammy 4096 Jan 11 12:31 node_modules
-rw-rw-r--   1 sammy sammy  442 Jan 11 12:30 package.json
drwxrwxr-x   2 sammy sammy 4096 Jan 11 12:30 scaffolds
drwxrwxr-x   3 sammy sammy 4096 Jan 11 12:30 source
drwxrwxr-x   3 sammy sammy 4096 Jan 11 12:30 themes
Out of all the files present, the _config.yml file is arguably the most important. All core settings are stored here and it is central to the blog. If you need to tweak something in the future, it’s likely to be in this file.
We’ll set up some basic customization next by going through _config.yml piece by piece. Open _config.yml with nano or your preferred text editor.
- nano _config.yml
At the top of the file, you should see a section labeled Site:
. . .

# Site
title: Hexo
subtitle:
description:
author: John Doe
language:
timezone:

. . .
The first four lines are the name of your blog, a suitable subtitle, a description, and the author name. You can choose whatever you like for these options. Note that not all Hexo themes show this data, so it mostly serves as site metadata where relevant.
The next two options are language and time zone. The language option takes 2-letter ISO-639-1 codes only. The timezone is set to your server’s time zone by default, and uses “tz database” formatting. If you decide you want to change either of these, make sure they are in these formats.
Here are some example values:
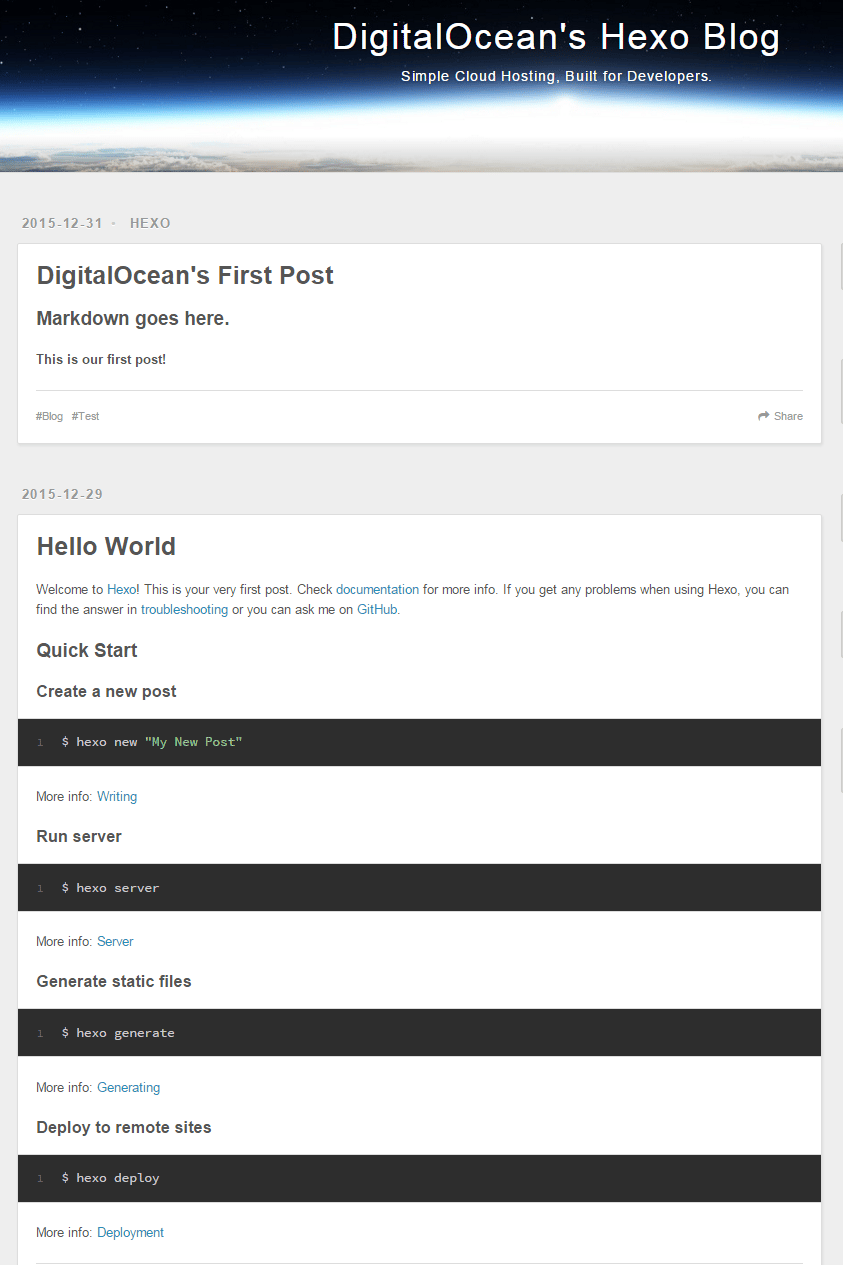
. . .

#Site
title: DigitalOcean's Hexo Blog
subtitle: Simple Cloud Hosting, Built for Developers.
description: Deploy an SSD cloud server in 55 seconds.
author: Sammy Shark
language: en
timezone: America/New_York

. . .
The next section is the URL section. Here, we want to change the URL option. Because we don’t currently have a domain name for our server, we can enter the IP address instead for the url: setting here.
. . .

# URL
## If your site is put in a subdirectory, set url as 'http://yoursite.com/child' and root as '/child/'
url: http://your_server_ip
root: /
permalink: :year/:month/:day/:title/
permalink_defaults:

. . .
The last option we want to change is default_layout: in the Writing section a little further down. This creates new posts as drafts so they must be published before being visible on the blog website.
Set it to draft now like we did below:
. . .

# Writing
new_post_name: :title.md # File name of new posts
default_layout: draft
titlecase: false # Transform title into titlecase

. . .
Save and quit the file for now. We will return to this file briefly for the deployment stages towards the end of the tutorial.
Step 3 — Creating and Publishing a New Post
The process for creating a post (or draft, like we configured earlier) starts by issuing the following command, where first-post is the name of the post you want to make.
- hexo new first-post
You should see the following output:
OutputINFO Created: ~/hexo_blog/source/_drafts/first-post.md
Open the new post for editing.
- nano ~/hexo_blog/source/_drafts/first-post.md
Every post must have its front-matter set up. Front-matter is a short block of JSON or YAML that configures settings like the title of your post, the published date, tags, and so on. The end of the front-matter is designated by the first --- or ;;; marker. After the front-matter, you can write your blog post with Markdown syntax.
Replace the default content in first-post.md with the below example options in the file to start the post. You can customize them if you like.
title: DigitalOcean's First Post
tags:
  - Test
  - Blog
categories:
  - Hexo
comments: true
date: 2015-12-31 00:00:00
---

## Markdown goes here.

**This is our first post!**
Save and exit the file.
The Markdown file we just created will be held within ~/hexo_blog/source/_drafts until we publish it. Any posts inside the _drafts folder will not be visible to visitors on the website.
Next, publish the post so it will be accessible by visitors.
- hexo publish first-post
This results in:
OutputINFO Published: ~/hexo_blog/source/_posts/first-post.md
The post will now be visible once we begin hosting the blog.
Step 4 — Running the Test Server
Now the previous configuration files are complete, and we have an example post ready. Next, we’ll start the test server.
- hexo server
It’s possible to force the test server to render posts in the _drafts folder. To do this include the -d option when issuing the last command.
Now that we have the test server running, you can view your blog by visiting http://your_server_ip:4000/ in your favorite browser. You’ll see Hexo’s pre-defined “Hello World” test post, and the test post we just created.
Exit the test server by pressing CTRL+C in the terminal.
The test server is best used for previewing changes and additions to your blog. Once you are happy with how it looks, it’s time to deploy it to the web.
Step 5 — Setting Up Git Deployment
There are a number of different ways to deploy what we’ve done so far with Hexo. The approach in this tutorial is to use Git to store the static files, hooks to forward them, and then Nginx to host them. However, there is provided support for Heroku, Git, Rsync, OpenShift, FTPSync, and more with extra framework packages.
To proceed, you’ll need a Git repository to store the static HTML files Hexo generates. To keep this simple, we will use a public Git repository provided by GitHub.
Create a new repository on GitHub named hexo_static by following their repository creation steps. Make sure to select the “Public” option and tick the Initialize this repository with a README checkbox.
After you’ve created the repository, open the main Hexo configuration file for editing.
- nano _config.yml
At the bottom of the file, there’s a section labeled Deployment:
. . .

# Deployment
## Docs: https://hexo.io/docs/deployment.html
deploy:
  type:
Fill out the options for deploy: as shown below. Note that the repo line should contain the URL to the Git repository you just created, so make sure to replace your_github_username with your own GitHub account username.
deploy:
  type: git
  repo: https://github.com/your_github_username/hexo_static.git
  branch: master
Save and exit the file.
Because we’ve chosen to use Git for deployment, we need the Hexo package that sends our static markup to the Git repository.
Use npm to install it.
- npm install hexo-deployer-git --save
You can now test deployment to the hexo_static repository and give it its first Hexo automated commit via:
- hexo generate && hexo deploy
Enter your GitHub authentication details when prompted.
Here is what a successful output looks like (or similar) after using these commands. Minus the file generations and Git insertions:
OutputTo https://github.com/username/hexo_static.git.
 * [new branch]      master -> master
Branch master set up to track remote branch master from https://github.com/username/hexo_static.git.
INFO  Deploy done: git
Step 6 — Setting up Nginx
We’ll use a basic Nginx web server setup to serve the Hexo blog because Nginx serves static content very well, and our blog will only ever contain static files. There are other viable options that work fine too, like GitHub pages or web servers such as Apache, but this choice in particular ensures some efficiency and personal control over the hosting.
First, create the system directories, which we’ll tell Nginx to use for hosting.
- sudo mkdir -p /var/www/hexo
Then give your current Ubuntu user ownership of these web server system directories.
- sudo chown -R $USER:$USER /var/www/hexo
Update the permissions in accordance with the ownership.
- sudo chmod -R 755 /var/www/hexo
Open up the default Nginx server block for editing.
- sudo nano /etc/nginx/sites-available/default
Ignoring the areas and lines of the file that are commented out, make changes to the active part of the configuration code so the root directive points to the /var/www/hexo directory.
. . .

server {
    listen 80 default_server;
    listen [::]:80 default_server ipv6only=on;

    root /var/www/hexo;
    index index.html index.htm;

. . .
Save and exit the file. If in the future you set up a domain name for this server, then come back to this file and replace the server_name entry in the same block with your new domain name.
Lastly, restart the Nginx service for the changes to take effect.
- sudo service nginx restart
Step 7 — Creating Git Hooks
In this step, we’ll link the hexo_static repository to another Git repository, so we can send the static HTML files through to the web server directory (when triggered).
First, initialize a new empty Git repository (not on GitHub). This repository’s only purpose will be to forward the contents of our hexo_static repository onto the web server directory.
- git init --bare ~/hexo_bare
Make a new hook file inside the Git generated hooks directory:
- nano ~/hexo_bare/hooks/post-receive
Add the two lines of code below into file. This specifies the Git work tree (which has the source code) and Git directory (which has configuration settings, history, and more).
#!/bin/bash

git --work-tree=/var/www/hexo --git-dir=/home/$USER/hexo_bare checkout -f
Save and quit the file once completed.
Make this post-receive file executable.
- chmod +x ~/hexo_bare/hooks/post-receive
We must now clone the hexo_static deployment repository, which we created in step 5, to our server. Make sure you replace username in this next command with your own GitHub account username.
- git clone https://github.com/username/hexo_static.git ~/hexo_static
Move into the cloned repository.
- cd ~/hexo_static
Finally, add our bare repository from earlier as a Git remote named live.
- git remote add live ~/hexo_bare
Step 8 — Creating the Deploy Script
A short shell script can be used to start and trigger the entire deploy process we’ve set up here. This means we won’t have to run several Hexo commands individually or trigger the Git hook with multiple commands.
Move back into our original Hexo blog directory, and create a file for the deploy script.
- cd ~/hexo_blog
- nano hexo_git_deploy.sh
Paste the following code into the file:
#!/bin/bash

hexo clean
hexo generate
hexo deploy

( cd ~/hexo_static ; git pull ; git push live master )
Save and quit the file.
The script contains three hexo commands:
cleanremoves any previously generated static files in the public folder.generatecreates the static HTML files from our markdown, inside the public folder.deploysends the newly generated static files as a commit to the “live” Git repository we defined in_config.ymlearlier on.
The last line, ( cd ~/hexo_static ; git pull ; git push live master ), triggers the Git hook and updates the web server hosting directory with our HTML static files.
Be sure to save and quit the file once it’s filled out.
Make the new deploy script executable to complete this step.
- chmod +x hexo_git_deploy.sh
Step 9 — Running the Deploy Script
Run the deployment script we created in the previous step to test the overall deploy process.
- ./hexo_git_deploy.sh
Wait for the commands and processing to complete, entering in any GitHub authentication details in the process. Then, take a look at the files in the /var/www/hexo directory.
- ls /var/www/hexo
Output2015 2016 archives categories css fancybox index.html js tags
Your web server directory should now be populated with the blog’s website files, which means accessing the web server through your browser will take you to the blog.
Visit http://your_server_ip/ in your favorite browser to see your blog live (without using the test server).
To deploy new blog changes in the future, all you need do is re-run the hexo_git_deploy.sh script. Remember to test new posts for errors with the hexo server or hexo server -d commands before deploying.
Step 10 — Examining Hexo’s Filesystem (Optional)
This section is optional and provides some background on the rest of Hexo’s filesystem. None of these files need changing or altering for this tutorial, but it’s good to know the general purpose of each one for if you want to make use of them in the future.
The layout of the files and directories looks like this:
Hexo files and directories├── _config.yml
├── node_modules
├── package.json
├── scaffolds
├── source
|   └── _posts
└── themes
node_modules
In this directory, Hexo stores the modules you download via npm for use with your blog. At the end of this tutorial, there will only be the packages we downloaded in step 1.
Outputhexo hexo-generator-archive hexo-generator-category hexo-generator-index hexo-generator-tag hexo-renderer-ejs hexo-renderer-marked hexo-renderer-stylus hexo-server
Some of these unfamiliar modules come bundled as part of the core packages. There is usually no real need to change or remove the files in here.
package.json
This JSON file contains our Hexo package configurations and versions which Hexo will use for your blog.
If you are ever required to update, downgrade, or remove a package manually, it can be done by altering the values in here. Usually, you will only need to do this if a conflict arises within Hexo, which is relatively uncommon.
scaffolds
When creating new posts, Hexo can base them upon template files in the scaffolds folder.
You must first create template files and place them here to use them. This feature is optional and only necessary if you’d like repeated layouts for your future Hexo posts.
source
The posts you publish and want visible to the public are kept in _posts, and once they’re generated, the _drafts folder plus any other user created pages live here too.
The vast majority of your blog’s Markdown content is placed inside of here by Hexo in one of these subfolders.
themes
Custom themes, once downloaded, should be kept in here. Most themes have their own _config.yml file to hold their equivalent configuration settings. We stuck with the default theme for the purposes of this guide.
Conclusion
There’s a lot more to Hexo than what was covered in this guide, but this is a good head-start for building your new blogging site. The documentation for Hexo is very concise if you want to learn more. Looking into installing one of the custom themes available for Hexo is the next step towards developing your blog.
Thanks for learning with the DigitalOcean Community. Check out our offerings for compute, storage, networking, and managed databases.
About the author(s)
former DO tech editor publishing articles here with the community, then founded the DO product docs team (https://do.co/docs). to all of my authors: you are incredible. working with you was a gift. love is what makes us great.
Still looking for an answer?
This textbox defaults to using Markdown to format your answer.
You can type !ref in this text area to quickly search our full set of tutorials, documentation & marketplace offerings and insert the link!
Splendid tutorial,did help me a lot.But it’s that possible to keep my Hexo online and editable on my domain by configuring the nginx port?
Hey, thank you for this great tutorial. But I’m getting this error (Ubuntu 16.04!) when executing the deploy script:
remote: fatal: Not a git repository: '/home/root/hexo_bare'
I initialized the bare repo like this: sudo git init --bare ~/hexo_bare.
What am I missing?
after running ./hexo_ git _deploy.sh, I checked /var/www/hexo but it’s empty, please help!
I find the number of hexo* directories and their relationship to be confusing. In order they appeared in the tutorial:
1 ~/hexo-blog (local) 2 hexo_static repo on github 3 /var/www/hexo “the live directory” 4 ~/hexo_bare (local) 5 ~/hexo_static (local)
3 and 4 are a single unit from git viewpoint.
A) hexo_deploy: 1 -> {3,4}
B) hexo_static% git pull 2 -> 5
C) hexo_static% git push live master 5 -> {3,4}
Assuming ~/blog and /var/www/hexo, are on the same machine, as is written in the article, then A) alone will get the public blog up and running.
B,C show a route 2->5->{3,4} from the github repo to live, but there is no route from a different local machine to the github repo, so it seems simply wrong.
I’m probably missing something obvious.
How about with a separate local and server:
1.0 ~/hexo-blog (local) 1.1 ~/hexo_static (local) 2 hexo_static repo on (github) 3.0 ~/hexo_static (server) 3.1 /var/www/hexo “the live directory” (server)
local - hexo_blog % deploy 1.0 -> 1.1 local - hexo_static % git push 1.1 -> 2 server - hexo_static % git pull 2- > 3.0 server - hexo_static % git checkout 3.0->3.1
(all very approximate shorthand, not meant to be literal commands)
This comment has been deleted
 This work is licensed under a Creative Commons Attribution-NonCommercial- ShareAlike 4.0 International License.
Become a contributor for community
Get paid to write technical tutorials and select a tech-focused charity to receive a matching donation.

DigitalOcean Documentation
Full documentation for every DigitalOcean product.

Resources for startups and AI-native businesses
The Wave has everything you need to know about building a business, from raising funding to marketing your product.
The developer cloud
Scale up as you grow — whether you're running one virtual machine or ten thousand.

Start building today
From GPU-powered inference and Kubernetes to managed databases and storage, get everything you need to build, scale, and deploy intelligent applications.
