By Hanif Jetha

Introduction
DigitalOcean’s Custom Images feature allows you to bring your virtual disk images from an on-premise environment or another cloud platform to DigitalOcean and use them to start DigitalOcean Droplets.
As described in the Custom Images documentation, the following image types are supported natively by the Custom Images upload tool:
In this tutorial, we’ll demonstrate how to use the free and open-source VirtualBox virtualization tool to create a DigitalOcean-compatible VDI image (VirtualBox Disk Image) from an Ubuntu 18.04 ISO. The steps in this guide can be adapted to work with your preferred distribution’s ISO images.
Prerequisites
Before you begin, you’ll need the following available to you:
-
A local machine or remote server (with GUI access) onto which you’ll install and use VirtualBox. In this tutorial we’ll use a Mac OS X local machine, but you can use any system supported by VirtualBox. To learn more about supported systems, consult the VirtualBox Manual. The GUI menu options should be similar across operating systems, but may not be identical.
-
An ISO-format Ubuntu 18.04 Server OS image. The
ubuntu-18.04.1-live-server-amd64.isoimage meets the two requirements listed in the Custom Images Image Requirements:- Your image must support the ext3 or ext4 filesystems
- Your image must have
cloud-init0.7.7,cloudbase-init,coreos-cloudinit,iginition, orbsd-cloudinitinstalled (Ubuntu 18.04 Server comes withcloud-initinstalled)
If you’re adapting these steps for another distribution’s ISO and your image does not have cloud-init installed and configured, you must install and configure it manually after installing the OS.
Once you have these prerequisites available to you, you’re ready to begin with this guide.
Step 1 — Installing VirtualBox and Creating a Virtual Machine
The tool we’ll use to convert the ISO-format image in this guide is VirtualBox, a free and open-source virtualizer for x86 hardware. By default, VirtualBox uses a GUI, which we’ll use to create the VDI image in this guide.
To begin, download and install VirtualBox from the downloads page. Follow the appropriate link in the VirtualBox 5.2.20 platform packages section depending on your host operating system. In this guide, we’ll be using an OSX system, so we’ll download and install VirtualBox using the provided DMG.
Once you’ve installed VirtualBox, open the application.
You should see the following welcome screen:
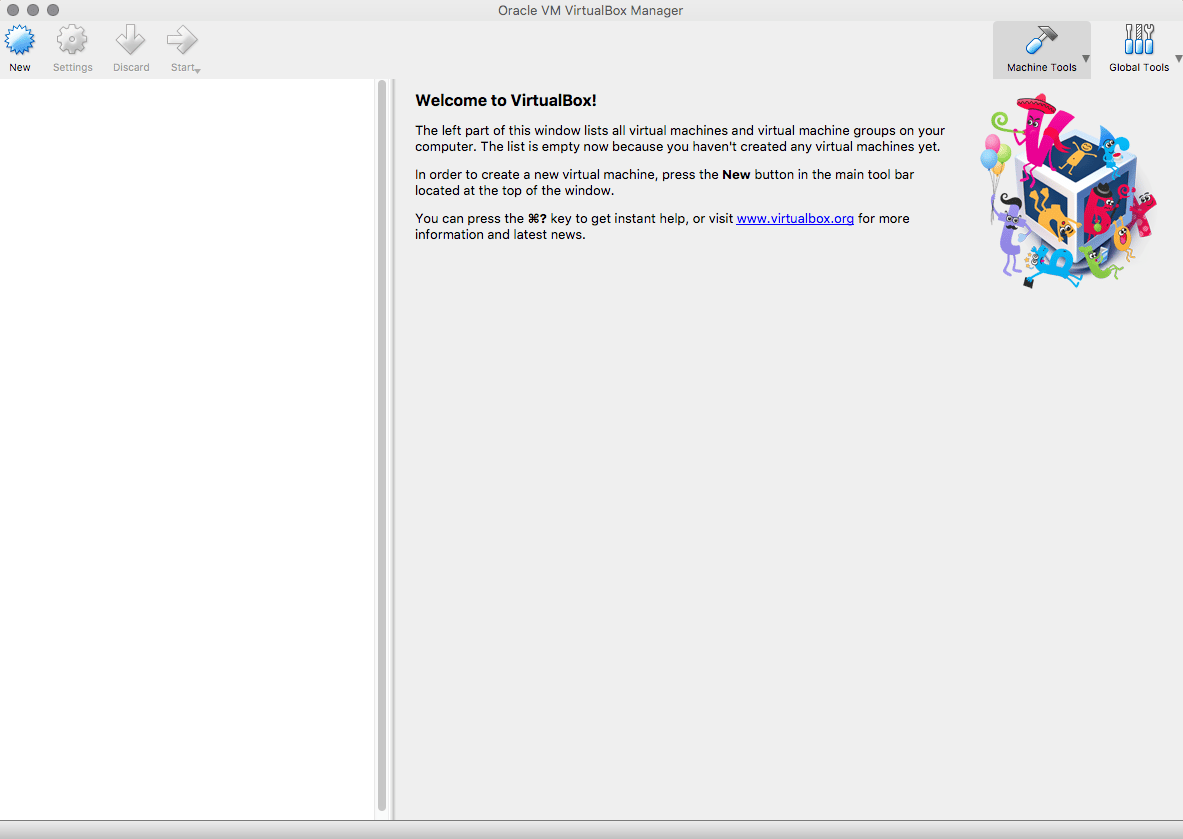
Click on New to begin creating your Ubuntu virtual machine.
The following window should pop up, allowing you to name your virtual machine (VM) and select its OS:
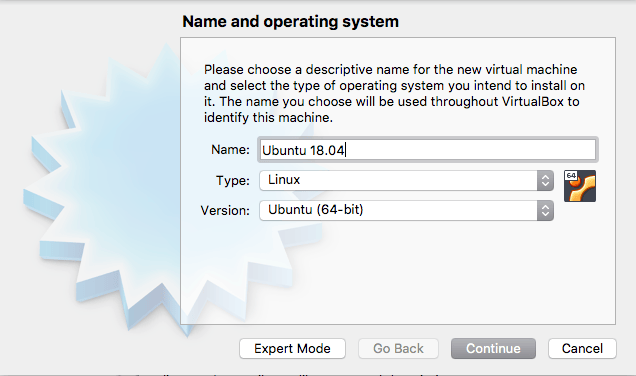
In this tutorial, we’ll name our VM Ubuntu 18.04, but feel free to give the VM a more descriptive name.
For Type, select Linux, and for Version, select Ubuntu (64-bit). Then, hit Continue.
The following screen should appear, allowing you to specify how much memory to allocate to your virtual machine:

Unless you have a more complex use case, 1024 MB should be enough memory for your virtual machine. If you need to adjust memory size, enter the amount of memory to be allocated to the VM, then hit Continue.
You should see the following screen:
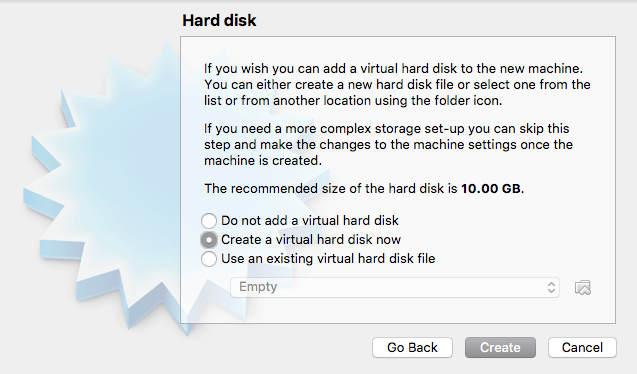
This window allows you to create a virtual hard disk for your VM. This virtual hard disk is the image that you’ll upload to DigitalOcean in a later step. The Ubuntu operating system will be installed from the ISO you downloaded to this virtual hard disk. Make sure Create a virtual hard disk now is selected, and hit Create.
The following Hard disk file type window should appear, allowing you to select the format you’d like to use for your image:
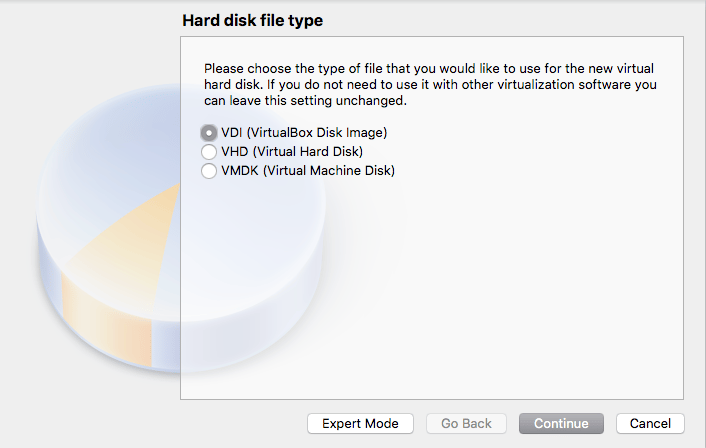
All three types are supported by DigitalOcean Custom Images, so unless you have a strong preference, select VDI (VirtualBox Disk Image). Hit Continue.
You should then see the following window:
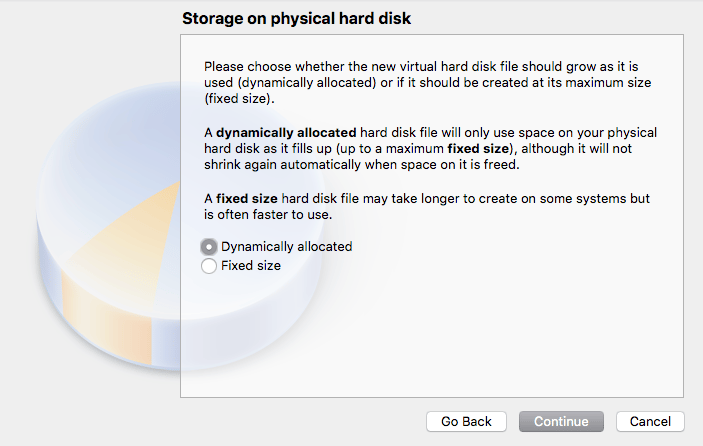
This window allows you to choose between a Dynamically allocated or Fixed size hard disk file. We’ll use the default Dynamically allocated option and allow the file to grow as we install the Ubuntu OS and packages. Hit Continue.
The next window allows you to name your hard disk file (as well as choose the path to which it will be saved), and specify its maximum size:
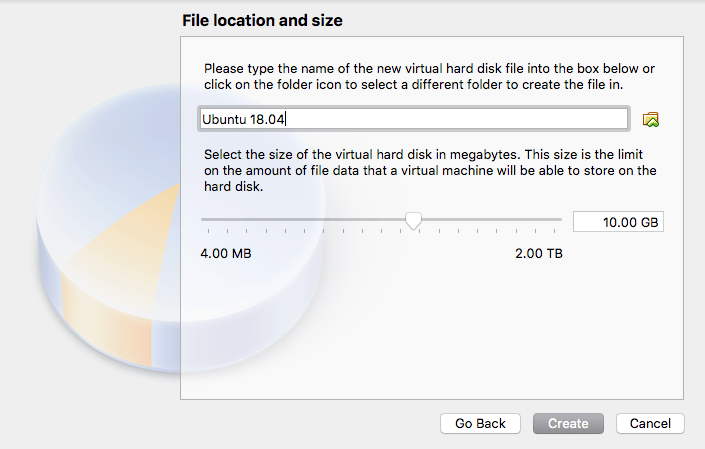
Be sure to give yourself enough disk space to install the operating system as well as additional packages you may need. The default 10 GB should be fine for most purposes, but if you anticipate installing a large number of packages or storing a lot of data in the image, you should bump this up to your anticipated disk usage.
Once you’ve selected the size of the virtual hard disk, hit Create.
At this point, you’ll be returned to the initial welcome screen, where you’ll see the virtual machine you just created:
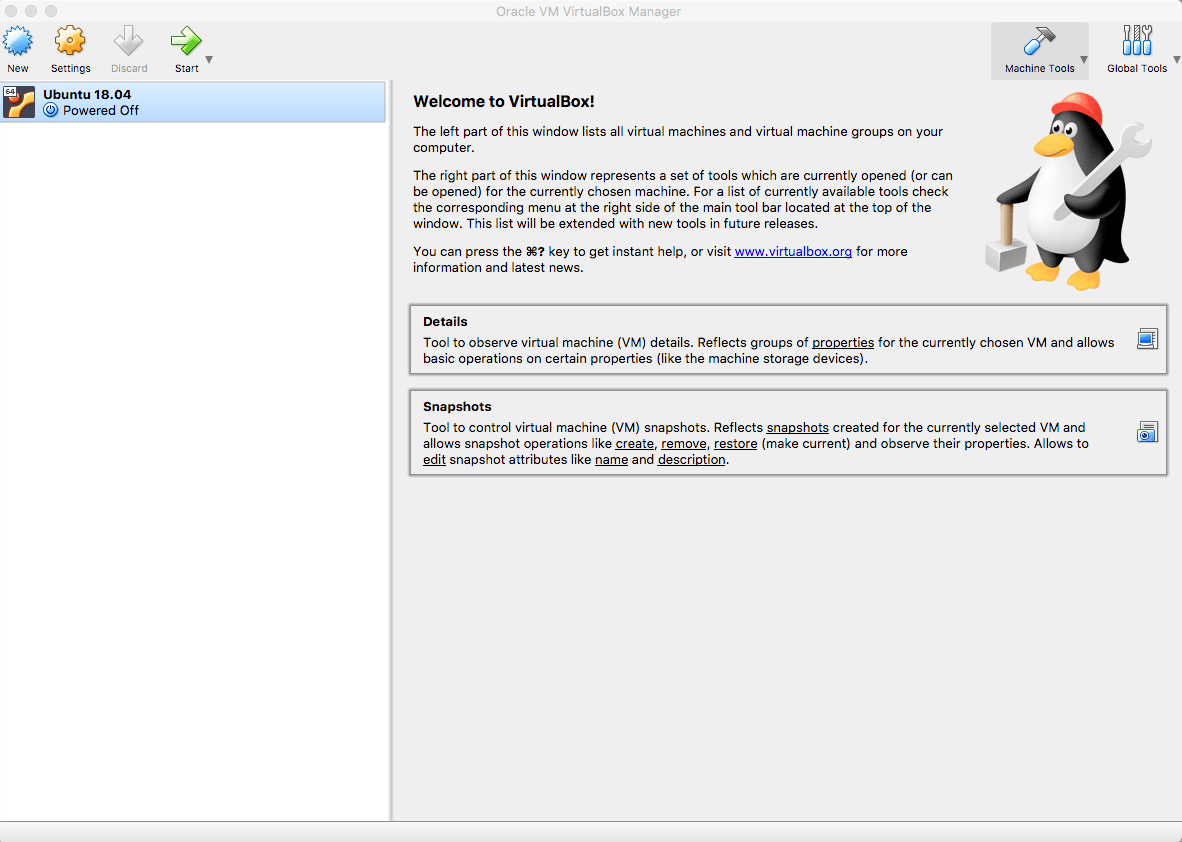
We can now begin installing Ubuntu onto the virtual machine.
Step 2 — Installing Ubuntu 18.04 onto the Virtual Machine
In this step we’ll install and configure the Ubuntu operating system onto our virtual machine.
To begin, from the VirtualBox welcome screen, select your virtual machine, and hit the Start button in the toolbar.
You should see the following virtual machine window, prompting you to select the ISO file from which you’ll boot the system:
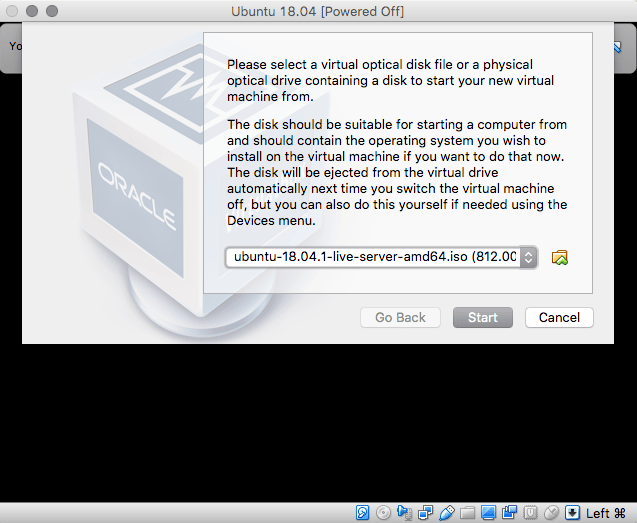
Select the Ubuntu 18.04 Server ISO you downloaded, and hit Start.
In the VM, the Ubuntu installer will begin booting from the ISO, and you should be brought to the following menu:
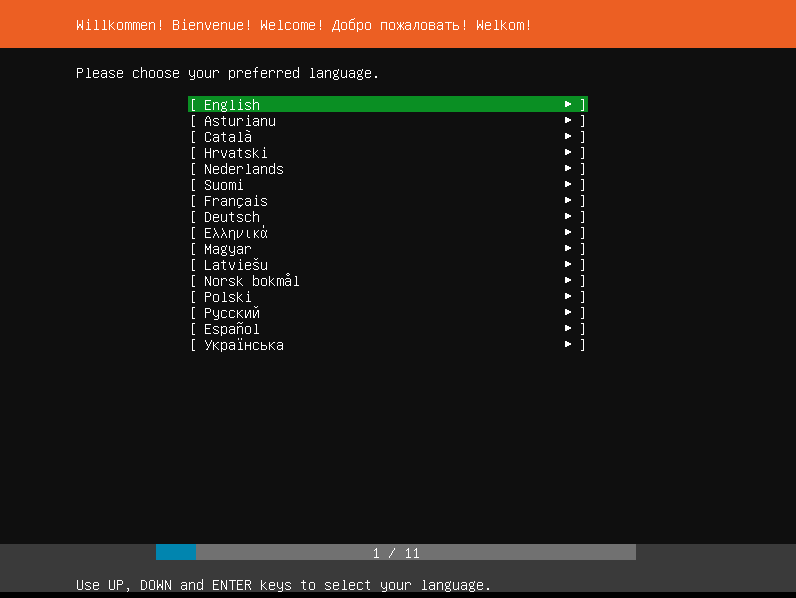
Choose your preferred language using the arrow keys, and hit ENTER to continue.
You should then see the following Keyboard configuration screen:
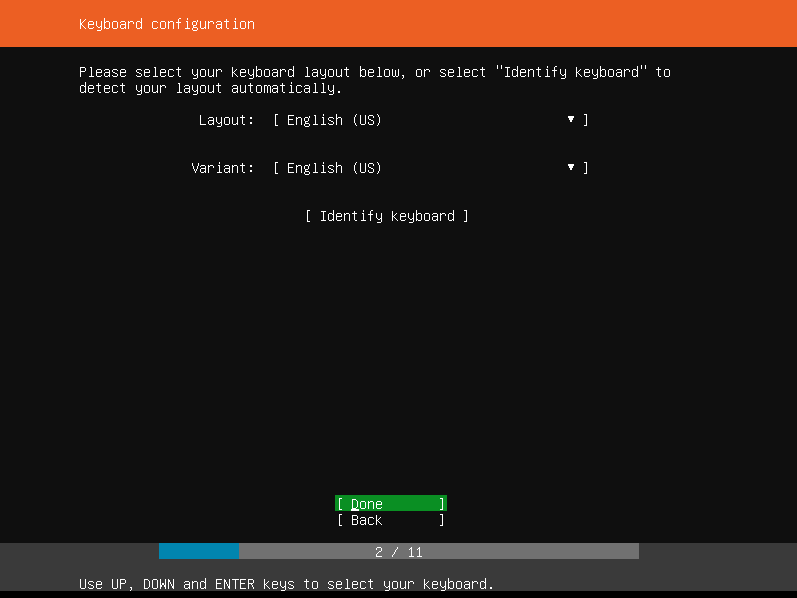
Choose your preferred keyboard configuration, select Done, and hit ENTER.
Next, you’ll be brought to the following installer selection screen:
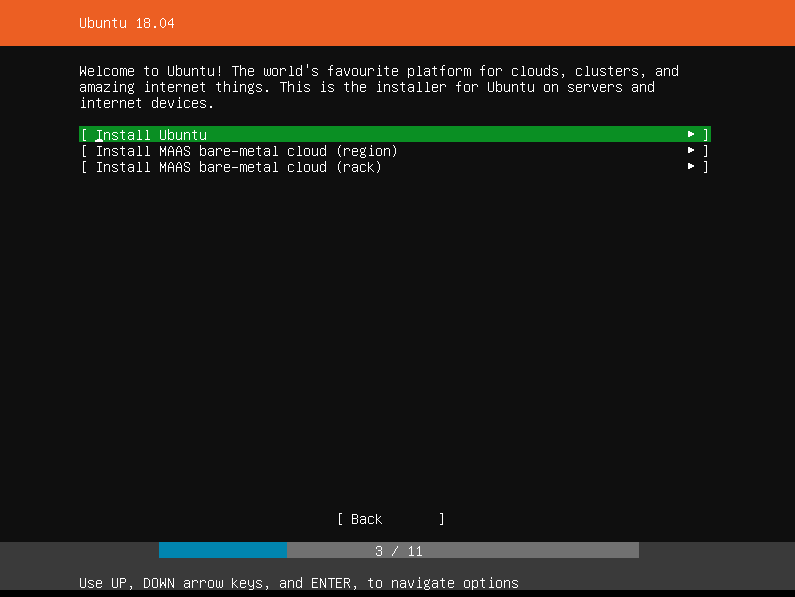
Select Install Ubuntu, and hit ENTER.
The following Network connections screen should appear:
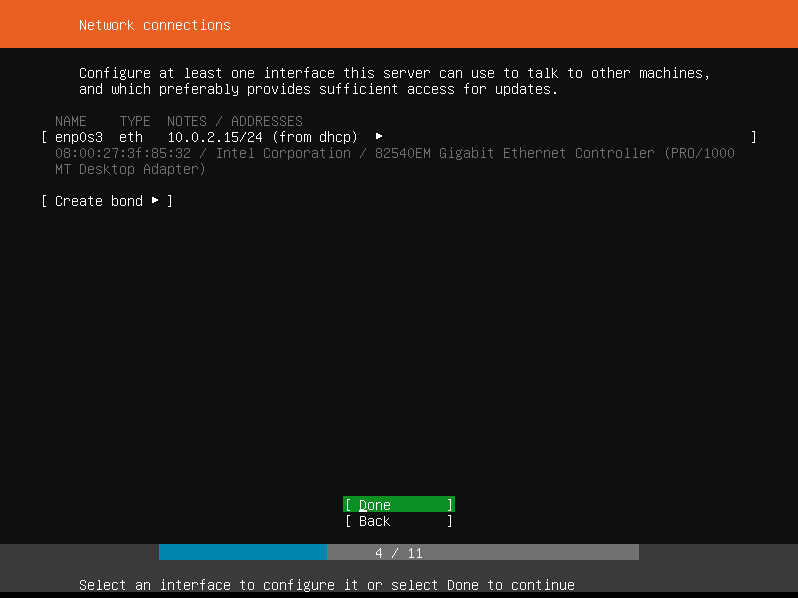
This screen allows you to configure the network interfaces for your Ubuntu server. Since we’re performing the installation on a virtual machine, we’ll just use the default option as the configured interface will be overwritten when we launch the image on the DigitalOcean platform.
Select Done and hit ENTER.
You’ll then be brought to the following Configure proxy screen:
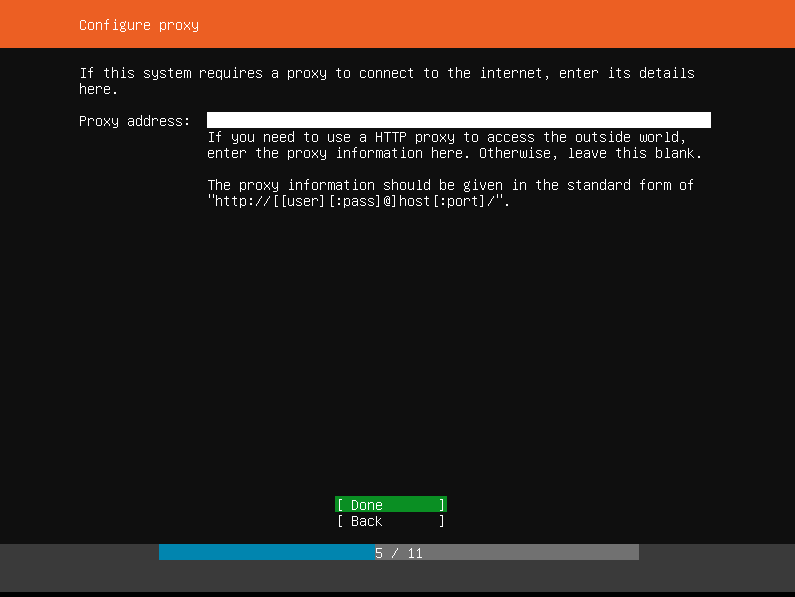
If you require a proxy, enter it here. Then, select Done, and hit ENTER.
The next screen will allow you to choose an Ubuntu archive mirror:
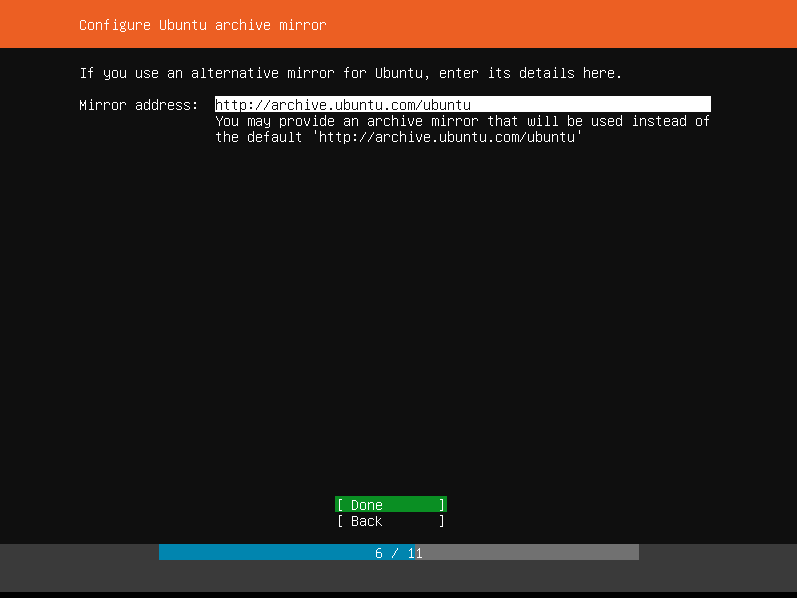
Unless you require a specific mirror, the default should be fine here. Select Done and hit ENTER.
Next, you’ll be prompted to partition your virtual disk:
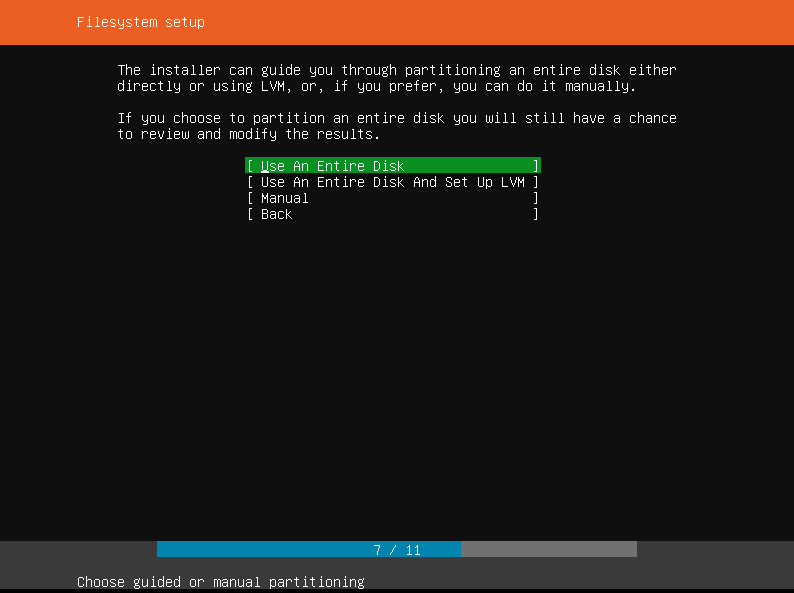
Unless you’d like to set up Logical Volume Manager (LVM) or manually partition the virtual disk, select Use An Entire Disk to use the entire attached virtual disk, and hit ENTER.
The following screen allows you to select the virtual disk that will be partitioned:
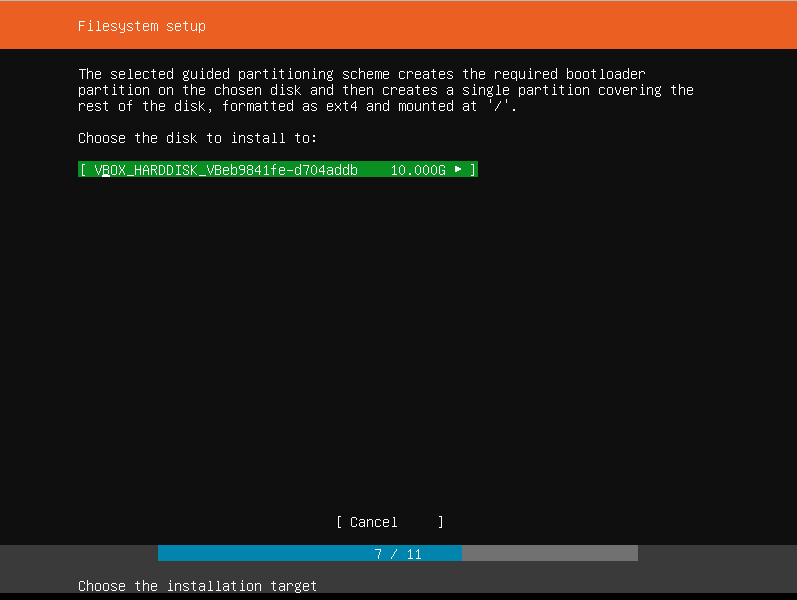
As described in the prompt text, the installer will create a partition for the bootloader, and use the remaining virtual disk space to create an ext4 partition to which the Ubuntu OS will be installed.
Select the attached virtual disk and hit ENTER.
The following screen displays a summary of the filesystem installer options before partitioning:
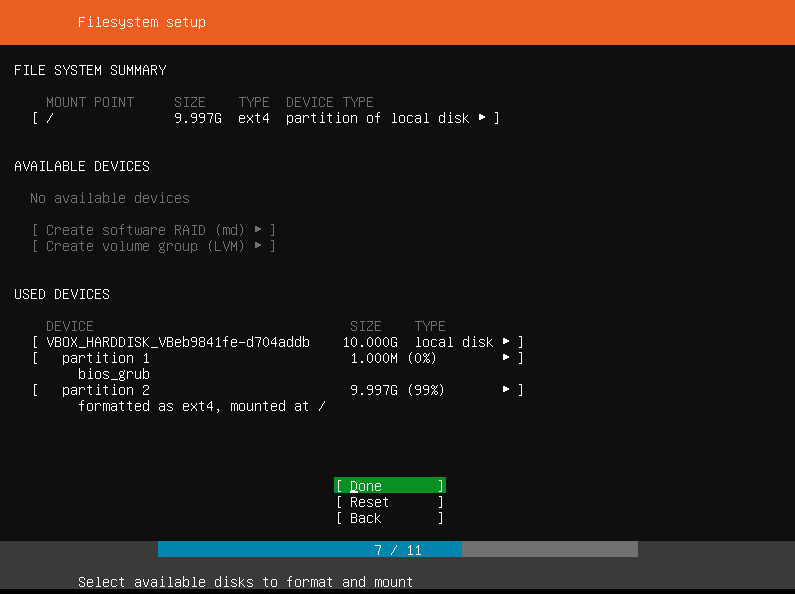
The ext4 partition will be mounted to /, and a second partition (1 MB) will be created for the GRUB bootloader. Once you’ve gone over and confirmed the partitioning scheme for your virtual disk, select Done and hit ENTER.
In the confirmation screen that appears, select Continue and hit ENTER.
The next screen will allow you to configure the system hostname, as well as an Ubuntu user:
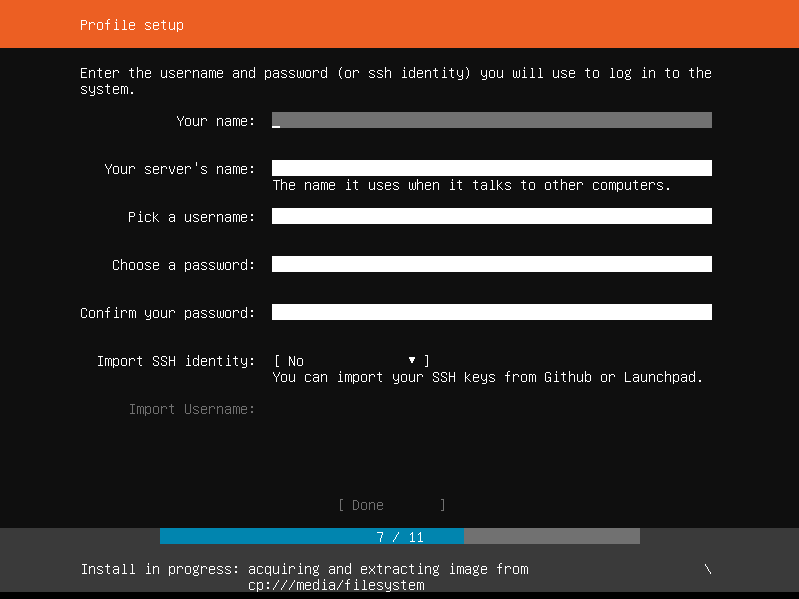
Note that as you fill out this screen, the installer will continue copying files to the virtual disk in the background.
In this tutorial, we’ll create a user named sammy and call our server ubuntu. The server name will likely be overwritten when this image is run on the DigitalOcean platform, so feel free to give it a temporary name here.
You can upload your SSH keys to DigitalOcean and automatically embed them into created Droplets, so for now we won’t Import SSH identity. To learn how to upload your SSH keys to DigitalOcean, consult the Droplet Product Documentation.
Once you’ve filled in all the required fields, the prompt should look something like this:
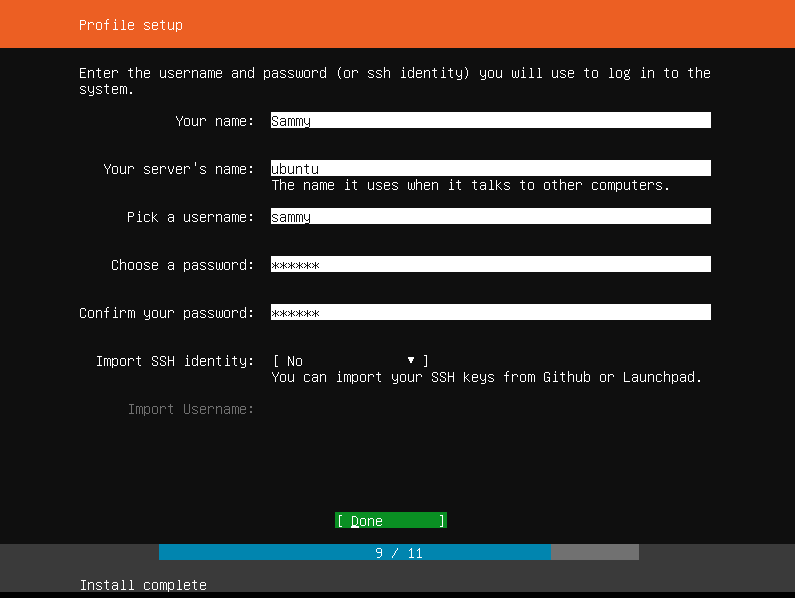
Select Done and hit ENTER.
The next screen will prompt you to select popular snaps for your Ubuntu server. Snaps are prepackaged bundles of software that contain an application, its dependencies, and configuration. To learn more about snaps, consult the Snap Documentation.
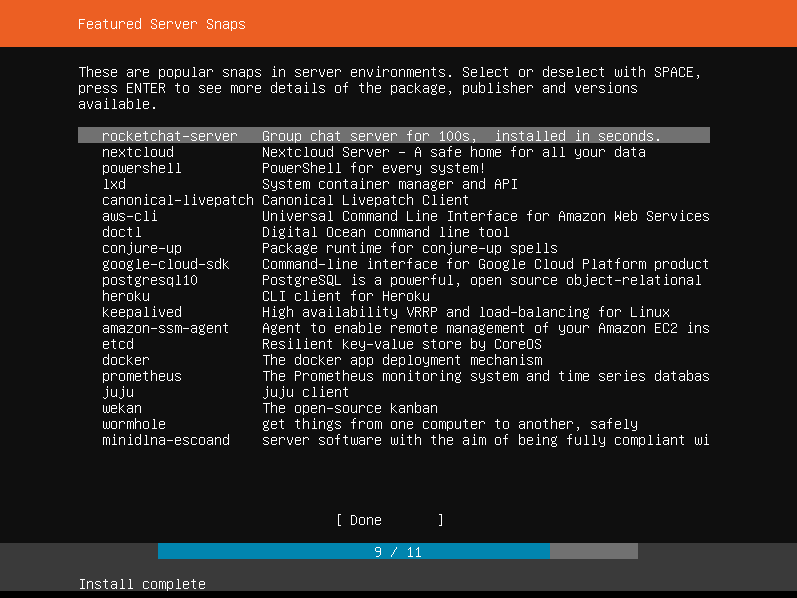
In this guide we won’t install any snaps and will manually install packages in a later step. If you’d like to install a snap, select or deselect it using SPACE and scroll down to Done. Then, hit ENTER.
Regardless of your selection in the snap screen, you’ll then be brought to an installation progress and summary screen:
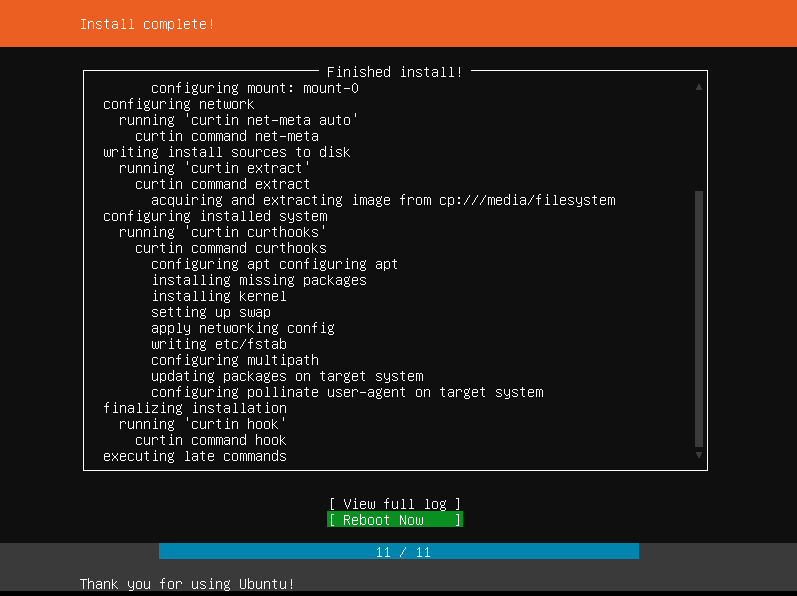
Once the installation completes, select Reboot Now and hit ENTER.
The installer will shut down and prompt you to remove the installation medium (in this case this is the ISO image we selected earlier). In most cases, the ISO will be detached automatically upon reboot, so you can simply hit ENTER.
To double check, in the VirtualBox GUI menu, navigate to Devices, and then Optical Drives. If the Remove disk from virtual drive option is available to you, click on it to detach the ISO from the virtual machine. Then, back in the virtual machine window, hit ENTER.
The system will reboot in the virtual machine, this time from the virtual disk to which we installed Ubuntu.
Since cloud-init is installed by default on Ubuntu 18.04 Server, the first time Ubuntu boots, cloud-init will run and configure itself. In the virtual machine window, you should see some cloud-init log items and have a prompt available to you. Hit ENTER.
You can then log in to your Ubuntu server using the user you created in the installer.
Enter your username and hit ENTER, then enter your password and hit ENTER.
You should now have access to a command prompt, indicating that you’ve successfully completed the Ubuntu 18.04 installation, and are now logged in as the user you created previously.
In the next step of this guide, we’ll reconfigure cloud-init and set it up to run when the Ubuntu image is launched as a Droplet on the DigitalOcean platform.
Step 3 — Reconfiguring cloud-init
cloud-initNow that we’ve installed Ubuntu 18.04 to a virtual disk and have the system up and running, we need to reconfigure cloud-init to use the appropriate datasource for the DigitalOcean platform. A cloud-init datasource is a source of config data for cloud-init that typically consists of userdata (like shell scripts) or server metadata, like hostname, instance-id, etc. To learn more about cloud-init datasources, consult the official cloud-init docs.
By default, on Ubuntu 18.04, cloud-init configures itself to use the DataSourceNoCloud datasource. This will cause problems when running the image on DigitalOcean, so we need to reconfigure cloud-init to use the ConfigDrive datasource and ensure that cloud-init reruns when the image is launched on DigitalOcean.
To begin, ensure that you’ve started your Ubuntu 18.04 virtual machine and have logged in as the user you created earlier.
From the command line, navigate to the /etc/cloud/cloud.cfg.d directory:
- cd /etc/cloud/cloud.cfg.d
Use the ls command to list the cloud-init config files present in the directory:
- ls
Output05_logging.cfg 50-curtin-networking.cfg 90_dpkg.cfg curtin-preserve-sources.cfg README
First, delete the 50-curtin-networking.cfg file, which configures networking interfaces for your Ubuntu server. When the image is launched on DigitalOcean, cloud-init will run and reconfigure these interfaces automatically. If this file is not deleted, the DigitalOcean Droplet created from this Ubuntu image will have its interfaces misconfigured and won’t be accessible from the internet.
- sudo rm 50-curtin-networking.cfg
Next, we’ll run dpkg-reconfigure cloud-init to remove the NoCloud datasource, ensuring that cloud-init searches for and finds the ConfigDrive datasource used on DigitalOcean:
- sudo dpkg-reconfigure cloud-init
You should see the following graphical menu:
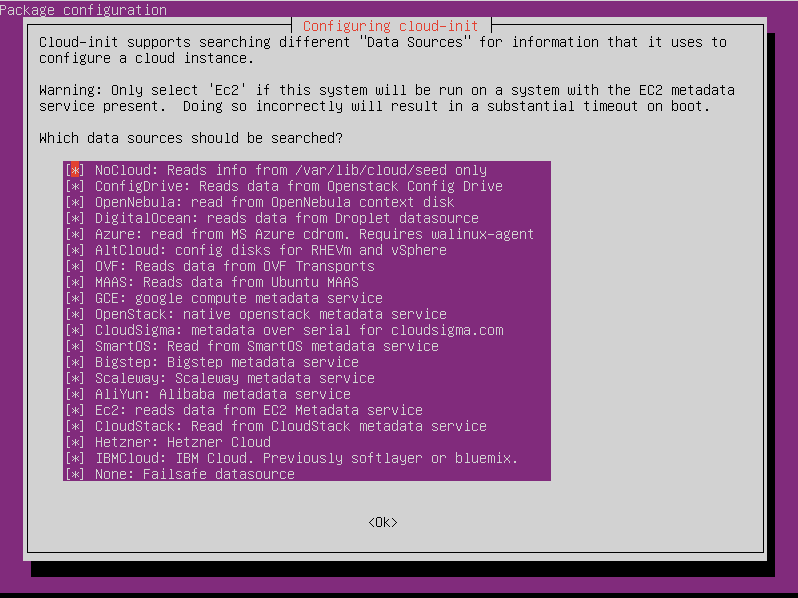
The NoCloud datasource is initially highlighted. Press SPACE to unselect it, then hit ENTER.
Finally, navigate to /etc/netplan:
- cd /etc/netplan
Remove the 50-cloud-init.yaml file (this was generated from the cloud-init networking file we removed earlier):
- sudo rm 50-cloud-init.yaml
The final step is ensuring that we clean up configuration from the initial cloud-init run so that it reruns when the image is launched on DigitalOcean.
To do this, run cloud-init clean:
- sudo cloud-init clean
At this point, your image is ready to be launched on the DigitalOcean platform. You can install additional packages and software into your image. Once you’re done, shutdown your virtual machine:
- sudo shutdown -h now
We can now move on to uploading and launching this custom image on the DigitalOcean platform.
Step 4 — Uploading Custom Image and Creating Droplet
Now that we’ve created an Ubuntu 18.04 VDI image and configured it for use on DigitalOcean, we can upload it using the Custom Images upload tool.
On macOS, the Ubuntu virtual disk image we created and configured will be located by default at ~/VirtualBox VMs/your_VM_name/your_virtual_disk_name.vdi. This path may vary slightly depending on the OS you’re using with VirtualBox.
Before we upload the image, we’ll compress it to speed up the file transfer to DigitalOcean.
On your host OS (not inside the virtual machine), navigate to the directory containing your VDI image file:
- cd ~/VirtualBox\ VMs/Ubuntu\ 18.04/
Now, use gzip to compress the file:
- gzip < Ubuntu\ 18.04.vdi > Ubuntu\ 18.04.gz
In this command we pipe the source Ubuntu 18.04.vdi file into gzip, specifying as output the Ubuntu 18.04.gz compressed file.
Once gzip finishes compressing your file, upload the .gz file to DigitalOcean, following instructions in the Custom Images Quickstart.
You should now be able to create and use Droplets from your custom Ubuntu 18.04 Server image.
Conclusion
In this tutorial, we learned how to create a custom VDI image from a vanilla Ubuntu 18.04 ISO using the VirtualBox virtualization tool. We adjusted cloud-init so it can properly configure Droplet networking on DigitalOcean, and finally compressed and uploaded the image using the Custom Images upload tool.
You can adjust the steps in this tutorial to work with your preferred Linux distribution’s ISO images. Ensure that you have an SSH server installed and configured to start on boot, and that cloud-init has been installed and properly configured to use the ConfigDrive datasource. Finally, ensure that any stale networking configuration files have been purged.
You may also wish to use a tool like Packer to automate the creation of your machine images.
To learn more about DigitalOcean Custom Images, consult the Custom Images product docs and launch blog post.
Thanks for learning with the DigitalOcean Community. Check out our offerings for compute, storage, networking, and managed databases.
About the author
DevOps Engineer, Former Technical Writer and Editor at DigitalOcean. Expertise in topics including Ubuntu, Kubernetes, Docker, CentOS.
Still looking for an answer?
This textbox defaults to using Markdown to format your answer.
You can type !ref in this text area to quickly search our full set of tutorials, documentation & marketplace offerings and insert the link!
Should the image be operational on my virtual box locally afterwards? When I power it on its stuck on starting initial cloud-init job (metadata bal bla bla) then eventually times out. It dose not make it to the login screen.
I haven’t tried uploading it to a droplet yet. since I can’t install anything on it.
The purpose of this is to be able to make a server setup on my local virtual box and then upload it to digital ocean once its complete is it not?
Ok scrap that it just went to login. Took some time though… its that normal?
Thanks
We’re approaching the end of 2019 and still no support for .ISO images.
Would this be ideal for Wordpress LXD containers for clients or defeats the purpose?
This does not work when using Virtualbox to create the VM and wanting digital ocean to send a root password to email. When creating the droplet you get the error “The image for this droplet does not use root passwords, please use an SSH key.” Even if you go into /etc/ssh/sshd_config and set “PermitRootLogin yes” it still gives the same error.
Anyone know how to use ubuntu server on Virtualbox and get a workind .vdi file.
I’ve had some network issues following this guide (the droplet wouldn’t create a netplan config) until I disabled all cloud-init data sources except DigitalOcean. Disabling only NoCloud wasn’t enough.
This comment has been deleted
this guide can not auto resize disk, because the first partion is GRUB bootloader , and second partition is /, so when cloudinit boot resize2fs can not resize / partion
The last part of these instructions (setting up for cloud-init within Digital Ocean) no longer work for the latest 18.04, which is 18.04.6. I believe this is also true of 18.04.5. Instead, you can use the instructions at the following URL for 20.04. Apparently, the latest 18.04 is using the same cloud-init stack for networking as 20.04:
Use this “Reconfiguring cloud-init in Ubuntu 20.04” for 18.04.5 and above: https://www.digitalocean.com/community/questions/droplet-created-from-personal-custom-image?comment=92217
Many thanks to @Yannek for figuring this part out, and to @hjet for these excellent instructions.
 This work is licensed under a Creative Commons Attribution-NonCommercial- ShareAlike 4.0 International License.
Become a contributor for community
Get paid to write technical tutorials and select a tech-focused charity to receive a matching donation.

DigitalOcean Documentation
Full documentation for every DigitalOcean product.

Resources for startups and AI-native businesses
The Wave has everything you need to know about building a business, from raising funding to marketing your product.
The developer cloud
Scale up as you grow — whether you're running one virtual machine or ten thousand.

Start building today
From GPU-powered inference and Kubernetes to managed databases and storage, get everything you need to build, scale, and deploy intelligent applications.
