
Status: Deprecated
This article is deprecated and no longer maintained.
See Instead
This article may still be useful as a reference but may not work or follow best practices. We strongly recommend using our Spaces product documentation instead. For the tasks in this guide, you can follow these docs:
Introduction
DigitalOcean Spaces is an object storage service that makes it easy and cost-effective to store and serve large amounts of data. Individual Spaces can be created and put to use quickly, with no configuration necessary.
In this tutorial, we’ll use the DigitalOcean Control Panel to create a new Space. We’ll then retrieve an API key and secret that can be used to grant access to the Space in any S3-compatible client or library.
Prerequisites
To complete this tutorial, you’ll need a DigitalOcean account. If you don’t have one already, you can register for one on the signup page.
Log into the DigitalOcean Control Panel to begin.
Creating a Space
To create a new Space, use the Create button in the upper-right corner of the Control Panel. Click the button, then choose Spaces from the dropdown:

If you’ve never created a Space before, you can also create one directly from the Spaces page. To do so, click Spaces in the main navigation of the Control Panel, then click Create a space. Either option will take you to the Create a Space screen:

First, choose a name for your space. This name must be unique among all Spaces (that is, no other Spaces user can have the same name in any region), must be 3–63 characters long, and may only contain lowercase letters, numbers, and dashes.
Next, choose the datacenter region you’d like your Space to be in. At the time this screenshot was captured, nyc3 and ams3 are the possible choices. More will become available over time.
Finally, choose whether you want unauthenticated users to be able to list out all files in your space. This does not affect access to individual files (that is set on a per-file basis), only the ability to obtain a list of all files. The default choice of Private is a safe one unless you have some scripts or clients that need to fetch file listings without an access key.
When your name and options are all set, scroll down and click the Create a Space button. Your Space will be created, and you’ll be taken to the file browser interface:
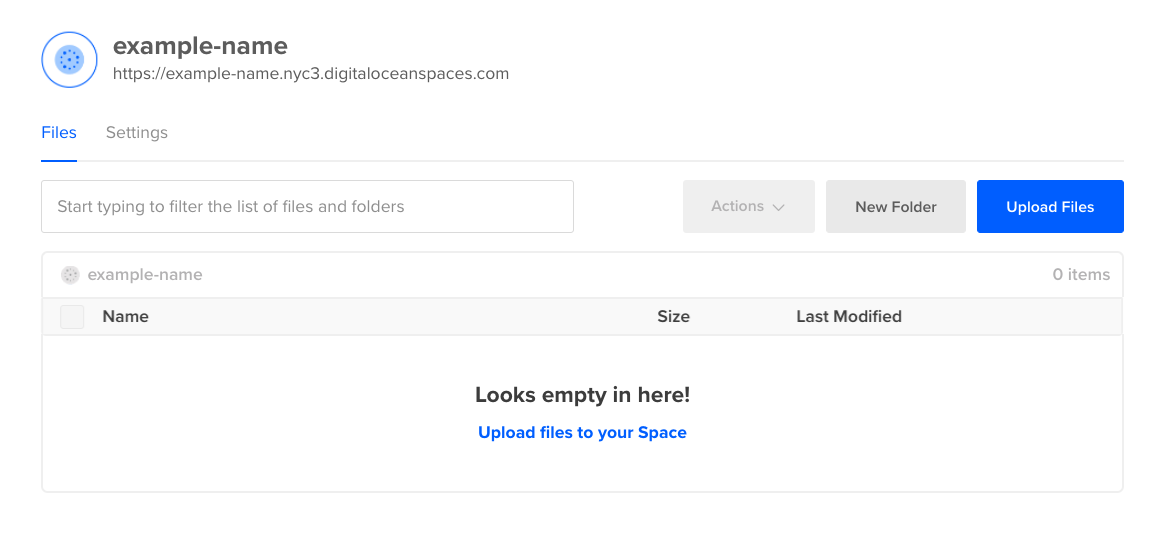
If this is your first Space, you will have a welcome.html file, otherwise the Space will be empty.
Take note of the URL of your Space. It’s available right under the Space name in the file browser view. In this example case, the full URL is https://example-name.nyc3.digitaloceanspaces.com. The Space name (often called the bucket name) here is example-name. The server URL (or address) is the remaining portion, consisting of the datacenter name followed by .digitaloceanspaces.com: https://nyc3.digitaloceanspaces.com.
There are a few different ways that clients and libraries will ask for this information. Some will want it in the same format it’s given in the Control Panel. Some require the bucket name to follow the server URL, such as https://nyc3.digitaloceanspaces.com/example-name. Still others will ask you to input the server address and bucket or Space name separately. Refer to your client or library’s documentation for more guidance here.
Next, we’ll create the key that we need to access our Spaces from third-party clients.
Creating an Access Key
To access our files from outside of the DigitalOcean Control Panel, we need to generate an access key and secret. These are a pair of random tokens that serve as a username and password to grant access to your Space.
First, click on the API link in the main navigation of the Control Panel. The resulting page lists your DigitalOcean API tokens and Spaces access keys. Scroll down to the Spaces portion:
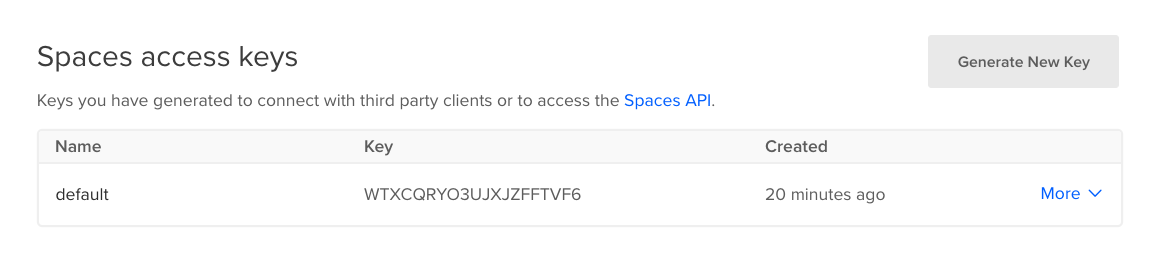
If this is your first Space, you might not have any keys listed. Click the Generate New Key button. The New Spaces key dialog will pop up:
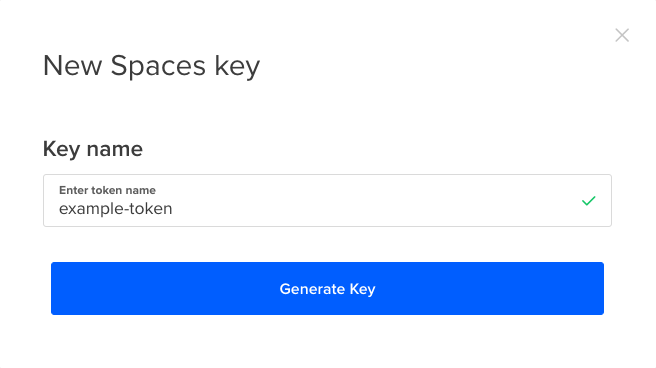
Enter a name for the key. You can create as many keys as you like, so keep in mind that the only way to revoke access for a key is to delete it. Therefore, you may want to partition keys by person, by team, or by the client software you’re using them in.
In this case, we’re making a key called example-token. Click the Generate Key button to complete the process. You’ll be returned to the API screen listing all of your keys. Note that the new key has two long tokens displayed:

The first is our access key. This is not secret and will continue to be visible in the Control Panel. The second string is your secret or secret key. This will only be displayed once. Record it in a safe place for later use. The next time you visit the API page this value will be gone, and there is no way to retrieve it.
Different S3-compatible clients may have subtly different names for the access key and secret. The terminology used is typically close enough to make it clear which token should go where. If not, please refer to your client or library’s documentation for more information.
Conclusion
In this tutorial we created a new DigitalOcean Space and a new access key and secret. We now know our server URL, bucket name (or Space name), access key, and secret. With this information you can connect most any S3-compatible client or library to your new DigitalOcean Space!
Thanks for learning with the DigitalOcean Community. Check out our offerings for compute, storage, networking, and managed databases.
About the author
Senior Technical Writer at DigitalOcean
Still looking for an answer?
This textbox defaults to using Markdown to format your answer.
You can type !ref in this text area to quickly search our full set of tutorials, documentation & marketplace offerings and insert the link!
What is a “bucket name”? See: https://www.digitalocean.com/community/tutorials/how-to-use-duplicity-with-gpg-to-back-up-data-to-digitalocean-spaces prerequisites
I have followed the tutorial and created access keys, but I cannot see how to map the keys to different Spaces. How and where is this done? Obviously we don’t want ClientA being able to use their own keys to access ClientB’s Space!
It seems the only way to assign keys to different storages is to create a separate account, is that right?
 This work is licensed under a Creative Commons Attribution-NonCommercial- ShareAlike 4.0 International License.
Become a contributor for community
Get paid to write technical tutorials and select a tech-focused charity to receive a matching donation.

DigitalOcean Documentation
Full documentation for every DigitalOcean product.

Resources for startups and SMBs
The Wave has everything you need to know about building a business, from raising funding to marketing your product.
The developer cloud
Scale up as you grow — whether you're running one virtual machine or ten thousand.

Get started for free
Sign up and get $200 in credit for your first 60 days with DigitalOcean.*

*This promotional offer applies to new accounts only.