By Bobby and Kathryn Hancox

The author selected the Open Source Initiative to receive a donation as part of the Write for DOnations program.
Introduction
Laravel is a free, open source PHP framework, based on Symfony and used for creating web applications. SendGrid is a cloud-based SMTP provider that allows you to send email without having to maintain email servers.
Having a contact form on your website makes it easier for your visitors to contact you directly. For your contact form to work correctly and send out emails, you need an SMTP server. This tutorial will use SendGrid and their free SMTP service to deliver the emails sent out from the website contact form to an email inbox.
In this tutorial, you’ll add a contact form to an existing Laravel application and configure it to send emails via SMTP using SendGrid.
Prerequisites
If you don’t already have a Laravel application set up, you will need the following:
- Access to an Ubuntu 20.04 server as a non-root user with sudo privileges, and an active firewall installed on your server. To set these up, please refer to our Initial Server Setup Guide for Ubuntu 20.04.
- The LEMP stack installed on your server by following the How to Install Nginx, MySQL and PHP on Ubuntu 20.04.
- Composer to install Laravel and its dependencies. You can install Composer by following our guide on How to Install Composer on Ubuntu 20.04.
- Laravel installed and configured on your server. If you don’t have Laravel already installed, you can follow our How To Install and Configure Laravel with Nginx on Ubuntu 20.04 tutorial.
After you have set up your Laravel application, you’ll also need the following:
- A SendGrid account. You can visit the SendGrid registration page to sign up for a free SendGrid account.
- A fully registered domain name pointed to your server. This tutorial will use
your_domainthroughout. You can purchase a domain name on Namecheap, get one for free on Freenom, or use the domain registrar of your choice. For DigitalOcean, you can follow this introduction to DigitalOcean DNS for details on how to add them.
Step 1 — Creating the Sender Identity
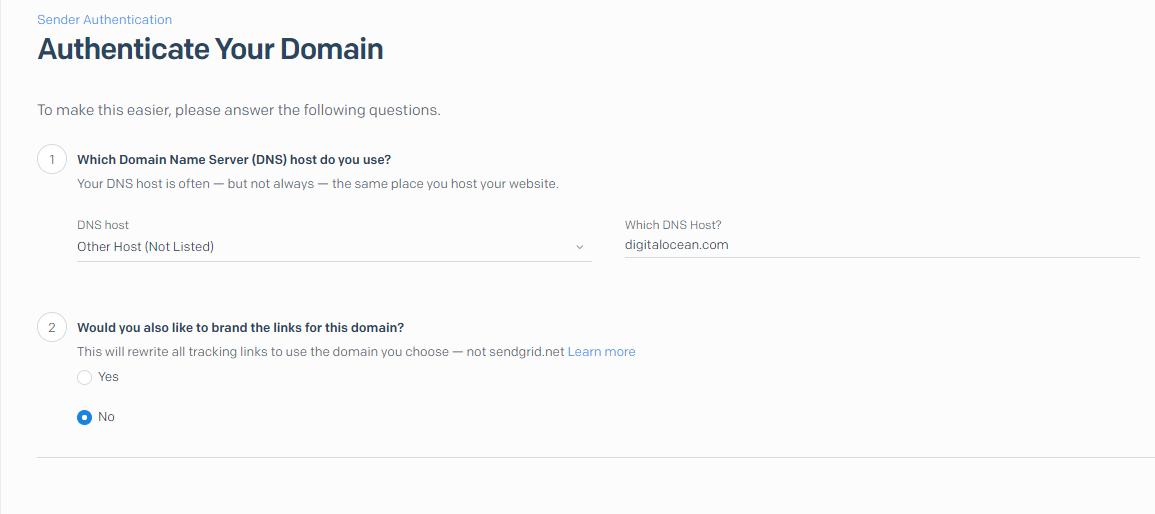
SendGrid requires you to verify the ownership of your domain name before allowing you to start sending emails. In order to verify your domain name, go to your SendGrid account, then go to the Dashboard and click on Authenticate your Domain.
This will take you to a page where you will need to specify your DNS host and choose if you would like to brand the links for your domain. Email link branding allows you to set all of the links used for click-tracking in your emails to your domain instead of from sendgrid.net.
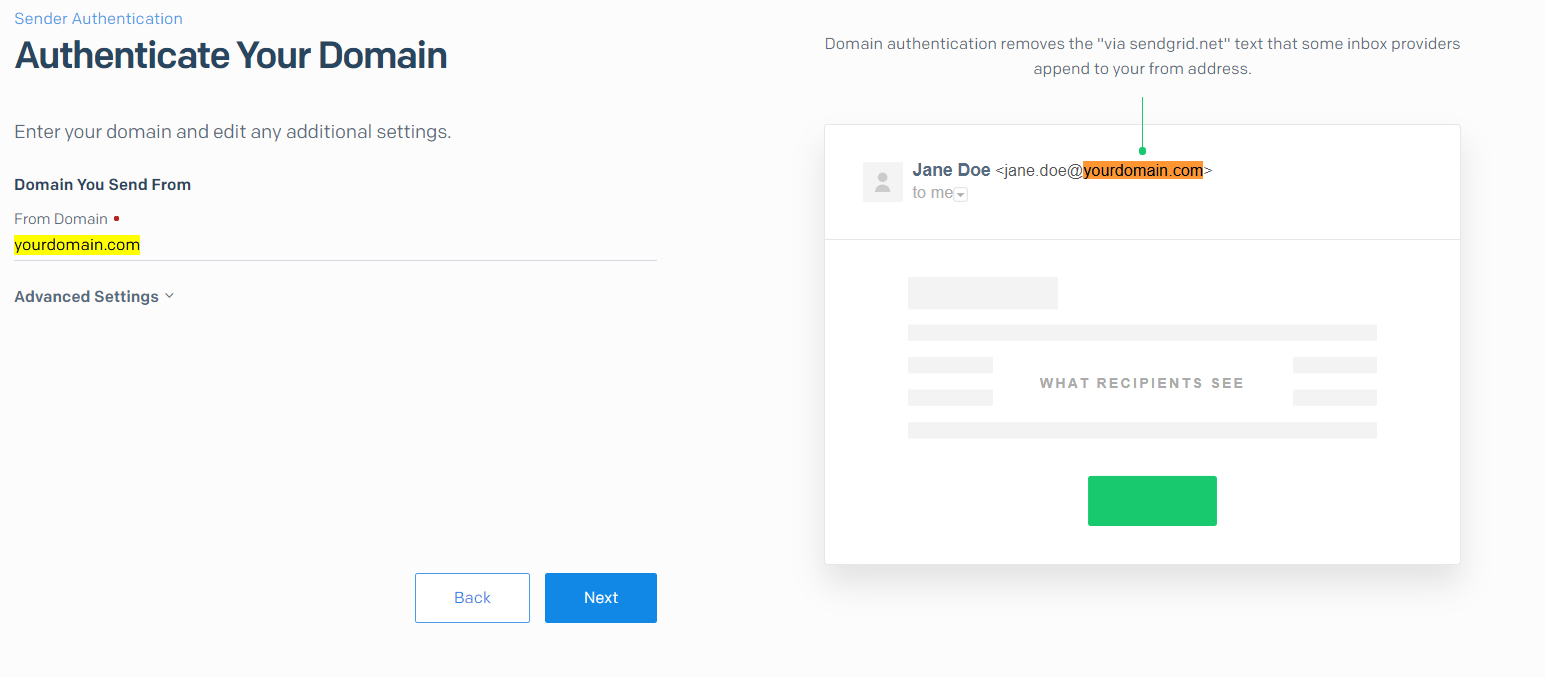
Then click Next and on the next page, specify your domain name.
Finally, you will need to add the DNS records provided by SendGrid to complete their verification process. For more information on how to manage your DNS records, you can read this tutorial on How to Create, Edit, and Delete DNS Records.
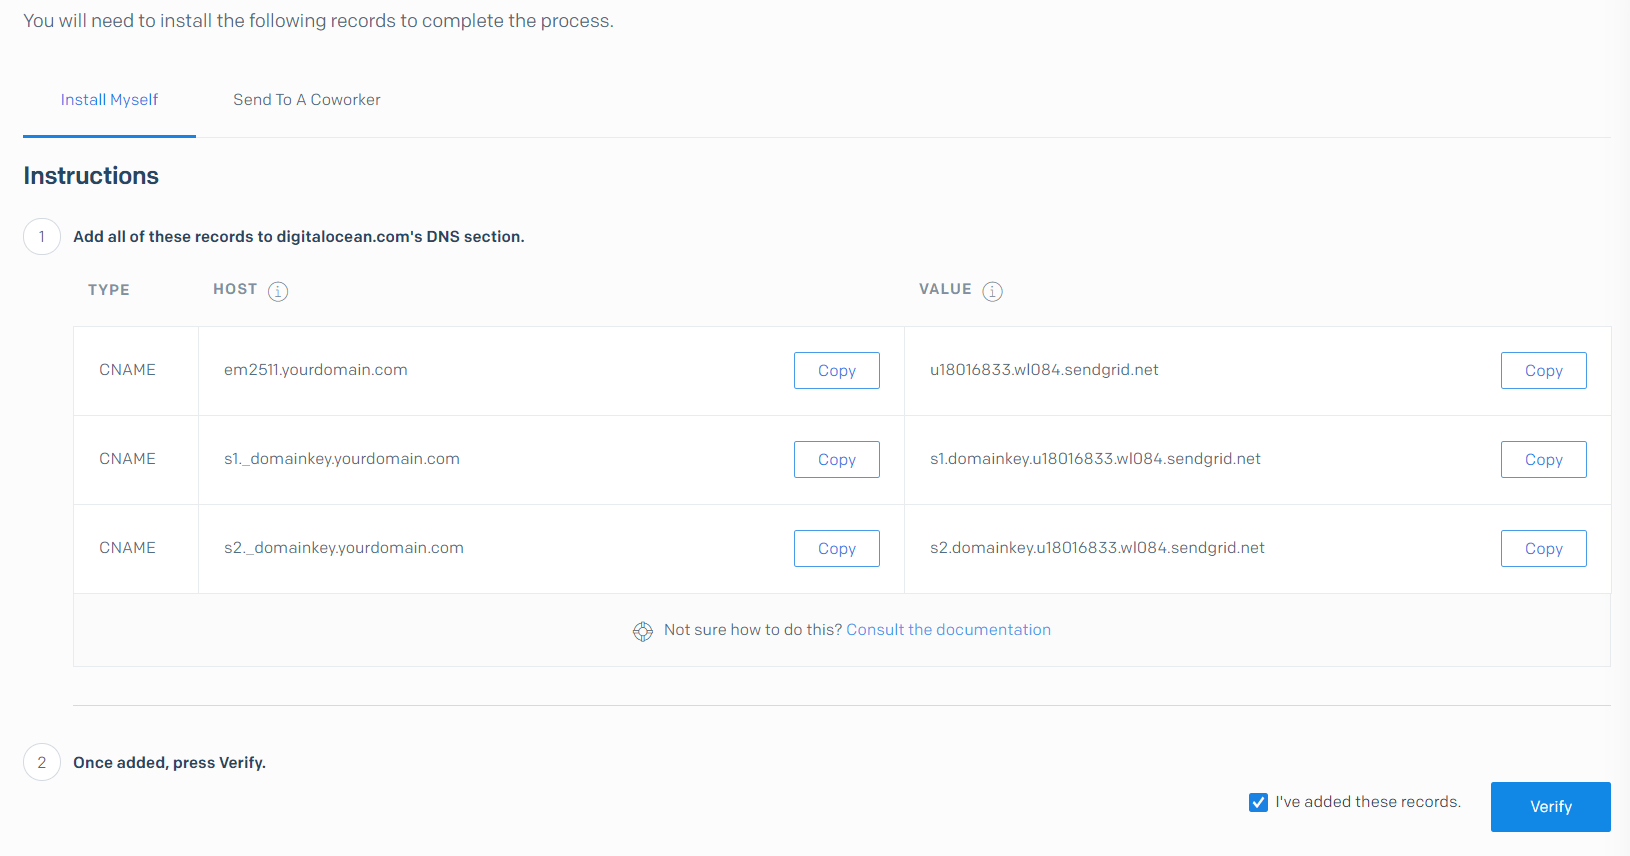
Once you have added the DNS records to your DNS zone, go back to SendGrid and hit the Verify button.
With your SendGrid Identity verified, you need to generate an API key, which you will use in your Laravel .env file.
From the menu on the left, click on API Keys and then click on the Create API Key button. For security, set the API Key Permissions to Restricted Access.
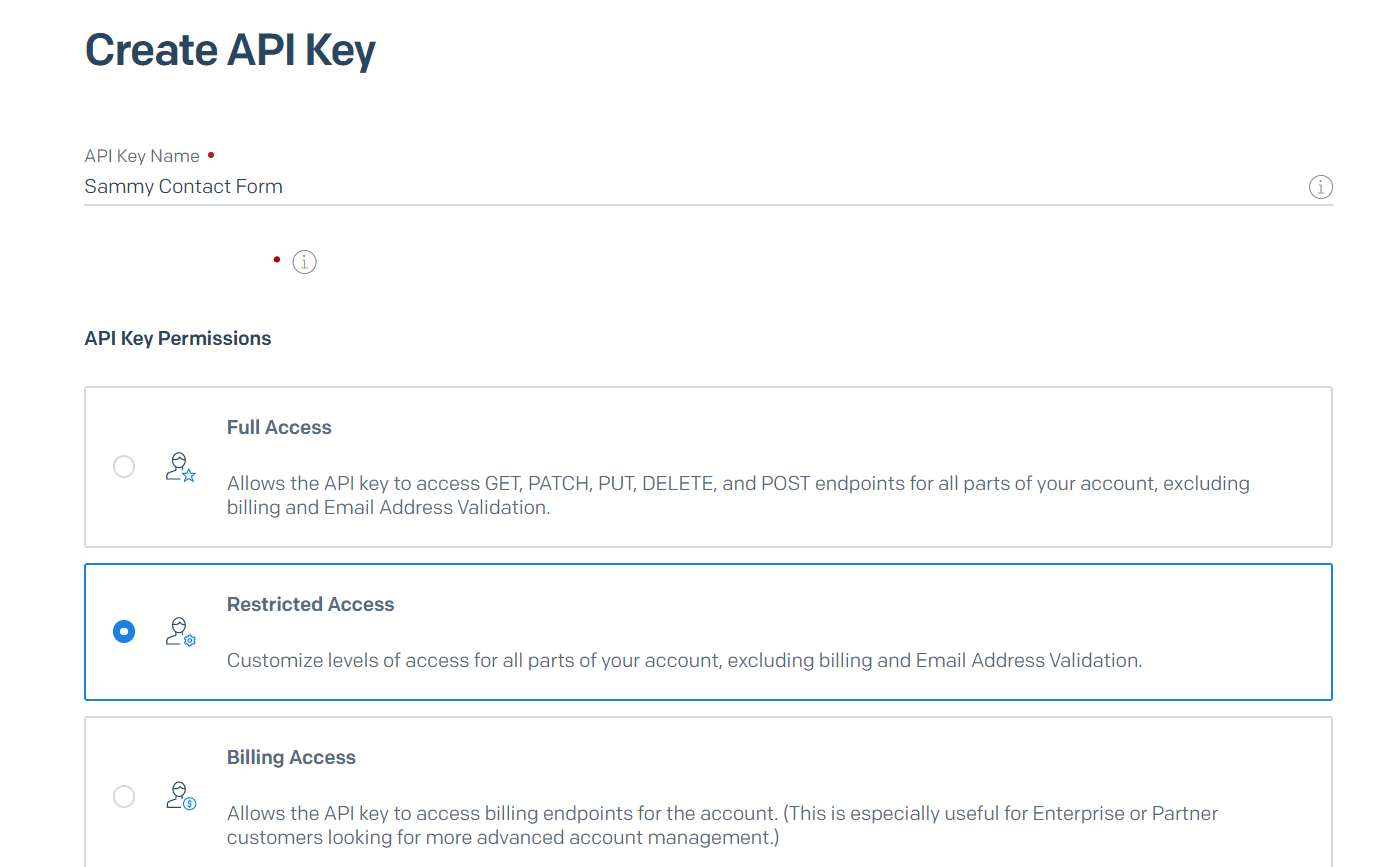
After that, scroll down and add the Mail Send permissions.

Finally, click on the Create & View button to get your API key. The API key will only be visible once, so be sure to take note of it in a secure place.
Now that you’ve configured your domain with SendGrid and generated your API key, you’ll configure the SMTP details for your Laravel application.
Step 2 — Configuring the SMTP Details
The .env file in Laravel is used to store various configuration options for your application environment. Since there is usually some sensitive information in the .env file, like your database connection details, you should not commit the .env file to source control.
If you completed the prerequisite tutorial, you’ll need to be in the /var/www/travellist directory to access your .env file:
- cd /var/www/travellist
After that, use your favorite text editor open the .env file:
- nano .env
There are many configuration variables in the .env file—in this tutorial you’ll only change the MAIL variables.
To do so, find the MAIL_ settings and configure the variables as following, adding in your copied API key to sendgrid_api_key and updating the other highlighted fields as necessary:
. . .
MAIL_MAILER=smtp
MAIL_HOST=smtp.sendgrid.net
MAIL_PORT=587
MAIL_USERNAME=apikey
MAIL_PASSWORD=sendgrid_api_key
MAIL_ENCRYPTION=tls
. . .
The following list contains an overview of the variables that have to be updated in order for your Laravel application to start using the SendGrid SMTP server:
MAIL_HOST: The SendGrid SMTP hostname, which will be used for sending out emails.MAIL_PORT: The SendGrid secure TLS SMTP port.MAIL_USERNAME: Your SendGrid username. By default, it isapikeyfor all accounts.MAIL_PASSWORD: Your SendGrid API Key.MAIL_ENCRYPTION: The mail encryption protocol. In this case you will use TLS as it secures the email content during the transfer between the servers.
Save and exit the file.
With your SMTP settings in place, you are ready to proceed and configure your contact controller.
Step 3 — Creating the Controller
Next you’ll create a controller that will handle your POST and GET requests for your contact form page.
You’ll use the GET route to return the HTML page containing your contact form, and the POST route will handle the contact form submissions.
In order to create a controller called ContactController in Laravel, use the following artisan command:
- php artisan make:controller ContactController
After running the command, you will get the following output:
OutputController created successfully.
This command will create a new controller at app/Http/Controllers/ContactController.php.
Run the following to edit the ContactController.php file:
- nano app/Http/Controllers/ContactController.php
First, you’ll include the Laravel Mail facade so that you can use the mail functionality in your new controller. A facade in Laravel is a class that provides access to different Laravel features. For more information about Laravel facades, take a look at the official Laravel Facades documentation.
To include the Laravel Mail facade add the following:
<?php

namespace App\Http\Controllers;

use Illuminate\Http\Request;
use Mail;
. . .
Then add the method that will handle your GET requests and return the contact page view:
. . .
class ContactController extends Controller
{
        public function contact(){
                return view('contact');
        }
}
Finally, let’s add a method that will handle the POST requests and send out the emails:
...
class ContactController extends Controller
{
        public function contact(){
                return view('contact');
        }

    public function contactPost(Request $request){
        $this->validate($request, [
                        'name' => 'required',
                        'email' => 'required|email',
                        'comment' => 'required'
                ]);

        Mail::send('email', [
                'name' => $request->get('name'),
                'email' => $request->get('email'),
                'comment' => $request->get('comment') ],
                function ($message) {
                        $message->from('youremail@your_domain');
                        $message->to('youremail@your_domain', 'Your Name')
                        ->subject('Your Website Contact Form');
        });

        return back()->with('success', 'Thanks for contacting me, I will get back to you soon!');

    }
}
Within the highlighted lines, you’ll need to change some of the variables, like so:
-
$message->from('youremail@your_domain');: Change theyouremail@your_domainwith your actual email address. -
$message->to('youremail@your_domain', 'Your Name'): The$message->toand the$message->fromdo not necessarily need to match. You can also change the$message->tovalue with another email address to which you would like to receive all of your contact form inquiries. -
subject('Your Website Contact Form');: You can also change the email subject by editing the message inside thesubjectmethod.
Note: the $message->from('youremail@your_domain'); address needs to match the domain name that you used with SendGrid.
Once you’ve finished these edits, the following will be your full ContactController.php file:
<?php

namespace App\Http\Controllers;

use Illuminate\Http\Request;
use Mail;

class ContactController extends Controller
{
    public function contact(){
        return view('contact');
    }

    public function contactPost(Request $request){
        $this->validate($request, [
                        'name' => 'required',
                        'email' => 'required|email',
                        'comment' => 'required'
                ]);

        Mail::send('email', [
                'name' => $request->get('name'),
                'email' => $request->get('email'),
                'comment' => $request->get('comment') ],
                function ($message) {
                        $message->from('youremail@your_domain');
                        $message->to('youremail@your_domain', 'Your Name')
                                ->subject('Your Website Contact Form');
        });

        return back()->with('success', 'Thanks for contacting me, I will get back to you soon!');

    }
}
Save and exit your file once you’ve finished your edits.
Your Contact Controller has two methods:
contact(): This method returns your contact Blade view template, which will hold your HTML page that has the HTML layout for your contact form. Blade is the templating engine that comes with Laravel. In your Blade template views, you can add your HTML structure along with PHP code and Blade syntax.contactPost(): This method handles all of the contact form submissions—where you handle the input validation and send out the emails.
You handle the validation inside the contactPost() method with the $this->validate() method. Inside the validation method, you specify that the name, email, and comment are required. That way, your users will not be able to submit empty or incomplete contact form inquiries. For more information on how the Laravel validation works, take a look at the official Laravel Validation documentation.
When validation is successful, the Mail::send() method constructs your email body and subject and then sends out the email.
Finally, if the email was sent successfully, you return a success message that displays to your users.
You’ve set up your contact controller and can now move on to GET and POST routes.
Step 4 — Creating the Routes
Laravel routes allow you to create SEO-friendly URLs for your application. By using Laravel routes, you can route your application requests to specific controllers, where you handle your application logic.
You’ll create two routes in your routes/web.php file to use the methods you set up in the previous step.
You will first create a GET route that maps to your contact method in your ContactController. This method only returns your contact Blade view. Open routes/web.php with the following command:
- nano routes/web.php
Add the GET route at the bottom of the file:
Note: If you followed the prerequisites, you’ll have different content in you routes/web.php file. You can add your routes to the end of this file as per the instructions in this tutorial.
<?php
use Illuminate\Support\Facades\Route;

/*
|--------------------------------------------------------------------------
| Web Routes
|--------------------------------------------------------------------------
|
| Here is where you can register web routes for your application. These
| routes are loaded by the RouteServiceProvider within a group which
| contains the "web" middleware group. Now create something great!
|
*/

Route::get('/contact', 'ContactController@contact')->name('contact');
You’ll now add a POST route and map it to your contactPost method, which will handle your user contact form submissions:
<?php
use Illuminate\Support\Facades\Route;

/*
|--------------------------------------------------------------------------
| Web Routes
|--------------------------------------------------------------------------
|
| Here is where you can register web routes for your application. These
| routes are loaded by the RouteServiceProvider within a group which
| contains the "web" middleware group. Now create something great!
|
*/
Route::get('/contact', 'ContactController@contact')->name('contact');
Route::post('/contact', 'ContactController@contactPost')->name('contactPost');
Once you have your Controller and Route ready, you can save and exit your file then proceed to the next step where you will prepare your Blade views.
Step 5 — Creating the Blade Views
In this step you will start by creating a view in the application that will hold your HTML contact form. It will have three input fields:
- Input field with type text for the email address of the user
- Input field with type text for the name of the user
- Text area for the comment
Create a file called resources/views/contact.blade.php:
- nano resources/views/contact.blade.php
Then add the following content:
<!DOCTYPE html>
<html lang="en">

<head>
    <meta charset="UTF-8">
    <meta name="viewport" content="width=device-width, initial-scale=1.0">
    <title>Contact Form with Laravel and SendGrid</title>
    <link rel="stylesheet" href="https://stackpath.bootstrapcdn.com/bootstrap/4.5.2/css/bootstrap.min.css"
        integrity="sha384-JcKb8q3iqJ61gNV9KGb8thSsNjpSL0n8PARn9HuZOnIxN0hoP+VmmDGMN5t9UJ0Z" crossorigin="anonymous">
</head>

<body>

    <div class="container">
        @if(session('success'))
        <div class="alert alert-success">
          {{ session('success') }}
        </div>
        @endif

        <form method="POST" action="/contact">
            @csrf
            <div class="form-group {{ $errors->has('name') ? 'has-error' : '' }}">
                <label for="email">Email address</label>
                <input name="email" type="email" class="form-control" id="email" aria-describedby="emailHelp"
                    placeholder="Enter your email">
                <span class="text-danger">{{ $errors->first('email') }}</span>
            </div>
            <div class="form-group {{ $errors->has('name') ? 'has-error' : '' }}">
                <label for="name">Name</label>
                <input name="name" type="text" class="form-control" id="name" aria-describedby="name" placeholder="Your name">
                <span class="text-danger">{{ $errors->first('name') }}</span>

            </div>
            <div class="form-group {{ $errors->has('name') ? 'has-error' : '' }}">
                <label for="exampleInputPassword1">Comment</label>
                <textarea name="comment" class="form-control" id="exampleFormControlTextarea1" rows="3"></textarea>
                <span class="text-danger">{{ $errors->first('comment') }}</span>
            </div>
            <button type="submit" class="btn btn-primary">Submit</button>
        </form>
    </div>

</body>

</html>
This is an HTML form with a POST method to the /contact route. When someone fills out the contact form, it’ll be handled by your contactPost method.
The <link> tag inside the <head> tag is used to include Bootstrap. You’re using some styling for the HTML form. You can change the style of the form so that it matches the design of your website. For more information on how to style your website, you can take a look at our CSS resources page.
The form is wrapped up in different <div> tags with classes from Bootstrap. You’re using the <div> tags to create the structure of the contact form. For more information on how the <div> tags work, check out the How To Use a <div>, the HTML Content Division Element tutorial.
Save and exit this file.
The next view that you’ll create is your email view.
Open the resources/views/email.blade.php file:
- nano resources/views/email.blade.php
Then add the following content:
Inquiry from: {{ $name }}
<p> Email: {{ $email }} </p>
<p> Message: {{ $comment }} </p>
This contains the email content that will be sent to users that complete your contact form. Save and exit the file.
With the styling and views complete, you’re ready to go ahead and test the contact form.
Step 6 — Testing the Contact Form
To test the contact form, visit http://your_domain/contact via your browser.
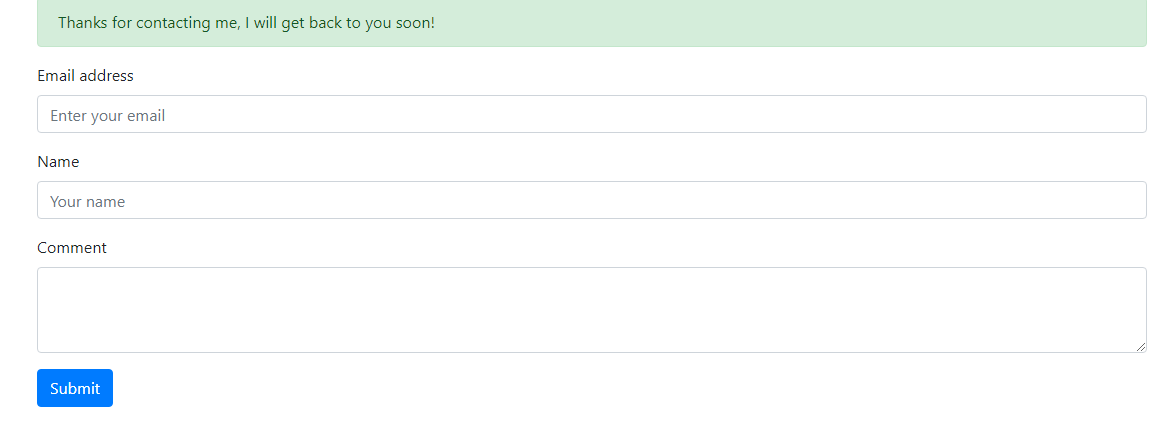
You’ll see the Bootstrap HTML form that you created in the previous step.
Complete all of the required fields and hit the Submit button. You will receive a green notification that the message was sent successfully.
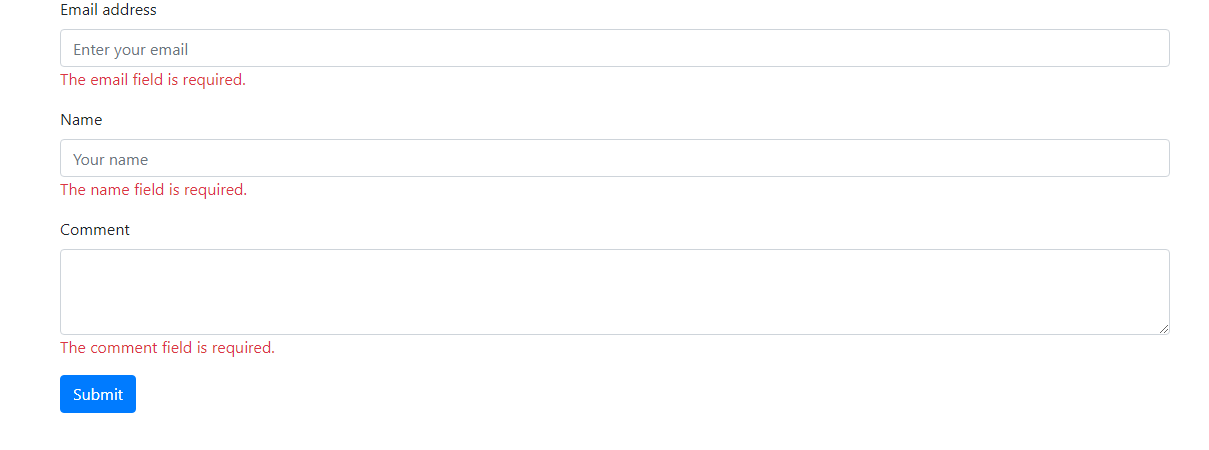
You can test the form by submitting it without filling any of the fields. The validation that you added in your controller will catch that and it’ll inform you that the fields must not be empty.
Finally, you can check your email account and make sure that you’ve received the test email and you can see it in your inbox.
Conclusion
You have now successfully added a contact form to your existing Laravel website.
You can also find more information in the official Laravel documentation.
To make sure that your contact form is secure, you can install an SSL certificate for your website by following our guide on How To Secure Nginx with Let’s Encrypt.
To learn more about Laravel, check out our collection of Laravel resources.
Thanks for learning with the DigitalOcean Community. Check out our offerings for compute, storage, networking, and managed databases.
About the author(s)
💻 DevOps Engineer | 🕸️ Laravel enthusiast | 🐧 Avid Linux lover | 🐳 Docker Captain
Former Senior Technical Editor at DigitalOcean, with a strong focus on DevOps and System Administration content. Areas of expertise include Terraform, PyTorch, Python, and Django.
Still looking for an answer?
This textbox defaults to using Markdown to format your answer.
You can type !ref in this text area to quickly search our full set of tutorials, documentation & marketplace offerings and insert the link!
Can someone help me?
Unfortunately that doesn’t work for me …
See the screenshot.
Hello,
Please update your routes:
use App\Http\Controllers\ContactController;
Route::get(‘/contact’, [ContactController::class, ‘contact’])->name(‘contact’); Route::post(‘/contact’, [ContactController:: class, ‘contactPost’])->name(‘contactPost’);
Can someone assist me?
Thanks a lot for the tutorial it really gave me a lot of insight into what may be happening to my website which is sending a 500 Server Error after pressing the submit button of our PHP contact form.
Ubuntu 18.04.2 Nginx 1.14.0 Laravel Framework 5.8.29
So I have been trying to fix this issue and I am not sure which SMTP (Sender Identity) was used, perhaps it needs maintenance.
Following your tutorial, I find out that there is no
cd /var/www/travellist
In my website but we do have controllers, unfortunately, the Email.Controller.php which I suppose is the equivalent to Contact.Controller.php appears in grey in my PuTTy screen all the others appear in green (Maybe this is useful), We do have the routes web.php, and the blade views contacto.blade.php
But something is not working well :(
I have a contact form it works on localhost but on the server it not working .htaccess rewriterule bad flag delimiters referer
Hi! Thanks for the tutorial. Working great from localhost but when I uploaded to the DO Server I keep on getting this error:
Swift_TransportException Connection could not be established with host mailhog :stream_socket_client(): php_network_getaddresses: getaddrinfo failed: Name or service not known
Any clue on what might be going on? Thanks!
 This work is licensed under a Creative Commons Attribution-NonCommercial- ShareAlike 4.0 International License.
Become a contributor for community
Get paid to write technical tutorials and select a tech-focused charity to receive a matching donation.

DigitalOcean Documentation
Full documentation for every DigitalOcean product.

Resources for startups and AI-native businesses
The Wave has everything you need to know about building a business, from raising funding to marketing your product.
The developer cloud
Scale up as you grow — whether you're running one virtual machine or ten thousand.

Start building today
From GPU-powered inference and Kubernetes to managed databases and storage, get everything you need to build, scale, and deploy intelligent applications.
