By Hathy A and Sharon Campbell

Introduction
Puppet is a configuration management tool that system administrators use to automate the processes involved in maintaining a company’s IT infrastructure. Writing individual Puppet manifest files is sufficient for automating simple tasks. However, when you have an entire workflow to automate, it is ideal to create and use a Puppet module instead. A Puppet module is just a collection of manifests along with files that those manifests require, neatly bundled into a reusable and shareable package.
WordPress is a very popular blogging platform. As an administrator, you might find yourself installing WordPress and its dependencies (Apache, PHP, and MySQL) very often. This installation process is a good candidate for automation, and today we create a Puppet module that does just that.
What This Tutorial Includes
In this tutorial you will create a Puppet module that can perform the following activities:
- Install Apache and PHP
- Install MySQL
- Create a database and a database user on MySQL for WordPress
- Install and configure WordPress
You will then create a simple manifest that uses the module to set up WordPress on Ubuntu 14.04. At the end of this tutorial, you will have a reusable WordPress module and a working WordPress installation on the server.
Prerequisites
You will need the following:
- Ubuntu 14.04 server
- A sudo user
- You shoud understand how to manage WordPress once you get to the control panel setup. If you need help with that, check the later parts of this tutorial
Step 1 — Install Puppet in Standalone Mode
To install Puppet using apt-get, the Puppet Labs Package repository has to be added to the list of available repositories. Puppet Labs has a Debian package that does this. The name of this package depends on the version of Ubuntu you are using. As this tutorial uses Ubuntu 14.04, Trusty Tahr, you have to download and install puppetlabs-release-trusty.deb.
Create and move into your Downloads directory:
mkdir ~/Downloads
cd ~/Downloads
Get the package:
wget https://apt.puppetlabs.com/puppetlabs-release-trusty.deb
sudo dpkg -i puppetlabs-release-trusty.deb
You can now install Puppet using apt-get.
sudo apt-get update
sudo apt-get install puppet
Puppet is now installed. You can check by typing in:
sudo puppet --version
It should print Puppet’s version. At the time of this writing, the latest version is 3.7.1.
Note: If you see a warning message about templatedir, check the solution in Step 2.
Step 2 - Install Apache and MySQL Modules
Managing Apache and MySQL are such common activities that PuppetLabs has its own modules for them. We’ll use these modules to install and configure Apache and MySQL.
You can list all the Puppet modules installed on your system using the following command:
sudo puppet module list
You will find no modules currently installed.
You might see a warning message that says:
Warning: Setting templatedir is deprecated. See http://links.puppetlabs.com/env-settings-deprecations
(at /usr/lib/ruby/vendor_ruby/puppet/settings.rb:1071:in `each')
To remove this warning, use nano to edit the puppet.conf file, and comment out the templatedir line:
sudo nano /etc/puppet/puppet.conf
After the edits, the file should have the following contents. You are just commenting out the templatedir line:
[main]
logdir=/var/log/puppet
vardir=/var/lib/puppet
ssldir=/var/lib/puppet/ssl
rundir=/var/run/puppet
factpath=$vardir/lib/facter
#templatedir=$confdir/templates

[master]
# These are needed when the puppetmaster is run by passenger
# and can safely be removed if webrick is used.
ssl_client_header = SSL_CLIENT_S_DN
ssl_client_verify_header = SSL_CLIENT_VERIFY
That should remove the warning message.
Install the PuppetLabs Apache and MySQL modules:
sudo puppet module install puppetlabs-apache
sudo puppet module install puppetlabs-mysql
Verify the installation by listing the modules again:
sudo puppet module list
You should be able to see the Apache and MySQL modules in the list.
/etc/puppet/modules
├── puppetlabs-apache (v1.1.1)
├── puppetlabs-concat (v1.1.1)
├── puppetlabs-mysql (v2.3.1)
└── puppetlabs-stdlib (v4.3.2)
Step 3 - Create a New Module for WordPress
Create a new directory to keep all your custom modules.
mkdir ~/MyModules
cd ~/MyModules
Let us call our module do-wordpress. Generate the generic new module:
puppet module generate do-wordpress --skip-interview
If you don’t include the –skip-interview flag, the command will be interactive, and will prompt you with various questions about the module to populate the metadata.json file.
At this point a new directory named do-wordpress has been created. It contains boilerplate code and a directory structure that is necessary to build the module.
Edit the metadata.json file to replace puppetlabs-stdlib with puppetlabs/stdlib.
nano ~/MyModules/do-wordpress/metadata.json
This edit is required due a currently open bug in Puppet. After the change, your metadata.json file should look like this:
{
  "name": "do-wordpress",
  "version": "0.1.0",
  "author": "do",
  "summary": null,
  "license": "Apache 2.0",
  "source": "",
  "project_page": null,
  "issues_url": null,
  "dependencies": [
    {"name":"puppetlabs/stdlib","version_requirement":">= 1.0.0"}
  ]
}
Step 4 - Create a Manifest to Install Apache and PHP
Use nano to create and edit a file named web.pp in the manifests directory, which will install Apache and PHP:
nano ~/MyModules/do-wordpress/manifests/web.pp
Install Apache and PHP with default parameters. We use prefork as the MPM (Multi-Processing Module) to maximize compatibility with other libraries.
Add the following code to the file exactly:
class wordpress::web {

    # Install Apache
    class {'apache':
        mpm_module => 'prefork'
    }

    # Add support for PHP
    class {'::apache::mod::php': }
}
Step 5 - Create a File to Store Configuration Variables
Use nano to create and edit a file named conf.pp in the manifests directory.
nano ~/MyModules/do-wordpress/manifests/conf.pp
This file is the one place where you should set custom configuration values such as passwords and names. Every other configuration file on the system will pull its values from this file.
In the future, if you need to change the Wordpress/MySQL configuration, you will have to change only this file.
Add the following code to the file. Make sure you replace the database values with the custom information you want to use with WordPress. You will most likely want to leave db_host set to localhost. You should change the root_password and db_user_password.
Variables that you can or should edit are marked in red:
class wordpress::conf {
    # You can change the values of these variables
    # according to your preferences

    $root_password = 'password'
    $db_name = 'wordpress'
    $db_user = 'wp'
    $db_user_password = 'password'
    $db_host = 'localhost'

    # Don't change the following variables

    # This will evaluate to wp@localhost
    $db_user_host = "${db_user}@${db_host}"

    # This will evaluate to wp@localhost/wordpress.*
    $db_user_host_db = "${db_user}@${db_host}/${db_name}.*"
}
Step 6 - Create a Manifest for MySQL
Use nano to create and edit a file named db.pp in the manifests directory:
nano ~/MyModules/do-wordpress/manifests/db.pp
This manifest does the following:
- Installs MySQL server
- Sets the root password for MySQL server
- Creates a database for Wordpress
- Creates a user for Wordpress
- Grants privileges to the user to access the database
- Installs MySQL client and bindings for various languages
All of the above actions are performed by the classes ::mysql::server and ::mysql::client.
Add the following code to the file exactly as shown. Inline comments are included to provide a better understanding:
class wordpress::db {

    class { '::mysql::server':

        # Set the root password
        root_password => $wordpress::conf::root_password,

        # Create the database
        databases => {
            "${wordpress::conf::db_name}" => {
                ensure => 'present',
                charset => 'utf8'
            }
        },

        # Create the user
        users => {
            "${wordpress::conf::db_user_host}" => {
                ensure => present,
                password_hash => mysql_password("${wordpress::conf::db_user_password}")
            }
        },

        # Grant privileges to the user
        grants => {
            "${wordpress::conf::db_user_host_db}" => {
                ensure     => 'present',
                options    => ['GRANT'],
                privileges => ['ALL'],
                table      => "${wordpress::conf::db_name}.*",
                user       => "${wordpress::conf::db_user_host}",
            }
        },
    }

    # Install MySQL client and all bindings
    class { '::mysql::client':
        require => Class['::mysql::server'],
        bindings_enable => true
    }
}
Step 7 - Download the Latest WordPress
Download the latest WordPress installation bundle from the official website using wget and store it in the files directory.
Create and move to a new directory:
mkdir ~/MyModules/do-wordpress/files
cd ~/MyModules/do-wordpress/files
Download the files:
wget http://wordpress.org/latest.tar.gz
Step 8 - Create a Template for wp-config.php
You might already know that Wordpress needs a wp-config.php file that contains information about the MySQL database that it is allowed to use. A template is used so that Puppet can generate this file with the right values.
Create a new directory named templates.
mkdir ~/MyModules/do-wordpress/templates
Move into the /tmp directory:
cd /tmp
Extract the WordPress files:
tar -xvzf ~/MyModules/do-wordpress/files/latest.tar.gz # Extract the tar
The latest.tar.gz file that you downloaded contains a wp-config-sample.php file. Copy the file to the templates directory as wp-config.php.erb.
cp /tmp/wordpress/wp-config-sample.php ~/MyModules/do-wordpress/templates/wp-config.php.erb
Clean up the /tmp directory:
rm -rf /tmp/wordpress # Clean up
Edit the wp-config.php.erb file using nano.
nano ~/MyModules/do-wordpress/templates/wp-config.php.erb
Use the variables defined in conf.pp to set the values for DB_NAME, DB_USER, DB_PASSWORD and DB_HOST. You can use the exact settings shown below, which will pull in your actual variables from the conf.pp file we created earlier. The items marked in red are the exact changes that you need to make on the four database-related lines.
Ignoring the comments, your file should look like this:
<?php
define('DB_NAME', '<%= scope.lookupvar('wordpress::conf::db_name') %>');
define('DB_USER', '<%= scope.lookupvar('wordpress::conf::db_user') %>');
define('DB_PASSWORD', '<%= scope.lookupvar('wordpress::conf::db_user_password') %>');
define('DB_HOST', '<%= scope.lookupvar('wordpress::conf::db_host') %>');
define('DB_CHARSET', 'utf8');
define('DB_COLLATE', '');

define('AUTH_KEY',         'put your unique phrase here');
define('SECURE_AUTH_KEY',  'put your unique phrase here');
define('LOGGED_IN_KEY',    'put your unique phrase here');
define('NONCE_KEY',        'put your unique phrase here');
define('AUTH_SALT',        'put your unique phrase here');
define('SECURE_AUTH_SALT', 'put your unique phrase here');
define('LOGGED_IN_SALT',   'put your unique phrase here');
define('NONCE_SALT',       'put your unique phrase here');

$table_prefix  = 'wp_';

define('WP_DEBUG', false);

if ( !defined('ABSPATH') )
	define('ABSPATH', dirname(__FILE__) . '/');

require_once(ABSPATH . 'wp-settings.php');
Step 9 - Create a Manifest for Wordpress
Use nano to create and edit a file named wp.pp in the manifests directory:
nano ~/MyModules/do-wordpress/manifests/wp.pp
This manifest performs the following actions:
- Copies the contents of the Wordpress installation bundle to /var/www/. This has to be done because the default configuration of Apache serves files from /var/www/
- Generates a wp-config.php file using the template
Add the following code to the file exactly as shown:
class wordpress::wp {

    # Copy the Wordpress bundle to /tmp
    file { '/tmp/latest.tar.gz':
        ensure => present,
        source => "puppet:///modules/wordpress/latest.tar.gz"
    }

    # Extract the Wordpress bundle
    exec { 'extract':
        cwd => "/tmp",
        command => "tar -xvzf latest.tar.gz",
        require => File['/tmp/latest.tar.gz'],
        path => ['/bin'],
    }

    # Copy to /var/www/
    exec { 'copy':
        command => "cp -r /tmp/wordpress/* /var/www/",
        require => Exec['extract'],
        path => ['/bin'],
    }

    # Generate the wp-config.php file using the template
    file { '/var/www/wp-config.php':
        ensure => present,
        require => Exec['copy'],
        content => template("wordpress/wp-config.php.erb")
    }
}
Step 10 - Create init.pp, a Manifest that Integrates the Other Manifests
Every Puppet module needs to have a file named init.pp. When an external manifest includes your module, the contents of this file will be executed. The puppet module generate command created a generic version of this file for you already.
Edit init.pp using nano:
nano ~/MyModules/do-wordpress/manifests/init.pp
Let the file have the following contents.
You can leave the commented explanations and examples at the top. There should be an empty block for the wordpress class. Add the contents shown here so the wordpress block looks like the one shown below. Make sure you get the brackets nested correctly.
Inline comments are included to explain the settings:
class wordpress {
    # Load all variables
    class { 'wordpress::conf': }

    # Install Apache and PHP
    class { 'wordpress::web': }

    # Install MySQL
    class { 'wordpress::db': }

    # Run Wordpress installation only after Apache is installed
    class { 'wordpress::wp':
        require => Notify['Apache Installation Complete']
    }

    # Display this message after MySQL installation is complete
    notify { 'MySQL Installation Complete':
        require => Class['wordpress::db']
    }

    # Display this message after Apache installation is complete
    notify { 'Apache Installation Complete':
        require => Class['wordpress::web']
    }

    # Display this message after Wordpress installation is complete
    notify { 'Wordpress Installation Complete':
        require => Class['wordpress::wp']
    }
}
Step 11 - Build the WordPress Module
The module is now ready to be built. Move into the MyModules directory:
cd ~/MyModules
Use the puppet module build command to build the module:
sudo puppet module build do-wordpress
You should see the following output from a successful build:
Notice: Building /home/user/MyModules/do-wordpress for release
Module built: /home/user/MyModules/do-wordpress/pkg/do-wordpress-0.1.0.tar.gz
The module is now ready to be used and shared. You will find the installable bundle in the module’s pkg directory.
Step 12 - Install the WordPress Module
To use the module, it has to be installed first. Use the puppet module install command.
sudo puppet module install ~/MyModules/do-wordpress/pkg/do-wordpress-0.1.0.tar.gz
After installation, when you run the sudo puppet module list command, you should see an output similar to this:
/etc/puppet/modules
├── do-wordpress (v0.1.0)
├── puppetlabs-apache (v1.1.1)
├── puppetlabs-concat (v1.1.1)
├── puppetlabs-mysql (v2.3.1)
└── puppetlabs-stdlib (v4.3.2)
Now that it’s installed, you should reference this module as do-wordpress for any Puppet commands.
Updating or Uninstalling the Module
If you receive installation errors, or if you notice configuration problems with WordPress, you will likely need to make changes in one or more of the manifest and related files we created earlier in the tutorial.
Or, you may simply want to uninstall the module at some point.
To update or uninstall the module, use this command:
sudo puppet module uninstall do-wordpress
If you just wanted to uninstall, you’re done.
Otherwise, make the changes you needed, then rebuild and reinstall the module according to Steps 11-12.
Step 13 - Use the Module in a Standalone Manifest File to Install WordPress
To use the module to install Wordpress, you have to create a new manifest, and apply it.
Use nano to create and edit a file named install-wp.pp in the /tmp directory (or any other directory of your choice).
nano /tmp/install-wp.pp
Add the following contents to the file exactly as shown:
class { 'wordpress':
}
Apply the manifest using puppet apply. This is the step that gets WordPress up and running on your server:
sudo puppet apply /tmp/install-wp.pp
It’s fine to see a warning or two.
This will take a while to run, but when it completes, you will have Wordpress and all its dependencies installed and running.
The final few successful installation lines should look like this:
Notice: /Stage[main]/Apache/File[/etc/apache2/mods-enabled/authn_core.load]/ensure: removed
Notice: /Stage[main]/Apache/File[/etc/apache2/mods-enabled/status.load]/ensure: removed
Notice: /Stage[main]/Apache/File[/etc/apache2/mods-enabled/mpm_prefork.load]/ensure: removed
Notice: /Stage[main]/Apache/File[/etc/apache2/mods-enabled/status.conf]/ensure: removed
Notice: /Stage[main]/Apache/File[/etc/apache2/mods-enabled/mpm_prefork.conf]/ensure: removed
Notice: /Stage[main]/Apache::Service/Service[httpd]: Triggered 'refresh' from 55 events
Notice: Finished catalog run in 55.91 seconds
You can open a browser and visit http://server-IP/. You should see the WordPress welcome screen.
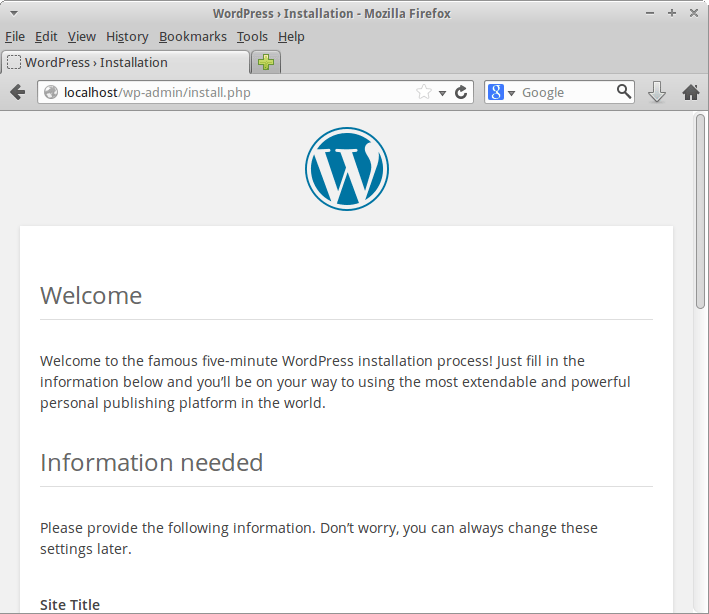
From here, you can configure your WordPress control panel normally.
Deploying to Multiple Servers
If you are running Puppet in an Agent-Master configuration and want to install WordPress on one or more remote machines, all you have to do is add the line class {'wordpress':} to the node definitions of those machines. To learn more about Agent-Master configuration and node definitions, you can refer to this tutorial:
Conclusion
With this tutorial, you have learned to create your own Puppet module that sets up WordPress for you. You could further build on this to add support for automatically installing certain themes and plugins. Finally, when you feel your module could be useful for others as well, you can publish it on Puppet Forge.
Thanks for learning with the DigitalOcean Community. Check out our offerings for compute, storage, networking, and managed databases.
About the author(s)
Hathy is an independent developer and blogger who loves tinkering with new frameworks, SDKs and devices.
Current fan and former Editorial Manager at DigitalOcean. Hi! Expertise in areas including Ubuntu, Docker, Rails, and more.
Still looking for an answer?
This textbox defaults to using Markdown to format your answer.
You can type !ref in this text area to quickly search our full set of tutorials, documentation & marketplace offerings and insert the link!
Hi,
Thanks for the tutorial. I have followed the same steps and able to install WordPress.
Here my question is where did we configure server-IP in the mentioned steps?
Regards, Narayana.
 This work is licensed under a Creative Commons Attribution-NonCommercial- ShareAlike 4.0 International License.
Become a contributor for community
Get paid to write technical tutorials and select a tech-focused charity to receive a matching donation.

DigitalOcean Documentation
Full documentation for every DigitalOcean product.

Resources for startups and AI-native businesses
The Wave has everything you need to know about building a business, from raising funding to marketing your product.
The developer cloud
Scale up as you grow — whether you're running one virtual machine or ten thousand.

Start building today
From GPU-powered inference and Kubernetes to managed databases and storage, get everything you need to build, scale, and deploy intelligent applications.
