By Justin Ellingwood and Brian Boucheron
Not using Ubuntu 18.04?
Choose a different version or distribution.
Introduction
TLS, or transport layer security, and its predecessor SSL, which stands for secure sockets layer, are web protocols used to wrap normal traffic in a protected, encrypted wrapper.
Using this technology, servers can send traffic safely between servers and clients without the possibility of messages being intercepted by outside parties. The certificate system also assists users in verifying the identity of the sites that they are connecting with.
In this guide, you will learn how to set up a self-signed SSL certificate for use with an Apache web server on Ubuntu 18.04.
Note: A self-signed certificate will encrypt communication between your server and any clients. However, because it is not signed by any of the trusted Certificate Authorities (CA) included with web browsers, users cannot use the certificate to validate the identity of your server automatically.
A self-signed certificate may be appropriate if you do not have a domain name associated with your server and for instances where an encrypted web interface is not user-facing. If you do have a domain name, in many cases it is better to use a CA-signed certificate. Read more about how to set up a free trusted certificate with our guide on How To Secure Apache with Let’s Encrypt on Ubuntu 18.04.
Prerequisites
To complete this tutorial, you will need:
- One Ubuntu 18.04 server with a non-root user configured with
sudoprivileges and firewall enabled. You can set up such a user account by following our Initial Server Setup with Ubuntu 18.04 - An Apache web server installed. If you would like to install an entire LAMP (Linux, Apache, MySQL, PHP) stack on your server, you can follow our guide on setting up LAMP on Ubuntu 18.04. If you only want the Apache web server, skip the steps pertaining to PHP and MySQL.
When you have completed the prerequisites, continue to the next step.
Step 1 — Creating the SSL Certificate
TLS/SSL works by using a combination of a public certificate and a private key. The SSL key is kept secret on the server. It is used to encrypt content sent to clients. The SSL certificate is publicly shared with anyone requesting the content. It can be used to decrypt the content signed by the associated SSL key.
You can create a self-signed key and certificate pair with a single OpenSSL command:
- sudo openssl req -x509 -nodes -days 365 -newkey rsa:2048 -keyout /etc/ssl/private/apache-selfsigned.key -out /etc/ssl/certs/apache-selfsigned.crt
This will prompt a series of questions. Before discussing those, here’s a review of what’s happening in the command you’re issuing:
openssl: This is the basic command line tool for creating and managing OpenSSL certificates, keys, and other files.req: This subcommand specifies to use X.509 certificate signing request (CSR) management. The “X.509” is a public key infrastructure standard that SSL and TLS adhere to for its key and certificate management. To create a new X.509 cert, use this subcommand.-x509: This further modifies the previous subcommand by telling the utility to make a self-signed certificate instead of generating a certificate signing request, as would normally happen.-nodes: This tells OpenSSL to skip the option to secure the certificate with a passphrase. Apache needs to be able to read the file, without user intervention, when the server starts up. A passphrase would prevent this from happening because users would have to enter it after every restart.-days 365: This option sets the length of time that the certificate will be considered valid. In this case, it’s set for one year.-newkey rsa:2048: This specifies that you want to generate a new certificate and a new key at the same time. The key required to sign the certificate was not created in a previous step, so it needs to be created along with the certificate. Thersa:2048portion tells it to make an RSA key that is 2048 bits long.-keyout: This line tells OpenSSL where to place the generated private key file that’s being created.-out: This tells OpenSSL where to place the certificate that’s being created.
As stated previously, these options will create both a key file and a certificate. You’ll be asked a few questions about your server in order to embed the information correctly in the certificate.
Fill out the prompts appropriately. The most important line is the one that requests the Common Name (e.g. server FQDN or YOUR name). You need to enter the domain name associated with your server or, more likely, your server’s public IP address.
The entire list of prompts will output as the following:
OutputCountry Name (2 letter code) [AU]:US
State or Province Name (full name) [Some-State]:New York
Locality Name (eg, city) []:New York City
Organization Name (eg, company) [Internet Widgits Pty Ltd]:Bouncy Castles, Inc.
Organizational Unit Name (eg, section) []:Ministry of Water Slides
Common Name (e.g. server FQDN or YOUR name) []:server_IP_address
Email Address []:admin@your_domain.com
Both of the files you created will be placed in the appropriate subdirectories under /etc/ssl.
Step 2 — Configuring Apache to Use SSL
You’ve successfully created your key and certificate files under the /etc/ssl directory. Now, you need to modify your Apache configuration to take advantage of these.
You’ll do this by making a few adjustments to the configuration:
- Create a configuration snippet to specify strong default SSL settings.
- Modify the included SSL Apache Virtual Host file to point to your generated SSL certificates.
- (Recommended) Modify the unencrypted Virtual Host file to automatically redirect requests to the encrypted Virtual Host.
When you’re finished, you will have a secure SSL configuration.
Creating an Apache Configuration Snippet with Strong Encryption Settings
To begin, create an Apache configuration snippet to define some SSL settings. This will set Apache up with a strong SSL cipher suite and enable some advanced features that will help keep your server secure. The parameters you’ll set can be used by any Virtual Hosts enabling SSL.
Create a new snippet in the /etc/apache2/conf-available directory. In this example, we’ll create the files using nano and name the file ssl-params.conf to make its purpose clear. Feel free to use your preferred text editor:
- sudo nano /etc/apache2/conf-available/ssl-params.conf
To set up Apache SSL securely, we will adapt the recommendations from Cipherlist.eu. Cipherlist.eu is a useful and digestible resource for understanding encryption settings used for popular software.
Note: These suggested settings from Cipherlist.eu offer strong security. Sometimes, this comes at the cost of greater client compatibility. If you need to support older clients, there is an alternative list that can be accessed by clicking the link on the page labeled “Yes, give me a ciphersuite that works with legacy / old software.” If desired, you can substitute that list with the content of the next example code block.
The choice of which configuration to use will depend largely on what you need to support. They both will provide great security.
For your purposes, copy the provided settings in their entirety. You’ll make one small change, though, by disabling the Strict-Transport-Security header (HSTS).
Preloading HSTS provides increased security, but can have far reaching consequences if accidentally enabled or enabled incorrectly. In this guide, we will not enable the settings, but you can modify that if you are sure you understand the implications.
Before deciding, take a moment to read up on HTTP Strict Transport Security, or HSTS, and specifically about the “preload” functionality
Now paste the configuration into the ssl-params.conf file:
SSLCipherSuite EECDH+AESGCM:EDH+AESGCM
# Requires Apache 2.4.36 & OpenSSL 1.1.1
SSLProtocol -all +TLSv1.3 +TLSv1.2
SSLOpenSSLConfCmd Curves X25519:secp521r1:secp384r1:prime256v1
# Older versions
# SSLProtocol All -SSLv2 -SSLv3 -TLSv1 -TLSv1.1
SSLHonorCipherOrder On
# Disable preloading HSTS for now.  You can use the commented out header line that includes
# the "preload" directive if you understand the implications.
# Header always set Strict-Transport-Security "max-age=63072000; includeSubDomains; preload"
Header always set X-Frame-Options DENY
Header always set X-Content-Type-Options nosniff
# Requires Apache >= 2.4
SSLCompression off
SSLUseStapling on
SSLStaplingCache "shmcb:logs/stapling-cache(150000)"
# Requires Apache >= 2.4.11
SSLSessionTickets Off
Save and close the file when you are finished. If you’re using nano, you can do this by pressing CTRL + X, then Y and ENTER.
Modifying the Default Apache SSL Virtual Host File
Next, you’ll modify /etc/apache2/sites-available/default-ssl.conf, the default Apache SSL Virtual Host file. If you’re using a different server block file, substitute its name in the following commands.
Before you begin, back up the original SSL Virtual Host file:
- sudo cp /etc/apache2/sites-available/default-ssl.conf /etc/apache2/sites-available/default-ssl.conf.bak
Now, open the SSL Virtual Host file to make adjustments:
- sudo nano /etc/apache2/sites-available/default-ssl.conf
Inside, with most of the comments removed, the Virtual Host file will contain the following content by default:
<IfModule mod_ssl.c>
        <VirtualHost _default_:443>
                ServerAdmin webmaster@localhost

                DocumentRoot /var/www/html

                ErrorLog ${APACHE_LOG_DIR}/error.log
                CustomLog ${APACHE_LOG_DIR}/access.log combined

                SSLEngine on

                SSLCertificateFile      /etc/ssl/certs/ssl-cert-snakeoil.pem
                SSLCertificateKeyFile /etc/ssl/private/ssl-cert-snakeoil.key

                <FilesMatch "\.(cgi|shtml|phtml|php)$">
                                SSLOptions +StdEnvVars
                </FilesMatch>
                <Directory /usr/lib/cgi-bin>
                                SSLOptions +StdEnvVars
                </Directory>

        </VirtualHost>
</IfModule>
You’ll be making some minor adjustments to the file. First set the normal things you’d want to adjust in a Virtual Host file (such as ServerAdmin email address, ServerName, etc., and adjust the SSL directives to point to your certificate and key files).
After making these changes, your server block should result in the following:
<IfModule mod_ssl.c>
        <VirtualHost _default_:443>
                ServerAdmin your_email@example.com
                ServerName server_domain_or_IP

                DocumentRoot /var/www/html

                ErrorLog ${APACHE_LOG_DIR}/error.log
                CustomLog ${APACHE_LOG_DIR}/access.log combined

                SSLEngine on

                SSLCertificateFile      /etc/ssl/certs/apache-selfsigned.crt
                SSLCertificateKeyFile /etc/ssl/private/apache-selfsigned.key

                <FilesMatch "\.(cgi|shtml|phtml|php)$">
                                SSLOptions +StdEnvVars
                </FilesMatch>
                <Directory /usr/lib/cgi-bin>
                                SSLOptions +StdEnvVars
                </Directory>

        </VirtualHost>
</IfModule>
Save and close the file when you are finished.
(Recommended) Modifying the HTTP Host File to Redirect to HTTPS
As it stands now, the server will provide both unencrypted HTTP and encrypted HTTPS traffic. For better security, it is recommended in most cases to redirect HTTP to HTTPS automatically. If you do not want or need this functionality, you can safely skip this section.
To adjust the unencrypted Virtual Host file to redirect all traffic to be SSL encrypted, open the /etc/apache2/sites-available/000-default.conf file:
- sudo nano /etc/apache2/sites-available/000-default.conf
Within the VirtualHost configuration blocks, add a Redirect directive, pointing all traffic to the SSL version of the site:
<VirtualHost *:80>
        . . .

        Redirect "/" "https://your_domain_or_IP/"

        . . .
</VirtualHost>
Save and close the file when you are finished.
Step 3 — Adjusting the Firewall
If you have the ufw firewall enabled, as recommended by the prerequisite guides, you might need to adjust the settings to allow for SSL traffic. Luckily, Apache registers a few profiles with ufw upon installation.
View the list of available profiles by running the following:
- sudo ufw app list
The output should be as follows:
OutputAvailable applications:
  Apache
  Apache Full
  Apache Secure
  OpenSSH
You can review the current setting by checking the status:
- sudo ufw status
If you allowed only regular HTTP traffic earlier, your output results will be like the following:
OutputStatus: active

To                         Action      From
--                         ------      ----
OpenSSH                    ALLOW       Anywhere
Apache                     ALLOW       Anywhere
OpenSSH (v6)               ALLOW       Anywhere (v6)
Apache (v6)                ALLOW       Anywhere (v6)
To allow additional HTTPS traffic, you can allow the “Apache Full” profile and then delete the redundant “Apache” profile allowance:
- sudo ufw allow 'Apache Full'
- sudo ufw delete allow 'Apache'
Confirm the changes by checking the status:
- sudo ufw status
OutputStatus: active

To                         Action      From
--                         ------      ----
OpenSSH                    ALLOW       Anywhere
Apache Full                ALLOW       Anywhere
OpenSSH (v6)               ALLOW       Anywhere (v6)
Apache Full (v6)           ALLOW       Anywhere (v6)
You’ve now successfully allowed Apache traffic to your firewall.
Step 4 — Enabling the Changes in Apache
Now that you’ve made changes and adjusted your firewall, you can enable the SSL and headers modules in Apache, enable your SSL-ready Virtual Host, and restart Apache.
Enable mod_ssl, the Apache SSL module, and mod_headers, which is needed by some of the settings in the SSL snippet, with the a2enmod command:
- sudo a2enmod ssl
- sudo a2enmod headers
Next, enable your SSL Virtual Host with the a2ensite command:
- sudo a2ensite default-ssl
You’ll also need to enable your ssl-params.conf file, to read in the values you set:
- sudo a2enconf ssl-params
At this point, your site and the necessary modules are enabled. Check to make sure that there are no syntax errors in your files with a test:
- sudo apache2ctl configtest
If everything is successful, you will get the following results:
OutputAH00558: apache2: Could not reliably determine the server's fully qualified domain name, using 127.0.1.1. Set the 'ServerName' directive globally to suppress this message
Syntax OK
The first line is a message telling you that the ServerName directive is not set globally. If you want to get rid of that message, you can set ServerName to your server’s domain name or IP address in /etc/apache2/apache2.conf. This is optional as the message will do no harm.
If your output has Syntax OK in it, your configuration file has no syntax errors. You can now safely restart Apache to implement your changes:
- sudo systemctl restart apache2
You’ve made your changes and next you’ll test your SSL server.
Step 5 — Testing Encryption
Now it’s time to test your SSL server. Start by opening your web browser and type https:// followed by your server’s domain name or IP into the address bar:
https://server_domain_or_IP
Because the certificate you created isn’t signed by one of your browser’s trusted certificate authorities, you will likely receive a warning like the following:
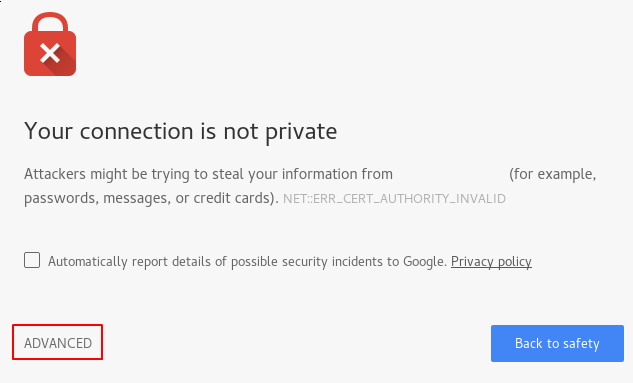
This is expected and normal. We are only interested in the encryption aspect of our certificate, not the third party validation of our host’s authenticity. Click ADVANCED and then the link provided to proceed to your host anyways:
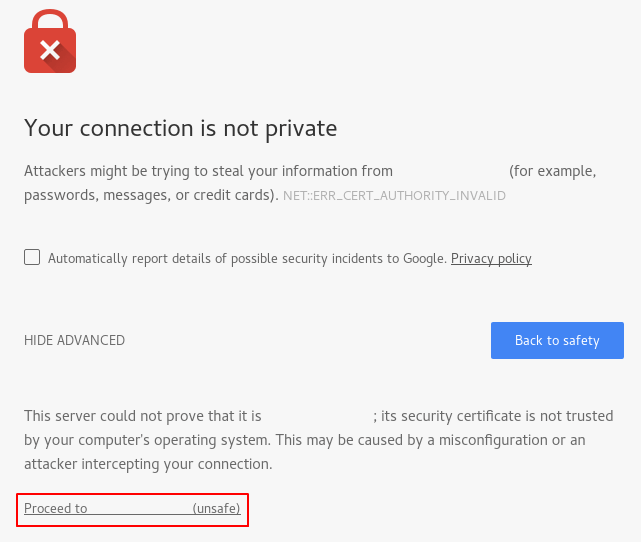
You should be taken to your site. In the browser address bar, you will have a lock with an “x” over it. This means that the certificate cannot be validated. It is still encrypting your connection.
If you configured Apache to redirect HTTP to HTTPS, you can also check whether the redirect functions correctly:
http://server_domain_or_IP
If this results in the same icon, this means that your redirect worked correctly.
Step 6 — Changing to a Permanent Redirect
If your redirect worked correctly and you are sure you want to allow only encrypted traffic, you should modify the unencrypted Apache Virtual Host again to make the redirect permanent.
Open your server block configuration file again:
- sudo nano /etc/apache2/sites-available/000-default.conf
Find the Redirect line you added earlier. Add permanent to that line, which changes the redirect from a 302 temporary redirect to a 301 permanent redirect:
<VirtualHost *:80>
        . . .

        Redirect permanent "/" "https://your_domain_or_IP/"

        . . .
</VirtualHost>
Save and close the file.
Check your configuration for syntax errors:
- sudo apache2ctl configtest
When you’re ready, restart Apache to make the redirect permanent:
- sudo systemctl restart apache2
You’ve successfully made the redirect permanent to allow only encrypted traffic.
Conclusion
You have configured your Apache server to use strong encryption for client connections. This will allow you to serve requests securely and will prevent outside parties from reading your traffic.
Thanks for learning with the DigitalOcean Community. Check out our offerings for compute, storage, networking, and managed databases.
About the author(s)
Former Senior Technical Writer at DigitalOcean, specializing in DevOps topics across multiple Linux distributions, including Ubuntu 18.04, 20.04, 22.04, as well as Debian 10 and 11.
Senior Technical Writer at DigitalOcean
Still looking for an answer?
This textbox defaults to using Markdown to format your answer.
You can type !ref in this text area to quickly search our full set of tutorials, documentation & marketplace offerings and insert the link!
Thx for the turorial,
but it only works for me with firefox 61(64bit), chrome 68 and edge 42 won’t work.
i don’t use a domain, only ip
failure: DLG_FLAGS_INVALID_CA
Very refreshing to see step by step guidance in Linux which is up-to-date, complete and does not make any assumptions about the knowledge of the user. (It worked!)
HEY!!! I got ubuntu 16.04.4 on lightsail… would this tutorial work ?..
Thanks
I used this guide since ubuntu 16.04 and even in ubuntu 18.04, but in my new install of ubuntu 18.04, i follwed the same steps but no error in following the steps, but while accessing the site from browser (firefox or opera), the following error is thrown:
In Opera:
This site can’t provide a secure connection <ip address> uses an unsupported protocol.
ERR_SSL_VERSION_OR_CIPHER_MISMATCH null
Unsupported protocol The client and server don’t support a common SSL protocol version or cipher suite.
In Firefox:
An error occurred during a connection to <ip address>. Cannot communicate securely with peer: no common encryption algorithm(s). Error code: SSL_ERROR_NO_CYPHER_OVERLAP
Just created this Droplet, and following the instructions I get the following error:
– Unit apache2.service has begun starting up. Dec 15 16:47:33 ubuntu-s-1vcpu-1gb-sfo2-01 apachectl[1305]: AH00526: Syntax error on line 1 of /etc/apache2/conf-enabled/ssl-params.conf: Dec 15 16:47:33 ubuntu-s-1vcpu-1gb-sfo2-01 apachectl[1305]: Invalid command ‘SSLCipherSuite’, perhaps misspelled or defined by a module not included in the server Dec 15 16:47:33 ubuntu-s-1vcpu-1gb-sfo2-01 apachectl[1305]: Action ‘start’ failed. Dec 15 16:47:33 ubuntu-s-1vcpu-1gb-sfo2-01 apachectl[1305]: The Apache error log may have more information. Dec 15 16:47:33 ubuntu-s-1vcpu-1gb-sfo2-01 systemd[1]: apache2.service: Control process exited, code=exited status=1 Dec 15 16:47:33 ubuntu-s-1vcpu-1gb-sfo2-01 systemd[1]: apache2.service: Failed with result ‘exit-code’. Dec 15 16:47:33 ubuntu-s-1vcpu-1gb-sfo2-01 systemd[1]: Failed to start The Apache HTTP Server.
SSLCipherSuite EECDH+AESGCM:EDH+AESGCM:AES256+EECDH:AES256+EDH SSLProtocol All -SSLv2 -SSLv3 -TLSv1 -TLSv1.1 SSLHonorCipherOrder On
Disable preloading HSTS for now. You can use the commented out header line that includes
the “preload” directive if you understand the implications.
Header always set Strict-Transport-Security “max-age=63072000; includeSubDomains; preload”
Header always set X-Frame-Options DENY Header always set X-Content-Type-Options nosniff
Requires Apache >= 2.4
SSLCompression off SSLUseStapling on SSLStaplingCache “shmcb:logs/stapling-cache(150000)”
Requires Apache >= 2.4.11
SSLSessionTickets Off
for those wanting to turn on directory privacy (follow this guide: https://www.digitalocean.com/community/tutorials/how-to-set-up-password-authentication-with-apache-on-ubuntu-16-04)
In order for you to then be able to redirect HTTP to HTTPS AND have the authentication enabled, add this block of code into Step 2, under /etc/apache2/sites-available/default-ssl.conf
<Directory /var/www/html>
                	AuthType Basic
                	AuthName "Restricted Content"
                	AuthUserFile /etc/apache2/.htpasswd
                	Require valid-user
</Directory>
So, the top of your default-ssl.conf will look like this,
<IfModule mod_ssl.c>
	<VirtualHost _default_:443>
		<Directory /var/www/html>
                	AuthType Basic
                	AuthName "Restricted Content"
                	AuthUserFile /etc/apache2/.htpasswd
                	Require valid-user
        	</Directory>

		ServerAdmin webmaster@localhost
.......................rest of file code...............
Finally, once you get to Step 6 of this tutorial, just add in:
Redirect permanent "/" "https://your_domain_or_IP"
I was able to achieve HTTP redirect to HTTPS with directory privacy enabled. You must add that block of code above to default-ssl.conf (similar to how you do it in the ‘how-to-set-up-password-authentication-with-apache-on-ubuntu-16-04’ tutorial, and you must complete that tutorial as well to even enable password authentication on Apache).
Hope this helps someone!
I successfully completed all of the steps until Step 4, but can’t connect to http://FQDN-HOSTNAME or https://FQDN-HOSTNAME where FQDN-HOSTNAME is my fully qualified domain name for my web server.
All browsers are more or less giving the same error:
This site can’t provide a secure connection FQDN-HOSTNAME sent an invalid response. Try running Windows Network Diagnostics. ERR_SSL_PROTOCOL_ERROR
Can anyone please point me in the right direction, and help troubleshoot this issue?
$ openssl s_client -connect FQDN-HOSTNAME:443 -CApath /etc/ssl/certs CONNECTED(00000003) 139951192613312:error:1408F10B:SSL routines:ssl3_get_record:wrong version number:…/ssl/record/ssl3_record.c:252:
no peer certificate available
No client certificate CA names sent
SSL handshake has read 5 bytes and written 176 bytes Verification: OK
New, (NONE), Cipher is (NONE) Secure Renegotiation IS NOT supported Compression: NONE Expansion: NONE No ALPN negotiated SSL-Session: Protocol : TLSv1.2 Cipher : 0000 Session-ID: Session-ID-ctx: Master-Key: PSK identity: None PSK identity hint: None SRP username: None Start Time: 1549634693 Timeout : 7200 (sec) Verify return code: 0 (ok) Extended master secret: no
$ curl -verbose https://FQDN-HOSTNAME
- Rebuilt URL to: https://FQDN-HOSTNAME/
- Trying 24.197.220.137…
- TCP_NODELAY set
- Connected to FQDN-HOSTNAME (24.197.220.137) port 443 (#0)
- ALPN, offering h2
- ALPN, offering http/1.1
- successfully set certificate verify locations:
- CAfile: /etc/ssl/certs/ca-certificates.crt CApath: /etc/ssl/certs
- TLSv1.2 (OUT), TLS handshake, Client hello (1):
- error:1408F10B:SSL routines:ssl3_get_record:wrong version number
- stopped the pause stream!
- Closing connection 0 curl: (35) error:1408F10B:SSL routines:ssl3_get_record:wrong version number
 This work is licensed under a Creative Commons Attribution-NonCommercial- ShareAlike 4.0 International License.
Become a contributor for community
Get paid to write technical tutorials and select a tech-focused charity to receive a matching donation.

DigitalOcean Documentation
Full documentation for every DigitalOcean product.

Resources for startups and AI-native businesses
The Wave has everything you need to know about building a business, from raising funding to marketing your product.
The developer cloud
Scale up as you grow — whether you're running one virtual machine or ten thousand.

Start building today
From GPU-powered inference and Kubernetes to managed databases and storage, get everything you need to build, scale, and deploy intelligent applications.
