By tinaciousdesign and Sharon Campbell

Introduction
In this tutorial, we are going to learn how to deploy an application made with DocPad to the standard 64-bit Ubuntu 14.04 image on DigitalOcean. DocPad is a Node.js-powered static site generator that can be used alone or alongside a Node.js app to drive your site’s content.
After reading this tutorial, you should be able to serve DocPad on port 80 as a non-root user, and make sure that if your DocPad app ever crashes, it will restart automatically.
Prerequisites
Before we get started, you will need the following:
- Ubuntu 14.04 Droplet
- Create a user with sudo privileges, which you will use to install, configure, and run DocPad: How To Add and Delete Users on an Ubuntu 14.04 VPS. In this tutorial, we’ll call this user docpad
You should do everything in this tutorial as the docpad user.
Step 1 — Installing Git, Node.js, and NPM
In this section, we’ll install the prerequisites for DocPad.
Make sure your server’s package lists are updated:
sudo apt-get update
Install Git, which will let you deploy a default DocPad application or your own custom application from a Git repository.
sudo apt-get install git
Install Node.js as your web server:
sudo apt-get install nodejs
Note that we are installing nodejs instead of node.
Node.js will now be available from the command line with the command nodejs.
We also want it to be available to us with the command node. In order to do that, we can create a symbolic link from node to Node.js. This is required to ensure that your DocPad application can properly download all of its plugin dependencies, as some of them call node:
sudo ln -s /usr/bin/nodejs /usr/bin/node
For more information and alternative ways of installing Node.js, see the article How To Install Node.js on an Ubuntu 14.04 server.
We need to install the command line interface for the package manager for Node to download our Node.js dependencies:
sudo apt-get install npm
Step 2 – Binding Node.js to Port 80
We would like our application to be accessible on port 80. By default, DocPad applications run on port 9778. In this step we will bind Node.js to port 80, and in a later step we will configure our DocPad application to run on port 80 as well. This way, we can get to our website from http://example.com instead of http://example.com:9778.
To bind Node.js to port 80, first make sure libcap2-bin is installed:
sudo apt-get install libcap2-bin
On most systems this is already installed. Then bind Node.js to port 80:
sudo setcap cap_net_bind_service=+ep /usr/bin/nodejs
Later on in the tutorial we will configure our DocPad application to use port 80.
Step 3 – Installing DocPad
Next, we will use NPM to install DocPad itself.
sudo npm install -g docpad
Clean up the permissions in the docpad user’s home directory, since we used sudo to install DocPad:
sudo chown -R docpad:docpad ~
If you chose a different user to run DocPad, replace the user and group with your own username.
Step 4 – Creating Your DocPad Application
In this section we’ll get your DocPad application set up on the server. You can use an existing project from a Git repository, or create a new test application from scratch.
Create a directory for your project. It can be called anything, but in this case we will use docpad_test. Then move into that directory.
mkdir ~/docpad_test
cd ~/docpad_test
Step 4a – Downloading Existing DocPad Application and Its Dependencies
If you have an existing DocPad application, follow these steps to deploy it to your server. First, we need to download our completed application from its Git repository:
git clone path_to_git_repository
Next, we will need to download all of our DocPad application’s dependencies:
npm install
If your application also uses Bower components, run:
bower install
Step 4b – Creating a New DocPad Application
If you do not have a DocPad application already, you can create a new one. In the application directory, initialize a new DocPad application:
docpad run
If this is your first time running DocPad, answer the interactive dialogue questions as desired:
Before we continue, have you read and agree to DocPad's Terms of Service (http://bevry.me/tos) and Privacy Policy (http://bevry.me/privacy)? [Y/n] y

Would you like to subscribe to our newsletter and stay up to date with the latest releases and tutorials? [Y/n] n
We will then be prompted to choose a skeleton with which to scaffold our app. Let’s choose Twitter Bootstrap (option 4) as it creates a sample website for us and we can immediately see something that works in the browser.
4
Now wait for a few minutes while DocPad builds and launches your app. You should see this output at the end of a successful deployment:
info: Installed the skeleton succesfully
notice: Shutting down the global DocPad, and starting up the local
info: Welcome to DocPad v6.63.8 (local installation: /home/docpad/docpad_test/node_modules/docpad)
info: Contribute: http://docpad.org/docs/contribute
info: Plugins: cleanurls, coffeescript, downloader, eco, less, livereload, marked, partials, related, stylus, text
info: Environment: development
info: DocPad listening to http://0.0.0.0:9778/ on directory /home/docpad/docpad_test/out
info: LiveReload listening to new socket on channel /docpad-livereload
info: Generating...
info: Generated 168/173 files in 15.012 seconds
info: Watching setup starting...
info: Watching setup
info: The action completed successfully
The process will keep running in your terminal window.
Now visit your IP address or domain at port 9778:
http://example.com:9778
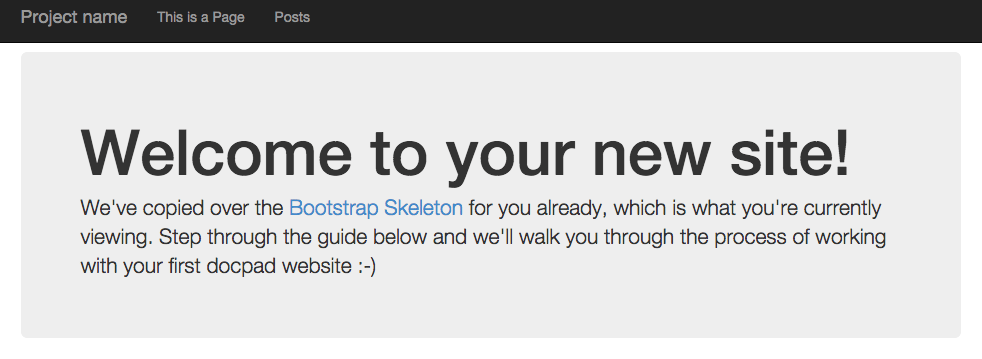
You should see the default DocPad home page:
We will update the application to run on port 80 in the next step so that users do not need to indicate a port when visiting your domain.
You can stop the DocPad server now by pressing CTRL+C.
If you want to view the files with ls in the application directory, you should see the following generated files and directories with the Bootstrap skeleton:
docpad.coffee LICENSE.md node_modules out package.json Procfile README.md src
Our application’s source code is in src.
Step 5 – Configuring DocPad to Run on Port 80
You will need to add the following line to your docpad.coffee config file so that DocPad will run your application on port 80. First, open the file for editing:
nano ~/docpad_test/docpad.coffee
Add the line port: 80 within the docpadConfig = {} block. The port line needs to be on the first level within the block. You can add it as the first line after docpadConfig = {.
docpadConfig = {

. . .

	port: 80

. . .

}
Make sure you are in your application directory. Run DocPad using the following command. If this is your first time running DocPad on the server, accept the terms and conditions and make sure that your application can run:
./node_modules/docpad/bin/docpad run
After the app successfully runs, you should be able to navigate to your website URL and view your site in the browser.
If you cannot find it, try navigating to http://example.com:9778. If you see it there, it is because your port was not properly configured in your docpad.coffee file. The port needs to be specified at the first level of the docpadConfig object.
Now kill the process by pressing Ctrl+C. In the next section we will make the application a service, rather than having to start it from the command line each time.
Step 6 – Running DocPad as a Service with Upstart
In this final step, we will create an Upstart script for the DocPad application. This will allow you to run start, stop, restart, etc. commands for the application from the command line. It will run in the background of your server so you don’t have to keep an SSH connection open. We will also configure the system to automatically relaunch the application if it crashes or when your server reboots.
Create the Upstart script:
sudo nano /etc/init/docpad_test.conf
Add the following contents:
description "DocPad Test Application"

start on (local-filesystems and net-device-up IFACE=eth0)
stop on runlevel [!12345]

# If the process quits unexpectedly trigger a respawn
respawn

env HOME=/home/docpad/
chdir /home/docpad/docpad_test/

setuid docpad
setgid docpad

exec /home/docpad/docpad_test/node_modules/docpad/bin/docpad run
description: Enter a description for this serviceenv HOME: Your DocPad user’s home directorychdir: The application root directorysetuidandsetgid: Your DocPad user (the group should have the same name)exec: The full path to the version of DocPad we want to run; this is the same as the command we used to start the application earlier, except that it uses the full path
For more about Upstart, please see this article.
Start your application from the command line. If you called the file something other than docpad_test.conf you should use the appropriate service name:
sudo service docpad_test start
Wait about 30 seconds for your DocPad application to generate; this time will vary depending on the size of your application, and will take about as much time as when you launched it manually with ./node_modules/docpad/bin/docpad run.
After waiting a few seconds, navigate to your domain or IP address in your browser. You should see your DocPad-generated website.
You’re all done! If you want to, issue a sudo reboot to your server and make sure the application comes back up automatically.
Conclusion
You should now be able to create a new DocPad application or clone an existing one, deploy it to your Ubuntu server, and be able to visit it at your domain.
To start building your website with DocPad, see the documentation.
Thanks for learning with the DigitalOcean Community. Check out our offerings for compute, storage, networking, and managed databases.
About the author(s)
Current fan and former Editorial Manager at DigitalOcean. Hi! Expertise in areas including Ubuntu, Docker, Rails, and more.
Still looking for an answer?
This textbox defaults to using Markdown to format your answer.
You can type !ref in this text area to quickly search our full set of tutorials, documentation & marketplace offerings and insert the link!
What are the implications of running docpad like this? docpad run runs in development mode. How different is production mode?
 This work is licensed under a Creative Commons Attribution-NonCommercial- ShareAlike 4.0 International License.
Become a contributor for community
Get paid to write technical tutorials and select a tech-focused charity to receive a matching donation.

DigitalOcean Documentation
Full documentation for every DigitalOcean product.

Resources for startups and AI-native businesses
The Wave has everything you need to know about building a business, from raising funding to marketing your product.
The developer cloud
Scale up as you grow — whether you're running one virtual machine or ten thousand.

Start building today
From GPU-powered inference and Kubernetes to managed databases and storage, get everything you need to build, scale, and deploy intelligent applications.
