By Erin Glass
Senior Manager, DevEd
![How To Deploy a Static Site from GitHub with DigitalOcean App Platform [Quickstart]](https://www.digitalocean.com/api/static-content/v1/images?src=%2F_next%2Fstatic%2Fmedia%2Fintro-to-cloud.d49bc5f7.jpeg&width=1920 "How To Deploy a Static Site from GitHub with DigitalOcean App Platform [Quickstart]")
Introduction
If you’ve built a static website in a local environment, the next step is to decide how to publish it to the web. One way to publish your site is to deploy it as an application through DigitalOcean App Platform, which allows developers to publish code directly to DigitalOcean servers without worrying about the underlying infrastructure. App Platform offers free hosting for your first three static sites.
In this tutorial, you will deploy a static website with App Platform from a GitHub repository. To follow along, you should have your website files hosted in a GitHub repository that you own. If you need instructions for hosting files in a GitHub repository and creating a GitHub account, please visit our our more in-depth tutorial How To Deploy a Static Website to the Cloud with DigitalOcean App Platform. By the end of this tutorial, you should have a published website and an understanding of how to deploy websites to the cloud from a GitHub repository with App Platform.
Prerequisites
- A GitHub account.
- Files for a static website in a GitHub repository that you own. You may also clone our sample static website repository for testing purposes.
- A credit card or Paypal account for signing up with DigitalOcean’s cloud service. You will not be charged for your first three sites.
Step 1 — Create Your DigitalOcean Account
To create a DigitalOcean account, visit the sign up page and choose among the following options:
- Entering an email address and password
- Using Google Single Sign On
- Using GitHub Single Sign On
If you choose to use an email address and password, you will need to verify your email address using the link included in the email that is automatically sent to you after registration.
Note that you will need to enter a payment method to verify your identity. This is a required step that helps to keep spammers out. You will not be charged. You may see a temporary pre-authorization charge to verify the card, which will be reversed within a week.
Once you have verified your account, you should be able to access the DigitalOcean App Platform. For complete documentation about signing up for a DigitalOcean account, please visit our guide Sign up for a DigitalOcean Account.
You are now ready to proceed to the next step.
Step 2 — Deploy Your Website with DigitalOcean App Platform
In this step we’ll deploy our static website with App Platform.
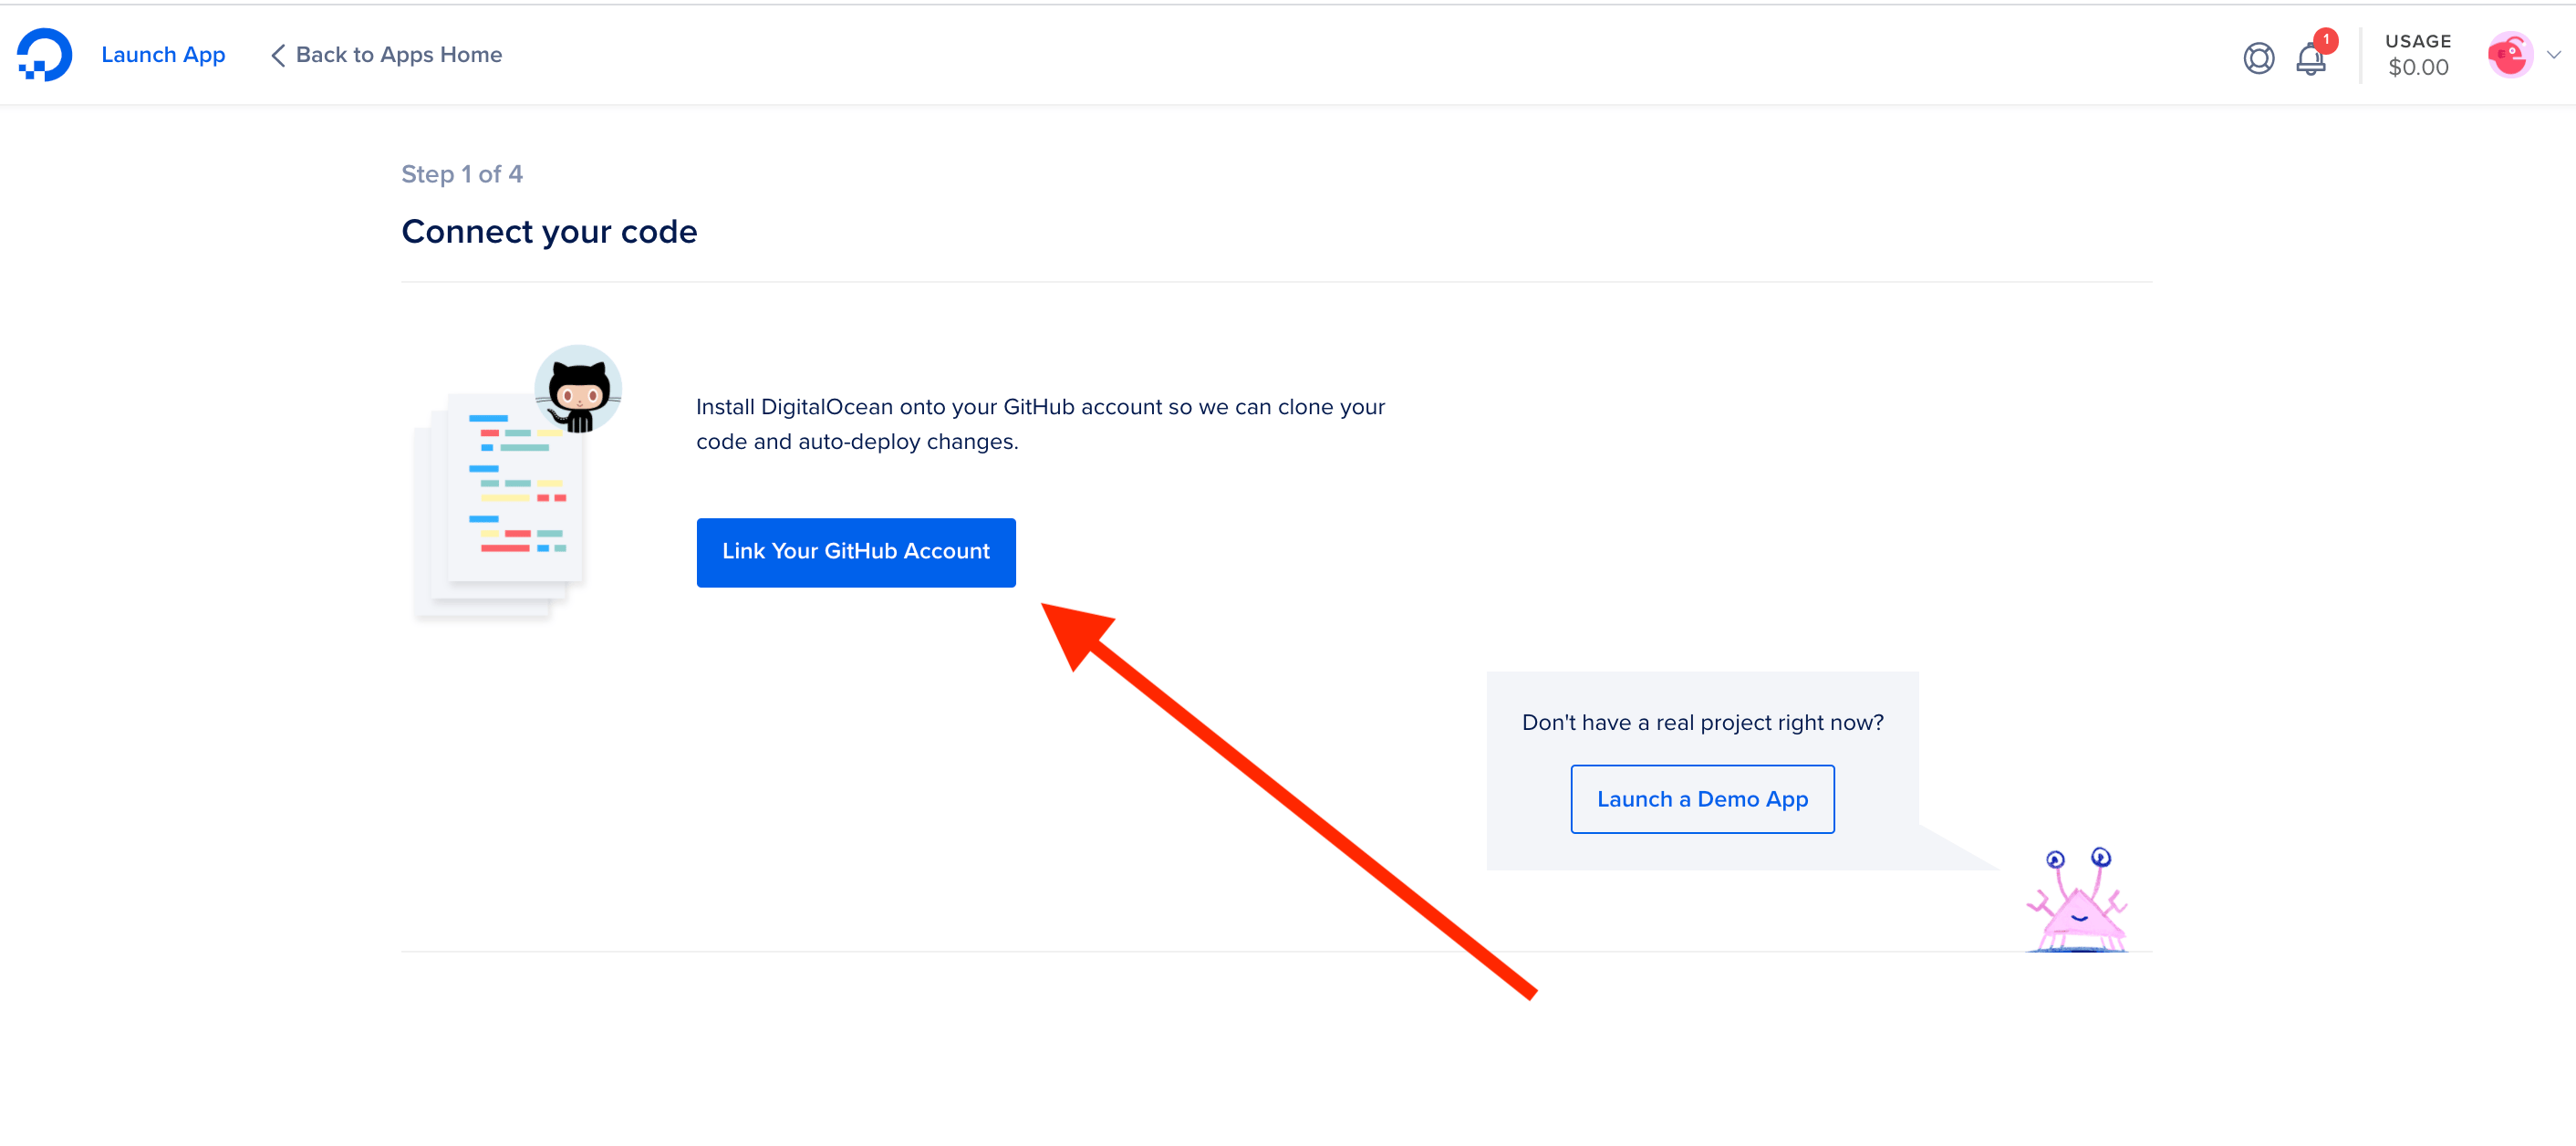
First, visit the DigitalOcean App Platform portal and click on the blue “Launch Your App” button:

On the next page, you will be prompted to select your GitHub repository. Since you have not yet connected your App Platform account to your GitHub account, you’ll need to click on the “Link Your GitHub Account” button:
You will then be prompted to sign into your GitHub account (if you aren’t already signed in) and select the account that you want to connect to App Platform. Once selected, you will be directed to a page where you can select which repositories to permit App Platform to access. Click the “Only select repositories” button and select the repository that you wish to push to App Platform.
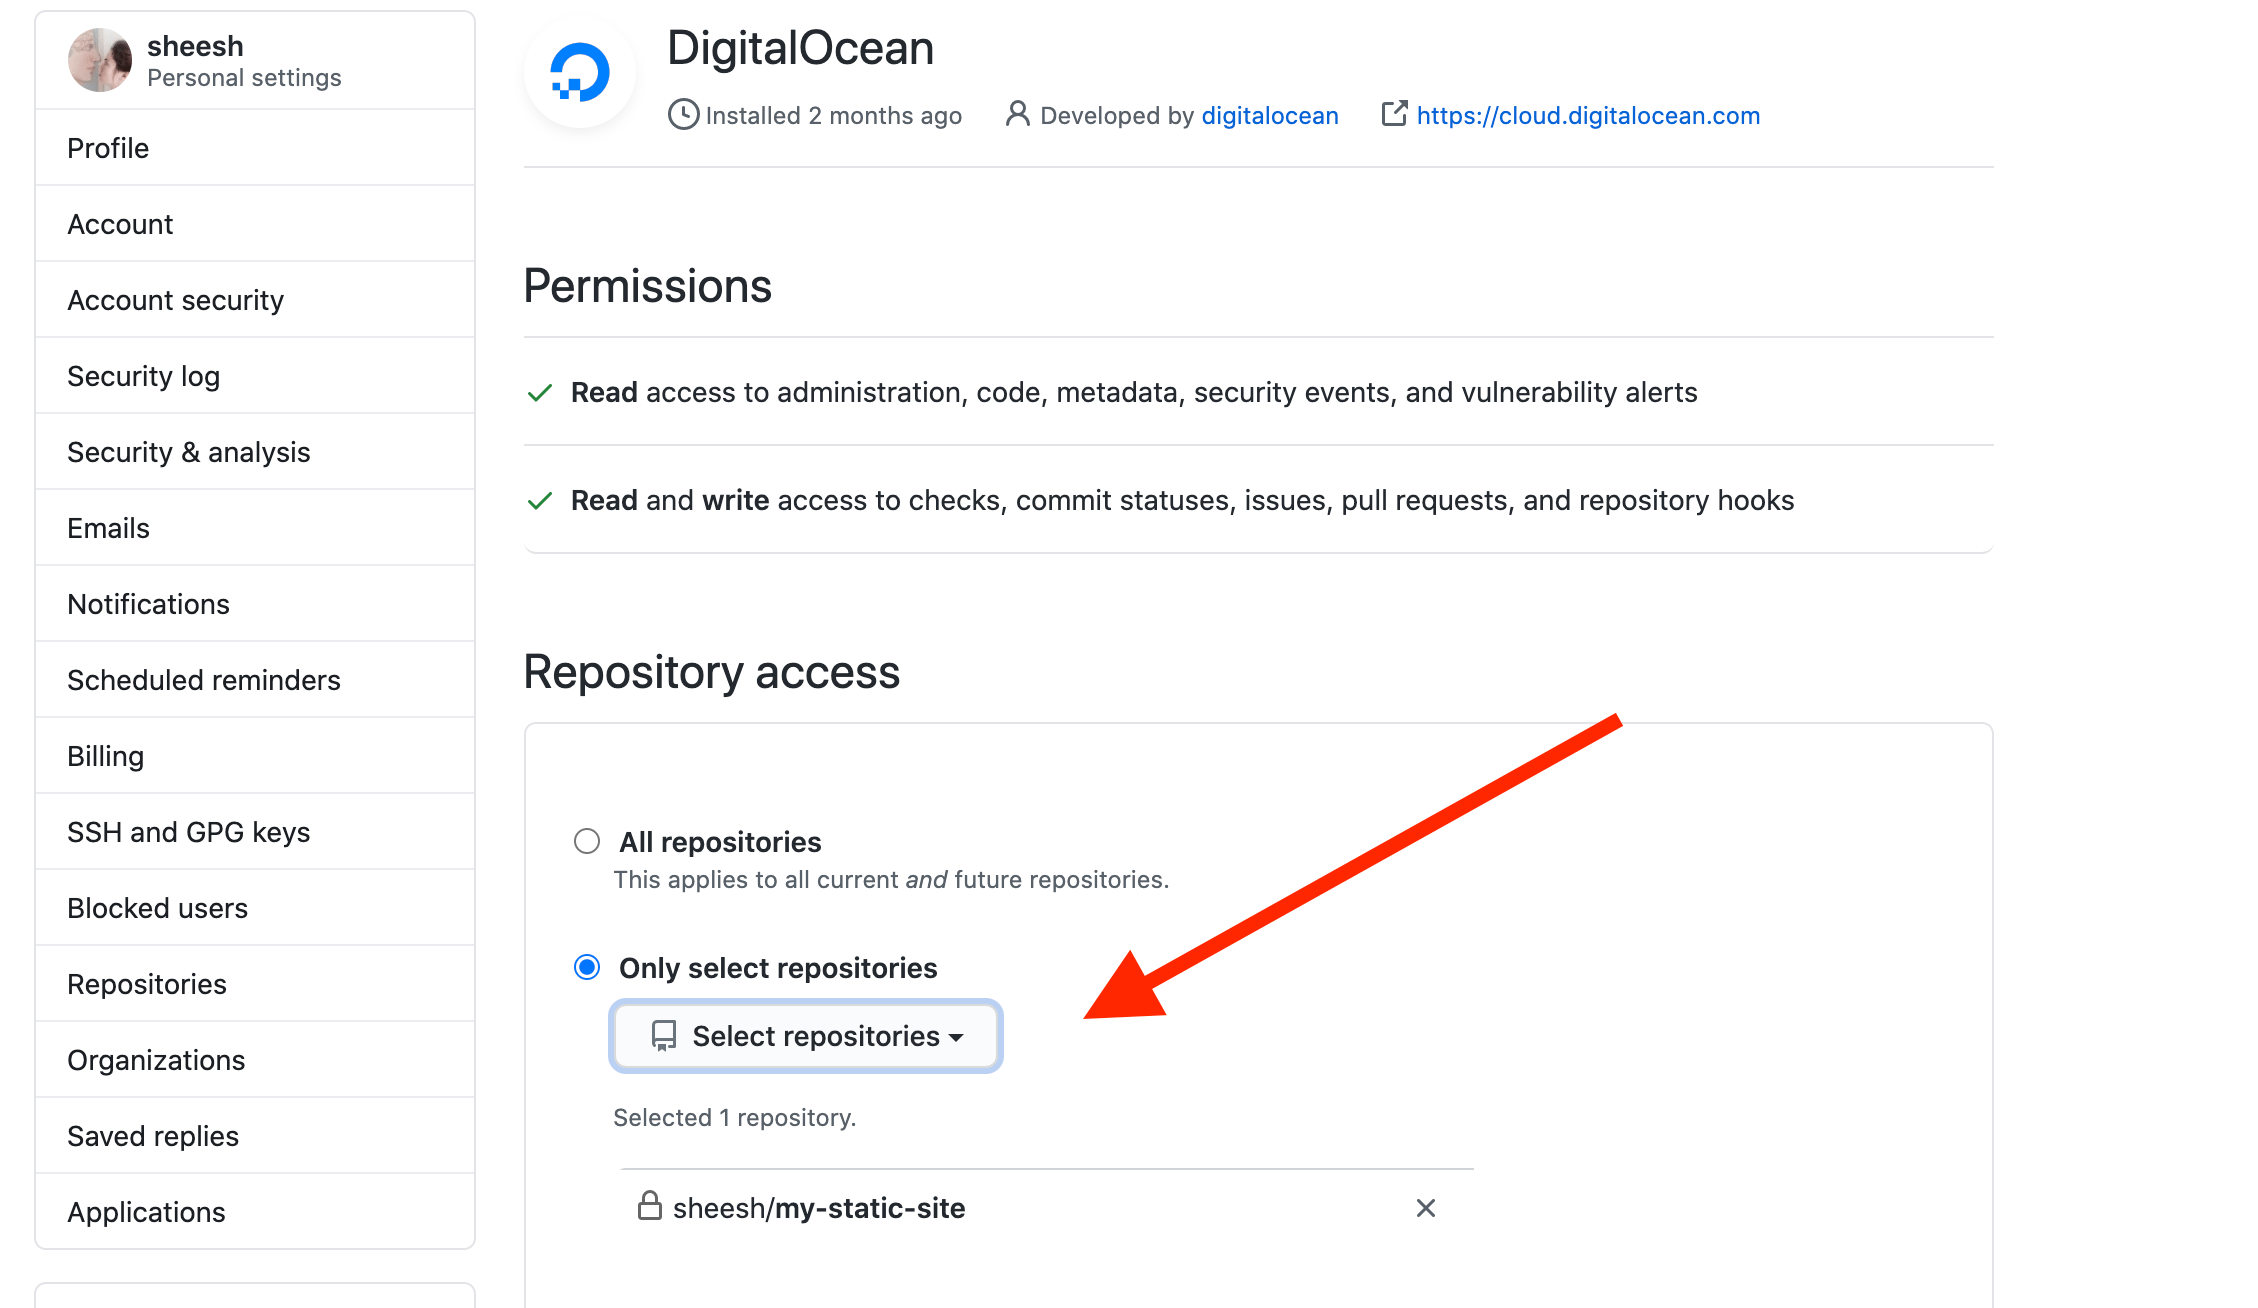
When you are done, click the “Save” button at the bottom of the webpage. You will now be directed back to App Platform, where you should now be able to select your repository in the dropdown menu:
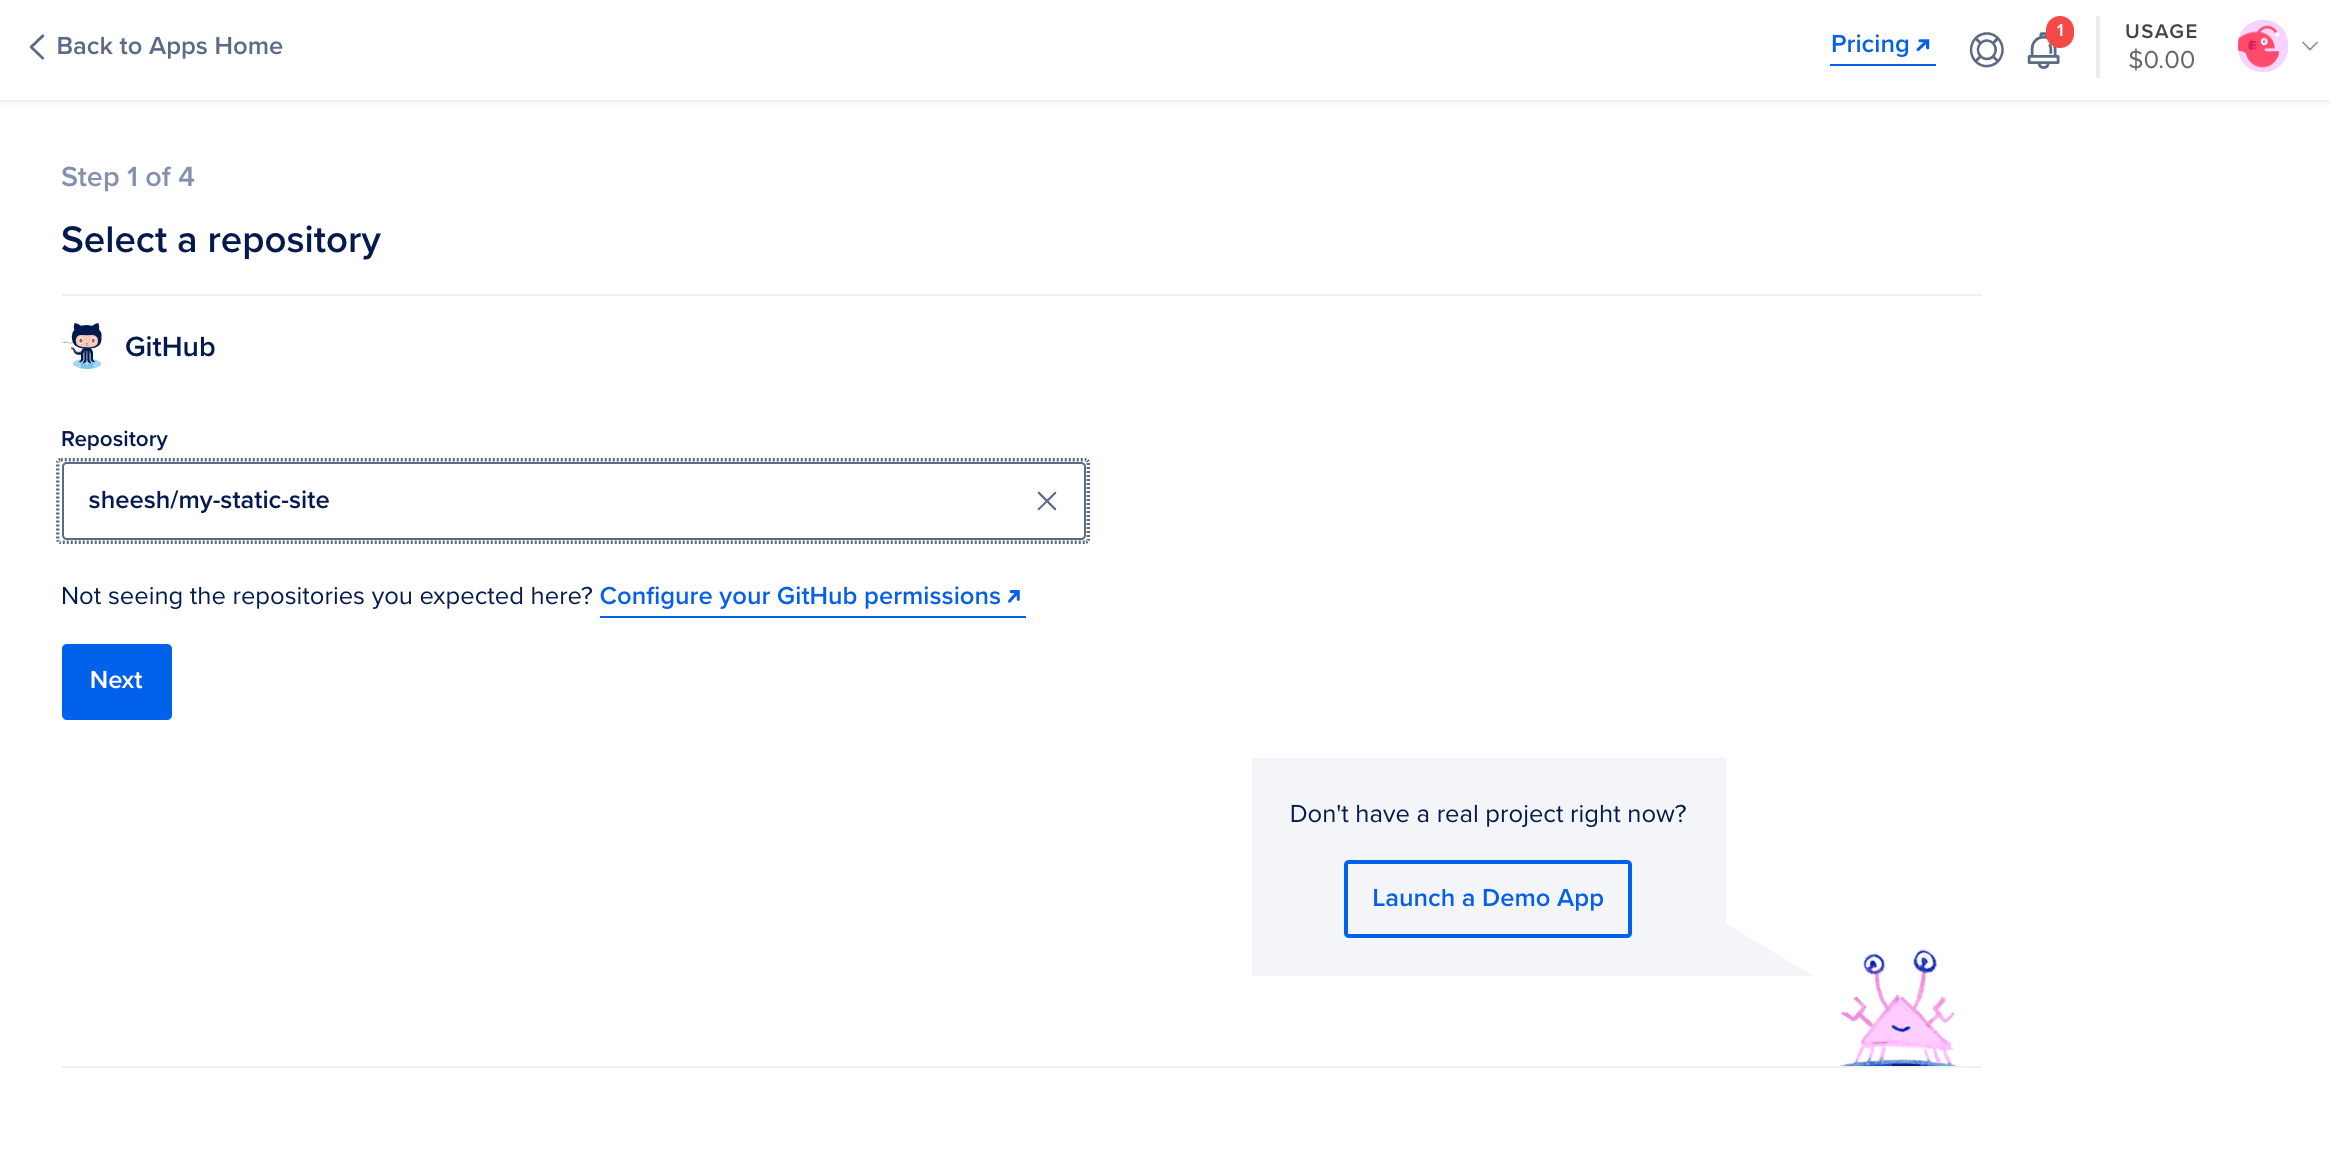
After selecting your repository, click “Next.” You will then be prompted to choose the name, branch, and options for Autodeploy. If the Autodeploy box is checked, any future changes you make to your repository files will be immediately pushed to your live site. Make your selections and click “Next”:
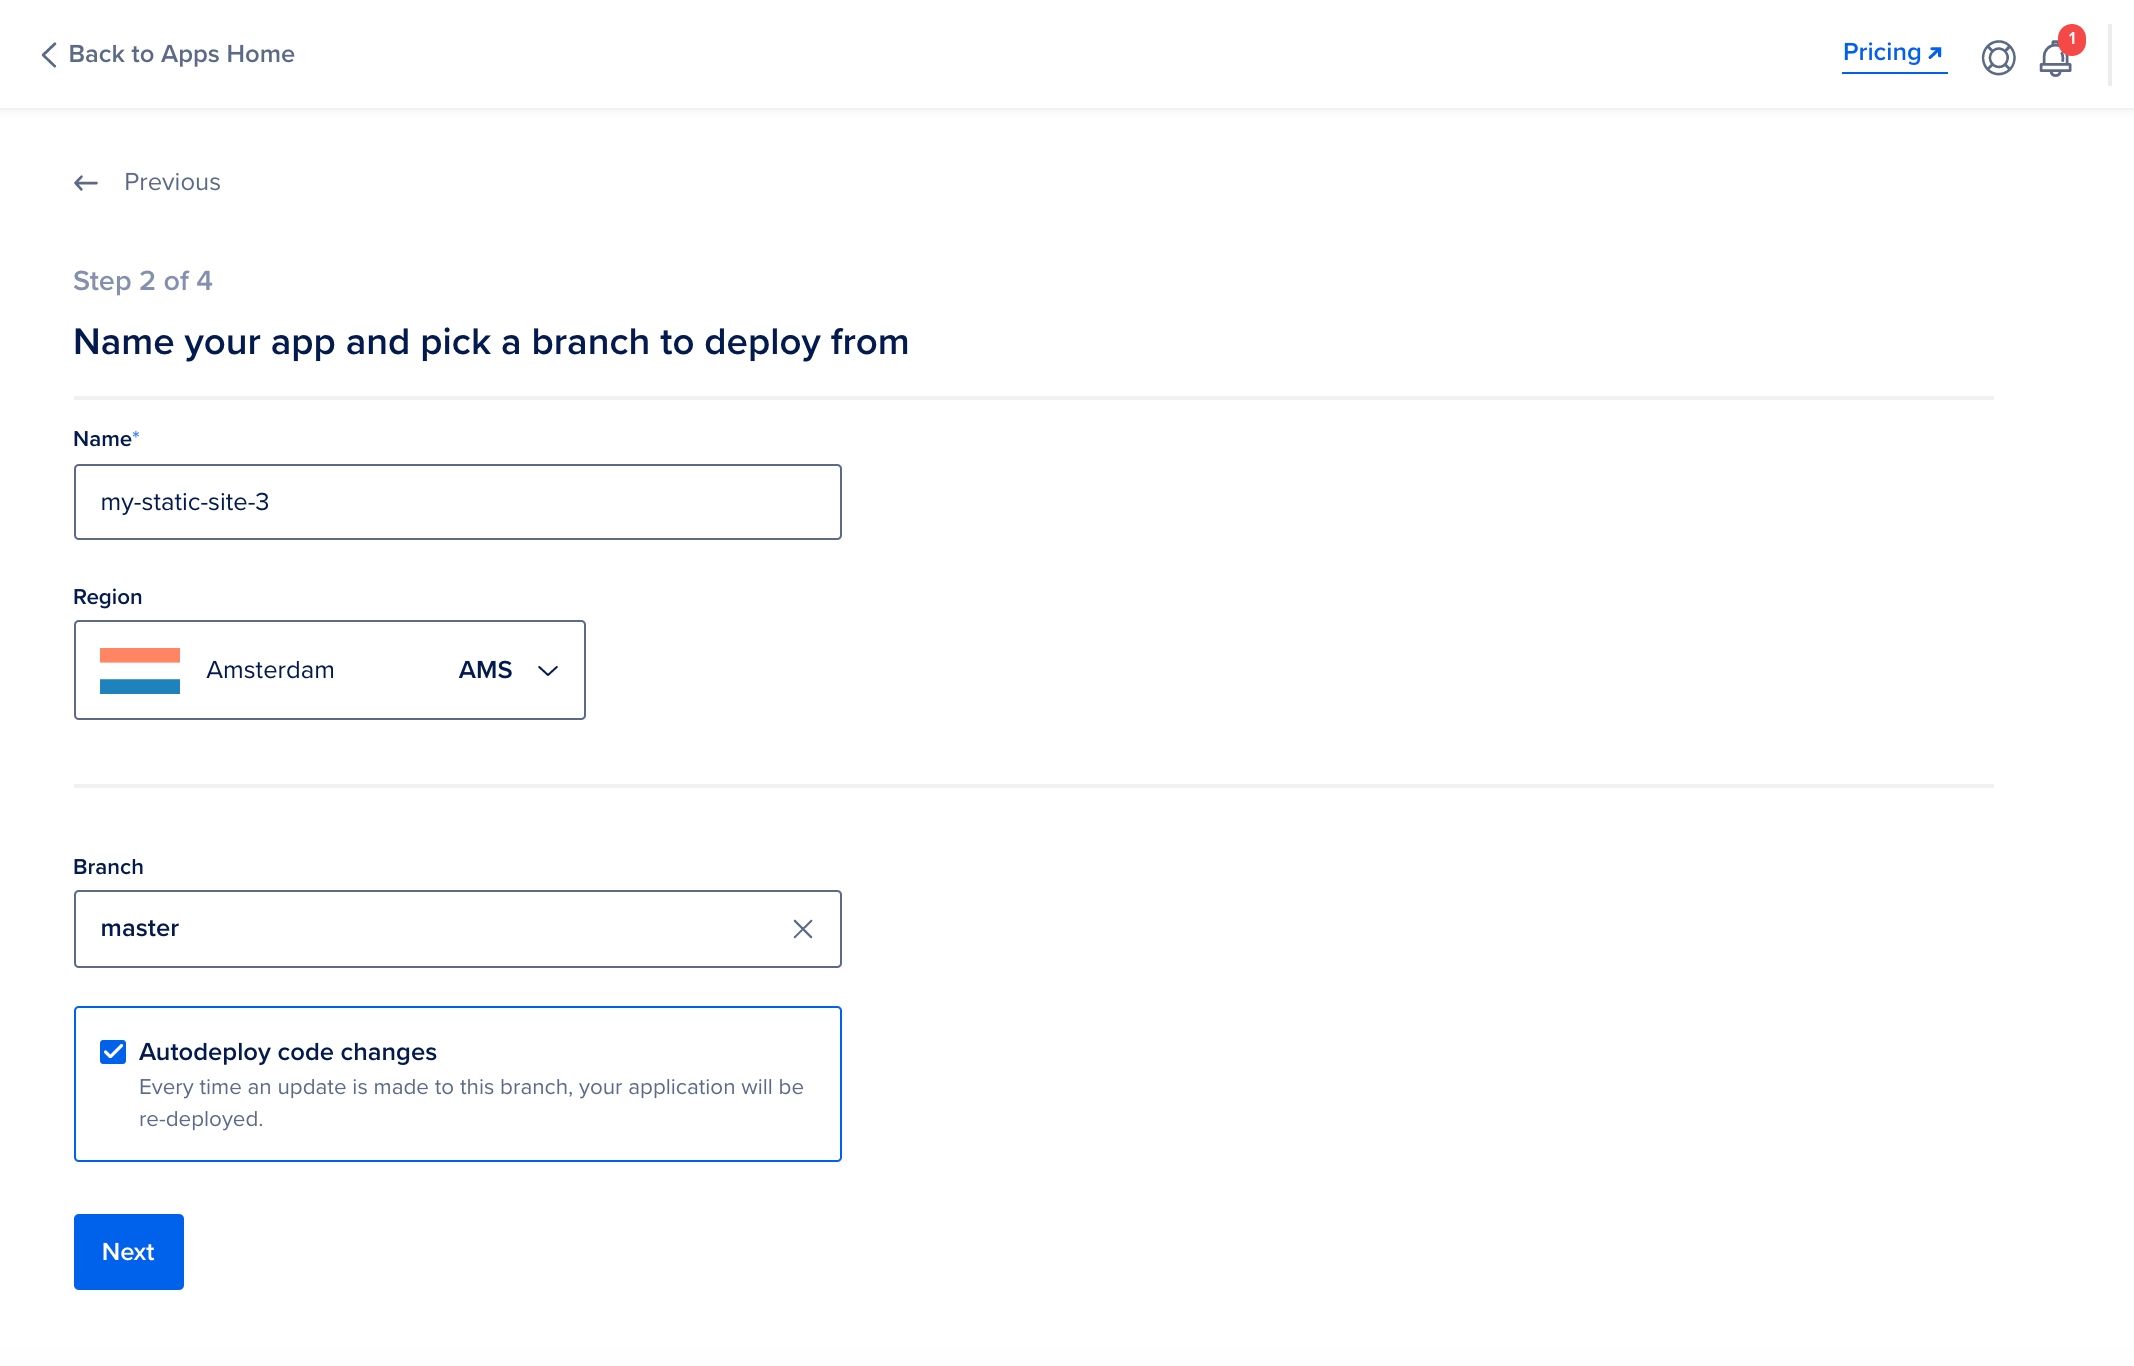
Next, you will be taken to a page where you can configure your App. This page should automatically detect your component type as a “Static Site":
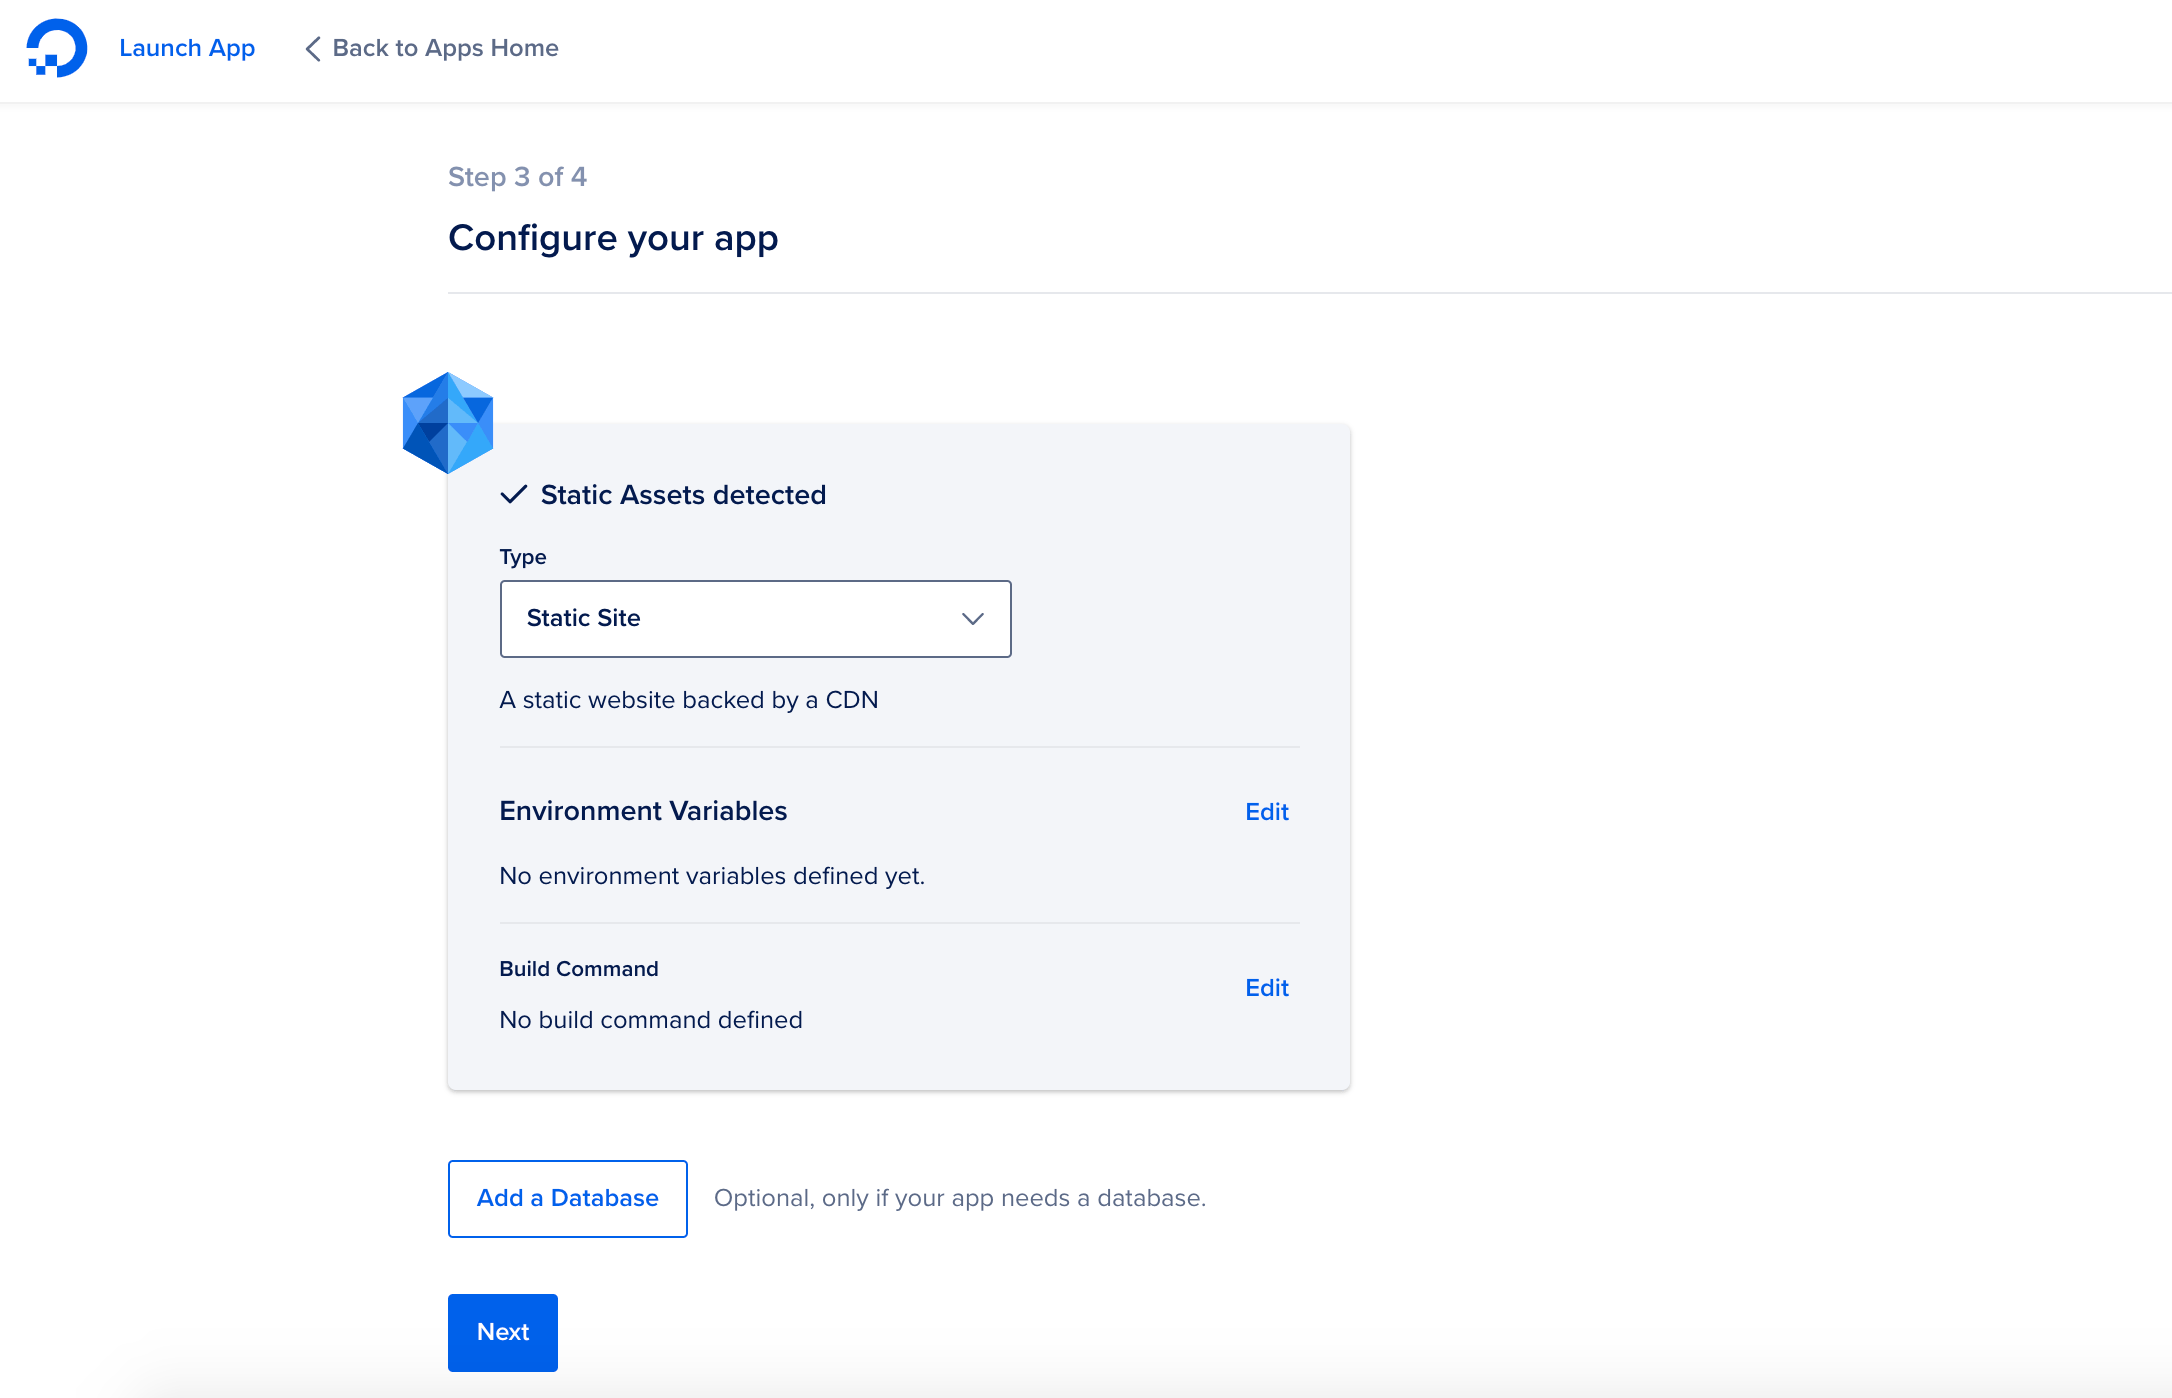
You should not need to make any changes on this page. Scroll down and click the blue button “Next” at the bottom of the page. You will be directed to a new window where you can select the “Starter” plan if you’d like to deploy this site as one of your free three static sites:
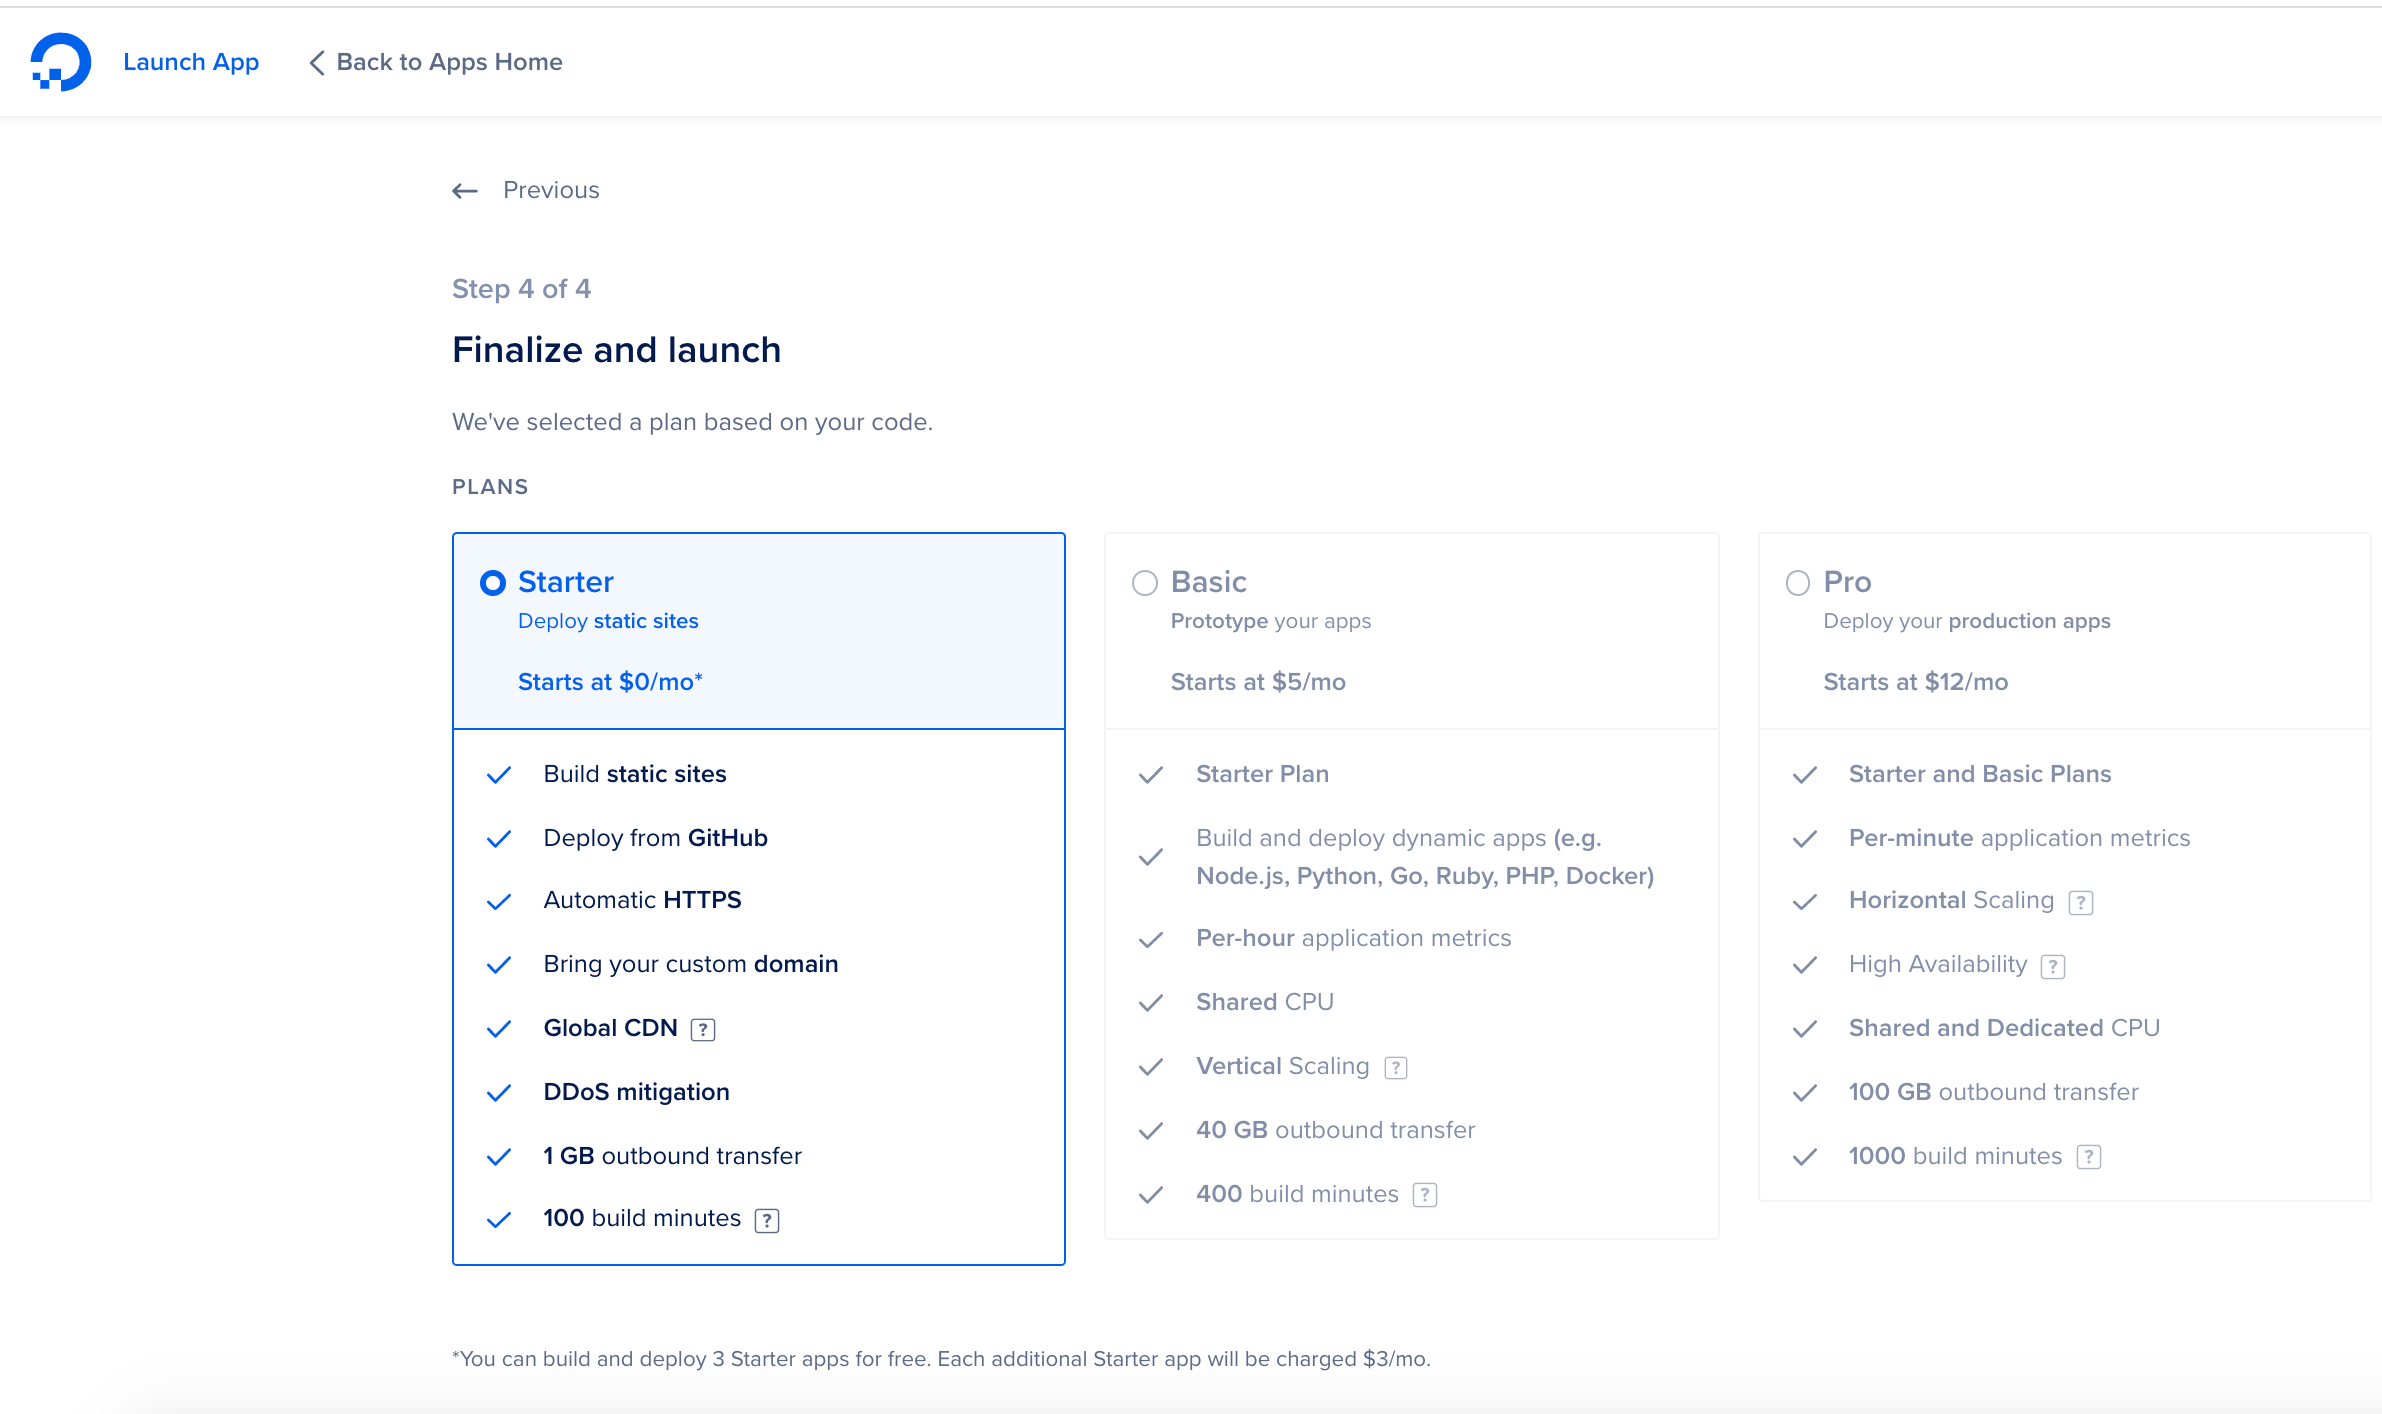
Select your desired plan and click the “Launch Your Starter App” button. You will be directed to your app’s admin page. When your app is finished deploying, you will see the “Deployed Successfully!” message:
 .
.
You will also see a link under your app’s name at the top of the page. Click on the link to make sure your site is working properly. You should be directed to a new web page with your published website. If your site is not appearing, go back and check for errors.
Your static site should now be published to the web through App Platform. Anyone with the app link will be able to access your site. If you’d like to add a custom domain to your site, please visit our How To Manage Custom Domains guide in App Platform product documentation.
Conclusion
In this tutorial, you have learned how to deploy a static site from GitHub to the DigitalOcean App Platform. If you kept the “Automatically deploy on push” option selected in Step 2, any changes you make to your GitHub repository will be automatically pushed to your site. If you did not select that option, you can deploy your changes by returning to your App’s admin page and clicking the “Deploy” button in the upper right hand corner.
For further information about App Platform, please visit the official App Platform product documentation and App Platform How To Manage Static Sites. Remember, you can host up to three free static sites. If you wish to delete your app, follow the instructions in the section Destroy an App in the product documentation.
Thanks for learning with the DigitalOcean Community. Check out our offerings for compute, storage, networking, and managed databases.
About the author
Open source advocate and lover of education, culture, and community.
Still looking for an answer?
This textbox defaults to using Markdown to format your answer.
You can type !ref in this text area to quickly search our full set of tutorials, documentation & marketplace offerings and insert the link!
 This work is licensed under a Creative Commons Attribution-NonCommercial- ShareAlike 4.0 International License.
Become a contributor for community
Get paid to write technical tutorials and select a tech-focused charity to receive a matching donation.

DigitalOcean Documentation
Full documentation for every DigitalOcean product.

Resources for startups and AI-native businesses
The Wave has everything you need to know about building a business, from raising funding to marketing your product.
The developer cloud
Scale up as you grow — whether you're running one virtual machine or ten thousand.

Start building today
From GPU-powered inference and Kubernetes to managed databases and storage, get everything you need to build, scale, and deploy intelligent applications.
