By James Quick and Manikandan Kurup

Introduction
Maintaining consistent code formatting is essential for readability, collaboration, and reducing unnecessary diffs in version control. Instead of manually enforcing style rules or debating formatting choices in code reviews, you can automate the process using a tool like Prettier - a popular, opinionated code formatter.
In this article, you’ll learn how to set up and use Prettier in Visual Studio Code (VS Code) to automatically format your code. Whether you’re working solo or as part of a development team, configuring Prettier ensures that your code stays clean and consistent across every file and contributor.
You’ll cover everything from installing the Prettier extension and configuring format-on-save, to integrating Prettier with ESLint for JavaScript and TypeScript projects. By the end of this guide, you’ll have a reliable and automated formatting workflow in place within VS Code.
Key Takeaways:
-
Prettier Automates Code Formatting: Prettier enforces consistent code style by automatically formatting code according to predefined rules, reducing manual formatting and team debates over style.
-
Installing the Prettier Extension in VS Code Is Quick and Essential: You can install the Prettier extension directly from the VS Code Extensions Marketplace to enable one-click or on-save formatting.
-
Prettier Can Be Run Manually or Automatically on Save: With the
Format Documentcommand or by enablingFormat On Save, you can ensure that your code is always formatted cleanly with minimal effort. -
You Can Customize Prettier to Match Your Preferences: Settings such as quote style, semicolon usage, tab width, and more can be adjusted in the VS Code UI or through a
.prettierrcconfiguration file. -
Team Projects Benefit from Shared Configuration: Using
.prettierrc,.prettierignore, and workspace-level.vscode/settings.jsonfiles ensures consistency across all contributors in a shared codebase. -
Prettier Can Be Integrated with ESLint: In JavaScript and TypeScript projects, you can integrate Prettier with ESLint using specific plugins to handle both linting and formatting without conflicts.
-
Installing Prettier Locally Helps Avoid Version Mismatches: Adding Prettier as a
devDependencyin your project ensures everyone uses the same version, crucial for reproducible results in teams and CI/CD pipelines. -
Troubleshooting Steps Are Available for Common Issues: The article provides solutions for common Prettier issues in VS Code, such as format-on-save not working, extension conflicts, and unsupported file types.
Prerequisites
Before you can format code with Prettier in Visual Studio Code, make sure you have the following tools and setup:
- Visual Studio Code installed: Download it from the official VS Code website.
- Prettier extension for VS Code: You’ll install it from the Extensions Marketplace later in the tutorial.
- Node.js and npm (optional but recommended): Required if you want to install Prettier as a local or global package via the command line.
- Sample code to format: This can be a JavaScript, TypeScript, Python, HTML, or Markdown project. Prettier supports many popular languages.
For this article, we’ll be using the following sample JavaScript code:
const name = "James";

const person ={first: name
}

console.log(person);

const sayHelloLinting = (fName) => {
console.log(`Hello linting, ${fName}`)
}

sayHelloLinting('James');
If you’re familiar with code formatting, you may notice some mistakes:
- A mix of single and double quotes.
- The first property of the
personobject should be on its own separate line. - The console statement inside the function should be indented.
- You may or may not like the optional parentheses surrounding the parameter of the arrow function.
These prerequisites apply whether you’re on Windows, Linux, or macOS.
How To Install Prettier in Visual Studio Code
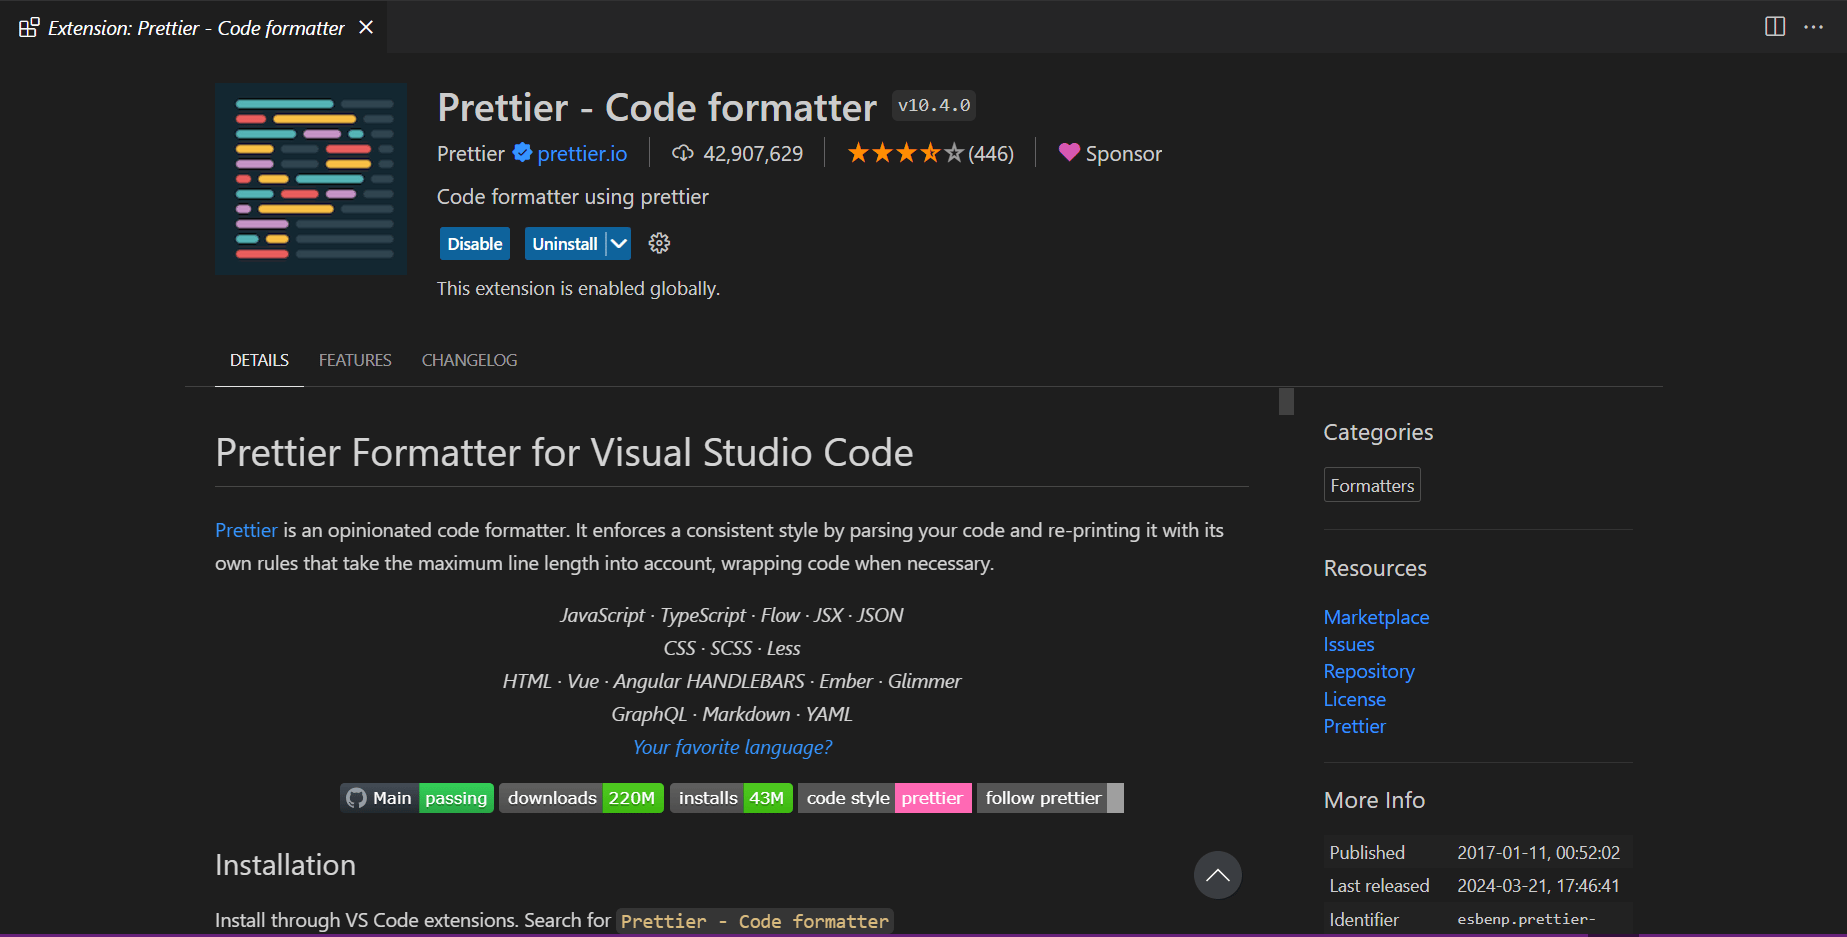
To format code with Prettier in Visual Studio Code, you first need to install the Prettier extension. There are two ways to do this:
Step 1: Install the Prettier Extension in VS Code
- Open Visual Studio Code.
- Go to the Extensions view by clicking the square icon on the sidebar or pressing Ctrl+Shift+X (or Cmd+Shift+X on Mac).
- In the search bar, type Prettier - Code formatter.
- Select the extension named Prettier – Code formatter and click Install.
Step 2: (Optional) Install Prettier via npm
If you want more control or plan to use Prettier from the command line or in CI/CD:
npm install --save-dev prettier
Or install globally:
npm install --global prettier
This is helpful if you want to use a specific version of Prettier for your project, which is common in team environments and for continuous integration (CI/CD) pipelines.
How To Use Prettier in Visual Studio Code
Once the Prettier extension is installed in VS Code, you can start formatting your code directly inside VS Code.
Using the Format Document Command
To start, let’s explore using the Format Document command. This command will make your code more consistent with proper spacing, line wrapping, and quotes; key benefits when you format code with Prettier.
To open the command palette, press Command + Shift + P on macOS or Ctrl + Shift + P on Windows.
In the command palette, search for format and then choose Format Document.

You may then be prompted to choose a formatter. Click the Configure button:
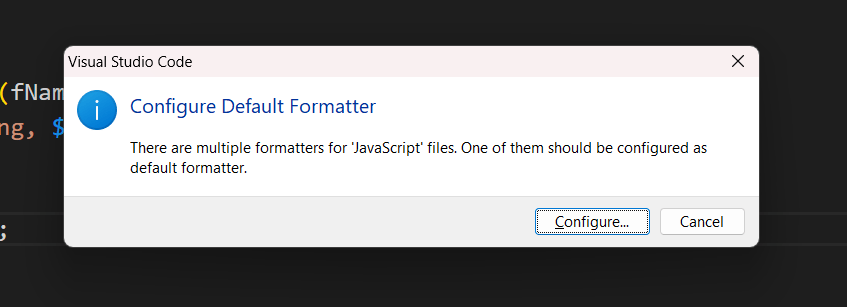
Then, select Prettier – Code Formatter.
Note: If you do not see a prompt for selecting a default formatter, you can manually set Prettier as the default formatter in VS Code. Open your Settings and set Editor: Default Formatter to esbenp.prettier-vscode.
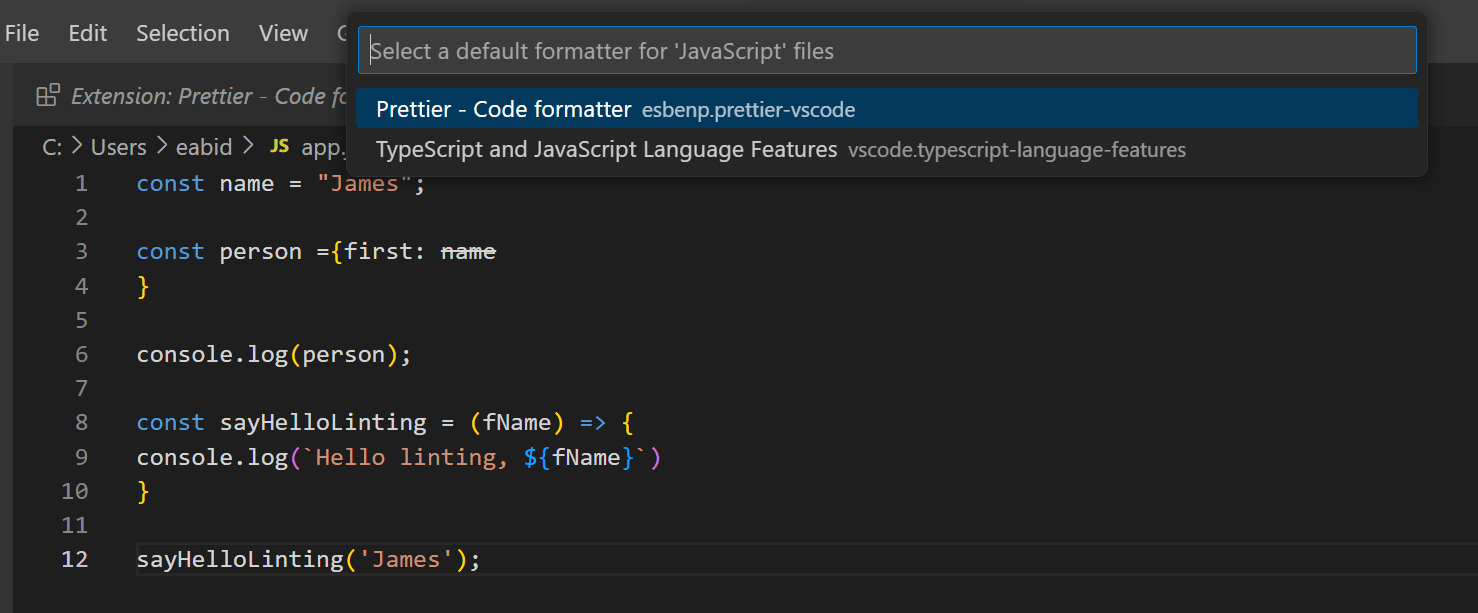
Your code is now formatted with consistent spacing, line wrapping, and quotes:
const name = "James";

const person = { first: name };

console.log(person);

const sayHelloLinting = (fName) => {
  console.log(`Hello linting, ${fName}`);
};

sayHelloLinting("James");
This also works on CSS files. You can turn code with inconsistent indentation, braces, new lines, and semicolons into clean, well-formatted code. For example:
body {color: red;
}
h1 {
  color: purple;
font-size: 24px
}
Will be reformatted as:
body {
  color: red;
}
h1 {
  color: purple;
  font-size: 24px;
}
Now that we’ve explored manual formatting, let’s look at how to enable VS Code auto-format on save using Prettier.
Formatting Code on Save
So far, you’ve had to run a command to format code with Prettier manually. To automate this process, you can enable Format on Save in VS Code formatting settings. This helps ensure that every file is automatically formatted before being committed to version control.
To change this setting, press Command + , on macOS, or Ctrl + , on Windows to open the Settings menu. Once the menu is open, search for Editor: Format On Save and make sure that option is checked:
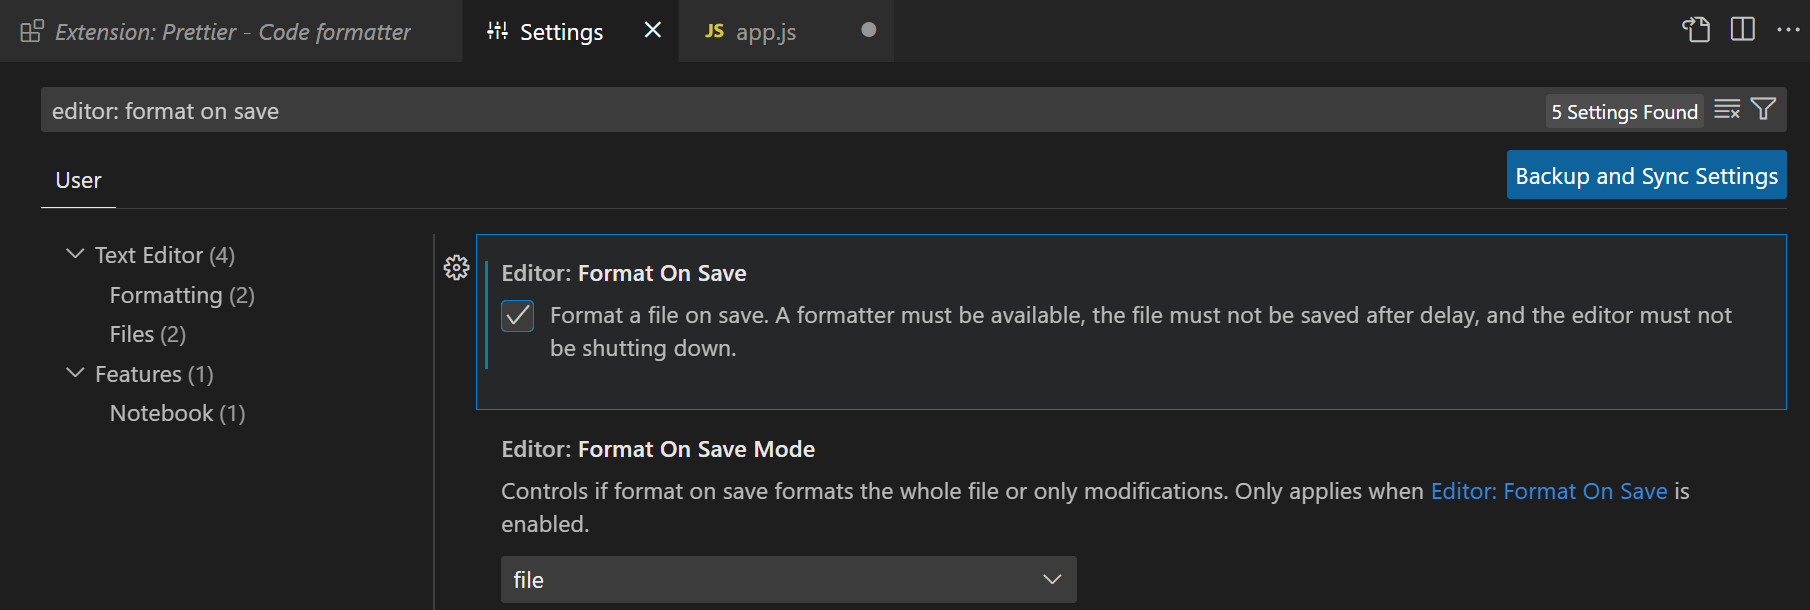
Once this is set, you can write your code as usual and it will be automatically formatted by Prettier when you save the file.
Changing the Prettier Configuration Settings
Prettier in VS Code applies sensible defaults, but you can customize its behavior to match your coding style.
Open the Settings menu. Then, search for Prettier to view and adjust available options:
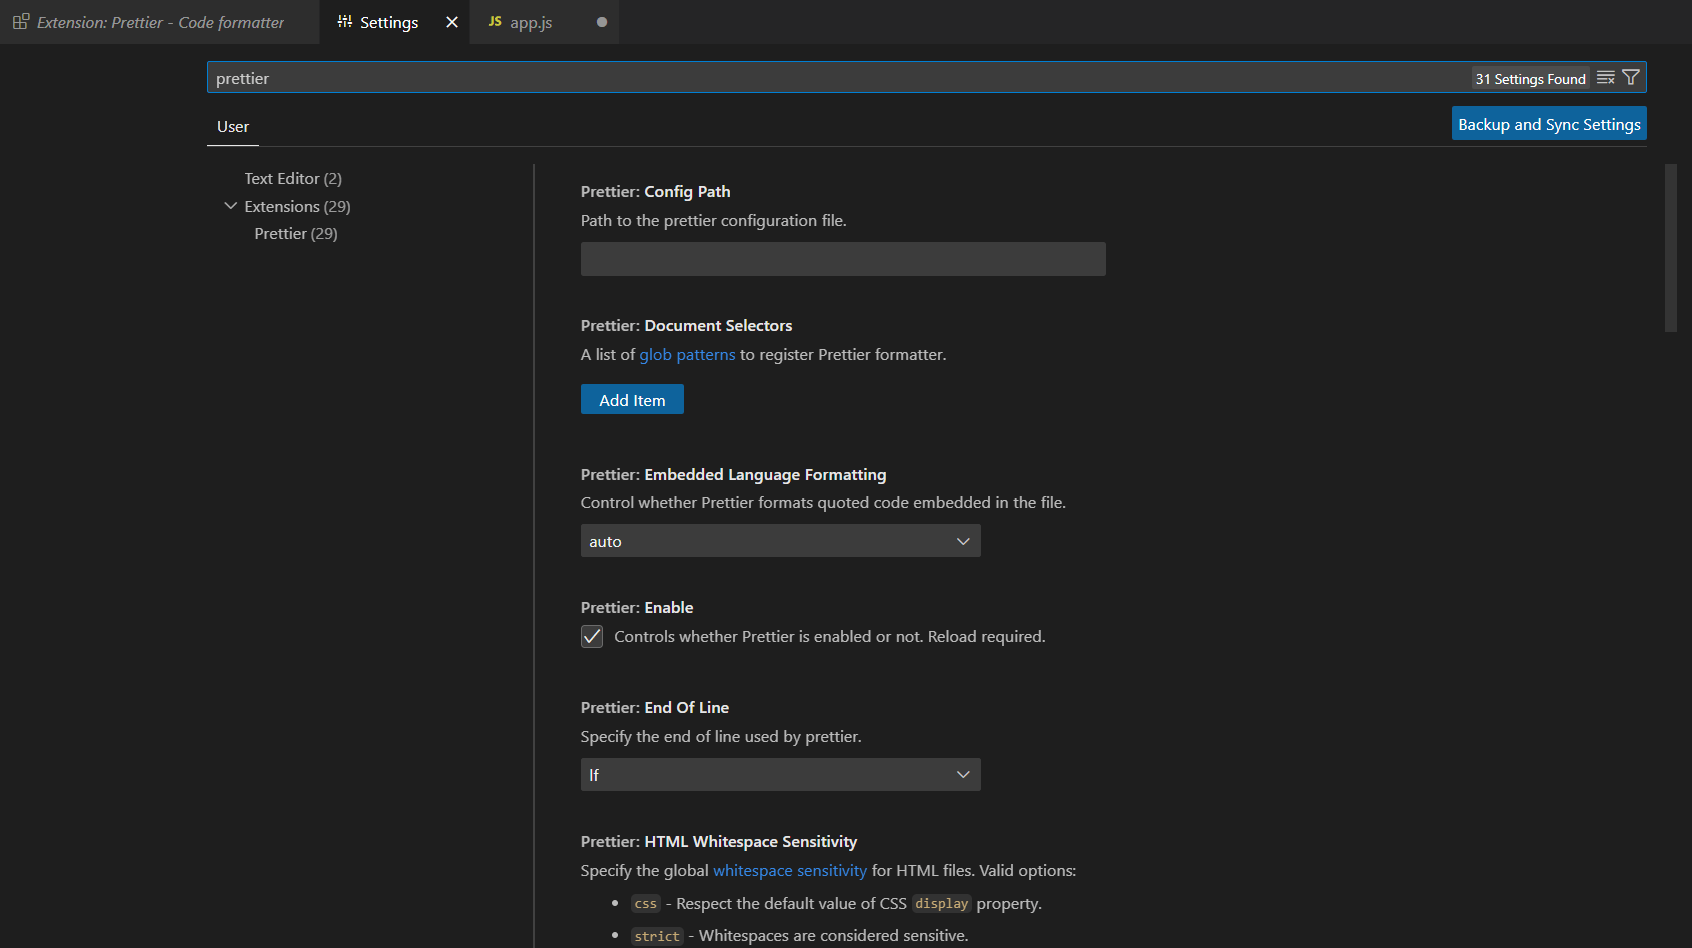
Here are some of the most commonly adjusted Prettier settings:
- Single Quote: Choose between single and double quotes.
- Semi: Choose whether or not to include semicolons at the end of lines.
- Tab Width: Specify how many spaces to insert for a tab.
Note: Keep in mind that configuring Prettier through the VS Code settings UI does not guarantee consistency across your team.
Creating a Prettier Configuration File
Everyone will have different preferences for their Prettier settings. But when working on a project as a team, it’s important that everyone uses the same configuration to maintain consistency. You can achieve this by adding a Prettier configuration file to your project.
Create a new file called .prettierrc.<extension> using one of the following formats:
ymlyamljsonjstoml
Here’s an example of a .prettierrc file using JSON:
{
  "trailingComma": "es5",
  "tabWidth": 4,
  "semi": false,
  "singleQuote": true
}
For more details, visit the Prettier configuration documentation. After creating and committing this file, you can ensure consistent code formatting with Prettier in VS Code across your entire team.
Configure Prettier for Team Environments
When working in a team, it’s essential to ensure that everyone formats code the same way. Relying on local editor settings can lead to inconsistent code style, messy diffs, and frustration during code reviews. To avoid this, you should configure Prettier in a way that is version-controlled and consistent across all contributors.
Add a .prettierrc Configuration File
As mentioned before, include a .prettierrc (or equivalent) file in your project root with your team’s formatting rules to maintain consistency:
{
  "singleQuote": true,
  "semi": false,
  "tabWidth": 2,
  "trailingComma": "es5"
}
This ensures that all developers use the same Prettier settings, regardless of their individual VS Code preferences.
Create a .prettierignore File
Just like .gitignore, this file tells Prettier which files or folders to skip. Commit it to version control to maintain consistent formatting behavior:
node_modules/
build/
dist/
*.min.js
Use Workspace Settings in .vscode/settings.json
Inside your project’s .vscode folder, create a settings.json file and add the following code:
{
  "editor.defaultFormatter": "esbenp.prettier-vscode",
  "editor.formatOnSave": true
}
This ensures that Prettier is enabled in VS Code on save for everyone who clones the project; no need for manual setup.
Tip: Commit the .vscode/settings.json file to your repository to share these settings across the team.
Install Prettier Locally in the Project
To avoid version mismatches, install Prettier as a dev dependency:
npm install --save-dev prettier
This ensures that all team members (and CI systems) use the same Prettier version.
Add Format Scripts to package.json
Include a script that lets contributors format all code consistently from the command line:
"scripts": {
  "format": "prettier --write ."
}
Now, anyone can run npm run format to apply Prettier formatting project-wide.
Using Prettier with ESLint
If you’re working on a JavaScript or TypeScript project, you’ve likely encountered ESLint, a powerful tool for identifying and fixing problems in your code. While ESLint focuses on code quality and potential errors, Prettier is designed to handle code formatting. Used together, they create a powerful workflow but it’s important to configure them properly to avoid conflicts.
Here’s how to integrate Prettier and ESLint in Visual Studio Code for a seamless development experience.
Why Use Prettier and ESLint Together?
- Prettier handles formatting (spaces, line breaks, indentation, etc.)
- ESLint handles code quality (syntax errors, best practices, anti-patterns)
Without proper setup, ESLint and Prettier can conflict; for example, ESLint might enforce one rule, and Prettier might override it. To avoid this, you can use specific ESLint plugins that turn off conflicting rules and delegate formatting to Prettier.
Step 1: Install Required Packages
You’ll need to install Prettier and the ESLint plugins that integrate with it.
npm install --save-dev prettier eslint-config-prettier eslint-plugin-prettier
eslint-config-prettier: Turns off formatting rules that would conflict with Prettiereslint-plugin-prettier: Runs Prettier as an ESLint rule and reports formatting issues as lint errors
Step 2: Configure .eslintrc
Update your ESLint configuration file (.eslintrc.js, .eslintrc.json, or similar) to extend Prettier and use the plugin:
{
  "extends": [
    "eslint:recommended",
    "plugin:prettier/recommended"
  ]
}
This ensures that Prettier formatting issues appear in the Problems tab and are highlighted in VS Code like any other lint error.
Step 3: Set Up VS Code to Use ESLint and Prettier Together
To format code with Prettier in Visual Studio Code while still running ESLint, do the following:
-
Open your VS Code settings (
settings.json) -
Add the following configuration:
{
"editor.formatOnSave": true,
"editor.defaultFormatter": "esbenp.prettier-vscode",
"editor.codeActionsOnSave": {
    "source.fixAll.eslint": true
    }
}
This setup will:
- Format code with Prettier on save
- Auto-fix lint errors using ESLint
- Avoid duplication or conflicts between the two tools
Optional: Add a Lint Script
To standardize linting and formatting in team environments, add this to your package.json:
"scripts": {
  "lint": "eslint .",
  "format": "prettier --write ."
}
Now, team members can run npm run lint and npm run format for consistent code quality and formatting.
Prettier vs. VS Code’s Default Formatter: What’s the Difference?
You might be wondering: Why use Prettier when VS Code already has a built-in formatter? While both tools serve the same purpose, keeping your code neat and consistent, they differ significantly in how they work and what they offer.
Here’s a clear comparison to help you understand why Prettier is preferred by most development teams.
Prettier: Opinionated and Consistent
Prettier is an opinionated code formatter, which means it enforces a consistent style by making decisions for you. Rather than relying on user-defined rules for every detail, Prettier applies formatting based on a few core settings like semicolons, single vs. double quotes, and tab width, and ignores everything else.
Key advantages of using Prettier:
- Consistent formatting across all files and languages
- Removes debates about code style in teams
- Works on save with the Prettier VS Code extension
- Supports many languages, including JavaScript, TypeScript, CSS, HTML, JSON, Markdown, and more
- Works across editors (not limited to VS Code)
- Highly automatable in CI/CD pipelines and Git hooks
Prettier is designed to prioritize consistency and simplicity. Its formatting is predictable and removes the need to make stylistic decisions while coding, allowing you to focus on logic, not layout.
VS Code’s Default Formatter: Basic and Language-Specific
Visual Studio Code comes with a built-in formatter for several languages, including HTML, JSON, and TypeScript. However, its capabilities are limited and language-dependent. You may get different formatting behavior depending on the file type, extensions installed, or personal editor settings.
Limitations of VS Code’s default formatter:
- Inconsistent results across file types
- Depends on language support (some formatters are basic or unavailable)
- Relies on user preferences, which can vary across teams
- No automatic formatting consistency across developers
- Harder to configure project-wide formatting rules
If you’re working solo and only using one language, VS Code’s built-in formatter may be sufficient. But in multi-language or team-based projects, these inconsistencies can lead to formatting issues and unnecessary style debates.
Why Developers Prefer Prettier
Here’s a side-by-side summary:
| Feature | Prettier | VS Code Default Formatter |
|---|---|---|
| Language Support | Wide (JS, TS, HTML, CSS, JSON, etc.) | Limited and varies by file type |
| Consistency | Enforced across all files | Depends on individual language rules |
| Configuration Sharing | Easy with .prettierrc |
Hard to standardize across teams |
| Format on Save | Fully supported | Supported but inconsistent |
| Automation (CI/CD, Git hooks) | Easy to set up | Not designed for automation |
| Team Collaboration | Highly recommended | Not team-friendly |
If you’re looking for a reliable, consistent, and automated way to format code with minimal setup, Prettier is the clear winner over VS Code’s default formatter. It’s the industry standard for a reason, and a must-have in team projects.
Troubleshooting Prettier in Visual Studio Code
Even with a correct setup, Prettier may not always behave as expected in Visual Studio Code. This section provides detailed solutions to the most common issues developers face when trying to format code with Prettier in VS Code.
Prettier Is Installed But Not Formatting
Symptoms:
- Running the “Format Document” command has no effect.
- Prettier is installed, but files do not reformat when saved.
- You don’t see any errors or logs in the Output panel.
Possible Causes and Fixes:
-
Prettier is not set as the default formatter: Visual Studio Code may be using a different formatting extension (such as the built-in formatter for HTML or CSS).
Fix: Set Prettier as the default formatter by adding the following to your global or workspace
settings.json:{ "editor.defaultFormatter": "esbenp.prettier-vscode" } -
Format on Save is disabled: If you’re expecting Prettier to run automatically on save, but it doesn’t, check this setting:
{ "editor.formatOnSave": true }You can verify this setting by opening the Command Palette (
Ctrl+Shift+PorCmd+Shift+P) and searching for “Preferences: Open Settings (JSON)”.
Prettier Only Works for Some File Types
Symptoms:
- Prettier formats JavaScript or TypeScript, but not HTML, CSS, or Python files.
- Format on save is inconsistent across languages.
Possible Causes and Fixes:
-
Language-specific formatter is overriding Prettier: Some file types (like HTML or JSON) may default to the built-in VS Code formatter.
Fix: Explicitly define Prettier as the formatter for specific languages in your settings:
{ "[html]": { "editor.defaultFormatter": "esbenp.prettier-vscode" }, "[css]": { "editor.defaultFormatter": "esbenp.prettier-vscode" }, "[json]": { "editor.defaultFormatter": "esbenp.prettier-vscode" } } -
Unsupported languages: Prettier does not support some file types out of the box (such as Python). For these, you’ll need to install and configure a dedicated formatter like Black for Python or YAPF, and assign that as the default formatter in VS Code.
Prettier Not Working in a Specific Project
Symptoms:
- Prettier works in one project but not in another.
- Running the Format Document command produces no changes in some projects.
- Code is ignored even though format on save is enabled.
Possible Causes and Fixes:
-
.prettierignorefile is excluding filesCheck if a
.prettierignorefile exists in your project and whether it is unintentionally excluding files or directories you are editing. -
Missing Prettier in project dependencies (if required)
Some teams install Prettier locally as a dev dependency. If Prettier is not listed in
package.json, VS Code may not detect it when using workspace settings.Fix: Install Prettier locally in your project:
npm install --save-dev prettier -
Corrupt or misconfigured workspace settings
If formatting fails silently, open
.vscode/settings.jsonand verify the following:{ "editor.formatOnSave": true, "editor.defaultFormatter": "esbenp.prettier-vscode" }
Prettier and ESLint Integration Causes Conflicts
Symptoms:
- Prettier works alone, but stops formatting when ESLint is enabled.
- ESLint shows formatting errors that Prettier doesn’t fix.
- Format on save stops working after ESLint is installed.
Possible Causes and Fixes:
-
Missing code action settings
When combining ESLint and Prettier, you must allow VS Code to apply automatic code fixes on save.
Fix: Add this to your settings:
{ "editor.codeActionsOnSave": { "source.fixAll.eslint": true } } -
Improper ESLint + Prettier plugin configuration
Make sure
eslint-config-prettierandeslint-plugin-prettierare properly installed and configured in.eslintrc:{ "extends": ["eslint:recommended", "plugin:prettier/recommended"] }This disables formatting rules in ESLint that conflict with Prettier and allows formatting issues to show as lint errors.
Prettier Still Not Working After All Configurations
Additional Troubleshooting Steps:
- Restart VS Code after changing settings.
- Check the Output panel: Go to
View > Outputand choose “Prettier” from the dropdown to see if any internal errors or warnings are being reported. - Disable conflicting extensions: Extensions like Beautify or language-specific formatters may override Prettier. Try disabling them temporarily.
- Reinstall Prettier: Uninstall and reinstall the Prettier extension if it appears unresponsive.
- Check the file type: Make sure the file you’re editing is a supported format (e.g.,
.js,.ts,.html,.json, etc.).
FAQs
1. How do I enable Prettier to format on save?
To enable Prettier to automatically format your code when you save a file in Visual Studio Code:
-
Open Command Palette (
Ctrl+Shift+PorCmd+Shift+P) -
Choose: Preferences: Open Settings (JSON)
-
Add the following setting:
{ "editor.formatOnSave": true }
This tells VS Code to run the formatter every time you save a file. Make sure Prettier is set as the default formatter (see next question).
2. How do I set Prettier as my default formatter?
To make sure Visual Studio Code uses Prettier for all formatting operations:
-
Open Settings (JSON) via the Command Palette.
-
Add this line:
{
  "editor.defaultFormatter": "esbenp.prettier-vscode"
}
You can apply this setting globally or in a workspace-specific .vscode/settings.json file.
3. What file types does Prettier support?
Prettier supports a wide range of file types out of the box, including:
- JavaScript (
.js), TypeScript (.ts) - JSON, YAML, TOML
- CSS, SCSS, Less
- HTML, Vue, Angular templates
- Markdown (
.md), MDX - GraphQL
- Handlebars (
.hbs)
Prettier can be configured to automatically format any of these file types on save, provided the file extension is recognized and the formatter is correctly assigned in your VS Code settings.
4. Why isn’t Prettier working in my project?
There are several possible reasons why Prettier is not working in VS Code:
- Prettier is not set as the default formatter
- Format on save is disabled
- Conflicting formatters (e.g., VS Code’s built-in HTML formatter)
- Unsupported file types (Prettier does not format all languages)
- Prettier is not installed in your local project (for team setups)
- Files or directories are excluded in a
.prettierignorefile
To fix these issues, check your settings.json, ensure Prettier is installed and selected as the formatter, and verify your file type is supported.
5. Can I use Prettier with ESLint?
Yes, Prettier works well with ESLint, especially in JavaScript and TypeScript projects. However, you should configure them to avoid conflicts:
-
Install the following packages:
npm install --save-dev prettier eslint-config-prettier eslint-plugin-prettier -
Update your
.eslintrcconfiguration:{ "extends": ["eslint:recommended", "plugin:prettier/recommended"], "plugins": ["prettier"], "rules": { "prettier/prettier": "error" } }
This setup disables ESLint formatting rules that conflict with Prettier and allows formatting issues to appear as ESLint errors in VS Code.
6. Can I ignore files or folders in Prettier formatting?
Yes. You can prevent Prettier from formatting specific files or directories by creating a .prettierignore file in the root of your project.
Example:
node_modules/
dist/
build/
*.min.js
coverage/
The syntax is similar to .gitignore. Any matching files or directories will be excluded from formatting, both in VS Code and when using the Prettier CLI.
Conclusion
Consistent code formatting plays a key role in improving readability, reducing errors, and simplifying collaboration. By setting up Prettier in Visual Studio Code, enabling format-on-save, and optionally integrating it with ESLint, you create a seamless development experience that scales from solo projects to large team environments. With shared configuration files like .prettierrc, .prettierignore, and workspace settings, you ensure that every contributor follows the same formatting rules without having to think about them.
Automating formatting not only simplifies code reviews and reduces merge conflicts but also creates a more professional, predictable, and error-resistant workflow. Whether you’re building a personal project, contributing to open source, or managing a production codebase, Prettier is a simple yet powerful tool that belongs in every developer’s toolkit.
For more tips on improving your development workflow and tooling, check out these related articles:
Thanks for learning with the DigitalOcean Community. Check out our offerings for compute, storage, networking, and managed databases.
About the author(s)
Developer. Speaker. Teacher. Developer Advocate at Auth0.
With over 6 years of experience in tech publishing, Mani has edited and published more than 75 books covering a wide range of data science topics. Known for his strong attention to detail and technical knowledge, Mani specializes in creating clear, concise, and easy-to-understand content tailored for developers.
Still looking for an answer?
This textbox defaults to using Markdown to format your answer.
You can type !ref in this text area to quickly search our full set of tutorials, documentation & marketplace offerings and insert the link!
 This work is licensed under a Creative Commons Attribution-NonCommercial- ShareAlike 4.0 International License.
Become a contributor for community
Get paid to write technical tutorials and select a tech-focused charity to receive a matching donation.

DigitalOcean Documentation
Full documentation for every DigitalOcean product.

Resources for startups and AI-native businesses
The Wave has everything you need to know about building a business, from raising funding to marketing your product.
The developer cloud
Scale up as you grow — whether you're running one virtual machine or ten thousand.

Start building today
From GPU-powered inference and Kubernetes to managed databases and storage, get everything you need to build, scale, and deploy intelligent applications.
