By Stanley Ulili and Caitlin Postal

The author selected Girls Who Code to receive a donation as part of the Write for DOnations program.
Introduction
JavaScript is commonly referred to as a single-threaded language because your web application code executes in a sequence one after the other in a single thread. If you are accessing a web app on a device with multiple cores, JavaScript only uses one core. When a task is executing on the main thread, all subsequent tasks must wait for the task to complete. When the task takes a long time, it blocks the main thread, preventing the remaining tasks from executing. Most of the blocking tasks tend to be CPU-intensive tasks, also known as CPU-bound tasks, with examples like processing graphics, mathematical calculations, and video or image compression.
In addition to CPU-bound tasks, you will also have I/O-bound tasks, which are non-blocking. These I/O-bound tasks spend most of the time issuing requests to the operating system (OS) and waiting for a response. An example is a network request that the Fetch API makes to a server. When you use the Fetch API to fetch a resource from a server, the operating system takes over the task, and the Fetch API waits for the OS response. During this time, the Fetch API callbacks are offloaded to a queue where they wait for the OS response, freeing the main thread and allowing it to execute the other subsequent tasks. Once the response is received, the callbacks associated with the Fetch API call execute on the main thread. Because the performance of I/O bound tasks depends on how long the operating system takes to finish the task, most I/O bound tasks, like Fetch, implement promises that define the functions that should run when the promise resolves; that is, when the operating system finishes the task and returns a response.
In contrast, CPU-bound tasks don’t idle like I/O-bound tasks that wait for the OS. CPU-bound tasks take hold of the CPU until the completion of the task, blocking the main thread in the process. Even if you wrap them in a promise, they will still block the main thread. Further, users can notice when the main thread is blocked as the web app user interface (UI) may freeze and anything using JavaScript may not work.
As a solution to this problem, browsers introduced the Web Workers API to provide multithreading support in the browser. With Web Workers, you can offload a CPU-intensive task to another thread, which frees the main thread. The main thread executes JavaScript code on one device core, and the offloaded task executes on another core. The two threads can communicate and share data through message passing.
In this tutorial, you will create a CPU-bound task that blocks the main thread in the browser and observe how it affects the web app. You will then unsuccessfully attempt to make a CPU-bound task non-blocking using promises. Finally, you will create a Web Worker to offload a CPU-bound task to another thread to prevent it from blocking the main thread.
Prerequisites
To follow this tutorial, you will need:
- A machine with two or more cores with a modern web browser installed.
- A local Node.js environment on your system, which you can setup with How To Install Node.js on Ubuntu 22.04. On other operating systems, follow the appropriate guide on How To Install Node.js and Create a Local Development Environment.
- Knowledge of the event loop, callbacks, and Promises, which you can learn by reading Understanding the Event Loop, Callbacks, Promises, and Async/Await in JavaScript.
- You will also need a basic knowledge of HTML, CSS, and JavaScript, which you can find in our How To Build a Website With HTML series, How To Build a Website With CSS series, and in How To Code in JavaScript.
Step 1 — Creating a CPU-Bound Task without Web Workers
In this step, you’ll create a web app that has a blocking CPU-bound task, as well as non-blocking tasks. The application will have three buttons. The first button will start the blocking task, which is a for loop that iterates about five billion times. The second button will increment a value on the web page and the third button will change the web app’s background color. The buttons for incrementing and changing the background are non-blocking.
To begin, create the project directory using the mkdir command:
- mkdir workers_demo
Move into the directory with the cd command:
- cd workers_demo
Using nano or your favorite text editor, create an index.html file:
- nano index.html
In your index.html file, add the following code to create buttons and div elements that display output:
<!DOCTYPE html>
<html lang="en">
  <head>
    <meta charset="UTF-8" />
    <meta name="viewport" content="width=device-width, initial-scale=1.0" />
    <title>Web Workers</title>
    <link rel="stylesheet" href="main.css" />
  </head>
  <body>
    <div class="wrapper">
      <div class="total-count"></div>
      <div class="buttons">
        <button class="btn btn-blocking" id="blockbtn">Blocking Task</button>
        <button class="btn btn-nonblocking" id="incrementbtn">Increment</button>
        <button class="btn btn-nonblocking" id="changebtn">
          Change Background
        </button>
      </div>
      <div class="output"></div>
    </div>
    <script src="main.js"></script>
  </body>
</html>
In the head section, you reference the main.css stylesheet, which will contain the app styles. In the body tag, you create a div element with a class of total-count, which will contain a value that will be incremented when a button is clicked. Next, you create another div element with three button elements as children. The first button will start a CPU-intensive task, which is blocking. The second button will increment the value in the div element with the class of total-count, and the third button will trigger JavaScript code to change the background color. These two tasks are non-blocking.
The next div element will contain output from the CPU-intensive task and finally, before the end of the body tag, you reference the main.js file, which will contain all the JavaScript code.
You might notice that the elements have IDs and classes. You will use them to reference the elements in JavaScript later in this step.
Now save and exit your file.
Create and open the main.css file:
- nano main.css
In your main.css file, add the following contents to style the elements:
body {
  background: #fff;
  font-size: 16px;
}

.wrapper {
  max-width: 600px;
  margin: 0 auto;
}
.total-count {
  margin-bottom: 34px;
  font-size: 32px;
  text-align: center;
}

.buttons {
  border: 1px solid green;
  padding: 1rem;
  margin-bottom: 16px;
}

.btn {
  border: 0;
  padding: 1rem;
}

.btn-blocking {
  background-color: #f44336;
  color: #fff;
}

#changebtn {
  background-color: #4caf50;
  color: #fff;
}
The .buttons are defined with a solid green border and light padding, but the blocking task is further defined by the .btn-blocking style that uses a different background color.
Save and close the file.
Now that you have defined the CSS styles, you will write JavaScript code to make the HTML elements interactive. Save and exit your file.
Create and open the main.js file in your editor:
- nano main.js
In your main.js file, add the following code to reference the DOM elements:
const blockingBtn = document.getElementById("blockbtn");
const incrementBtn = document.getElementById("incrementbtn");
const changeColorBtn = document.getElementById("changebtn");
const output = document.querySelector(".output");
const totalCountEl = document.querySelector(".total-count");
In the first three lines, you reference the buttons with their IDs using the getElementByID() method of the document object. In the last two lines, you reference the div elements with their class names using the querySelector() method of the document object.
Next, define an event listener that will increment a div element value when the incrementBtn button is clicked:
...
totalCountEl.textContent = 0;

incrementBtn.addEventListener("click", function incrementValue() {
  let counter = totalCountEl.textContent;
  counter++;
  totalCountEl.textContent = counter;
});
First, you set the text content of the totalCountEl element to 0. Then you attach an event listener to the incrementBtn button using the DOM’s addEventListener() method. The method takes two arguments: the event to listen for and a callback. Here, the event listener listens for a click event and calls the incrementValue() callback when the click event has been fired.
In the incrementValue() callback, you fetch the totalCountEl text content value from the DOM and set it to the counter variable. You then increment the value by 1 and set the totalCountEl element text content to the incremented value.
Next, add the following code to attach a click event to the changeColorBtn button so that the background color randomly changes when the button is clicked:
...
changeColorBtn.addEventListener("click", function changeBackgroundColor() {
  colors = ["#009688", "#ffc107", "#dadada"];
  const randomIndex = Math.floor(Math.random() * colors.length)
  const randomColor = colors[randomIndex];
  document.body.style.background = randomColor;
});
In the previous code, you attach a click event listener that runs the changeBackgroundColor callback when the user clicks the changeColorBtn button. In the callback, you set the colors variable to an array of three HEX color values. You then call the Math.random() method and multiply its result with the array length value to generate a random number between 0 and the array length 3. The random value is then rounded to the nearest integer using the Math.Floor() method and stored in the randomIndex variable.
After that, you select a value from the array using the random index, and then you set the body.style.background property of the document object to that color.
Now that you have implemented two buttons that trigger non-blocking tasks to execute, you will attach an event listener to the remaining button to start a CPU-intensive task. The loop will iterate five billion times, and save the result in the DOM.
Still in your main.js file, add the following code to attach a click event listener for a button that starts a blocking task:
...
blockingBtn.addEventListener("click", function blockMainThread() {
  let counter = 0;
  for (let i = 0; i < 5_000_000_000; i++) {
    counter++;
  }
  output.textContent = `Result: ${counter}`;
});
In the preceding code, you attach a click event listener that runs the blockMainThread() callback. Within the function, you set counter to the value 0 and then create a loop that iterates five billion times. During each iteration, the counter value is incremented by 1. After the loop finishes, the result of the calculation is set to the output element.
The complete file will now match the following:
const blockingBtn = document.getElementById("blockbtn");
const incrementBtn = document.getElementById("incrementbtn");
const changeColorBtn = document.getElementById("changebtn");
const output = document.querySelector(".output");
const totalCountEl = document.querySelector(".total-count");
totalCountEl.textContent = 0;

incrementBtn.addEventListener("click", function incrementValue() {
  let counter = totalCountEl.textContent;
  counter++;
  totalCountEl.textContent = counter;
});

changeColorBtn.addEventListener("click", function changeBackgroundColor() {
  colors = ["#009688", "#ffc107", "#dadada"];
  const randomIndex = Math.floor(Math.random() * colors.length)
  const randomColor = colors[randomIndex];
  document.body.style.background = randomColor;
});

blockingBtn.addEventListener("click", function blockMainThread() {
  let counter = 0;
  for (let i = 0; i < 5_000_000_000; i++) {
    counter++;
  }
  output.textContent = `Result: ${counter}`;
});
Once you are finished entering your code, save and exit your file.
To avoid Cross-Origin Resource Sharing (CORS) errors when you start working with Web Workers in Step 3, you need to create a web server for the app. Run the following command to create a server:
- npx serve .
Enter y to confirm, and the console will output a Serving! message to confirm that the server is running:
Output   ┌─────────────────────────────────────────────────────┐
   │                                                     │
   │   Serving!                                          │
   │                                                     │
   │   - Local:            http://localhost:3000         │
   │   - On Your Network:  http://your_ip_address:3000   │
   │                                                     │
   │   Copied local address to clipboard!                │
   │                                                     │
   └─────────────────────────────────────────────────────┘
Open your preferred web browser and visit http://localhost:3000/index.html.
Note: If you are following the tutorial on a remote server, you can view the index.html file in your browser using port forwarding.
In your current terminal, start a web server with the following command:
- npx serve .
When prompted, enter y to proceed.
Your console may load the following error but it should not impact your ability to access the web server:
OutputERROR: Cannot copy server address to clipboard: Couldn't find the `xsel` binary and fallback didn't work. On Debian/Ubuntu you can install xsel with : sudo apt install xsel.

   ┌─────────────────────────────────────────────────────┐
   │                                                     │
   │   Serving!                                          │
   │                                                     │
   │   - Local:            http://localhost:3000         │
   │   - On Your Network:  http://your_ip_address:3000   │
   │                                                     │
   │   Copied local address to clipboard!                │
   │                                                     │
   └─────────────────────────────────────────────────────┘
Open a second terminal on your local machine, then enter the following command:
- ssh -L 3000:localhost:3000 your_non_root_user@your_server_ip
Return to your browser and navigate to http://localhost:3000/index.html to access your app’s homepage.
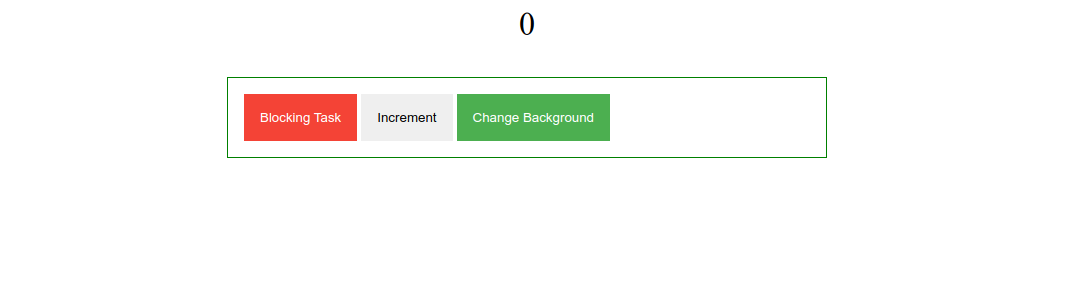
When the page loads, it will display a homepage with the Blocking Task, Increment, and Change Background buttons. The incrementing counter will start at 0 because you have not pressed the button to increment the count yet:
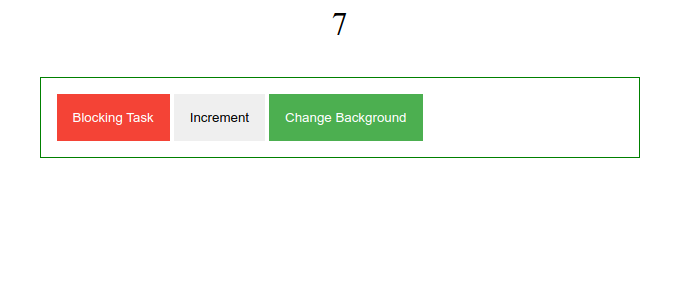
First, click the Increment button several times to update the number on the page on each click:
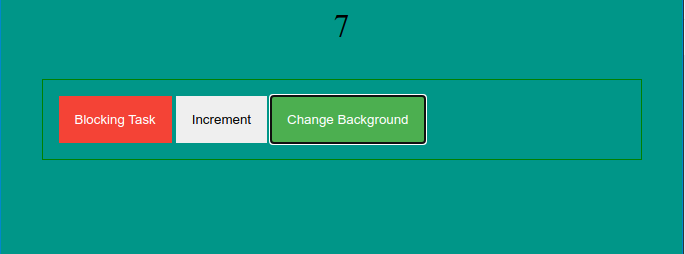
Second, click the Change Background button a few times to change the page’s background color:
Finally, press the Blocking Task button, then randomly click the Increment and the Change Background buttons. The page will become non-responsive, and the buttons won’t work. This freeze occurs because the Blocking Task button starts a CPU-intensive task that has blocked the main thread, and no other code will execute until the main thread is free. After some time passes and the CPU-intensive task finishes, the page will show Result: 5000000000. At this point, if you click the other buttons, they will start working again.
As you have experienced, a blocking task is immediately noticeable to users and can harm your application’s user experience.
Now that you created an app with a blocking task that freezes the app via the main thread, you will use promises to convert the CPU-bound tasks into non-blocking tasks.
Step 2 — Offloading a CPU-Bound Task Using Promises
The use of the Fetch API or other promise-based methods for handling I/O tasks sometimes gives the wrong impression that wrapping a CPU-bound task in a promise can make it non-blocking. As mentioned in the introduction, the I/O tasks are non-blocking because they are handled by the operating system, which notifies the JavaScript engine when it has finished the task. While the operating system does the I/O task, the callbacks associated with the I/O tasks wait for a response from the OS in a queue. As they wait in the queue, the main thread is free to handle all the subsequent tasks. When a response comes from the OS, the callbacks execute in the main thread and there is no parallel execution of the callbacks.
To demonstrate that promises don’t make a CPU-bound task non-blocking, you will wrap the CPU-intensive task in a promise in this step.
In your text editor, open the main.js file:
- nano main.js
In your main.js file, add the highlighted code to create a calculateCount() function that wraps a CPU-intensive task in a promise:
...
function calculateCount() {
  return new Promise((resolve, reject) => {
    let counter = 0;
    for (let i = 0; i < 5_000_000_000; i++) {
      counter++;
    }
    resolve(counter);
  });
}

blockingBtn.addEventListener("click", function blockMainThread(){
  ....
})
The calculateCount() function returns a promise. In the function, you initialize a promise using the new Promise syntax, which takes a callback that accepts the resolve and reject parameters. The parameters handle the success or failure of an operation in the callback. The callback contains the CPU-intensive loop, which iterates five billion times. After the loop finishes, you call the resolve method with the result.
Now that you have a CPU-bound task in the calculateCount() function, remove the highlighted code:
...
blockingBtn.addEventListener("click", function blockMainThread() {
  let counter = 0;
  for (let i = 0; i < 5_000_000_000; i++) {
    counter++;
  }
  output.textContent = `Result: ${counter}`;
});
With the code removed, you will call the calculateCount() function in the blockMainThread() function. Since the function returns a promise, you need the async/await syntax to consume the promise.
Add the highlighted code to make blockMainThread() function asynchronous and invoke the calculateCount() function:
...
blockingBtn.addEventListener("click", async function blockMainThread() {
  const counter = await calculateCount();
  output.textContent = `Result: ${counter}`;
});
In the preceding code, you prefix the blockMainThread() function with the async keyword to make it asynchronous. Within the function, you prefix the calculateCount() function with the await keyword and invoke the function. The await operator waits for the promise to resolve. Once resolved, the counter variable is set to the returned value and the output div element is set to the result of the CPU-bound task.
Your complete file will now match the following:
const blockingBtn = document.getElementById("blockbtn");
const incrementBtn = document.getElementById("incrementbtn");
const changeColorBtn = document.getElementById("changebtn");
const output = document.querySelector(".output");
const totalCountEl = document.querySelector(".total-count");
totalCountEl.textContent = 0;

incrementBtn.addEventListener("click", function incrementValue() {
  let counter = totalCountEl.textContent;
  counter++;
  totalCountEl.textContent = counter;
});

changeColorBtn.addEventListener("click", function changeBackgroundColor() {
  colors = ["#009688", "#ffc107", "#dadada"];
  const randomIndex = Math.floor(Math.random() * colors.length)
  const randomColor = colors[randomIndex];
  document.body.style.background = randomColor;
});

function calculateCount() {
  return new Promise((resolve, reject) => {
    let counter = 0;
    for (let i = 0; i < 5_000_000_000; i++) {
      counter++;
    }
    resolve(counter);
  });
}

blockingBtn.addEventListener("click", async function blockMainThread() {
  const counter = await calculateCount();
  output.textContent = `Result: ${counter}`;
});
Once you are done making the changes, save and exit your file.
With your server still running, refresh http://localhost:3000/index.html in your browser. Click the Increment and Change Background buttons. After that, click the Blocking Task button and then click the other buttons. The other buttons are still non-responsive when a CPU-bound task is running, which proves that wrapping a CPU-bound task in a promise does not make the task non-blocking.
Now that you have attempted to offload a CPU-bound using promises and noted its failure, you’ll use Web Workers to make CPU-intensive tasks non-blocking.
Step 3 — Offloading a CPU-Bound Task Using Web Workers
In this step, you will create a dedicated worker to offload the CPU-bound task by moving the CPU-bound task into a worker.js file. In the main.js file, you will instantiate a dedicated Web Worker with the path to the worker.js file. Once the Web Worker has been initialized, the CPU-bound task will be offloaded to a separate thread and the main thread will be free to handle the remaining tasks.
First, create a worker.js file:
- nano worker.js
In your worker.js file, add the following code to add the CPU-bound task in the file:
let counter = 0;
for (let i = 0; i < 5_000_000_000; i++) {
  counter++;
}
The preceding code block contains the CPU-bound task you have been using so far. This code will now run in a separate thread.
To ensure that the main thread can access the result of the calculation, you need to send a message containing the data using the postMessage() method of the Worker interface.
In your worker.js file, add the highlighted line to send data to the main thread:
let counter = 0;
for (let i = 0; i < 5_000_000_000; i++) {
  counter++;
}
postMessage(counter);
In this line, you invoke the postMessage() method with the counter variable that contains the result of the CPU-bound task calculation.
Save and close the file.
Now that you moved the CPU-bound task to the worker.js, open the main.js file:
- nano main.js
Remove the highlighted lines containing the CPU-bound task in the main.js file:
...
function calculateCount() {
  return new Promise((resolve, reject) => {
    let counter = 0;
    for (let i = 0; i < 5_000_000_000; i++) {
      counter++;
    }
    resolve(counter);
  });
}

blockingBtn.addEventListener("click", async function blockMainThread() {
  const counter = await calculateCount();
  output.textContent = `Result: ${counter}`;
});
In the blockMainThread callback, add the highlighted code to initialize the worker and listen to messages from the worker thread:
blockingBtn.addEventListener("click", function blockMainThread() {
  const worker = new Worker("worker.js");
  worker.onmessage = (msg) => {
    output.textContent = `Result: ${msg.data}`;
  };
});
First, you create an instance of Worker with the path to the worker.js file you created earlier. Second, you attach the onmessage property of the Worker interface to the worker thread, which will listen to any messages coming from the worker thread. If there is an incoming message, the message event is fired, which calls the callback with the message data msg as the argument. In the callback, you modify the output text content with the message received from the Web Worker.
The complete file will now match the following code block:
const blockingBtn = document.getElementById("blockbtn");
const incrementBtn = document.getElementById("incrementbtn");
const changeColorBtn = document.getElementById("changebtn");
const output = document.querySelector(".output");
const totalCountEl = document.querySelector(".total-count");
totalCountEl.textContent = 0;

incrementBtn.addEventListener("click", function incrementValue() {
  let counter = totalCountEl.textContent;
  counter++;
  totalCountEl.textContent = counter;
});

changeColorBtn.addEventListener("click", function changeBackgroundColor() {
  colors = ["#009688", "#ffc107", "#dadada"];
  const randomIndex = Math.floor(Math.random() * colors.length)
  const randomColor = colors[randomIndex];
  document.body.style.background = randomColor;
});

blockingBtn.addEventListener("click", function blockMainThread() {
  const worker = new Worker("worker.js");
  worker.onmessage = (msg) => {
    output.textContent = `Result: ${msg.data}`;
  };
});
Save and exit the file.
With the server running, return to your web browser and visit http://localhost:3000/index.html. The page will load successfully from the server.
First, click the Increment and Change Background buttons a few times. Second, click the Blocking Task button to start the CPU-intensive task, and then continue clicking the other buttons. The buttons will now work without any issues, even though the CPU-intensive task is still executing.
You can now offload a CPU-intensive task with a dedicated Web Worker to make it non-blocking.
Conclusion
In this tutorial, you created an app that starts a CPU-bound task that blocks the main thread. You then tried unsuccessfully to use promises to make the CPU-bound task non-blocking. Finally, you used a dedicated Web Worker to offload a CPU-bound task to another thread to make it non-blocking.
As a next step, you can visit the Web Workers API for comprehensive coverage of Dedicated Web Workers. Apart from dedicated Web Workers, the Web Workers API comes with Shared Workers and Service Workers, which can be used for providing offline access and boosting performance.
If you use Node.js, you can learn how to use worker threads in How To Use Multithreading in Node.js.
Thanks for learning with the DigitalOcean Community. Check out our offerings for compute, storage, networking, and managed databases.
About the author(s)
Software Engineer with a passion for sharing my knowledge.
Still looking for an answer?
This textbox defaults to using Markdown to format your answer.
You can type !ref in this text area to quickly search our full set of tutorials, documentation & marketplace offerings and insert the link!
 This work is licensed under a Creative Commons Attribution-NonCommercial- ShareAlike 4.0 International License.
Become a contributor for community
Get paid to write technical tutorials and select a tech-focused charity to receive a matching donation.

DigitalOcean Documentation
Full documentation for every DigitalOcean product.

Resources for startups and AI-native businesses
The Wave has everything you need to know about building a business, from raising funding to marketing your product.
The developer cloud
Scale up as you grow — whether you're running one virtual machine or ten thousand.

Start building today
From GPU-powered inference and Kubernetes to managed databases and storage, get everything you need to build, scale, and deploy intelligent applications.
