By Jay Martinez

Prerequisites
This tutorial will illustrate the steps required to install and configure Slim Framework on a Digital Ocean VPS. By the end of this tutorial, you will have a well organized, working instance of Slim Framework, complete with a folder structure that you can base your project in.
This tutorial assumes that you have a LAMP (or your preferred) stack installed on Ubuntu. If you don’t, you can refer to this article that helps you install a LAMP stack on Ubuntu.
If your application won’t be using MySQL, you can skip its installation. The minimum you will need installed is an Apache web server (with Mod_Rewrite) and PHP (minimum 5.3 version).
Quick Setup for Prerequisites
1. Install Apache
apt-get update
apt-get install apache2
2. Install PHP
apt-get install php5 libapache2-mod-php5 php5-mcrypt
3. Enable mod_rewrite
a2enmod rewrite
4. Modify the Apache configuration file
Modify the Apache configuration file and change AllowOverride None to AllowOverride All for the document root. Depending on your server setup, this configuration file could be any one of the following:
/etc/apache2/apache2.conf/etc/apache2/sites-enabled/000-default/etc/apache2/sites-available/default
In the configuration file, locate the section that looks like the following:
<Directory /var/www/>
        Options Indexes FollowSymLinks
        AllowOverride None
        Require all granted
</Directory>
Change this to the following and save the file:
<Directory /var/www/>
        Options Indexes FollowSymLinks
        AllowOverride All
        Require all granted
</Directory>
5. Restart Apache
service apache2 restart
This tutorial also assumes familiarity with Linux basics.
What is Slim Framework?
Slim is one of the most popular, open source microframeworks available for PHP in the market. It is extremely efficient, fast, and easy to use. While it is ideal for developing small to medium sized web applications, it can also be used quite effectively to build large scalable PHP applications.
Slim is packed with the most common utilities that you would expect in a framework:
- Easy to use, powerful, and flexible router
- Custom view to render templates
- Secure cookies
- HTTP caching
- Easy to use error handling and debugging
- Simple configuration
Installation
Installing Slim Framework consists of three steps
- Downloading Slim Framework
- Extracting from Zip File
- Copying Slim Framework to a Common Location
1. Download Slim Framework
You can download the Slim Framework using the following command:
wget https://github.com/codeguy/Slim/zipball/master
This will fetch the framework as a zip file and store it in the current directory with the name master.
2. Extract from the Zip File
The contents of the zip file can be extracted using the following command:
unzip master -d ./
Note: If you get an error that unzip isn’t installed, you can install it by using the command apt-get install unzip and then execute the above command to extract all the files.
The above command will extract the files in a folder named something like codeguy-Slim-3a2ac72. This folder contains a folder named Slim which is the framework folder.
3. Copy Slim Framework to a Common Location
We will now copy the codeguy-Slim-3a2ac72/Slim folder to a common location like /usr/local/Slim from where it’ll be accessible to all projects on this server that use Slim. This will avoid duplication and prevent any maintenance issues that could arise from duplicate installations.
Let’s copy the folder using the following command:
cp -r ./codeguy-Slim-3a2ac72/Slim /usr/local/Slim
Note: The name of the extracted folder (codeguy-Slim-3a2ac72 in this case) might be slightly different if you download a different version of Slim. Make sure to modify the name of the folder in the above command accordingly
Once this is done, any of your projects that use Slim Framework can reference it from this location.
Important Note: A lot of tutorials install frameworks in the public folder/document root (like /var/www/Slim). Installing framework files outside the public folder/document root (as done above) makes the application relatively more secure as the framework files won’t be accessible in a browser.
Organizing Your Slim Based Project
A Slim project is typically spread over three main directories:
1. Slim framework directory
This directory contains the framework files and is the directory that was copied in the previous step (/usr/local/Slim)
2. Project directory
This directory contains your project files like routers, views, models, etc. Being a microframework, Slim doesn’t enforce any particular project structure. This means that you are free to structure your project files in any manner you deem fit. This is particularly helpful in cases when developers are used to a particular folder structure.
This directory can reside anywhere on the server, but ideally it should not be in a web accessible location. You can place it in the /usr/local or in your home folder. For example, if you create in the project in a folder named HelloSlim, it could be located at /usr/local/HelloSlim or ~/HelloSlim or any other location you prefer.
Here’s one way how files in this folder could be arranged:
HelloSlim
|- Routes
|  |- route1.php
|  |- route2.php
|- Models
|  |- model1.php
|  |- model2.php
|- Views
|  |- footer.php
|  |- header.php
|  |- sidebar.php
|  |- view1.php
|  |- view2.php
|- Class
|  |- class1.php
|  |- class2.php
|- routes.php       //contains 'include' statements for all routes in the 'Routes' folder
|- includes.php     //contains 'include' statements for all models/classes in the 'Models/Class' folders
You can create this folder structure by executing the following commands:
mkdir /usr/local/HelloSlim
mkdir /usr/local/HelloSlim/Routes
mkdir /usr/local/HelloSlim/Models
mkdir /usr/local/HelloSlim/Views
mkdir /usr/local/HelloSlim/Class
Note: You can use this folder structure or change it completely to suit your preferences.
3. Document root/Public folder
This is the web accessible folder (typically located at /var/www). This folder contains only two Slim related files:
- index.php
- .htaccess
This folder will also contain all the projects script, style and image files. To keep things organized, you can divide those into the scripts, styles and images folders respectively.
Here’s a sample structure of the document root folder:
Document Root (eg. /var/www/)
|- scripts
|  |- jquery.min.js
|  |- custom.js
|- styles
|  |- style.css
|  |- bootstrap.min.css
|- images
|  |- logo.png
|  |- banner.jpg
|- .htaccess
|- index.php
File Contents
Assuming that your project has the structure defined above, you’ll need to fill the .htaccess and index.php files (in the document root) with the following contents respectively:
.htaccess
RewriteEngine On
RewriteCond %{REQUEST_FILENAME} !-f
RewriteRule ^ index.php [QSA,L]
index.php
<?php

require '/usr/local/Slim/Slim.php';     //include the framework in the project
\Slim\Slim::registerAutoloader();       //register the autoloader

$projectDir = '/usr/local/HelloSlim';   //define the directory containing the project files

require "$projectDir/includes.php";     //include the file which contains all the project related includes

$app = new \Slim\Slim(array(
    'templates.path' => '/usr/local/HelloSlim/Views'
));      //instantiate a new Framework Object and define the path to the folder that holds the views for this project

require "$projectDir/routes.php";       //include the file which contains all the routes/route inclusions

$app->run();                            //load the application
To complete this tutorial assuming that the project has been arranged as per the folder structure defined in the previous section, the routes.php and includes.php files (in the project directory) should have the following contents:
routes.php
<?php

require '/usr/local/HelloSlim/Routes/route1.php';
require '/usr/local/HelloSlim/Routes/route2.php';
Note: You could create the routes directly in this file instead of including other files containing routes. However, defining routes in different, logically grouped files will make your project more maintainable
includes.php
<?php

require "/usr/local/HelloSlim/Class/class1.php";
require "/usr/local/HelloSlim/Class/class2.php";

require "/usr/local/HelloSlim/Models/model1.php";
require "/usr/local/HelloSlim/Models/model2.php";
Sample Slim Application
Now that you know how to set up a Slim application, let’s create a simple application which does the following:
- Handles static Routes (GET & POST)
- Handles dynamic Routes
- Uses views
Note: This sample application will assume that Slim has been deployed as described above.
Let’s map out the requirements for this sample application:
<table width=“100%”> <tr> <th>Route</th> <th>Type</th> <th>Action</th> </tr> <tr> <td>/hello</td> <td>GET (static)</td> <td>Displays a static View</td> </tr> <tr> <td>/hello/NAME</td> <td>GET (dynamic)</td> <td>Displays a dynamic View</td> </tr> <tr> <td>/greet</td> <td>POST</td> <td>Displays a View after a POST request</td> </tr> </table>
This project will require the following files to be created in the Application folder (/usr/local/HelloSlim/):
HelloSlim
|- Routes
|  |- getRoutes.php
|  |- postRoutes.php
|- Views
|  |- footer.php
|  |- header.php
|  |- hello.php
|  |- greet.php
|- routes.php
The public folder/document root will look something like the following:
Here’s a sample structure of the document root folder:
Document Root (eg. /var/www/)
|- .htaccess
|- index.php
Now populate these files as follows:
1. /var/www/.htaccess
RewriteEngine On
RewriteCond %{REQUEST_FILENAME} !-f
RewriteRule ^ index.php [QSA,L]
2. /var/www/index.php
<?php

require '/usr/local/Slim/Slim.php';     //include the framework in the project
\Slim\Slim::registerAutoloader();       //register the autoloader

$projectDir = '/usr/local/HelloSlim';   //define the directory containing the project files

$app = new \Slim\Slim(array(
    'templates.path' => '/usr/local/HelloSlim/Views'
));      //instantiate a new Framework Object and define the path to the folder that holds the views for this project

require "$projectDir/routes.php";       //include the file which contains all the routes/route inclusions

$app->run();                            //load the application
3. /usr/local/HelloSlim/Routes/getRoutes.php
<?php

$app->get('/', function(){
    echo 'This is a simple starting page';
});

//The following handles any request to the /hello route

$app->get('/hello', function() use ($app){
    // the following statement invokes and displays the hello.php View
    $app->render('hello.php');
});


//The following handles any dynamic requests to the /hello/NAME routes (like /hello/world)

$app->get('/hello/:name', function($name) use ($app){
    // the following statement invokes and displays the hello.php View. It also passes the $name variable in an array so that the view can use it.
    $app->render('hello.php', array('name' => $name));
});
4. /usr/local/HelloSlim/Routes/postRoutes.php
<?php

 //The following handles the POST requests sent to the /greet route

$app->post('/greet', function() use ($app){
    //The following statement checks if 'name' has been POSTed. If it has, it assigns the value to the $name variable. If it hasn't been set, it assigns a blank string.
    $name = (null !== $app->request->post('name'))?$app->request->post('name'):'';

    //The following statement checks if 'greeting' has been POSTed. If it has, it assigns the value to the $greeting variable. If it hasn't been set, it assigns a blank string.
    $greeting = (null !== $app->request->post('greeting'))?$app->request->post('greeting'):'';

    // the following statement invokes and displays the 'greet.php' View. It also passes the $name & $greeting variables in an array so that the view can use them.
    $app->render('greet.php', array(
        'name' => $name,
        'greeting' => $greeting
    ));
});
5. /usr/local/HelloSlim/Views/footer.php
        <small>Copyright notice...</small>
    </body>
</html>
6. /usr/local/HelloSlim/Views/header.php
<pre> <!DOCTYPE html> <html> <head> <title>Sample Slim Application</title> </head< <body> </pre>
7. /usr/local/HelloSlim/Views/hello.php
***
<?php include('header.php'); ?>

***
<h1>Hello <?php echo isset($name)?$name:''; ?></h1>
<!-- The above line handles both the dynamic and the static GET routes that we implemented in the getRoutes.php file.

***

<h2>Send a greeting</h2>
<form method='POST' action='/greet'>
    <label>Name</label><br>
    <input name='name' placeholder='Who do you want to greet?'><br>
    <label>Greeting</label><br>
    <input name='greeting' placeholder='Your greeting message'><br>
    <input type='submit' value='Greet!'>
</form>

***
<?php include('footer.php'); ?>
8. /usr/local/HelloSlim/Views/greet.php
    <?php

    include('header.php');

    echo "<p>$greeting, $name</p><p><a href='/hello'>First Page</a></p>";

    include('footer.php');
9. /usr/local/HelloSlim/routes.php
    <?php

    include 'Routes/getRoutes.php';
    include 'Routes/postRoutes.php';
Sample Application Screenshots
If you visit your newly created sample application at http://yourdomain.com/, you’ll see something like the following:
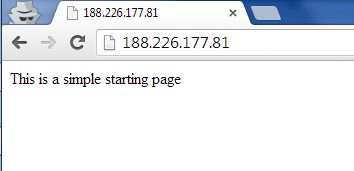
Note: If you are not using a domain name with your Digital Ocean droplet, use the IP address of the droplet instead.
If you visit http://yourdomain.com/hello, you’ll get the following:

If you visit http://yourdomain.com/hello/World, you’ll get the following:
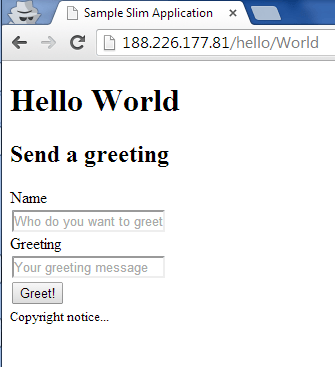
Note: If you replace the ‘World’ in the URL with another word, the content of the page will change accordingly.
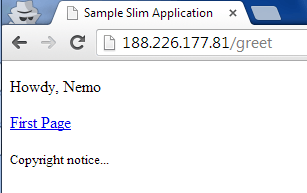
To test the POST route, enter a name and greeting in the available fields and hit the ‘Greet!’ button as follows:

After hitting the ‘Greet!’ button, you should get something like the following:
Final Word
Now that you have a well organized working instance of the Slim framework installed, you are ready to start working on your project. If you need additional help with Slim, you can always refer to the comprehensive official documentation.
<div class=“author”>Submitted by: <a href=“http://www.php.buzz”>Jay</a></div>
Thanks for learning with the DigitalOcean Community. Check out our offerings for compute, storage, networking, and managed databases.
About the author
Still looking for an answer?
This textbox defaults to using Markdown to format your answer.
You can type !ref in this text area to quickly search our full set of tutorials, documentation & marketplace offerings and insert the link!
Hi, I have followed the instructions but I am just getting a blank screen. I had to download slim from the website and also had a html folder inside var. Any ideas what I’ve done wrong?
Aside for the differences between the version used above and Slim 3.
What if we wanted to make the /usr/local/HelloSlim/Views/header.php view dynamic and pass for instance a title?
I got this error after run this commond wget https://github.com/codeguy/Slim/zipball/master
HTTP request sent, awaiting response… 404 Not Found 2017-02-07 11:51:24 ERROR 404: Not Found.
What I do now ?
Is there a newer version of this tutorial for people using Ubuntu 16.04 with PHP 7? I was told that I’d need to make a PHP application using Slim Skeleton to make a podcast feed with MySQL. I tried installing Asterisk using a tutorial for Ubuntu 14.04, but the scripts said that it did not support PHP 7.
 This work is licensed under a Creative Commons Attribution-NonCommercial- ShareAlike 4.0 International License.
Become a contributor for community
Get paid to write technical tutorials and select a tech-focused charity to receive a matching donation.

DigitalOcean Documentation
Full documentation for every DigitalOcean product.

Resources for startups and AI-native businesses
The Wave has everything you need to know about building a business, from raising funding to marketing your product.
The developer cloud
Scale up as you grow — whether you're running one virtual machine or ten thousand.

Start building today
From GPU-powered inference and Kubernetes to managed databases and storage, get everything you need to build, scale, and deploy intelligent applications.
