By Mark Drake and Erika Heidi
Not using Ubuntu 20.04?
Choose a different version or distribution.
Introduction
When developing a website or web application, many users need the functionality of a database system like MySQL. However, interacting with the system solely from the MySQL command-line client requires familiarity with Structured Query Language — more commonly referred to as SQL — which can present a major hurdle for some users.
phpMyAdmin was created to allow users to interact with MySQL through an intuitive web interface, running alongside a PHP development environment. This guide will walk you through installing phpMyAdmin on top of an Nginx server.
Note: phpMyAdmin runs on a database server, handles database credentials, and allows users to execute SQL statements on the database. Combined with the fact that it’s a widely-deployed PHP application, this means that phpMyAdmin is frequently targeted for attack. If you install and configure phpMyAdmin without taking the proper steps to secure it from malicious actors, you run the risk of your data being lost or stolen.
In addition to installing the application, this tutorial will go over several measures you can take to harden your phpMyAdmin installation’s security. It will also explain each measure in detail so that you can make informed decisions and protect your system.
Prerequisites
In order to complete this guide, you will need:
- A server running Ubuntu 20.04. This server should have a non-root user with administrative privileges and a firewall configured with
ufw. To set this up, follow our initial server setup guide for Ubuntu 20.04. - A LEMP stack (Linux, Nginx, MySQL, and PHP) installed on your Ubuntu 20.04 server. To install and configure these components, follow our guide on How To Install Linux, Nginx, MySQL, PHP (LEMP stack) on Ubuntu 20.04.
Additionally, because phpMyAdmin handles authentication using MySQL credentials, we strongly recommend that you install an SSL/TLS certificate to enable encrypted traffic between server and client. If you do not have an existing domain configured with a valid certificate, follow this guide on securing Nginx with Let’s Encrypt on Ubuntu 20.04 to set this up.
Warning: If you don’t have an SSL/TLS certificate installed on the server and you still want to proceed, please consider enforcing access via SSH Tunnels as explained in Step 5 of this guide.
Once you have these prerequisites in place, you can begin following Step 1 of this guide.
Step 1 — Installing phpMyAdmin
You can install phpMyAdmin by using APT to download the phpmyadmin package from the default Ubuntu repositories.
Begin by updating the server’s package index:
- sudo apt update
Now you can install phpMyAdmin by running the following command:
- sudo apt install phpmyadmin
During the installation process, you will be prompted to choose a web server (either Apache or Lighttpd) to configure. phpMyAdmin can automatically make a number of configuration changes to ensure that it works correctly with either of these web servers upon installation. However, because you are using Nginx as a web server you shouldn’t choose either of these options. Instead, press TAB to highlight the <Ok> and then press ENTER to continue the installation process.
Next, you’ll be prompted whether to use dbconfig-common for configuring the application database. Select <Yes>. This will set up the internal database and administrative user for phpMyAdmin. You will be asked to define a new password for the phpmyadmin MySQL user, but because this isn’t a password you need to remember you can leave it blank and let phpMyAdmin randomly create a password.
Note: Assuming you installed MySQL by following Step 2 of the prerequisite LEMP stack tutorial, you may have decided to enable the Validate Password plugin. As of this writing, enabling this component will trigger an error when the phpMyAdmin installation process attempts to set a password for the phpmyadmin user:
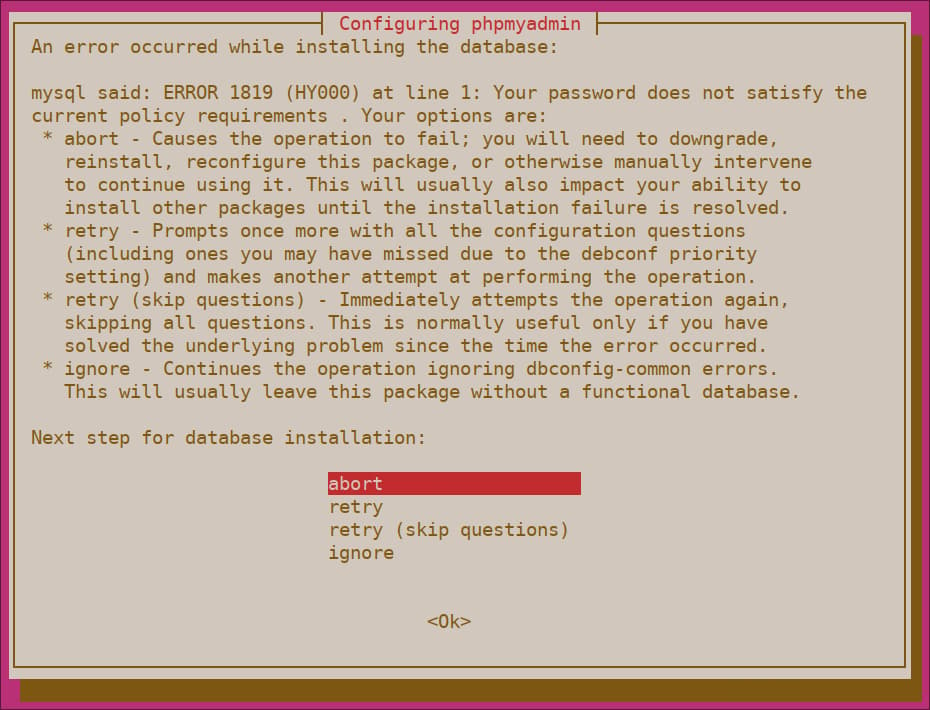
To resolve this, select the abort option to stop the installation process. Then, open up your MySQL prompt:
- sudo mysql
Or, if you enabled password authentication for the root MySQL user, run this command and then enter your password when prompted:
- mysql -u root -p
From the MySQL prompt, run the following command to disable the Validate Password component. Note that this won’t actually uninstall it, but just stop the component from being loaded on your MySQL server:
- UNINSTALL COMPONENT "file://component_validate_password";
Following that, you can close the MySQL client:
- exit
Then try installing the phpmyadmin package again and it will work as expected:
- sudo apt install phpmyadmin
Once phpMyAdmin is installed, you can open the MySQL prompt once again with sudo mysql or mysql -u root -p and then run the following command to re-enable the Validate Password component:
- INSTALL COMPONENT "file://component_validate_password";
Once the apt install command completes, phpMyAdmin will be fully installed. However, for the Nginx web server to find and serve the phpMyAdmin files correctly, you’ll need to create a symbolic link from the installation files to Nginx’s document root directory. If you followed the prerequisite LEMP stack tutorial, your Nginx installation’s document root is /var/www/your_domain/
- sudo ln -s /usr/share/phpmyadmin /var/www/your_domain/phpmyadmin
Your phpMyAdmin installation is now operational. To access the interface, go to your server’s domain name or public IP address followed by /phpmyadmin in your web browser:
https://server_domain_or_IP/phpmyadmin
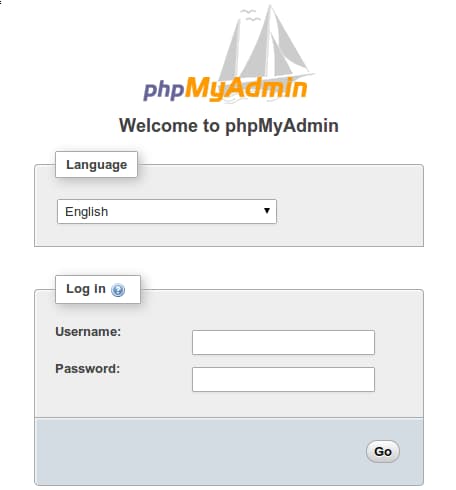
As mentioned before, phpMyAdmin handles authentication using MySQL credentials. This means that to log into phpMyAdmin, you use the same username and password you would normally use to connect to the database using the command line or with an API. If you need help creating MySQL users, check out this guide on How To Manage an SQL Database.
Note: Logging into phpMyAdmin as the root MySQL user is discouraged because it represents a significant security risk. This guide will outline how to disable logins as the root MySQL user in Step 3 of this guide.
Your phpMyAdmin installation is completely functional at this point. However, by installing a web interface, you’ve exposed your MySQL database server to the outside world. Because of phpMyAdmin’s popularity, and the potential for it to provide access to large amounts of sensitive data, installations like these are common targets for attacks. In the following sections of this guide, we’ll go over a few different methods by which you can make your phpMyAdmin installation more secure.
Step 2 — Changing phpMyAdmin’s Default Location
One way to protect your phpMyAdmin installation is by making it harder to find. Bots will scan for common paths, like /phpmyadmin, /pma, /admin, /mysql, and other similar names. Changing the interface’s URL from /phpmyadmin to something non-standard will make it much harder for automated scripts to find your phpMyAdmin installation and attempt brute-force attacks.
In the previous step, you created a symbolic link in your Nginx web document root pointing to /usr/share/phpmyadmin, where the actual phpMyAdmin application files are located. You can rename this symbolic link to change phpMyAdmin’s interface URL.
To do this, navigate to the Nginx document root directory:
- cd /var/www/your_domain/
Then run the following ls command to list the files in the document root directory to get a better sense of the change you’ll make. This command includes the -l option, which tells the command to use the “long listing” format. This will instruct ls to return more information than it would otherwise:
- ls -l
Your output will contain a line like the following:
Output. . .
lrwxrwxrwx 1 root  root   22 Jan 15 21:09 phpmyadmin -> /usr/share/phpmyadmin/
. . .
This line indicates that you have a symbolic link named phpmyadmin in this directory. You can change this link name to whatever you’d like, and doing so will in turn change the URL where you can access phpMyAdmin. This will help to obscure the endpoint from bots performing automated searches of common endpoint names.
Choose a name that hides the purpose of the endpoint. This guide will name the endpoint /hiddenlink and use this name in examples throughout, but you should choose an alternate name.
Rename the symbolic link with the mv command:
- sudo mv phpmyadmin hiddenlink
After running this command, run the ls -l command again to confirm that the symbolic link was renamed correctly:
- ls -l
This time, the output will indicate that the listing for the symbolic link has been updated with its new name:
Outputtotal 8
. . .
lrwxrwxrwx 1 root  root   22 Jan 15 21:09 hiddenlink -> /usr/share/phpmyadmin/
. . .
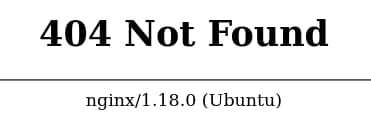
Now when you go to the URL you previously used to access phpMyAdmin, you’ll get a 404 error:
https://server_domain_or_IP/phpmyadmin
You can instead access your phpMyAdmin interface at the new URL you just configured:
https://server_domain_or_IP/hiddenlink
By obscuring phpMyAdmin’s real location on the server, you’re securing its interface against automated scans and manual brute-force attempts.
Step 3 — Disabling Root Login
On MySQL, as well as within regular Linux systems, the root account is a special administrative account with unrestricted access to the system. In addition to being a privileged account, it’s a known login name, which makes it an obvious target for brute-force attacks. To minimize these risks, this step will outline how to configure phpMyAdmin to deny any login attempts coming from the root MySQL user. This way, even if you provide valid credentials for the user root, you’ll still get an Access denied! error and won’t be allowed to log in.
Because you selected dbconfig-common to configure and store phpMyAdmin settings, the application’s default configuration is currently stored within your MySQL database. You’ll need to create a new config.inc.php file in phpMyAdmin’s configuration directory to define your custom settings. Even though phpMyAdmin’s PHP scripts are located inside the /usr/share/phpmyadmin directory, the application’s configuration files are located in /etc/phpmyadmin.
Create a new custom settings file inside the /etc/phpmyadmin/conf.d directory and name it pma_secure.php:
- sudo nano /etc/phpmyadmin/conf.d/pma_secure.php
Then add the following content to the new file:
<?php

# PhpMyAdmin Settings
# This should be set to a random string of at least 32 chars
$cfg['blowfish_secret'] = 'CHANGE_THIS_TO_A_STRING_OF_32_RANDOM_CHARACTERS';

$i=0;
$i++;

$cfg['Servers'][$i]['auth_type'] = 'cookie';
$cfg['Servers'][$i]['AllowNoPassword'] = false;
$cfg['Servers'][$i]['AllowRoot'] = false;

?>
By including the AllowNoPassword and AllowRoot directives and setting both of them to false, this configuration file disables passwordless logins and logins by the root MySQL user, respectively.
Note that the auth_type setting configures phpMyAdmin to use the cookie authentication method. phpMyAdmin uses the cookie authentication method by default, which allows you to log in to phpMyAdmin as any valid MySQL user with the help of cookies. With this method, the MySQL user password is stored and encrypted with the Advanced Encryption Standard (AES) algorithm in a temporary cookie.
Historically, phpMyAdmin instead used the Blowfish algorithm for this purpose. However, it still looks for a directive named blowfish_secret, which points to passphrase to be used internally by the AES algorithm. This isn’t a passphrase you need to remember, so any string containing 32 random characters will work here.
Update the line that reads 'CHANGE_THIS_TO_A_STRING_OF_32_RANDOM_CHARACTERS' to a random string containing at least 32 characters.
Note: If the passphrase you enter here is shorter than 32 characters in length, it will result in the encrypted cookies being less secure. Entering a string longer than 32 characters, though, won’t cause any harm.
To generate a truly random string of characters, you can install and use the pwgen program with APT:
- sudo apt install pwgen
By default, pwgen creates easily pronounceable, though less secure, passwords. However, by including the -s flag, as in the following command, you can create a completely random, difficult-to-memorize password. Note the final two arguments to this command: 32, which dictates how long the password string pwgen will generate should be; and 1 which tells pwgen how many strings it should generate:
- pwgen -s 32 1
Copy this command’s resulting output and add it to the pma_secure.php file, replacing 'CHANGE_THIS_TO_A_STRING_OF_32_RANDOM_CHARACTERS'.
Save and close the file when you’re done editing it. If you used nano, do so by pressing CTRL + X, Y to confirm the changes, and then ENTER to return to the bash prompt.
The changes will apply automatically. If you reload the login page now and try to log in as root, you will get an Access denied! error:
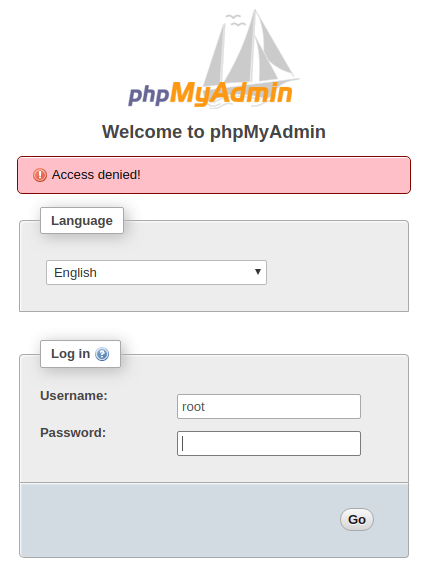
Logins by the root MySQL user are now prohibited on your phpMyAdmin installation. This security measure will block brute-force scripts from trying to guess the root database user’s password on your server. Moreover, it will enforce the usage of less-privileged MySQL accounts for accessing phpMyAdmin’s web interface, which by itself is an important security practice.
Step 4 — Creating an Authentication Gateway
Hiding your phpMyAdmin installation in an unusual location might sidestep some automated bots scanning the network, but it’s useless against targeted attacks. To better protect a web application with restricted access, it’s generally more effective to stop attackers before they can even reach the application. This way, they’ll be unable to use generic exploits and brute-force attacks to guess access credentials.
In the specific case of phpMyAdmin, it’s even more important to keep the login interface locked away. By keeping it open to the world, you’re offering a brute-force platform for attackers to guess your database credentials.
This step outlines how to add an extra authentication layer to your phpMyAdmin installation so as to increase the security of your MySQL databases. Most web servers, including Nginx, provide this capability natively. By completing this step, anyone who tries to access your phpMyAdmin installation’s login screen will first be required to pass through an HTTP authentication prompt by entering a valid username and password.
To set this up, you first need to create a password file to store the authentication credentials. Nginx requires that passwords be encrypted using the crypt() function. The OpenSSL suite, which should be installed on your Ubuntu server by default, includes this functionality.
To create an encrypted password, type:
- openssl passwd
You will be prompted to enter and confirm the password that you wish to use. The utility will then display an encrypted version of the password that will look something like this:
Output9YHV.p60.Cg6I
Copy this value, as you will need to include it in the authentication file you are about to create.
Now, create an authentication file. For the purposes of this guide, we’ll call this file pma_pass and place it in the Nginx configuration directory:
- sudo nano /etc/nginx/pma_pass
In this file, specify the username you would like to use, followed by a colon (:) and then the encrypted version of the password you received from the openssl passwd utility.
In this example the user is named sammy, but you can choose any username you’d like. This doesn’t need to be the name of an existing user profile on your Ubuntu server or that of a MySQL user.
After adding your chosen username and the encrypted password you copied earlier, the file will look like this:
sammy:9YHV.p60.Cg6I
Save and close the file when finished.
Next, you’ll need to modify the Nginx configuration file. Again, this guide follows the conventions established in the prerequisite LEMP tutorial, so the configuration file used in the following examples is /etc/nginx/sites-available/your_domain. Be sure that you use the relevant Nginx configuration file for the web location where your phpMyAdmin installation is currently hosted.
Open your Nginx configuration file in your preferred text editor to get started:
- sudo nano /etc/nginx/sites-available/your_domain
Locate the server block, and the location / section within it. You need to create a new location section below this location / block to match phpMyAdmin’s current path on the server.
Recall that in Step 2 of this guide you changed the name of phpMyAdmin’s location by renaming the symbolic link (hiddenlink in our example). Here, you need to enter the name you used for this symbolic link. You don’t need to include the full file path, just the name of the symbolic link relative to the Nginx document root directory:
server {
        . . .

        location / {
                try_files $uri $uri/ =404;
        }

        location ^~ /hiddenlink {

        }

        . . .
}
Within this block, set up two directives: auth_basic, which defines the message that will be displayed on the authentication prompt, and auth_basic_user_file, pointing to the authentication file you just created. Add both of these directives to the new location section:
server {
        . . .
        location / {
                try_files $uri $uri/ =404;
        }

        location ^~ /hiddenlink {
                auth_basic "Admin Login";
                auth_basic_user_file /etc/nginx/pma_pass;
        }
        . . .
}
Lastly, notice that this block has a ^~ selector before the new location definition. This is to make sure Nginx won’t bypass your access rules when it matches the rule for PHP files, which are typically defined as a regular expression in order to catch all .php files. In Nginx configuration files, regular expression definitions have a higher precedence over standard location definitions. This means that if you we don’t use the ^~ selector at the beginning of the location, users will still be able to bypass the authentication prompt by navigating to http://server_domain_or_ip/hiddenlink/index.php in their browser.
The ^~ selector at the beginning of the location definition tells Nginx to ignore other matches when it finds a match for this location. This means that any subdirectories or files within /hiddenlink/ will be matched with this rule. However, because the definition to parse PHP files will be skipped as a result of the ^~ selector usage, we’ll need to include a new PHP location block inside the /hiddenlink definition. This will make sure PHP files inside this location are properly parsed; otherwise they will be sent to the browser as download content.
Add the following highlighted lines within the location block you just added:
server {
        . . .

        location / {
                try_files $uri $uri/ =404;
        }

        location ^~ /hiddenlink/ {
                auth_basic "Admin Login";
                auth_basic_user_file /etc/nginx/pma_pass;

                location ~ \.php$ {
                        include snippets/fastcgi-php.conf;
                        fastcgi_pass unix:/var/run/php/php7.4-fpm.sock;
                }
        }
    . . .
}
Remember to replace hiddenlink with the actual path where phpMyAdmin can be found. You should also double check the location of your PHP-FPM socket file, which will vary depending on which version of PHP you currently have installed. In this example, we use php7.4-fpm.sock which is valid for PHP 7.4, the version that is installed on Ubuntu 20.04 via the default APT repositories.
Save and close the file when you’re done. To check whether the configuration file is valid, run the following command:
- sudo nginx -t
The following output indicates that the configuration file’s syntax is valid:
Outputnginx: the configuration file /etc/nginx/nginx.conf syntax is ok
nginx: configuration file /etc/nginx/nginx.conf test is successful
To activate the new authentication gate, reload Nginx:
- sudo systemctl reload nginx
Now when you visit the phpMyAdmin URL in your web browser, you will be prompted for the username and password you added to the pma_pass file:
https://server_domain_or_IP/hiddenlink
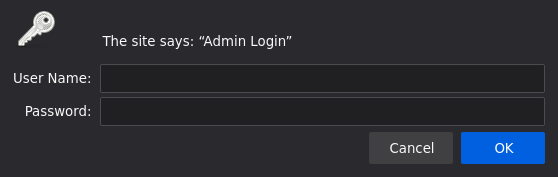
Once you enter your credentials, you’ll be taken to the standard phpMyAdmin login page.
Note: The authentication prompt may not appear if you have accessed phpMyAdmin recently. To force the prompt to appear, you may have to refresh the page, clear your cache, or open a different browser session.
In addition to providing an extra layer of security, this gateway will help keep your MySQL logs clean of spammy authentication attempts.
Step 5 — Setting Up Access via Encrypted Tunnels
For increased security, it is possible to lock down your phpMyAdmin installation to authorized hosts only. You can limit access to phpMyAdmin by specifying individual authorized hosts in your Nginx configuration file. This way, any request coming from an IP address that is not on the list will be denied.
Even though this feature alone can be enough in some use cases, it’s not always the best long-term solution, mainly due to the fact that most people don’t access the internet from static IP addresses. As soon as you get a new IP address from your internet provider, you’ll be unable to get to the phpMyAdmin interface until you update the Nginx configuration file with your new IP address.
For a more robust long-term solution, you can use IP-based access control to create a setup in which users will only have access to your phpMyAdmin interface if they’re accessing from either an authorized IP address or localhost via SSH tunneling. We’ll go over how to set up both of these access controls in the sections below.
Combining IP-based access control with SSH tunneling greatly increases security because it fully blocks access coming from the public internet (except for authorized IPs), in addition to providing a secure channel between the user and the server through the use of encrypted tunnels.
Setting Up IP-Based Access Control on Nginx
On Nginx, IP-based access control can be defined in the corresponding location block of a given site, using the directives allow and deny. For instance, if you want to only allow requests coming from a given host, you would include the following two lines, in this order, inside the relevant location block for the site you would like to protect:
allow hostname_or_IP;
deny all;
You can allow as many hosts as you want, and you only need to include one allow line for each authorized host/IP inside the respective location block for the site you’re protecting. The directives will be evaluated in the same order as they are listed until a match is found or the request is finally denied due to the deny all directive.
In this step, you’ll configure Nginx to only allow requests coming from localhost or your current IP address. First, you’ll need to know the current public IP address your local machine is using to connect to the internet. There are various ways to obtain this information; for simplicity, this guide will use the service provided by ipinfo.io. You can either open the URL https://ipinfo.io/ip in your browser, or run the following command from your local machine:
- curl https://ipinfo.io/ip
This command will return an IP address, like this:
Output203.0.113.0
The value returned by this command is your local machine’s current public IP address. You’ll configure phpMyAdmin’s location block to only allow requests coming from that IP or locally from the server itself.
To do this, once again open your site’s Nginx configuration file using your preferred text editor:
- sudo nano /etc/nginx/sites-available/your_domain
Because you already have an access rule within your current configuration, you need to combine it with IP-based access control using the directive satisfy all. This way, you can keep the current HTTP authentication prompt for increased security.
Add the following highlighted lines to your phpMyAdmin configuration’s location block:
server {
        . . .

        location ^~ /hiddenlink/ {
                satisfy all; #requires both conditions

                allow 203.0.113.0; #allow your IP
                allow 127.0.0.1; #allow localhost via SSH tunnels
                deny all; #deny all other sources

                auth_basic "Admin Login";
                auth_basic_user_file /etc/nginx/pma_pass;

                location ~ \.php$ {
                        include snippets/fastcgi-php.conf;
                        fastcgi_pass unix:/var/run/php/php7.4-fpm.sock;
                }
        }

        . . .
}
This is how the file will look after adding these new directives. Remember to replace hiddenlink with the actual path where phpMyAdmin can be found, and the highlighted IP address with your local machine’s current public IP address:
server {
        . . .

        location ^~ /hiddenlink/ {
                satisfy all; #requires both conditions

                allow 203.0.113.0; #allow your IP
                allow 127.0.0.1; #allow localhost via SSH tunnels
                deny all; #deny all other sources

                auth_basic "Admin Login";
                auth_basic_user_file /etc/nginx/pma_pass;

                location ~ \.php$ {
                        include snippets/fastcgi-php.conf;
                        fastcgi_pass unix:/var/run/php/php7.4-fpm.sock;
                }
        }

        . . .
}
Save and close the file when you’re done. To check if the configuration file is valid, you can run:
- sudo nginx -t
The following output is expected:
Outputnginx: the configuration file /etc/nginx/nginx.conf syntax is ok
nginx: configuration file /etc/nginx/nginx.conf test is successful
Now reload the web server so the changes take effect:
- sudo systemctl reload nginx
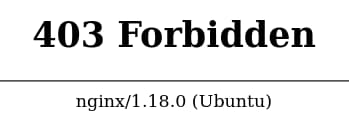
Because your IP address is explicitly listed as an authorized host, your access shouldn’t be disturbed. Anyone else trying to access your phpMyAdmin installation, however, will now get a 403 Forbidden error:
https://server_domain_or_IP/hiddenlink
The next subsection of this guide will provide details on how to use SSH tunneling to access the web server through local requests. This way, you’ll still be able to access phpMyAdmin’s interface even when your IP address changes.
Accessing phpMyAdmin Through an Encrypted Tunnel
SSH tunneling works as a way of redirecting network traffic through encrypted channels. By running an ssh command similar to what you would use to log into a server, you can create a secure “tunnel” between your local machine and that server. After establishing a tunnel, all traffic coming in on a given local port can be redirected through the encrypted tunnel, using the remote server as a proxy before reaching out to the internet. This is similar to what happens when you use a virtual private network (VPN), but SSH tunnels generally require less configuration to set up.
You can use SSH tunneling to proxy your requests to the remote web server running phpMyAdmin. By creating a tunnel between your local machine and the server where phpMyAdmin is installed, you can redirect local requests to the remote web server. More importantly, traffic will be encrypted and requests will reach Nginx as if they’re coming from localhost. This way, no matter what IP address you’re connecting from, you’ll be able to securely access phpMyAdmin’s interface.
Because the traffic between your local machine and the remote web server will be encrypted, this is a safe alternative for situations where you can’t have an SSL/TLS certificate installed on the web server running phpMyAdmin.
From your local machine, run this command whenever you need access to phpMyAdmin:
- ssh user@server_domain_or_IP -L 8000:localhost:80 -L 8443:localhost:443 -N
Let’s examine each part of the command:
- user: the Ubuntu user profile to connect to on the server where phpMyAdmin is running
- server_domain_or_IP: SSH host where phpMyAdmin is running
- -L 8000:localhost:80 redirects HTTP traffic on port
8000 - -L 8443:localhost:443 redirects HTTPS traffic on port
8443 - -N: prevents the execution of remote commands
Note: This command will block the terminal until you interrupt it by pressing CTRL+C, in which case it will end the SSH connection and stop the packet redirection. If you’d prefer to run this command in background mode, you can include the SSH option -f.
Now, go to your browser and replace server_domain_or_IP with localhost:PORT, where PORT is either 8000 for HTTP or 8443 for HTTPS:
http://localhost:8000/hiddenlink
https://localhost:8443/hiddenlink
Note: If you’re accessing phpMyAdmin via HTTPS, you might get an alert message questioning the security of the SSL certificate. This happens because the domain name you’re using (localhost) doesn’t match the address registered within the certificate (that is, the domain where phpMyAdmin is actually being served). Rest assured that it is safe to proceed.
Also, be aware that you may need to refresh your browser session or double check the URL if you’ve set up any redirects in your Nginx configuration file.
All requests on localhost:8000 (HTTP) and localhost:8443 (HTTPS) are now being redirected through a secure tunnel to your remote phpMyAdmin application. Not only have you increased security by disabling public access to your phpMyAdmin, you also protected all traffic between your local computer and the remote server by using an encrypted tunnel to send and receive data.
If you’d like to enforce the usage of SSH tunneling to anyone who wants access to your phpMyAdmin interface (including you), you can do that by removing any other authorized IPs from the Nginx configuration file, leaving 127.0.0.1 as the only host allowed to access that location. Considering nobody will be able to make direct requests to phpMyAdmin, it is safe to remove HTTP authentication in order to simplify your setup. This is how your configuration file would look like in such a scenario:
server {
        . . .

        location ^~ /hiddenlink/ {
                allow 127.0.0.1; #allow localhost via SSH tunnels
                deny all; #deny all other sources

                location ~ \.php$ {
                        include snippets/fastcgi-php.conf;
                        fastcgi_pass unix:/var/run/php/php7.4-fpm.sock;
                }
        }

        . . .
}
Once you reload Nginx’s configuration with sudo systemctl reload nginx, your phpMyAdmin installation will be locked down and users will be required to use SSH tunnels in order to access phpMyAdmin’s interface via redirected requests.
Conclusion
By following this tutorial, you installed phpMyAdmin on Ubuntu 20.04 running Nginx as the web server. You also learned about several advanced methods to secure a phpMyAdmin installation on Ubuntu, such as disabling root login, creating an extra layer of authentication, and using SSH tunneling to access a phpMyAdmin installation via local requests only.
After completing this tutorial, you can manage your MySQL databases from a reasonably secure web interface. This user interface exposes most of the functionality available via the MySQL command line. You can browse databases and schema, execute queries, and create new data sets and structures.
If you’d like to learn more about working with MySQL, we encourage you to check out this introduction to queries in MySQL. For a deeper understanding of SQL beyond just queries, you may also be interested in our How To Use SQL tutorial series.
Thanks for learning with the DigitalOcean Community. Check out our offerings for compute, storage, networking, and managed databases.
About the author(s)
Former Technical Writer at DigitalOcean. Focused on SysAdmin topics including Debian 11, Ubuntu 22.04, Ubuntu 20.04, Databases, SQL and PostgreSQL.
Dev/Ops passionate about open source, PHP, and Linux. Former Senior Technical Writer at DigitalOcean. Areas of expertise include LAMP Stack, Ubuntu, Debian 11, Linux, Ansible, and more.
Still looking for an answer?
This textbox defaults to using Markdown to format your answer.
You can type !ref in this text area to quickly search our full set of tutorials, documentation & marketplace offerings and insert the link!
I did a silly mistake by running (ssh user@server_domain_or_IP -L 8000:localhost:80 -L 8443:localhost:443 -N) on my digital ocean droplet instead of local machine.
What’s the best way to remove the SSH key from my droplet that was mistakenly generated from the command?
Hello, thank you for this tutorial. At step 4 My browser start to download file, when I follow the link in the browser. The file seems to be php.
<?php

declare(strict_types=1);

use PhpMyAdmin\Routing;

if (! defined('ROOT_PATH')) {
    // phpcs:disable PSR1.Files.SideEffects
    define('ROOT_PATH', __DIR__ . DIRECTORY_SEPARATOR);
    // phpcs:enable
}

global $route, $containerBuilder;

require_once ROOT_PATH . 'libraries/common.inc.php';

$dispatcher = Routing::getDispatcher();
Routing::callControllerForRoute($route, $dispatcher, $containerBuilder);
The error is solved by checking simple the name in location ^~ /upravlenie/ should be the same as in the browser http://art.art/upravlenie/.
server {
        listen 80;
        listen [::]:80;
        root /var/www/html;
        index index.php index.html index.htm index.nginx-debian.html;
        server_name art.art www.art.art;
        location / {
                try_files $uri $uri/ =404;
        }

        location ^~ /upravlenie/ {
                auth_basic "Admin Login";
                auth_basic_user_file /etc/nginx/pma_pass;

                location ~ \.php$ {
                        include snippets/fastcgi-php.conf;
                        fastcgi_pass unix:/var/run/php/php7.4-fpm.sock;
                }
        }
}
How do we configure Nginx to use phpmyadmin from /var/www/phpmyadmin instead of from inside the website itself? I’m having a hard time figuring out how to use location
I have used this => installed MySQL by following Step 2 of the prerequisite LEMP stack tutorial, https://www.digitalocean.com/community/tutorials/how-to-install-linux-nginx-mysql-php-lemp-stack-on-ubuntu-20-04#step-2-—-installing-mysql
now it is not clear what I must do there https://assets.digitalocean.com/articles/phpmyadmin_2004/pma_vpp_error.png abort ?
I have continue whit abort end have such error http://159.223.225.241/phpmyadmin/
Hi thank you so much for your content in this tutorial!
I managed to configure everything right and everything works fine.
I’m just having trouble connecting php scripts that connect via LOCALHOST to mysql. I get this error: Invalid request. Parameter Missing.
How can I connect to mysql using localhost in a php application?
Do the security settings made in the tutorial influence this?
I get a 403 Error. Used to get a 404 error. Only 402 errors to o it seems… I hat my life
How does SSH tunneling work if you’re hosting multiple sites on your server?
 This work is licensed under a Creative Commons Attribution-NonCommercial- ShareAlike 4.0 International License.
Become a contributor for community
Get paid to write technical tutorials and select a tech-focused charity to receive a matching donation.

DigitalOcean Documentation
Full documentation for every DigitalOcean product.

Resources for startups and AI-native businesses
The Wave has everything you need to know about building a business, from raising funding to marketing your product.
The developer cloud
Scale up as you grow — whether you're running one virtual machine or ten thousand.

Start building today
From GPU-powered inference and Kubernetes to managed databases and storage, get everything you need to build, scale, and deploy intelligent applications.
