Not using Ubuntu 20.04?
Choose a different version or distribution.
Introduction
Securing your Nginx server with HTTPS not only protects data but also boosts SEO rankings and user trust.
Let’s Encrypt is a Certificate Authority (CA) that provides an easy way to obtain and install free TLS/SSL certificates, thereby enabling encrypted HTTPS on web servers. It simplifies the process with a software client called Certbot, which automates as much of the workflow as possible. Today, the entire procedure of acquiring and installing a certificate is fully automated on both Apache and Nginx.
In this tutorial, you’ll learn how to secure Nginx with Let’s Encrypt on Ubuntu using Certbot, enabling free SSL, HTTPS redirects, HSTS, and automated certificate renewal.
This tutorial will use a separate Nginx server configuration file instead of the default file. We recommend creating a new Nginx server block for each domain. This approach helps prevent common mistakes and keeps the default configuration as a fallback.
Let DigitalOcean worry about managing Nginx and Let’s Encrypt. DigitalOcean App Platform will let you deploy directly from GitHub in minutes. App Platform will also handle SSL certs and routing for you.
Key Takeaways:
- Let’s Encrypt provides free SSL/TLS certificates trusted by all major browsers, with automated installation and renewal through Certbot on Ubuntu.
- Certbot’s Nginx plugin automatically modifies server blocks to enable HTTPS, configure redirects, and implement SSL directives without manual editing.
- SSL certificates from Let’s Encrypt are valid for 90 days, but Certbot installs a systemd timer that runs twice daily to automatically renew certificates within 30 days of expiration.
- The HTTP-01 challenge requires port 80 to be publicly accessible, while the DNS-01 challenge is necessary for wildcard certificates or servers behind CDN/proxies.
- After obtaining certificates, enable HTTP Strict Transport Security (HSTS) with the
Strict-Transport-Securityheader to force browsers to connect only via HTTPS. - Certbot stores certificates in
/etc/letsencrypt/live/and automatically referencesfullchain.pem(certificate + chain) andprivkey.pem(private key) in Nginx configuration. - Let’s Encrypt enforces rate limits, allowing up to 50 certificates per registered domain per week. Use the staging environment (
--staging) for testing to avoid hitting production limits. - DNS propagation delays, closed firewall ports (80/443), and incorrect Nginx
server_namedirectives are common causes of Certbot validation failures. - When Certbot successfully renews a certificate, it automatically reloads Nginx to apply the new certificate without service interruption or manual intervention.
- For production security, combine Let’s Encrypt SSL with Nginx hardening practices like TLS 1.2+ only, strong cipher suites, OCSP stapling, and Mozilla’s recommended SSL configurations.
Prerequisites
To follow this tutorial, you will need:
- One Ubuntu server set up by following the initial server setup for Ubuntu tutorial, including a sudo-enabled non-root user and a firewall.
- A registered domain name. This tutorial will use
example.comthroughout. You can purchase a domain name from Namecheap, or use the domain registrar of your choice. - Both of the following DNS records set up for your server. If you are using DigitalOcean, please see our DNS documentation for details on how to add them.
- An A record with
example.compointing to your server’s public IP address. - An A record with
www.example.compointing to your server’s public IP address.
- An A record with
- Nginx installed by following How To Install Nginx on Ubuntu. Be sure that you have a server block for your domain. This tutorial will use
/etc/nginx/sites-available/example.comas an example.
Step 1 — Installing Certbot
The first step to using Let’s Encrypt to obtain an SSL certificate is to install the Certbot software on your server.
Install Certbot and its Nginx plugin with apt:
sudo apt install certbot python3-certbot-nginx

Certbot is now ready to use, but in order for it to automatically configure SSL for Nginx, we need to verify some of Nginx’s configuration.
Step 2 — Confirming Nginx’s Configuration
Certbot needs to be able to find the correct server block in your Nginx configuration for it to be able to automatically configure SSL. Specifically, it does this by looking for a server_name directive that matches the domain you request a certificate for.
If you followed the server block set up step in Nginx installation, you should have a server block for your domain at /etc/nginx/sites-available/example.com with the server_name directive already set appropriately.
To check, open the configuration file for your domain using nano or your favorite text editor:
sudo nano /etc/nginx/sites-available/example.com
Find the existing server_name line. It should look like this:
...
server_name example.com www.example.com;
...
If it does, exit your editor and move on to the next step.
If it doesn’t, update it to match. Then save the file, quit your editor, and verify the syntax of your configuration edits:
sudo nginx -t
If you get an error, reopen the server block file and check for any typos or missing characters. Once your configuration file’s syntax is correct, reload Nginx to load the new configuration:
sudo systemctl reload nginx
Certbot can now find the correct server block and update it automatically.
Next, let’s update the firewall to allow HTTPS traffic.
Step 3 — Allowing HTTPS Through the Firewall
If you have the UFW firewall enabled, as recommended by the prerequisite guides, you’ll need to adjust the settings to allow HTTPS traffic. Luckily, Nginx registers a few profiles with UFW upon installation.
You can see the current settings by typing:
sudo ufw status
It will probably look like this, meaning that only HTTP traffic is allowed to the web server:
OutputStatus: active

To                         Action      From
--                         ------      ----
OpenSSH                    ALLOW       Anywhere
Nginx HTTP                 ALLOW       Anywhere
OpenSSH (v6)               ALLOW       Anywhere (v6)
Nginx HTTP (v6)            ALLOW       Anywhere (v6)
To additionally let in HTTPS traffic, allow the Nginx Full profile and delete the redundant Nginx HTTP profile allowance:
sudo ufw allow 'Nginx Full'
sudo ufw delete allow 'Nginx HTTP'
Your status should now look like this:
sudo ufw status
OutputStatus: active

To                         Action      From
--                         ------      ----
OpenSSH                    ALLOW       Anywhere
Nginx Full                 ALLOW       Anywhere
OpenSSH (v6)               ALLOW       Anywhere (v6)
Nginx Full (v6)            ALLOW       Anywhere (v6)
Next, let’s run Certbot and fetch our certificates.
Step 4 — Obtaining an SSL Certificate with Let’s Encrypt
Certbot provides a variety of ways to obtain SSL certificates through plugins. The Nginx plugin will take care of reconfiguring Nginx and reloading the config whenever necessary. To use this plugin, type the following:
sudo certbot --nginx -d example.com -d www.example.com
This runs Certbot with the --nginx plugin, using -d to specify the domain names you’d like the certificate to be valid for.
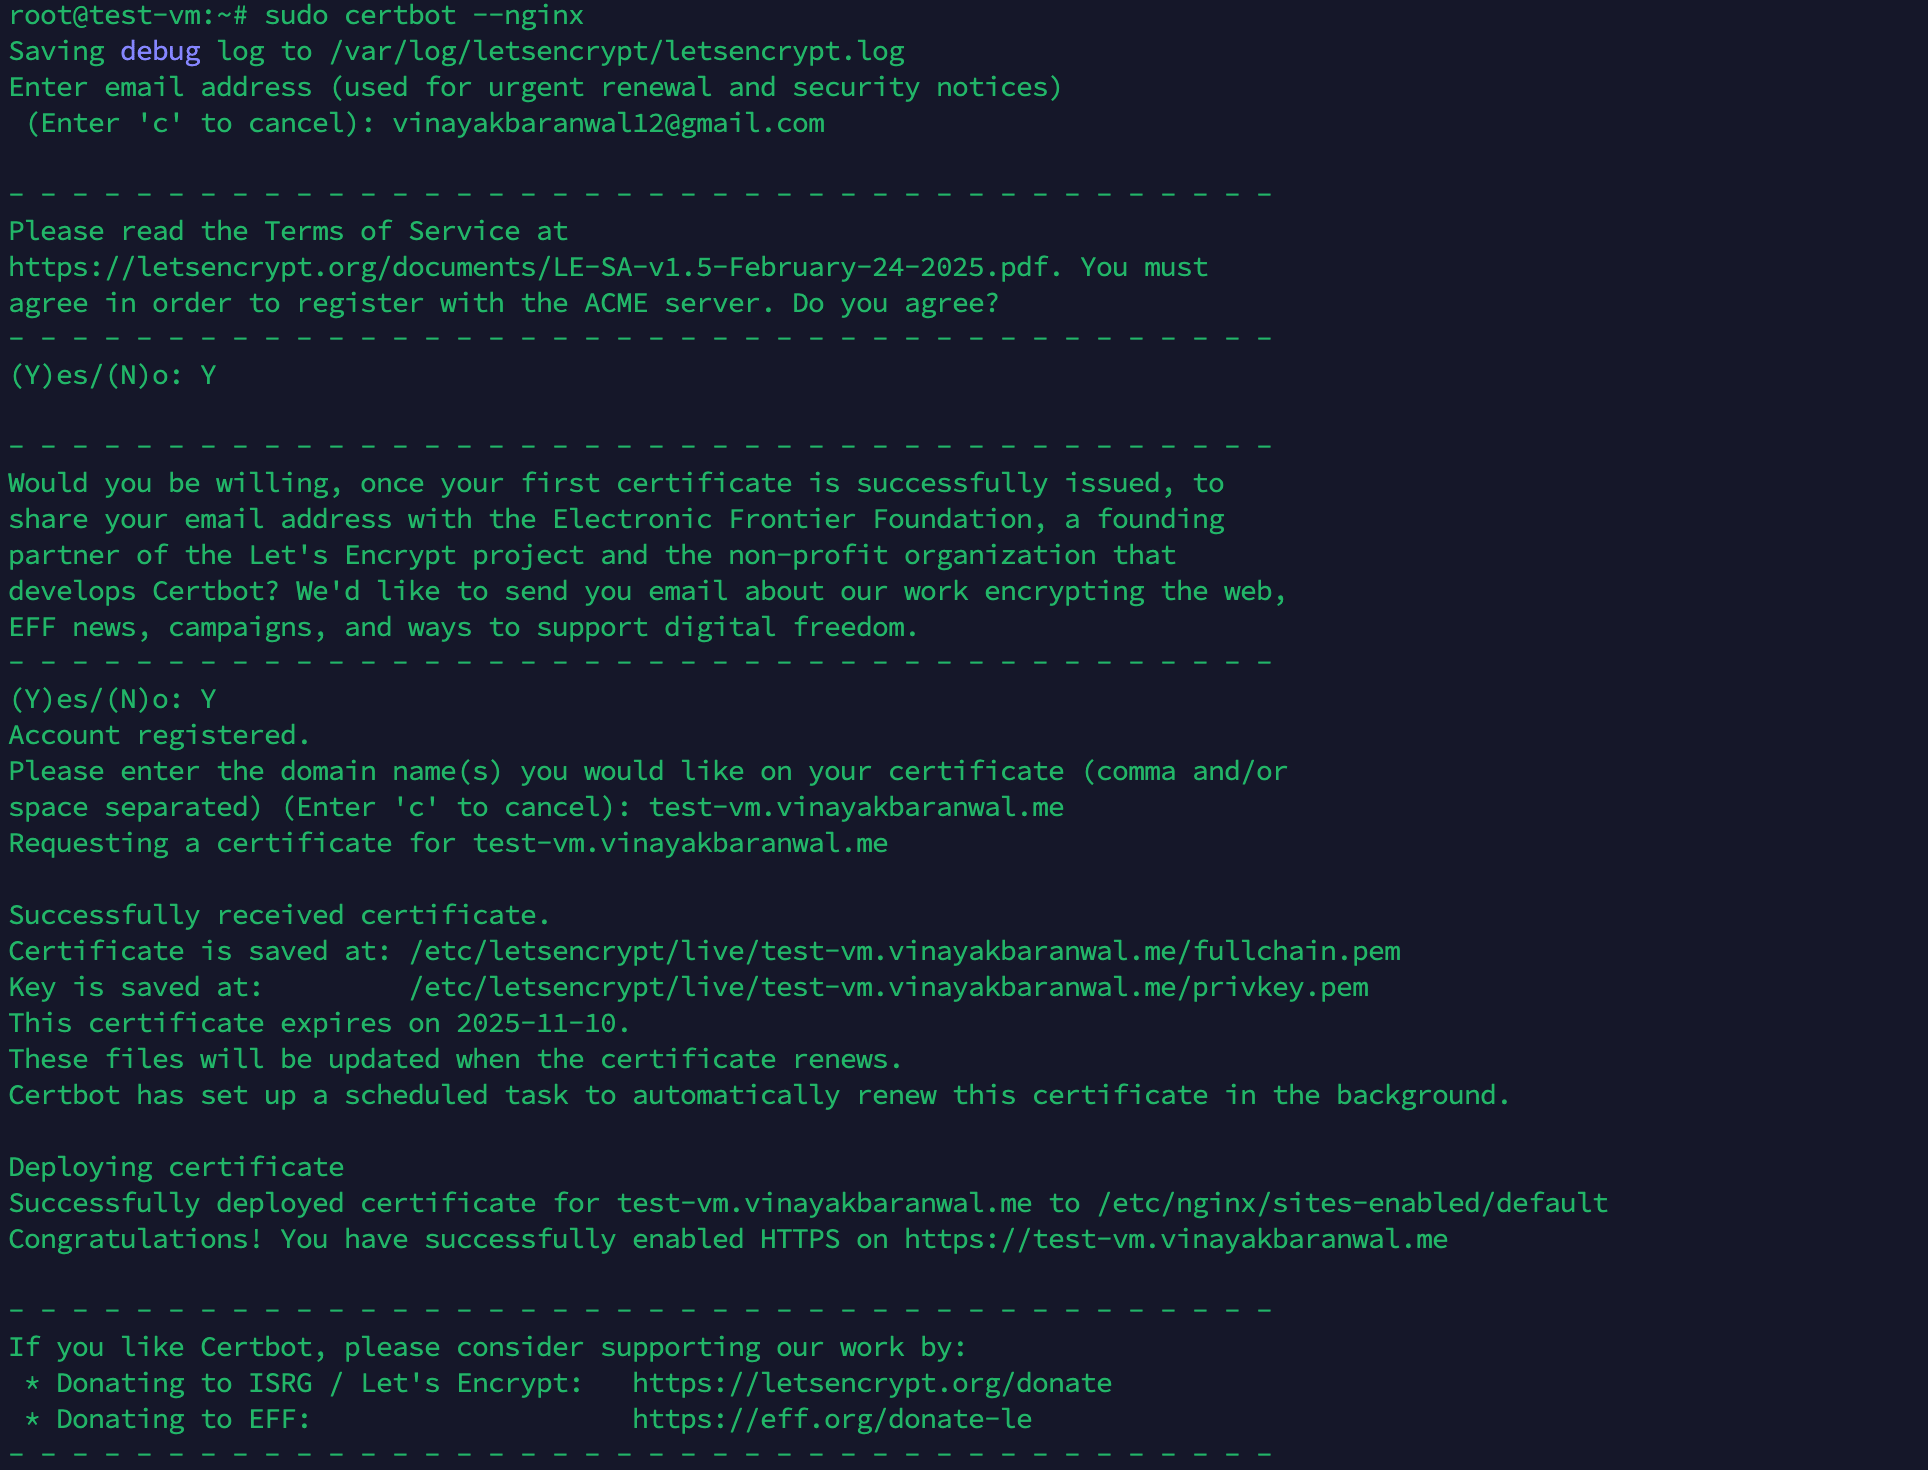
If this is your first time running Certbot, you will be prompted to enter an email address and agree to the terms of service. After doing so, Certbot will communicate with the Let’s Encrypt server, then run a challenge to verify that you control the domain you’re requesting a certificate for.
If that’s successful, Certbot will ask how you’d like to configure your HTTPS settings.
OutputPlease choose whether or not to redirect HTTP traffic to HTTPS, removing HTTP access.
- - - - - - - - - - - - - - - - - - - - - - - - - - - - - - - - - - - - - - - -
1: No redirect - Make no further changes to the webserver configuration.
2: Redirect - Make all requests redirect to secure HTTPS access. Choose this for
new sites, or if you're confident your site works on HTTPS. You can undo this
change by editing your web server's configuration.
- - - - - - - - - - - - - - - - - - - - - - - - - - - - - - - - - - - - - - - -
Select the appropriate number [1-2] then [enter] (press 'c' to cancel):
Select your choice and press ENTER. The configuration will be updated, and Nginx will reload to pick up the new settings. Certbot will wrap up with a message telling you the process was successful and where your certificates are stored:
OutputIMPORTANT NOTES:
 - Congratulations! Your certificate and chain have been saved at:
   /etc/letsencrypt/live/example.com/fullchain.pem
   Your key file has been saved at:
   /etc/letsencrypt/live/example.com/privkey.pem
   Your cert will expire on 2020-08-18. To obtain a new or tweaked
   version of this certificate in the future, simply run certbot again
   with the "certonly" option. To non-interactively renew *all* of
   your certificates, run "certbot renew"
 - If you like Certbot, please consider supporting our work by:

   Donating to ISRG / Let's Encrypt:   https://letsencrypt.org/donate
   Donating to EFF:                    https://eff.org/donate-le
By default, Certbot stores certificates in /etc/letsencrypt/live/ and updates your Nginx server block to use fullchain.pem (certificate plus chain) and privkey.pem (private key).
You can confirm the configuration by running:
sudo nginx -T | grep ssl_
This will display the SSL directives currently in use by Nginx.
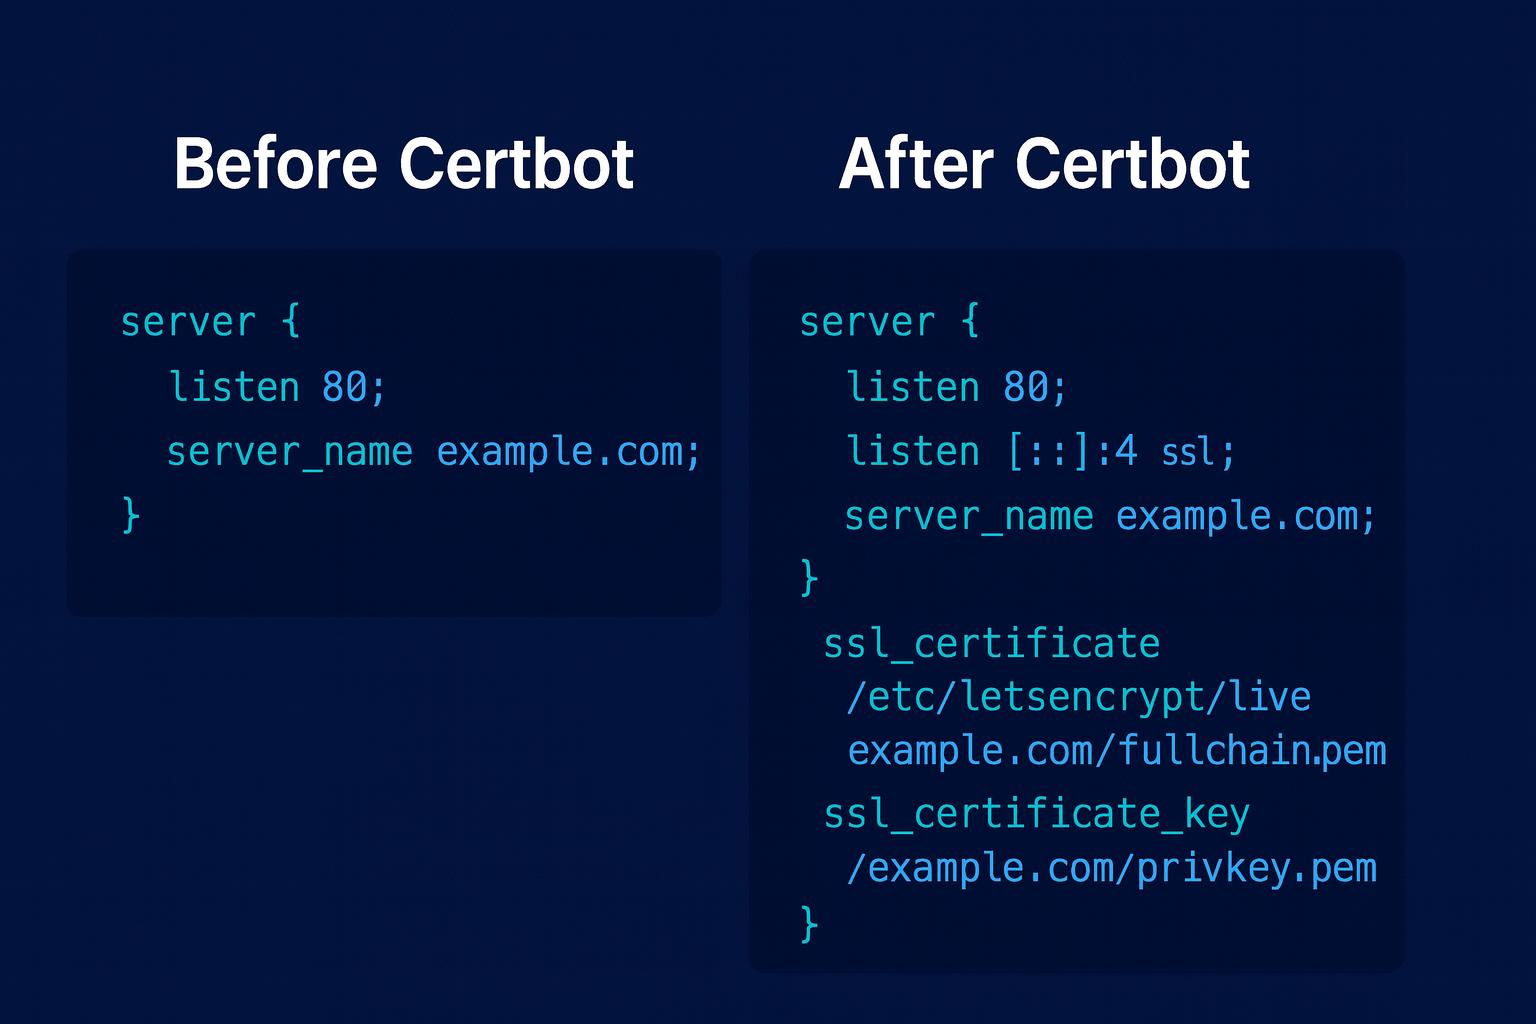
How Certbot Updates Nginx Configuration
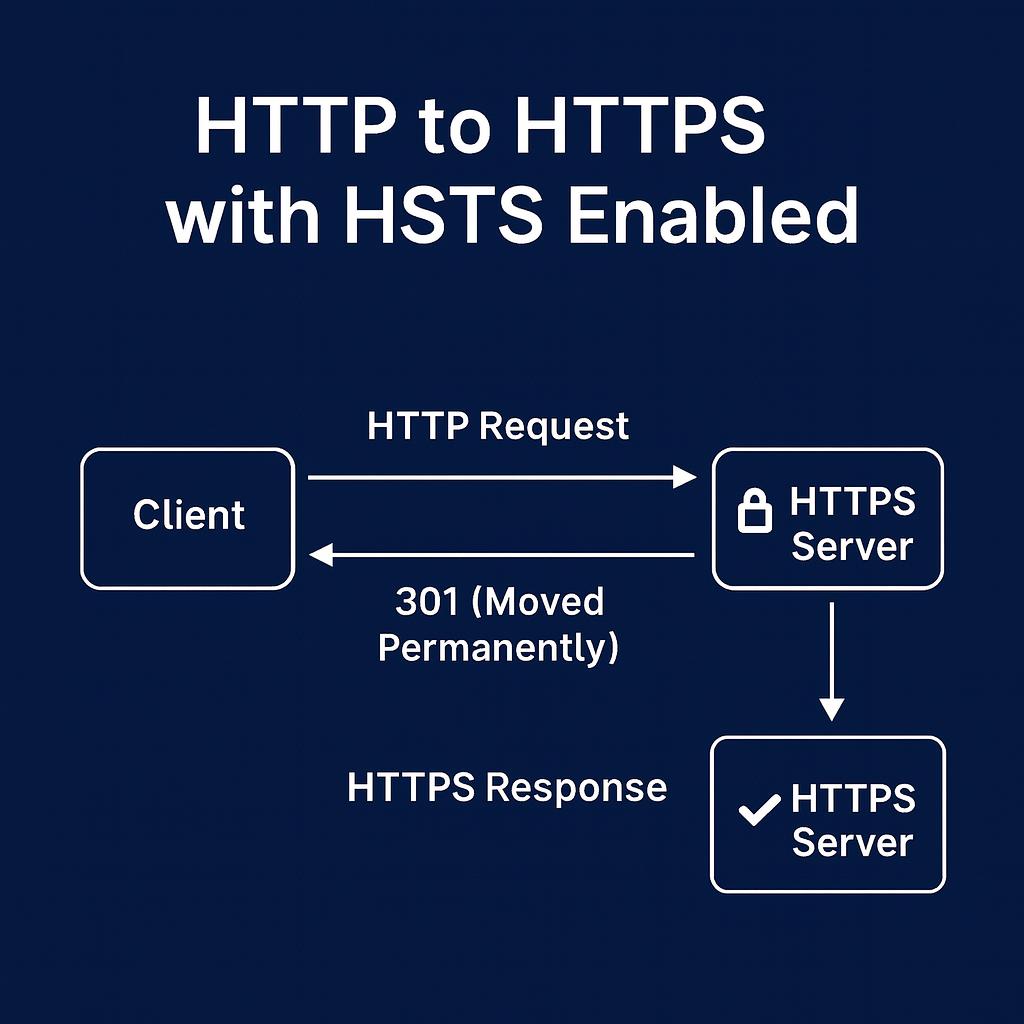
When you run Certbot with the --nginx flag, it analyzes your Nginx configuration to locate the server blocks that correspond to the domains you provided. Certbot then automatically modifies these server blocks to enable SSL/TLS by inserting the required HTTPS directives. If you opt for HTTP-to-HTTPS redirection, Certbot also configures Nginx to forward all HTTP requests to HTTPS, ensuring that all visitors access your site securely over an encrypted connection.
The process is seamless: Certbot handles the insertion of SSL certificate paths, private key references, and can also add security enhancements like HTTP Strict Transport Security (HSTS) headers if you opt in. This automation saves you from manually editing configuration files and helps prevent common mistakes.
The diagram below illustrates how, after Certbot’s changes, all HTTP requests are redirected to HTTPS, and HSTS can be enabled to further enforce secure connections:
SSL/TLS Essentials for Developers
Before troubleshooting or customizing your configuration, it’s useful to understand some core SSL/TLS concepts that Certbot and Let’s Encrypt rely on:
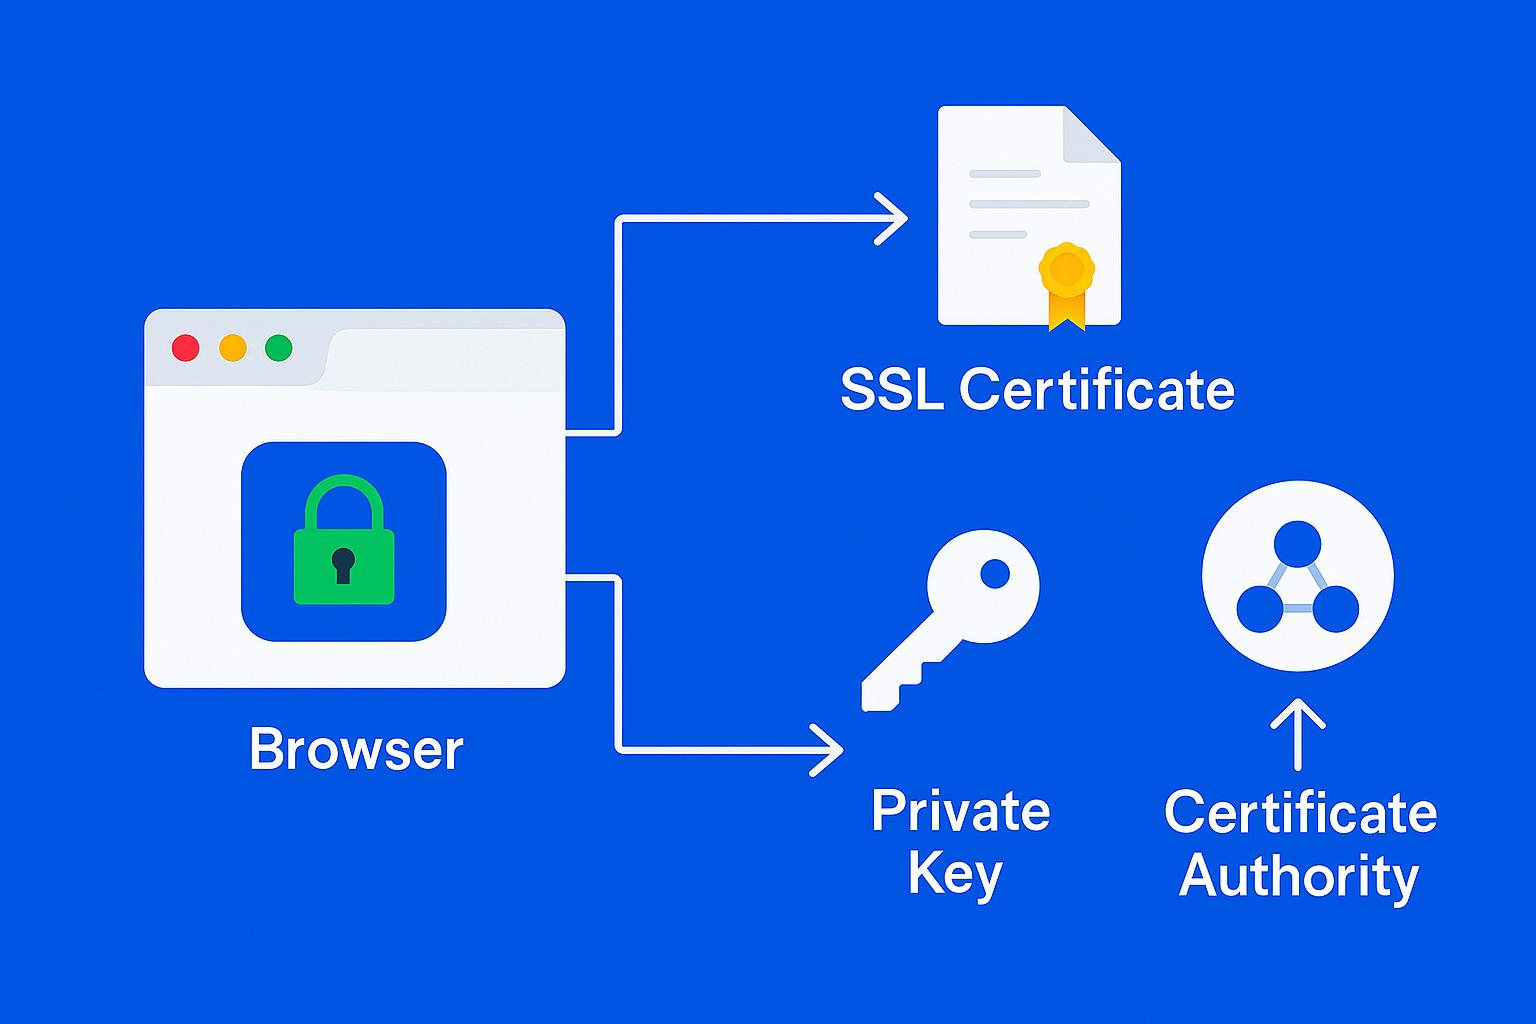
Certificate
A digital file issued by a Certificate Authority (CA) like Let’s Encrypt that proves your server’s identity and enables encrypted HTTPS connections. It contains your domain name, the issuing CA, and validity dates, among other metadata.
Private Key
A secret cryptographic key stored securely on your server (e.g., /etc/letsencrypt/live/example.com/privkey.pem). It’s used to establish secure communications and must never be shared publicly. If compromised, your certificate’s security is compromised.
Certificate Chain (Intermediate Certificates)
Links your server certificate to the root certificate trusted by browsers. Certbot installs the fullchain.pem file, which includes your server certificate and all necessary intermediate certificates.
ACME Challenge Types
Let’s Encrypt uses the ACME (Automated Certificate Management Environment) protocol to verify domain ownership before issuing a certificate. Common challenge types include:
- HTTP-01: Places a temporary file on your server at
http://yourdomain/.well-known/acme-challenge/…which Let’s Encrypt fetches over port 80 to verify control. - DNS-01: Requires adding a specific DNS TXT record to your domain. Useful for wildcard certificates or when HTTP validation isn’t possible.
- TLS-ALPN-01: Uses a special TLS handshake over port 443 for validation. Less commonly used in basic setups.
Understanding these concepts will help you interpret Certbot’s behavior, diagnose issues, and make informed decisions when configuring SSL/TLS on your server.
When you run sudo certbot --nginx -d example.com -d www.example.com, Certbot parses your existing Nginx server block(s) to locate the one matching your server_name directive. It then injects SSL/TLS directives and, if selected, an HTTP-to-HTTPS redirect.
For example, a typical server block before running Certbot might look like:
server {
    listen 80;
    server_name example.com www.example.com;
    root /var/www/example.com;
    index index.html;
}
After running Certbot with the redirect option, it will be modified to:
server {
    listen 80;
    server_name example.com www.example.com;
    return 301 https://$host$request_uri;
}

server {
    listen 443 ssl;
    server_name example.com www.example.com;

    ssl_certificate /etc/letsencrypt/live/example.com/fullchain.pem;
    ssl_certificate_key /etc/letsencrypt/live/example.com/privkey.pem;
    include /etc/letsencrypt/options-ssl-nginx.conf;
    ssl_dhparam /etc/letsencrypt/ssl-dhparams.pem;

    root /var/www/example.com;
    index index.html;
}
Add the following directive to enforce HTTP Strict Transport Security (HSTS), which tells browsers to only connect over HTTPS and preload this setting for subdomains:
add_header Strict-Transport-Security "max-age=63072000; includeSubDomains; preload" always;
Key changes Certbot makes:
- Adds a redirect server block on port 80 if you choose “Redirect”.
- Adds
ssl_certificateandssl_certificate_keydirectives pointing to the Let’s Encrypt certificate and private key. - Includes
options-ssl-nginx.conf(predefined strong SSL settings). - Adds a reference to
ssl-dhparams.pemfor Diffie-Hellman key exchange security. - Keeps your existing root and index settings intact.
Certbot also reloads Nginx to apply these changes immediately.
Tip: After enabling HTTPS, consider restricting your server to TLS 1.2 and above, disabling weak ciphers, and enabling OCSP stapling to further boost your SSL Labs score.
For a detailed walkthrough on strong SSL/TLS configurations, see Mozilla’s SSL Configuration Generator for Nginx.
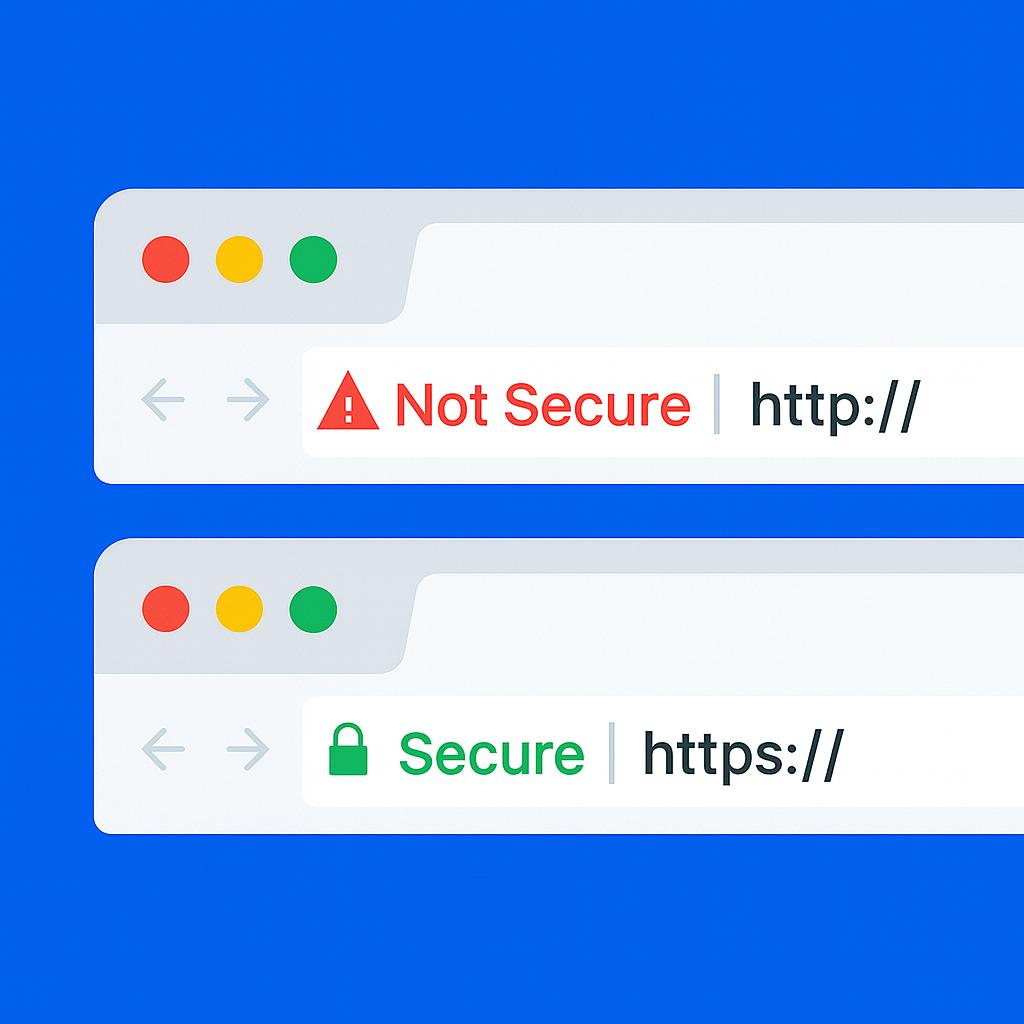
Your certificates are downloaded, installed, and loaded. Try reloading your website using https:// and notice your browser’s security indicator. It should indicate that the site is properly secured, usually with a lock icon. If you test your server using the SSL Labs Server Test, it will get an A grade.
Troubleshooting Let’s Encrypt / Certbot Errors
Even with the Nginx plugin, you might encounter errors when issuing or renewing Let’s Encrypt certificates. Here are common problems and how to fix them:
Hitting Let’s Encrypt Rate Limits
- Let’s Encrypt imposes limits on how many certificates you can issue per domain per week (e.g., 5 certificates per week for the same FQDN set).
- If you hit this limit, use the staging environment for testing:
sudo certbot --nginx --staging -d example.com -d www.example.com
- Certificates from staging are not trusted by browsers, but they allow you to test your configuration without consuming production quota.
DNS Propagation Delays
DNS changes (like new A or AAAA records) can take time to propagate. If Certbot can’t validate your domain, check:
dig +short example.com
dig +short www.example.com
Make sure they return the correct public IP of your server. You can also use online DNS checkers to verify global propagation.
Port 80/443 Accessibility
Let’s Encrypt must connect to your server on port 80 (HTTP) or 443 (HTTPS) for validation. Ensure no firewall, security group, or reverse proxy is blocking these ports:
sudo ufw allow 80
sudo ufw allow 443
IPv6 Mismatches
If you have both IPv4 and IPv6 DNS records but only one is reachable, validation may fail. Update your DNS to match reachable IPs or ensure both addresses serve the same content.
Wrong Server Block
If the wrong Nginx server block responds to the ACME challenge, Certbot will fail validation. Make sure the server_name directive matches exactly and no conflicting blocks exist.
Viewing Certbot Logs
For detailed error messages, inspect:
sudo less /var/log/letsencrypt/letsencrypt.log
This file contains the full ACME conversation and can pinpoint why a request failed.
For more troubleshooting guidance, see the official Let’s Encrypt documentation: https://letsencrypt.org/docs/.
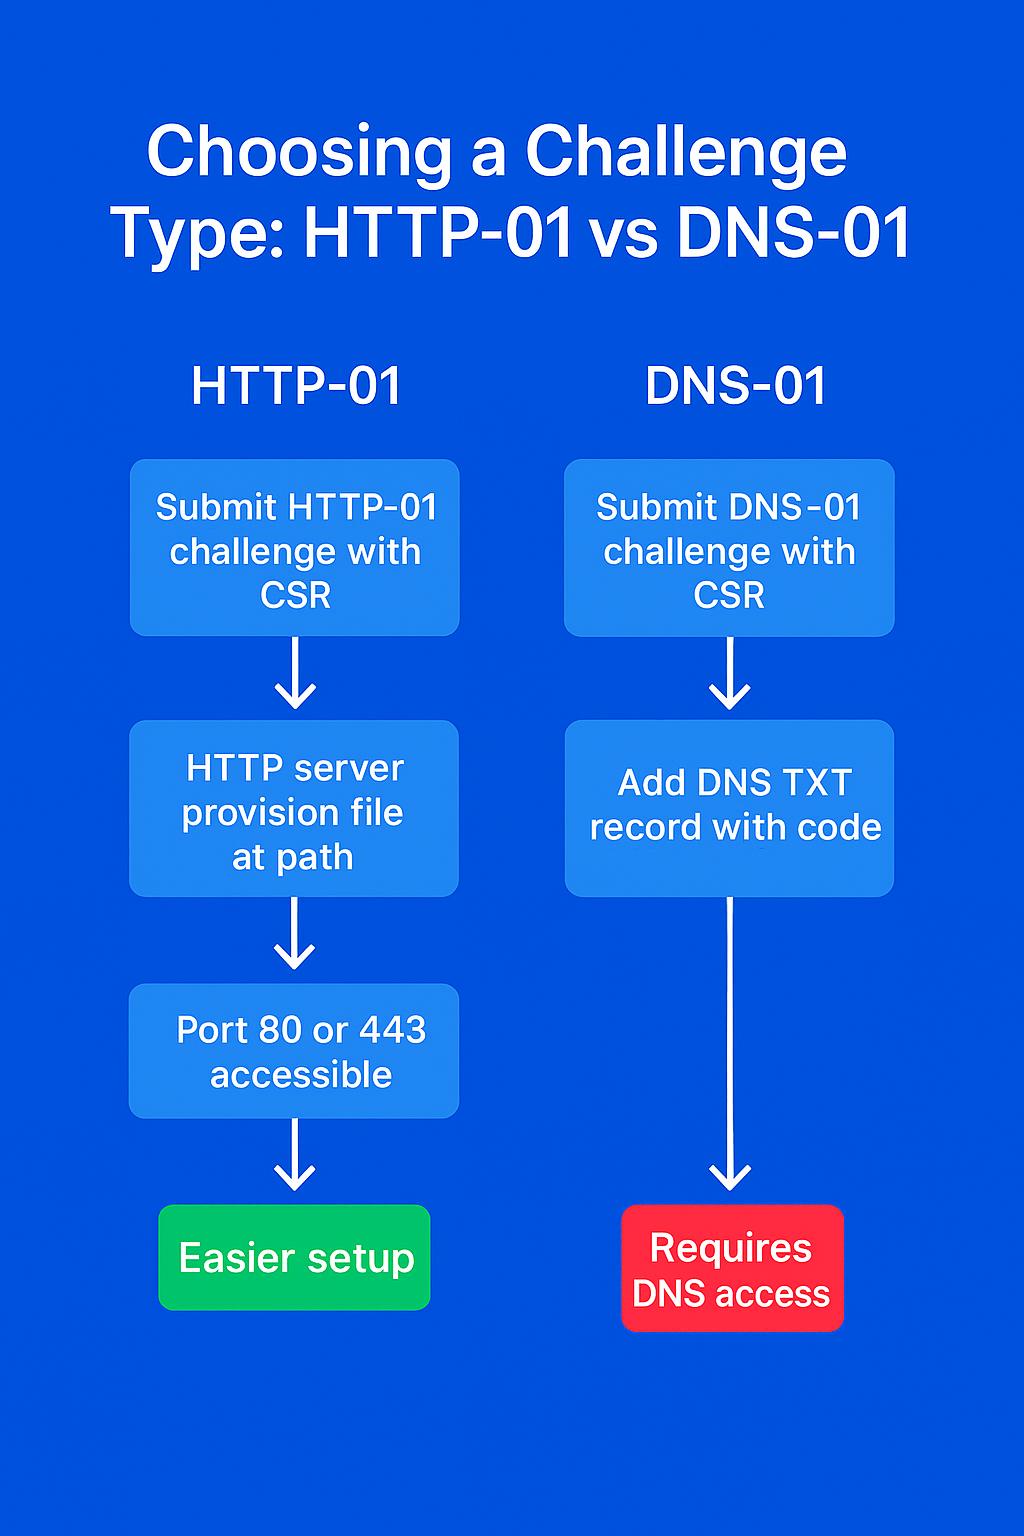
Choosing a Challenge Type: HTTP-01 vs DNS-01
Pick the ACME challenge that fits your setup and constraints:
| Aspect | HTTP-01 | DNS-01 |
|---|---|---|
| Use cases | Most single-domain sites | Wildcards, behind CDN/proxy, no port 80 |
| Port requirements | Port 80 reachable | No HTTP port required |
| Works behind CDN/proxy | Often problematic | Yes (validates via DNS) |
| Automation | Simple with --nginx |
Requires DNS API plugin |
| Propagation delays | None | DNS TTL/propagation can delay |
When to choose HTTP-01
- You control the server responding on port 80 for the domain.
- You’re issuing a certificate for specific hostnames (e.g.,
example.com,www.example.com). - You want the simplest automation with the Nginx plugin.
Example (HTTP-01 with Nginx plugin):
sudo certbot --nginx -d example.com -d www.example.com
When to choose DNS-01
- You need a wildcard certificate (
*.example.com). - You’re behind a CDN/proxy and can’t or won’t bypass it for validation.
- Your origin server doesn’t expose port 80 publicly.
Example (manual DNS-01 for wildcard):
sudo certbot certonly --manual --preferred-challenges dns \
  -d example.com -d '*.example.com'
Example (DNS-01 with a DNS provider plugin, e.g., Cloudflare):
sudo apt install python3-certbot-dns-cloudflare
sudo certbot --dns-cloudflare \
  --dns-cloudflare-credentials ~/.secrets/cf.ini \
  -d example.com -d '*.example.com'
Tip: For DNS-01 automation, use your DNS provider’s Certbot plugin (Cloudflare, Route 53, DigitalOcean, etc.) so TXT records are created and cleaned up automatically.
Let’s finish by testing the renewal process.
Step 5 — Verifying Certbot Auto-Renewal
Let’s Encrypt’s certificates are only valid for ninety days. This is to encourage users to automate their certificate renewal process. The certbot package we installed takes care of this for us by adding a systemd timer that will run twice a day and automatically renew any certificate that’s within thirty days of expiration.
You can query the status of the timer with systemctl:
sudo systemctl status certbot.timer
Output● certbot.timer - Run certbot twice daily
     Loaded: loaded (/lib/systemd/system/certbot.timer; enabled; vendor preset: enabled)
     Active: active (waiting) since Mon 2020-05-04 20:04:36 UTC; 2 weeks 1 days ago
    Trigger: Thu 2020-05-21 05:22:32 UTC; 9h left
   Triggers: ● certbot.service
To test the renewal process, you can do a dry run with certbot:
sudo certbot renew --dry-run
If you see no errors, you’re all set. When necessary, Certbot will renew your certificates and reload Nginx to pick up the changes. If the automated renewal process ever fails, Let’s Encrypt will send a message to the email you specified, warning you when your certificate is about to expire.
FAQs
1. Is Let’s Encrypt really free?
Yes! Let’s Encrypt is a public Certificate Authority that provides free SSL/TLS certificates trusted by all major browsers. There are no fees for issuance or renewal. You can automate the process with Certbot on Ubuntu and Nginx. Donations are optional and help support the project.
2. How long are Let’s Encrypt certificates valid?
Let’s Encrypt certificates are valid for 90 days. This short lifetime encourages automation and limits risk if a private key is compromised. Certbot on Ubuntu sets up a systemd timer to renew certificates automatically. You can test renewal with:
sudo certbot renew --dry-run
3. Can I secure multiple domains or subdomains with Let’s Encrypt?
Yes. You can use multiple -d flags with Certbot to create a SAN (Subject Alternative Name) certificate for several domains (e.g., example.com, www.example.com). For wildcard domains (e.g., *.example.com), use the DNS-01 challenge.
Example:
sudo certbot --nginx -d example.com -d www.example.com
4. What if Certbot can’t access my domain for validation?
First, check DNS propagation using dig example.com. Make sure ports 80 (HTTP) and 443 (HTTPS) are open with sudo ufw allow 80 and sudo ufw allow 443. Confirm your Nginx server_name directive matches the domain. If you’re behind a CDN or proxy, temporarily bypass it or use the DNS-01 challenge. Certbot logs are located at /var/log/letsencrypt/letsencrypt.log.
5. How do I automate certificate renewal?
Certbot installs a systemd timer on Ubuntu that runs twice daily to check and renew certificates. You can verify the timer with:
sudo systemctl status certbot.timer
No manual intervention is needed unless renewal fails.
6. Will Nginx reload automatically after certificate renewal?
Yes. Certbot is configured to reload Nginx automatically after a successful renewal, so your site will use the new certificate without downtime. You can customize this behavior with Certbot hooks if needed.
7. What are Let’s Encrypt’s rate limits?
Let’s Encrypt enforces rate limits to ensure fair use. For example, you can issue up to 50 certificates per registered domain per week. There are also limits for failed validations and duplicate certificates. See Let’s Encrypt Rate Limits for details.
8. Can I use Let’s Encrypt on a server without a public IP or with a firewall?
Let’s Encrypt requires your server to be publicly accessible on port 80 (HTTP) or 443 (HTTPS) for HTTP-01 or TLS-ALPN-01 challenges. If your server is behind a firewall or not publicly accessible, use the DNS-01 challenge to prove domain ownership via DNS records.
9. How do I troubleshoot certificate issues?
Check Certbot’s logs at /var/log/letsencrypt/letsencrypt.log for detailed error messages. Common issues include DNS misconfiguration, closed ports, or incorrect Nginx server blocks. Tools like dig, curl, and nginx -t can help diagnose problems.
10. Is it safe to use Let’s Encrypt for production websites?
Absolutely. Let’s Encrypt certificates are trusted by all major browsers and are widely used in production environments. Ensure you automate renewals, monitor certificate expiry, and follow best practices for Nginx security (such as enabling HSTS and keeping your server updated).
Conclusion
In this tutorial, you secured Nginx on Ubuntu with free SSL certificates from Let’s Encrypt. You installed Certbot, configured HTTPS, enabled HSTS, and verified automated renewals.
You have now successfully secured Nginx with Let’s Encrypt on Ubuntu using Certbot. Your site is running with free SSL, HTTPS enforced, HSTS enabled, and certificates set to renew automatically. To further enhance security, check out the DigitalOcean Nginx config generator, or for a hands-on guide, refer to the Nginx Security Hardening Guide by SecopSolution.
If you have further questions about using Certbot, the official documentation is a good place to start.
Thanks for learning with the DigitalOcean Community. Check out our offerings for compute, storage, networking, and managed databases.
About the author(s)
Senior Technical Writer at DigitalOcean
Building future-ready infrastructure with Linux, Cloud, and DevOps. Full Stack Developer & System Administrator. Technical Writer @ DigitalOcean | GitHub Contributor | Passionate about Docker, PostgreSQL, and Open Source | Exploring NLP & AI-TensorFlow | Nailed over 50+ deployments across production environments.
With over 6 years of experience in tech publishing, Mani has edited and published more than 75 books covering a wide range of data science topics. Known for his strong attention to detail and technical knowledge, Mani specializes in creating clear, concise, and easy-to-understand content tailored for developers.
Still looking for an answer?
This textbox defaults to using Markdown to format your answer.
You can type !ref in this text area to quickly search our full set of tutorials, documentation & marketplace offerings and insert the link!
@bboucheron, I deleted the server and the DNS record that was having letsencript. After installing a new server, and setting up the same domain name I tried to install letsencript again and have the following error;
"An unexpected error occurred: The server experienced an internal error :: Error retrieving account “https://acme-v02.api.letsencrypt.org/acme/acct/95574462”
Do you know why please?
Hi
Can any one help with below requests: I have an app running on ubuntu 20.04 and nginx on http://example.com:9999
I want to migrate all of the urls (http://example.com:9999 and http://example.com:9999/x/x to https://example.com and https://example.com/x/x
Can anyone pls help?
Hello, i have an issue with my website. I have installed wordpress with LEMP following this tutorial https://www.digitalocean.com/community/tutorials/how-to-install-wordpress-with-lemp-on-ubuntu-18-04 and setted up my certificate with this tutorial. My problem is now my website can’t be accessed if i type “mydomain.com”. If i type “mydomain.com” and then click on the browser’s bar to see the url it shows me “https://www.mydomain.com” and if i erase the “https://www.” my website loads correctly but if i check the browser’s bar again it shows me "https://mydomain.com/
It’s kinda confusing because if i type on the console:
sudo ufw status
It shows me
To                         Action      From
--                         ------      ----
OpenSSH                    ALLOW       Anywhere
Nginx Full                 ALLOW       Anywhere
OpenSSH (v6)               ALLOW       Anywhere (v6)
Nginx Full (v6)            ALLOW       Anywhere (v6)
Additionally I changed the General settings of wordpress “WordPress Address (URL)” and “Site Address (URL)” to “https://mydomain.com”
Also i have updated my Cloudflare’s dns records to:
A www MY IP A mydomain.com MY IP
I have to say that i don’t have a CNAME on my records.
Can you help me please?
sudo certbot renew --dry-run
command is not working anymore. You will get something like:
Could not choose appropriate plugin: The manual plugin is not working; there may be problems with your existing configuration.
The error was: PluginError('An authentication script must be provided with --manual-auth-hook when using the manual plugin non-interactively.')
Attempting to renew cert (xxxx.com) from /etc/letsencrypt/renewal/xxx.com.conf produced an unexpected error: The manual plugin is not working; there may be problems with your existing configuration.
The error was: PluginError('An authentication script must be provided with --manual-auth-hook when using the manual plugin non-interactively.'). Skipping.
This article neglects to mention that, prior to running sudo certbot --nginx -d example.com -d www.example.com you should create a folder called .well-known at the home directory. Otherwise you’ll get a message along the lines of:
IMPORTANT NOTES:
 - The following errors were reported by the server:

   Domain: example.com
   Type:   dns
   Detail: During secondary validation: Invalid response from
   http://www.example.com [xxx.xx.xxx.xxx]: 404

   Domain: www.example.com
   Type:   dns
   Detail: During secondary validation: Invalid response from
   http://www.example.com/.well-known/acme-challenge/xxxxxxxxxxxxxxxxxxx
   [xxx.xx.xxx.xxx]: 404
I was able to obtain the initial cert without issue, but the dry run in the last step fails (my domain replaced with example.com):
Attempting to renew cert (*example.com*) from /etc/letsencrypt/renewal/*example.com*.conf produced an unexpected error: HTTPSConnectionPool(host='acme-staging-v02.api.letsencrypt.org', port=443): Max retries exceeded with url: /directory (Caused by SSLError(SSLError("bad handshake: SysCallError(104, 'ECONNRESET')"))). Skipping.
All renewal attempts failed. The following certs could not be renewed:
  /etc/letsencrypt/live/*example.com*/fullchain.pem (failure)
I can ping acme-staging-v02.api.letsencrypt.org and have tried disabling ufw but get the same error.
Im having trouble with the step 4, anyone can help me, this is what I got:
root@KatzeCommunity:/# sudo certbot --nginx -d katzecommunity.net -d www.katzecommunity.net
Saving debug log to /var/log/letsencrypt/letsencrypt.log
Plugins selected: Authenticator nginx, Installer nginx
Obtaining a new certificate
Performing the following challenges:
http-01 challenge for katzecommunity.net
http-01 challenge for www.katzecommunity.net
Waiting for verification...
Challenge failed for domain katzecommunity.net
Challenge failed for domain www.katzecommunity.net
http-01 challenge for katzecommunity.net
http-01 challenge for www.katzecommunity.net
Cleaning up challenges
Some challenges have failed.

IMPORTANT NOTES:
 - The following errors were reported by the server:

   Domain: katzecommunity.net
   Type:   unauthorized
   Detail: Invalid response from
   http://katzecommunity.net/.well-known/acme-challenge/S4wuYcayDEV88smz7q2NBOzTJ4h3ZeZQI8P2Gvg81Rs
   [159.65.216.130]: "<!DOCTYPE html>\n<html lang=\"en\">\n  <head>\n
   <meta charset=\"utf-8\"/>\n    <title>Katze Community</title>\n
   <base href=\"/\"/>\n  "

   Domain: www.katzecommunity.net
   Type:   unauthorized
   Detail: Invalid response from
   http://www.katzecommunity.net/.well-known/acme-challenge/YS_jGkFICDdcgVswBdPp5jLmVU2Zy1urIUDUYYNFy2Y
   [159.65.216.130]: "<!DOCTYPE html>\n<html lang=\"en\">\n  <head>\n
   <meta charset=\"utf-8\"/>\n    <title>Katze Community</title>\n
   <base href=\"/\"/>\n  "

   To fix these errors, please make sure that your domain name was
   entered correctly and the DNS A/AAAA record(s) for that domain
   contain(s) the right IP address.
 This work is licensed under a Creative Commons Attribution-NonCommercial- ShareAlike 4.0 International License.
Become a contributor for community
Get paid to write technical tutorials and select a tech-focused charity to receive a matching donation.

DigitalOcean Documentation
Full documentation for every DigitalOcean product.

Resources for startups and AI-native businesses
The Wave has everything you need to know about building a business, from raising funding to marketing your product.
The developer cloud
Scale up as you grow — whether you're running one virtual machine or ten thousand.

Start building today
From GPU-powered inference and Kubernetes to managed databases and storage, get everything you need to build, scale, and deploy intelligent applications.
