By Dirk Breuer and Sharon Campbell

Introduction
ArangoDB is a NoSQL database. It was created in 2011, when many NoSQL database were already around, with the goal of being a comprehensive database solution that could cover a variety of use cases.
At its core ArangoDB is a document store but that is only the beginning. You can query data with a full-fledged query language (named AQL), make ACID compliant transactions, add custom HTTP endpoints in the form of JavaScript applications with its embedded V8, and more.
Since ArangoDB has a lot of features it could be intimidating at first, but after a second look it is not complicated at all. This article will help you to install ArangoDB and will give a short introduction to how some of its core features can be used.
After completing this tutorial, you should be able to:
- Install ArangoDB on Ubuntu 14.04
- Configure ArangoDB for basic usage
- Insert, modify, and query for data
Core Concepts
Throughout the article we will use some core concepts. You’ll probably want to familiarize yourself with them before building a project on ArangoDB:
-
Document Store: ArangoDB stores data in documents, in contrast to how relational databases store data. Documents are arbitrary data structures consisting of key-value pairs. The key is a string that names the value (like a column in a relational database). The value can be any data type, even another document. Documents are not bound to any schema.
-
Query Language: Interact with your data using either an API or a query language. While the former leaves a lot of details to the API user, a query language hands over the details to the database. In a relational database, SQL is an exampel of a query language.
-
ACID: The four properties Atomicity, Consistency, Isolation, and Durability describe the guarantees of database transactions. ArangoDB supports ACID-compliant transactions.
-
V8: Google’s JavaScript engine that powers Chrome can be easily embedded in other software too. Using it in ArangoDB enables using JavaScript inside the database. Much of ArangoDB’s internal functionality is built with JavaScript.
-
HTTP API: ArangoDB provides an HTTP API to allow clients to interact with the database. The API is resource oriented and can be extended with JavaScript.
Prerequisites
Before we start, make sure to have your Droplet set up correctly:
-
Create a Droplet with Ubuntu 14.04 x64
-
Add a sudo user
Now you should log in to your server using the newly created user. All of the examples in the tutorial can be performed from the user’s home directory:
- cd ~
Step 1 — Installing ArangoDB
ArangoDB comes pre-built for many operating systems and distributions. The chance is high you don’t need to build it from source. For more details, please refer to the ArangoDB documentation. For this tutorial we will use Ubuntu 14.04 x64.
Since ArangoDB uses OpenSUSE’s build service, the first thing is to download the public key for its repositories:
- wget https://www.arangodb.com/repositories/arangodb2/xUbuntu_14.04/Release.key
You need sudo to install the key:
- sudo apt-key add Release.key
Next add the apt repository and update the index:
- sudo apt-add-repository 'deb https://www.arangodb.com/repositories/arangodb2/xUbuntu_14.04/ /'
- sudo apt-get update
Install ArangoDB:
- sudo apt-get install arangodb
We can check if everything went well by querying the HTTP API:
- curl http://localhost:8529/_api/version
The following output indicates ArangoDB is up and running:
Output{"server":"arango","version":"2.5.5"}
Step 2 — Accessing the Command Line with arangosh
ArangoDB ships with arangosh, a command-line client which gives you full access to the database through its JavaScript runtime. You can use it to run administrative tasks or scripts in production.
It’s also well suited to getting started with ArangoDB and its core functionality. To follow along, start an arangosh session like this:
- arangosh
The result is basically a JavaScript shell where you can run arbitrary JavaScript code. For example, add two numbers:
- 23 + 19
You’ll get this result:
Output42
If you want to dive deeper in this topic, type tutorial into the shell.
Step 3 — Adding a Database User
For security reasons, it is only possible to add users from the arangosh command line interface. You should still be in the arangosh shell from the previous step.
Now let’s add a new user, sammy. This user will have access to the entire database. This is OK for now, but you might want to create more limited users in a production environment. Use a secure password.
- require("org/arangodb/users").save("sammy", "password");
Now exit the arangosh shell:
- exit
Step 4 — Configuring the Web Interface
ArangoDB ships with a very powerful web interface. It offers monitoring capabilities, data browsing, interactive API documentation, a powerful query editor, and even an integrated arangosh. We will focus on the usage of the web interface for the reminder of this tutorial.
To make the web interface easily accessible we need to undertake some preparations:
-
Enable authentication
-
Bind ArangoDB to the public network interface
Enable Authentication
ArangoDB, like many other NoSQL databases, ships with authentication disabled. It is highly recommended to enable authentication if you run ArangoDB in a shared environment and/or want to use the web interface. For more details on this topic please refer to the ArangoDB documentation.
Activate authentication in the /etc/arangodb/arangod.conf file. You can run this command to create a backup file and set the disable-authentication parameter to no:
- sudo sed -i.bak 's/disable-authentication = yes/disable-authentication = no/g' /etc/arangodb/arangod.conf
Alternately, use a text editor to set the disable-authentication parameter to no.
Restart the database:
- sudo service arangodb restart
Bind ArangoDB to the Public Network Interface
Configure ArangoDB to listen on the public network interface. First, open the /etc/arangodb/arangod.conf file for editing:
- sudo nano /etc/arangodb/arangod.conf
Locate the active endpoint line, which should be at the end of the [server] block below a section of examples. Update the setting as shown below, using your own server’s IP address, and port 8529.
. . .

endpoint = tcp://your_server_ip:8529
Since arangosh uses its own default configuration, we need to change the endpoint in the /etc/arangodb/arangosh.conf file too:
- sudo nano /etc/arangodb/arangosh.conf
Again, make sure the endpoint line is set to tcp://your_server_ip:8529.
pretty-print = true

[server]
endpoint = tcp://your_server_ip:8529
disable-authentication = true

. . .
If you’d rather run two multipart, one-line commands to update these two files, you can run these commands instead:
- sudo sed -i.bak "s/^endpoint = .*/endpoint = tcp:\/\/$(sudo ifconfig eth0 | grep "inet " | cut -d: -f 2 | awk '{print $1}'):8529/g" /etc/arangodb/arangod.conf
- sudo sed -i.bak "s/^endpoint = .*/endpoint = tcp:\/\/$(sudo ifconfig eth0 | grep "inet " | cut -d: -f 2 | awk '{print $1}'):8529/g" /etc/arangodb/arangosh.conf
These arcane looking commands will extract the current public IP address and replace the default bind addresses (127.0.0.1). Don’t worry, the -i.bak option creates updates before changing the configuration.
Now restart ArangoDB once more:
- sudo service arangodb restart
Step 5 — Accessing the ArangoDB Web Interface
Now you should be able to access the web interface in your browser:
http://your_server_ip:8529
Please log in with the username and password you created for the database in Step 3.
Warning: Although we set up authentication, the transport is not secured yet. In production you should set up TLS encryption if you make ArangoDB accessible from another host.
The first screen you should see is the dashboard with basic metrics about the database server:
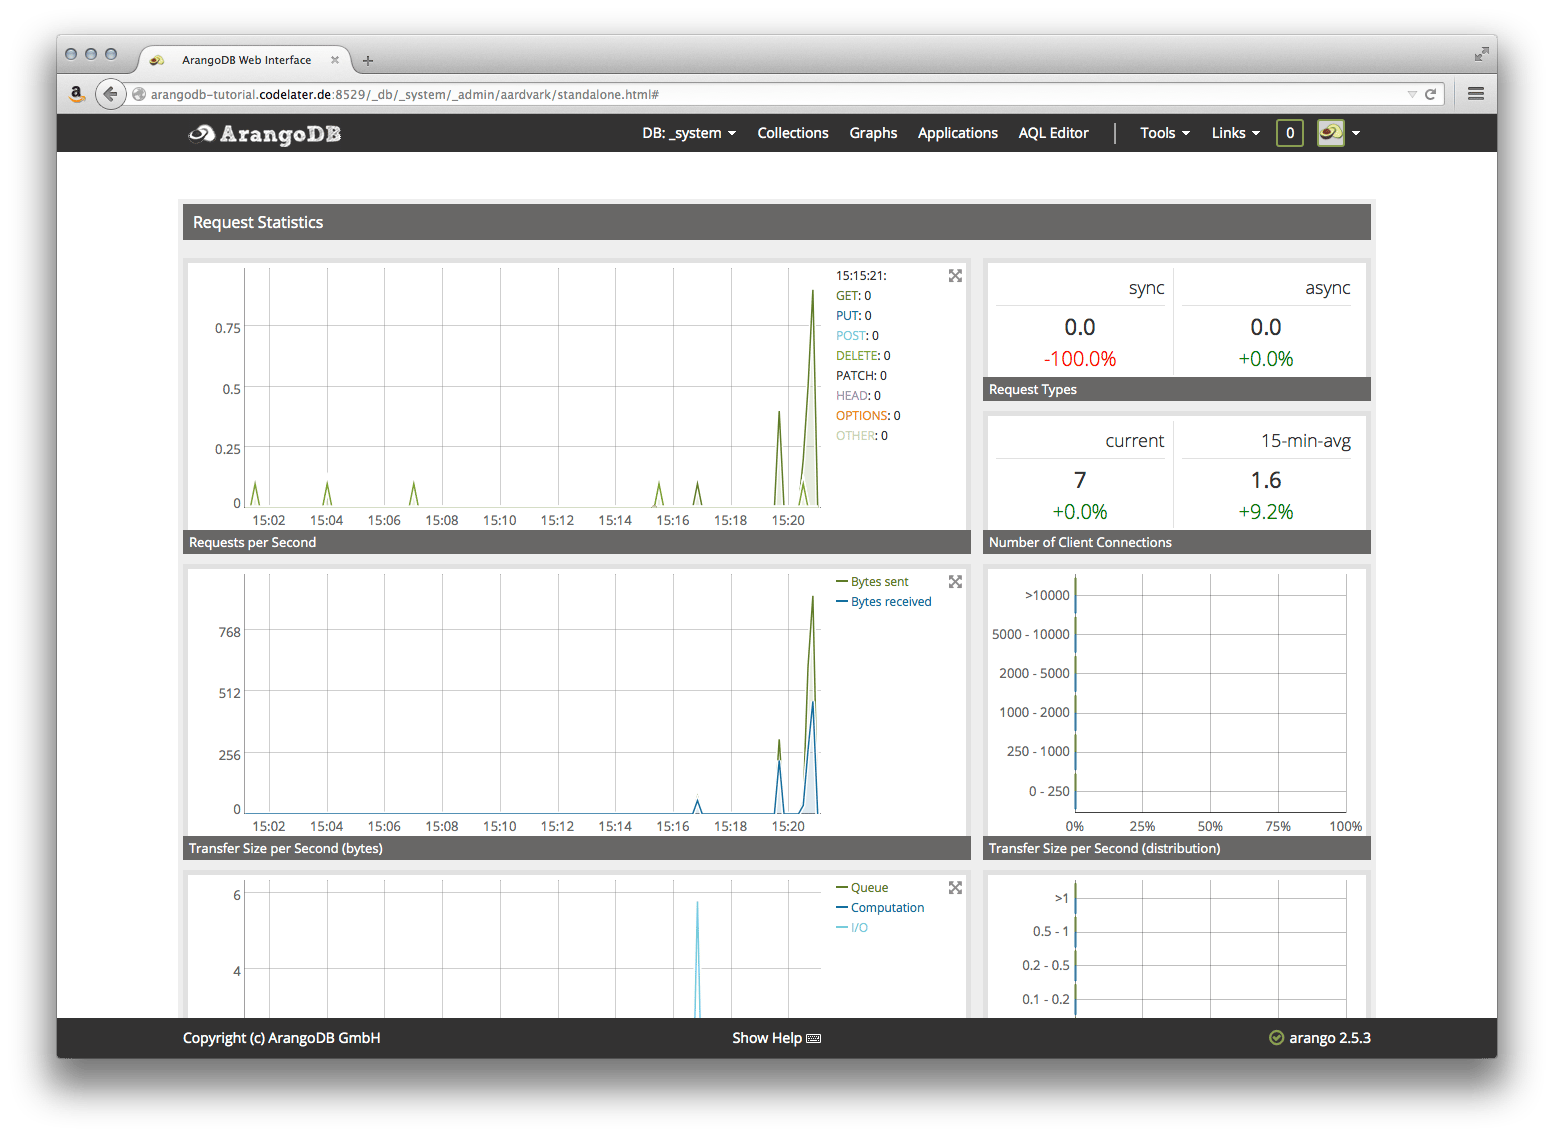
In the center of the top navigation you will see DB: _system. This indicates the currently-selected database. The default is the _system database. Certain administrative tasks can only be performed in the _system database.
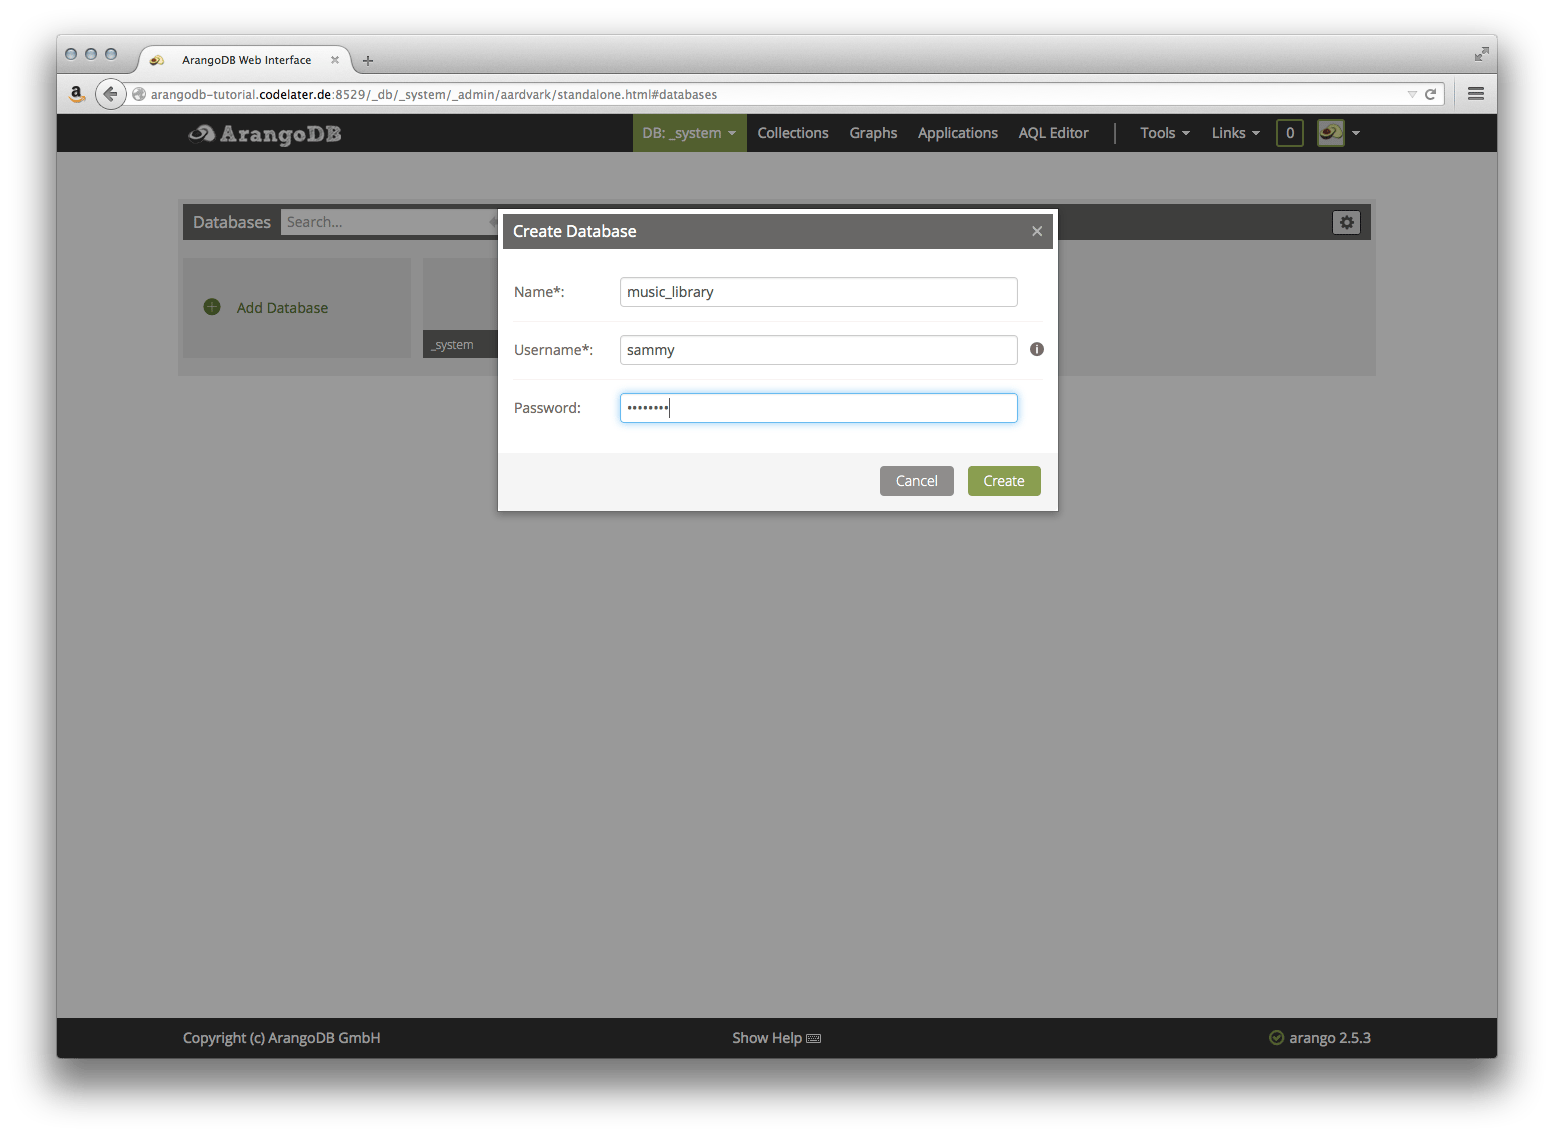
For the following sections, we will create a database to work with. Hover over the DB: _system menu item, and click the Manage DBs link.
On the following page click the Add Database button. Fill out the form to create a database named music_library. You must enter the same username and password as before in this dialog, or you will not be able to access the new database later:
We are now set to start actually do something with ArangoDB.
Step 6 — Performing CRUD Operations with arangosh
We will leave the web interface for now and return to the arangosh command line interface to cover basic CRUD operations in ArangoDB. Later on we will cover the same operations in the web interface again, but doing it in the shell helps us get a better understanding of how things work.
To follow along, go back to the command line for your server. Connect to the new music_library database using your user and password:
- arangosh --server.database music_library --server.username sammy --server.password password
Create a Document Collection
If you come from a relational database background, a Collection is the ArangoDB equivalent of a table in an SQL database. We will create a collection to store songs in our music library:
- db._createDocumentCollection('songs')
ArangoDB provides a series of methods to manage Collections. Most of them are not of interest at this point, but please take a look at them as you get further into ArangoDB. For now, we’ll focus on CRUD operations (create, read, update and delete) - that is, how to get actual data in and out of the database.
Creating Documents
Where you would have rows in an SQL-based database, ArangoDB has Documents. Documents in ArangoDB are JSON objects. Each document is associated with a collection and has three core attributes: _id, _rev, and _key.
A document is uniquely identified inside a database by its document handle which consists of the collection name and the _key, separated by a /. The document handle is stored in the _id field of a document. Both the _key and the _id are similar to the primary key in a relation database.
Note: If you don’t specify something yourself, ArangoDB will create a _key for each document. You can specify a custom _key if you wish, but you need to make sure it is unique. Throughout this tutorial we will set the _key explicitly to make it easier to copy and paste the examples.
Let’s add our first document to the songs collection:
- db.songs.save(
- { title: "Immigrant Song", album: "Led Zeppelin III", artist: "Led Zeppelin", year: 1970, length: 143, _key: "immigrant_song" }
- )
Output{
  "error" : false,
  "_id" : "songs/immigrant_song",
  "_rev" : "11295857653",
  "_key" : "immigrant_song"
}
The db object holds all collections as properties. Each collection provides functions to interact with the documents in that collection. The save function takes any JSON object and stores it as a document in the collection, returning the aforementioned core attributes and whether an error has occurred. The return from each operation is again a JSON object.
To have something to play with we need some more documents. Just copy and paste the next snippet to add several more entries to the database:
- db.songs.save(
- {album: "Led Zeppelin III", title: "Friends", artist: "Led Zeppelin", year: 1970, length: 235, _key: "friends"}
- );
-
- db.songs.save(
- {album: "Led Zeppelin III", title: "Celebration Day", artist: "Led Zeppelin", year: 1970, length: 209, _key: "celebration_day"}
- );
-
- db.songs.save(
- {album: "Led Zeppelin III", title: "Since I've Been Loving You", artist: "Led Zeppelin", year: 1970, length: 445, _key: "since_i_ve_been_loving_you"}
- );
-
- db.songs.save(
- {album: "Led Zeppelin III", title: "Out On the Tiles", artist: "Led Zeppelin", year: 1970, length: 244, _key: "out_on_the_tiles"}
- );
-
- db.songs.save(
- {album: "Led Zeppelin III", title: "Gallows Pole", artist: "Led Zeppelin", year: 1970, length: 298, _key: "gallows_pole"}
- );
-
- db.songs.save(
- {album: "Led Zeppelin III", title: "Tangerine", artist: "Led Zeppelin", year: 1970, length: 192, _key: "tangerine"}
- );
-
- db.songs.save(
- {album: "Led Zeppelin III", title: "That's the Way", artist: "Led Zeppelin", year: 1970, length: 338, _key: "that_s_the_way"}
- );
-
- db.songs.save(
- {album: "Led Zeppelin III", title: "Bron-Y-Aur Stomp", artist: "Led Zeppelin", year: 1970, length: 260, _key: "bron_y_aur_stomp"}
- );
-
- db.songs.save(
- {album: "Led Zeppelin III", title: "Hats Off to (Roy) Harper", artist: "Led Zeppelin", year: 1970, length: 221, _key: "hats_off_to_roy_harper"}
- );
Reading Documents
To retrieve a document you can use either the document handle or the _key. Using the document handle is only required if you don’t go over the collection itself. Having a collection, you can use the document function:
- db.songs.document('immigrant_song');
Output{
  "year" : 1970,
  "length" : 143,
  "title" : "Immigrant Song",
  "album" : "Led Zeppelin III",
  "artist" : "Led Zeppelin",
  "_id" : "songs/immigrant_song",
  "_rev" : "11295857653",
  "_key" : "immigrant_song"
}
Now that we can create and read documents, we will look into how to change them:
Updating Documents
When it comes to updating your data, you have two options: replace and update.
The replace function will replace the entire document with a new one, even if you provide completely different attributes.
The update function, on the other hand, will just patch a document by merging it with the given attributes. Let’s try a less-destructive update first, where we update the genre of one of our songs:
- db.songs.update("songs/immigrant_song",
-
- { genre: "Hard Rock" }
-
- );
Let’s take a look at the updated song entry:
- db.songs.document("songs/immigrant_song");
Output{
  "year" : 1970,
  "length" : 143,
  "title" : "Immigrant Song",
  "album" : "Led Zeppelin III",
  "artist" : "Led Zeppelin",
  "genre" : "Hard Rock",
  "_id" : "songs/immigrant_song",
  "_rev" : "11421424629",
  "_key" : "immigrant_song"
}
The update function is especially helpful when you have a large document and need to update only a small subset of its attributes.
In contrast, using the same JSON with the replace function will destroy your data.
- db.songs.replace("songs/immigrant_song",
-
- { genre: "Hard Rock" }
-
- );
View the updated song now:
- db.songs.document("songs/immigrant_song")
As you can see, the original data has been removed from the document:
Output{
  "genre" : "Hard Rock",
  "_id" : "songs/immigrant_song",
  "_rev" : "11495939061",
  "_key" : "immigrant_song"
}
Removing Documents
To remove a document from a collection, call the remove function with the document handle:
- db.songs.remove("songs/immigrant_song")
While the arangosh shell is a great tool, it’s cumbersome for exploring the other features of ArangoDB. Next we will look into the built in web interface to dig further into its capabilities.
Step 7 — Performing CRUD Operations with the Web Interface
We’ve seen how to handle documents on the arangosh, and now we return to the web interface. Visit http://your_server_ip:8529/_db/music_library in your browser.
Create a Document Collection
Click the Collections tab in the top navigation bar.
You can see the existing songs collection that we added from the command line; feel free to click on it and view the entries, if you like.
From the main Collections page, click on the Add Collection button.

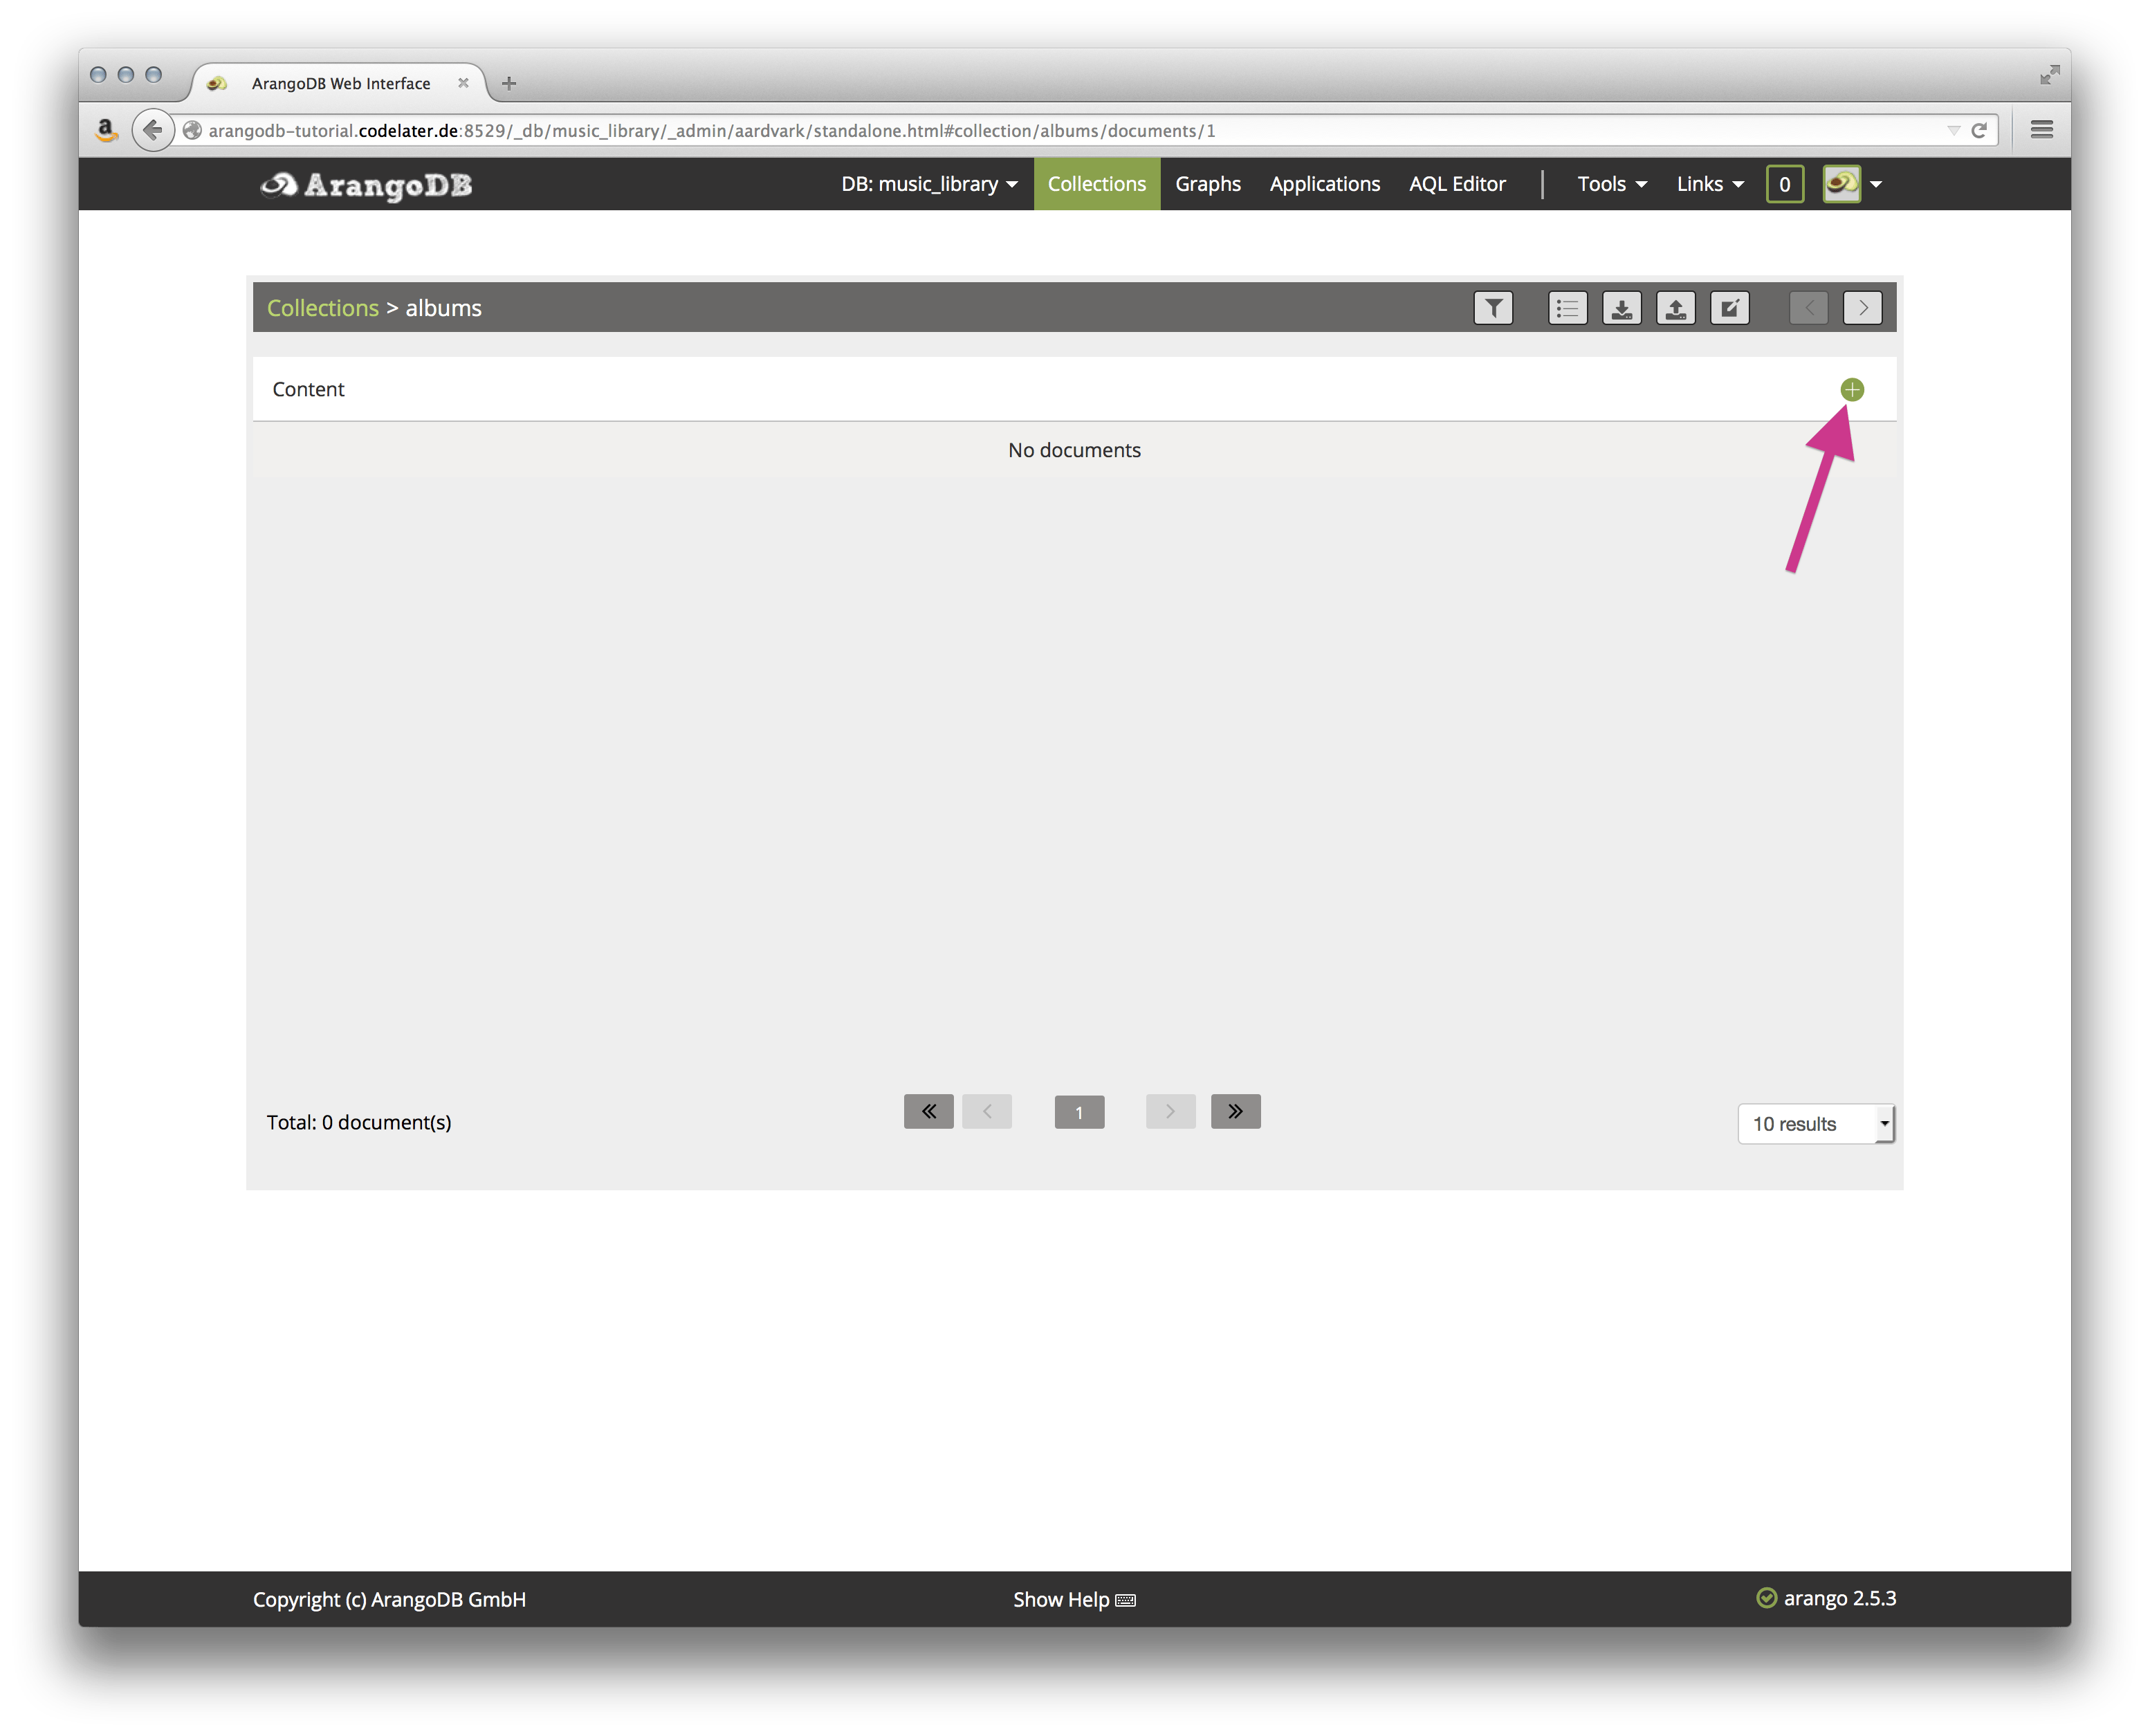
Since we already have songs, we will add an albums collection. Enter albums as the Name in the New Collection dialog that popped up. The default type, Document, is fine.
Click Save and you should see now two collections on the page.
Click on the albums collection. You are presented with an empty collection:
Creating Documents
Click the + sign in the upper right corner to add a document. You will first get asked for a _key. Enter led_zeppelin_III as the key.
Next there’s a form where you can edit the contents of a document. There is a graphical way of adding attributes called Tree, but for now, switch to the Code view by selecting it from the Tree dropdown menu:

Please copy and paste the following JSON into the editor area (make sure you use only one set of curly braces):
{
"name": "Led Zeppelin III",
"release_date": "1970-10-05",
"producer": "Jimmy Page",
"label": "Atlantic",
"length": 2584
}
Be aware that is required to quote the keys in this mode. After you’re done, hit the Save button. The page should flash green for a moment to indicate a successful save.
Reading Documents
You need to manually navigate back to the Collections page after saving the new document.
If you click on the albums collection, you’ll see the new entry.
Updating Documents
To edit the contents of a document, just click on the row you want to edit in the document overview. You will be presented with the same editor as when creating new documents.
Removing Documents
Deleting documents is as simple as pressing the - icon at the end of each document row. Confirm the deletion when prompted.
Additionally, the Collections overview page for a specific collection lets you export and import data, manage indexes, and filter the documents.
As mentioned before, the web interface has a lot to offer. Covering every feature is beyond this tutorial, so you’re invited to explore the other features on your own. We will dig just into one more feature in this tutorial: The AQL Editor.
Step 8 — Querying the Data with AQL
As mentioned in the introduction, ArangoDB comes with a full-fledged query language called AQL.
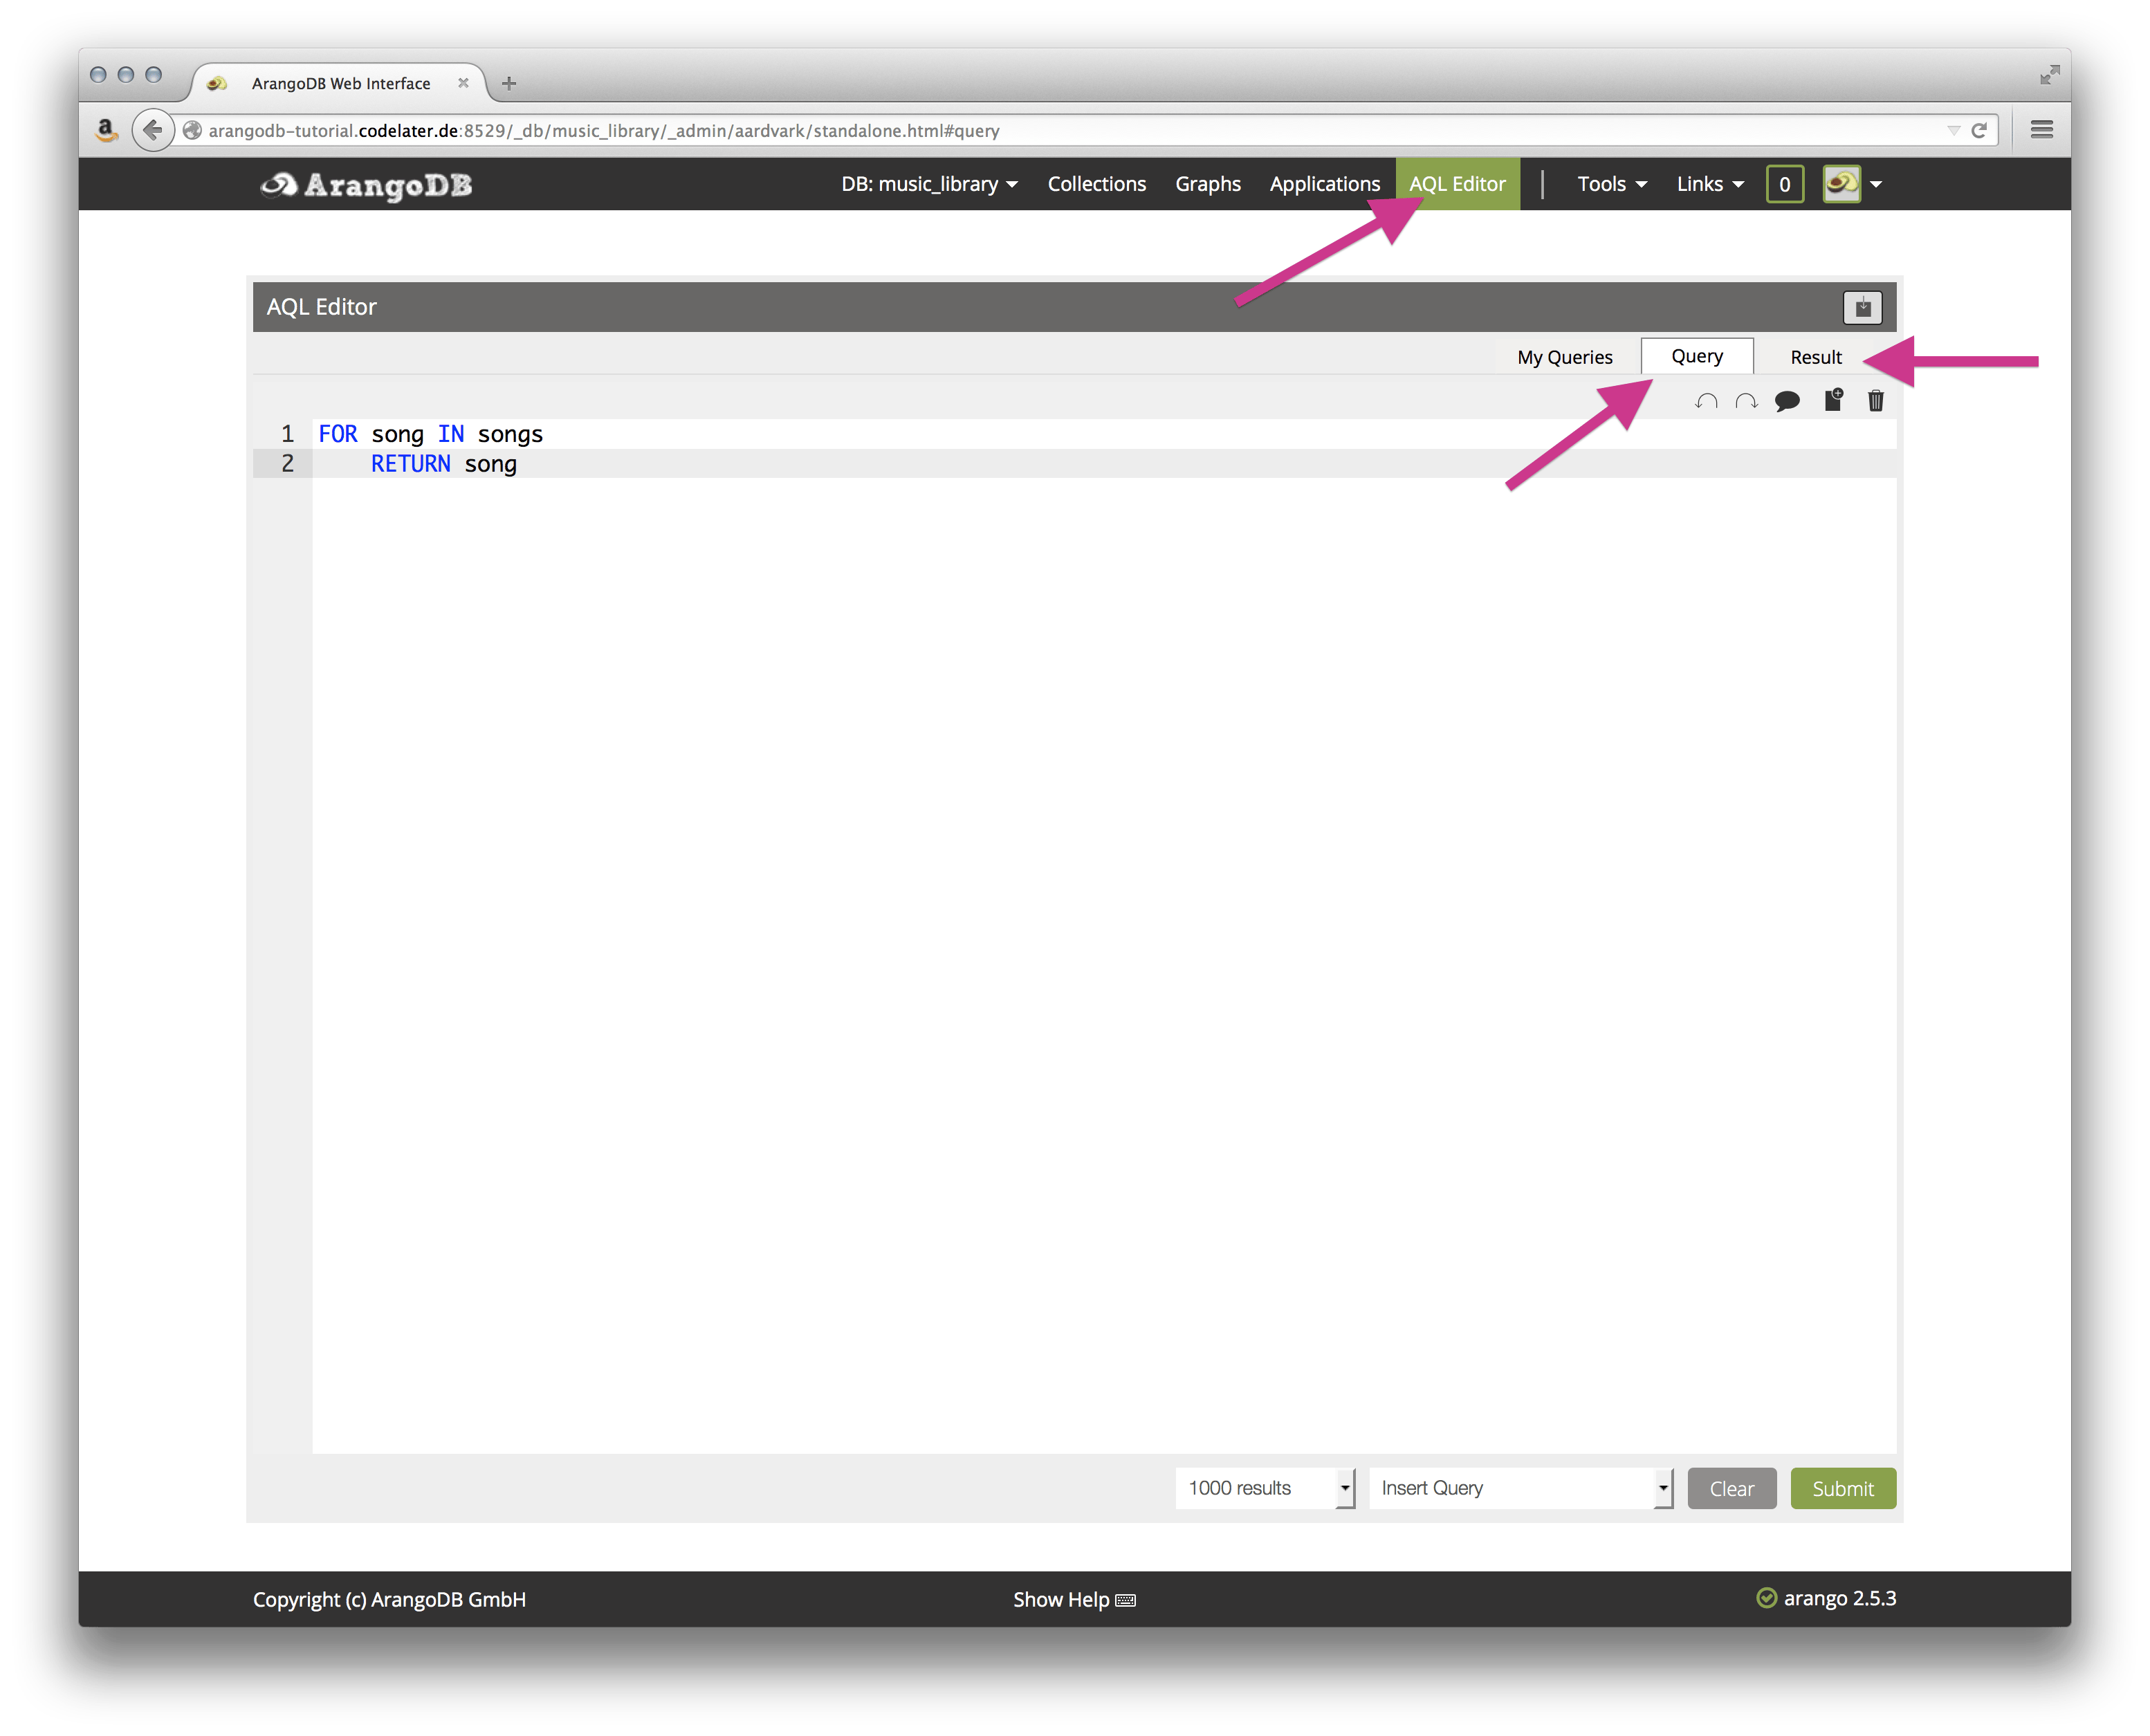
To interact with AQL in the web interface, click on the AQL Editor tab in the top navigation. You will be presented with a blank editor.
To switch between the editor and the result view, use the Query and Result tabs in the upper right corner:
The editor has syntax highlighting, undo/redo functionality, and and query saving. The following section will explore some of the features of AQL. For a complete reference, visit the comprehensive documentation.
AQL Basics
AQL is a declarative language, meaning that a query expresses what result should be achieved but not how it should be achieved. It allows querying for data but also modifying the data. Both approaches can be combined to achieve complex tasks.
Reading and modifying queries in AQL is fully ACID-compliant. Operations will either finish in whole or not at all. Even reading data will happen on a consistent snapshot of the data.
We begin again with creating data. Let’s add more songs to our songs collection. Just copy and paste the following query:
FOR song IN [

{ album: "Led Zeppelin", title: "Good Times Bad Times", artist: "Led Zeppelin", length: 166, year: 1969, _key: "good_times_bad_times" }

,

{ album: "Led Zeppelin", title: "Dazed and Confused", artist: "Led Zeppelin", length: 388, year: 1969, _key: "dazed_and_confused" }

,

{ album: "Led Zeppelin", title: "Communication Breakdown", artist: "Led Zeppelin", length: 150, year: 1969, _key: "communication_breakdown" }

]

INSERT song IN songs
Click the Submit button.
This query is already a good example of how AQL works: You iterate over a list of documents with FOR and perform an operation on each of the documents. The list could be an array with JSON objects or any collection in your database. Operations include filtering, modifying, selecting more documents, creating new structures, or (as in this example)inserting documents into the database. In fact, AQL supports all CRUD operations too.
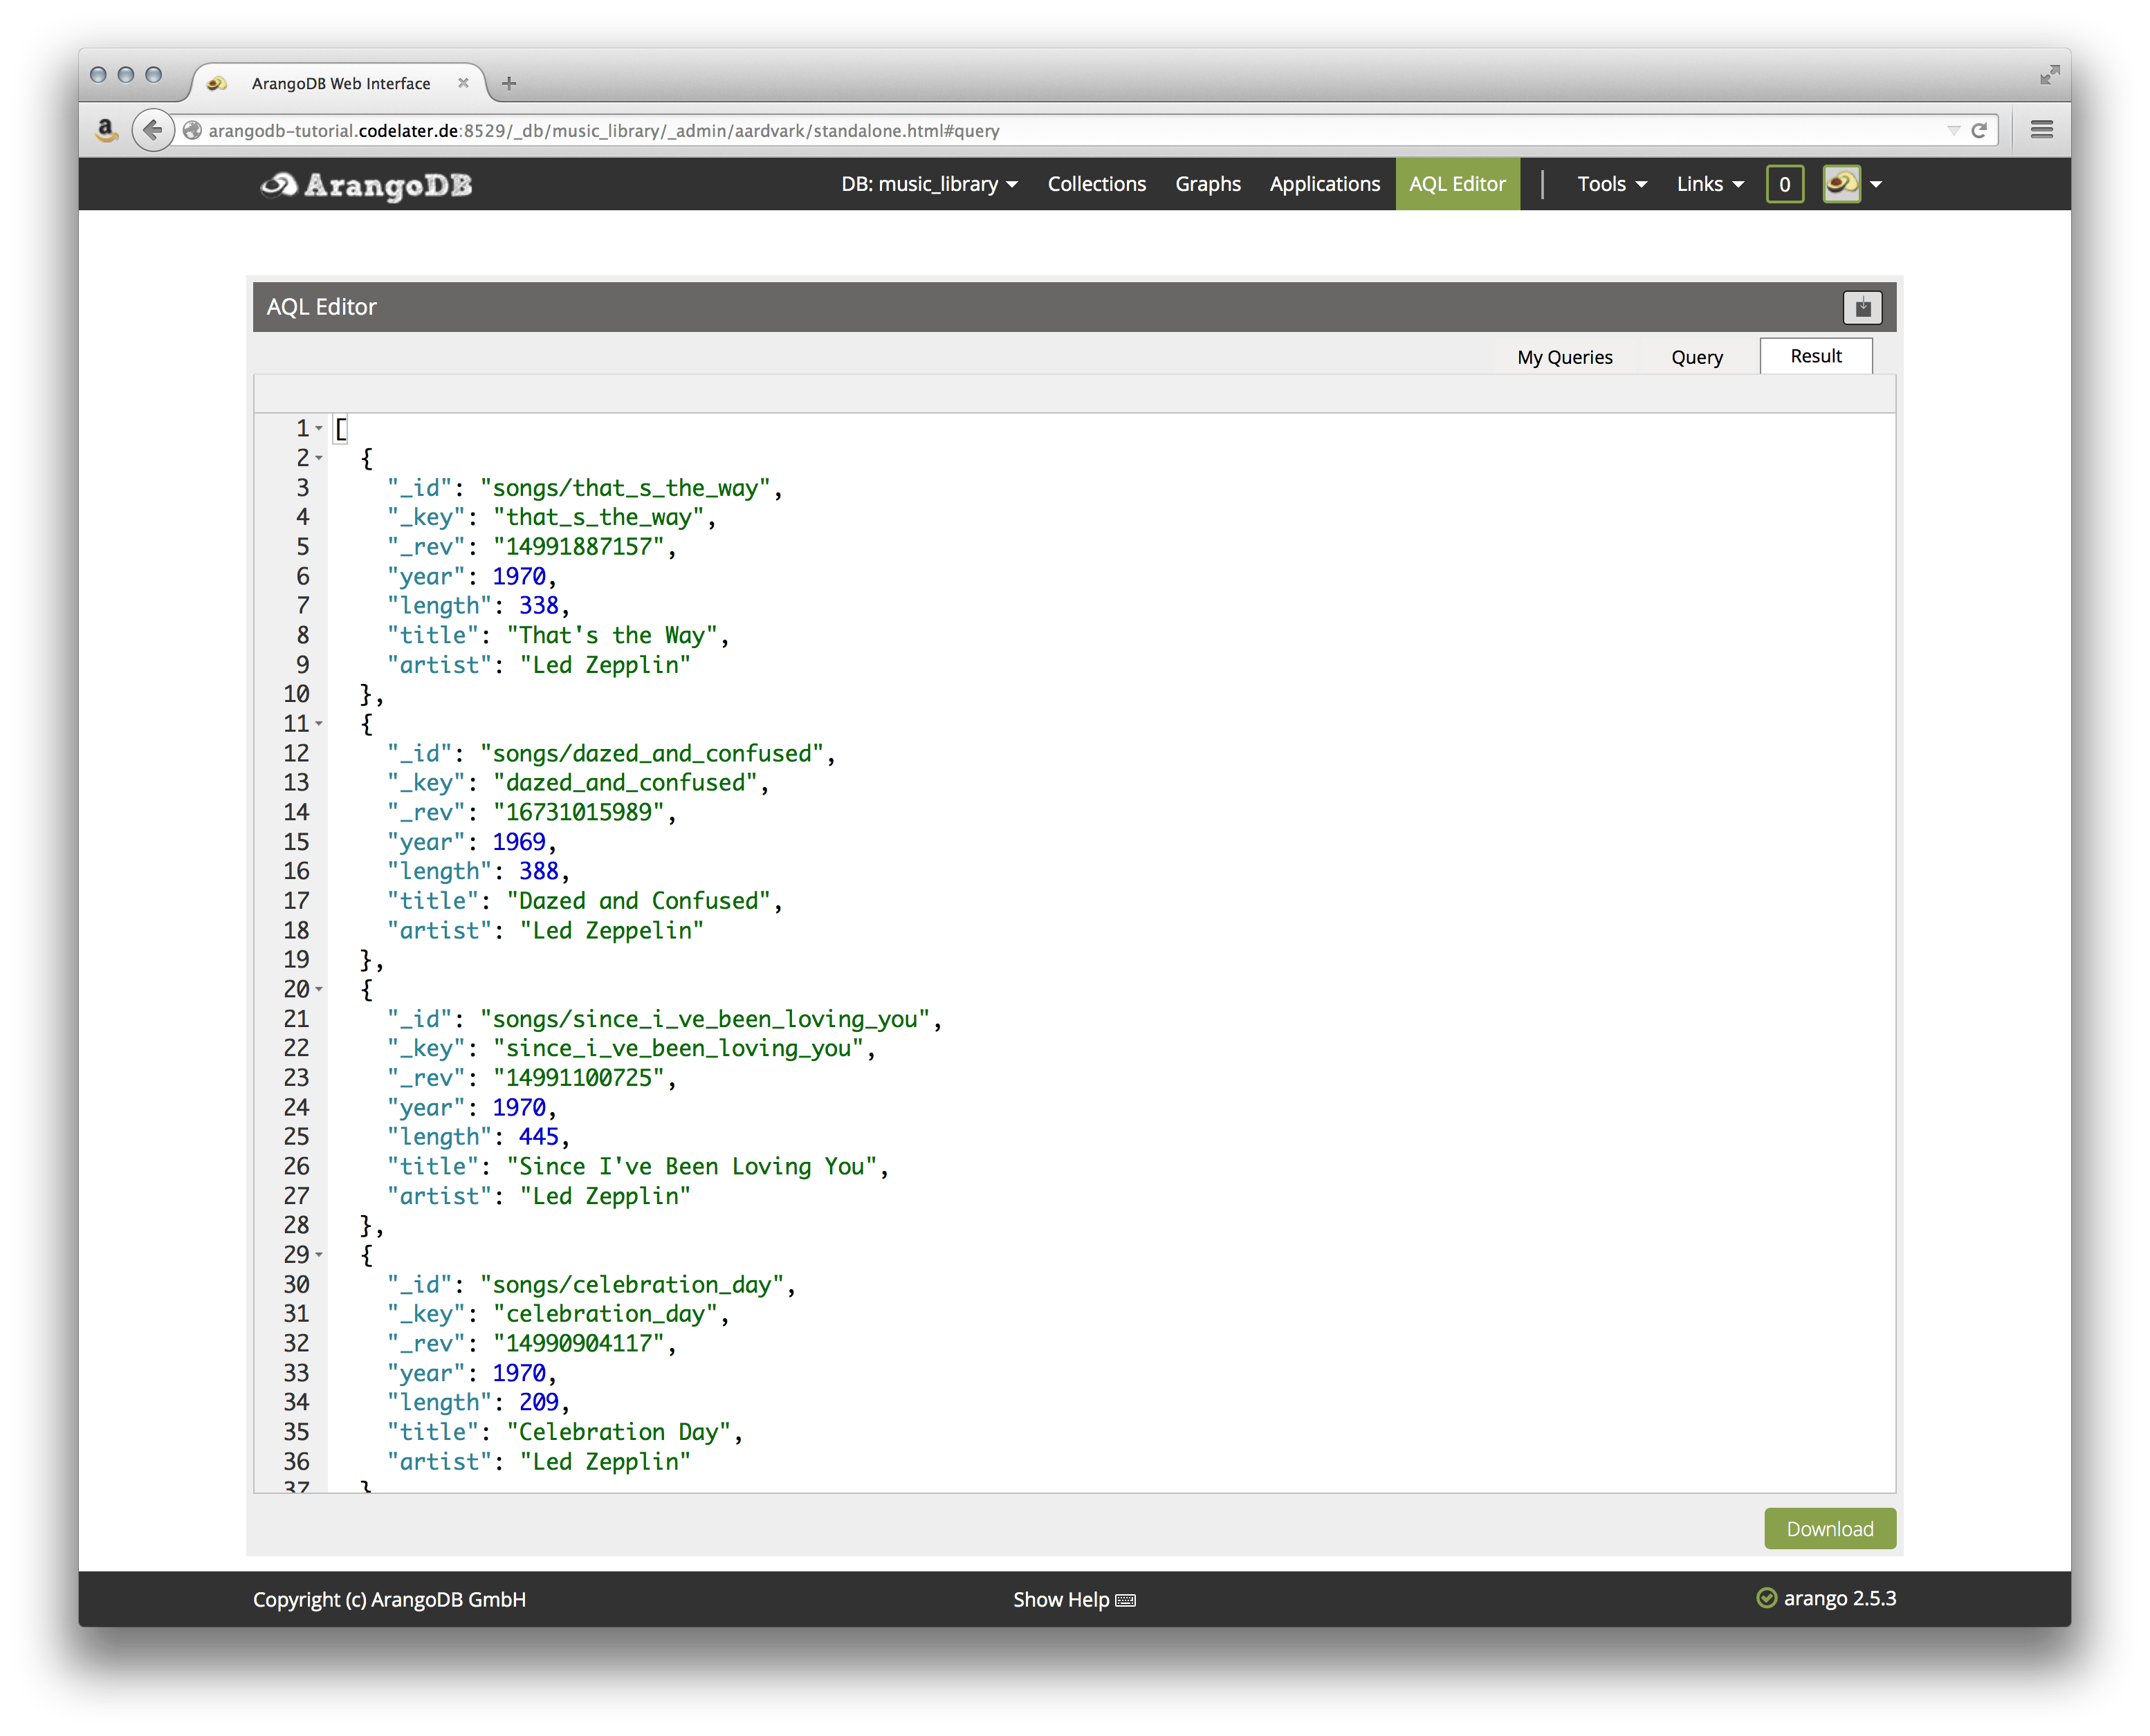
To get an overview of all the songs in the database, run the following query. It is the equivalent of a SELECT * FROM songs in an SQL-based database (since the editor remembers the last query, you should click on the trash can icon to clear the editor):
FOR song IN songs RETURN song
Now you’ll see all the entries from the song database in the text field. Go back to the Query tab and clear the editor again.
Another example involves basic filtering for songs above a playtime of three minutes:
FOR song IN songs

FILTER song.length > 180

RETURN song
The result is presented in the Result tab of the editor:
Complex AQL Example
AQL comes with a set of functions for all supported data types and even allows the addition of new functions. Combined with ability to assign variables within a query, you can build very complex constructs. This allows you to move data-intensive operations closer to the data itself rather then executing them on the client. To illustrate this, we will format a song’s duration as mm:ss to make it read nicely for the user:
FOR song IN songs

FILTER song.length > 180

LET minutes = FLOOR(song.length / 60)

LET seconds = song.length % 60

RETURN

{ title: song.title, duration: CONCAT_SEPARATOR(':', minutes, seconds) }
This time we will just return the song title together with the duration. The RETURN lets you create a new JSON object to return for each input document.
AQL is complex language with a lot of features. But there is one more feature worth mentioning, especially in the context of NoSQL databases: Joins.
Joins in AQL
Using a document store as your database has several implications. You should model your data in a different way than you would when using a relational database.
In a document store, you have the ability to embed data that would otherwise be modeled as a relation, but this approach is not always feasible. There are cases when a relation makes much more sense. Without the ability to let the database perform the required joins, you would end up joining the data on the client, or denormalizing your data model and embedding sub-documents. This becomes especially problematic for complex and large data sets.
So, let’s do a join.
To illustrate this feature we will replace the album attribute of the songs with a reference to the albums collection. We already created the album Led Zeppelin III as a document before. Please go back and re-add the album if you deleted it during the earlier example.
This query will to the trick:
FOR album IN albums

FOR song IN songs

FILTER song.album == album.name

LET song_with_album_ref = MERGE(UNSET(song, 'album'),

{ album_key: album._key }

)

REPLACE song WITH song_with_album_ref IN songs
We first iterate over all the albums and then look up all the songs that this album is associated with. The next step is to create a new document which contains the album_key attribute and UNSET the album attribute. We will use REPLACE and not UPDATE to update the song documents. This is possible because we created a new song document before.
After this data migration, we can now maintain the album document in one place. When fetching the song data, we can use a join to add the album name again to the song documents:
FOR song IN songs

FOR album IN albums

FILTER album._key == song.album_key

RETURN MERGE(song,

{ album: album.name }

)
We’ve barely scraped the surface of what can be accomplished with AQL, but you should have a good impression of what is possible. For a complete language reference and more examples, refer to the extensive documentation.
(Optional) Step 9 — Making Backups
You should start thinking about backups once you put an ArangoDB database into production. It is a good practice to establish backups before that, though.
Using the Backup feature from DigitalOcean is a good start. Additionally, you may want to look into using arangodump and arangorestore to have more fine-grained control about what to back up and where to store the backups.
(Optional) Step 10 — Upgrading
When a new version of ArangoDB is released it will be published through the configured package repository. To install the latest version, you first need to update the repository index:
- sudo apt-get update
Now stop the database:
- sudo service arangodb stop
Update it to the latest version:
- sudo apt-get install arangodb
Note: After installing the update, the system tries to start the arangodb service. This may fail because the database files need to be upgraded. This is to be expected.
You may need to upgrade the database files themselves:
- sudo service arangodb upgrade
After that, start the server as usual:
- sudo service arangodb start
Extending ArangoDB with Foxx Applications
Before we finish, there is one more thing worth mentioning: Since ArangoDB has an integrated V8 engine to handle all the JavaScript and it has an HTTP server built in, we could extend the existing HTTP API with custom endpoints. This functionality is called Foxx.
Foxx is a framework to use ArangoDB to build custom microservices with persistent data. Foxx apps are written in JavaScript and run in ArangoDB’s V8 context. The app has direct access to the native JavaScript interface and thus can access the data without any HTTP round trips. Foxx provides a minimal framework much in the sense of Sinatra for Ruby or Flask for Python. You write controllers to handle incoming requests and implement the business logic inside models.
Foxx apps can be managed via the web interface and can be developed like any other app. You can put them under version control and even deploy them directly out of a Git repository. Since they are just JavaScript, unit testing them is straightforward. For simple use cases, they are much like stored procedures in a relational database system, but Foxx code is much easier to maintain and test.
Using Foxx apps as stored procedures is just the beginning. Imagine you have multiple applications which share certain business logic. With Foxx, you can move this business logic closer to the data to make processing faster and reduce the complexity of distributing the shared implementation among components. Running ArangoDB as a cluster even takes care of making Foxx apps available on each member in the cluster.
Even entire web applications are possible with Foxx. Using frontend frameworks such as Angular or Ember allows you to run applications entirely off the database. No additional infrastructure is needed for this. In a production environment, you would eventually put Nginx or similar in front of ArangoDB. ArangoDB ships with some Foxx apps that provide common functionality, such as authentication and a session store. You can even use npm packages if they do not rely on the HTTP functionality.
For a good introduction to Foxx, please refer to this cookbook.
Conclusion
ArangoDB is a powerful database with a wide range of supported use cases. It is well maintained and has very good documentation. Getting started with it is easy since there are packages for every major operating system. The web interface lowers the burden of exploring the features, and if you come from a relational background, using AQL is not that different from using SQL.
Having the option to extend the database with JavaScript applications, and the graph features, make ArangoDB a complete package to get an application started and growing.
So far we’ve shared the big picture of ArangoDB.
As next steps, we suggest the following:
-
For any real application you will interact with the HTTP API. We didn’t cover it here, because you most likely won’t use it directly, but through one of the many native language drivers.
-
Interacting with the data in ArangoDB is done through AQL most of the time. Getting used to it is a must if you want to use ArangoDB in a production environment.
-
ArangoDB is not only a document store, but has very powerful graph features as well. It allows you to model your data as vertices in a directed graph. Relations can be modeled as edges between those vertices instead of using
_keyreferences. Modeling your data in this way can have benefits over the relational approach used in SQL databases.
Thanks for learning with the DigitalOcean Community. Check out our offerings for compute, storage, networking, and managed databases.
About the author(s)
Dirk is a freelance Ruby developer from Cologne, Germany. He works on web apps, with a focus on backends. You may see him automate things, too.
Current fan and former Editorial Manager at DigitalOcean. Hi! Expertise in areas including Ubuntu, Docker, Rails, and more.
Still looking for an answer?
This textbox defaults to using Markdown to format your answer.
You can type !ref in this text area to quickly search our full set of tutorials, documentation & marketplace offerings and insert the link!
Awesome tutorial! I have never heard before of ArangoDB but I am thinking of replacing some SQL stuff with this new NoSQL solution. It also has a pretty solid PHP Framework (arangodb-php)
For Debian 7 Users:
echo "deb http://www.arangodb.com/repositories/arangodb2/Debian_7.0/ /" >> /etc/apt/sources.list.d/arangodb.list
apt-get update
 This work is licensed under a Creative Commons Attribution-NonCommercial- ShareAlike 4.0 International License.
Become a contributor for community
Get paid to write technical tutorials and select a tech-focused charity to receive a matching donation.

DigitalOcean Documentation
Full documentation for every DigitalOcean product.

Resources for startups and AI-native businesses
The Wave has everything you need to know about building a business, from raising funding to marketing your product.
The developer cloud
Scale up as you grow — whether you're running one virtual machine or ten thousand.

Start building today
From GPU-powered inference and Kubernetes to managed databases and storage, get everything you need to build, scale, and deploy intelligent applications.
