
Introduction
Concourse CI is a modern, scalable continuous integration system designed to automate testing pipelines with a composable, declarative syntax. Building off of the success of earlier CI systems, Concourse aims to simplify pipeline management and eliminate “snowflake” servers so that the testing server is as well regulated as the code it processes.
In this tutorial, we will demonstrate how to install Concourse CI on an Ubuntu 16.04 server. We will configure a PostgreSQL database to use as the backend, download and install the Concourse binaries, and then configure the web and worker processes that allow us to build and execute continuous integration pipelines.
Prerequisites
To complete this guide, you will need an Ubuntu 16.04 server with at least 1 GB of RAM. Configure a non-root sudo user and a firewall as described in the Ubuntu 16.04 initial server setup guide before continuing.
Install and Configure PostgreSQL
Before we download the Concourse CI binaries, we should set up a PostgreSQL instance on our server. Concourse will use the PostgreSQL database to store its pipeline data.
First, update the local package index to refresh the local view of available files. Afterwards, install the postgresql and postgresql-contrib packages from Ubuntu’s default repositories:
- sudo apt-get update
- sudo apt-get install postgresql postgresql-contrib
Once the database software is installed, we will create a dedicated PostgreSQL user named concourse to manage the Concourse assets within the database system. To create this user, we will use sudo to act as the postgres system user, which has admin access to the database system:
- sudo -u postgres createuser concourse
By default, Concourse attempts to connect to a database called atc. Concourse calls its main web and API hub the “ATC”, which stands for “air traffic control”. We can create this database and assign ownership to the concourse database user to provide appropriate access:
- sudo -u postgres createdb --owner=concourse atc
With our database in place, we are now ready to download and install the Concourse CI binaries.
Download and Install the Concourse CI Executables
Concourse provides links to compiled executables for the Linux platform on both their website and GitHub.
The easiest place to find them is on the Concourse CI download page. In the Downloads section, under the Concourse Binaries section, right-click and copy the link location for the Linux platform download. Keep this page open, as we will be coming back to it momentarily.
On your server, switch to the /tmp directory and then use curl to download the link you copied:
- cd /tmp
- curl -LO copied_URL_for_concourse_binary
Next, we will download the latest fly command line client. Back on the Concourse CI download page, in the Downloads section, under the Fly Binaries section, right-click and copy the link location for the Linux platform download.
On your server, download the copied link to /tmp again with curl:
- cd /tmp
- curl -LO copied_URL_for_fly_binary
If the download request resulted in an error, the files will contain an HTTP error message instead of a binary program. Check that the files are actually binary executables by typing:
- file *linux_amd64 | grep executable
Outputconcourse_linux_amd64: ELF 64-bit LSB executable, x86-64, version 1 (SYSV), dynamically linked, interpreter /lib64/ld-linux-x86-64.so.2, for GNU/Linux 2.6.32, BuildID[sha1]=3f24eae5da950594d8d1aaea7631bc20883afba3, not stripped
fly_linux_amd64:       ELF 64-bit LSB executable, x86-64, version 1 (SYSV), statically linked, not stripped
The above output indicates that the files are executables. We can add executable permission to the files, remove the _linux_amd64 suffix, and move them to the /usr/local/bin directory by typing:
- chmod +x concourse* fly*
- sudo mv concourse* /usr/local/bin/concourse
- sudo mv fly* /usr/local/bin/fly
Asking for the version of each program will serve as a small check to make sure everything is operating correctly:
- cd ~
- concourse --version
- fly --version
Output3.0.1
3.0.1
Now that our binaries are in place, we can begin configuring Concourse.
Create the Concourse CI Configuration Assets
Next, we can start to put together the configuration and keys that Concourse will use to start up.
Before we begin, create a configuration directory where we can keep all of the relevant files:
- sudo mkdir /etc/concourse
We can now generate encryption keys and create files that define our Concourse configuration.
Creating the Key Files
Concourse is composed of a few related components that all need to be able to communicate securely with one another.
The ATC is the main hub that handles web and API requests and coordinates pipelines. Workers manage containers to run the CI/CD tasks defined in the pipeline. The TSA is a custom SSH server that securely registers workers with the ATC.
Even though we will be running all of these components on a single server, the worker and TSA expect to communicate securely. To satisfy this expectation, we will create three sets of keys:
- a key pair for the TSA component
- a key pair for the worker
- a session signing key pair used to sign tokens for user sessions and TSA to ATC communication
Since these will be used automatically when each of the components start up, we need to create these keys without a password. We can create each of these key pairs in the /etc/concourse directory by typing:
- sudo ssh-keygen -t rsa -q -N '' -f /etc/concourse/tsa_host_key
- sudo ssh-keygen -t rsa -q -N '' -f /etc/concourse/worker_key
- sudo ssh-keygen -t rsa -q -N '' -f /etc/concourse/session_signing_key
If we check in the concourse directory, we can see that three public and three private keys are now available:
- ls -l /etc/concourse
Outputtotal 24
-rw------- 1 root root 1679 May 11 17:19 session_signing_key
-rw-r--r-- 1 root root  394 May 11 17:19 session_signing_key.pub
-rw------- 1 root root 1679 May 11 17:19 tsa_host_key
-rw-r--r-- 1 root root  394 May 11 17:19 tsa_host_key.pub
-rw------- 1 root root 1675 May 11 17:19 worker_key
-rw-r--r-- 1 root root  394 May 11 17:19 worker_key.pub
The TSA will decide which workers are authorized to connect to the system by checking an authorized key file. We need to pre-populate the authorized keys file with the worker’s public key that we generated so that it can connect successfully.
Since this is our only worker, we can just copy the file over:
- sudo cp /etc/concourse/worker_key.pub /etc/concourse/authorized_worker_keys
Now that we have the key files and an initial file for authorized workers, we can create the files that will define our Concourse configuration.
Creating the Environment Configuration Files
The Concourse binary does not read from a configuration file natively. However, it can take configuration values from environment variables passed in when the process starts.
In a moment, we will be creating systemd unit files to define and manage our Concourse services. The unit files can read environment variables from a file and pass them to the process as it starts. We will create a file that defines the variables for the Concourse web process, which start the ATC and TSA components, and another file for the Concourse worker process.
Create and open a file for the web process by typing:
- sudo nano /etc/concourse/web_environment
Inside, we will define the environment variables needed by the ATC and TSA components. Each variable begins with CONCOURSE_.
To start, we will define some static values that we don’t need to modify. These variables will define the location of the private TSA and session keys, the file defining the authorized workers, and the PostgreSQL socket location:
# These values can be used as-is
CONCOURSE_SESSION_SIGNING_KEY=/etc/concourse/session_signing_key
CONCOURSE_TSA_HOST_KEY=/etc/concourse/tsa_host_key
CONCOURSE_TSA_AUTHORIZED_KEYS=/etc/concourse/authorized_worker_keys
CONCOURSE_POSTGRES_SOCKET=/var/run/postgresql
Next, we’ll set some variables that will need to be changed to match your environment. The CONCOURSE_EXTERNAL_URL defines the IP address and port that the service will bind to. Set this to your server’s public IP address and port 8080.
We will also set a username and password for the main team, which functions as the Concourse administrative group. You can select any username and password you’d like here. You can change the admin credentials at any time by modifying these values and restarting the service:
# These values can be used as-is
CONCOURSE_SESSION_SIGNING_KEY=/etc/concourse/session_signing_key
CONCOURSE_TSA_HOST_KEY=/etc/concourse/tsa_host_key
CONCOURSE_TSA_AUTHORIZED_KEYS=/etc/concourse/authorized_worker_keys
CONCOURSE_POSTGRES_SOCKET=/var/run/postgresql

# Change these values to match your environment
CONCOURSE_BASIC_AUTH_USERNAME=sammy
CONCOURSE_BASIC_AUTH_PASSWORD=theshark
CONCOURSE_EXTERNAL_URL=http://servers_public_IP:8080
Save and close the file when you are finished.
Next, create an environment file for the worker process:
- sudo nano /etc/concourse/worker_environment
Inside, we will define the locations of the worker’s private key, the TSA’s public key, and the directory where the worker will store its files. We will also set the address where the TSA can be reached, which will be the localhost in our case. You can use the values below without modification:
# These values can be used as-is
CONCOURSE_WORK_DIR=/var/lib/concourse
CONCOURSE_TSA_WORKER_PRIVATE_KEY=/etc/concourse/worker_key
CONCOURSE_TSA_PUBLIC_KEY=/etc/concourse/tsa_host_key.pub
CONCOURSE_TSA_HOST=127.0.0.1:2222
Save and close the file when you are finished.
Creating a Dedicated System User and Adjusting Permissions
Before we move on, we should create a dedicated Linux user to run the Concourse web process. This will allow us to start the web-facing service with limited privileges.
Because of the way that PostgreSQL handles authentication by default, it is important that the username match the PostgreSQL username we created earlier. Create a system user and group called concourse by typing:
- sudo adduser --system --group concourse
We can give the new user ownership over the /etc/concourse directory and its contents by typing:
- sudo chown -R concourse:concourse /etc/concourse
The environment files contain some sensitive data like the administrative username and password for the CI server. Adjust the permissions of the environment files so that regular users cannot read or modify the values in those files:
- sudo chmod 600 /etc/concourse/*_environment
Our configuration assets are now owned by the concourse system user with limited privileges for other users.
Create Systemd Unit Files for the Web and Worker Processes
We are now ready to define the Concourse CI unit files that will start and manage the application processes. We will create one file for the web process that handles the TSA and ATC components and one file for the worker process that handles containers for pipeline tasks.
Creating the Concourse Web Unit File
Start by creating a concourse-web.service file within the /etc/systemd/system file:
- sudo nano /etc/systemd/system/concourse-web.service
Inside, paste the following contents:
[Unit]
Description=Concourse CI web process (ATC and TSA)
After=postgresql.service

[Service]
User=concourse
Restart=on-failure
EnvironmentFile=/etc/concourse/web_environment
ExecStart=/usr/local/bin/concourse web

[Install]
WantedBy=multi-user.target
The first section of the file sets the unit description for the web process and indicates that this unit should be started after the PostgreSQL unit when deciding on ordering.
The [Service] section defines the way that the service will be run. We will run the service as the concourse user we configured earlier and we tell systemd to automatically restart the service if it fails, which can be useful if the process dies from memory constraints or similar issues. We load the web_environment file we defined earlier to establish the environment and we start the actual process by calling concourse web.
The [Install] section tells systemd how to tie the unit to the system start order if we configure the service to start at boot.
Save and close the file when you are finished.
Creating the Concourse Worker Unit File
Next, open a similar file to define the worker process:
- sudo nano /etc/systemd/system/concourse-worker.service
Inside, paste the following contents:
[Unit]
Description=Concourse CI worker process
After=concourse-web.service

[Service]
User=root
Restart=on-failure
EnvironmentFile=/etc/concourse/worker_environment
ExecStart=/usr/local/bin/concourse worker

[Install]
WantedBy=multi-user.target
This unit functions similarly to the concourse-web unit. This time, we tell system to start the worker process after the Concourse web process has been started. The worker process is run as the root user instead of concourse because it requires administrative privileges for container management. We load the worker_environment file and use the concourse worker command to start the process.
Save and close the file when you are finished.
Adjust the Firewall and Start the Services
With our unit files in place, we can now allow access through the firewall and start the services.
The web process will listen for connections on port 8080, so we need to open access to that port in the ufw firewall:
- sudo ufw allow 8080
The containers used by the worker process require forwarding access so that they can correctly reach the internet and resolve DNS queries. We can enable this by typing:
- sudo ufw default allow routed
We can now start our services by typing:
- sudo systemctl start concourse-web concourse-worker
We can check that both services were started correctly by typing:
- sudo systemctl status concourse-web concourse-worker
Output● concourse-web.service - Concourse CI web process (ATC and TSA)
   Loaded: loaded (/etc/systemd/system/concourse-web.service; disabled; vendor preset: enabled)
   Active: active (running) since Thu 2017-05-11 20:18:16 UTC; 1min 40s ago
 Main PID: 9954 (concourse)
    Tasks: 7
   Memory: 100.0M
      CPU: 2.058s
   CGroup: /system.slice/concourse-web.service
           └─9954 /usr/local/bin/concourse web

May 11 20:19:51 testatc concourse[9954]: {"timestamp":"1494533991.818562269","source":"tsa","message":"tsa.connection.keepalive","log_level":1,"data":{"remote":"127.0.0.1:48764","session":"1","type":"keepalive"}}
. . .

● concourse-worker.service - Concourse CI worker process
   Loaded: loaded (/etc/systemd/system/concourse-worker.service; disabled; vendor preset: enabled)
   Active: active (running) since Thu 2017-05-11 20:18:16 UTC; 1min 39s ago
 Main PID: 9960 (concourse)
    Tasks: 9
   Memory: 619.6M
      CPU: 20.353s
   CGroup: /system.slice/concourse-worker.service
           └─9960 /usr/local/bin/concourse worker

May 11 20:19:12 testatc concourse[9960]: {"timestamp":"1494533952.909682751","source":"tsa","message":"tsa.connection.channel.forward-worker.heartbeat.start","log_level":1,"data":{"remote":"127.0.0.1:48764","session":"1.1.1.7","worker-address":"127.0.0.1:38993","worker-platform":"linux","worker-tags":""}}
. . .
Check that both services read “active (running)” and that the log lines do not contain any obvious errors. Pay special attention to the web service to make sure that the log lines do not indicate problems connecting to the database.
If the services started successfully, enable them so that they will start each time the server boots:
- sudo systemctl enable concourse-web concourse-worker
Check Access On the Command Line and Through the Web Interface
Now that the Concourse services is running, we should check that we have access.
Checking Access On the Command Line
First, let’s check that we can access the Concourse service with the fly command line client.
We have to log in using the administrative username and password that we configured in the /etc/concourse/web_environment file using the login subcommand. A single fly binary can be used to contact and manage multiple Concourse servers, so the command uses a concept called “targets” as an alias for different servers. We will call our target “local” to log into the local Concourse server:
- fly -t local login -c http://127.0.0.1:8080
You will be prompted for the username and password for the main team, which we set in the web_environments file. After entering your credentials, “target saved” should be displayed:
Outputlogging in to team 'main'

username: sammy
password:

target saved
This indicates that we were able to log in successfully. While we are here, let’s verify that the worker process was able to successfully register to the TSA component by typing:
- fly -t local workers
Outputname              containers  platform  tags  team  state    version
concourse-server  0           linux     none  none  running  1.0
The fly command is used to configure pipelines and manage the Concourse CI service. The fly help command provides information about additional commands.
Checking Access Through the Web Interface
Next, check web access by visiting your server’s IP address followed by :8080 in a web browser:
http://servers_public_IP:8080
You should be able to access the initial Concourse CI page:
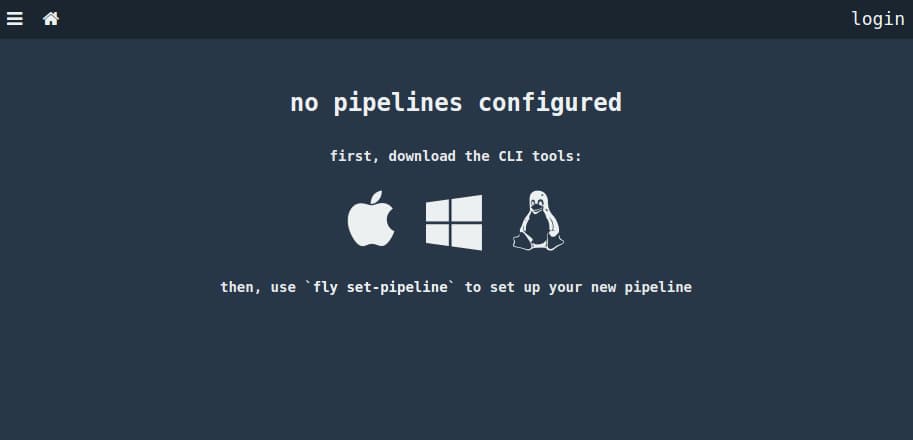
From here, you optionally can download the fly command to your local computer as a command line client by clicking on the image corresponding to your platform. This allows you to manage your CI environment without logging into the server. Remember to supply your server’s public IP address instead of 127.0.0.1 when logging in with fly for the first time (read the warning about encryption below before logging in remotely).
If you click on the login link in the upper-right corner, you can log into the web interface. First, you will be asked to select your team. The main team, which is the administrative group, is the only available selection by default:
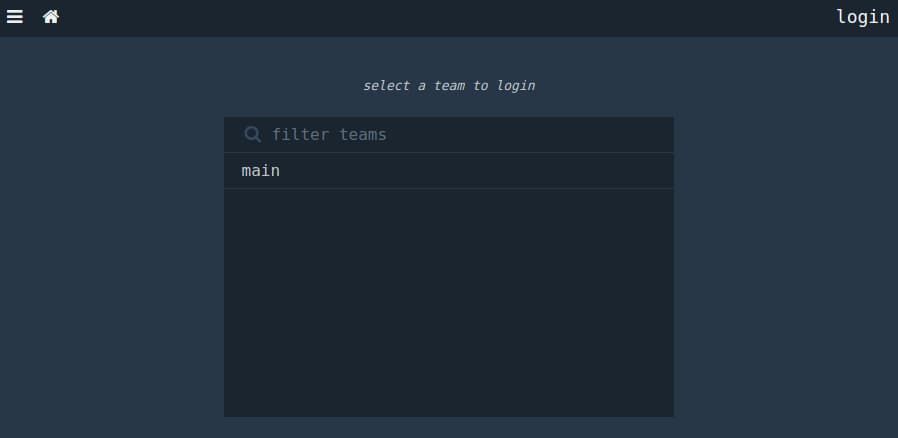
On the next page, you will be asked to enter your credentials.
Warning: The web interface and API gateway provided by Concourse CI are not encrypted by default, so your username and password will be submitted to the server as plain text. If you are planning on using this installation for anything other than evaluation purposes, protect the web interface with SSL before logging in. Follow our instructions on setting up an SSL protected Nginx reverse proxy for Concourse CI to configure secure access.
After entering the credentials you configured within the web_environment file, you will be logged in and taken back to the default placeholder interface:
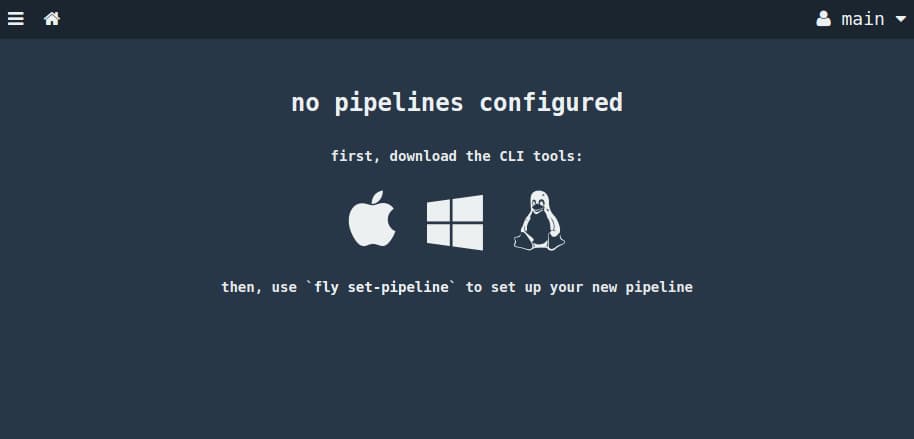
Once you submit your pipeline configuration to the server with fly, this screen will be replace by an interface where you can monitor your pipeline activity.
Conclusion
In this guide, we installed PostgreSQL and the Concourse binaries, set up encryption keys, and configured Concourse and network access. After starting the services, we logged in locally using the fly command and accessed the web interface to confirm functionality.
As mentioned earlier, before you use Concourse for actual work, it is important to protect the web and API gateways with SSL. Follow our guide on setting up an SSL reverse proxy for Concourse CI with Nginx to configure secure access to your server before interacting with the server remotely.
To learn how to use fly to add pipelines to your Concourse server, check out the “hello world” example in the Concourse documentation.
Thanks for learning with the DigitalOcean Community. Check out our offerings for compute, storage, networking, and managed databases.
Tutorial Series: Setting Up and Using Concourse CI on Ubuntu 16.04
Concourse CI is a modern, flexible continuous integration server which aims to simplify common abstractions and encourage building repeatable, decoupled automated testing. In this series, we will cover how to install and secure a Concourse CI server on Ubuntu 16.04. Afterwards, we will explore how to develop and implement a continuous integration pipeline for your project.
About the author
Former Senior Technical Writer at DigitalOcean, specializing in DevOps topics across multiple Linux distributions, including Ubuntu 18.04, 20.04, 22.04, as well as Debian 10 and 11.
Still looking for an answer?
This textbox defaults to using Markdown to format your answer.
You can type !ref in this text area to quickly search our full set of tutorials, documentation & marketplace offerings and insert the link!
I believe this needs an update to get the concourse workers working. CONCOURSE_TSA_HOST=127.0.0.1 needs to be CONCOURSE_TSA_HOST=127.0.0.1:2222 (adding the port)
I agreements to provence policy Mokterpur, Charghat, Rajshahi, Bangladesh.
Please add below lines to /etc/concourse/web_environment to make it work
CONCOURSE_ADD_LOCAL_USER=test:test CONCOURSE_MAIN_TEAM_LOCAL_USER=test
 This work is licensed under a Creative Commons Attribution-NonCommercial- ShareAlike 4.0 International License.
Become a contributor for community
Get paid to write technical tutorials and select a tech-focused charity to receive a matching donation.

DigitalOcean Documentation
Full documentation for every DigitalOcean product.

Resources for startups and AI-native businesses
The Wave has everything you need to know about building a business, from raising funding to marketing your product.
The developer cloud
Scale up as you grow — whether you're running one virtual machine or ten thousand.

Start building today
From GPU-powered inference and Kubernetes to managed databases and storage, get everything you need to build, scale, and deploy intelligent applications.
