
Introduction
Matomo is an open-source, self-hosted web analytics application written in PHP.
In this tutorial you will install Matomo and a MariaDB database using Docker Compose, then install Nginx to act as a reverse proxy for the Matomo app. Finally, you will enable secure HTTPS connections by using Certbot to download and configure SSL certificates from the Let’s Encrypt Certificate Authority.
Prerequisites
In order to complete this tutorial, you’ll first need the following:
- An Ubuntu 20.04 server, with the UFW firewall enabled. Please read Initial Server Setup with Ubuntu 20.04 to learn more about setting up these requirements
- Docker installed. You can use Step 1 of How To Install and Use Docker on Ubuntu 20.04 to get this done. Optionally, you may follow Step 2 of that tutorial if you want your non-root user to be able to run
dockercommands without usingsudo - Docker Compose installed. Follow Step 1 of How To Install and Use Docker Compose on Ubuntu 20.04 to install this software
Note: These prerequisite steps can be skipped if you’re using DigitalOcean’s One-Click Docker Image. This image will have Docker, Docker Compose, and UFW already installed and configured.
Launch a new Docker image in the region of your choice, then log in as the root user and proceed with the tutorial. Because you’ll be using the root user, you could leave off the sudo parts of all the commands that follow, but it’s not necessary.
Finally, to enable SSL you’ll need a domain name pointed at your server’s public IP address. This should be something like example.com or matomo.example.com, for instance. If you’re using DigitalOcean, please see our DNS Quickstart for information on creating domain resources in our control panel.
When you’ve satisfied all the prerequisites, proceed to Step 1, where you’ll download and launch the Matomo software.
Step 1 — Running Matomo and MariaDB with Docker Compose
Your first step will be to create the Docker Compose configuration that will launch containers for both the Matomo app and a MariaDB database.
This tutorial will put your configuration inside a matomo directory in your home directory. You could also choose to work in an /opt/matomo directory or some other directory of your choosing.
First ensure you’re in your home directory:
- cd ~
Then create the matomo directory and cd into it:
- mkdir matomo
- cd matomo
Now open a new blank YAML file called docker-compose.yml:
- nano docker-compose.yml
This is the configuration file that the docker-compose software will read when bringing up your containers. Paste the following into the file:
version: "3"

services:
  db:
    image: mariadb
    command: --max-allowed-packet=64MB
    restart: always
    environment:
      - MARIADB_DATABASE=matomo
      - MARIADB_USER
      - MARIADB_PASSWORD
      - MARIADB_ROOT_PASSWORD
    volumes:
      - ./db:/var/lib/mysql

  app:
    image: matomo
    restart: always
    volumes:
      - ./matomo:/var/www/html
    ports:
      - 127.0.0.1:8080:80
The file defines two services, one db service which is the MariaDB container, and an app service which runs the Matomo software. Both services also reference a named volume where they store some data, and the app service also opens up port 8080 on the loopback (127.0.0.1) interface, which we’ll connect to via localhost.
Save the file and exit your text editor to continue. In nano, press CTRL+O then ENTER to save, then CTRL+X to exit.
The MariaDB container needs some configuration to be passed to it through environment variables in order to function. The docker-compose.yml file lists these environment variables, but not all of them have associated values. That’s because it’s good practice to keep passwords out of your docker-compose.yml file, especially if you’ll be committing it to a Git repository or other source control system.
Instead, we’ll put the necessary information in a .env file in the same directory, which the docker-compose command will automatically load when we start our containers.
Open a new .env file with nano:
- nano .env
You’ll need to fill in a user name and password, as well as a strong password for the MariaDB root superuser account:
MARIADB_USER=matomo
MARIADB_PASSWORD=a_strong_password_for_user
MARIADB_ROOT_PASSWORD=a_strong_password_for_root
One way of generating a strong password is to use the openssl command, which should be available on most any operating system. The following command will print out a random 30 character hash that you can use as a password:
- openssl rand 30 | base64 -w 0 ; echo
When you’re done filling out the information in your .env file, save it and exit your text editor.
You’re now ready to bring up the two containers with docker-compose:
- sudo docker-compose up -d
The up subcommand tells docker-compose to start the containers (and volumes and networks) defined in the docker-compose.yml file, and the -d flag tells it to do so in the background (“daemonize”) so the command doesn’t take over your terminal. docker-compose will print some brief output as it starts the containers:
OutputCreating matomo_db_1  ... done
Creating matomo_app_1 ... done
When that’s done, Matomo should be running. You can test that a webserver is running at localhost:8080 by fetching the homepage using the curl command:
- curl --head http://localhost:8080
This will print out only the HTTP headers from the response:
OutputHTTP/1.1 200 OK
Date: Tue, 25 Jan 2022 19:56:16 GMT
Server: Apache/2.4.51 (Debian)
X-Powered-By: PHP/8.0.14
X-Matomo-Request-Id: 1e953
Cache-Control: no-store, must-revalidate
Referrer-Policy: same-origin
Content-Security-Policy: default-src 'self' 'unsafe-inline' 'unsafe-eval'; img-src 'self' 'unsafe-inline' 'unsafe-eval' data:;
Set-Cookie: MATOMO_SESSID=dde7d477b0822e166ed90448964ec1e7; path=/; HttpOnly; SameSite=Lax
Content-Type: text/html; charset=utf-8
The 200 OK response means the Matomo server is up and running, but it’s only available on localhost. The highlighted X-Matomo-Request-Id header indicates that the server is Matomo and not something else that might be configured to listen on port 8080. Next we’ll set up Nginx to proxy public traffic to the Matomo container.
Step 2 — Installing and Configuring Nginx
Putting a web server such as Nginx in front of your Matomo server can improve performance by offloading caching, compression, and static file serving to a more efficient process. We’re going to install Nginx and configure it to reverse proxy requests to Matomo, meaning it will take care of handing requests from your users to Matomo and back again. Using a non-containerized Nginx will also make it easier to add Let’s Encrypt SSL certificates in the next step.
First, refresh your package list, then install Nginx using apt:
- sudo apt update
- sudo apt install nginx
Allow public traffic to ports 80 and 443 (HTTP and HTTPS) using the “Nginx Full” UFW application profile:
- sudo ufw allow "Nginx Full"
OutputRule added
Rule added (v6)
Next, open up a new Nginx configuration file in the /etc/nginx/sites-available directory. We’ll call ours matomo.conf but you could use a different name:
- sudo nano /etc/nginx/sites-available/matomo.conf
Paste the following into the new configuration file, being sure to replace your_domain_here with the domain that you’ve configured to point to your Matomo server. This should be something like matomo.example.com, for instance:
server {
    listen       80;
    listen       [::]:80;
    server_name  your_domain_here;

    access_log  /var/log/nginx/matomo.access.log;
    error_log   /var/log/nginx/matomo.error.log;

    location / {
      proxy_set_header X-Forwarded-For $proxy_add_x_forwarded_for;
      proxy_set_header X-Real-IP $remote_addr;
      proxy_set_header X-Forwarded-Host $host;
      proxy_set_header X-Forwarded-Proto https;
      proxy_pass http://localhost:8080;
  }
}
This configuration is HTTP-only for now, as we’ll let Certbot take care of configuring SSL in the next step. The rest of the config sets up logging locations and then passes all traffic, as well as some important proxy headers, along to http://localhost:8080, the Matomo container we started up in the previous step.
Save and close the file, then enable the configuration by linking it into /etc/nginx/sites-enabled/:
- sudo ln -s /etc/nginx/sites-available/matomo.conf /etc/nginx/sites-enabled/
Use nginx -t to verify that the configuration file syntax is correct:
- sudo nginx -t
Outputnginx: the configuration file /etc/nginx/nginx.conf syntax is ok
nginx: configuration file /etc/nginx/nginx.conf test is successful
And finally, reload the nginx service to pick up the new configuration:
- sudo systemctl reload nginx
Your Matomo site should now be available on plain HTTP. Load http://your_domain_here (you may have to click through a security warning) and it will look like this:
Now that you have your site up and running over HTTP, it’s time to secure the connection with Certbot and Let’s Encrypt certificates. You should do this before going through Matomo’s web-based setup procedure.
Step 3 — Installing Certbot and Setting Up SSL Certificates
Thanks to Certbot and the Let’s Encrypt free certificate authority, adding SSL encryption to our Matomo app will take only two commands.
First, install Certbot and its Nginx plugin:
- sudo apt install certbot python3-certbot-nginx
Next, run certbot in --nginx mode, and specify the same domain you used in the Nginx server_name config:
- sudo certbot --nginx -d your_domain_here
You’ll be prompted to agree to the Let’s Encrypt terms of service, and to enter an email address.
Afterwards, you’ll be asked if you want to redirect all HTTP traffic to HTTPS. It’s up to you, but this is generally recommended and safe to do.
After that, Let’s Encrypt will confirm your request and Certbot will download your certificate:
OutputCongratulations! You have successfully enabled https://matomo.example.com

You should test your configuration at:
https://www.ssllabs.com/ssltest/analyze.html?d=matomo.example.com
- - - - - - - - - - - - - - - - - - - - - - - - - - - - - - - - - - - - - - - -

IMPORTANT NOTES:
 - Congratulations! Your certificate and chain have been saved at:
   /etc/letsencrypt/live/matomo.example.com/fullchain.pem
   Your key file has been saved at:
   /etc/letsencrypt/live/matomo.example.com/privkey.pem
   Your cert will expire on 2021-12-06. To obtain a new or tweaked
   version of this certificate in the future, simply run certbot again
   with the "certonly" option. To non-interactively renew *all* of
   your certificates, run "certbot renew"
 - Your account credentials have been saved in your Certbot
   configuration directory at /etc/letsencrypt. You should make a
   secure backup of this folder now. This configuration directory will
   also contain certificates and private keys obtained by Certbot so
   making regular backups of this folder is ideal.
 - If you like Certbot, please consider supporting our work by:

   Donating to ISRG / Let's Encrypt:   https://letsencrypt.org/donate
   Donating to EFF:                    https://eff.org/donate-le
Certbot will automatically reload Nginx to pick up the new configuration and certificates. Reload your site and it should switch you over to HTTPS automatically if you chose the redirect option.
Your site is now secure and it’s safe to continue with the web-based setup steps.
Step 4 — Setting Up Matomo
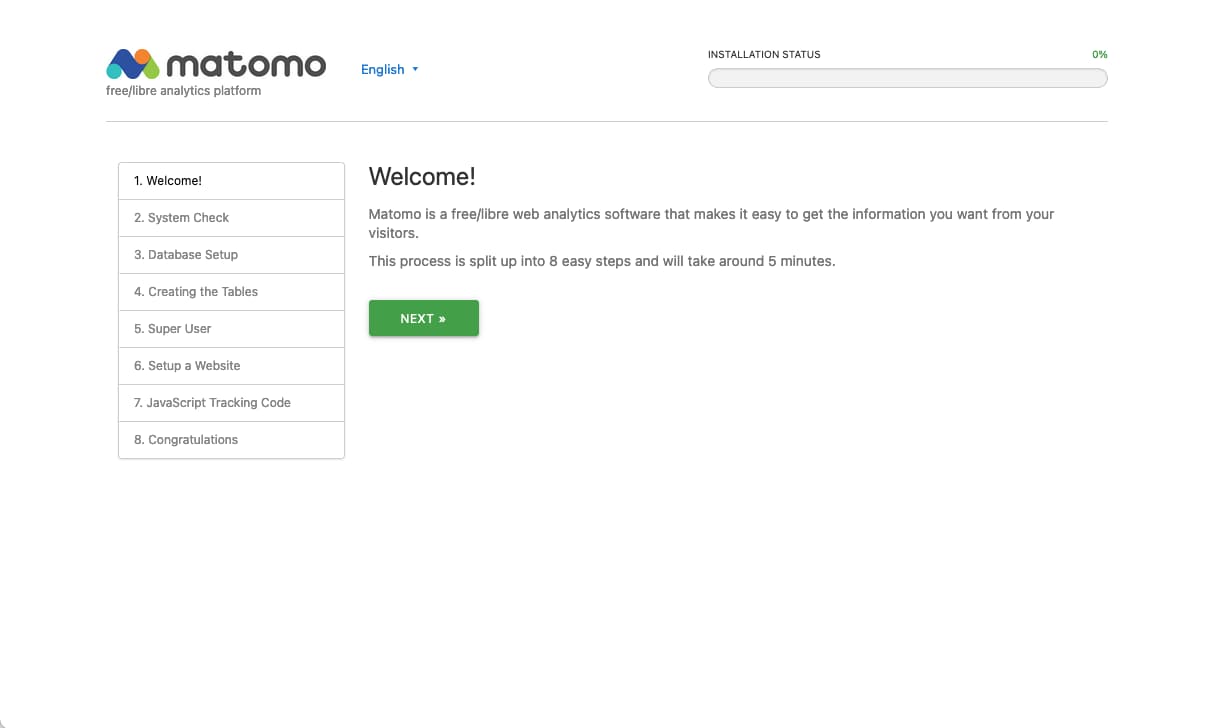
Back in your web browser you should now have Matomo’s Welcome! page open via a secure https:// connection. Now you can enter usernames and passwords safely to complete the installation process.
Click the Next button. You’ll be taken to the System Check step:
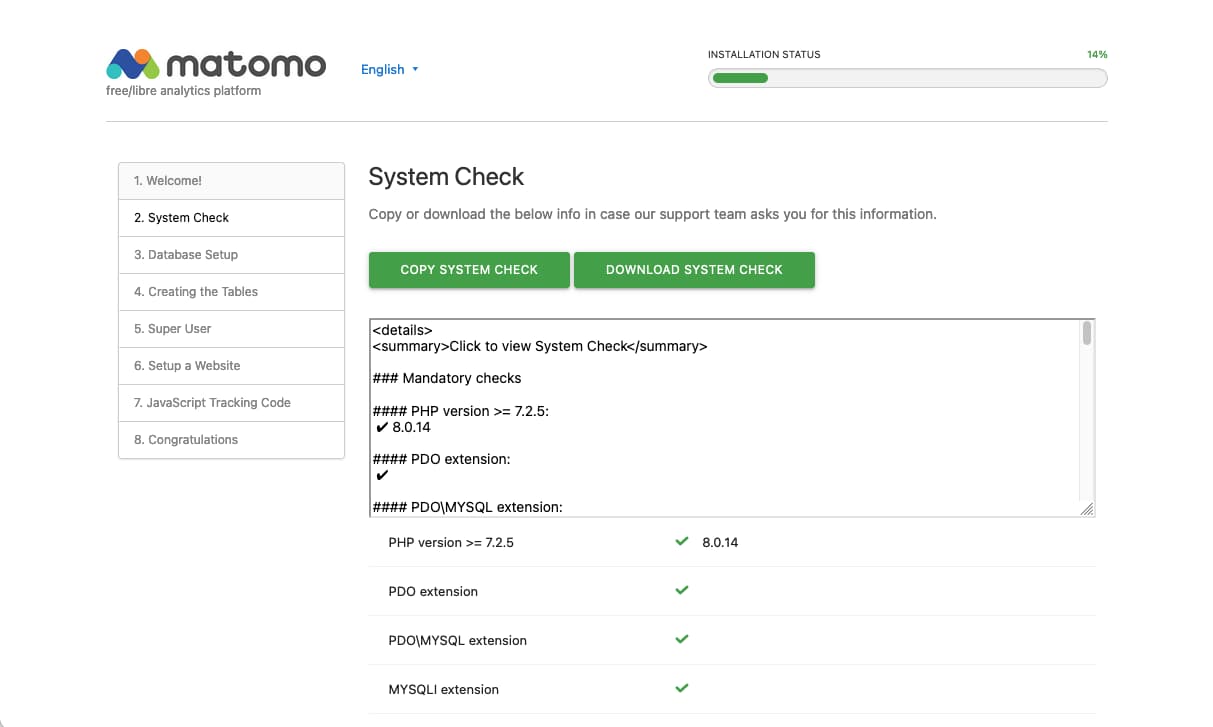
This is a summary of the system Matomo is running on, and everything should be green checkmarks indicating there are no problems. Scroll all the way to the bottom and click the Next button.
Now you’ll be on the Database Setup page:
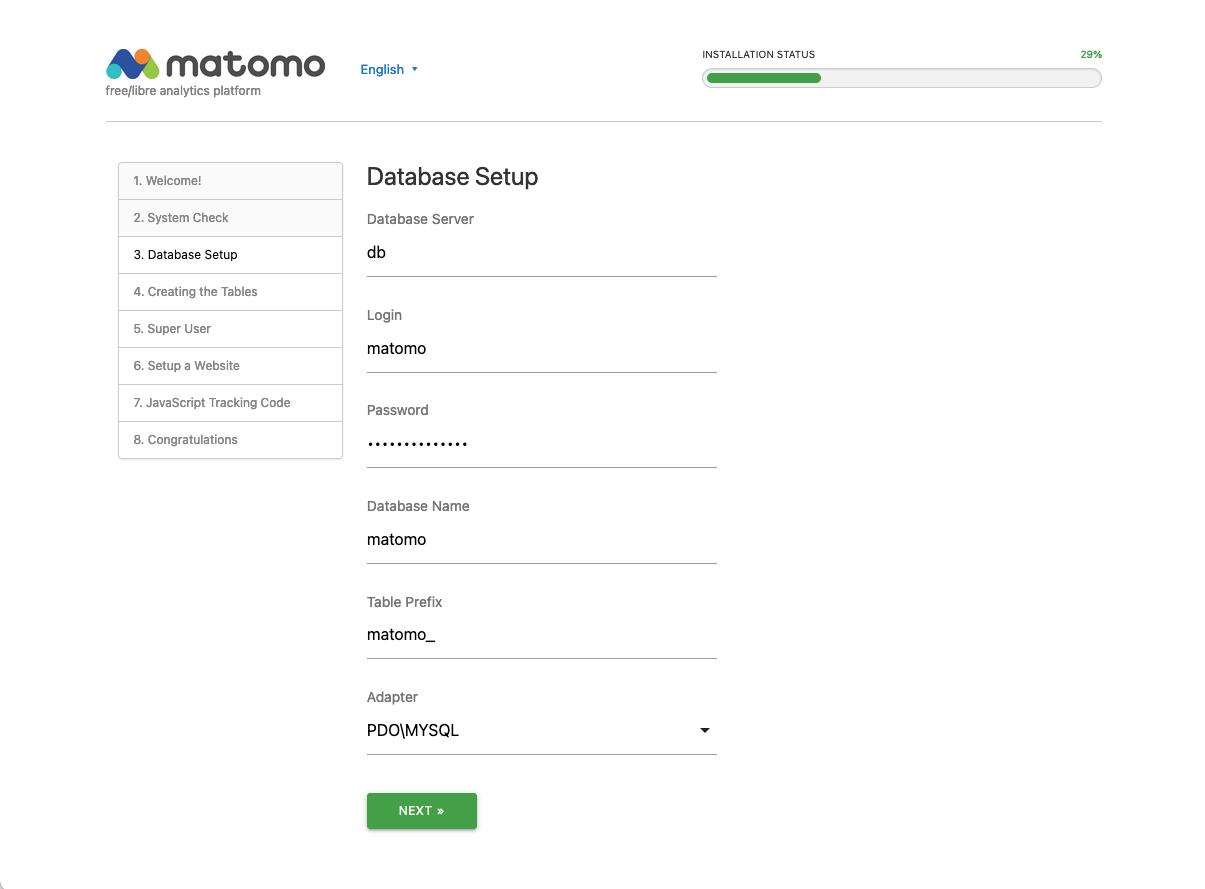
The information you fill in on this page will tell the Matomo application how to connect to the MariaDB database. You’ll need the MARIADB_USER and MARIADB_PASSWORD that you chose in Step 1. You can copy them out of your .env file if you need to.
Fill out the first four fields:
- Database Server: db
- Login: the username you set in the
MARIADB_USERenvironment variable - Password: the password you set in the
MARIADB_PASSWORDenvironment variable - Database Name: matomo
The defaults are fine for the remaining two fields.
Click Next once more. You’ll get a confirmation that the database was set up correctly. Click Next again. You’ll then need to set up an admin user, and finally you’ll set up information about the first website you want to collect analytics for.
After all that, you should end up on step 8, a Congratulations page. You’re almost all done. Scroll down to the bottom and click the Continue to Matomo button, and you’ll be taken to the homepage:
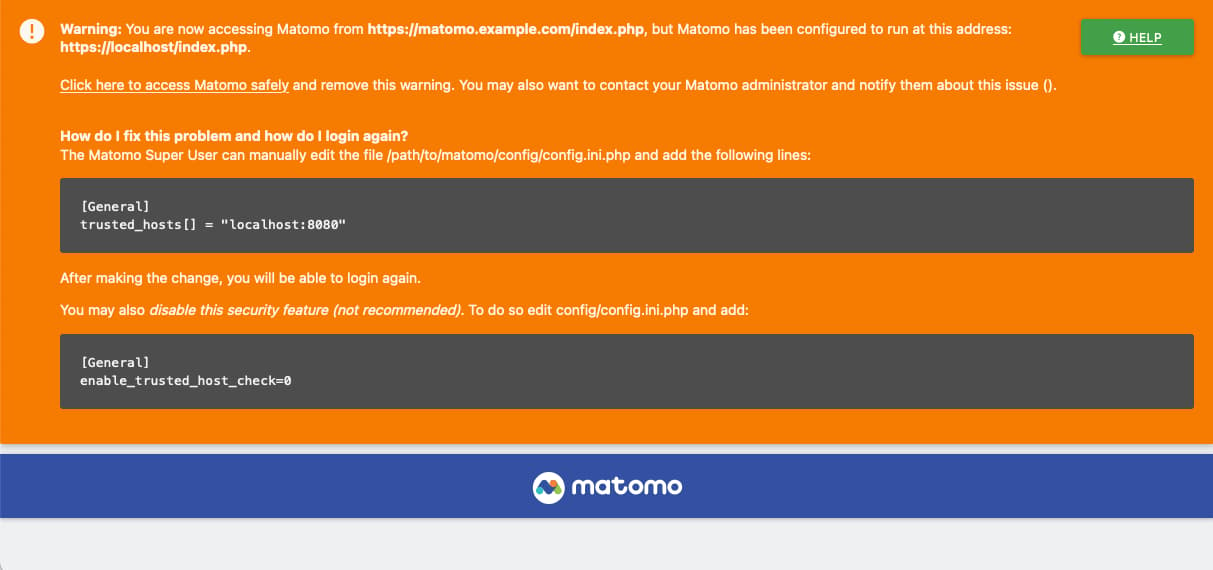
There will be a large warning at the top of the page. There’s a small update you’ll need to do to Matomo’s configuration file to finish up this process.
Back on the command line, open up the configuration file with a text editor:
- sudo nano matomo/config/config.ini.php
Near the top you should have a [General] section. Add the last three lines, highlighted below, to the end of that section:
[General]
proxy_client_headers[] = "HTTP_X_FORWARDED_FOR"
proxy_host_headers[] = "HTTP_X_FORWARDED_HOST"
salt = "e0a81d6e54d6d2200efd0f0ef6ef8563"
trusted_hosts[] = "localhost"
trusted_hosts[] = "example.com"
trusted_hosts[] = "localhost:8080"
assume_secure_protocol = 1
force_ssl = 1
These options let Matomo know that it’s safe to use port 8080, and that it should assume it’s always being accessed over a secure connection.
Save and close the configuration file, then switch back to your browser and reload the page. The error should be gone, and you’ll be presented with a login prompt:
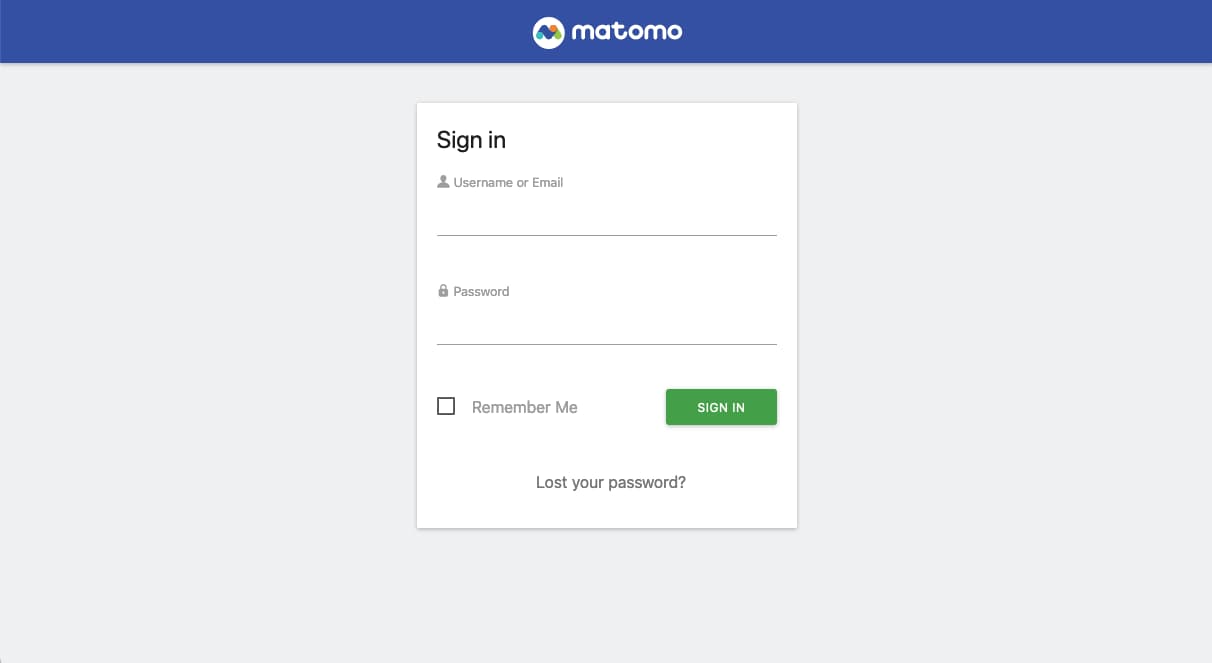
Log in with the admin account you created during setup, and you should be taken to the dashboard:
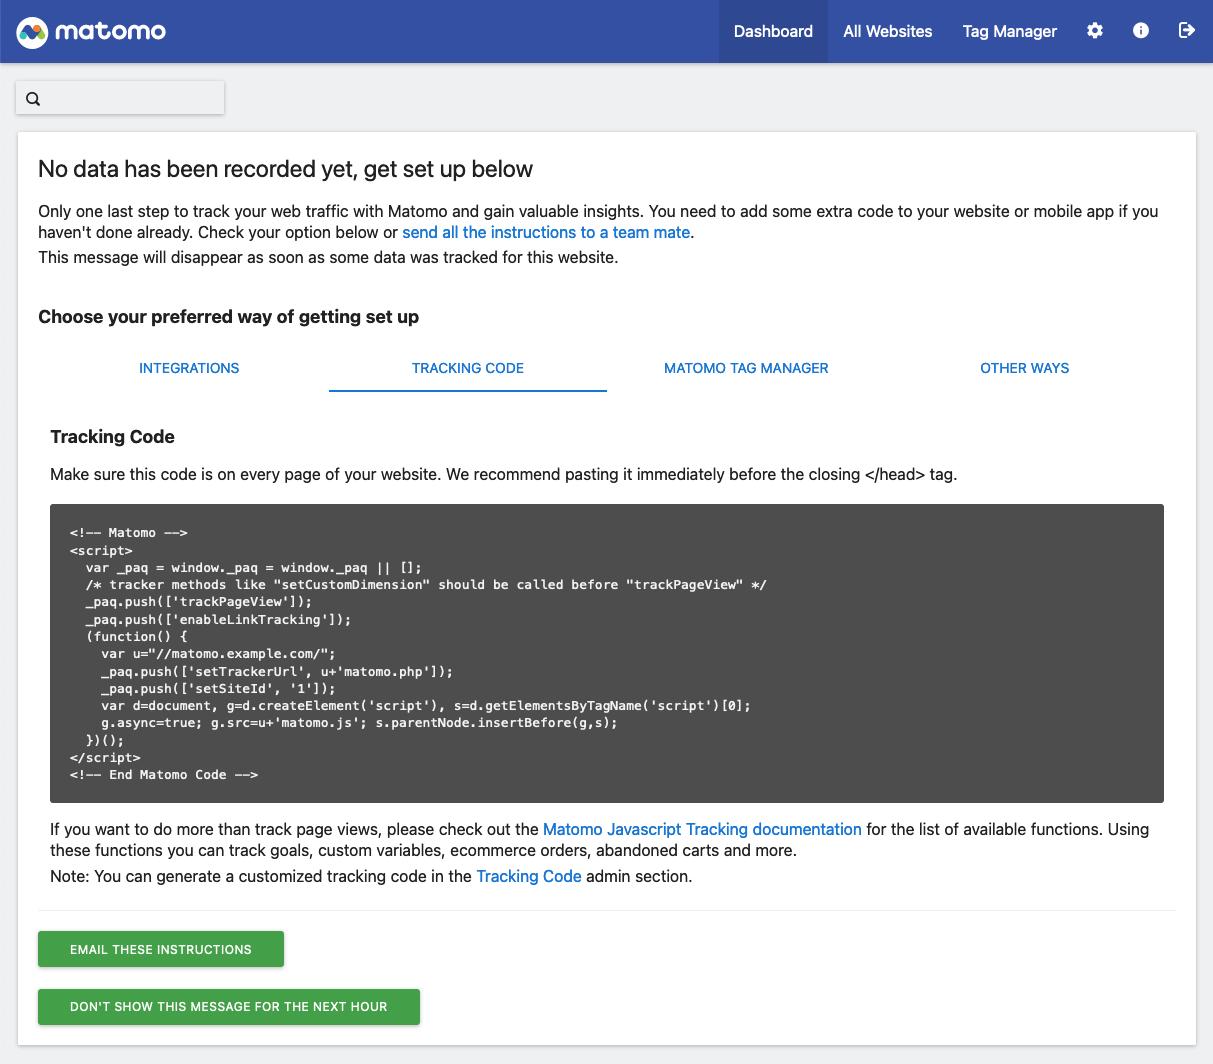
Because you’ve probably not set up your tracking code yet, the dashboard will indicate that no data has been recorded. Follow the instructions to finish setting up the JavaScript code on your website to start receiving analytics data.
Conclusion
In this tutorial, you launched the Matamo analytics app and a MariaDB database using Docker Compose, then set up an Nginx reverse proxy and secured it using Let’s Encrypt SSL certificates.
You’re now ready to set up your website and add the Matomo analytics tracking script. For more information about operating the Matomo software, please see the official Matomo documentation.
Thanks for learning with the DigitalOcean Community. Check out our offerings for compute, storage, networking, and managed databases.
About the author
Senior Technical Writer at DigitalOcean
Still looking for an answer?
This textbox defaults to using Markdown to format your answer.
You can type !ref in this text area to quickly search our full set of tutorials, documentation & marketplace offerings and insert the link!
 This work is licensed under a Creative Commons Attribution-NonCommercial- ShareAlike 4.0 International License.
Become a contributor for community
Get paid to write technical tutorials and select a tech-focused charity to receive a matching donation.

DigitalOcean Documentation
Full documentation for every DigitalOcean product.

Resources for startups and AI-native businesses
The Wave has everything you need to know about building a business, from raising funding to marketing your product.
The developer cloud
Scale up as you grow — whether you're running one virtual machine or ten thousand.

Start building today
From GPU-powered inference and Kubernetes to managed databases and storage, get everything you need to build, scale, and deploy intelligent applications.
