By Hathy A and Sharon Campbell

Introduction
Apache Accumulo is an open-source distributed NoSQL database based on Google’s BigTable. It is used to efficiently perform CRUD (Create Read Update Delete) operations on extremely large data sets (often referred to as Big Data). Accumulo is preferred over other similar distributed databases (such as HBase or CouchDB) if a project requires fine-grained security in the form of cell-level access control.
Accumulo is built on top of other Apache software. Accumulo represents its data in the form of key-value pairs and stores that data as files on HDFS (Apache’s Hadoop Distributed File System). It also uses Apache ZooKeeper to synchronize settings between all its processes.
In this tutorial you will learn how to:
- Install and configure Apache HDFS and ZooKeeper: These systems must be active before Accumulo is started
- Install and configure a standalone instance of Accumulo
Prerequisites
You will need the following:
- Ubuntu 14.04 server (preferably 32-bit)
- A sudo user
- At least 2 GB of swap space
Step 1 — Install and Configure JDK 7
Accumulo, HDFS, and ZooKeeper are all written in Java and need a JVM (Java Virtual Machine) to run. So, let’s start by installing the JDK.
Update the package list index.
sudo apt-get update
Install OpenJDK 7 using apt-get.
sudo apt-get install openjdk-7-jdk
Use nano to edit your shell environment file, .bashrc.
nano ~/.bashrc
Add JAVA_HOME as an environment variable at the end of the file.
export JAVA_HOME=/usr/lib/jvm/java-7-openjdk-i386
Note: The value of
JAVA_HOMEcan be different depending on your server’s architecture. For example, on a 64-bit server, the value would be/usr/lib/jvm/java-7-openjdk-amd64. You can see the exact path by listing the contents of the/usr/lib/jvm/directory. If your path is different from what’s shown here, make sure you make the appropriate changes here and elsewhere.
Save the file and exit nano. Update the environment variables of the current session by typing:
. ~/.bashrc
Edit the JVM’s java.security configuration file using nano.
sudo nano $JAVA_HOME/jre/lib/security/java.security
Search for the parameter securerandom.source and change the line so that it looks like this:
securerandom.source=file:/dev/./urandom
Save the file and exit nano. This change is necessary to decrease the JVM’s startup time. Not making this change can lead to very long startup times on most virtual servers.
Step 2 — Install SSH
Hadoop needs SSH and Rsync to manage its daemons. Install them using the following command:
sudo apt-get install ssh rsync
Step 3 — Enable Passwordless SSH Connectivity
Hadoop should be able to connect to your server over SSH without being prompted for a password.
Generate an RSA key using ssh-keygen.
ssh-keygen -P ''
Press ENTER when prompted, to choose the default values.
Add the generated key to the authorized_keys file.
cat ~/.ssh/id_rsa.pub >> ~/.ssh/authorized_keys
The values localhost and 0.0.0.0 should be added to the list of known hosts. The easiest way to do this is by running the ssh command.
Let us add localhost first.
ssh localhost
You will be prompted by a message that looks like this:
The authenticity of host 'localhost (127.0.0.1)' can't be established.
ECDSA key fingerprint is bf:01:63:5b:91:aa:35:db:ee:f4:7e:2d:36:e7:de:42.
Are you sure you want to continue connecting (yes/no)?
Type in yes and press ENTER.
Once the login is complete, exit the child SSH session by typing in:
exit
Let us add 0.0.0.0 now.
ssh 0.0.0.0
Type in yes and press ENTER when prompted.
Once again, exit the child SSH session by typing in:
exit
SSH setup is now complete.
Step 4 — Create a Downloads Directory
You will be downloading a couple of files for this tutorial. Though not really necessary, it is a good idea to store all your downloads in a separate directory.
mkdir -p ~/Downloads
Enter the directory.
cd ~/Downloads
Step 5 — Download Apache Hadoop
At the time of writing, the latest stable version of Hadoop is 2.6.0. Download it using wget.
wget "http://www.eu.apache.org/dist/hadoop/common/stable/hadoop-2.6.0.tar.gz"
Step 6 — Download Apache ZooKeeper
The latest stable version of ZooKeeper is 3.4.6. Download it using wget.
wget "http://www.eu.apache.org/dist/zookeeper/stable/zookeeper-3.4.6.tar.gz"
Step 7 — Download Apache Accumulo
The latest stable version of Accumulo is 1.6.1. Download it using wget.
wget "http://www.eu.apache.org/dist/accumulo/1.6.1/accumulo-1.6.1-bin.tar.gz"
Step 8 — Create an Installs Directory
Create a directory to store all of our Accumulo-related installations.
mkdir -p ~/Installs
Enter the directory.
cd ~/Installs
Step 9 — Install and Configure Hadoop
Use the tar command to extract the contents of hadoop-2.6.0-src.tar.gz.
tar -xvzf ~/Downloads/hadoop-2.6.0.tar.gz
Note: If you installed a different version of any of this software, please use the appropriate version in your file name.
Use nano to open hadoop-env.sh.
nano ~/Installs/hadoop-2.6.0/etc/hadoop/hadoop-env.sh
Look for the line that starts with export JAVA_HOME and change it to:
export JAVA_HOME=/usr/lib/jvm/java-7-openjdk-i386
Make sure this value is identical to the value you set in .bashrc.
By default Hadoop generates a lot of debug logs. To stop this behavior, look for the line that starts with export HADOOP_OPTS and change it to:
export HADOOP_OPTS="$HADOOP_OPTS -XX:-PrintWarnings -Djava.net.preferIPv4Stack=true"
Save and exit.
Use nano to open core-site.xml.
nano ~/Installs/hadoop-2.6.0/etc/hadoop/core-site.xml
Add a <property> block named fs.defaultFS. Its value should point to the namenode’s hostname and port (in our case, it is localhost and the default port 9000). Ignoring the comments, edit your file so that it looks like this:
<?xml version="1.0" encoding="UTF-8"?>
<?xml-stylesheet type="text/xsl" href="configuration.xsl"?>
<configuration>
    <property>
        <name>fs.defaultFS</name>
        <value>hdfs://localhost:9000</value>
    </property>
</configuration>
Save and exit.
Use nano to open hdfs-site.xml.
nano ~/Installs/hadoop-2.6.0/etc/hadoop/hdfs-site.xml
The following properties need to be added to this file:
-
dfs.replication: This number specifies how many times a block is replicated by Hadoop. By default, Hadoop creates3replicas for each block. In this tutorial, use the value1, as we are not creating a cluster. -
dfs.name.dir: This points to a location in the filesystem where the namenode can store the name table. You need to change this because Hadoop uses/tmpby default. Let us usehdfs_storage/nameto store the name table. -
dfs.data.dir: This points to a location in the filesystem where the datanode should store its blocks. You need to change this because Hadoop uses/tmpby default. Let us usehdfs_storage/datato store the data blocks.
Ignoring the comments, after adding these properties, your file should look like this:
<?xml version="1.0" encoding="UTF-8"?>
<?xml-stylesheet type="text/xsl" href="configuration.xsl"?>
<configuration>
    <property>
        <name>dfs.replication</name>
        <value>1</value>
    </property>
    <property>
        <name>dfs.name.dir</name>
        <value>hdfs_storage/name</value>
    </property>
    <property>
        <name>dfs.data.dir</name>
        <value>hdfs_storage/data</value>
    </property>
</configuration>
Use nano to create a new file named mapred-site.xml.
nano ~/Installs/hadoop-2.6.0/etc/hadoop/mapred-site.xml
Add a property named mapred.job.tracker to this file. This property contains the hostname and port number on which the MapReduce job tracker runs. For our setup, use localhost and the default port 9001.
Add the following content to the file:
<?xml version="1.0"?>
<?xml-stylesheet type="text/xsl" href="configuration.xsl"?>
<configuration>
     <property>
         <name>mapred.job.tracker</name>
         <value>localhost:9001</value>
     </property>
</configuration>
Enter Hadoop’s base directory (this is important because Hadoop creates the hdfs_storage directory in the current directory).
cd ~/Installs/hadoop-2.6.0/
The NameNode can now be initialized by typing in:
~/Installs/hadoop-2.6.0/bin/hdfs namenode -format
You should see quite a bit of output.
Next, start the NameNode by typing in:
~/Installs/hadoop-2.6.0/sbin/start-dfs.sh
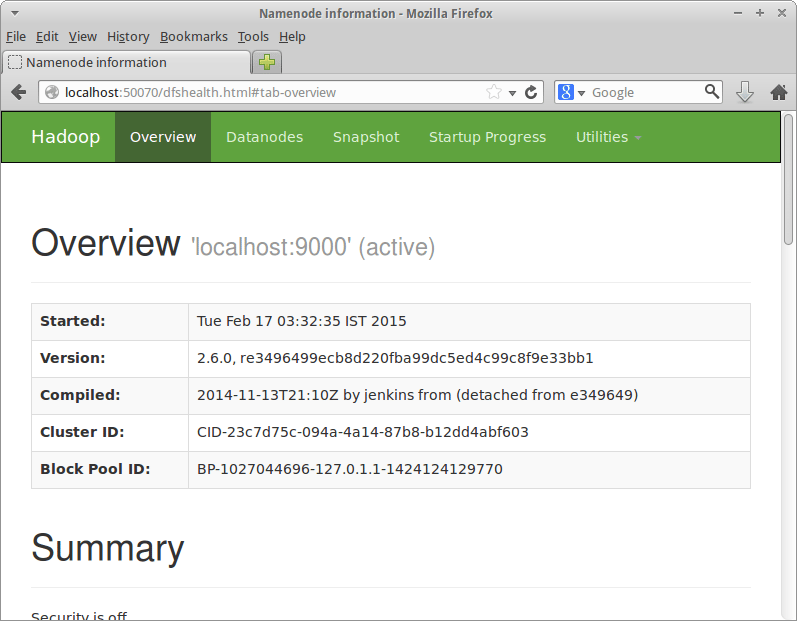
Wait a minute or two for it to start. Once started, you can use a browser to visit http://<your-ip>:50070/ and browse through the web interface of the NameNode.
Troubleshooting
If you are not able to access the web interface, check if the NameNode is active by using the following command:
jps
Your output should contain the following three processes along with the Jps process:
DataNodeNameNodeSecondaryNameNode
If you see that NameNode is not present in the output, perform the following steps. If they don’t execute in a block, you may have to run them separately. Comments are inluded in-line.
cd ~/Installs/hadoop-2.6.0/
~/Installs/hadoop-2.6.0/sbin/stop-dfs.sh # Stop Hadoop's nodes
rm -rf hdfs_storage # Delete the namenode data
rm -rf /tmp/hadoop-* # Delete the temporary directories
~/Installs/hadoop-2.6.0/bin/hdfs namenode -format # Reformat the namenode
Restart Hadoop using start-dfs.sh:
~/Installs/hadoop-2.6.0/sbin/start-dfs.sh
You should be able to access the web interface now.
Step 10 — Install and Configure ZooKeeper
Enter the Installs directory.
cd ~/Installs
Use tar to extract zookeeper-3.4.6.tar.gz.
tar -xvzf ~/Downloads/zookeeper-3.4.6.tar.gz
Copy the example file zoo_sample.cfg to zoo.cfg.
cp ~/Installs/zookeeper-3.4.6/conf/zoo_sample.cfg ~/Installs/zookeeper-3.4.6/conf/zoo.cfg
Configuration of ZooKeeper is now complete. Start ZooKeeper by typing in:
~/Installs/zookeeper-3.4.6/bin/zkServer.sh start
You should see output that looks like this:
JMX enabled by default
Using config: ~/Installs/zookeeper-3.4.6/bin/../conf/zoo.cfg
Starting zookeeper ... STARTED
Step 11 — Install and Configure Accumulo
Now that all its dependencies are satisfied, it is time to work on the installation of Accumulo itself.
Enter the Installs directory.
cd ~/Installs
Extract accumulo-1.6.1-bin.tar.gz using tar:
tar -xvzf ~/Downloads/accumulo-1.6.1-bin.tar.gz
Accumulo comes with sample configurations for servers with various memory sizes: 512 MB, 1 GB, 2 GB and 3 GB. I’m going to use the configuration for 512 MB in this tutorial. You can pick another configurations if your server has more memory.
Copy the 512 MB configuration files to the conf directory.
cp ~/Installs/accumulo-1.6.1/conf/examples/512MB/standalone/* ~/Installs/accumulo-1.6.1/conf/
Use nano to edit your shell environment again, using the .bashrc file.
nano ~/.bashrc
Add the following environment variables to this file:
- HADOOP_HOME: The path to the Hadoop installation
- ZOOKEEPER_HOME: The path to the ZooKeeper installation
Add the following lines to your file:
export HADOOP_HOME=~/Installs/hadoop-2.6.0/
export ZOOKEEPER_HOME=~/Installs/zookeeper-3.4.6/
Save and exit.
Update the environment so that the variables you added to .bashrc are available in the current session.
. ~/.bashrc
Use nano to edit accumulo-env.sh.
nano ~/Installs/accumulo-1.6.1/conf/accumulo-env.sh
By default, Accumulo’s HTTP monitor binds only to the local network interface. To be able to access it over the Internet, you have to set the value of ACCUMULO_MONITOR_BIND_ALL to true.
Find the line that starts with export ACCUMULO_MONITOR_BIND_ALL and uncomment it. It should look like this:
export ACCUMULO_MONITOR_BIND_ALL="true"
Save and exit.
Use nano to edit accumulo-site.xml.
nano ~/Installs/accumulo-1.6.1/conf/accumulo-site.xml
Accumulo’s worker processes communicate with each other using a secret key. This should be changed to a string which is secure. Search for the property instance.secret and change its value. I’m going to use this string: PASS1234. The XML for the property should look like this:
<property>
    <name>instance.secret</name>
    <value>PASS1234</value>
    <description>A secret unique to a given instance that all servers must know in order to communicate with one another.
      Change it before initialization. To
      change it later use ./bin/accumulo org.apache.accumulo.server.util.ChangeSecret --old [oldpasswd] --new [newpasswd],
      and then update this file.
    </description>
</property>
Next, add a new property named instance.volumes. The value of this property specifies where Accumulo should store its data in the HDFS. Let us store the data in the directory /accumulo.
<property>
    <name>instance.volumes</name>
    <value>hdfs://localhost:9000/accumulo</value>
</property>
Find the property trace.token.property.password, and set its value to something secure. Remember this value as you will need it in the next step. I am going to set this to mypassw.
  <property>
    <name>trace.token.property.password</name>
    <value>mypassw</value>
  </property>
Save and exit.
Initialize Accumulo.
~/Installs/accumulo-1.6.1/bin/accumulo init
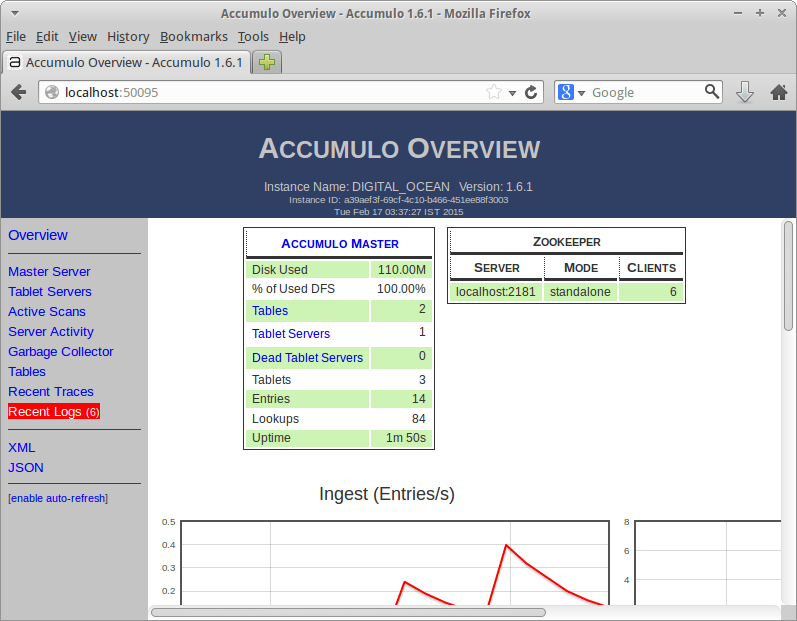
You will be prompted to enter an Instance name. Use any name of your choice. I choose DIGITAL_OCEAN.
Next, you will be prompted for a password. Type in the same password that you used for the property trace.token.property.password.
Once the command completes, you can start Accumulo.
~/Installs/accumulo-1.6.1/bin/start-all.sh
You might see a few warnings recommending higher values for certain system parameters. As we are creating a very small instance in this tutorial, you can ignore those warnings.
Once the startup is complete, you can use a browser to visit Accumulo’s web interface at http://<your-server-ip>:50095.
Conclusion
In this tutorial, you have learned how to set up Apache Accumulo and all the other components it depends on. We have created a very simple setup today using HDFS in pseudo-distributed mode that can run on a single small server. For optimal performance in a production scenario, HDFS should be running in the fully-distributed mode.
In production scenarios, it is also highly recommended that these processes be deployed on servers that have at least 8GB of RAM and 4 or more processor cores so that each process can use over 2GB of memory and a separate core. Alternately, you could deploy the components separately on different servers.
For more information, refer to Apache Accumulo’s user manual.
Thanks for learning with the DigitalOcean Community. Check out our offerings for compute, storage, networking, and managed databases.
About the author(s)
Hathy is an independent developer and blogger who loves tinkering with new frameworks, SDKs and devices.
Current fan and former Editorial Manager at DigitalOcean. Hi! Expertise in areas including Ubuntu, Docker, Rails, and more.
Still looking for an answer?
This textbox defaults to using Markdown to format your answer.
You can type !ref in this text area to quickly search our full set of tutorials, documentation & marketplace offerings and insert the link!
Thanks for the tutorial. I followed it along and got a working accumulo instance. But for some reason I am not able to connect to it from my client machine using the java. Are there some settings which prevent the connection? The code in the getConnector line. Also documented my problems on stackoverflow
Instance i = new ZooKeeperInstance("DIGITAL_OCEAN","46.101.199.216:2181");
    	 // WARN  org.apache.accumulo.core.client.ClientConfiguration  - Found no client.conf in default paths. Using default client configuration values.
    	 System.out.println("This is reached");
    	 Connector conn = i.getConnector("root", new PasswordToken("mypassw"));
    	 System.out.println("This is not reached");
Ok, found the problem. If you want to access accumulo from another server you will need to replace localhost with your FQDN in a couple of accumulo configs (see http://stackoverflow.com/questions/34075582/connection-to-accumulo-just-hangs-on-initialization).
Also I reccomend to replace the dataDir setting in ~/Installs/zookeeper-3.4.6/conf/zoo.cfg with something which is not tmp, since otherwise zookeeper will forget about your accumulo instance after restart.
I just used this for ubuntu 16.04, Hadoop 2.7.2, Accumulo 1.7.2 and Zookeeper 3.4.8, works great! But see the thread below if you need to connect an external client to Accumulo!
Note: I used Oracle Java 7 and did not follow the first part of the tutorial.
Thanks for the tutorial, in fact, the best one that I could find on this matter. Straightforward and flawless.
First, thank you for the good tutorial!
The current version of accumulo I used with Ubuntu 16.04 is 1.8.1.
In this version the web interface is no longer available at port 50095 but on 9995. Also good to note that with ubuntu 16.04 one can install zookeeper via apt.
In the accumulo-env.sh one then has to set ZOOKEEPER_HOME=/usr/share/java
 This work is licensed under a Creative Commons Attribution-NonCommercial- ShareAlike 4.0 International License.
Become a contributor for community
Get paid to write technical tutorials and select a tech-focused charity to receive a matching donation.

DigitalOcean Documentation
Full documentation for every DigitalOcean product.

Resources for startups and AI-native businesses
The Wave has everything you need to know about building a business, from raising funding to marketing your product.
The developer cloud
Scale up as you grow — whether you're running one virtual machine or ten thousand.

Start building today
From GPU-powered inference and Kubernetes to managed databases and storage, get everything you need to build, scale, and deploy intelligent applications.
