By Joshua Tan and Brian Hogan

Introduction
Webmin is a web front-end that allows you to manage your server remotely through a browser. Virtualmin is a plugin for Webmin that simplifies the management of multiple virtual hosts through a single interface, similar to cPanel or Plesk. With Virtualmin, you can manage user accounts, Apache virtual hosts, DNS entries, MySQL databases, mailboxes, and much more.
In this tutorial, you’ll use a script to install the free edition, Virtualmin GPL. This script will install everything you need to use Virtualmin, including Webmin and the following prerequisites:
- A LAMP stack (Apache, PHP, and MySQL), for serving web sites and web applications.
- BIND, a DNS server.
- PostFix, a mail server.
Once you install Virtualmin and its components, you’ll configure Webmin through its graphical interface and create a new virtual host with Virtualmin. Once you complete this tutorial you will be able to create any number of user accounts to host multiple domains on a single server through your browser.
Warning: Do not follow this tutorial on a live production server that is already running Apache, MySQL and PHP, as this can result in data loss. Use a new server and transfer your data over instead.
Prerequisites
To complete this tutorial, you will need:
- One new Ubuntu 16.04 server with at least 1GB of RAM set up by following the Ubuntu 16.04 initial server setup guide, including a sudo non-root user and a firewall.
- A Fully-Qualified Domain Name configured to point to your server. You can learn how to point domain names to DigitalOcean Droplets by following the How To Set Up a Host Name with DigitalOcean tutorial.
- Two registered custom nameservers for Virtualmin by following the How To Create Vanity or Branded Nameservers with DigitalOcean Cloud Servers tutorial. Register
ns1.your_domain.comandns2.your_domain.com, whereyour_domain.comis your domain name.
Step 1 — Setting the Hostname and FQDN
For Virtualmin to work properly, you need to configure the hostname and FQDN on the server itself by editing the /etc/hostname and /etc/hosts files, as well as update your DNS settings so DNS lookups resolve properly.
First, log in to your server as your non-root user. Once you have logged in, update the package database:
- sudo apt-get update
Then install any necessary updates and packages to ensure you start with a stable and up-to-date system.
- sudo apt-get dist-upgrade -y
Next, change the hostname to match the FQDN you’ve pointed to the server in the prerequisites.
To check the current server hostname, run this command:
- hostname -f
To change the hostname for your server, open the file /etc/hostname in your editor:
- sudo nano /etc/hostname
Delete the current hostname and replace it with your hostname:
your_hostname
Use just the hostname, not the entire FQDN, in this file. For example, if your FQDN is virtualmin.example.com, enter virtualmin in this file.
Save the file and exit the editor.
Next, add both the hostname and FQDN in the /etc/hosts file:
sudo nano /etc/hosts
Modify the line that starts with 127.0.0.1 to use your FQDN and hostname, in that order:
127.0.1.1	your_hostname.your_domain.com your_hostname
127.0.0.1	localhost
...
Remember to replace your_hostname and your_domain.com with your own hostname and domain name. Save the file and exit the editor.
If this line doesn’t exist in your file, add it to avoid some compatibility issues with other software on your Ubuntu system. You can learn more about this in the official Debian manual entry on setting up hostnames.
To check if the name has been changed correctly, reboot your server.
- sudo reboot
Then ssh into your server again. You should see the new hostname on your terminal prompt. For example:
your_user@your_hostname:~$
Use the hostname command to verify that the FQDN was set correctly:
hostname -f
You’ll see your FQDN in the output:
outputyour_hostname.your_domain.com
If you don’t, double-check the changes you made to your configuration, correct any errors, and reboot.
Next, edit the network configuration file so that it uses this server as one of the DNS servers to resolve domain names. Open the configuration file:
- sudo nano /etc/network/interfaces.d/50-cloud-init.cfg
Add the IP address 127.0.0.1 to the configuration file. Look for the following line:
dns-nameservers 8.8.8.8 8.8.4.4
Change it to:
dns-nameservers 8.8.8.8 8.8.4.4 127.0.0.1
Make sure there is a space before 127.0.0.1. Save the file and exit the editor.
You have prepared the server by setting the hostname, FQDN, and the network configuration. Let’s install Virtualmin.
Step 2 — Installing Virtualmin
To install Virtualmin, download and run the official Virtualmin installation script, which will install Virtualmin, and Webmin, along with a LAMP stack, BIND, and Postfix.
Use wget to download the script:
- wget https://software.virtualmin.com/gpl/scripts/install.sh
While this script comes from the official Virtualmin website, you may want to open the script in your editor and review the contents before running it.
- sudo nano ./install.sh
Once you’re comfortable with the contents of the script, use it to install Virtualmin and its prerequisites:
- sudo /bin/sh ./install.sh
The script will display a warning message about existing data and compatible operating systems. Press y to confirm that you want to continue the installation.
The script will take some time to complete all the steps as it installs various software packages and components.
Once the script completes, you can configure the root password.
Step 3 — Configuring Webmin’s Root Password
Virtualmin is an add-on to Webmin, and by default, Webmin uses the system root user and password for the web interface login. If you log in to your server using an SSH key, you may not have the system root password, or may not feel comfortable using it to log in remotely through a browser. Let’s tell Webmin to use a different password for its web interface. This process won’t change the system root password; it’ll just tell Webmin to use the password you specify for the login.
To change Webmin’s root password, use the following command:
- sudo /usr/share/webmin/changepass.pl /etc/webmin root yourpassword
Replace yourpassword with your preferred password.
Next, restart the Webmin service so the changes take effect.
- sudo systemctl restart webmin
Next, we will configure Webmin using the web front-end.
Step 4 — Configuring Webmin Using The Post-Installion Wizard
To configure Webmin, we’ll use its web-based Post-Installation Wizard. Open your web browser and navigate to https://your_server_ip:10000. You can also use your fully-qualified domain name to access the site.
Note: Your browser may show a “Your connection is not secure” or “Your connection is not private” warning since Virtualmin uses a self-signed certificate. This warning is normal. You can add Let’s Encrypt SSL certificate after you have completed this tutorial by following Step 2 of the How to Install Webmin on Ubuntu 16.04 tutorial.
Log in as the root user with the newly-changed password you set in the previous step.
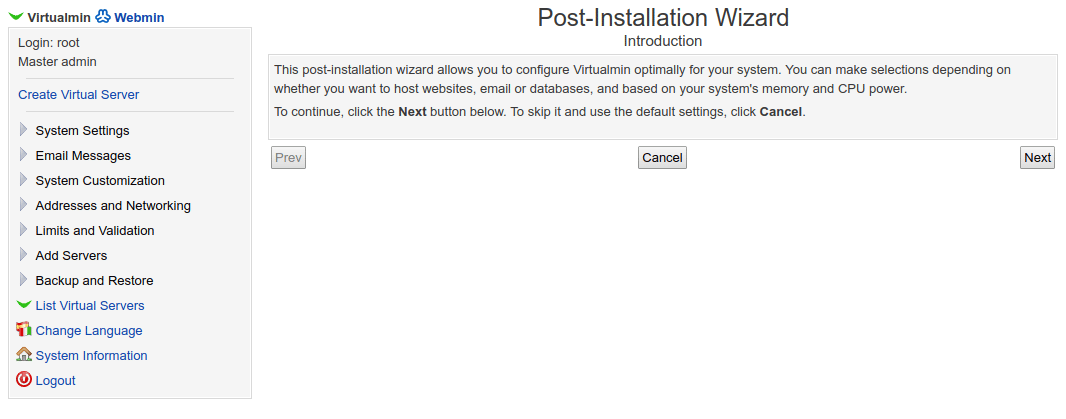
Once you have logged in, you’ll see the Introduction screen stating that you are going through the steps to configure Virtualmin. Press Next to continue.
On the Memory use screen, select No for Preload Virtualmin libraries, since you don’t need to run the Virtualmin UI all the time. Select Yes for Run email domain lookup server to enable faster mail processing. Press Next to continue.
On the Virus scanning screen, select No for Run ClamAV server scanner so you’ll use less RAM. Press Next to continue.
On the Spam filtering screen, select No for Run SpamAssassin server filter and press Next to continue.
The next three screens configure the database server:
- On the Database servers screen, select Yes to Run MySQL database server and no to Run PostgreSQL database server. Press Next to continue.
- On the MySQL password screen, enter your desired MySQL root password. It should be different from the root password you used to log in to Webmin.
- On the MySQL database size screen, select the RAM option that matches the amount of RAM your server has. For a 1GB server, select Large system (1G) on which MySQL is heavily used. Press Next to continue.
Next, you’ll see a screen like the following, where you’re asked to enter nameservers:
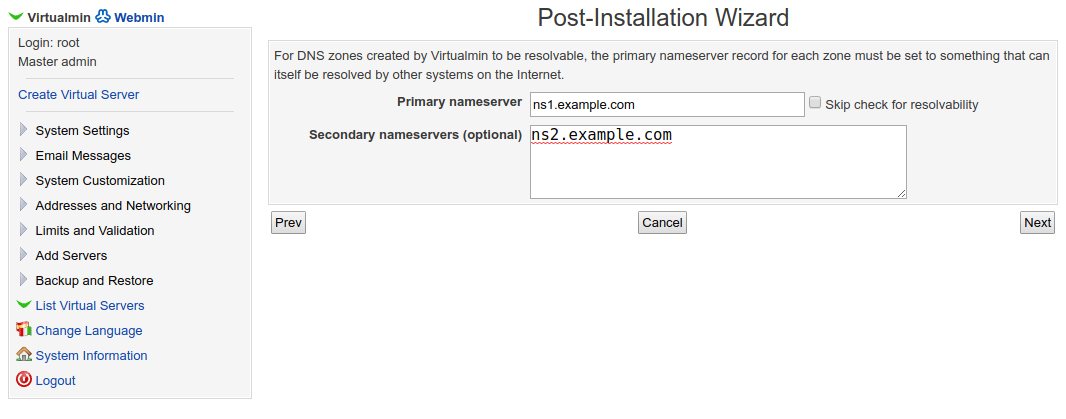
Enter your primary and secondary nameservers here which you configured in the prerequisites. If you haven’t set these up, check the Skip check for resolvability box to avoid error message and proceed.
Next, on the Password storage mode screen, select Store plain-text passwords if you must support password recovery. Otherwise, choose Only store hashed passwords. After clicking Next, you will see the All done screen. Click Next to end.
Finally, you’ll be presented with the Virtualmin/Webmin dashboard.
You may see a message at the top stating that Virtualmin comes with a new theme. To activate the new theme, click the Switch Themes button. The page will reload but may look unstyled, as the new theme’s CSS file might not load properly. To solve this issue, refresh your browser manually.
You may also see a message stating that Virtualmin’s configuration has not been checked. Click the Re-check and refresh configuration button to check your Virtualmin configuration. Address any errors that the check reports.
Your server is now configured. Let’s use the interface to create a new virtual server.
Step 5 — Creating A New Virtual Server
Virtualmin makes it easy to set up new virtual hosts, as well as users to manage those hosts.
Click on the Virtualmin tab on the left sidebar to display the Virtualmin sidebar menu. Next, click Create Virtual Server. You’ll see the following screen:

On the form that appears, enter the following:
- For Domain name, enter the domain name you plan to use for the new virtual server.
- For Description, enter an appropriate description of your server.
- For Administration password, enter a password that you’ll use to manage this virtual server. It should be different from other passwords you’ll use.
Leave all the other options at their default values.
Click Create Server to create the new virtual server. The screen will display output as Virtualmin creates the various components for you.
You have just created a new virtual server using Virtualmin, as well as a user that can manage the server. The username will be displayed in the output, and the password will be the password you set. You can provide that username and password to another user so they can manage the virtual server through Virtualmin themselves.
To log out of Virtualmin, click the red exit arrow icon at the bottom of the left sidebar.
Conclusion
In this tutorial, you configured VirtualMin and used its interface to create a virtual server and a new administrative user for that server.
To learn more about Virtualmin, look at the official Virtualmin documentation. Don’t forget to get familiar with the Webmin documentaiton, since you can use Webmin to manage services, install updates, and do other system administration tasks.
Thanks for learning with the DigitalOcean Community. Check out our offerings for compute, storage, networking, and managed databases.
About the author(s)
I'm a Joomla website developer & run my servers on desktop & cloud. My interest includes testing & using various Linux distros.
Managed the Write for DOnations program, wrote and edited community articles, and makes things on the Internet. Expertise in DevOps areas including Linux, Ubuntu, Debian, and more.
Still looking for an answer?
This textbox defaults to using Markdown to format your answer.
You can type !ref in this text area to quickly search our full set of tutorials, documentation & marketplace offerings and insert the link!
Hello First of all i’d like to thank you mr. Joshua Tan for this detailed tutorial i followed up the steps but i had two problems
problem 1 when i rebooted the droplet , the ufw firewall was reset and all ports was blocked , so i had to open ports manually is there a solution for this ?
Problem 2 i want to activate bind dns server to manage dns on my own so i added a new virtual host with a new domain mynewdomain.com and i made two glue records ns1.mynewdomain.com and ns2.mynewdomain.com both directed to my droplet ip address and i updated the name server to be ns1.mynewdomain.com ,ns2.mynewdomain.com
but when i test the dns using http://www.webdnstools.com/dnstools/check-domain-results i get this error and opening the domain say no dns recorded
A search was performed starting with the root servers, but no NS records were found for this domain.
Try again as the name servers for this domain may have been busy and didn't respond in time. If this error persists, there may be a problem with your name servers.
note : in order to activate bind dns server i have added a nameserver in resolv.conf 127.0.1.1 , this was suggested by the virtual min when i run the recheck configuration Any suggestions ? Thank You in advance :)
Thanks for the manual. I am grateful you put so much effort in it. But please update it as it has also some serious problems:
- it starts with referring to another page for initial setup, but it is unclear whether the firewall should be set up. The text claims yes, a comment claims no and it is unclear how Virtualmin should work with the firewall.
- the example is of the type example.mydomain.com. But most installations won’t use a subdomain and it is unclear how things should be set in that case.
- Virtualmin is downloaded in the article with the command “wget https://software.virtualmin.com/gpl/scripts/install.sh”. That didn’t work for me. After consulting the virtualmin website it appeared that https doesn’t work, only http.
- In the virtualmin setup it is unclear to me how I should deal with the nameservers. Do I really need to set up ns1.mydomain.com when there is already ns1.digitalocean.com pointing to me?
- When I am finished with the Virtualmin setup and do the check I get the dreaded “Virtualmin is configured to setup DNS zones, but this system is not setup to use itself as a DNS server. Either add 127.0.0.1 to the list of DNS servers, or turn off the BIND feature on the module config page.” error. When I check 127.0.0.1 is missing. But it is impossible for me to add. The addition is just ignored.
Thanks for reading my rant. I hope someone can address the point I mentioned.
i do not have this file: /etc/network/interfaces.d/50-cloud-init.cfg. would you please give me another option? (i did not register in the droplet.)
had a few issues by setting up virtualmin 127.0.0.1 but this fixed it for me https://tjosm.com/6430/fix-system-is-not-setup-to-use-itself-as-a-dns-server/
▣□□ Phase 1 of 3: Setup Downloading repository metadata [ ✔ ] Enabling universe repositories, if not already available [ ✔ ] Disabling cdrom: repositories [ ✔ ] Cleaning out old metadata [ ✔ ] Downloading RPM-GPG-KEY-virtualmin-6 [ ✔ ] Downloading RPM-GPG-KEY-webmin [ ✔ ] Installing Virtualmin 6 key [ ✔ ] Installing Webmin key [ ✔ ] Updating apt metadata [ ✔ ]
▣▣□ Phase 2 of 3: Installation Installing Webmin [ ✔ ] Installing Usermin [ ✔ ] Installing fail2ban [ ✔ ] Removing nginx (if installed) before LAMP installation. ▒▒▒▒███
stocked at this stage, waited for 2 hours and nothing!
i am installing virtualmin on ubuntu 16.04 LAMP server, already installed webmin and it is working fine now, need to install the virtualmin plugin. any advise?
Great job guys Am new to this server and dns stuff so pardon me guys FYI I got a little bit confused at the hostname and hosts file section, because of this i finished the whole tutorial successfully but could not log into the system, only to re realize that i had to have an A record of the chosen hostname in order to access the server in the browser on port 10000 nice tuts! my website here
Thanks for this, I will give this ago. Currently using Sentora but want a control panel which works on new versions of linux.
Is there an updated guide on how to install Virtualmin?
I have already installed Webmin using this guide: How To Install Webmin on Ubuntu 22.04
 This work is licensed under a Creative Commons Attribution-NonCommercial- ShareAlike 4.0 International License.
Become a contributor for community
Get paid to write technical tutorials and select a tech-focused charity to receive a matching donation.

DigitalOcean Documentation
Full documentation for every DigitalOcean product.

Resources for startups and AI-native businesses
The Wave has everything you need to know about building a business, from raising funding to marketing your product.
The developer cloud
Scale up as you grow — whether you're running one virtual machine or ten thousand.

Start building today
From GPU-powered inference and Kubernetes to managed databases and storage, get everything you need to build, scale, and deploy intelligent applications.
