By Savic and Rachel Lee

The author selected the Free and Open Source Fund to receive a donation as part of the Write for DOnations program.
Introduction
Updates to resources hosted on Kubernetes are scheduled for propagation almost immediately. Kubernetes can monitor the health of the cluster and restart containers if needed, but it does not include a strategy to deal with bad or buggy containers. This means that if the new container release is applied and starts behaving unexpectedly, Kubernetes won’t be able to properly resolve the situation by initiating a rollback to an earlier version or by stopping the propagation entirely.
Flagger is a progressive delivery operator for Kubernetes that resolves the outlined problem by gradually shifting traffic to the new release while monitoring configured metrics. It can perform automated analysis and testing on the new release, deciding whether to propagate it to the whole cluster or stop if issues are found. Flagger slowly increases the load on the new release while keeping the old one available, ensuring minimal downtime. It can send notifications to Slack, Microsoft Teams, and other platforms to notify you and your team of transpired events.
In this tutorial, you’ll install Flagger and use it to set up progressive delivery for the podinfo app to your DigitalOcean Kubernetes cluster. podinfo is a web app that provides details about the environment it’s running in. You’ll set up Flagger to watch over its deployed resources, automatically test new releases, and notify you on Slack using webhooks. In the end, you’ll quickly be informed if the requested changes have issues, without leaving the cluster deployments in an unusable state.
Prerequisites
Before you begin this tutorial, you’ll need:
-
A DigitalOcean Kubernetes cluster, version 1.19 or newer, with your connection configuration configured as the
kubectldefault. Instructions on how to configurekubectlare shown under the Connect to your Cluster step shown when you create your cluster. To learn how to create a Kubernetes cluster on DigitalOcean, see Kubernetes Quickstart. -
The Helm package manager installed on your local machine. To do this, complete Step 1 of the How To Install Software on Kubernetes Clusters with the Helm 3 Package Manager tutorial.
-
The Nginx Ingress Controller and Cert-Manager installed on the cluster. For a guide on how to do this, see How To Set Up an Nginx Ingress on DigitalOcean Kubernetes Using Helm.
-
A Slack workspace you’re a member of. To learn how to create a workspace, visit the official docs.
-
A domain name with a DNS A record pointed to the DigitalOcean Load Balancer used by the Ingress. If you are using DigitalOcean to manage your domain’s DNS records, consult How to Manage DNS Records to create A records. In this tutorial, we’ll refer to the A record as
app.your_domain.Note: The domain name you use in this tutorial must differ from the one used in the How To Set Up an Nginx Ingress on DigitalOcean Kubernetes prerequisite tutorial.
Step 1 — Installing Flagger and Configuring Nginx Ingress Controller
In this section, you’ll install Flagger to your cluster using Helm. You’ll also configure the Nginx Ingress Controller to make its internal metrics accessible to other applications, which Flagger will use to decide whether to allow or deny the new release, depending on how it performs.
You’ll first need to add the repository containing Flagger to Helm by running:
- helm repo add flagger https://flagger.app
The output will look similar to this:
Output"flagger" has been added to your repositories
Update Helm to let it know what it contains:
- helm repo update
Then, run the following command to install Flagger:
- helm install flagger flagger/flagger \
- --set prometheus.install=true \
- --set meshProvider=nginx
This command installs Flagger from the chart repository which you’ve just added and names the Helm release flagger. Since it will be monitoring a web app, the flagger release will be tied to the Nginx Ingress controller.
The output will look similar to the following, detailing that Flagger is deployed:
OutputNAME: flagger
LAST DEPLOYED: ...
NAMESPACE: default
STATUS: deployed
REVISION: 1
TEST SUITE: None
NOTES:
Flagger installed
To expose the Nginx Ingress Controller metrics, you’ll need to set additional variables within its Helm release, while retaining the already defined ones. You can do so by running helm upgrade and passing in the --reuse-values parameter, along with the new variable values:
- helm upgrade nginx-ingress ingress-nginx/ingress-nginx \
- --reuse-values \
- --set controller.metrics.enabled=true \
- --set controller.podAnnotations."prometheus\.io/scrape"=true \
- --set controller.podAnnotations."prometheus\.io/port"=10254
This command modifies the nginx-ingress Helm release and enables Prometheus metrics collection on the controller and its pods.
The output will look similar to this:
OutputRelease "nginx-ingress" has been upgraded. Happy Helming!
NAME: nginx-ingress
LAST DEPLOYED: ...
NAMESPACE: default
STATUS: deployed
REVISION: 2
TEST SUITE: None
NOTES:
The ingress-nginx controller has been installed.
...
Note that the revision number is now 2, indicating that an upgrade has happened.
In this section, you’ve installed Flagger and configured the Nginx Ingress Controller to expose its internal metrics. In the next step, you’ll deploy an app and set up Flagger to control its releases.
Step 2 — Deploying an App
Now you’re going to deploy the podinfo web app and create a canary resource to control its releases. Canary resources come from Flagger and tell it how, when, and for how long to test the new release before applying or denying it. They also control the flow of gradually diverting traffic from the old release to the new one.
The podinfo app will be stored in a namespace called test. Run the following command to create it:
- kubectl create ns test
Then, deploy podinfo by running:
- kubectl apply -k https://github.com/fluxcd/flagger//kustomize/podinfo?ref=main
This command will pull the podinfo manifests from the official Flagger GitHub repository and apply them to your cluster.
kubectl will display the following output:
Outputdeployment.apps/podinfo created
horizontalpodautoscaler.autoscaling/podinfo created
To verify that it’s been deployed, run the following command:
- kubectl get pods -n test
You’ll see output similar to this:
OutputNAME                       READY   STATUS    RESTARTS   AGE
podinfo-78fd6c49bf-jsjm5   1/1     Running   0          18s
podinfo-78fd6c49bf-k2nh4   0/1     Running   0          3s
Now that the pods are running, you’ll create an Ingress to expose the app at your domain. Open a file called podinfo-ingress.yaml for editing:
- nano podinfo-ingress.yaml
Add the following lines:
apiVersion: networking.k8s.io/v1
kind: Ingress
metadata:
  name: podinfo
  namespace: test
  labels:
    app: podinfo
spec:
  ingressClassName: nginx
  rules:
    - host: "app.your_domain"
      http:
        paths:
          - pathType: Prefix
            path: "/"
            backend:
              service:
                name: podinfo
                port:
                  number: 80
This Ingress exposes the podinfo service at the app.your_domain domain. Remember to replace it with your own domain, then save and close the file.
Note that the podinfo service does not yet exist in your cluster. It will be created later by Flagger automatically as part of the canary. This won’t prevent the Ingress from being deployed.
Create the Ingress in Kubernetes by running the following command:
- kubectl apply -f podinfo-ingress.yaml
Before you create the canary, you’ll need to deploy Flagger’s load tester, which allows canary resources to test releases by sending HTTP requests. Run the following command to install it in the test namespace using Helm:
- helm install flagger-loadtester flagger/loadtester -n test
Helm will display the following output:
OutputNAME: flagger-loadtester
LAST DEPLOYED: Thu Jan  6 11:37:45 2022
NAMESPACE: test
STATUS: deployed
REVISION: 1
TEST SUITE: None
NOTES:
Flagger's load testing service is available at http://flagger-loadtester.test/
You’ll now define the canary and store it in a file called podinfo-canary.yaml. Open it for editing by running:
- nano podinfo-canary.yaml
Add the following lines:
apiVersion: flagger.app/v1beta1
kind: Canary
metadata:
  name: podinfo
  namespace: test
spec:
  provider: nginx
  targetRef:
    apiVersion: apps/v1
    kind: Deployment
    name: podinfo
  ingressRef:
    apiVersion: networking.k8s.io/v1
    kind: Ingress
    name: podinfo
  progressDeadlineSeconds: 60
  service:
    port: 80
    targetPort: 9898
  analysis:
    interval: 10s
    threshold: 10
    maxWeight: 50
    stepWeight: 5
    metrics:
    - name: request-success-rate
      thresholdRange:
        min: 99
      interval: 1m
    webhooks:
      - name: acceptance-test
        type: pre-rollout
        url: http://flagger-loadtester.test/
        timeout: 30s
        metadata:
          type: bash
          cmd: "curl -sd 'test' http://podinfo-canary/token | grep token"
      - name: load-test
        url: http://flagger-loadtester.test/
        timeout: 5s
        metadata:
          cmd: "hey -z 1m -q 10 -c 2 http://app.your_domain/"
First, you set the name and namespace in which the canary will reside. Under spec, you first define the targetRef, which specifies the deployment to watch over, which is podinfo. Similarly, the accompanying Ingress which you’ve just created is specified under ingressRef.
With progressDeadlineSeconds, you allow the canary to be idle for a maximum of 60 seconds at any moment, before the new changes are completely reverted. This prevents stalling and sets a deadline for its execution. Then, you define the podinfo service that the Ingress will use. Flagger may also create multiple temporary Services during the canary execution, but the main one will always be available during the lifetime of the canary.
The analysis block defines how Flagger will look at the metrics it receives from the Nginx Ingress Controller. interval instructs it to look at them every 10 seconds, and threshold limits how many times metric checks can fail or be unavailable before the new release is rolled back. The maximum percentage of traffic that can be routed to the new release is 50, as specified in maxWeight. stepWeight controls how much the traffic towards the canary will increase with every testing step.
The next two sections, metrics and webhooks, define how the new release will be tested — by creating traffic using the Load Tester you deployed previously, and monitoring the success rate of the requests. The release passes testing if the percentage of successful requests is 99% or higher.
Remember to replace the highlighted domain with your own, then save and close the file.
Roll it out with kubectl:
- kubectl apply -f podinfo-canary.yaml
You’ll see the canary being created:
Outputcanary.flagger.app/podinfo created
You can now navigate to app.your_domain. You’ll see the podinfo app:
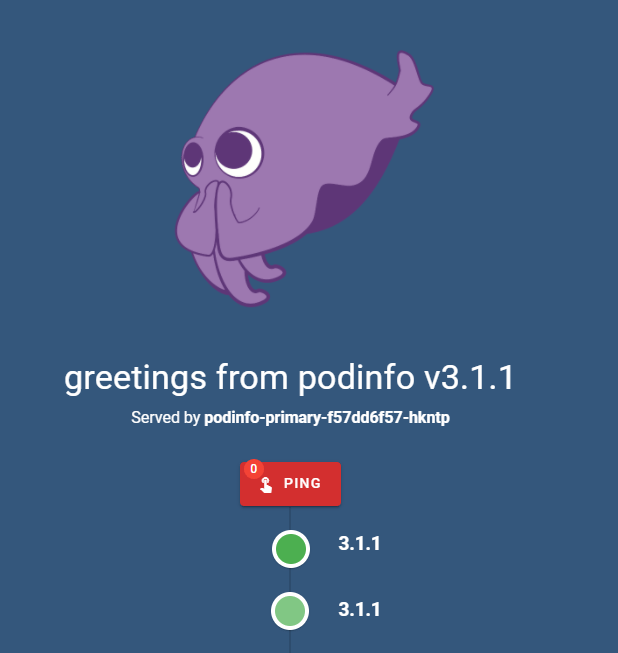
The main page shows the version of podinfo that has been served to you and from which pod. You can press the Ping button to refresh version numbers of other pods.
To verify that Flagger takes over the process of updating the deployment as per the configuration outlined in the canary, run the following command to set a different version of podinfo:
- kubectl set image deployment/podinfo podinfod=stefanprodan/podinfo:6.0.3 -n test
The deployment will be updated:
Outputdeployment.apps/podinfo image updated
Flagger will detect that the deployment revision number changed, which you can check by listing the events associated with the podinfo canary:
- kubectl describe canary/podinfo -n test
After some time, the output will be similar to this:
OutputEvents:
  Type     Reason  Age                From     Message
  ----     ------  ----               ----     -------
  Normal   Synced  117s               flagger  New revision detected! Scaling up podinfo.test
  Warning  Synced  107s               flagger  canary deployment podinfo.test not ready: waiting for rollout to finish: 0 of 2 (readyThreshold 100%) updated replicas are available
  Warning  Synced  97s                flagger  canary deployment podinfo.test not ready: waiting for rollout to finish: 1 of 2 (readyThreshold 100%) updated replicas are available
  Normal   Synced  87s                flagger  Starting canary analysis for podinfo.test
  Normal   Synced  87s                flagger  Pre-rollout check acceptance-test passed
  Normal   Synced  87s                flagger  Advance podinfo.test canary weight 5
  Warning  Synced  67s (x2 over 77s)  flagger  Halt advancement no values found for nginx metric request-success-rate probably podinfo.test is not receiving traffic: running query failed: no values found
  Normal   Synced  57s                flagger  Advance podinfo.test canary weight 10
  Normal   Synced  47s                flagger  Advance podinfo.test canary weight 15
  Normal   Synced  37s                flagger  Advance podinfo.test canary weight 20
  Normal   Synced  27s                flagger  Advance podinfo.test canary weight 25
  ...
Flagger logs all actions it takes according to the canary definition. After it detects a new revision, it spins up test pods from it and starts the analysis by advancing the canary weight, meaning that more traffic is being diverted to the new pods.
Return to your browser and watch the version numbers flicker as the app continually refreshes itself. The versions are changing because Flagger is increasing the quantity of traffic that gets routed to the new release that is being tested:
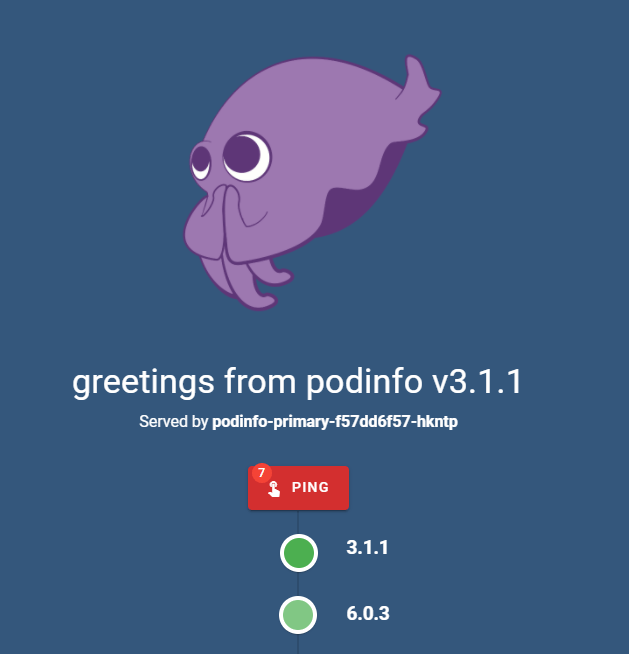
Flagger denotes the traffic shifts with events starting with Advance podinfo.test canary weight, followed by the percentage of traffic being diverted:
Output...
  Normal   Synced  116s                  flagger  Advance podinfo.test canary weight 10
  Normal   Synced  106s                  flagger  Advance podinfo.test canary weight 15
...
After some time, the canary deployment should succeed and the version numbers will stabilize:
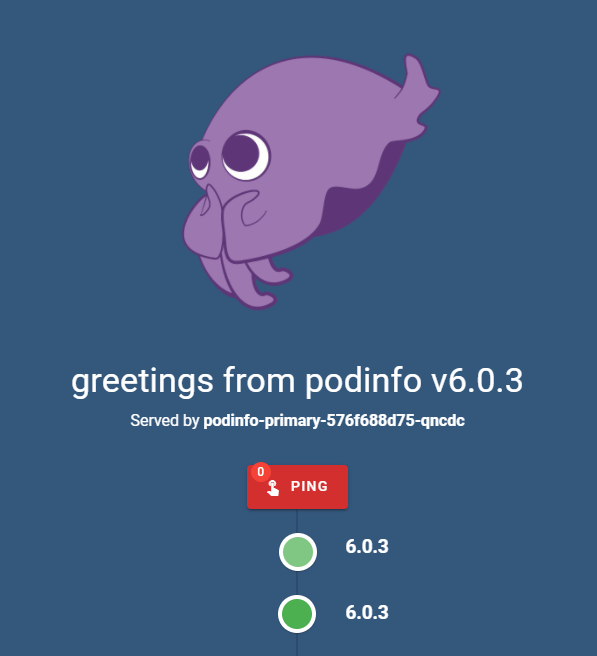
The final event log of the canary will look similar to this:
OutputEvents:
  Type     Reason  Age                   From     Message
  ----     ------  ----                  ----     -------
  Normal   Synced  2m56s                 flagger  New revision detected! Scaling up podinfo.test
  Warning  Synced  2m46s                 flagger  canary deployment podinfo.test not ready: waiting for rollout to finish: 0 of 2 (readyThreshold 100%) updated replicas are available
  Warning  Synced  2m36s                 flagger  canary deployment podinfo.test not ready: waiting for rollout to finish: 1 of 2 (readyThreshold 100%) updated replicas are available
  Normal   Synced  2m26s                 flagger  Starting canary analysis for podinfo.test
  Normal   Synced  2m26s                 flagger  Pre-rollout check acceptance-test passed
  Normal   Synced  2m26s                 flagger  Advance podinfo.test canary weight 5
  Warning  Synced  2m6s (x2 over 2m16s)  flagger  Halt advancement no values found for nginx metric request-success-rate probably podinfo.test is not receiving traffic: running query failed: no values found
  Normal   Synced  116s                  flagger  Advance podinfo.test canary weight 10
  Normal   Synced  106s                  flagger  Advance podinfo.test canary weight 15
  Normal   Synced  96s                   flagger  Advance podinfo.test canary weight 20
  Normal   Synced  86s                   flagger  Advance podinfo.test canary weight 25
  Normal   Synced  76s                   flagger  Advance podinfo.test canary weight 30
  Warning  Synced  16s                   flagger  podinfo-primary.test not ready: waiting for rollout to finish: 1 old replicas are pending termination
  Normal   Synced  6s (x6 over 66s)      flagger  (combined from similar events): Routing all traffic to primary
The last event says that traffic will be routed to the primary service, meaning that the canary deployment has finished.
In this step, you’ve deployed the podinfo app and created an Ingress to expose it at your domain. You’ve also created a canary resource to control and test new deployment revisions. You’ll now configure Flagger to report canary events to Slack for better visibility.
Step 3 — Reporting to Slack
You’ll now set up Flagger to send its logs to your Slack workspace, so you and your team will always be able to see full log of events through time.
To use Slack integration, you’ll need to have an incoming webhook on Slack for your workspace. Incoming webhooks are a simple way for an application to provide real-time information from other applications. If you haven’t ever created a webhook, you’ll first need to create an app for your workspace.
To do so, first log in to Slack and navigate to the app creation page. Pick a name that you’ll recognize, select the desired workspace, and click Create App.
You’ll be redirected to the settings page for the new app. Click on Incoming Webhooks on the left navigation bar.
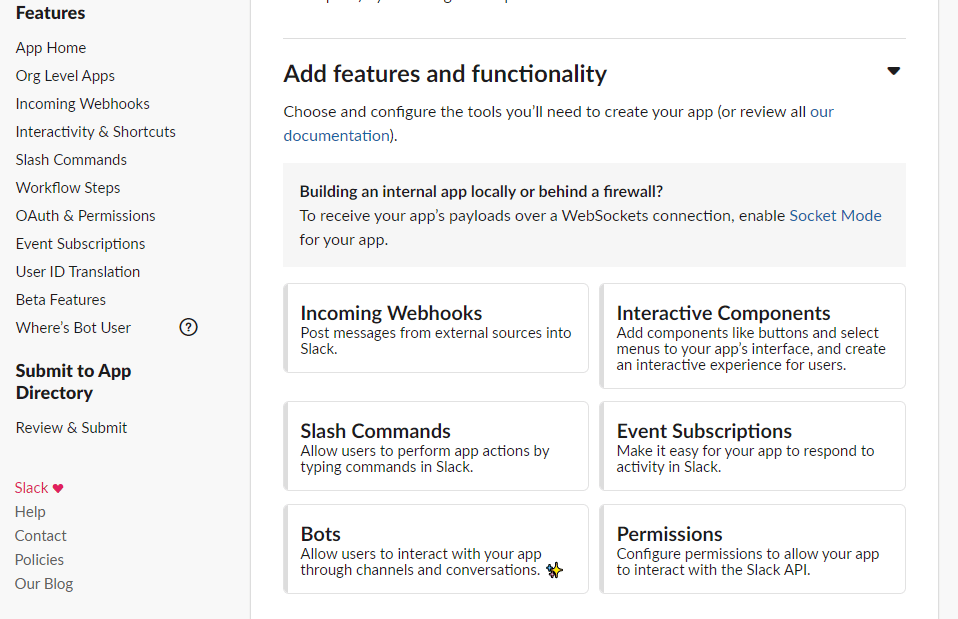
Enable webhooks by flipping the switch button next to the title Activate Incoming Webhooks.
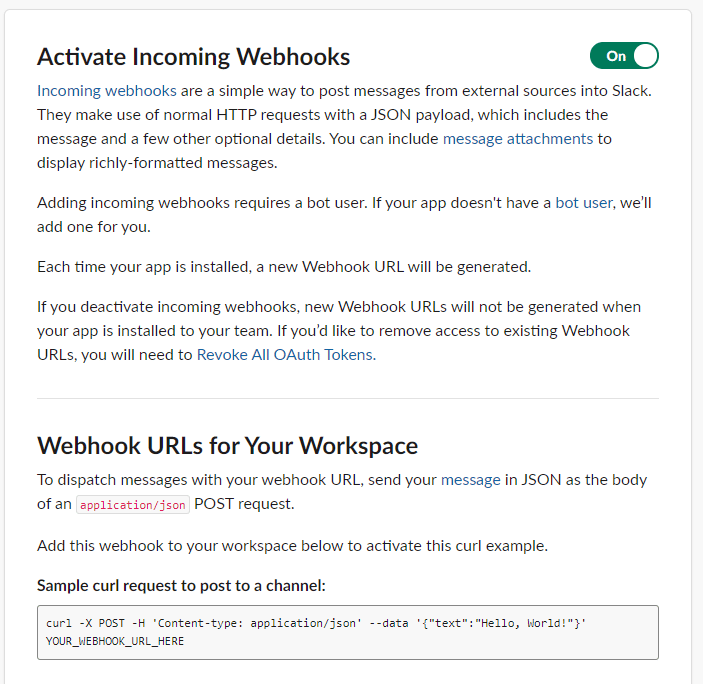
A new section further down the page will be uncovered. Scroll down and click the Add New Webhook to Workspace button. On the next page, select the channel you want the reports to be sent to and click Allow.
You’ll be redirected back to the settings page for webhooks, and you’ll see a new webhook listed in the table. Click on Copy to copy it to your clipboard and make note of it for later use.
To configure Flagger to send logs to Slack, you’ll need to update its Helm release by running:
- helm upgrade flagger flagger/flagger \
- --reuse-values \
- --set slack.url=your_hook_URL \
- --set slack.channel=your_channel_name \
- --set slack.user=username
Remember to replace the your_hook_URL with the webhook URL you noted earlier, your_channel_name with the name of the desired channel, and username with the username of the user that created the webhook.
Because --reuse-values is passed in, Helm will base the new Flagger release on the existing one. This means that existing values of set variables will remain untouched, just as when you’ve reconfigured the Nginx Ingress Controller in the first step of this tutorial.
The output will look similar to this:
OutputRelease "flagger" has been upgraded. Happy Helming!
NAME: flagger
LAST DEPLOYED: ...
NAMESPACE: default
STATUS: deployed
REVISION: 2
TEST SUITE: None
NOTES:
Flagger installed
You can now try to release a new podinfo deployment by running:
- kubectl set image deployment/podinfo podinfod=stefanprodan/podinfo:3.1.1 -n test
You’ll soon see messages appearing in Slack:
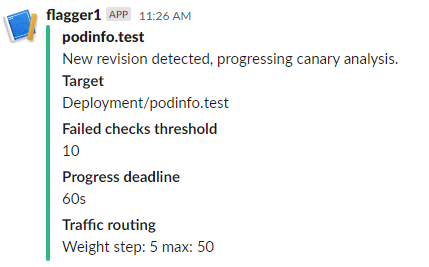
The Slack messages portrays basic info about the canary analysis, such as the deadline and how many times testing can fail before aborting the deployment. Under Traffic Routing, you can see by how much the percentage of routed traffic is incremented during each iteration, until it hits the shown limit.
When this release deploys, you’ll see a success message:

Let’s see how Flagger reports failures. Since the canary requires a 99% success rate for all HTTP requests (which it reads from the Nginx Ingress Controller), you’ll create a new release and generate HTTP 500 errors from it while it’s in testing.
For the new release, deploy the 6.0.3 version again by running:
- kubectl set image deployment/podinfo podinfod=stefanprodan/podinfo:6.0.3 -n test
You’ll see a new message on Slack coming from Flagger, indicating that a new revision was detected. To simulate failures, you’ll use the status API of podinfo, which allows you to generate HTTP status reports that you specify.
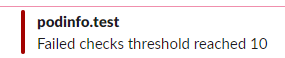
Run the following command to create a large number of HTTP 500 statuses:
- watch curl http://app.your_domain/status/500
After some time, you’ll see that Flagger decided not to apply the new release, due to the HTTP request success rate being unacceptably low 10 times in a row:
To exit curl, press CTRL+C.
You now have Flagger reporting to Slack whenever a new revision of the podinfo deployment is detected. You’ll also be notified of the outcome of the new release, so you and your team will always be in the loop regarding the success of your app’s releases.
To destroy the resources you’ve deployed, run the following commands:
- kubectl delete -f podinfo-ingress.yaml
- kubectl delete -f podinfo-canary.yaml
Conclusion
You’ve now learned how to automate testing of new releases pushed to your Kubernetes cluster using Flagger, without impacting the existing deployments. You’ve also set up alerting to Slack, so you’ll always know what deployments are happening in real time, you’ll be proactively informed of issues present in new releases.
The canary analysis process can be extended with advanced Prometheus queries — for example, to act according to the HTTP request latency. You can learn more about this in Flagger’s official documentation.
Thanks for learning with the DigitalOcean Community. Check out our offerings for compute, storage, networking, and managed databases.
About the author(s)
Expert in cloud topics including Kafka, Kubernetes, and Ubuntu.
Still looking for an answer?
 This work is licensed under a Creative Commons Attribution-NonCommercial- ShareAlike 4.0 International License.
Become a contributor for community
Get paid to write technical tutorials and select a tech-focused charity to receive a matching donation.

DigitalOcean Documentation
Full documentation for every DigitalOcean product.

Resources for startups and AI-native businesses
The Wave has everything you need to know about building a business, from raising funding to marketing your product.
The developer cloud
Scale up as you grow — whether you're running one virtual machine or ten thousand.

Start building today
From GPU-powered inference and Kubernetes to managed databases and storage, get everything you need to build, scale, and deploy intelligent applications.
