By Arthur Isac, Jes Olson and Rachel Lee

The authors selected the The Apache Software Foundation and Free and Open Source Fund to receive donations as part of the Write for DOnations program.
Introduction
Mastodon is an open-source self-hosted social network. Mastodon is federated, which means multiple instances of Mastodon can interoperate, allowing users from different servers to communicate with each other to create a network called the fediverse. The fediverse is a network of interconnected servers, which communicate with each other using the ActivityPub protocol.
As the Mastodon community grows exponentially, so does the load on the servers. For the last year, numerous incidents of Mastodon servers going down happened because of peak user activity. To prevent the Mastodon server from going down during user influx it needs to be scaled.
In order to understand how to scale a Mastodon, you need to understand what Mastodon is made of. A Mastodon server consists of five main components: Web service, StreamingAPI service, Sidekiq service, Redis, and PostgreSQL.

Optionally, object storage can drastically improve the performance of static media files and decrease the load on Web service. While not giving a performance boost, ElasticSearch can also enable full-text search and LibreTranslate can allow your server to automatically translate messages making your server just a little nicer.
Note: Mastodon services only communicate via data storage (Redis and PostgreSQL). This gives major flexibility for distributed setups, but simply distributing components across multiple machines without a proper configuration won’t give the desired performance boost.
In this tutorial, you’ll learn about different scaling techniques for your Mastodon server:
- Increasing the database resources and available connections
- Splitting Sidekiq queues into multiple processes
- Configuring threads and resources for each Sidekiq queue
- Adding object storage to unload Web service
- Increasing threads and processes of Web service
If you are planning to scale your Mastodon server to meet some active users’ capacity, we recommend going through the whole article and scaling each component. On the other hand, if you target to scale a particular component - feel free to jump to the corresponding component section. The rule of thumb is to keep your average load at about 60-70% on each machine running Mastodon components. Sometimes poor service configuration can result in low performance as well as a low average load. Each section below contains symptoms to detect such cases.
Note: This article contains examples intended for Mastodon servers running on systemd services (such as Mastodon Droplet 1-Click). If you have another type of Mastodon setup (Docker, K8s, etc.), consider using corresponding configuration methods.
Improving Database Performance
PostgreSQL is the main source of truth for your Mastodon server. It contains all users’ credentials, toots, boosts, user relations, and so on. It is of the highest priority for you to keep the database secured and backed up.
Mastodon uses an immense amount of connections to the database. Symptoms of connection starvation include poor Sidekiq performance, hours of latency in updates of feed, overall slowness, and even the whole server becoming inaccessible.
In this section, you will calculate the number of connections required for your server and configure the database accordingly. With no extra resources, it will save your server from connection starvation, which impacts the performance of all Mastodon services.
Info: The number of connections necessary for your Mastodon server must NEVER exceed max_connections variable of your PostgreSQL. Also, max_connections should be as low as possible to avoid database contention.
To calculate the total number of connections required for your Mastodon server, you need to calculate the number of connections required by each component:
- For every Web service instance, the required connections are MAX_THREADS multiplied by WEB_CONCURRENCY.
- For every StreamingAPI instance, the required connections are the STREAMING_CLUSTER_NUM multiplied by the DB_POOL.
- For every Sidekiq instance, the required connections equal the DB_POOL.
Info: All variables from above can be found in the environments of the corresponding component. Further in the article, you will work with every variable listed here.
Sum up all those numbers and add an extra 20 connections for maintenance. This is your value for max_connections.
Info: Properly configuring the database is your top priority in scaling Mastodon, but to determine max_connections number, you have to know how you will scale other services first. After you have created a plan on how to scale other services (which you will find in the next sections) you can return here to finish calculating max_connections.
Now that you know have a value for max_connections, you will use it to configure your database.
A good way to generate configuration is to use a service called PGTune. Upon opening the PGTune page you will be greeted with configuration fields that you have to populate:
- DB Version: Specify here the version of PostgreSQL that your Mastodon server uses. You can find it by using this command on the machine running PostgreSQL:
- pg_config --version
- OS Type: Operating system of the machine which runs PostgreSQL.
- DB Type: Type of workload your PostgreSQL will perform. In the case of Mastodon, choose Online Transaction Processing System (OLTP in the future) since Mastodon creates tons of connections.
- Total Memory (RAM): Amount of memory PostgreSQL will use. Try to allocate up to half of the physical memory of a machine, but if other services are running on the same machine - make sure not to exceed the total RAM. For example, on a machine with 8 GB of RAM and just PostgreSQL, we specify 4 GB in PGTune.
- Number of CPUs: Amount of CPU cores that PostgreSQL will use. Since OLTP is CPU bound, we highly recommend setting this number as high as the number of CPU threads your machine supports.
- Number of Connections: max_connections goes here.
- Data Storage: Type of data storage device on the machine which runs PostgreSQL.
For example, this is how the configuration looks on an 8 GB RAM machine, 8 threads, and 420 max_connections:

After clicking Generate you will receive configuration parameters which should be added to your postgresl.conf file.
On the machine running your PostgreSQL open postgresql.conf:
- sudo nano /etc/postgresql/major version of your PostgreSQL/main/postgresql.conf
For example, if you are running PostgreSQL version 15.x, the location of this file would be /etc/postgresql/15/main/postgresql.conf.
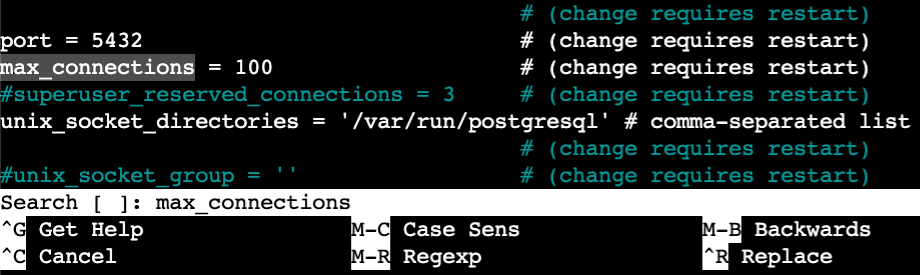
Next, for each parameter generated by the PGTune, you will search for the same parameter in your postgresql.conf and change its value. Use Ctrl+W to search in nano and Esc+/ in vi/vim. If some parameter does not exist in your postgresql.conf you can create it anywhere in the file.
Finally, restart the PostgreSQL service to apply changes:
- sudo service postgressql restart
Now you know how to configure your PostgreSQL for better performance for Mastodon and how to apply the new configuration. In the next section, you will find exact values for all variables required to calculate max_connections.
Perfecting Sidekiq queues
Sidekiq is a Ruby job scheduler and worker. It is responsible for executing background jobs, such as propagating posts between servers, generating link previews, processing likes, and so on.
Sidekiq uses Redis as a queue manager for jobs and PostgreSQL to save job results. If multiple servers are connected (users are following people from other servers), a lot of jobs will be created to propagate necessary data from one server to another.
Symptoms of Sidekiq bottleneck include long latency in feed updates, clogged Sidekiq queues, and persistent database load.
In this section, you will approximate the size of Sidekiq queues required for your server as well as the number of physical machines required to run them.
Mastodon has several queues for Sidekiq. However, some of them are more resource-intense and will fully load the CPU, while others will barely inflict any percentage of the load. The table below contains the description of all queues required for Mastodon as well as their resource priority, high priority queues will utilize more CPU compared to low priority:
| Queue | Priority | Role |
|---|---|---|
| default | Highest | Handles all tasks that affect local users. |
| ingress | High | Handles incoming remote activities. Lower priority than the default queue so local users still see their posts when the server is under load. Keep in mind, the ingress queue is highly CPU intense. |
| push | Medium | Delivers payloads to other servers. |
| pull | Medium | Handles tasks such as handling imports, backups, resolving threads, deleting users, and forwarding replies. |
| mailers | Low | Delivers emails. |
| scheduler | Lowest | Manages cron jobs such as refreshing trending hashtags and cleaning up logs. |
Warning: scheduler queue must be never scaled into multiple processes. Only 1 process running scheduler should exist for your Mastodon server.
The table above will help you to properly allocate machines, but what about configuring queues themselves? Queues are limited in how many active users they can effectively serve and this limit correlates to the number of threads particular queue has. The more threads are allocated - the more active users certain queues can handle. The type of queue also affects this limit, some queues require fewer threads to serve the same amount of users compared to other queues. This multidimensional relationship is described in the graph below.
The X-axis indicates the expected number of active users Mastodon will serve, while the Y-axis indicates the estimated number of threads required for each queue to serve the corresponding amount of active users:

Depending on your server community, push or pull queues may have different priorities. If your community is highly interconnected with other federations, give priority to the push queue. Otherwise, if your server is specific to some are of interest, you can expect a lot of local activity and give priority to pull.
Note: Different servers have different usage patterns and load distribution. Try to predict the usage pattern of your server by analyzing the likelihood that users from your server will boost or like users from other servers.
For example, if your server covers a specific scientific topic, users from your server will communicate mostly with each other. On the other hand, if your server is a personal political blog, users from your server may be more likely to boost other politicians. As a Mastodon admin, you’ll need to monitor the load of your own servers and scale the components accordingly.
The last important note about Sidekiq queues is the fact that ~10-15 threads of Sidekiq require 1 GB of RAM. This concludes a relation:

Warning: Single Sidekiq service SHOULD NOT use more than 50 threads. To serve 60 threads - run 2 services with 30 threads each.
For example, we estimate 15000 active users who will primarily use only local federation. According to the graph above we need:
default: about 70 threads total, 2 services 35 threads each.ingress: about 50 threads total, 2 services 25 threads each.pull: about 40 threads total, 1 service with all 40 threads.push: about 30 threads total, 1 service with all 35 threads.mailer: about 20 threads total, 1 service with all 20 threads.scheduler: 5 threads total, 1 service with all 5 threads.
Remember our users are not using external federations that much, so we gave priority to the pull queue instead of push.
Since the scheduler queue is the lowest priority queue, we can run it together with the default queue, it won’t affect the default queue at all. Together they require 70 + 5 = 75 threads which correspond to roughly 8GB of RAM. Since it’s just one heavy queue, we can use a single 4 cores 8GB machine.
ingress and mailer are high and low-priority queues, meaning they will require less CPU resource compared to a single default queue, but we will still use a 4-core machine. The total amount of threads for them is 25 + 20 = 45 which is roughly 6GB of RAM.
pull and push queues are both medium priorities, making them a bit more CPU intense compared to ingress and mailer, so we will use 4 cores again. The amount of threads is 40 + 30 = 70 which corresponds to 8GB of RAM.
To sum up, if we plan to serve 15000 active users, for Sidekiq configuration we will need in total 3 machines:
- A 4c/8GB machine to serve 2 services of the
defaultqueue with 35 threads each and 1 service ofschedulerqueue with 5 threads. - A 4c/8GB machine to serve 1 service of
ingressqueue with 50 threads and 1 service ofmailerqueue with 20 threads. - A 4c/6GB machine to serve 1 service of
pullqueue with 40 threads and 1 service ofpushqueue with 30 threads.
Note: The best way to determine the number of cores required is by observing the average load on machines running Sidekiq.
More CPU cores are required if the average load is more than 80%. If the amount of cores is already high enough (more than 8 cores for example) you may try to create another machine with the same configuration, without the need for any sort of load balancing it will distribute the load and will give you another dimension to scale. Don’t forget to not run scheduler queue more than once.
Scaling Sidekiq
To fully utilize hardware resources, Sidekiq needs to be configured with the proper amount of threads and scaled on the process level. In this section, you will find how to exactly set the number of threads for Sidekiq queues as well as how to run multiple queues on the same machine using service templates.
Note: Examples below can be inlined in the systemd service’s ExecStart or Docker’s command fields. In case you are using Docker, remember to rebuild your containers after making changes to Docker files.
Increasing the number of threads used by a single Sidekiq process
A service is a resource which systemd can manage, log, automatically restart and so on. Wrapping an executable in the service is one of the easiest ways to deploy an application. Systemd service is the most common way to run Sidekiq queues. The location of the Sidekiq service depends on the type of your Mastodon installation. For example, if you are using Mastodon Droplet 1-Click, you can find the Sidekiq service file at this location:
- cat /etc/systemd/system/mastodon-sidekiq.service
Let’s take a quick look at the top of the service file:
[Unit]
Description=mastodon-sidekiq
After=network.target

[Service]
Type=simple
User=mastodon
WorkingDirectory=/home/mastodon/live
Environment="RAILS_ENV=production"
Environment="DB_POOL=25"
Environment="MALLOC_ARENA_MAX=2"
Environment="LD_PRELOAD=libjemalloc.so"
ExecStart=/home/mastodon/.rbenv/shims/bundle exec sidekiq -c 25
...

[Install]
WantedBy=multi-user.target
Our attention should fall on two particular fields: ExecStart and Environment.
ExecStart defines starting point of the service which runs when the service starts or restarts.
Environment defines environment variables which are passed to ExecStart.
To scale a single Sidekiq process you should increase the number of threads Sidekiq will use. This number is controlled by -c parameter in the ExecStart field. Don’t forget to keep DB_POOL environment variable in sync with -c parameter.
As an example, let’s increase the number of threads to 45. You are going to change values for both -c parameters as well as DB_POOL:
[Unit]
Description=mastodon-sidekiq
After=network.target

[Service]
Type=simple
User=mastodon
WorkingDirectory=/home/mastodon/live
Environment="RAILS_ENV=production"
Environment="DB_POOL=40"
Environment="MALLOC_ARENA_MAX=2"
Environment="LD_PRELOAD=libjemalloc.so"
ExecStart=/home/mastodon/.rbenv/shims/bundle exec sidekiq -c 40
...

[Install]
WantedBy=multi-user.target
Info: DB_POOL environment should always be the same values as the -c parameter (40 in the example above). Having it smaller will introduce Sidekiq performance issues and having it higher will introduce an extra load on the database.
After making any changes to the service file make sure to reload unit files and restart the Sidekiq service:
- sudo systemctl daemon-reload
- sudo systemctl restart mastodon-sidekiq.service
By applying changes from this section, you increased amount of threads which Sidekiq uses, making it capable of serving more users.
Specifying a particular queue for a single Sidekiq instance
Let’s start by analyzing the default Sidekiq service file. If you are using Mastodon Droplet 1-Click, you can find the Sidekiq service file at this location:
- cat /etc/systemd/system/mastodon-sidekiq.service
As you know, Mastodon divides Sidekiq data into several queues. By default, there is no queue explicitly specified in the service file.
[Unit]
Description=mastodon-sidekiq
After=network.target

[Service]
Type=simple
User=mastodon
WorkingDirectory=/home/mastodon/live
Environment="RAILS_ENV=production"
Environment="DB_POOL=25"
Environment="MALLOC_ARENA_MAX=2"
Environment="LD_PRELOAD=libjemalloc.so"
ExecStart=/home/mastodon/.rbenv/shims/bundle exec sidekiq -c 25
...

[Install]
WantedBy=multi-user.target
No explicit queue implies Sidekiq will serve all queues with some default priorities. Since even a single Sidekiq queue is resource-intense, running all queues on a single instance of the Sidekiq is less than ideal.
What you want to achieve is to split Sidekiq queues into several instances of Sidekiq. This will allow you to specify the exact number of threads for each queue and will also allow you to run different queues on multiple machines.
Hopefully, overriding default Sidekiq behaviour only requires adding a -q parameter to the ExecStart field.
For example, let’s make Sidekiq serve only the ingress queue:
[Unit]
Description=mastodon-sidekiq
After=network.target

[Service]
Type=simple
User=mastodon
WorkingDirectory=/home/mastodon/live
Environment="RAILS_ENV=production"
Environment="DB_POOL=25"
Environment="MALLOC_ARENA_MAX=2"
Environment="LD_PRELOAD=libjemalloc.so"
ExecStart=/home/mastodon/.rbenv/shims/bundle exec sidekiq -c 25 -q ingress
...

[Install]
WantedBy=multi-user.target
By specifying -q ingress you tell Sidekiq to only serve the ingress queue and nothing else.
Warning: The example above will make all queues except ingress unprocessed, meaning Mastodon will not function properly. Make sure to cover every queue at least once. The next section contains guidance on how to run multiple instances of Sidekiq service on a single machine.
Having Sidekiq service only process a single queue has several advantages: it is easier to process logs for the particular queue, it gives per-queue management and thread control and allows for distributed setup by running different queues on different machines. Overall, it is considered the main practice in scaling Sidekiq queues. However, it is not always efficient to give all hardware resources to a single queue, that’s why in the next section you will learn how to run multiple queues separately, but on a single machine
Using templates to run multiple instances of Sidekiq on a single machine
Running only a single instance of Sidekiq is less than efficient. To scale Sidekiq further, you can run multiple instances of Sidekiq simultaneously. Since the systemd service is the most common way to run Sidekiq, you will learn how to create a service template to simplify running multiple instances of Sidekiq on a single machine.
The service template allows us to create multiple services from a single service file.
First, let’s create a copy of our existing Sidekiq service file:
- cp /etc/systemd/system/mastodon-sidekiq.service /etc/systemd/system/mastodon-sidekiq-template.service
This will create a new file called mastodon-sidekiq-template.service which is a copy of the existing Sidekiq service.
You will modify this copy to convert it into a template. A template is defined by template specifiers, in this article you will use two particular specifiers: %i and %j.
- %i is the instance name. For instantiated services, this is the string between the first “@” character and the type suffix.
- %j is the final component of the prefix. This is the string between the last “-” and the end of the prefix name.
Sounds confusing? Let’s jump into the practical part to understand it better.
Firstly, open your new service file to edit it:
- sudo nano /etc/systemd/system/mastodon-sidekiq-template.service
Now, change some values in the service file to template specifiers:
- The description field should contain %j specifier for easier tracking and maintenance of service.
- DB_POOL environment variable should be equal to %i specifier.
- -c parameter in ExecStart should be equal to %i
- -q parameter in ExecStart should be equal to %j
[Unit]
Description=mastodon-sidekiq-%j-queue
After=network.target

[Service]
...
Environment="DB_POOL=%i"
Environment="MALLOC_ARENA_MAX=2"
Environment="LD_PRELOAD=libjemalloc.so"
ExecStart=/home/mastodon/.rbenv/shims/bundle exec sidekiq -c %i -q %j
...
[Install]
WantedBy=multi-user.target
As you might guess, %i specifier will contain the number of threads of Sidekiq and %j specifier will contain the name of the Sidekiq queue.
So, how you can set these variables? Specifiers are substituted with particular sections from the service file.

Let’s use this template to create service files for desired Sidekiq configurations.
First, copy the template to specify the queues which you want to run on this machine. For example, to run default and scheduler queues:
- cp /etc/systemd/system/mastodon-sidekiq-template.service /etc/systemd/system/mastodon-sidekiq-default@.service
- cp /etc/systemd/system/mastodon-sidekiq-template.service /etc/systemd/system/mastodon-sidekiq-scheduler@.service
For the name of the queue, you can use one of default, ingress, push, pull, mailers, scheduler.
You might have noticed you did not specify anything after the @ symbol. That’s because you will specify this parameter when you will enable the service itself. Now to enable new services, let’s use 20 threads for default queue and 5 for the scheduler queue:
- sudo systemctl enable mastodon-sidekiq-default@20.service
- sudo systemctl enable mastodon-sidekiq-scheduler@5.service
Finally, after you enabled your new services, you can run all of them at once using the following command:
- sudo systemctl start mastodon-sidekiq*
At this point, you successfully created a template service file and used it to run multiple services of Sidekiq with different queues and threads.
Changing the configuration of running template services
If you wish to, for example, change the number of threads from 20 to 40 for your templated default service you should first disable the existing service:
- sudo systemctl stop mastodon-sidekiq-default.service
- sudo systemctl disable mastodon-sidekiq-default@20.service
Notice how you only specify the number of threads for the disable command and not stop.
After you have disabled the old push service, you can create a new service with 40 threads instead of 20:
- sudo systemctl enable mastodon-sidekiq-default@40.service
- sudo systemctl start mastodon-sidekiq-default.service
At this point, you successfully changed the number of threads for your existing systemd service.
Running multiple services of the same Sidekiq queue
As you know, a single instance of Sidekiq should not have more than 50 threads. Running 60 threads of some queue requires splitting it into 2 services 30 threads each.
To achieve that, you need to copy the template multiple times with the same queue, but with an addition of an index. An index is simply a number which will distinguish each service file.
Copy the initial template multiple times, but increment the index each time the same queue repeats. For example, to create 2 service files of the default queue:
- cp /etc/systemd/system/mastodon-sidekiq-template.service /etc/systemd/system/mastodon-sidekiq-1-default@.service
- cp /etc/systemd/system/mastodon-sidekiq-template.service /etc/systemd/system/mastodon-sidekiq-2-default@.service
Warning: DO NOT append index after the name of a queue like this: /etc/systemd/system/mastodon-sidekiq-default-2@service. This will make the template treat 2 as the name of the queue which will inevitably make it fail. Insert index only BEFORE the name of a queue.
Now, let’s enable them with 40 threads for the first instance of the default queue and 60 threads for the second instance:
- sudo systemctl enable mastodon-sidekiq-1-default@40.service
- sudo systemctl enable mastodon-sidekiq-2-default@60.service
Finally, after you enabled your services, you can run them all using the following command:
- sudo systemctl start mastodon-sidekiq*
At this point, you successfully created multiple instances of the same queue, allowing you to properly split large amounts of threads.
You learned multiple approaches to set up the Sidekiq service(s). In some situations a single default service is enough, others will require multiple services on a single machine and some will even require multiple services of the same queue on multiple machines. It all depends on the number of active users you want to support.
Adding object storage
Object storage, or simply bucket, allows storing media files uploaded by users of your server. This includes photos, videos, gifs, audio files, and so on.
Moving from the filesystem to the object storage helps increase the speed and capacity of storage, but more importantly, it reduces the load from Mastodon services. Additionally, most cloud-provided object storages also provide CDN, which will deliver media files to users much faster.
Note: Mastodon uses S3 compatible interface, which means your object storage provider must support the S3 interface and provide mapping for S3 storage credentials.
If you accidentally missed object storage configuration during Mastodon initialization, you can add necessary variables directly to the configuration of machines running Web service, since object storage is used only by the Web service.
Warning: By changing object storage you will lose any existing media files on your server.
On the machine(s) running Web service, open .env.production in your preferred text editor, if you are using Mastodon Droplet 1-Click env.production is located at /home/mastodon/live:
- sudo nano .env.production
Add the following lines anywhere to your .env.production file(s), replacing the highlighted text with your own information. If these variables already exist - it means object storage was configured during setup, you can still change them if values are incorrect:
...
S3_ENABLED=true
S3_PROTOCOL=https
S3_BUCKET=your bucket name
S3_REGION=your bucket region
S3_HOSTNAME=your bucket hostname
S3_ENDPOINT=your bucket endpoint
AWS_ACCESS_KEY_ID=your bucket secret ID
AWS_SECRET_ACCESS_KEY=your bucket secret key
...
The variables above represent S3 interface connection parameters. Make sure to use the correct S3 mapping for connection parameters from your object storage provider.
Then save and exit the editor.
Make sure to restart the Web service(s) after saving changes:
- sudo systemctl restart mastodon-web.service
Now you know how to manually configure object storage for Mastodon in case of automatic setup failure, human error or manual installation. Object storage will help to reduce the load on your Mastodon Web service(s) and provide better upload/download speeds for media files on your server.
Scaling the Web service
The web service is a Ruby-on-Rails HTTPS server that serves Mastodon UI and processes requests from users. The load of the web service is directly proportional to the number of active users. Every thread can answer a single request at the same time. If all threads are busy, the next request must wait. If the request is waiting for too long, it is cancelled with a timeout error. Web service bottlenecks can be identified by the long request processing times: page opens slowly, posts are being created with a noticeable delay, or timeout errors appear on logs.
Warning: Web service enforces HTTPS only, which means SSL termination cannot be used on the load balancer between multiple machines hosting the Web services.
To allow Web service to process more users, you need to increase the total quantity of threads used by the service. This can be done by increasing the environment variables for WEB_CONCURRENCY (the number of workers) and/or MAX_THREADS (threads per worker). Each worker has MAX_THREADS amount of threads, so the total quantity of threads is WEB_CONCURRENCY multiply by MAX_THREADS.
Increasing MAX_THREADS tends to consume more CPU, while increasing WEB_CONCURRENCY tends to consume more RAM. The average estimation for Mastodon version 4.0.2 is 2-3 GB of RAM for a single worker. In the example above with WEB_CONCURRENCY = 3 estimated amount of RAM necessary is 9 GB.
For MAX_THREADS we recommend starting with some generic value like 15 and increasing it until 70% of CPU is used on average. This means you need to observe the machines running your Web services to understand if you can squeeze more threads.
Note: Below are demonstrated snippets for systemd Web service configuration. If you are using other technology to run your Web service (Docker, K8s, etc.), adjust WEB_CONCURRENCY and MAX_THREADS variables according to your technology environment specifications.
First, let’s open the web service file:
- sudo nano /etc/systemd/system/mastodon-web.service
What you will see is a Web service systemd file which looks like this:
[Unit]
Description=mastodon-web
After=network.target

[Service]
...
Environment="LD_PRELOAD=libjemalloc.so"
ExecStart=/home/mastodon/.rbenv/shims/bundle exec puma -C config/puma.rb
ExecReload=/bin/kill -SIGUSR1 $MAINPID
...
[Install]
WantedBy=multi-user.target
Now, append two extra fields with WEB_CONCURRENCY and MAX_THREADS variables right above ExecStart field:
[Unit]
Description=mastodon-web
After=network.target

[Service]
...
Environment="LD_PRELOAD=libjemalloc.so"
Environment="WEB_CONCURRENCY=your concurrency value"
Environment="MAX_THREADS=your threads value"
ExecStart=/home/mastodon/.rbenv/shims/bundle exec puma -C config/puma.rb
ExecReload=/bin/kill -SIGUSR1 $MAINPID
...
[Install]
WantedBy=multi-user.target
These new fields will override default values for WEB_CONCURRENCY and MAX_THREADS with your own values.
Save and exit the editor.
Make sure to reload unit files and restart the service after saving changes:
- sudo systemctl daemon-reload
- sudo systemctl restart mastodon-web.service
Note: Since 2017, the performance of Web service almost doubled, we highly encourage everyone to monitor hardware usage to determine if more or fewer resources should be allocated.
At this point, you have increased default values for Web service configuration. This made your Mastodon frontend support more active users. Keep in mind to always have an extra performance margin to ensure your Mastodon server won’t throttle on a large user influx.
Increasing StreamingAPI throughput
StreamingAPI is a NodeJS server that hosts API for real-time updates. It allows users to receive a stream of events directly from the server. StreamingAPI is limited by how many users it can serve simultaneously. The limit is bound to the STREAMING_CLUSTER_NUM environment variable.
StreamingAPI bottleneck can be identified by looking at service logs. If something like node[1201554]: ERR! error: sorry, too many clients already appears in logs, it means the number of users using StreamingAPI is more than it can handle and new users are automatically disconnected.
Scaling StreamingAPI is pretty straightforward.
Increasing STREAMING_CLUSTER_NUM environment variable will allow StreamingAPI to serve more users.
If you see a lot of error: sorry, too many clients already messages in your logs, increase STREAMING_CLUSTER_NUM by 1.5x-2x times.
For example, if your current configuration for STREAMING_CLUSTER_NUM is 2, update the variable to 4
On the machine running StreamingAPI, open the StreamingAPI service file:
- sudo nano /etc/systemd/system/mastodon-streaming.service
Edit value of the STREAMING_CLUSTER_NUM variable:
[Unit]
Description=mastodon-streaming
After=network.target

[Service]
...
Environment="STREAMING_CLUSTER_NUM=your new value"
ExecStart=/usr/bin/node ./streaming
...
Save the file and make sure to reload unit files and restart the service after saving changes:
- sudo systemctl daemon-reload
- sudo systemctl restart mastodon-streaming.service
Additionally, by default StreamingAPI does not have a DB_POOL variable set. Without this variable explicitly set StreamingAPI will use 10 connections. Explicitly increasing DB_POOL variable without increasing STREAMING_CLUSTER_NUM variable, but in case you want to do it you can simply create a new environment variable in a StreamingAPI service file.
On the machine running StreamingAPI, open the StreamingAPI service file:
- sudo nano /etc/systemd/system/mastodon-streaming.service
Add new environment variable DB_POOL:
[Unit]
Description=mastodon-streaming
After=network.target

[Service]
...
Environment="DB_POOL=your value"
Environment="STREAMING_CLUSTER_NUM=your value"
ExecStart=/usr/bin/node ./streaming
...
Save the file and make sure to reload unit files and restart the service after saving changes:
- sudo systemctl daemon-reload
- sudo systemctl restart mastodon-streaming.service
This will override the default value for DB_POOL and give you a clearer understanding of how many database connections are required for your instance of StreamingAPI.
Note: If you don’t explicitly indicate value for DB_POOL, use value 10 as DB_POOL in calculating max_connections variable.
You have now updated the StreamingAPI configuration to allow better throughput. This will help your StreamingAPI to serve more simultaneous users without failing. Optionally, you explicitly indicated DB_POOL environment variable to optimize your database configuration routine or left it unchanged and used 10 as value for DB_POOL for StreamingAPI.
Conclusion
In this tutorial, you have learned how to identify and address bottlenecks in PostgreSQL, Sidekiq, Web service and StreamingAPI. Now you can set up a new server or scale your existing server.
Scaling approaches can always be improved and refined, for example, complex Sidekiq configurations can be templated even more. The official Mastodon scaling guide contains some extra points of view on how to scale and optimize your server.
Another great way to improve user experience on your server is by enabling full-text search using ElasticSearch. This will allow users to find results from their statuses, mentions, favourites, and bookmarks.
It is also possible to make Mastodon translate toots and other messages to user language by enabling LibreTranslate.
Thanks for learning with the DigitalOcean Community. Check out our offerings for compute, storage, networking, and managed databases.
About the author(s)
Still looking for an answer?
This textbox defaults to using Markdown to format your answer.
You can type !ref in this text area to quickly search our full set of tutorials, documentation & marketplace offerings and insert the link!
just a heads up: the next version of Mastodon is getting rid of the STREAMING_CLUSTER_NUM environment variable, in favour of running multiple of the streaming server on different ports and letting nginx do the load balancing (there’ll be a templated systemd configuration for this).
 This work is licensed under a Creative Commons Attribution-NonCommercial- ShareAlike 4.0 International License.
Become a contributor for community
Get paid to write technical tutorials and select a tech-focused charity to receive a matching donation.

DigitalOcean Documentation
Full documentation for every DigitalOcean product.

Resources for startups and AI-native businesses
The Wave has everything you need to know about building a business, from raising funding to marketing your product.
The developer cloud
Scale up as you grow — whether you're running one virtual machine or ten thousand.

Start building today
From GPU-powered inference and Kubernetes to managed databases and storage, get everything you need to build, scale, and deploy intelligent applications.
