
Introduction
Concourse CI is a modern and scalable continuous integration system designed to automate testing pipelines with a composable, declarative syntax. Building off of the success of earlier CI systems, Concourse aims to simplify pipeline management and eliminate “snowflake” servers so that the testing server is as well regulated as the code it processes.
In a previous tutorial, we demonstrated how to install and configure a Concourse CI instance on an Ubuntu 16.04 server. By the end, we were left with a continuous integration server which could be managed and monitored from both the command line and a web interface.
In this guide, we will secure the Concourse CI interfaces by setting up a TLS/SSL reverse proxy with Nginx. While Concourse can be configured to use SSL natively, a reverse proxy provides more flexibility for future scaling and access to a more robust feature set.
Prerequisites
Before you begin, you will need an Ubuntu 16.04 server with at least 1G of RAM. Complete the following guides to set up a non-root user, install and configure Concourse, install Nginx, and configure TLS/SSL connections on the server. You will also need a domain name pointed at your Concourse server to properly secure it:
- Initial Server Setup with Ubuntu 16.04
- How To Install Concourse CI on Ubuntu 16.04
- How To Install Nginx on Ubuntu 16.04
- How To Secure Nginx with Let’s Encrypt on Ubuntu 16.04
After following these prerequisites, you will have a Concourse server operating on port 8080. Additionally, Nginx will be up and running on ports 80 and 443. Traffic to port 80 will be redirected to port 443, which will encrypt traffic for requests to your server’s domain name.
When you are ready to begin, continue below.
Configuring Nginx As a Reverse Proxy for Concourse
The first thing we need to do is modify the SSL server block file to route traffic to the Concourse CI server.
Find the Correct File to Edit
Since we want our SSL-secured domain name to serve the Concourse interface, we need to find which server block file is currently handling our domain name. Since we are only interested in the active server blocks, we can use grep to search within the /etc/nginx/sites-enabled directory:
- grep -R server_name /etc/nginx/sites-enabled
You will probably see something like this:
Output/etc/nginx/sites-enabled/default:   server_name example.com;
/etc/nginx/sites-enabled/default:   return 301 https://$server_name$request_uri;
/etc/nginx/sites-enabled/default:   server_name example.com;
/etc/nginx/sites-enabled/default:#  server_name example.com;
In the above output, the domain name (example.com in this instance) is being defined within the /etc/nginx/sites-enabled/default file. You will want to edit the file (the first column) associated with your domain name.
It’s possible that you might also see something like this:
Output/etc/nginx/sites-enabled/default:   server_name _;
/etc/nginx/sites-enabled/default:   return 301 https://$server_name$request_uri;
/etc/nginx/sites-enabled/default:   server_name _;
/etc/nginx/sites-enabled/default:#  server_name example.com;
The server_name _; usually in the above output is a server block definition that matches any unmatched requests. If you cannot find a server_name definition that matches your domain name, you should use the file that looks like that instead.
Define the Concourse Server Block
Open the file that defines your domain in your text editor to get started:
- sudo nano /etc/nginx/sites-enabled/default
With the comments removed for brevity, your file will likely look similar to this if you followed the tutorials in the prerequisite section correctly:
server {
    listen 80 default_server;
    listen [::]:80 default_server;
    server_name example.com;
    return 301 https://$server_name$request_uri;
}

server {
    listen 443 ssl http2 default_server;
    listen [::]:443 ssl http2 default_server;
    include snippets/ssl-example.com.conf;
    include snippets/ssl-params.conf;

    root /var/www/html;
    index index.html index.htm index.nginx-debian.html;

    server_name example.com;

    location / {
        try_files $uri $uri/ =404;
    }

    location ~ /.well-known {
        allow all;
    }
}
There might be slight variations, but this should be the general structure of the file. We can adapt this to proxy to our Concourse server by making two significant edits.
First, at the very beginning of the file, prior to the server blocks, we will create an upstream block called concourse that defines how our Concourse web process accepts connections. The continuous integration server accepts connections on port 8080.
Next, find the server block that is responsible for serving SSL content by looking for the block with the string listen 443. Check again that the server_name defined in that block matches your domain name (or is set to server_name _; if you didn’t find any results matching your domain name when you searched with find).
Inside of this server block, we need to adjust the location / block so that Nginx will pass all requests (that are not explicitly defined elsewhere) to the Concourse server. To do this, we will include parameters from an external file, set a few additional parameters, and define the necessary proxy headers before passing the request to the upstream we defined earlier.
Replace the try_files directive defined within the location / block with the lines in the following example. When you are finished, the completed file should look similar to this:
upstream concourse {
        server 127.0.0.1:8080;
}

server {
    listen 80 default_server;
    listen [::]:80 default_server;
    server_name example.com;
    return 301 https://$server_name$request_uri;
}

server {
    listen 443 ssl http2 default_server;
    listen [::]:443 ssl http2 default_server;
    include snippets/ssl-example.com.conf;
    include snippets/ssl-params.conf;

    root /var/www/html;
    index index.html index.htm index.nginx-debian.html;

    server_name example.com;

    location / {
        include proxy_params;
        proxy_http_version 1.1;
        proxy_read_timeout 90;

        proxy_set_header Upgrade $http_upgrade;
        proxy_set_header Connection "upgrade";

        proxy_pass http://concourse;
    }

    location ~ /.well-known {
        allow all;
    }
}
When you are finished editing, save and close the file.
Test and Activate the New Configuration
Before using the new configuration, let Nginx check for syntax mistakes by typing:
- sudo nginx -t
Outputnginx: the configuration file /etc/nginx/nginx.conf syntax is ok
nginx: configuration file /etc/nginx/nginx.conf test is successful
If you see error messages instead of the above success message, go back and review the file you edited for mistakes before continuing on.
To implement the new configuration, restart Nginx:
- sudo systemctl restart nginx
Nginx is now configured to forward requests for your domain name to the Concourse server.
Configuring Concourse to Bind to the Local Loopback Interface
Now that Nginx is set up to forward traffic to the Concourse server, we should limit where Concourse accepts connections from. Currently, Concourse will accept connections to port 8080 on all interfaces, so users could bypass the SSL encryption by connecting directly with the integration server.
We can modify this behavior by altering the Concourse web configuration. Open the web process’s configuration file we created at /etc/concourse/web_environment in your text editor:
- sudo nano /etc/concourse/web_environment
Find the CONCOURSE_EXTERNAL_URL parameter and change it to reflect the URL that users should use to access the Concourse web interface. This includes the protocol, specified by https://, followed by our domain name.
Afterwards, set a new environment variable called CONCOURSE_BIND_IP to 127.0.0.1. By default, Concourse listens to all interfaces, but this setting tells Concourse to bind only to the local interface. Remote connections must be proxied through Nginx, which can enforce SSL:
. . .
CONCOURSE_EXTERNAL_URL=https://example.com
CONCOURSE_BIND_IP=127.0.0.1
Save and close the file when you are finished.
Restart the Concourse web process to start using the new settings:
- sudo systemctl restart concourse-web
Check that the Concourse web interface is listening only to the local loopback interface by typing:
- sudo netstat -plunt | grep 8080
Outputtcp 0 0 127.0.0.1:8080 0.0.0.0:* LISTEN 20932/concourse
The above output indicates that the Concourse web process is only listening on the local interface.
We can now modify our firewall settings to remove our exception for port 8080 since all external requests will be routed through Nginx:
- sudo ufw delete allow 8080
secondary_label Output]
Rule deleted
Rule deleted (v6)
Now, we can log into the web interface securely.
Testing the Web Interface
In the web browser of your choice, visit your server’s domain name:
https://example.com
You should be able to access the initial Concourse CI page:

If you look in the address bar of your browser, there will be some indication that you are connecting to the integration server over a secure connection:

Nginx secures the connection with your browser and passes the request on to Concourse. Now that we can connect securely, it’s safe to log in to the web interface.
If you click on the login link in the upper-right corner, you can log into the web interface. First, you will be asked to select your team. The main team, which is the administrative group, is the only available selection by default:
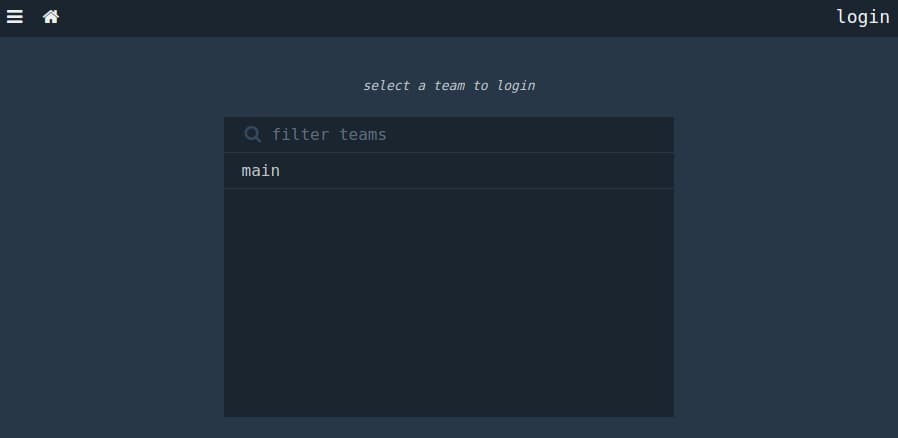
On the next page, you will be asked to enter your credentials.
After entering the credentials you configured within the web_environment file, you will be logged in and taken back to the default placeholder interface:
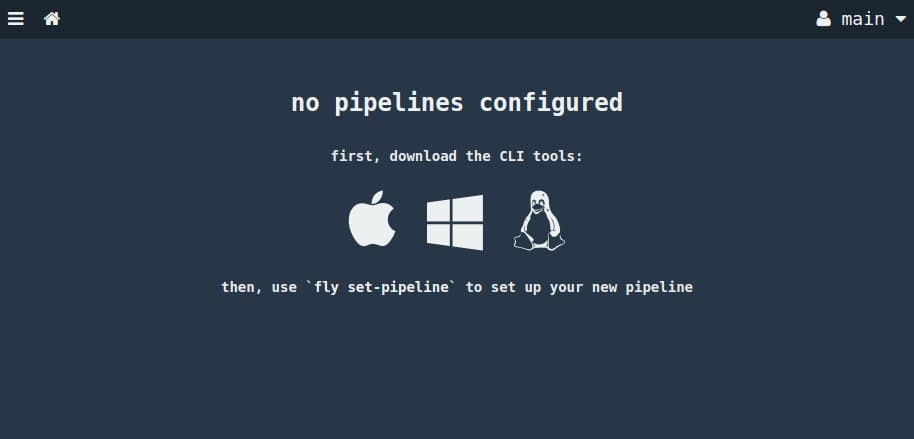
Once you submit your pipeline configuration to the server with fly, this screen will be replace by an interface where you can monitor your pipeline activity.
Conclusion
In this guide, we’ve configured Nginx as a secure reverse proxy for a Concourse CI server. Nginx accepts secure connections from clients and forwards requests to the Concourse server. Concourse binds to the local loopback interface so that remote clients cannot connect directly.
Now that you can contact the Concourse server securely, you can begin building and managing pipelines using the fly tool and the web interface. You can follow our next guide to learn how to develop and implement continuous integration pipelines to set up automatic testing processes for your project. You may also want to check out the “hello world” example in the Concourse documentation.
Thanks for learning with the DigitalOcean Community. Check out our offerings for compute, storage, networking, and managed databases.
Tutorial Series: Setting Up and Using Concourse CI on Ubuntu 16.04
Concourse CI is a modern, flexible continuous integration server which aims to simplify common abstractions and encourage building repeatable, decoupled automated testing. In this series, we will cover how to install and secure a Concourse CI server on Ubuntu 16.04. Afterwards, we will explore how to develop and implement a continuous integration pipeline for your project.
About the author
Former Senior Technical Writer at DigitalOcean, specializing in DevOps topics across multiple Linux distributions, including Ubuntu 18.04, 20.04, 22.04, as well as Debian 10 and 11.
Still looking for an answer?
This textbox defaults to using Markdown to format your answer.
You can type !ref in this text area to quickly search our full set of tutorials, documentation & marketplace offerings and insert the link!
The "hello world" example in the Concourse documentation link is broken:
https://concourse-ci.org/hello-world.html
Maybe this is the intended link:
 This work is licensed under a Creative Commons Attribution-NonCommercial- ShareAlike 4.0 International License.
Become a contributor for community
Get paid to write technical tutorials and select a tech-focused charity to receive a matching donation.

DigitalOcean Documentation
Full documentation for every DigitalOcean product.

Resources for startups and AI-native businesses
The Wave has everything you need to know about building a business, from raising funding to marketing your product.
The developer cloud
Scale up as you grow — whether you're running one virtual machine or ten thousand.

Start building today
From GPU-powered inference and Kubernetes to managed databases and storage, get everything you need to build, scale, and deploy intelligent applications.
