
Introduction
Strapi is an opensource, headless Content Management System (CMS), built with the JavaScript programming language. Like other headless CMS’, Strapi doesn’t come with a frontend out of the box. Instead, it relies on an API that allows you to architect your content structure. Additionally, Strapi offers a variety of ways to build out your website, integrating with popular frameworks like React and Next.js. Furthermore, you can choose how to consume an API using either a REST API or GraphQL.
In this tutorial, you will install Strapi and set up a production environment to begin creating content. While Strapi runs SQLite in its development mode, you will configure it to use PostgreSQL. You’ll also serve your Strapi application behind an Nginx reverse proxy, and use the PM2 process manager to ensure stable uptime. Finally, you will secure your Nginx connection using Let’s Encrypt.
Prerequisites
To follow this tutorial, you will need:
- An Ubuntu 22.04 server set up by following our Initial Server Setup Guide
- Strapi recommends a server with at least 2 CPU cores and 4GB of RAM. This tutorial will assume your server meets the recommended hardware specifications.
- Node.js version 16.xx installed on your server. Follow Option 2 in our How To Install Node.js on Ubuntu 22.04 tutorial.
- Make sure to replace version 18.xx with 16.xx via the PPA option. Strapi may not work properly with Node versions beyond 16 at the time of this writing. Specifically, Node v16.18.1 is used in this tutorial.
- PostgreSQL installed by following Step 1 of our How To Install and Use PostgreSQL on Ubuntu 22.04 tutorial.
- Nginx installed and configured as a reverse proxy. Follow Steps 1 and 2 of our How To Configure Nginx as a Reverse Proxy tutorial.
- When configuring the address of the application server to proxy, use
http://localhost:1337as theapp_server_address.
- When configuring the address of the application server to proxy, use
- A domain name pointed at your server’s public IP. This will be configured with Nginx to proxy your application server.
With Node.js version 16, Nginx, and Postgres installed on your server, you’re ready to proceed with the tutorial.
Step 1 — Setting Up Your Postgres Database
A database is required for any Strapi project. Currently, it supports MySQL, MariaDB, SQlite, and PostgreSQL. You can check the minimum version requirements within their official documentation. Furthermore, Strapi expects a fresh database. This means you can’t use an existing database to link to for your Strapi instance.
First, create a database:
- sudo -i -u postgres createdb strapi-db
Then create a user for your database:
- sudo -i -u postgres createuser --interactive
OutputEnter name of role to add: sammy
Shall the new role be a superuser? (y/n) y
By default, in PostgreSQL, you authenticate as database users using the Identification Protocol or ident authentication method. This involves PostgreSQL taking the client’s Ubuntu username and using it as the database username. This allows for greater security in many cases, but it can also cause issues when you’d like an outside program, such as Strapi, to connect to one of your databases. To resolve this, set a password for this PostgreSQL role to allow Strapi to connect to your database.
From your terminal, open the PostgreSQL prompt:
- sudo -u postgres psql
From the PostgreSQL prompt, update the user profile to have a strong password of your choosing:
- ALTER USER sammy PASSWORD 'postgres_password';
Exit out of your PostgreSQL user by entering \q in your terminal:
- \q
With your database and user credentials created, you’re ready to install Strapi.
Step 2 — Installing Strapi on Your Server
To install Strapi on your server, enter the following command:
- npx create-strapi-app@latest my-project
Confirm with y to proceed with the installation.
After confirming yes, you’ll access an interactive installation. Choose the following options while making sure your Database name, Username, and Password are changed appropriately:
Output? Choose your installation type Custom (manual settings)
? Choose your preferred language JavaScript
? Choose your default database client postgres
? Database name: strapi-db
? Host: 127.0.0.1
? Port: 5432
? Username: sammy
? Password: postgres_password
? Enable SSL connection: No
The SSL connection is not enabled because it will be configured and obtained with a Let’s Encrypt certificate later in the tutorial. Strapi will begin installation after you make your selections.
Once the installation is complete, you’re ready to build your Strapi project.
First, make sure that you’re in the my-project directory:
- cd my-project
Next, run the following command:
- NODE_ENV=production npm run build
Output> my-project@0.1.0 build
> strapi build

Building your admin UI with production configuration...

✔ Webpack
  Compiled successfully in 35.44s

Admin UI built successfully
This command will build your Strapi project, including the Strapi admin UI.
You can now test your Strapi server. Run the following command to start your Strapi server directly:
- node /home/sammy/my-project/node_modules/.bin/strapi start
Output[2022-11-21 13:54:24.671] info: The Users & Permissions plugin automatically generated a jwt secret and stored it in .env under the name JWT_SECRET.
Project information
┌────────────────────┬──────────────────────────────────────────────────┐
│ Time │ Mon Nov 21 2022 13:54:24 GMT+0000 (Coordinated … │
│ Launched in │ 1603 ms │
│ Environment │ development │
│ Process PID │ 4743 │
│ Version │ 4.5.4 (node v16.18.1) │
│ Edition │ Community │
└────────────────────┴──────────────────────────────────────────────────┘
Actions available
One more thing...
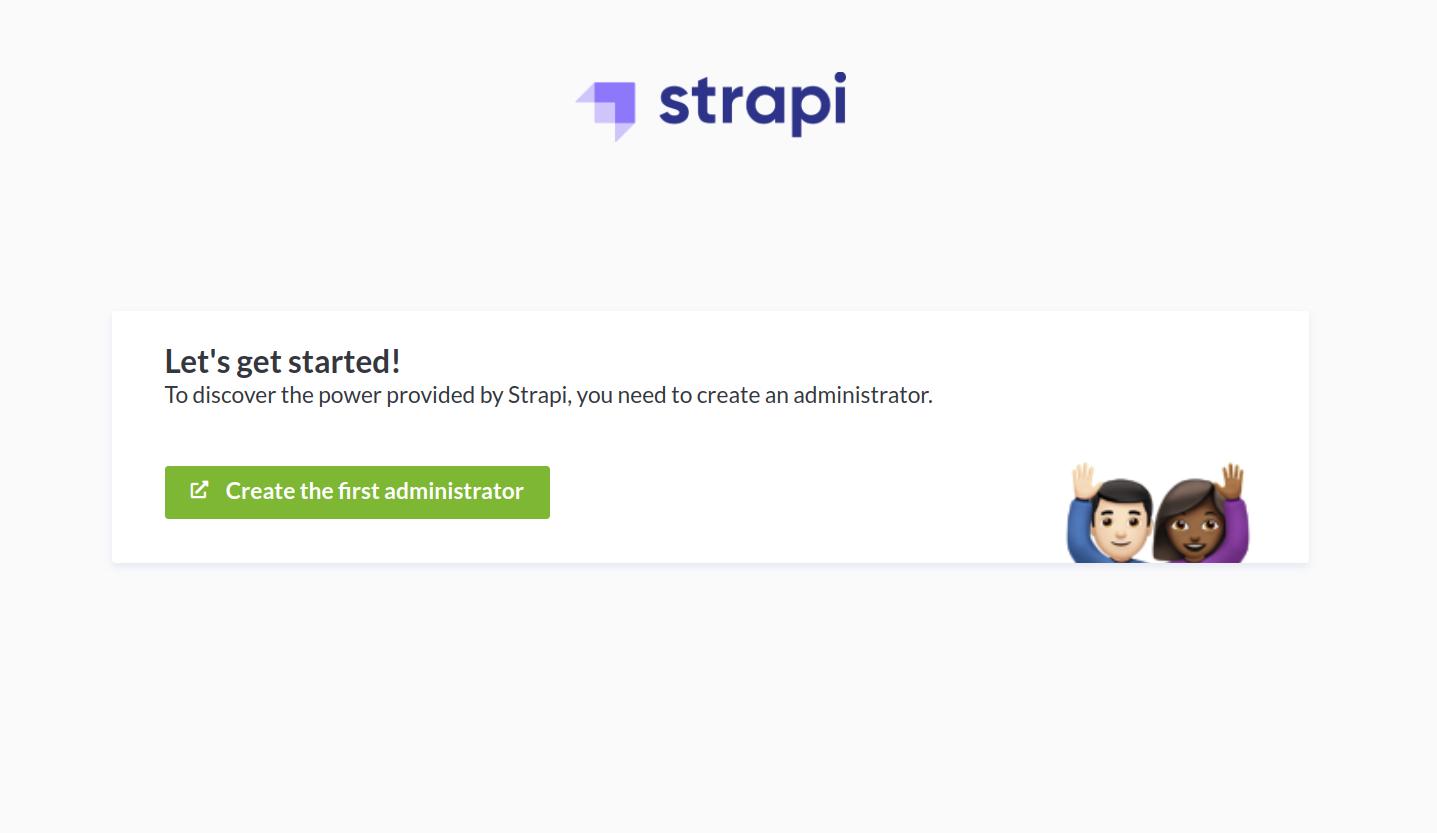
Create your first administrator 💻 by going to the administration panel at:
┌─────────────────────────────┐
│ http://localhost:1337/admin │
└─────────────────────────────┘
If you followed the prerequisites, you set up Nginx as a reverse proxy to Strapi’s default address of http://localhost:1337. Navigate to http://your_domain in your browser to view the default Strapi landing page:
build and start commands.This command with the default configuration is currently using Strapi’s development mode. It also relies on a process that is tied to a command in your terminal and isn’t suitable for production. In the next step, you will add production settings to a process manager called PM2.
Exit your server by pressing CTRL+c.
With Strapi installed, you’re ready to set up PM2 to run your server in the background as a service.
Step 3 — Installing and Configuring PM2
Instead of starting the server manually, you can rely on PM2 to manage this process. For more details about PM2 and configuring a production ready Node.js application, review our guide. PM2 helps to keep your server up and running without having to start it up manually, ensuring uptime.
First, make sure you’re in the top directory:
- cd ~
Next, install PM2 with the following command:
- sudo npm install pm2@latest -g
Then, create a configuration file for PM2 with your preferred text editor. nano is used in this example:
- sudo nano ecosystem.config.js
Add the following content to this file, while making sure to change the project directory name and path, along with your database name, user, and password:
module.exports = {
  apps: [
    {
      name: 'strapi',
      cwd: '/home/sammy/my-project',
      script: 'npm',
      args: 'start',
      env: {
        NODE_ENV: 'production',
        DATABASE_HOST: 'localhost',
        DATABASE_PORT: '5432',
        DATABASE_NAME: 'strapi-db',
        DATABASE_USERNAME: 'sammy',
        DATABASE_PASSWORD: 'postgres_password',
      },
    },
  ],
};
After editing the PM2 configuration, exit the file. If you’re using nano, press CTRL+x, then y, and ENTER.
Run your Strapi instance in the background with the following command:
- pm2 start ecosystem.config.js
Output[PM2][WARN] Applications strapi not running, starting...
[PM2] App [strapi] launched (1 instances)
┌─────┬───────────┬─────────────┬─────────┬─────────┬──────────┬────────┬──────┬───────────┬──────────┬──────────┬──────────┬──────────┐
│ id  │ name      │ namespace   │ version │ mode    │ pid      │ uptime │ ↺    │ status    │ cpu      │ mem      │ user     │ watching │
├─────┼───────────┼─────────────┼─────────┼─────────┼──────────┼────────┼──────┼───────────┼──────────┼──────────┼──────────┼──────────┤
│ 0   │ strapi    │ default     │ N/A     │ fork    │ 22608    │ 0s     │ 0    │ online    │ 0%       │ 30.3mb   │ sammy    │ disabled │
└─────┴───────────┴─────────────┴─────────┴─────────┴──────────┴────────┴──────┴───────────┴──────────┴──────────┴──────────┴──────────┘
Applications that are running under PM2 restart automatically if the application crashes or is killed. You can launch your Strapi instance at startup by running the following subcommand:
- pm2 startup
Output[PM2] Init System found: systemd
[PM2] To setup the Startup Script, copy/paste the following command:
sudo env PATH=$PATH:/usr/bin /usr/lib/node_modules/pm2/bin/pm2 startup systemd -u sammy --hp /home/sammy
This generates and configures a startup script to launch PM2 and its managed processes when the server boots.
Next, copy and execute the command given to you in the output, using your username in place of sammy:
- sudo env PATH=$PATH:/usr/bin /usr/lib/node_modules/pm2/bin/pm2 startup systemd -u sammy --hp /home/sammy
Then, save the PM2 process list:
- pm2 save
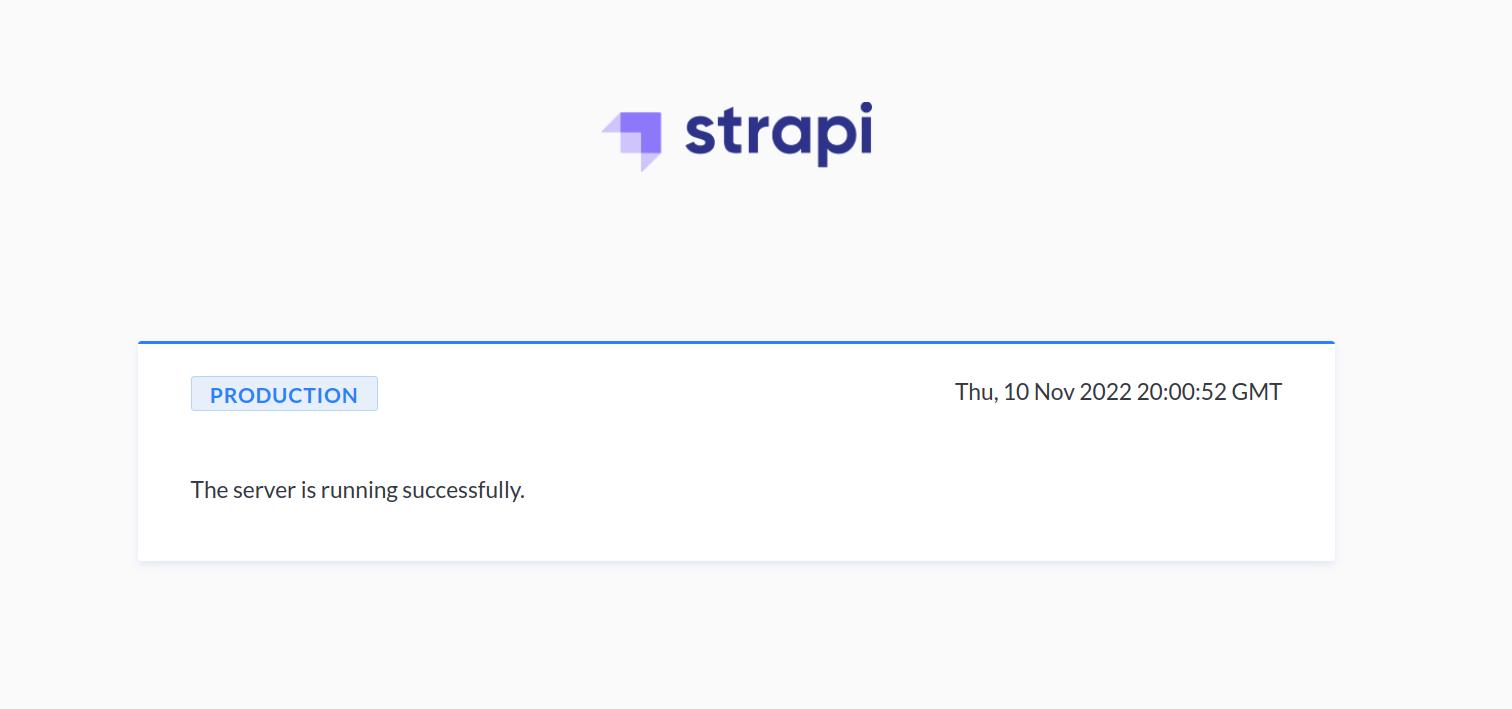
You now have the PM2 service running on your server. If you navigate back to http://your_domain, notice that Strapi is now running in production mode:
With PM2 running your server in the background, you can finish up securing your Strapi instance.
Step 4 — Securing Strapi with Let’s Encrypt
As you may have noticed when you navigated to your domain to view the Strapi landing page, the URL, as indicated with http:// instead of https://, is an unsecure connection.
Secure your Strapi instance with Let’s Encrypt by entering the following command:
- sudo snap install --classic certbot
Link the certbot command from the snap install directory to your path so you can run it by writing certbot:
- sudo ln -s /snap/bin/certbot /usr/bin/certbot
Next, allow HTTPS traffic and the Nginx Full profile:
- sudo ufw allow 'Nginx Full'
Delete the redundant Nginx HTTP profile allowance:
- sudo ufw delete allow 'Nginx HTTP'
Then use the Nginx plugin to obtain the certificate by inserting your domain address:
- sudo certbot --nginx -d your_domain -d www.your_domain
When running the command, you are prompted to enter an email address and agree to the terms of service. You can opt in or out of an email list as well. After doing so, you are greeted with a message telling you the process was successful and where your certificates are stored:
Output. . .
Successfully received certificate.
Certificate is saved at: /etc/letsencrypt/live/your_domain/fullchain.pem
Key is saved at: /etc/letsencrypt/live/your_domain/privkey.pem
This certificate expires on 2023-02-05.
These files will be updated when the certificate renews.
Certbot has set up a scheduled task to automatically renew this certificate in the background.

Deploying certificate
Successfully deployed certificate for your_domain to /etc/nginx/sites-enabled/your_domain
Successfully deployed certificate for www.your_domain /etc/nginx/sites-enabled/your_domain
Congratulations! You have successfully enabled HTTPS on https://your_domain and https://www.your_domain
. . .
Navigate to http://your_domain. You are automatically redirected to an HTTPS version of your site. Notice too, that Strapi is running in production mode:
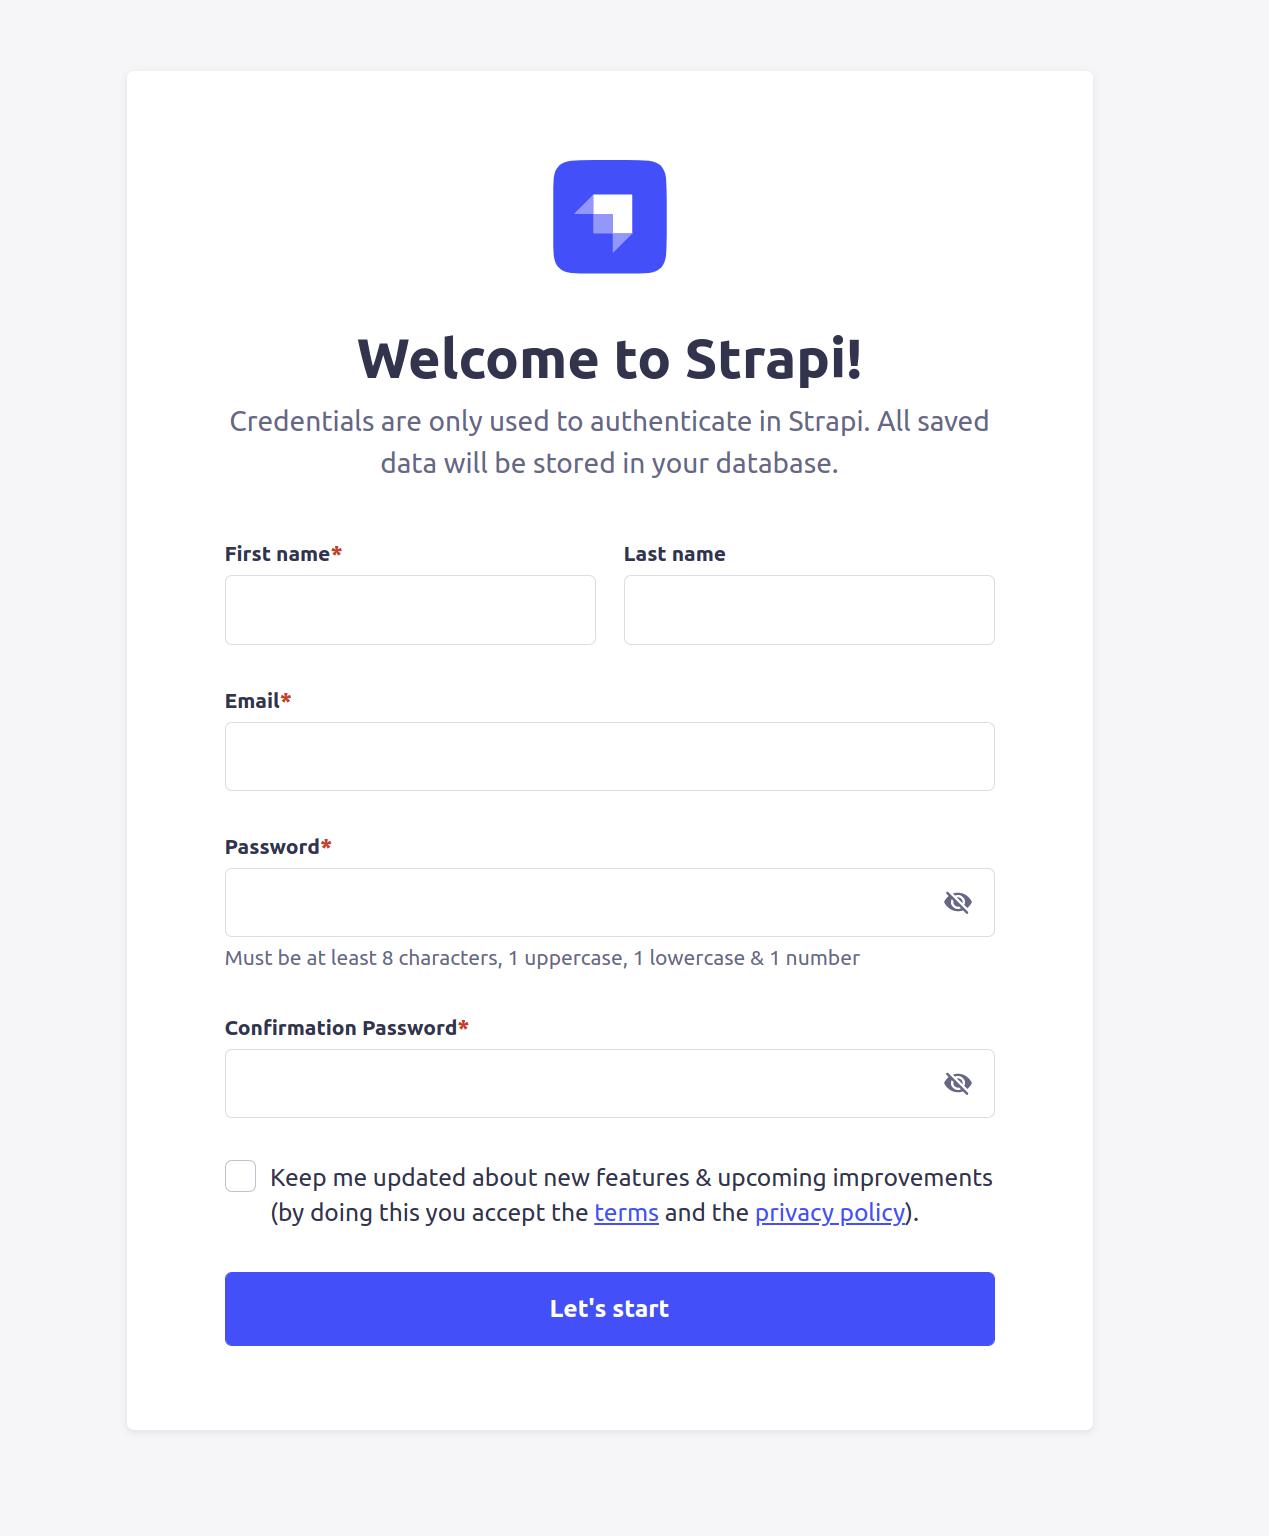
You can now navigate to https://your_domain/admin to create your Strapi administrator account:
After entering in your new credentials, you can enter the administrative dashboard:
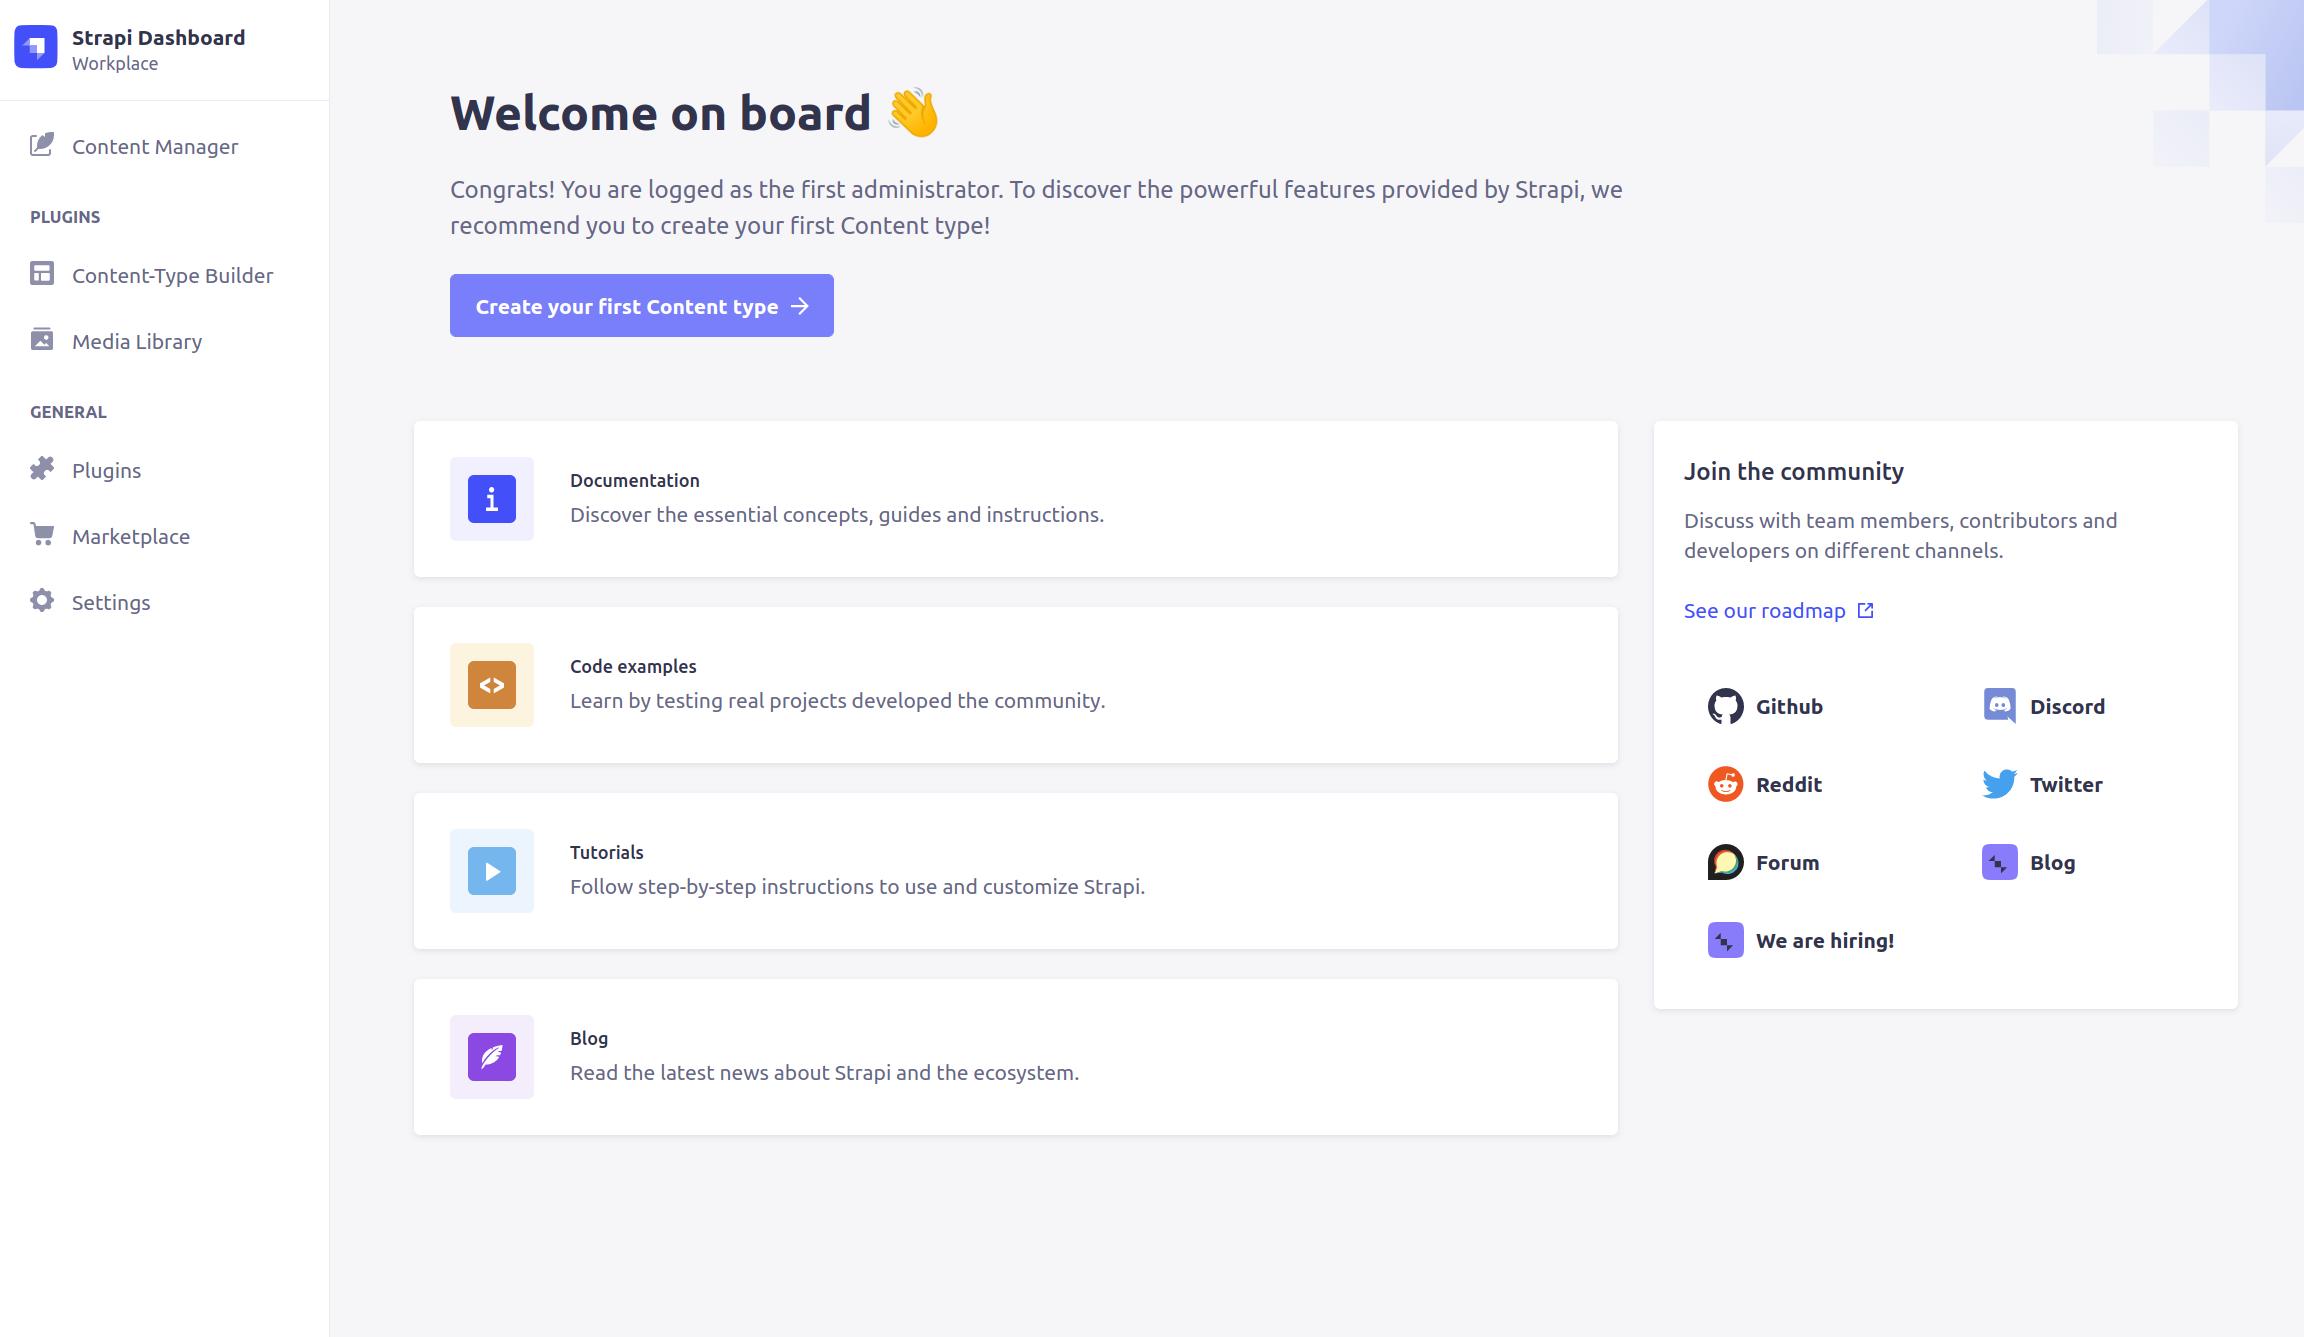
From the dashboard, you can start creating content on Strapi.
Conclusion
In this tutorial, you set up a production environment for Strapi using a PostgreSQL database. You also served your Strapi application behind an Nginx reverse proxy and used the PM2 process manager to keep your server up and running.
After setting up your Strapi server, you can start creating content using the Strapi administrative dashboard. You can learn more about setting up and configuring your Strapi application from Strapi’s official documentation.
Thanks for learning with the DigitalOcean Community. Check out our offerings for compute, storage, networking, and managed databases.
About the author(s)
Associate Technical Writer @ DigitalOcean
Still looking for an answer?
This textbox defaults to using Markdown to format your answer.
You can type !ref in this text area to quickly search our full set of tutorials, documentation & marketplace offerings and insert the link!
This comment has been deleted
Thanks for this awesome guide! I still had a question: How would it be possible to deploy from development to production? I could use git, but would updating the files cause PM2 to reload Strapi?
Ok but how do i edit my content types? This leaves me in a pickle. Deno the best next step but gonna try split this into dev on local and prod on remote and then link them with git… Unless i can run dev on remote on another port…
🚨 I need your help, unfortunately this is not working for me
I followed multiple tutorials but these are the ones that helped the most:
Server Setup Ubuntu Firewall essentials Mysql Install NGINX Config
All of those to be ready to do this one that’s the most important Strapi Install on Ubuntu
I added my domain api.inkker.com as an A Record
It’s such a simple setup I have strapi running on port 3000, here is my nginx config at /etc/nginx/sites-available/api.inkker.com
server {
    listen 80;
    listen [::]:80;

    server_name api.inkker.com;

    location / {
        proxy_pass http://127.0.0.1:3000;
        include proxy_params;
    }
}
I allowed the ports on the firewall
root@inkker-server:/etc/nginx/sites-available# ufw status
Status: active

To                         Action      From
--                         ------      ----
OpenSSH                    ALLOW       Anywhere
Nginx HTTP                 ALLOW       Anywhere
80                         ALLOW       Anywhere
OpenSSH (v6)               ALLOW       Anywhere (v6)
Nginx HTTP (v6)            ALLOW       Anywhere (v6)
80 (v6)                    ALLOW       Anywhere (v6)
I reloaded nginx as I should and created the symlink and this is what I get in the browser:
 This work is licensed under a Creative Commons Attribution-NonCommercial- ShareAlike 4.0 International License.
Become a contributor for community
Get paid to write technical tutorials and select a tech-focused charity to receive a matching donation.

DigitalOcean Documentation
Full documentation for every DigitalOcean product.

Resources for startups and AI-native businesses
The Wave has everything you need to know about building a business, from raising funding to marketing your product.
The developer cloud
Scale up as you grow — whether you're running one virtual machine or ten thousand.

Start building today
From GPU-powered inference and Kubernetes to managed databases and storage, get everything you need to build, scale, and deploy intelligent applications.
