
Status: Deprecated
This article covers a version of Ubuntu that is no longer supported. If you are currently operate a server running Ubuntu 12.04, we highly recommend upgrading or migrating to a supported version of Ubuntu:
- Upgrade to Ubuntu 14.04.
- Upgrade from Ubuntu 14.04 to Ubuntu 16.04
- Migrate the server data to a supported version
Reason: Ubuntu 12.04 reached end of life (EOL) on April 28, 2017 and no longer receives security patches or updates. This guide is no longer maintained.
See Instead:
This guide might still be useful as a reference, but may not work on other Ubuntu releases. If available, we strongly recommend using a guide written for the version of Ubuntu you are using. You can use the search functionality at the top of the page to find a more recent version.
Introduction
WordPress is a popular CMS (content management system) that can help you get your site off of the ground quickly and easily. Sometimes, you need to host multiple, unrelated sites on the same server.
This guide will cover how to host two separate WordPress instances on one VPS. They will each have their own domain name. This is different from setting up multisite.
We will accomplish this through the use of virtual hosts. This guide will use an Ubuntu 12.04 VPS server, but other distributions should function in a similar way..
Prerequisites
This guide has a few requirements that are covered in-depth in some of our other articles. Before you begin, make sure you have completed the following:
- Create a new DigitalOcean VPS to host your WordPress sites. Complete the initial server configuration by following this guide.
- Set up two domain names with DigitalOcean. Use this guide to learn how to set up domain names with DigitalOcean.
- Install a LAMP stack on Ubuntu using this guide.
At this point, you should have LAMP installed on Ubuntu and both of your domain names should be pointing to your droplet.
Ensure that this is the case by visiting your domain names in a web browser. Both domains should give you the same default Apache index page:

If your domains do not lead to this page, then either you need to wait for the DNS changes to propagate, or you have misconfigured something in the previous steps. Do not continue until this is resolved.
Download Wordpress
When you are ready, log into your server and change to your home directory. We will download the files here:
cd
wget http://wordpress.org/latest.tar.gz
Unzip and decompress the archive file by issuing the following command:
tar xzvf latest.tar.gz
Create Site Databases and Users
Before we continue, we need to configure an independent database and user for each site within MySQL. This will ensure that the site data is separate.
For the purposes of this guide, we will be using the following information:
| Site Name | firstsite.com | secondsite.com |
|---|---|---|
| Database Name | FirstDatabase | SecondDatabase |
| Database User | FirstUser | SecondUser |
| Database Password | FirstPassword | SecondPassword |
The table above is provided to give you context for the commands we will be using. Substitute your own information when you are filling out the commands that follow.
Log into MySQL using the administrator account you configured during the MySQL installation:
mysql -u root -p
You will be prompted for the MySQL root password and then you will be dropped into a MySQL prompt.
Create the two databases with the following commands:
CREATE DATABASE FirstDatabase;
CREATE DATABASE SecondDatabase;
Create a user that will be associated with each database:
CREATE USER FirstUser@localhost;
CREATE USER SecondUser@localhost;
Next, set up the password access for each account:
SET PASSWORD FOR FirstUser@localhost= PASSWORD("FirstPassword");
SET PASSWORD FOR SecondUser@localhost= PASSWORD("SecondPassword");
Finish up by granting privileges to the new users. This associates the database users with their respective databases and grants them appropriate permissions:
GRANT ALL PRIVILEGES ON FirstDatabase.* TO FirstUser@localhost IDENTIFIED BY 'FirstPassword';
GRANT ALL PRIVILEGES ON SecondDatabase.* TO SecondUser@localhost IDENTIFIED BY 'SecondPassword';
Refresh MySQL's privilege information to implement the changes:
FLUSH PRIVILEGES;
Exit out of MySQL to return to the shell session:
exit
Configuring Site Root Directories
We will be installing both of the sites within individual directories in the web root of our server.
Change to the "/var/www/" directory:
cd /var/www
Create a directory for each of our sites. These will store the site files:
sudo mkdir FirstSite
sudo mkdir SecondSite
Copy the sample configuration before we move the web contents into our folders:
cp ~/wordpress/wp-config-sample.php ~/wordpress/wp-config.php
Finally, copy the files to the directories you created under the web root of the server:
sudo rsync -avP ~/wordpress/ /var/www/FirstSite/
sudo rsync -avP ~/wordpress/ /var/www/SecondSite/
Give ownership of the directories to the Apache web user and then add your linux username to the web group:
sudo chown www-data:www-data * -R
sudo usermod -a -G www-data linux_user_name
WordPress Configuration
We will configure each site with the information about our sites.
First Site Configuration
Change directories to the first site's document root:
cd /var/www/FirstSite
Open the WordPress Configuration file for editing:
sudo nano wp-config.php
Find the section that contains the fields below and substitute the database, username, and password for your first site:
// ** MySQL settings - You can get this info from your web host ** //
/** The name of the database for WordPress */
define('DB_NAME', 'FirstDatabase');

/** MySQL database username */
define('DB_USER', 'FirstUser');

/** MySQL database password */
define('DB_PASSWORD', 'FirstPassword');
Save and exit.
Second Site Configuration
Change directories to the second site's document root:
cd /var/www/SecondSite
Open the WordPress Configuration file for editing:
sudo nano wp-config.php
Find the same section you edited for the previous site. You will be entering information for the second site this time.
// ** MySQL settings - You can get this info from your web host ** //
/** The name of the database for WordPress */
define('DB_NAME', 'SecondDatabase');

/** MySQL database username */
define('DB_USER', 'SecondUser');

/** MySQL database password */
define('DB_PASSWORD', 'SecondPassword');
Save and exit.
Apache Virtual Host Configuration
We need to configure Apache to direct traffic from each domain to their respective directories. We will do this by creating separate virtual host files for each domain.
Change the directory to Apache's available sites directory:
cd /etc/apache2/sites-available
Create a new virtual host file for each site by copying the default virtual host file:
sudo cp default FirstSite
sudo cp default SecondSite
First Site Virtual Host Configuration
Open the first file you copied to configure the virtual host for the first site:
sudo nano FirstSite
Change the information in the file to match the following. Remember to substitute the information in red to match your first site:
<VirtualHost *:80>
	ServerAdmin your_email_address
	ServerName firstsite.com
	ServerAlias www.firstsite.com

	DocumentRoot /var/www/FirstSite
	<Directory />
		Options FollowSymLinks
		AllowOverride None
	</Directory>
	<Directory /var/www/FirstSite>
		Options Indexes FollowSymLinks MultiViews
		AllowOverride None
		Order allow,deny
		allow from all
	</Directory>
. . .
. . .
If you need to enable pretty permalinks, you can change the "AllowOverride None" within the "<Directory /var/www/FirstSite>" block to "AllowOverride All". You can learn more about the requirements for pretty permalinks here.
After making the changes, save and close the file.
Second Site Virtual Host Configuration
Open the second virtual host file for editing:
sudo nano SecondSite
Change the information to reflect your second site's information:
<VirtualHost *:80>
	ServerAdmin your_email_address
	ServerName secondsite.com
	ServerAlias www.secondsite.com

	DocumentRoot /var/www/SecondSite
	<Directory />
		Options FollowSymLinks
		AllowOverride None
	</Directory>
	<Directory /var/www/SecondSite>
		Options Indexes FollowSymLinks MultiViews
		AllowOverride None
		Order allow,deny
		allow from all
	</Directory>
. . .
. . .
Save and close the file.
Final Configuration
There are a few more steps necessary to get our sites working.
First, WordPress needs an extra PHP module installed in order to function correctly. Install it by typing:
sudo apt-get install php5-gd
Next, enable the virtual host files that we created by typing:
sudo a2ensite FirstSite
sudo a2ensite SecondSite
Finally, reload Apache so that it reads our changes:
sudo service apache2 reload
Seeing the Results
In order to see your new WordPress sites, simply navigate to your domain names in a web browser.
If you have configured everything correctly, you should be greeted by a page that looks like this:
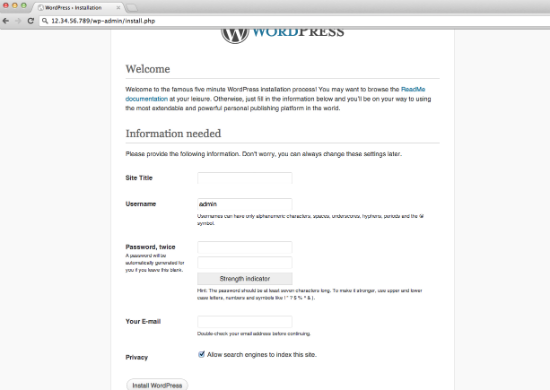
You can now log in and configure each site independently. These sites are completely separate and can be administered as if they exist on two entirely different VPS servers.
Thanks for learning with the DigitalOcean Community. Check out our offerings for compute, storage, networking, and managed databases.
About the author
Former Senior Technical Writer at DigitalOcean, specializing in DevOps topics across multiple Linux distributions, including Ubuntu 18.04, 20.04, 22.04, as well as Debian 10 and 11.
Still looking for an answer?
This textbox defaults to using Markdown to format your answer.
You can type !ref in this text area to quickly search our full set of tutorials, documentation & marketplace offerings and insert the link!
I have a question regarding where the WordPress files are located after this step:
Download Wordpress When you are ready, log into your server and change to your home directory. We will download the files here:
I have looked elsewhere for “best practices” for installing WordPress to handle multiple blogs and I need enlightenment.
Can someone explain why software such as WordPress is not installed into a subdirectory of /usr/bin ? MySQL lives at /usr/bin/mysql
@billmarel: MySQL is binary software. WordPress is just a bunch of php scripts – a regular website. Websites shouldn’t be stored in /usr/bin.
I hope that clears stuff up :]
Not really:
I have a question regarding where the WordPress files are located after this step:
Download Wordpress When you are ready, log into your server and change to your home directory. We will download the files here:
Why does WP need to be installed in my home directory?
@billmarel: WP doesn’t need to be installed in your home directory. You can install it <em>anywhere</em> you like. However, installing it in your home directory is the easiest way to do it without having any permissions issues et al.
I had mucho problemo making none default permalinks work in WordPress. After much hair pulling, I found this article:
http://wordpress.org/support/topic/pretty-permalinks-problem-not-found?replies=15
In that post the author rem’d out AllowOverride to make permalinks work
After reading this on apache: http://httpd.apache.org/docs/2.2/mod/core.html#allowoverride I elected to set the AllowOverride to All.
I’ve updated the article to mention that AllowOverride must be set to “All” if you need pretty permalinks to work. Thanks for the suggestion!
Permalinks in wordpress works with .htaccess files. They are special config files for single website.
If you want to learn more about them you can find a nice read here: http://net.tutsplus.com/tutorials/other/the-ultimate-guide-to-htaccess-files/
chown www-data:www-data * -R
Nooo! Use suexec / suphp / mod_ruid2 for security reason.
@digi I followed this guide and all was fine but reading what you wrote: chown www-data:www-data * -R Nooo! Use suexec / suphp / mod_ruid2 for security reason. Could you explain what should be done inside this Howto to use mod_ruid2 ? I searched on Google but didn’t find any clear howto I could use.
Done. Thank you for this guide! Some follow-up questions for what happens after…
Correct me if any of the following steps are wrong…
-
Let’s say that FirstSite was originally hosted on Dreamhost. First I’m going to add all the necessary DNS records to DigitalOcean.
-
Then I am going to log in to the domain registrar and change the DNS servers to point to NS1.digitalocean.com / NS2… / NS3…
-
Then what? My understanding is that now the database is full of values like “http://xx.xx.xx.xx/firstsite.com” when I want it to be “http://firstsite.com” . I find this to be a problem - I don’t think that Wordpress will just up and solve that on its own - so what should be done?
 This work is licensed under a Creative Commons Attribution-NonCommercial- ShareAlike 4.0 International License.
Become a contributor for community
Get paid to write technical tutorials and select a tech-focused charity to receive a matching donation.

DigitalOcean Documentation
Full documentation for every DigitalOcean product.

Resources for startups and AI-native businesses
The Wave has everything you need to know about building a business, from raising funding to marketing your product.
The developer cloud
Scale up as you grow — whether you're running one virtual machine or ten thousand.

Get started for free
Sign up and get $200 in credit for your first 60 days with DigitalOcean.*

*This promotional offer applies to new accounts only.