
Status: Deprecated
This article is deprecated and no longer maintained.
Reason
Ubuntu 12.04 reached end of life (EOL) on April 28, 2017 and no longer receives security patches or updates.
See Instead
This article may still be useful as a reference, but may not follow best practices or work on this or other Ubuntu releases. We strongly recommend using a recent article written for the version of Ubuntu you are using.
If you are currently operating a server running Ubuntu 12.04, we highly recommend upgrading or migrating to a supported version of Ubuntu:
Introduction
VNC stands for Virtual Network Computing, which allows you to connect to your server remotely, and be able to use your keyboard, mouse, and monitor to interface with that server.
Step 1 - Install VNC server and XFCE 4 desktop.
To get started, we will install a VNC server on Ubuntu 12.10 x64 Server droplet. Login as root and install packages:
apt-get -y install ubuntu-desktop tightvncserver xfce4 xfce4-goodies
Step 2 - Add a VNC user and set its password.
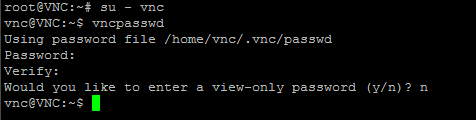
adduser vncpasswd vncIf you would like to get root as user vnc you would have to add it to sudoers file. Make sure you are logged in as root:echo "vnc ALL=(ALL) ALL" >> /etc/sudoersSet user vnc’s VNC Server password:su - vncvncpasswdexitThis step sets the VNC password for user ‘vnc’. It will be used later when you connect to your VNC server with a VNC client:
Now you can login as user ‘vnc’ and obtain root by running ‘sudo su -‘ and entering your password:

Step 3 - Install VNC As A Service
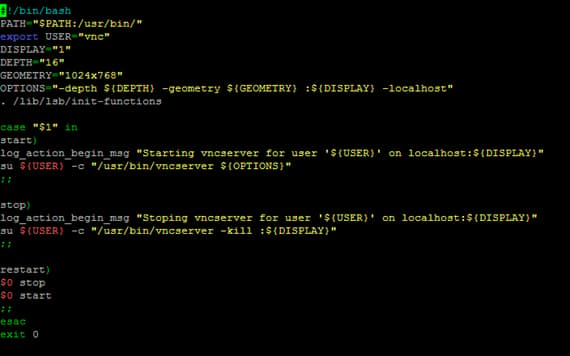
Login as root and edit /etc/init.d/vncserver and add the following lines:
#!/bin/bash
PATH="$PATH:/usr/bin/"
export USER="vnc"
DISPLAY="1"
DEPTH="16"
GEOMETRY="1024x768"
OPTIONS="-depth ${DEPTH} -geometry ${GEOMETRY} :${DISPLAY}"
. /lib/lsb/init-functions

case "$1" in
start)
log_action_begin_msg "Starting vncserver for user '${USER}' on localhost:${DISPLAY}"
su ${USER} -c "/usr/bin/vncserver ${OPTIONS}"
;;

stop)
log_action_begin_msg "Stoping vncserver for user '${USER}' on localhost:${DISPLAY}"
su ${USER} -c "/usr/bin/vncserver -kill :${DISPLAY}"
;;

restart)
$0 stop
$0 start
;;
esac
exit 0
Edit /home/vnc/.vnc/xstartup and replace with:
#!/bin/sh
xrdb $HOME/.Xresources
xsetroot -solid grey
startxfce4 &
Update file permissions and allow any user to start X Server:
chown -R vnc. /home/vnc/.vnc && chmod +x /home/vnc/.vnc/xstartup
sed -i 's/allowed_users.*/allowed_users=anybody/g' /etc/X11/Xwrapper.config
Make /etc/init.d/vncserver executable and start VNC server:
chmod +x /etc/init.d/vncserver && service vncserver start
Add your VNC server to automatically start on reboot:
update-rc.d vncserver defaults
Step 4 - Connect to your droplet with TightVNC
TightVNC is a great VNC client that allows SSH tunnel. It can be downloaded from http://www.tightvnc.com/download.php
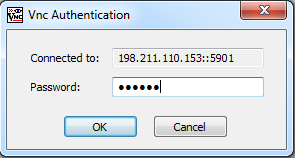
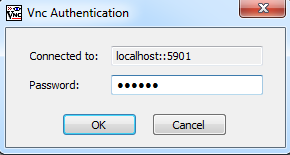
Make sure to use IP::port as your remote host, where IP is your droplet’s IP and port is 5901:

You will be asked for VNC password that you specified in step 2 with vncpasswd:
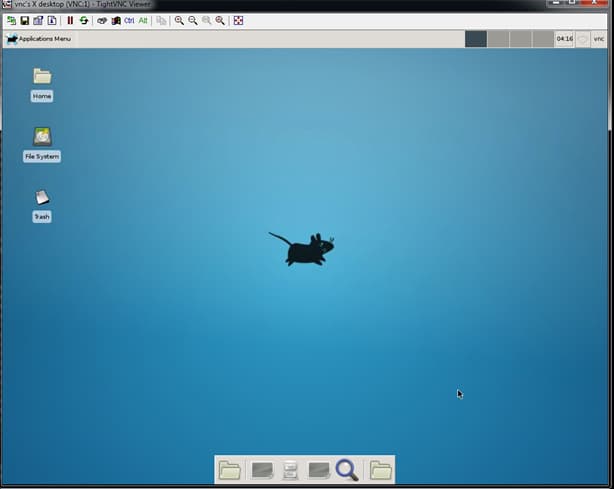
And now you are connected:
Step 5 - Secure your VNC server session with encryption
A basic VNC server setup has no encryption, which makes it vulnerable to snooping.
We will create an SSH tunnel with Putty and connect to VNC via this tunnel.
First, we need to make sure VNC server only listens on localhost.
Edit /etc/init.d/vncserver and add -localhost to OPTIONS:
OPTIONS="-depth ${DEPTH} -geometry ${GEOMETRY} :${DISPLAY} -localhost"
Restart VNC server:
/etc/init.d/vncserver restart
Make sure VNC server is only listening on localhost IP:
netstat -alpn | grep :5901

Download Putty from http://www.chiark.greenend.org.uk/~sgtatham/putty/download.html
For Windows: http://the.earth.li/~sgtatham/putty/latest/x86/putty.exe
Start Putty and enter your droplet IP under Session:
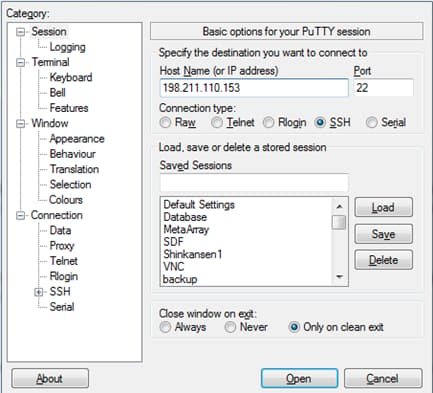
Don’t connect just yet.
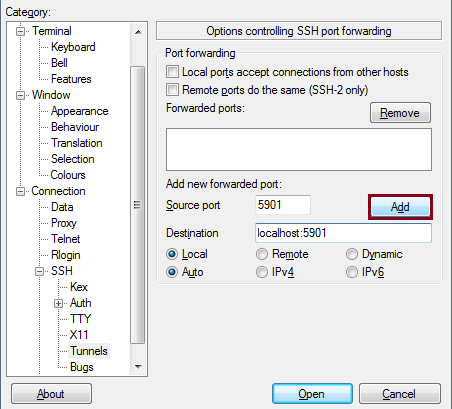
Scroll down to Connection -> SSH -> Tunnels and Add New Forwarded Port and click Add:
Now you can connect by clicking Open. You can login as user vmc:
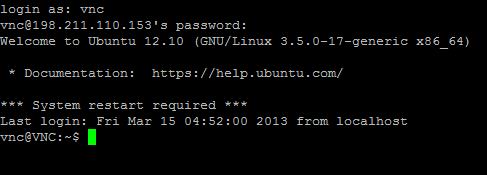
Make sure you don’t close this SSH session, as it creates a tunnel between your PC (localhost) and your droplet, mapping ports 5901 on both ends.
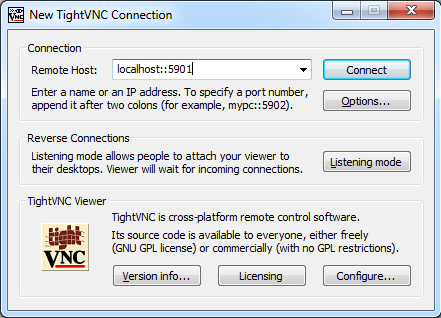
Connect with TightVNC to localhost::5901
Enter your VNC password from Step 3 above:
And you are now connected via a secure connection:
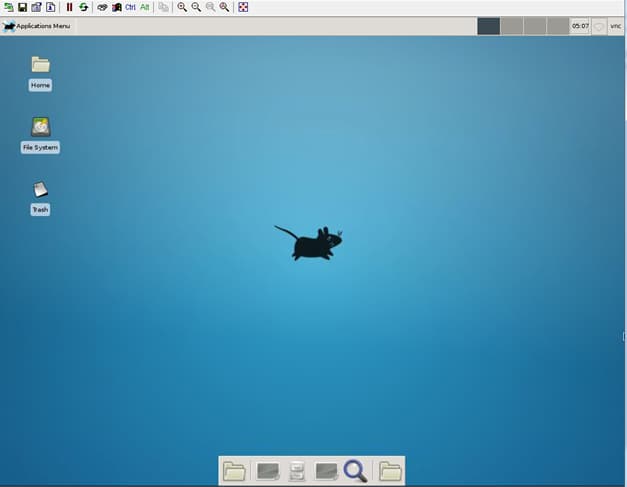
And you are all done!
Thanks for learning with the DigitalOcean Community. Check out our offerings for compute, storage, networking, and managed databases.
About the author
Still looking for an answer?
This textbox defaults to using Markdown to format your answer.
You can type !ref in this text area to quickly search our full set of tutorials, documentation & marketplace offerings and insert the link!
Thanks, superb article. Perhaps a custom image could be available with VNC? Would go in line with DO’s mission of simplicity.
Photos missing?!? Love the concept but would love to see the screenshots too.
I’m stuck at Step 4. I get this error message:
root@VNC:~# edit /etc/init.d/vncserver Warning: unknown mime-type for “/etc/init.d/vncserver” – using “application/octet-stream” Error: no “edit” mailcap rules found for type “application/octet-stream” root@VNC:~# Warning: unknown mime-type for “/etc/init.d/vncserver” – using “application/octet-stream” Warning:: command not found root@VNC:~# Error: no “edit” mailcap rules found for type “application/octet-stream”^C
@josephs.julian: You have to use a text editor to edit a file. I suggest nano - it’s more user friendly than other alternatives such as vim or emacs:
nano /etc/init.d/vncserver
Thanks, very great and helpful tutorial, i only have one problem, i still have open port on my IP:5901
When i follow your steps and type netstat -alpn | grep :5901 i get both 127.0.0.1:5901 MYIP:5901
alexandar.n - did you follow the ‘Recommended Step’ ? You have to restart the VNC server after you edit config. Make sure you have “-localhost” added to OPTIONS in “/etc/init.d/vncserver”.
I have followed every step from tutorial, and it was showing both ip’s on service restart, but i rebooted server and now is showing only on localhost. Again, great tutorial!
How can I do step 4 (Edit /home/vnc/.vnc/xstartup and replace with:) without having xfce4 installed??? Just because I prefer the ubuntu’s desktop
 This work is licensed under a Creative Commons Attribution-NonCommercial- ShareAlike 4.0 International License.
Become a contributor for community
Get paid to write technical tutorials and select a tech-focused charity to receive a matching donation.

DigitalOcean Documentation
Full documentation for every DigitalOcean product.

Resources for startups and AI-native businesses
The Wave has everything you need to know about building a business, from raising funding to marketing your product.
The developer cloud
Scale up as you grow — whether you're running one virtual machine or ten thousand.

Start building today
From GPU-powered inference and Kubernetes to managed databases and storage, get everything you need to build, scale, and deploy intelligent applications.
