By Abdelhadi Dyouri and Caitlin Postal

The author selected the Free and Open Source Fund to receive a donation as part of the Write for DOnations program.
Introduction
Flask is a lightweight Python web framework with useful tools and features for creating web applications in Python. SQLAlchemy is an SQL toolkit that offers efficient and high-performing database access for relational databases. It supplies ways to interact with several database engines, such as SQLite, MySQL, and PostgreSQL, by providing access to the database’s SQL functionalities. This toolkit also gives you an Object Relational Mapper (ORM), which enables you to make queries and handle data using simple Python objects and methods. Flask-SQLAlchemy is a Flask extension that makes using SQLAlchemy with Flask easier, providing tools and methods to interact with your database in your Flask applications.
Flask provides a way to build a small web application quickly with one Python file. However, a small application can grow into a large application with multiple database tables, hundreds of routes, and complex features. Writing the code for a large application in one file will quickly become messy and hard to manage. Flask allows you to organize your application’s code base by splitting each of the application’s major parts into specific directories and files for a better-organized application.
For example, in a social media application, you might have the routes for users in a file called routes.py inside a directory called users, and you might then collect the database models for users inside a module called users.py inside a models directory. Then you can do the same for posts, followers, hashtags, questions, answers, ads, the marketplace, payments, and other features in your large social media application. If you want to edit some business logic into the payments code, you can change the database code for payments in a file located at mysocialapp/models/payment.py, then change the business logic in a file located at mysocialapp/payments/routes.py. Each part of the application will have its code isolated in different files and directories, effectively splitting the application into easy-to-manage components. This structure also helps familiarize new developers with your application so they know where to troubleshoot an issue or add a new feature.
Flask provides a feature called blueprints for making application components. In the prior example, you can use blueprints to structure your large social media application with different blueprints, such as a users’ blueprint, a blueprint for posts, one for followers, and so on for each feature.
In this tutorial, you’ll use Flask blueprints to structure a web application with three components: the main blueprint containing the home page and other main routes, a posts blueprint for managing blog posts, and a questions blueprint for questions and answers.
Prerequisites
-
A local Python 3 programming environment, which you can set up by following the tutorial for your distribution in How To Install and Set Up a Local Programming Environment for Python 3 series. In this tutorial, we’ll call our project directory
flask_app. -
An understanding of basic Flask concepts, such as routes, view functions, and templates. If you are not familiar with Flask, check out How to Create Your First Web Application Using Flask and Python and How to Use Templates in a Flask Application.
-
An understanding of basic HTML concepts. You can review our How To Build a Website with HTML tutorial series for background knowledge.
-
An understanding of basic Flask-SQLAlchemy concepts, such as setting up a database, creating database models, and inserting data into the database. See How to Use Flask-SQLAlchemy to Interact with Databases in a Flask Application for background knowledge.
The Target Application Structure
By the end of the tutorial, you will have built a Flask application with the following structure:
.
└── flask_app
    ├── app
    │   ├── extensions.py
    │   ├── __init__.py
    │   ├── main
    │   │   ├── __init__.py
    │   │   └── routes.py
    │   ├── models
    │   │   ├── post.py
    │   │   └── question.py
    │   ├── posts
    │   │   ├── __init__.py
    │   │   └── routes.py
    │   ├── questions
    │   │   ├── __init__.py
    │   │   └── routes.py
    │   └── templates
    │       ├── base.html
    │       ├── index.html
    │       ├── posts
    │       │   ├── categories.html
    │       │   └── index.html
    │       └── questions
    │           └── index.html
    ├── app.db
    └── config.py
Inside your flask_app directory, you’ll have an app.db database file and a config.py configuration file for your Flask application. The main Flask application will be in the app directory, which will have an __init__.py special file to make it a package for imports to work properly, and it will contain a function for creating the Flask application instance.
The app directory will contain an extensions.py file for managing the Flask extensions you’ll use in your application (in this tutorial, Flask-SQLAlchemy is the example of using a Flask extension). You will also have the following directories:
main: the main blueprint for main routes, such as the home page.posts: the posts blueprint for managing blog posts.questions: the questions blueprint for managing questions and answers.models: the directory that will contain Flask-SQLAlchemy models.templates: the templates directory that will contain files for the main blueprint and a directory for each blueprint.
Step 1 — Installing Flask and Flask-SQLAlchemy
In this step, you’ll install the necessary packages for your application.
In your flask_app directory, active your virtual environment:
- source my_env/bin/activate
With your virtual environment activated, use pip to install Flask and Flask-SQLAlchemy:
- pip install Flask Flask-SQLAlchemy
Once the installation has finished, the output will print a line similar to the following:
OutputSuccessfully installed Flask-2.1.2 Flask-SQLAlchemy-2.5.1 Jinja2-3.1.2 MarkupSafe-2.1.1 SQLAlchemy-1.4.39 Werkzeug-2.1.2 click-8.1.3 greenlet-1.1.2 itsdangerous-2.1.2
With the required Python packages installed, you’ll set up a configuration file to manage your Flask application’s settings in the next step.
Step 2 — Creating a Configuration File
In this step, you’ll create a configuration file for your Flask application, separating your application settings from the rest of the application and making changing settings easier. The configuration file will configure things such as the secret key, the SQLAlchemy database URI, and so on.
In your flask_app directory, open a new file called config.py. This file will hold your Flask application’s configuration:
- nano config.py
Add the following code to it:
import os

basedir = os.path.abspath(os.path.dirname(__file__))


class Config:
    SECRET_KEY = os.environ.get('SECRET_KEY')
    SQLALCHEMY_DATABASE_URI = os.environ.get('DATABASE_URI')\
        or 'sqlite:///' + os.path.join(basedir, 'app.db')
    SQLALCHEMY_TRACK_MODIFICATIONS = False
Save and close the file.
You import the os module to access your file system. You use os to establish the base directory with os.path.abspath(os.path.dirname(__file__)) to correctly set up the path of the database file.
You use a class called Config and set configuration values using class variables. Here, you set three configurations:
-
SECRET_KEY: A long random string used by Flask as a secret key, or a key used to secure the sessions that remember information from one request to another. The user can access the information stored in the session but cannot modify it unless they have the secret key, so you must never allow anyone to access your secret key. See the Flask documentation on sessions for more information. Other Flask extensions often use this secret key to secure data. See Step 3 of How To Use Web Forms in a Flask Application for more information on how to create a secure secret key. When developing your Flask applications, you should set the secret key with an environment variable calledSECRET_KEY. To get its value in thisconfig.pyfile and save it in a class variable calledSECRET_KEY, you access the environment variable’s value via theos.environobject using itsget()method. (Though you do not need to set a secret key to follow this tutorial, you can review the note at the end of this list for instructions on how to set a secret key.) -
SQLALCHEMY_DATABASE_URI: The database URI specifies the database you want to establish a connection with using SQLAlchemy. In this case, you either get it from aDATABASE_URIenvironment variable or you set a default value. The default URI value here follows the formatsqlite:///path/to/app.db. You use theos.path.join()function to join the base directory you constructed and stored in thebasedirvariable and theapp.dbfile name. With this, creating a Flask application without setting aDATABASE_URIenvironment variable will connect to anapp.dbdatabase file in yourflask_appdirectory by default. The file will be created when you create your database tables. If you’d like to set a database URI for a different SQL engine, see Step 2 of How to Use Flask-SQLAlchemy to Interact with Databases in a Flask Application. -
SQLALCHEMY_TRACK_MODIFICATIONS: A configuration to enable or disable tracking modifications of objects. You set it toFalseto disable tracking and use less memory. For more, you can read the configuration page in the Flask-SQLAlchemy documentation.
Note: You will not set a secret key in this tutorial because you will not use functionality that needs a secret key. However, if you need to set a secret key, you can set it as follows (for Windows, use set instead of export):
- export SECRET_KEY="your secret key"
Similarly, you can set a database URI like so (use set on Windows):
- export DATABASE_URI="postgresql://username:password@host:port/database_name"
You have now set up a configuration file for your application. Next, you’ll set up a Flask application instance and create a few blueprints that represent different components of your Flask application.
Step 3 — Creating a Flask Application Factory
In this step, you’ll create a Flask application factory, which is a Python function that sets up a Flask application instance.
At this point in the tutorial, your flask_app directory structure is as follows (excluding the virtual environment’s directory):
.
├── flask_app
   └── config.py
Your application’s core code will live inside a project directory, which will be a Python package. In this tutorial, we’ll call it app, but you can use your project’s name or another common directory name such as src, core, or something similar.
You’ll make the folder containing the application’s core code a Python package so that imports work correctly throughout the code base and to increase its maintainability.
To make the app project directory a Python package, you’ll create a special __init__.py file inside of it, which marks directories as Python packages. This __init__.py file will hold code for your Flask factory function, which is a function you’ll use to set and create the Flask application instance where you link all your Flask blueprints together. Think of the factory function as the central function in which all your Flask components (blueprints) are combined into one application and that you can use to create different Flask application instances for different purposes with different configurations. For example, you could use the factory function to create a Flask application instance for testing with proper configurations for testing.
Inside your flask_app directory, create this new app directory:
- mkdir app
Then open a new __init__.py file inside the app directory:
- nano app/__init__.py
Add the following code to it:
from flask import Flask

from config import Config

def create_app(config_class=Config):
    app = Flask(__name__)
    app.config.from_object(config_class)

    # Initialize Flask extensions here

    # Register blueprints here

    @app.route('/test/')
    def test_page():
        return '<h1>Testing the Flask Application Factory Pattern</h1>'

    return app
Save and close the file.
In this file, you import the Flask class from the flask package. Then you import the Config configuration class from the config.py file you created in the flask_app directory in the previous step.
The create_app() function is the Flask application factory function. It creates an application instance called app from the Flask() class using the familiar app = Flask(__name__) line. You configure the application by importing configuration values from an object using the app.config.from_object() method, passing it the value of the config_class parameter, which holds the Config class as a default value. You will initialize your Flask extensions below the # Initialize Flask extensions here comment and register your application blueprints below the # Register blueprints here comment once you create them.
You create a test route using the app.route() decorator inside the factory function to demonstrate how to register routes inside application factories. In this case, the test_page() view function returns the heading Testing the Flask Application Factory Pattern.
Lastly, the create_app() factory function returns the application instance you constructed with the line return app.
Flask will automatically detect the create_app() factory function in your app package and use it to create an application instance. But you’ll need to set the environment variables required to run your Flask application in development mode first.
While in your flask_app directory with your virtual environment activated, you will tell Flask where the factory function is by passing the core application’s directory name app as a value to the FLASK_APP environment variable. Then you will set the FLASK_ENV environment variable to development to run the application in development mode and get access to the debugger. For more information about the Flask debugger, see How To Handle Errors in a Flask Application.
First, set the app package as the place where Flask should look for the create_app() factory function:
- export FLASK_APP=app
You may be used to building your Flask applications in a single Python file called app.py. In that case, you also use the same command to tell Flask where to locate your application. The difference here is that app in the preceding command is for the project’s core directory, where you have your __init__.py file.
Set the FLASK_ENV environment variable to run the application in development mode:
- export FLASK_ENV=development
Then run the application:
- flask run
With the development server running, visit the following URL using your browser:
http://127.0.0.1:5000/test/
The site will load with a Testing the Flask Application Factory Pattern heading.
You have now created a Flask application factory function. Next, you’ll create Flask blueprints and register them in this factory function.
Step 4 — Creating Flask Blueprints
In this step, you will create a blueprint for the main routes that will manage the main component of your Flask application, and then you will register the blueprint on your factory function. You’ll create another blueprint each for blog posts, questions, and answers. You’ll add a few routes to each blueprint and render templates for each route with a templates directory for each blueprint.
At this point in the tutorial, your flask_app directory structure is as follows (excluding the virtual environment’s directory):
.
├── flask_app
    ├── app
    │   └── __init__.py
    └── config.py
Creating the Main Blueprint and Rendering its Templates
You will now create the main blueprint for the application and render its templates.
Leave the development server you started in the previous step running, and open a new terminal.
Navigate to your flask_app directory in the new terminal. Then create a directory called main for your main blueprint inside the app directory:
- mkdir app/main
Next, open a new __init__.py main file inside the new main directory:
- nano app/main/__init__.py
This is where you’ll create your main blueprint. Add the following code to this file:
from flask import Blueprint

bp = Blueprint('main', __name__)
Save and close the file.
Here, you import the Blueprint class from the flask package. Then you use this class to create a blueprint object bp, passing it two arguments: a name ('main' in this case) and the __name__ special variable, which holds the name of the current Python module.
You now have a blueprint object, which will later have routes and functions you can plug into the Flask application you create using the create_app() factory function you’ve written in the previous step.
Next, you’ll create a routes.py file inside your main blueprint directory, which will hold the routes of the main blueprint. Open a new routes.py file inside your main blueprint directory:
- nano app/main/routes.py
You’ll create routes using the bp object. Add the following route inside the new file:
from app.main import bp


@bp.route('/')
def index():
    return 'This is The Main Blueprint'
Save and close the file.
Here, you import the bp blueprint object from the main blueprint, which you access through app.main. In the import line, app is the project’s package, main is the main blueprint package, and bp is the object you declared in the main blueprint’s __init__.py file.
You use the bp object to create a / route and an index() view function with the bp.route() decorator, similar to the familiar app.route() decorator.
For Flask to use these routes and to make them importable directly from the blueprint, you’ll need to import this routes.py file in your blueprint’s __init__.py file. Open it for editing:
- nano app/main/__init__.py
Add the highlighted import line at the end of the file:
from flask import Blueprint

bp = Blueprint('main', __name__)

from app.main import routes
Save and close the file.
With this addition, registering a blueprint will also register its routes.
Now that you’ve created a blueprint and added a route, you’ll need to tell Flask about this new blueprint so that it can be treated as part of your Flask application. To do this, you’ll register the blueprint inside your Flask application factory function.
Open the app/__init__.py file to edit your factory function:
- nano app/__init__.py
Edit the create_app() factory function to match the following block, adding the highlighted lines:
...
def create_app(config_class=Config):
    app = Flask(__name__)
    app.config.from_object(config_class)

    # Initialize Flask extensions here

    # Register blueprints here
    from app.main import bp as main_bp
    app.register_blueprint(main_bp)

    @app.route('/test/')
    def test_page():
        return '<h1>Testing the Flask Application Factory Pattern</h1>'

    return app
Save and close the file.
You import the bp blueprint object from the main blueprint and rename it to main_bp for readability. Then you use the app.register_blueprint() method to register this main blueprint for Flask to treat as part of the application.
With the development server running, navigate to the following URL:
http://127.0.0.1:5000/
The page will load with the text This is The Main Blueprint, which is the text you returned in the main route.
You now have a blueprint with a route in your application. Next, you will edit the main route in the main blueprint to render an HTML template, which will demonstrate how to render templates when working with Flask blueprints.
Open the routes.py file of the main blueprint for modification:
- nano app/main/routes.py
Edit the file with the highlighted lines:
from flask import render_template
from app.main import bp

@bp.route('/')
def index():
    return render_template('index.html')
Save and close the file.
Here, you import the render_template() function and use it in the route to render a template file called index.html.
You’ll now have to create a templates directory and base template that all other templates will share to avoid code repetition.
Create a templates directory inside your app directory:
- mkdir app/templates
Open a new file called base.html to act as the base template:
- nano app/templates/base.html
Add the following code to the new file:
<!DOCTYPE html>
<html lang="en">
<head>
    <meta charset="UTF-8">
    <title>{% block title %} {% endblock %} - FlaskApp</title>
    <style>
        h2 {
            width: 100%;
        }

        .title {
            margin: 5px;
            width: 100%;
        }

        .content {
            margin: 5px;
            width: 100%;
            display: flex;
            flex-direction: row;
            flex-wrap: wrap;
        }

        .post {
            flex: 20%;
            padding: 10px;
            margin: 5px;
            background-color: #f3f3f3;
            inline-size: 100%;
        }

        .title a {
            color: #00a36f;
            text-decoration: none;
        }

        nav a {
            color: #d64161;
            font-size: 3em;
            margin-left: 50px;
            text-decoration: none;
        }

    </style>
</head>
<body>
    <nav>
        <a href="{{ url_for('main.index') }}">FlaskApp</a>
        <a href="#">Posts</a>
        <a href="#">Categories</a>
        <a href="#">Questions</a>
    </nav>
    <hr>
    <div class="content">
        {% block content %} {% endblock %}
    </div>
</body>
</html>
Save and close the file.
This base template features HTML boilerplate that you will reuse in your other templates.
The base template has a title block, some CSS, a navigation bar to link to different parts of your application, and a content block. For more on base templates, see How To Use Templates in a Flask Application.
You use the syntax blueprint_name.view_function_name to link to a route when using the url_for() function with blueprints. The index page is handled by the index() view function in the main blueprint; therefore, you pass main.index to the url_for() function to build a link.
Now, create the index.html file you rendered in the index() view function of the main blueprint:
- nano app/templates/index.html
Add the following code to the newly created file:
{% extends 'base.html' %}

{% block content %}
    <span class="title"><h1>{% block title %} The Home Page of FlaskApp {% endblock %}</h1></span>
    <div class="content">
        <h2>This is the main Flask blueprint</h2>
    </div>
{% endblock %}
Save and close the file.
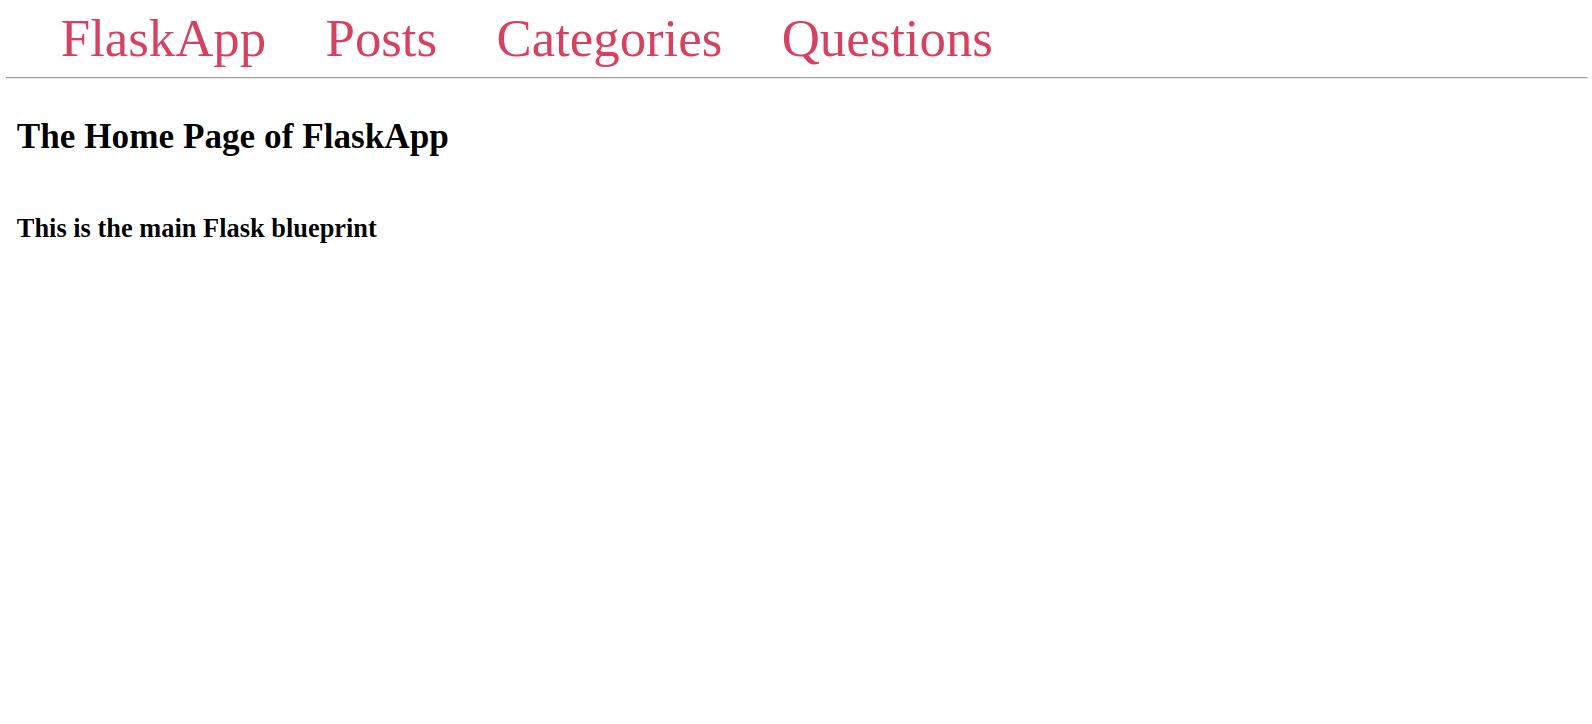
Here, you extend the base template. You replace the content block, using an <h1> heading that also serves as a title and an <h2> heading to indicate the index page is part of the main Flask blueprint.
With the development server running, visit the index page using your browser or refresh it if it’s already open:
http://127.0.0.1:5000/
A page similar to the following image will load:
You have now set up a blueprint, added a route to its routes.py file, registered it on the application, and rendered templates for it. Next, you’ll create another blueprint for blog posts.
Creating the Posts Blueprint and Rendering its Templates
Now you’ll create the blueprint for blog posts, register it, and render its templates.
At this point in the tutorial, your flask_app directory structure is as follows (excluding the virtual environment’s directory):
.
├── flask_app
    ├── app
    │   ├── __init__.py
    │   ├── main
    │   │   ├── __init__.py
    │   │   └── routes.py
    │   └── templates
    │       ├── base.html
    │       └── index.html
    └── config.py
To create a new blueprint for blog posts, you’ll follow the same steps as in the previous section.
First, create a new posts directory to hold the blueprint’s files:
- mkdir app/posts
Next, open a new __init__.py file inside the new posts directory:
- nano app/posts/__init__.py
Create a bp blueprint object and import the routes that you’ll create into the blueprint’s routes.py file:
from flask import Blueprint

bp = Blueprint('posts', __name__)


from app.posts import routes
Save and close the file.
In the preceding code block, you use posts as the blueprint’s name. You also import the routes from a routes.py file, which you haven’t created yet.
Next, open the new routes.py file where you’ll put the routes for the posts blueprint:
- nano app/posts/routes.py
Add the following routes to this file:
from flask import render_template
from app.posts import bp

@bp.route('/')
def index():
    return render_template('posts/index.html')

@bp.route('/categories/')
def categories():
    return render_template('posts/categories.html')
Save and close the file.
Here, you have two routes: a route for the index page of the posts component of the application and a route for categories, which will be part of the posts component.
In the index route, you render a template file with the path posts/index.html which means that Flask will look for a directory called posts in the templates directory and then look for an index.html file inside of the posts directory.
In the categories route, you render a categories.html template, which will also be inside a posts directory inside the templates folder.
Now create the new posts directory inside your templates directory:
- mkdir app/templates/posts
Next, create the new index.html file inside the posts directory. This is the file you render in the index() view function of the posts blueprint:
- nano app/templates/posts/index.html
Add the following code to the newly created file:
{% extends 'base.html' %}

{% block content %}
    <span class="title"><h1>{% block title %} The Posts Page {% endblock %}</h1></span>
    <div class="content">
        <h2>This is the posts Flask blueprint</h2>
    </div>
{% endblock %}
Save and close the file.
Here you extend the base template. You also set an <h1> heading as a title and an <h2> heading to mark the page as part of the posts blueprint.
Next, create a new categories.html file inside the posts directory. This is the file you rendered in the categories() view function of the posts blueprint:
- nano app/templates/posts/categories.html
Add the following code to the newly created file:
{% extends 'base.html' %}

{% block content %}
    <span class="title"><h1>{% block title %} Categories {% endblock %}</h1></span>
    <div class="content">
        <h2>This is the categories page within the posts blueprint</h2>
    </div>
{% endblock %}
Save and close the file.
You extend the base template and set an <h1> heading as a title and a <h2> heading to mark the page as part of the posts blueprint.
You’ve created the posts blueprint, added routes, and made the rendered templates. You will now register this blueprint in your factory function for Flask to recognize it as part of the application.
Open the app/__init__.py file to edit your factory function:
- nano app/__init__.py
Edit the create_app() factory function by adding the highlighted lines:
def create_app(config_class=Config):
    app = Flask(__name__)
    app.config.from_object(config_class)

    # Initialize Flask extensions here

    # Register blueprints here
    from app.main import bp as main_bp
    app.register_blueprint(main_bp)

    from app.posts import bp as posts_bp
    app.register_blueprint(posts_bp, url_prefix='/posts')

    @app.route('/test/')
    def test_page():
        return '<h1>Testing the Flask Application Factory Pattern</h1>'

    return app
Save and close the file.
Here you imported the bp blueprint object from the posts blueprint package and renamed it posts_bp for readability.
You register the posts blueprint using the app.register_blueprint() method by passing it the posts_bp blueprint object. You also pass it a value '/posts' for the url_prefix parameter, which will prefix the blueprint’s routes with this string. For example, the main / route of the posts blueprint will become accessible via /posts/, and the /categories route will be at /posts/categories/.
With your new posts blueprint registered and your development server running, use your browser to navigate to the following URLs:
http://127.0.0.1:5000/posts/
http://127.0.0.1:5000/posts/categories/
The The Posts Page heading will load for the http://127.0.0.1:5000/posts/ page. A Categories heading will load for the http://127.0.0.1:5000/posts/categories/ page.
To make the Posts and Categories links in the navigation bar functional, open the base template for modification:
- nano app/templates/base.html
Modify the <nav> tag with the highlighted expressions:
    <nav>
        <a href="{{ url_for('main.index') }}">FlaskApp</a>
        <a href="{{ url_for('posts.index') }}">Posts</a>
        <a href="{{ url_for('posts.categories') }}">Categories</a>
        <a href="#">Questions</a>
    </nav>
Save and close the file.
You link to the posts index with the url_for('posts.index') function call and the categories page with url_for('posts.categories').
Refresh any page in your application to enable the Posts and Categories link functionality.
You now have a posts blueprint registered in your application. Next, you’ll add a blueprint for questions and answers.
Creating the Questions Blueprint and Rendering its Templates
Now you’ll create the questions blueprint, register it, and render its templates.
At this point in the tutorial, your flask_app directory structure is as follows (excluding the virtual environment’s directory):
.
├── flask_app
    ├── app
    │   ├── __init__.py
    │   ├── main
    │   │   ├── __init__.py
    │   │   └── routes.py
    │   ├── posts
    │   │   ├── __init__.py
    │   │   └── routes.py
    │   └── templates
    │       ├── base.html
    │       ├── index.html
    │       └── posts
    │           ├── categories.html
    │           └── index.html
    └── config.py
To create a new blueprint for questions and answers, create a new questions directory to hold the blueprint’s files:
- mkdir app/questions
Next, open a new __init__.py file inside the new questions directory:
- nano app/questions/__init__.py
Create a bp blueprint object and import the routes that you’ll later create in the blueprint’s routes.py file:
from flask import Blueprint

bp = Blueprint('questions', __name__)

from app.questions import routes
Save and close the file.
In the preceding code block, you use questions as the blueprint’s name. You also import the routes from a routes.py file, which you haven’t created yet.
Next, open the new routes.py file where you’ll put the routes for the questions blueprint:
- nano app/questions/routes.py
Add the following routes to this file:
from flask import render_template
from app.questions import bp

@bp.route('/')
def index():
    return render_template('questions/index.html')
Save and close the file.
You create a / route using the questions blueprint object, rendering a template file called index.html inside a directory called questions, which you’ll create inside the templates folder.
Create the questions directory inside the templates directory, and then open an index.html file in it:
- mkdir app/templates/questions
- nano app/templates/questions/index.html
Add the following code to the new file:
{% extends 'base.html' %}

{% block content %}
    <span class="title">
        <h1>{% block title %} Questions {% endblock %}</h1>
    </span>
    <div class="questions">
        <h2>Questions Blueprint</h2>
    </div>
{% endblock %}
Save and close the file.
Here, you set a title and a subheading, similar to the previous index templates in the other blueprints.
Now open app/__init__.py to register the questions blueprint in the create_app() factory function:
- nano app/__init__.py
Edit the create_app() factory function by adding the highlighted lines:
def create_app(config_class=Config):
    app = Flask(__name__)
    app.config.from_object(config_class)

    # Initialize Flask extensions here

    # Register blueprints here
    from app.main import bp as main_bp
    app.register_blueprint(main_bp)

    from app.posts import bp as posts_bp
    app.register_blueprint(posts_bp, url_prefix='/posts')

    from app.questions import bp as questions_bp
    app.register_blueprint(questions_bp, url_prefix='/questions')

    @app.route('/test/')
    def test_page():
        return '<h1>Testing the Flask Application Factory Pattern</h1>'

    return app
Save and close the file.
You register the questions blueprint as you did with the posts blueprint, adding a /questions prefix to its routes.
With your development server running, use your browser to navigate to the following URL:
http://127.0.0.1:5000/questions/
The Questions and Questions Blueprint headings will be displayed on the page.
You will now make the Questions link functional. Open the base template to edit the navigation bar:
- nano app/templates/base.html
Modify the <nav> tag with the highlighted expression:
    <nav>
        <a href="{{ url_for('main.index') }}">FlaskApp</a>
        <a href="{{ url_for('posts.index') }}">Posts</a>
        <a href="{{ url_for('posts.categories') }}">Categories</a>
        <a href="{{ url_for('questions.index') }}">Questions</a>
    </nav>
Save and close the file.
Here, you link to the questions index page using the url_for('questions.index') function call.
Refresh any page in your application to enable the Questions link functionality in the navigation bar.
You have created several blueprints to manage different components of your application. You registered the blueprints on your factory function and rendered templates for each route. Next, you’ll add Flask-SQLAlchemy to your application to manage and organize large databases in your Flask application.
Step 5 — Adding Flask-SQLAlchemy Models to your Flask Application
In this step, you’ll integrate Flask-SQLAlchemy with your application, add a directory for database models, and create a model for posts and one for questions. You’ll insert a few blog posts into the posts table, then edit the posts’ index route to display all posts in the database. You will also insert a few questions and answers into the questions table to display them on the questions’ index page, alongside a new web form for adding further questions and answers to the database.
At this point in the tutorial, your flask_app directory structure is as follows (excluding the virtual environment’s directory):
.
├── flask_app
    ├── app
    │   ├── __init__.py
    │   ├── main
    │   │   ├── __init__.py
    │   │   └── routes.py
    │   ├── posts
    │   │   ├── __init__.py
    │   │   └── routes.py
    │   ├── questions
    │   │   ├── __init__.py
    │   │   └── routes.py
    │   └── templates
    │       ├── base.html
    │       ├── index.html
    │       ├── posts
    │       │   ├── categories.html
    │       │   └── index.html
    │       └── questions
    │           └── index.html
    └── config.py
Creating a File for Managing Flask Extensions and Integrating Flask-SQLAlchemy
To add the Flask-SQLAlchemy extension to your application, you’ll first add a Python module called extensions.py, in which you’ll set up your various Flask extensions, to your app directory.
Open a new extensions.py file inside your app directory:
- nano app/extensions.py
Add the following code to the newly created file:
from flask_sqlalchemy import SQLAlchemy
db = SQLAlchemy()
Save and close the file.
Here, you import the SQLAlchemy() class from the Flask-SQLAlchemy package, and then you use it to create a db database object with no arguments.
You will use this db object to integrate SQLAlchemy with the Flask application you construct in your factory function. Open your app/__init__.py file to edit the factory function:
- nano app/__init__.py
Edit the file to import and initialize the database object:
from flask import Flask

from config import Config
from app.extensions import db

def create_app(config_class=Config):
    app = Flask(__name__)
    app.config.from_object(config_class)

    # Initialize Flask extensions here
    db.init_app(app)

    # Register blueprints here
    from app.main import bp as main_bp
    app.register_blueprint(main_bp)

    from app.posts import bp as posts_bp
    app.register_blueprint(posts_bp, url_prefix='/posts')

    from app.questions import bp as questions_bp
    app.register_blueprint(questions_bp, url_prefix='/questions')

    @app.route('/test/')
    def test_page():
        return '<h1>Testing the Flask Application Factory Pattern</h1>'

    return app
Here, you import the db database object from the app.extensions module you created earlier. Before registering blueprints, you connect the database object to the app application instance using the db.init_app() method. With this, you can use your db object to create and interact with Flask-SQLAlchemy models in your application.
Remember that you’ve configured Flask-SQLAlchemy using the Config object in the config.py file inside your flask_app directory. You can open this file for a quick reminder:
- nano config.py
import os

basedir = os.path.abspath(os.path.dirname(__file__))

class Config:
    SECRET_KEY = os.environ.get('SECRET_KEY')
    SQLALCHEMY_DATABASE_URI = os.environ.get('DATABASE_URI')\
        or 'sqlite:///' + os.path.join(basedir, 'app.db')
    SQLALCHEMY_TRACK_MODIFICATIONS = False
If you don’t set up a DATABASE_URI environment variable, the db object will, by default, connect to an SQLite file called app.db that will appear in your flask_app directory once you create your database tables. Close the file when finished reviewing it.
You can check that the database was registered correctly using the Flask shell. First, with your virtual environment activated, make sure you’ve set up your Flask environment variables in your flask_app directory:
- export FLASK_APP=app
- export FLASK_ENV=development
Open the Flask shell:
- flask shell
Import the db object from the app.extensions module, then print it:
- from app.extensions import db
- print(db)
You’ll receive the path of your database, similar to the following:
Output<SQLAlchemy engine=sqlite:///your_path_to_flask_app/app.db>
This output means that the db object was properly registered. If you get an error running the code in the Flask shell, ensure you’ve correctly registered the db object in your factory function before moving to the next section. You can exit the Flask shell by typing exit().
Creating and Interacting with the Post Model
In large applications, you may have hundreds of database tables, which means you would need to write hundreds of SQLAlchemy models to manage them. Putting all your models in one file will make your application hard to maintain, so you will split your models into separate Python files inside a models directory. Each file will hold the models and functions related to a specific part of your application. For example, you may put models and functions for managing posts inside a post.py file in a directory called models in the app directory.
At this point in the tutorial, your flask_app directory structure is as follows (excluding the virtual environment’s directory):
.
├── flask_app
    ├── app
    │   ├── extensions.py
    │   ├── __init__.py
    │   ├── main
    │   │   ├── __init__.py
    │   │   └── routes.py
    │   ├── posts
    │   │   ├── __init__.py
    │   │   └── routes.py
    │   ├── questions
    │   │   ├── __init__.py
    │   │   └── routes.py
    │   └── templates
    │       ├── base.html
    │       ├── index.html
    │       ├── posts
    │       │   ├── categories.html
    │       │   └── index.html
    │       └── questions
    │           └── index.html
    └── config.py
To create a database model for posts in its own file, first create a directory called models inside your app directory:
- mkdir app/models
Then, open a new file called post.py inside your models directory:
- nano app/models/post.py
Add the following code to the newly created file:
from app.extensions import db

class Post(db.Model):
    id = db.Column(db.Integer, primary_key=True)
    title = db.Column(db.String(150))
    content = db.Column(db.Text)

    def __repr__(self):
        return f'<Post "{self.title}">'
Save and close the file.
You import the db database object from the app.extensions module. Then you create a Flask-SQLAlchemy database model called Post using the db.Model class. In the model, you have an ID integer column as a primary key (id), a column to hold strings for the post title (title), and a text column for content (content). You use the special __repr__() method to provide a string representation for each post object using its title. For more on Flask-SQLAlchemy, you can review How to Use Flask-SQLAlchemy to Interact with Databases in a Flask Application.
Next, open the Flask shell to create the post table based on the post model:
- flask shell
Run the following code to create the posts table:
- from app.extensions import db
- from app.models.post import Post
- db.create_all()
You import the db object from the app.extensions module and the Post model from the app.models.post module. Then you use the create_all() method to create the posts table.
The code should execute without an output. If you receive an error, check your app/extensions.py and app/models/post.py files, and review the previous steps to ensure you have followed them as written.
Note: The db.create_all() function does not recreate or update a table if it already exists. For example, if you want to modify your model by adding a new column and so you run the db.create_all() function, the change you make to the model will not be applied to the table if the table already exists in the database. The solution is to delete all existing database tables with the db.drop_all() function and then recreate them with the db.create_all() function like so:
- db.drop_all()
- db.create_all()
These commands will apply the modifications you make to your models and will delete all the existing data in the database. To update the database and preserve existing data, you’ll need to use schema migration, which allows you to modify your tables and preserve data. You can use the Flask-Migrate extension to perform SQLAlchemy schema migrations through the Flask command-line interface.
Next, run the following code to create ten random posts:
- import random
-
- for i in range(0, 10):
- random_num = random.randrange(1, 1000)
- post = Post(title=f'Post #{random_num}',
- content=f'Content #{random_num}')
- db.session.add(post)
- print(post)
- print(post.content)
- print('--')
- db.session.commit()
You import the db database object, the Post database model, and the random Python module. You’ll use this module to generate random numbers to create sample posts with different titles and contents. You use a for loop with the range() Python function to repeat a code block ten times.
In the for loop, you use the random.randrange() method to generate a random integer number between 1 and 1000 and save it to a variable called random_num. You then create a post object using the Post model and use the random number in the random_num variable to generate a sample post title and content.
You then add the post object to the database session, print the object itself and its content, and commit the transaction.
You’ll receive an output similar to the following but with different numbers:
Output<Post "Post #58">
Content #58
--
<Post "Post #55">
Content #55
--
<Post "Post #994">
Content #994
--
<Post "Post #394">
Content #394
--
<Post "Post #183">
Content #183
--
<Post "Post #633">
Content #633
--
<Post "Post #790">
Content #790
--
<Post "Post #883">
Content #883
--
<Post "Post #259">
Content #259
--
<Post "Post #581">
Content #581
--
Each post has a randomly generated number attached to it. These posts will now be in your database.
Leave the Flask shell running and open a new terminal window. Source your environment and navigate to your application folder.
Now that you have some sample posts in your table, you can display them on the posts’ index page. First, open the posts routes file to modify the index route:
- nano app/posts/routes.py
Edit the imports and the index route by adding the highlighted lines:
from flask import render_template
from app.posts import bp
from app.extensions import db
from app.models.post import Post


@bp.route('/')
def index():
    posts = Post.query.all()
    return render_template('posts/index.html', posts=posts)
Save and close the file.
You import the db database object and the Post model. You get all the posts in the database and then pass them to the posts’ index template.
Open the posts’ index template for modification to display the posts you passed to it:
- nano app/templates/posts/index.html
Edit the file by adding the highlighted lines:
{% extends 'base.html' %}

{% block content %}
    <span class="title"><h1>{% block title %} The Posts Page {% endblock %}</h1></span>
    <div class="content">
        <h2>This is the posts Flask blueprint</h2>
        {% for post in posts %}
            <div class="post">
                <p><b>#{{ post.id }}</b></p>
                <p class="title">
                    <b>
                        <a href="#">
                            {{ post.title }}
                        </a>
                    </b>
                </p>
                <div class="content">
                    <p>{{ post.content }}</p>
                </div>
                <hr>
            </div>
        {% endfor %}
    </div>
{% endblock %}
Save and close the file.
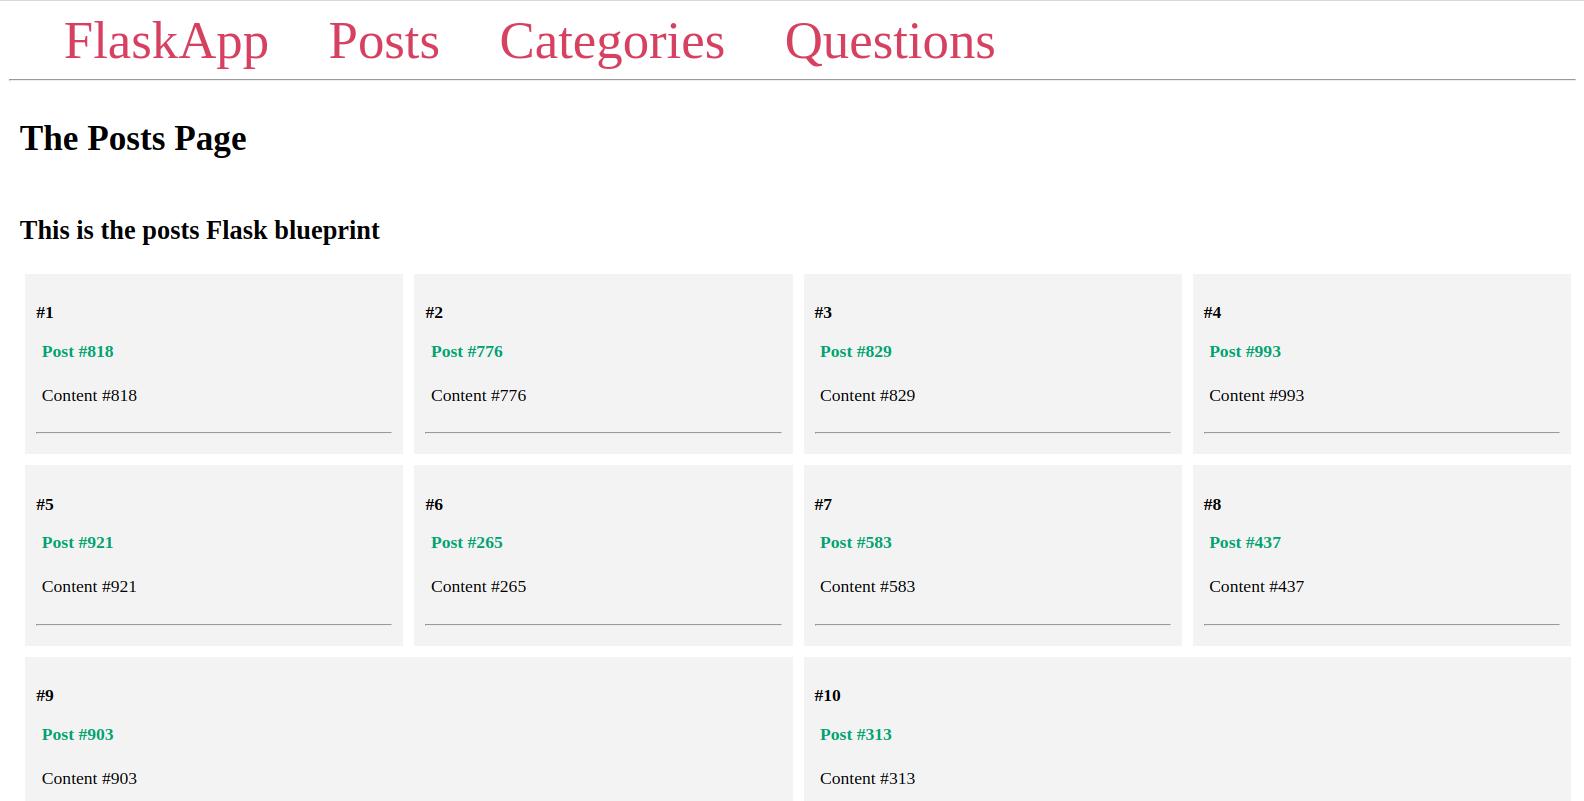
Here, you loop through posts and display each post’s ID, title, and content.
With the development server running, visit the posts’ index page or refresh it if you have it open:
http://127.0.0.1:5000/posts/
The sample posts you’ve generated will be displayed on the index page, similar to the following image:
You now have a database model for posts. You can now add features to your application with new routes and templates, such as creating, editing, and deleting posts.
Creating and Interacting with the Question Model
You’ve created a posts model and interacted with it in your posts blueprint. You will now add the questions database model for managing questions and answers.
At this point in the tutorial, your flask_app directory structure is as follows (excluding the virtual environment’s directory):
.
├── flask_app
    ├── app
    │   ├── extensions.py
    │   ├── __init__.py
    │   ├── main
    │   │   ├── __init__.py
    │   │   └── routes.py
    │   ├── models
    │   │   └── post.py
    │   ├── posts
    │   │   ├── __init__.py
    │   │   └── routes.py
    │   ├── questions
    │   │   ├── __init__.py
    │   │   └── routes.py
    │   └── templates
    │       ├── base.html
    │       ├── index.html
    │       ├── posts
    │       │   ├── categories.html
    │       │   └── index.html
    │       └── questions
    │           └── index.html
    ├── app.db
    └── config.py
To create a questions database model, open a new file called question.py inside your models directory:
- nano app/models/question.py
Add the following code:
from app.extensions import db

class Question(db.Model):
    id = db.Column(db.Integer, primary_key=True)
    content = db.Column(db.Text)
    answer = db.Column(db.Text)

    def __repr__(self):
        return f'<Question {self.content}>'
Save and close the file.
Here, you import the db database object from the app.extensions module. Then you create a model called Question using the db.Model class. In the model, you have an ID integer column as a primary key (id), a text column for the question’s content (content), and a text column for its answer (answer). Then you use the special __repr__() method to represent each question using its content.
In the terminal session that is running the Flask shell, run the following code to create the questions table based on the questions model:
- flask shell
Run the following code to create the questions table and add a few questions and answers to it:
- from app.extensions import db
- from app.models.question import Question
- db.create_all()
-
- q1 = Question(content='Why is the sky blue?', answer='Because... Why not?')
- q2 = Question(content='What is love?', answer='A portal to the underworld.')
- db.session.add_all([q1, q2])
- db.session.commit()
The code should execute without an output. If you receive an error, check your app/models/question.py file to ensure your code is written with the correct syntax.
You import the database object and the questions model, then use db.create_all() to create the table, and finally you add two question objects to the database session and commit the transaction.
Exit the Flask shell:
- exit()
You can now interact with the new questions model in your questions blueprint. To do so, open the questions blueprint’s routes.py file for a modification to query and display the questions you have in your questions table:
- nano app/questions/routes.py
Edit the file by adding the highlighted lines:
from flask import render_template
from app.questions import bp
from app.models.question import Question

@bp.route('/')
def index():
    questions = Question.query.all()
    return render_template('questions/index.html', questions=questions)
Save and close the file.
Here, you import the questions model, get all the questions in the database, and then pass them to the questions’ index template.
Next, you’ll display the questions you passed to the questions’ index template and add a web form to allow users to add new questions. Open the index.html file in the questions’ template directory:
- nano app/templates/questions/index.html
Edit the file by adding the highlighted lines:
{% extends 'base.html' %}

{% block content %}
    <span class="title">
        <h1>{% block title %} Questions {% endblock %}</h1>
    </span>
    <div class="questions">
        <h2>Questions Blueprint</h2>

        <div class="question">
            <div class="new-question">
                <form method="POST">
                    <p>
                        <textarea id="q-content"
                                name="content"
                                placeholder="Question"
                                cols="30" rows="3"></textarea>
                    </p>
                    <textarea id="q-answer"
                            name="answer"
                            placeholder="Answer"
                            cols="30" rows="3"></textarea>
                    <p><input type="submit"></p>
                </form>
            </div>
            <div class="questions-list">
                {% for question in questions %}
                    <div class="question">
                        <h4>{{ question.content }}</h4>
                        <p>{{ question.answer }}</p>
                        <hr>
                    </div>
                {% endfor %}
            </div>
        </div>

    </div>
{% endblock %}
Save and close the file.
Here, you create a form with two text areas: one for the question’s content and one for its answer. Then you add a submit button for the form.
Below the form, you loop through the questions variable you passed from the questions’ index route, displaying each question’s content and answer.
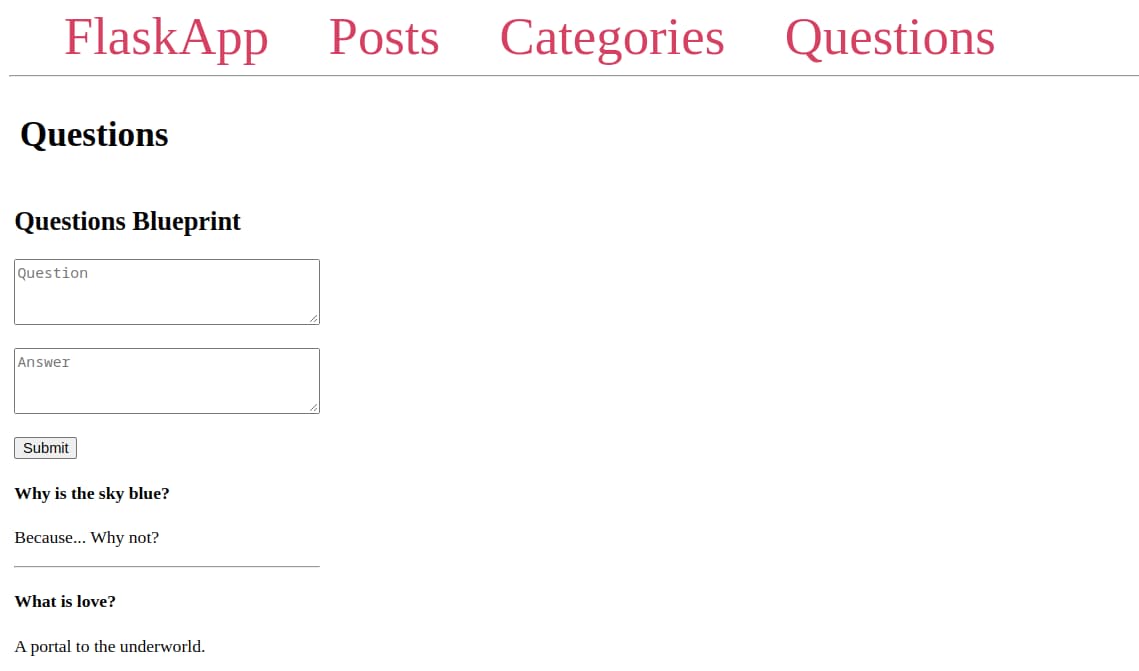
With your development server running, use your browser to navigate to the questions index page:
http://127.0.0.1:5000/questions/
The page will load with the blueprint heading, the submission form, and two sample questions:
However, filling in and submitting the form will result in a 405 Method Not Allowed HTTP error because the form sends a POST request to the questions’ index route, but the route does not accept nor handle POST requests. To resolve this issue and make the form functional, you’ll modify the index route of the questions blueprint and use the form data to add new questions to the database.
Open the questions blueprint’s routes.py file:
- nano app/questions/routes.py
Edit the file by adding the highlighted lines:
from flask import render_template, request, url_for, redirect
from app.questions import bp
from app.models.question import Question
from app.extensions import db

@bp.route('/', methods=('GET', 'POST'))
def index():
    questions = Question.query.all()

    if request.method == 'POST':
        new_question = Question(content=request.form['content'],
                                answer=request.form['answer'])
        db.session.add(new_question)
        db.session.commit()
        return redirect(url_for('questions.index'))

    return render_template('questions/index.html', questions=questions)
Save and close the file.
You allow the GET and POST methods by passing the ('GET', 'POST') tuple to the methods parameter. You handle POST requests in the if request.method == 'POST': condition. In it, you create a new question object using the content and answer the user submits, which you get from the request.form object. You add the new question to the database session, commit the transaction, and then redirect the user to the questions index page.
The form will now work, and you can add new questions and answers to your database. You can test this functionality at the http://127.0.0.1:5000/questions/ URL.
You have integrated Flask-SQLAlchemy with your application, adding a directory for models to organize your code.
You can compare your final files against the code held in the DigitalOcean community repository.
Conclusion
You’ve structured a large Flask application using blueprints and organized it with templates and models. You set it up so that each component has its own routes, templates, and models.
The example web application now has three major components that can be expanded upon in different ways:
-
The main blueprint: You can add an about page or a contact page for users to contact the application owner.
-
The posts blueprint: You can add pages for creating, editing, deleting, and sorting posts. You can also add tags to posts using a Many-to-Many database relationship with Flask-SQLAlchemy.
-
The questions blueprint: You can add pages for managing questions and use a One-to-Many database relationship with Flask-SQLAlchemy to create another table for answers so that a question can have multiple solutions.
You can also add more blueprints for features such as authentication, payments, administration, and more.
If you want to read more about Flask, check out the other tutorials in the How To Build Web Applications with Flask series.
Thanks for learning with the DigitalOcean Community. Check out our offerings for compute, storage, networking, and managed databases.
Tutorial Series: How To Build Web Applications with Flask

Flask is a lightweight Python web framework that provides useful tools and features for creating web applications in the Python Language. It gives developers flexibility and is an accessible framework for new developers because you can build a web application quickly using only a single Python file. Flask is also extensible and doesn’t force a particular directory structure or require complicated boilerplate code before getting started. Learning Flask will allow you to quickly create web applications in Python. You can take advantage of Python libraries to add advanced features to your web application, like storing your data in a database, or validating web forms.
Browse Series: 13 tutorials
About the author(s)
Web developer. I mostly use Python & JavaScript. I like Flask and I am currently learning React. You can say hi on Twitter :)
Still looking for an answer?
This textbox defaults to using Markdown to format your answer.
You can type !ref in this text area to quickly search our full set of tutorials, documentation & marketplace offerings and insert the link!
This comment has been deleted
This is a very good in-depth tutorial. Many sites show how Blueprint works, but it shows how to properly build the app’s architecture and the interaction between Blueprint and SQLAlchemy. Very useful to me.
 This work is licensed under a Creative Commons Attribution-NonCommercial- ShareAlike 4.0 International License.
Become a contributor for community
Get paid to write technical tutorials and select a tech-focused charity to receive a matching donation.

DigitalOcean Documentation
Full documentation for every DigitalOcean product.

Resources for startups and AI-native businesses
The Wave has everything you need to know about building a business, from raising funding to marketing your product.
The developer cloud
Scale up as you grow — whether you're running one virtual machine or ten thousand.

Start building today
From GPU-powered inference and Kubernetes to managed databases and storage, get everything you need to build, scale, and deploy intelligent applications.
