
Introduction
Synology makes a variety of home and business network attached storage devices (NAS) running their Linux-based DiskStation Manager software.
DigitalOcean Spaces is an object storage service that makes it easy and cost-effective to store and retrieve large amounts of data.
In this tutorial, we will set up a Synology NAS to back up data to a DigitalOcean Space, using Synology’s Hyper Backup software.
Prerequisites
To complete this tutorial, you will need a Synology NAS, with some shared folders or iSCSI LUNs already created.
You will also need to know the following details about your Space:
- Access Key
- Secret Key
- Server URL
- Bucket Name
You can learn how to set up a Space and get all the above information by following our tutorial How To Create a DigitalOcean Space and API Key.
Once you have your information, log in to your Synology’s web interface as an admin-enabled user, and proceed to Step 1 to install the backup software.
Step 1 — Installing the Hyper Backup Software
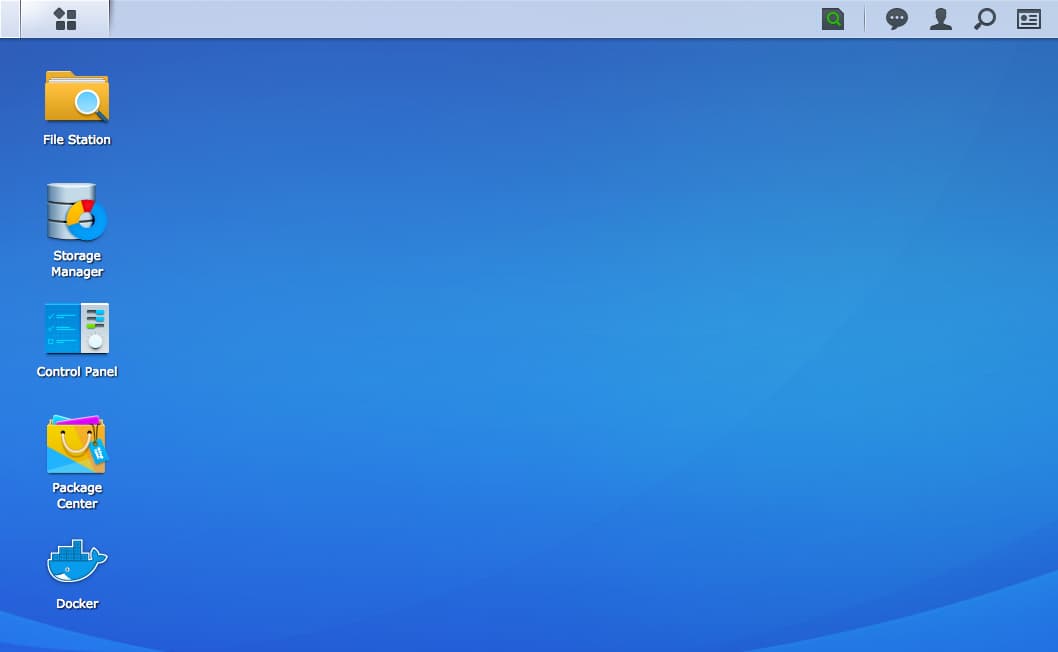
Upon logging in you’ll see DSM’s desktop interface:
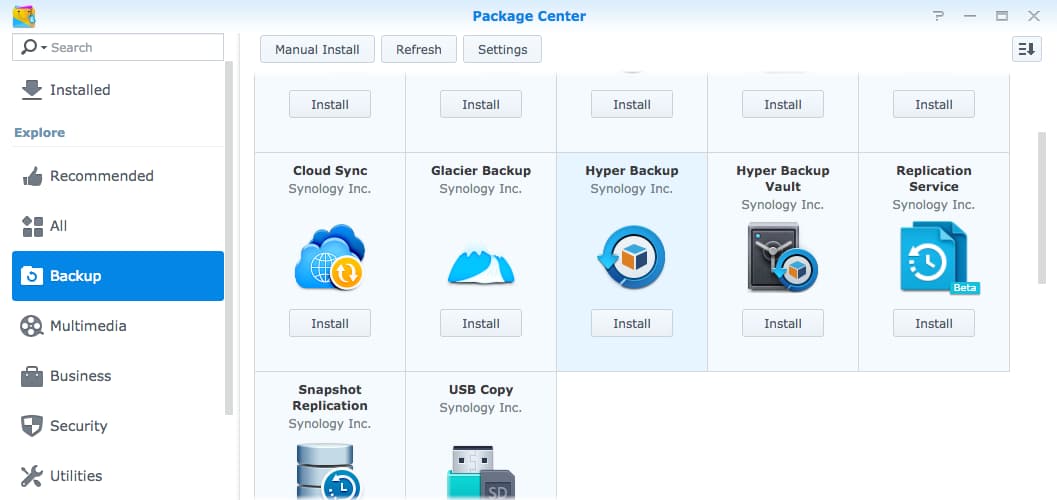
To install the Hyper Backup software, click on the Package Center icon. The application will open. In the left-hand column of Package Center, select Backup to browse backup apps. Scroll down a bit and you’ll find the Hyper Backup software:
Click the Install button to install the software. You’ll see some status updates as the application downloads and installs, then the button will change to Open. You may click the button to open Hyper Backup, or you can launch it from the DSM main menu by clicking the main menu button in the upper-left corner of your screen:
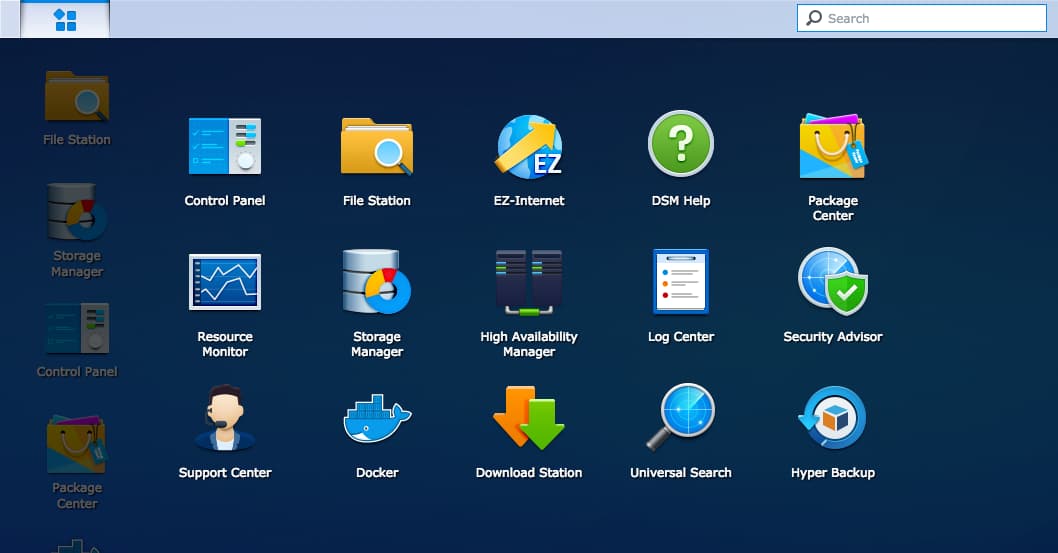
You’ll be shown a list of applications. Click Hyper Backup and the application will open.
Next, we’ll walk through the steps to set up a backup.
Step 2 — Setting Up a Backup to Spaces
When you first open up Hyper Backup, you’ll be presented with a Backup Wizard screen:
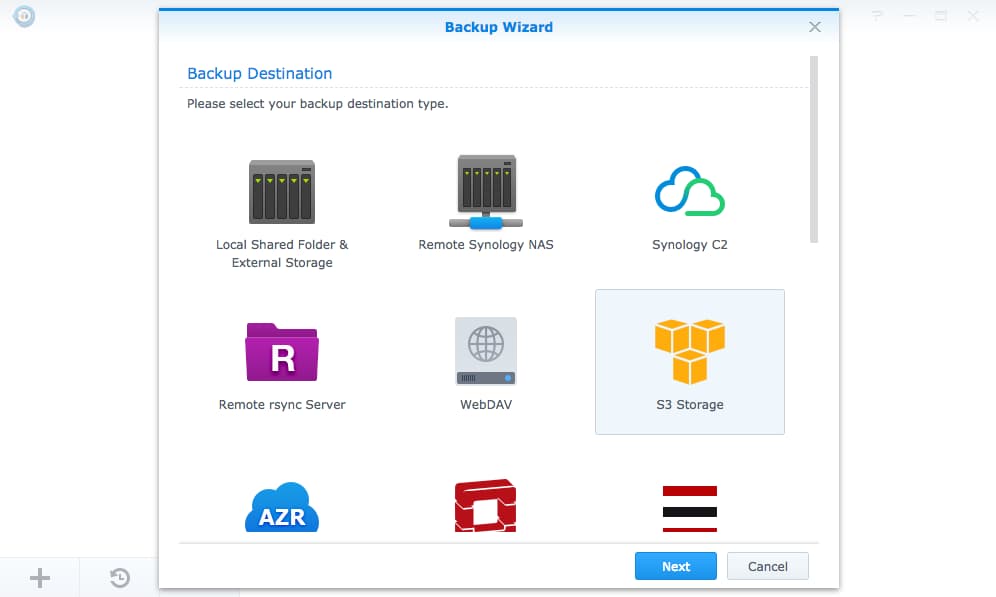
This wizard will take us through five steps in order to configure our first backup.
First, select S3 Storage to begin setting up the Spaces storage destination. Then click Next to continue.
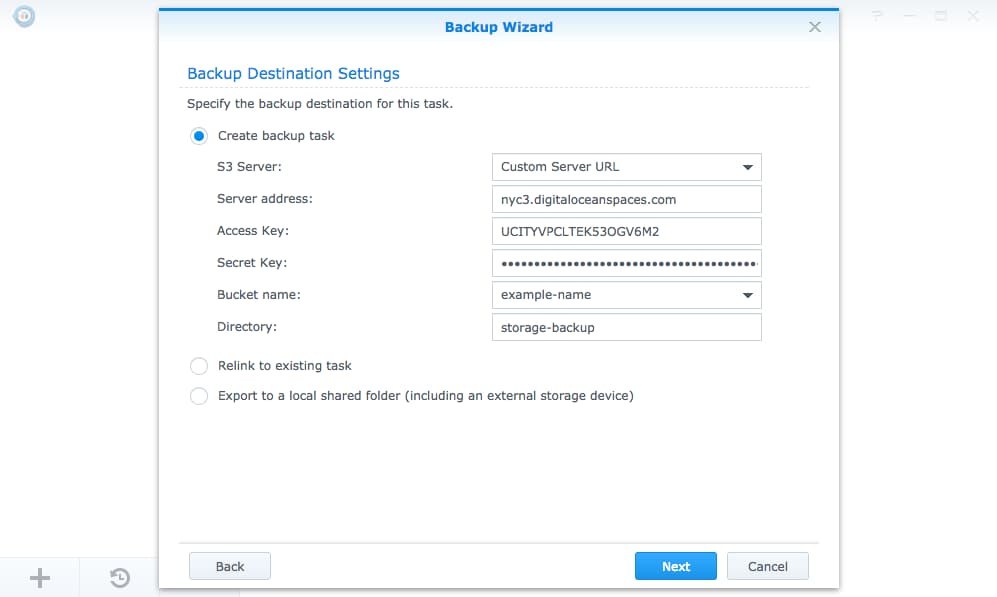
This step will set up a connection to Spaces. Let’s walk through the options:
- S3 Server: select Custom Server URL from the dropdown
- Server address: should be your Spaces server address, which will be the datacenter region you chose when you created the Space, plus
digitaloceanspaces.com. In this case we’ve enterednyc3.digitaloceanspaces.com - Access Key: your Spaces access key
- Secret Key: your Spaces secret key
- Bucket name: when you click on this form field, the application will attempt to connect to the server and find all available buckets (individual Spaces). Select the appropriate Space from the resulting list, or you can make a new Space if necessary
- Directory: this is the directory within your Space where the backup data will be stored
Click Next to continue to the next step.
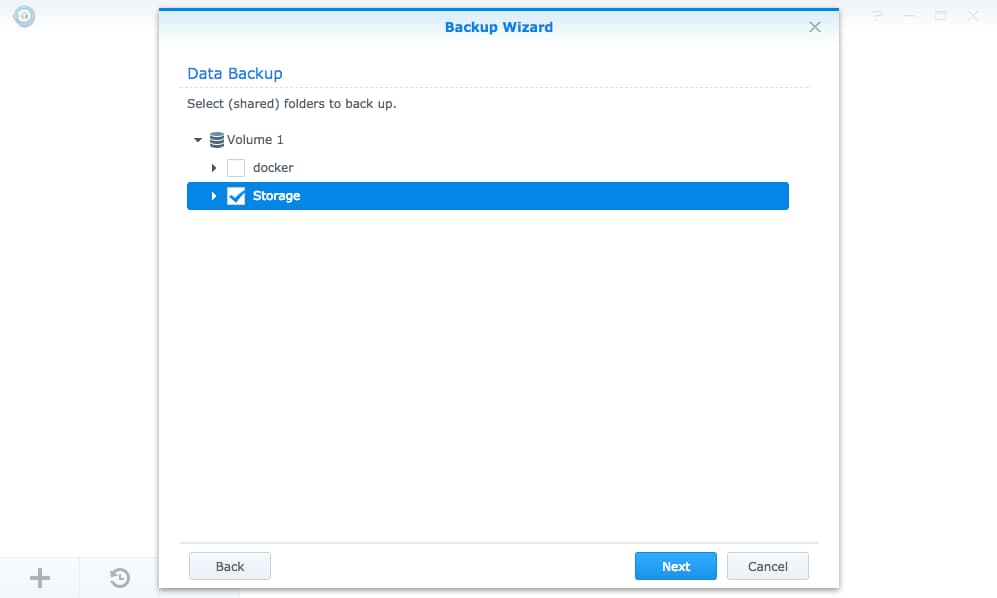
You’ll be asked to select the items you’d like to back up. Here we’ve selected the Storage volume. You can also drill down into the directory hierarchy and pick individual subdirectories to back up.
Hit Next after you’ve made your selection.
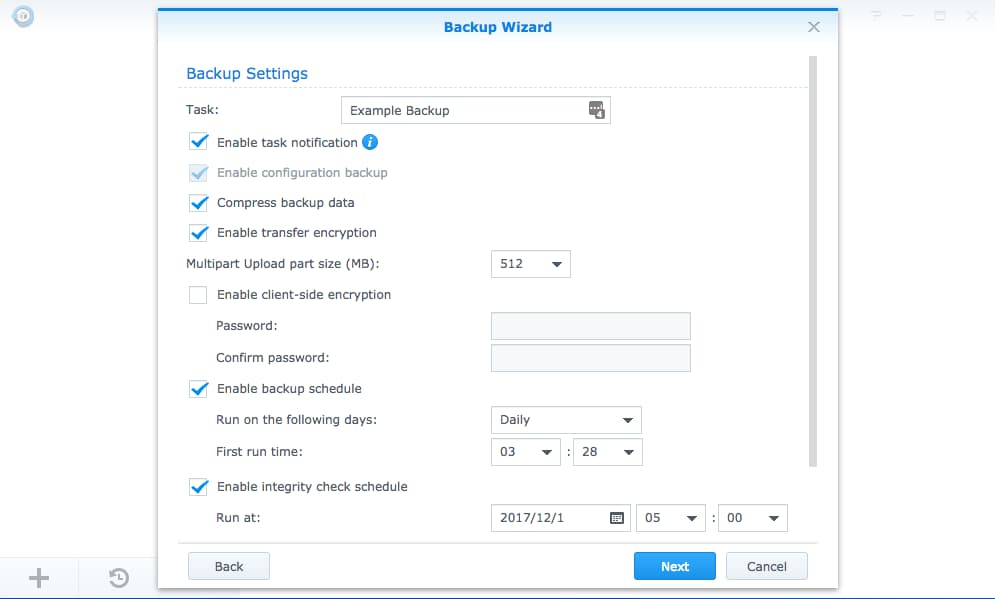
This next step has many options for controlling the compression, encryption, and scheduling of the backup task. First, give the task a name in the Task field. We chose Example Backup in this case.
Next, you must check the Enable transfer encryption checkbox. Spaces is available over an encrypted HTTPS connection only, so your connection will fail without this box selected.
The rest of the defaults are fine as they are, but you may want to enable client-side encryption of your backups. This means that your NAS will encrypt the backup files before sending them to Spaces. This is different from the Enable transfer encryption option we just selected, as that option secures the files during transfer only. With client-side encryption, all backup data will be fully encrypted on the Spaces server.
You may also want to update the backup and integrity check schedules. Pick a time when the added bandwidth and processor load won’t interfere with your own use of the NAS. Typically this is late at night.
Click Next to go to the final step.
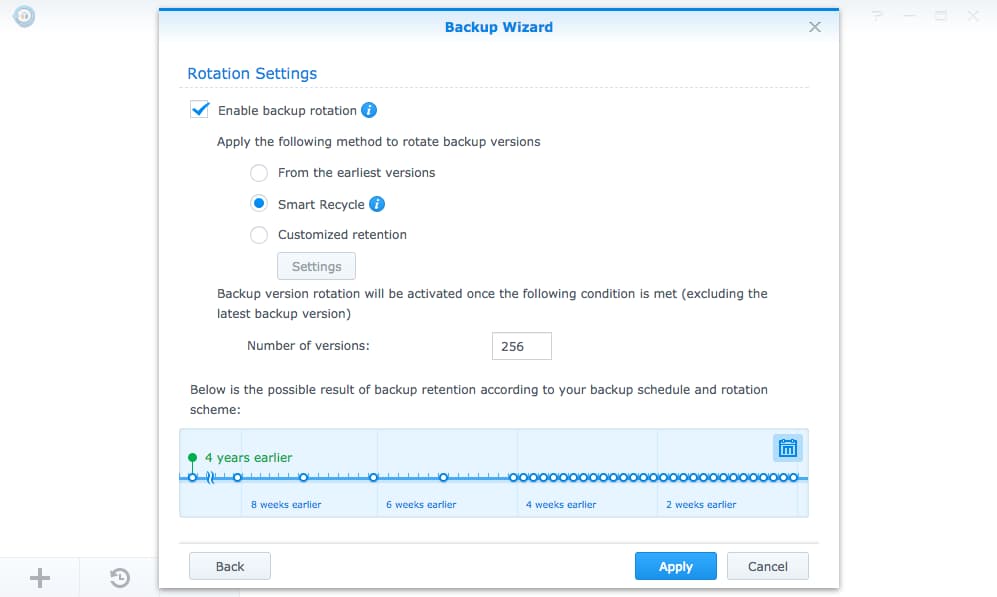
This step configures backup rotations, where old backups will be systematically deleted to reduce storage usage. The Smart Recycle option is a good default that will retain 24 hours of hourly backups, one month of daily backups, and as many weekly backups as possible before hitting the total number specified in the Number of versions option.
If you need different options, choose Customized retention and then click Settings to set that up.
When your rotation settings are all set, click Apply to finish the setup. You will be prompted to back up immediately. If you choose not to, your first backup will happen according to the schedule you set. Otherwise, your backup will start right away. Either way, you’ll now be taken to the main Hyper Backup interface:
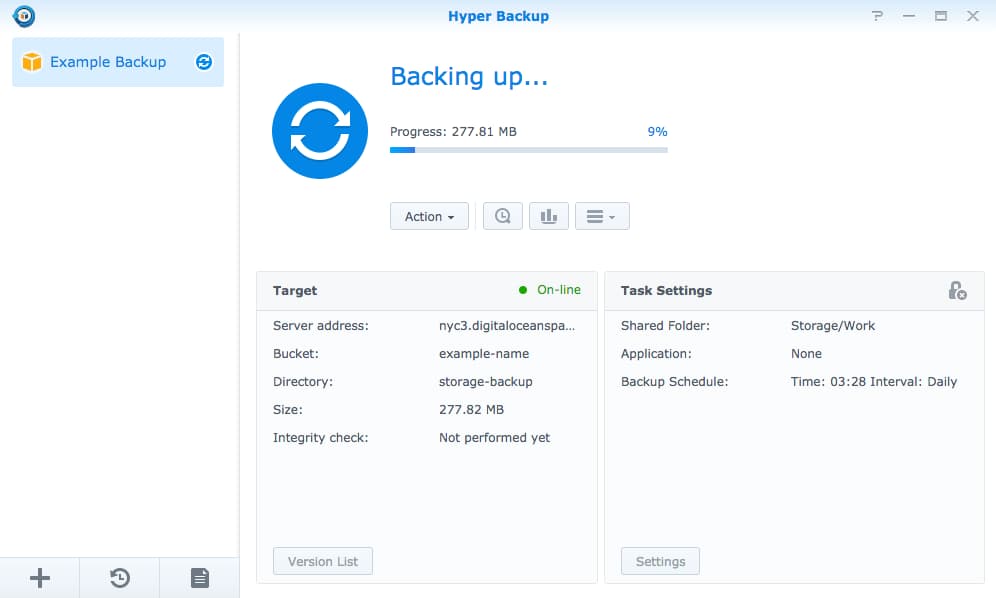
Using this interface, you can set up more backup tasks, browse and restore backed up data, and monitor the status of in-progress backups.
Conclusion
In this tutorial we installed Synology’s Hyper Backup software, and configured a backup to the DigitalOcean Spaces object storage service. For more detailed information on the configuration and use of Hyper Backup, please refer to the official documentation.
Thanks for learning with the DigitalOcean Community. Check out our offerings for compute, storage, networking, and managed databases.
About the author
Senior Technical Writer at DigitalOcean
Still looking for an answer?
This textbox defaults to using Markdown to format your answer.
You can type !ref in this text area to quickly search our full set of tutorials, documentation & marketplace offerings and insert the link!
This doesn’t seem to work… There is a new “signature version” field v2 and v4 the only options don’t seem to work.
 This work is licensed under a Creative Commons Attribution-NonCommercial- ShareAlike 4.0 International License.
Become a contributor for community
Get paid to write technical tutorials and select a tech-focused charity to receive a matching donation.

DigitalOcean Documentation
Full documentation for every DigitalOcean product.

Resources for startups and AI-native businesses
The Wave has everything you need to know about building a business, from raising funding to marketing your product.
The developer cloud
Scale up as you grow — whether you're running one virtual machine or ten thousand.

Start building today
From GPU-powered inference and Kubernetes to managed databases and storage, get everything you need to build, scale, and deploy intelligent applications.
