
Introduction
In this tutorial, we will show you how to use Git hooks to automate the deployment of the production environment of your Rails application to a remote Ubuntu 14.04 server. Using Git hooks will allow you to deploy your application by simply pushing your changes to a production server, instead of having to manually pull and do things like execute database migrations. As you continue to work on your application, setting up some form of automated deploys, such as Git hooks, will save you time in the long run.
This particular setup uses a simple “post-receive” Git hook, in addition to Puma as the application server, Nginx as a reverse proxy to Puma, and PostgreSQL as the database.
If you are new to Git Hooks and would like to learn more before moving on, read this tutorial: How To Use Git Hooks To Automate Development and Deployment Tasks.
Prerequisites
You will require access to a non-root user that has superuser privileges on your Ubuntu server. In our example setup, we will use a user called deploy. This tutorial will show you how to set that up: Initial Server Setup with Ubuntu 14.04. If you want to deploy without entering a password, be sure to set up SSH keys.
You will need to install Ruby on your server. If you haven’t done so already, you can install it along with Rails using rbenv or RVM.
You will also need to have a Rails application that is managed in a git repository on your local development machine. If you don’t have one and would like to follow along, we’ll provide a simple example app.
Let’s get started!
Install PostgreSQL
Most production Rails environments use PostgreSQL as the database, so let’s install it on your server now.
On your production server, update apt-get:
- sudo apt-get update
Then install PostgreSQL with these commands:
- sudo apt-get install postgresql postgresql-contrib libpq-dev
Note: You should also install PostgreSQL on your development machine, so you can install the pg gem, the PostgreSQL adapter, locally. This will be required to run bundle install when we add the gem to your application’s Gemfile. As the installation steps vary by OS, this is an exercise left to the reader.
Create Production Database User
To keep things simple, let’s name the production database user the same as your application name. For example, if your application is called “appname”, you should create a PostgreSQL user like this:
- sudo -u postgres createuser -s appname
We want to set the database user’s password, so enter the PostgreSQL console like this:
- sudo -u postgres psql
Then set the password for the database user, “appname” in the example, like this:
- \password appname
Enter your desired password and confirm it.
Exit the PostgreSQL console with this command:
- \q
Now we’re ready to configure the your application with the proper database connection information.
Prepare Your Rails Application
On your development machine, most likely your local computer, we will prepare your application to be deployed.
Optional: Create a Rails Application
Ideally, you already have a Rails application that you want to deploy. If this is the case, you may skip this subsection, and make the appropriate substitutions while following along. If not, the first step is to create a new Rails application.
These commands will create a new Rails application, named “appname”, in our home directory. Feel free to substitute the highlighted “appname” with something else:
- cd ~
- rails new appname
Then change into the application directory:
- cd appname
For our sample app, we will generate a scaffold controller so our application will have something to display:
- rails generate scaffold Task title:string note:text
Now let’s make sure our application is in a git repository.
Initialize Git Repo
If your application isn’t already in a Git repository for some reason, initialize it and perform an initial commit.
On your development machine, change to your application’s directory. In our example, our app is called “appname” and it is located in our home directory:
- cd ~/appname
- git init
- git add -A
- git commit -m 'initial commit'
Now let’s tweak our application to prepare it to connect to our production PostgreSQL database.
Update Database Configuration
On your development machine, change to your application’s directory if you aren’t already there. In our example, our app is called “appname” and it is located in our home directory:
- cd ~/appname
Now open the database configuration file in your favorite editor. We’ll use vi:
- vi config/database.yml
Find the production section of your application’s database configuration, and replace it with your production database connection information. If you followed the example set up exactly, it will look something like this (substitute any values where appropriate):
production:
  <<: *default
  host: localhost
  adapter: postgresql
  encoding: utf8
  database: appname_production
  pool: 5
  username: <%= ENV['APPNAME_DATABASE_USER'] %>
  password: <%= ENV['APPNAME_DATABASE_PASSWORD'] %>
Save and exit. This specifies that the production environment of the application should use a PostgreSQL database called “appname_production” on the localhost—the production server. Note that the database username and password are set to environment variables. We’ll specify those on the server later.
Update Gemfile
If your Gemfile does not already have the PostgreSQL adapter gem, pg, and the Puma gem specified, you should add them now.
Open your application’s Gemfile in your favorite editor. We’ll use vi here:
- vi Gemfile
Add the following lines to the Gemfile:
group :production do
  gem 'pg'
  gem 'puma'
end
Save and exit. This specifies that the production environment should use the pg and puma gems.
Configure Puma
Before configuring Puma, you should look up the number of CPU cores your server has. You can easily to that, on your server, with this command:
- grep -c processor /proc/cpuinfo
Now, on your development machine, add the Puma configuration to config/puma.rb. Open the file in a text editor:
- vi config/puma.rb
Copy and paste this configuration into the file:
# Change to match your CPU core count
workers 2

# Min and Max threads per worker
threads 1, 6

app_dir = File.expand_path("../..", __FILE__)
shared_dir = "#{app_dir}/shared"

# Default to production
rails_env = ENV['RAILS_ENV'] || "production"
environment rails_env

# Set up socket location
bind "unix://#{shared_dir}/sockets/puma.sock"

# Logging
stdout_redirect "#{shared_dir}/log/puma.stdout.log", "#{shared_dir}/log/puma.stderr.log", true

# Set master PID and state locations
pidfile "#{shared_dir}/pids/puma.pid"
state_path "#{shared_dir}/pids/puma.state"
activate_control_app

on_worker_boot do
  require "active_record"
  ActiveRecord::Base.connection.disconnect! rescue ActiveRecord::ConnectionNotEstablished
  ActiveRecord::Base.establish_connection(YAML.load_file("#{app_dir}/config/database.yml")[rails_env])
end
Change the number of workers to the number of CPU cores of your server. The example assumes you have 2 cores.
Save and exit. This configures Puma with the location of your application, and the location of its socket, logs, and PIDs. Feel free to modify the file, or add any other options that you require.
Commit your recent changes:
- git add -A
- git commit -m 'added pg and puma'
Before moving on, generate a secret key that will be used for the production environment of your app:
- rake secret
rake secret sample output:29cc5419f6b0ee6b03b717392c28f5869eff0d136d8ae388c68424c6e5dbe52c1afea8fbec305b057f4b071db1646473c1f9a62f803ab8386456ad3b29b14b89
You will copy the output and use it to set your application’s SECRET_KEY_BASE in the next step.
Create Puma Upstart Script
Let’s create an Upstart init script so we can easily start and stop Puma, and ensure that it will start on boot.
On your production server, download the Jungle Upstart tool from the Puma GitHub repository to your home directory:
- cd ~
- wget https://raw.githubusercontent.com/puma/puma/master/tools/jungle/upstart/puma-manager.conf
- wget https://raw.githubusercontent.com/puma/puma/master/tools/jungle/upstart/puma.conf
Now open the provided puma.conf file, so we can configure the Puma deployment user:
- vi puma.conf
Look for the two lines that specify setuid and setgid, and replace “apps” with the name of your deployment user and group. For example, if your deployment user is called “deploy”, the lines should look like this:
setuid deploy
setgid deploy
Now look for the line with this: exec /bin/bash <<'EOT'. Add the following lines under it, making sure to substitute the PostgreSQL username and password, and the rake secret that you created earlier:
  export APPNAME_DATABASE_USER='appname'
  export APPNAME_DATABASE_PASSWORD='appname_password'
  export SECRET_KEY_BASE='rake_secret_generated_above'
Save and exit.
Now copy the scripts to the Upstart services directory:
- sudo cp puma.conf puma-manager.conf /etc/init
The puma-manager.conf script references /etc/puma.conf for the applications that it should manage. Let’s create and edit that inventory file now:
- sudo vi /etc/puma.conf
Each line in this file should be the path to an application that you want puma-manager to manage. We are going to deploy our application to a directory named “appname” in our user’s home directory. In our example, it would be the following (be sure to update the path to where your app will live:
/home/deploy/appname
Save and exit.
Now your application is configured to start at boot time, through Upstart. This means that your application will start even after your server is rebooted. Keep in mind that we haven’t deployed the application, so we don’t want to start it just yet.
Install and Configure Nginx
To make the application accessible to the internet, we should use Nginx as a web server.
Install Nginx using apt-get:
- sudo apt-get install nginx
Now open the default server block with a text editor:
- sudo vi /etc/nginx/sites-available/default
Replace the contents of the file with the following code block. Be sure to replace the the highlighted parts with the appropriate username and application name (two locations):
upstream app {
    # Path to Puma SOCK file, as defined previously
    server unix:/home/deploy/appname/shared/sockets/puma.sock fail_timeout=0;
}

server {
    listen 80;
    server_name localhost;

    root /home/deploy/appname/public;

    try_files $uri/index.html $uri @app;

    location @app {
        proxy_pass http://app;
        proxy_set_header X-Forwarded-For $proxy_add_x_forwarded_for;
        proxy_set_header Host $http_host;
        proxy_redirect off;
    }

    error_page 500 502 503 504 /500.html;
    client_max_body_size 4G;
    keepalive_timeout 10;
}
Save and exit. This configures Nginx as a reverse proxy, so HTTP requests get forwarded to the Puma application server via a Unix socket. Feel free to make any changes as you see fit.
We’ll hold off from restarting Nginx for now, as the application doesn’t exist on the server yet. We’ll prepare the application next.
Prepare Production Git Remote
On your production server, install git with apt-get:
- sudo apt-get install git
Then create a directory for the remote repository. We will create a bare git repository in the home directory called “appname_production”. Feel free to name your remote repository whatever you want (except don’t put it in ~/appname because that’s where we will deploy the application to):
- mkdir ~/appname_production
- cd ~/appname_production
- git init --bare
Since this is a bare repository, there is no working directory and all of the files that are located in .git in a conventional setup are in the main directory itself.
We need to create post-receive git hook, which is the script that will run when the production server receives a git push. Open the hooks/post-receive file in your editor:
- vi hooks/post-receive
Copy and paste the following script into the post-receive file:
#!/bin/bash

GIT_DIR=/home/deploy/appname_production
WORK_TREE=/home/deploy/appname
export APPNAME_DATABASE_USER='appname'
export APPNAME_DATABASE_PASSWORD='appname_password'

export RAILS_ENV=production
. ~/.bash_profile

while read oldrev newrev ref
do
    if [[ $ref =~ .*/master$ ]];
    then
        echo "Master ref received.  Deploying master branch to production..."
        mkdir -p $WORK_TREE
        git --work-tree=$WORK_TREE --git-dir=$GIT_DIR checkout -f
        mkdir -p $WORK_TREE/shared/pids $WORK_TREE/shared/sockets $WORK_TREE/shared/log

        # start deploy tasks
        cd $WORK_TREE
        bundle install
        rake db:create
        rake db:migrate
        rake assets:precompile
        sudo restart puma-manager
        sudo service nginx restart
        # end deploy tasks
        echo "Git hooks deploy complete"
    else
        echo "Ref $ref successfully received.  Doing nothing: only the master branch may be deployed on this server."
    fi
done
Be sure to update the following highlighted values:
GIT_DIR: the directory of bare git repository you created earlierWORK_TREE: the directory to which you want to deploy your application (this should match the location that you specified in the Puma configuration)APPNAME_DATABASE_USER: PostgreSQL username (required for rake tasks)APPNAME_DATABASE_PASSWORD: PostgreSQL password (required for rake tasks)
Next, you should review the commands between the # start deploy tasks and # end deploy tasks comments. These are the commands that will run every time the master branch is pushed to the production git remote (appname_production). If you leave them as is, the server will attempt to do the following for the production environment of your application:
- Run bundler
- Create the database
- Migrate the database
- Precompile the assets
- Restart Puma
- Restart Nginx
If you want to make any changes, or add error checking, feel free to do that here.
Once you are done reviewing the post-receive script, save and exit.
Next, make the script executable:
- chmod +x hooks/post-receive
Passwordless Sudo
Because the post-receive hook needs to run sudo commands, we will allow the deploy user to use passwordless sudo (substitute your deploy username here if it’s different):
- sudo sh -c 'echo "deploy ALL=(ALL) NOPASSWD:ALL" > /etc/sudoers.d/90-deploy'
This will allow the deploy user to run sudo commands without supplying a password. Note that you will probably want to restrict what the commands that the deploy user can run with superuser privileges. At a minimum, you will want to use SSH key authentication and disable password authentication.
Add Production Git Remote
Now that we have everything set up on the production server, let’s add the production git remote to our application’s repository.
On your development machine, ensure that you are in your application’s directory:
- cd ~/appname
Then add a new git remote named “production” that points to the bare git repository, appname_production, that you created on your production server. Substitute the username (deploy), server IP address, and remote repository name (appname_production):
- git remote add production deploy@production_server_public_IP:appname_production
Now your application is ready to be deployed with a git push.
Deploy to Production
With all the preparation you’ve done, you can now deploy your application to your production server by running the following git command:
- git push production master
This simply pushes your local master branch to the production remote that you created earlier. When the production remote receives the push, it will execute the post-receive hook script that we set up earlier. If you set everything up correctly, your application should now be available at the public IP address of the your production server.
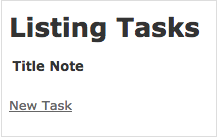
If you used our example application, you should be able to access http://production_server_IP/tasks in a web browser and see something like this:
Conclusion
Any time you make a change to your application, you can run the same git push command to deploy to your production server. This alone should save you a lot of time over the life of your project.
This tutorial only covered the “post-receive” hook, but there are several other types of hooks that can help improve the automation of your deployment process. Read this tutorial to learn more about Git hooks: How To Use Git Hooks To Automate Development and Deployment Tasks!
Thanks for learning with the DigitalOcean Community. Check out our offerings for compute, storage, networking, and managed databases.
About the author
Software Engineer @ DigitalOcean. Former Señor Technical Writer (I no longer update articles or respond to comments). Expertise in areas including Ubuntu, PostgreSQL, MySQL, and more.
Still looking for an answer?
This textbox defaults to using Markdown to format your answer.
You can type !ref in this text area to quickly search our full set of tutorials, documentation & marketplace offerings and insert the link!
I’m not sure if I missed a step, but after following the tutorial using the example app provided (I don’t write my own ruby code yet), I opened my production server to encounter the 500.html page of the ruby app and my nginx log reported the following:
2015/07/13 01:46:59 [crit] 3444#0: *4 connect() to unix:/home/c/appname/shared/sockets/puma.sock failed (2: No such file or directory) while connecting to upstream, client: 192.168.70.1, server: localhost, request: "GET /tasks HTTP/1.1", upstream: "http://unix:/home/c/appname/shared/sockets/puma.sock:/tasks", host: "prod"
If this isn’t something that immediately says, “oh! That’s a quick fix!” then, it’s really no big deal, haha.
Thanks for the tutorial!
I have done everything as it is instructed. Pushed Successfully. Pointing to my IP addresss, it gives 502 bad gateway error.
This comment has been deleted
Hello I was wondering if in the “Create Puma Upstart Script” section, there is a typo at “puma.conf excerpt 2 of 2” code example. I think there should be a closing single quotation mark on the third line.
YES YEEEEES FINALLY I HAVE DONE IT. If anyone in the future runs into any errors, just redo it and be persistent. There is a high chance you will make mistakes when you are deploying your app for the first time. I’m pretty sure I’ve created and destroyed over 10 droplets. Thank you again Mitchell for this amazing tutorial.
Hello! I have a problem with puma-manager. It doesn’t start and sudo restart puma-manager returns restart: Unknown instance:. This is my third try to deploy the app. Thank you in advance for your help!
Git post-recieve file doesn’t work with me without fully quality ruby commands:
$HOME/.rbenv/shims/bundle install
$HOME/.rbenv/shims/rake db:create
$HOME/.rbenv/shims/rake db:migrate
$HOME/.rbenv/shims/rake assets:precompile
BTW, I am using Ubuntu hence I am using .bashrc instead of .bash_profile (in all places including this file)
I’ve followed this to the letter but hitting my droplets ip address just gives me the “Welcome to nginx!” page?
This comment has been deleted
Thanks for the write up, Mitchell.
I just wish it would work for me. I’ve gone through this step by step three times now and I can’t get it to work. If I go to http://<ip>, I just get the Nginx welcome page (Yes, I have restarted nginx). And if I go to http://<ip>/sessions, I get the nginx 404 page.
Any thoughts on where I’m going wrong?
 This work is licensed under a Creative Commons Attribution-NonCommercial- ShareAlike 4.0 International License.
Become a contributor for community
Get paid to write technical tutorials and select a tech-focused charity to receive a matching donation.

DigitalOcean Documentation
Full documentation for every DigitalOcean product.

Resources for startups and AI-native businesses
The Wave has everything you need to know about building a business, from raising funding to marketing your product.
The developer cloud
Scale up as you grow — whether you're running one virtual machine or ten thousand.

Start building today
From GPU-powered inference and Kubernetes to managed databases and storage, get everything you need to build, scale, and deploy intelligent applications.
