By Hanif Jetha

Introduction
In this tutorial you’ll deploy a containerized Django polls application into a Kubernetes cluster.
Django is a powerful web framework that can help you get your Python application off the ground quickly. It includes several convenient features like an object-relational mapper, user authentication, and a customizable administrative interface for your application. It also includes a caching framework and encourages clean app design through its URL Dispatcher and Template system.
In How to Build a Django and Gunicorn Application with Docker, the Django Tutorial Polls application was modified according to the Twelve-Factor methodology for building scalable, cloud-native web apps. This containerized setup was scaled and secured with an Nginx reverse-proxy and Let’s Encrypt-signed TLS certificates in How To Scale and Secure a Django Application with Docker, Nginx, and Let’s Encrypt. In this final tutorial in the From Containers to Kubernetes with Django series, the modernized Django polls application will be deployed into a Kubernetes cluster.
Kubernetes is a powerful open-source container orchestrator that automates the deployment, scaling and management of containerized applications. Kubernetes objects like ConfigMaps and Secrets allow you to centralize and decouple configuration from your containers, while controllers like Deployments automatically restart failed containers and enable quick scaling of container replicas. TLS encryption is enabled with an Ingress object and the ingress-nginx open-source Ingress Controller. The cert-manager Kubernetes add-on renews and issues certificates using the free Let’s Encrypt certificate authority.
If you’re looking for a managed Kubernetes hosting service, check out our simple, managed Kubernetes service built for growth.
Prerequisites
To follow this tutorial, you will need:
- A Kubernetes 1.15+ cluster with role-based access control (RBAC) enabled. This setup will use a DigitalOcean Kubernetes cluster, but you are free to create a cluster using another method.
- The
kubectlcommand-line tool installed on your local machine and configured to connect to your cluster. You can read more about installingkubectlin the official documentation. If you are using a DigitalOcean Kubernetes cluster, please refer to How to Connect to a DigitalOcean Kubernetes Cluster to learn how to connect to your cluster usingkubectl. - A registered domain name. This tutorial will use
your_domain.comthroughout. You can get one for free at Freenom, or use the domain registrar of your choice. - An ingress-nginx Ingress Controller and the cert-manager TLS certificate manager installed into your cluster and configured to issue TLS certificates. To learn how to install and configure an Ingress with cert-manager, please consult How to Set Up an Nginx Ingress with Cert-Manager on DigitalOcean Kubernetes.
- An
ADNS record withyour_domain.compointing to the Ingress Load Balancer’s public IP address. If you are using DigitalOcean to manage your domain’s DNS records, consult How to Manage DNS Records to learn how to createArecords - An S3 object storage bucket such as a DigitalOcean Space to store your Django project’s static files and a set of Access Keys for this Space. To learn how to create a Space, consult the How to Create Spaces product documentation. To learn how to create Access Keys for Spaces, consult Sharing Access to Spaces with Access Keys. With minor changes, you can use any object storage service that the django-storages plugin supports.
- A PostgreSQL server instance, database, and user for your Django app. With minor changes, you can use any database that Django supports.
- The PostgreSQL database should be called polls (or another memorable name to input in your config files below) and in this tutorial the Django database user will be named sammy. For guidance on creating these, follow Step 1 of How to Build a Django and Gunicorn Application with Docker. You should perform these steps from your local machine.
- A DigitalOcean Managed PostgreSQL cluster is used in this tutorial. To learn how to create a cluster, consult the DigitalOcean Managed Databases product documentation.
- You can also install and run your own PostgreSQL instance. For guidance on installing and administering PostgreSQL on an Ubuntu server, please see How To Install and Use PostgreSQL on Ubuntu 18.04.
- A Docker Hub account and public repository. For more information on creating these, please see Repositories from the Docker documentation.
- The Docker engine installed on your local machine. Please see How to Install and Use Docker on Ubuntu 18.04 to learn more.
Once you have these components set up, you’re ready to begin with this guide.
Step 1 — Cloning and Configuring the Application
In this step we’ll clone the application code from GitHub and configure settings like database credentials and object storage keys.
The application code and Dockerfile can be found in the polls-docker branch of the Django Tutorial Polls App GitHub repository. This repo contains code for the Django documentation’s sample Polls application, which teaches you how to build a polling application from scratch.
The polls-docker branch contains a Dockerized version of this Polls app. To learn how the Polls app was modified to work effectively in a containerized environment, please see How to Build a Django and Gunicorn Application with Docker.
Begin by using git to clone the polls-docker branch of the Django Tutorial Polls App GitHub repository to your local machine:
- git clone --single-branch --branch polls-docker https://github.com/do-community/django-polls.git
Navigate into the django-polls directory:
- cd django-polls
This directory contains the Django application Python code, a Dockerfile that Docker will use to build the container image, as well as an env file that contains a list of environment variables to be passed into the container’s running environment. Inspect the Dockerfile:
- cat Dockerfile
OutputFROM python:3.7.4-alpine3.10

ADD django-polls/requirements.txt /app/requirements.txt

RUN set -ex \
    && apk add --no-cache --virtual .build-deps postgresql-dev build-base \
    && python -m venv /env \
    && /env/bin/pip install --upgrade pip \
    && /env/bin/pip install --no-cache-dir -r /app/requirements.txt \
    && runDeps="$(scanelf --needed --nobanner --recursive /env \
        | awk '{ gsub(/,/, "\nso:", $2); print "so:" $2 }' \
        | sort -u \
        | xargs -r apk info --installed \
        | sort -u)" \
    && apk add --virtual rundeps $runDeps \
    && apk del .build-deps

ADD django-polls /app
WORKDIR /app

ENV VIRTUAL_ENV /env
ENV PATH /env/bin:$PATH

EXPOSE 8000

CMD ["gunicorn", "--bind", ":8000", "--workers", "3", "mysite.wsgi"]
This Dockerfile uses the official Python 3.7.4 Docker image as a base, and installs Django and Gunicorn’s Python package requirements, as defined in the django-polls/requirements.txt file. It then removes some unnecessary build files, copies the application code into the image, and sets the execution PATH. Finally, it declares that port 8000 will be used to accept incoming container connections, and runs gunicorn with 3 workers, listening on port 8000.
To learn more about each of the steps in this Dockerfile, please see Step 6 of How to Build a Django and Gunicorn Application with Docker.
Now, build the image using docker build:
- docker build -t polls .
We name the image polls using the -t flag and pass in the current directory as a build context, the set of files to reference when constructing the image.
After Docker builds and tags the image, list available images using docker images:
- docker images
You should see the polls image listed:
OutputREPOSITORY          TAG                 IMAGE ID            CREATED             SIZE
polls               latest              80ec4f33aae1        2 weeks ago         197MB
python              3.7.4-alpine3.10    f309434dea3a        8 months ago        98.7MB
Before we run the Django container, we need to configure its running environment using the env file present in the current directory. This file will be passed into the docker run command used to run the container, and Docker will inject the configured environment variables into the container’s running environment.
Open the env file with nano or your favorite editor:
- nano env
DJANGO_SECRET_KEY=
DEBUG=True
DJANGO_ALLOWED_HOSTS=
DATABASE_ENGINE=postgresql_psycopg2
DATABASE_NAME=polls
DATABASE_USERNAME=
DATABASE_PASSWORD=
DATABASE_HOST=
DATABASE_PORT=
STATIC_ACCESS_KEY_ID=
STATIC_SECRET_KEY=
STATIC_BUCKET_NAME=
STATIC_ENDPOINT_URL=
DJANGO_LOGLEVEL=info
Fill in missing values for the following keys:
DJANGO_SECRET_KEY: Set this to a unique, unpredictable value, as detailed in the Django docs. One method of generating this key is provided in Adjusting the App Settings of the Scalable Django App tutorial.DJANGO_ALLOWED_HOSTS: This variable secures the app and prevents HTTP Host header attacks. For testing purposes, set this to*, a wildcard that will match all hosts. In production you should set this toyour_domain.com. To learn more about this Django setting, consult Core Settings from the Django docs.DATABASE_USERNAME: Set this to the PostgreSQL database user created in the prerequisite steps.DATABASE_NAME: Set this topollsor the name of the PostgreSQL database created in the prerequisite steps.DATABASE_PASSWORD: Set this to the PostgreSQL user password created in the prerequisite steps.DATABASE_HOST: Set this to your database’s hostname.DATABASE_PORT: Set this to your database’s port.STATIC_ACCESS_KEY_ID: Set this to your Space or object storage’s access key.STATIC_SECRET_KEY: Set this to your Space or object storage’s access key Secret.STATIC_BUCKET_NAME: Set this to your Space name or object storage bucket.STATIC_ENDPOINT_URL: Set this to the appropriate Spaces or object storage endpoint URL, for examplehttps://your_space_name.nyc3.digitaloceanspaces.comif your Space is located in thenyc3region.
Once you’ve finished editing, save and close the file.
In the next step we’ll run the configured container locally and create the database schema. We’ll also upload static assets like stylesheets and images to object storage.
Step 2 — Creating the Database Schema and Uploading Assets to Object Storage
With the container built and configured, use docker run to override the CMD set in the Dockerfile and create the database schema using the manage.py makemigrations and manage.py migrate commands:
- docker run --env-file env polls sh -c "python manage.py makemigrations && python manage.py migrate"
We run the polls:latest container image, pass in the environment variable file we just modified, and override the Dockerfile command with sh -c "python manage.py makemigrations && python manage.py migrate", which will create the database schema defined by the app code.
If you’re running this for the first time you should see:
OutputNo changes detected
Operations to perform:
  Apply all migrations: admin, auth, contenttypes, polls, sessions
Running migrations:
  Applying contenttypes.0001_initial... OK
  Applying auth.0001_initial... OK
  Applying admin.0001_initial... OK
  Applying admin.0002_logentry_remove_auto_add... OK
  Applying admin.0003_logentry_add_action_flag_choices... OK
  Applying contenttypes.0002_remove_content_type_name... OK
  Applying auth.0002_alter_permission_name_max_length... OK
  Applying auth.0003_alter_user_email_max_length... OK
  Applying auth.0004_alter_user_username_opts... OK
  Applying auth.0005_alter_user_last_login_null... OK
  Applying auth.0006_require_contenttypes_0002... OK
  Applying auth.0007_alter_validators_add_error_messages... OK
  Applying auth.0008_alter_user_username_max_length... OK
  Applying auth.0009_alter_user_last_name_max_length... OK
  Applying auth.0010_alter_group_name_max_length... OK
  Applying auth.0011_update_proxy_permissions... OK
  Applying polls.0001_initial... OK
  Applying sessions.0001_initial... OK
This indicates that the database schema has successfully been created.
If you’re running migrate a subsequent time, Django will perform a no-op unless the database schema has changed.
Next, we’ll run another instance of the app container and use an interactive shell inside of it to create an administrative user for the Django project.
- docker run -i -t --env-file env polls sh
This will provide you with a shell prompt inside of the running container which you can use to create the Django user:
- python manage.py createsuperuser
Enter a username, email address, and password for your user, and after creating the user, hit CTRL+D to quit the container and kill it.
Finally, we’ll generate the static files for the app and upload them to the DigitalOcean Space using collectstatic. Note that this may take a bit of time to complete.
- docker run --env-file env polls sh -c "python manage.py collectstatic --noinput"
After these files are generated and uploaded, you’ll receive the following output.
Output121 static files copied.
We can now run the app:
- docker run --env-file env -p 80:8000 polls
Output[2019-10-17 21:23:36 +0000] [1] [INFO] Starting gunicorn 19.9.0
[2019-10-17 21:23:36 +0000] [1] [INFO] Listening at: http://0.0.0.0:8000 (1)
[2019-10-17 21:23:36 +0000] [1] [INFO] Using worker: sync
[2019-10-17 21:23:36 +0000] [7] [INFO] Booting worker with pid: 7
[2019-10-17 21:23:36 +0000] [8] [INFO] Booting worker with pid: 8
[2019-10-17 21:23:36 +0000] [9] [INFO] Booting worker with pid: 9
Here, we run the default command defined in the Dockerfile, gunicorn --bind :8000 --workers 3 mysite.wsgi:application, and expose container port 8000 so that port 80 on your local machine gets mapped to port 8000 of the polls container.
You should now be able to navigate to the polls app using your web browser by typing http://localhost in the URL bar. Since there is no route defined for the / path, you’ll likely receive a 404 Page Not Found error, which is expected.
Navigate to http://localhost/polls to see the Polls app interface:

To view the administrative interface, visit http://localhost/admin. You should see the Polls app admin authentication window:
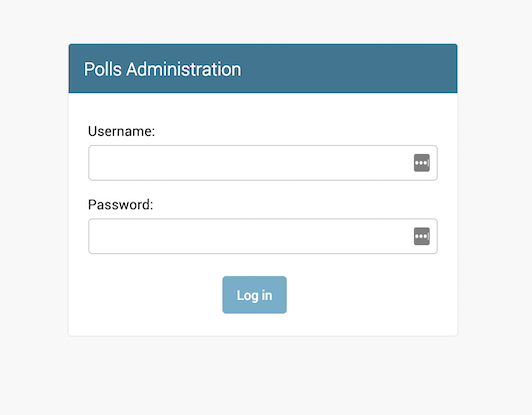
Enter the administrative username and password you created with the createsuperuser command.
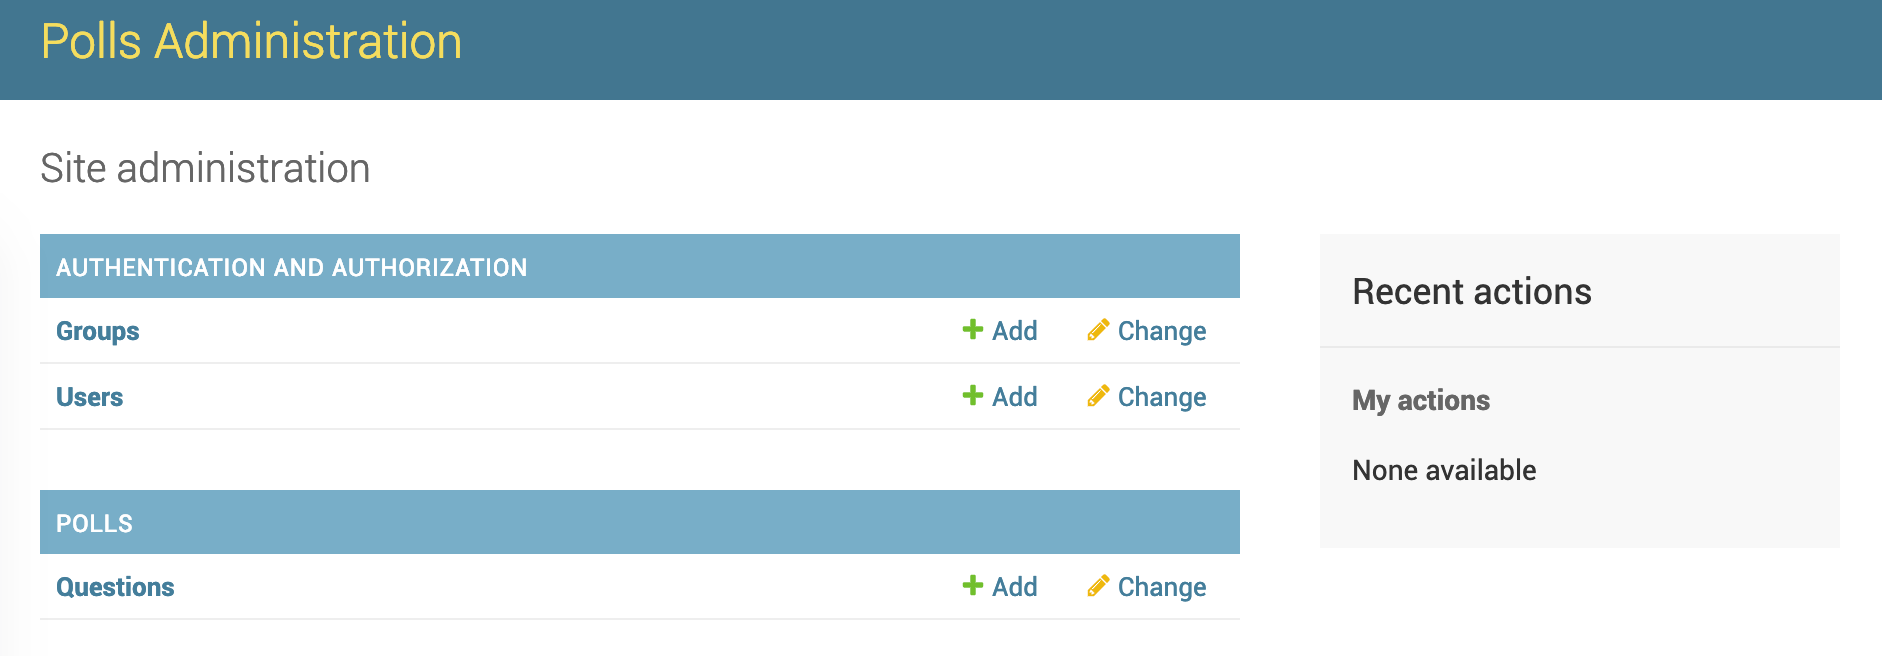
After authenticating, you can access the Polls app’s administrative interface:
Note that static assets for the admin and polls apps are being delivered directly from object storage. To confirm this, consult Testing Spaces Static File Delivery.
When you are finished exploring, hit CTRL+C in the terminal window running the Docker container to kill the container.
With the Django app Docker image tested, static assets uploaded to object storage, and database schema configured and ready for use with your app, you’re ready to upload your Django app image to an image registry like Docker Hub.
Step 3 — Pushing the Django App Image to Docker Hub
To roll your app out on Kubernetes, your app image must be uploaded to a registry like Docker Hub. Kubernetes will pull the app image from its repository and then deploy it to your cluster.
You can use a private Docker registry, like DigitalOcean Container Registry, currently free in Early Access, or a public Docker registry like Docker Hub. Docker Hub also allows you to create private Docker repositories. A public repository allows anyone to see and pull the container images, while a private repository allows you to restrict access to you and your team members.
In this tutorial we’ll push the Django image to the public Docker Hub repository created in the prerequisites. You can also push your image to a private repository, but pulling images from a private repository is beyond the scope of this article. To learn more about authenticating Kubernetes with Docker Hub and pulling private images, please see Pull an Image from a Private Registry from the Kubernetes docs.
Begin by logging in to Docker Hub on your local machine:
- docker login
OutputLogin with your Docker ID to push and pull images from Docker Hub. If you don't have a Docker ID, head over to https://hub.docker.com to create one.
Username:
Enter your Docker Hub username and password to login.
The Django image currently has the polls:latest tag. To push it to your Docker Hub repo, re-tag the image with your Docker Hub username and repo name:
- docker tag polls:latest your_dockerhub_username/your_dockerhub_repo_name:latest
Push the image to the repo:
- docker push sammy/sammy-django:latest
In this tutorial the Docker Hub username is sammy and the repo name is sammy-django. You should replace these values with your own Docker Hub username and repo name.
You’ll see some output that updates as image layers are pushed to Docker Hub.
Now that your image is available to Kubernetes on Docker Hub, you can begin rolling it out in your cluster.
Step 4 — Setting Up the ConfigMap
When we ran the Django container locally, we passed the env file into docker run to inject configuration variables into the runtime environment. On Kubernetes, configuration variables can be injected using ConfigMaps and Secrets.
ConfigMaps should be used to store non-confidential configuration information like app settings, and Secrets should be used for sensitive information like API keys and database credentials. They are both injected into containers in a similar fashion, but Secrets have additional access control and security features like encryption at rest. Secrets also store data in base64, while ConfigMaps store data in plain text.
To begin, create a directory called yaml in which we’ll store our Kubernetes manifests. Navigate into the directory.
- mkdir yaml
- cd
Open a file called polls-configmap.yaml in nano or your preferred text editor:
- nano polls-configmap.yaml
Paste in the following ConfigMap manifest:
apiVersion: v1
kind: ConfigMap
metadata:
  name: polls-config
data:
  DJANGO_ALLOWED_HOSTS: "*"
  STATIC_ENDPOINT_URL: "https://your_space_name.space_region.digitaloceanspaces.com"
  STATIC_BUCKET_NAME: "your_space_name"
  DJANGO_LOGLEVEL: "info"
  DEBUG: "True"
  DATABASE_ENGINE: "postgresql_psycopg2"
We’ve extracted the non-sensitive configuration from the env file modified in Step 1 and pasted it into a ConfigMap manifest. The ConfigMap object is called polls-config. Copy in the same values entered into the env file in the previous step.
For testing purposes leave DJANGO_ALLOWED_HOSTS as * to disable Host header-based filtering. In a production environment you should set this to your app’s domain.
When you’re done editing the file, save and close it.
Create the ConfigMap in your cluster using kubectl apply:
- kubectl apply -f polls-configmap.yaml
Outputconfigmap/polls-config created
With the ConfigMap created, we’ll create the Secret used by our app in the next step.
Step 5 — Setting Up the Secret
Secret values must be base64-encoded, which means creating Secret objects in your cluster is slightly more involved than creating ConfigMaps. You can repeat the process from the previous step, manually base64-encoding Secret values and pasting them into a manifest file. You can also create them using an environment variable file, kubectl create, and the --from-env-file flag, which we’ll do in this step.
We’ll once again use the env file from Step 1, removing variables inserted into the ConfigMap. Make a copy of the env file called polls-secrets in the yaml directory:
- cp ../env ./polls-secrets
Edit the file in your preferred editor:
- nano polls-secrets
DJANGO_SECRET_KEY=
DEBUG=True
DJANGO_ALLOWED_HOSTS=
DATABASE_ENGINE=postgresql_psycopg2
DATABASE_NAME=polls
DATABASE_USERNAME=
DATABASE_PASSWORD=
DATABASE_HOST=
DATABASE_PORT=
STATIC_ACCESS_KEY_ID=
STATIC_SECRET_KEY=
STATIC_BUCKET_NAME=
STATIC_ENDPOINT_URL=
DJANGO_LOGLEVEL=info
Delete all the variables inserted into the ConfigMap manifest. When you’re done, it should look like this:
DJANGO_SECRET_KEY=your_secret_key
DATABASE_NAME=polls
DATABASE_USERNAME=your_django_db_user
DATABASE_PASSWORD=your_django_db_user_password
DATABASE_HOST=your_db_host
DATABASE_PORT=your_db_port
STATIC_ACCESS_KEY_ID=your_space_access_key
STATIC_SECRET_KEY=your_space_access_key_secret
Be sure to use the same values used in Step 1. When you’re done, save and close the file.
Create the Secret in your cluster using kubectl create secret:
- kubectl create secret generic polls-secret --from-env-file=poll-secrets
Outputsecret/polls-secret created
Here we create a Secret object called polls-secret and pass in the secrets file we just created.
You can inspect the Secret using kubectl describe:
- kubectl describe secret polls-secret
OutputName:         polls-secret
Namespace:    default
Labels:       <none>
Annotations:  <none>

Type:  Opaque

Data
====
DATABASE_PASSWORD:     8 bytes
DATABASE_PORT:         5 bytes
DATABASE_USERNAME:     5 bytes
DJANGO_SECRET_KEY:     14 bytes
STATIC_ACCESS_KEY_ID:  20 bytes
STATIC_SECRET_KEY:     43 bytes
DATABASE_HOST:         47 bytes
DATABASE_NAME:         5 bytes
At this point you’ve stored your app’s configuration in your Kubernetes cluster using the Secret and ConfigMap object types. We’re now ready to deploy the app into the cluster.
Step 6 — Rolling Out the Django App Using a Deployment
In this step you’ll create a Deployment for your Django app. A Kubernetes Deployment is a controller that can be used to manage stateless applications in your cluster. A controller is a control loop that regulates workloads by scaling them up or down. Controllers also restart and clear out failed containers.
Deployments control one or more Pods, the smallest deployable unit in a Kubernetes cluster. Pods enclose one or more containers. To learn more about the different types of workloads you can launch, please review An Introduction to Kubernetes.
Begin by opening a file called polls-deployment.yaml in your favorite editor:
- nano polls-deployment.yaml
Paste in the following Deployment manifest:
apiVersion: apps/v1
kind: Deployment
metadata:
  name: polls-app
  labels:
    app: polls
spec:
	replicas: 2
  selector:
    matchLabels:
      app: polls
  template:
    metadata:
      labels:
        app: polls
    spec:
      containers:
        - image: your_dockerhub_username/app_repo_name:latest
          name: polls
          envFrom:
          - secretRef:
              name: polls-secret
          - configMapRef:
              name: polls-config
          ports:
            - containerPort: 8000
              name: gunicorn
Fill in the appropriate container image name, referencing the Django Polls image you pushed to Docker Hub in Step 2.
Here we define a Kubernetes Deployment called polls-app and label it with the key-value pair app: polls. We specify that we’d like to run two replicas of the Pod defined below the template field.
Using envFrom with secretRef and configMapRef, we specify that all the data from the polls-secret Secret and polls-config ConfigMap should be injected into the containers as environment variables. The ConfigMap and Secret keys become the environment variable names.
Finally, we expose containerPort 8000 and name it gunicorn.
To learn more about configuring Kubernetes Deployments, please consult Deployments from the Kubernetes documentation.
When you’re done editing the file, save and close it.
Create the Deployment in your cluster using kubectl apply -f:
- kubectl apply -f polls-deployment.yaml
- deployment.apps/polls-app created
Check that the Deployment rolled out correctly using kubectl get:
- kubectl get deploy polls-app
OutputNAME        READY   UP-TO-DATE   AVAILABLE   AGE
polls-app   2/2     2            2           6m38s
If you encounter an error or something isn’t quite working, you can use kubectl describe to inspect the failed Deployment:
- kubectl describe deploy
You can inspect the two Pods using kubectl get pod:
- kubectl get pod
OutputNAME                         READY   STATUS    RESTARTS   AGE
polls-app-847f8ccbf4-2stf7   1/1     Running   0          6m42s
polls-app-847f8ccbf4-tqpwm   1/1     Running   0          6m57s
Two replicas of your Django app are now up and running in the cluster. To access the app, you need to create a Kubernetes Service, which we’ll do next.
Step 7 — Allowing External Access using a Service
In this step, you’ll create a Service for your Django app. A Kubernetes Service is an abstraction that allows you to expose a set of running Pods as a network service. Using a Service you can create a stable endpoint for your app that does not change as Pods die and are recreated.
There are multiple Service types, including ClusterIP Services, which expose the Service on a cluster-internal IP, NodePort Services, which expose the Service on each Node at a static port called the NodePort, and LoadBalancer Services, which provision a cloud load balancer to direct external traffic to the Pods in your cluster (via NodePorts, which it creates automatically). To learn more about these, please see Service from the Kubernetes docs.
In our final setup we’ll use a ClusterIP Service that is exposed using an Ingress and the Ingress Controller set up in the prerequisites for this guide. For now, to test that everything is functioning correctly, we’ll create a temporary NodePort Service to access the Django app.
Begin by creating a file called polls-svc.yaml using your favorite editor:
- nano polls-svc.yaml
Paste in the following Service manifest:
apiVersion: v1
kind: Service
metadata:
  name: polls
  labels:
    app: polls
spec:
  type: NodePort
  selector:
    app: polls
  ports:
    - port: 8000
      targetPort: 8000
Here we create a NodePort Service called polls and give it the app: polls label. We then select backend Pods with the app: polls label and target their 8000 ports.
When you’re done editing the file, save and close it.
Roll out the Service using kubectl apply:
- kubectl apply -f polls-svc.yaml
Outputservice/polls created
Confirm that your Service was created using kubectl get svc:
- kubectl get svc polls
OutputNAME    TYPE       CLUSTER-IP       EXTERNAL-IP   PORT(S)          AGE
polls   NodePort   10.245.197.189   <none>        8000:32654/TCP   59s
This output shows the Service’s cluster-internal IP and NodePort (32654). To connect to the service, we need the external IP addresses for our cluster nodes:
- kubectl get node -o wide
OutputNAME                   STATUS   ROLES    AGE   VERSION   INTERNAL-IP   EXTERNAL-IP      OS-IMAGE                       KERNEL-VERSION          CONTAINER-RUNTIME
pool-7no0qd9e0-364fd   Ready    <none>   27h   v1.18.8   10.118.0.5    203.0.113.1   Debian GNU/Linux 10 (buster)   4.19.0-10-cloud-amd64   docker://18.9.9
pool-7no0qd9e0-364fi   Ready    <none>   27h   v1.18.8   10.118.0.4    203.0.113.2    Debian GNU/Linux 10 (buster)   4.19.0-10-cloud-amd64   docker://18.9.9
pool-7no0qd9e0-364fv   Ready    <none>   27h   v1.18.8   10.118.0.3    203.0.113.3   Debian GNU/Linux 10 (buster)   4.19.0-10-cloud-amd64   docker://18.9.9
In your web browser, visit your Polls app using any Node’s external IP address and the NodePort. Given the output above, the app’s URL would be: http://203.0.113.1:32654/polls.
You should see the same Polls app interface that you accessed locally in Step 1:
You can repeat the same test using the /admin route: http://203.0.113.1:32654/admin. You should see the same Admin interface as before:
At this stage, you’ve rolled out two replicas of the Django Polls app container using a Deployment. You’ve also created a stable network endpoint for these two replicas, and made it externally accessible using a NodePort Service.
The final step in this tutorial is to secure external traffic to your app using HTTPS. To do this we’ll use the ingress-nginx Ingress Controller installed in the prerequisites, and create an Ingress object to route external traffic to the polls Kubernetes Service.
Step 8 — Configuring HTTPS Using Nginx Ingress and cert-manager
Kubernetes Ingresses allow you to flexibly route traffic from outside your Kubernetes cluster to Services inside of your cluster. This is accomplished using Ingress objects, which define rules for routing HTTP and HTTPS traffic to Kubernetes Services, and Ingress Controllers, which implement the rules by load balancing traffic and routing it to the appropriate backend Services.
In the prerequisites you installed the ingress-nginx Ingress Controller and cert-manager TLS certificate automation add-on. You also set up staging and production ClusterIssuers for your domain using the Let’s Encrypt certificate authority, and created an Ingress to test certificate issuance and TLS encryption to two dummy backend Services. Before continuing with this step, you should delete the echo-ingress Ingress created in the prerequisite tutorial:
- kubectl delete ingress echo-ingress
If you’d like you can also delete the dummy Services and Deployments using kubectl delete svc and kubectl delete deploy, but this is not essential to complete this tutorial.
You should also have created a DNS A record with your_domain.com pointing to the Ingress Load Balancer’s public IP address. If you’re using a DigitalOcean Load Balancer, you can find this IP address in the Load Balancers section of the Control Panel. If you are also using DigitalOcean to manage your domain’s DNS records, consult How to Manage DNS Records to learn how to create A records.
If you’re using DigitalOcean Kubernetes, also ensure that you’ve implemented the workaround described in Step 5 of How to Set Up an Nginx Ingress with Cert-Manager on DigitalOcean Kubernetes.
Once you have an A record pointing to the Ingress Controller Load Balancer, you can create an Ingress for your_domain.com and the polls Service.
Open a file called polls-ingress.yaml using your favorite editor:
- nano polls-ingress.yaml
Paste in the following Ingress manifest:
[polls-ingress.yaml]
apiVersion: networking.k8s.io/v1beta1
kind: Ingress
metadata:
  name: polls-ingress
  annotations:
    kubernetes.io/ingress.class: "nginx"
    cert-manager.io/cluster-issuer: "letsencrypt-staging"
spec:
  tls:
  - hosts:
    - your_domain.com
    secretName: polls-tls
  rules:
  - host: your_domain.com
    http:
      paths:
      - backend:
          serviceName: polls
          servicePort: 8000
We create an Ingress object called polls-ingress and annotate it to instruct the control plane to use the ingress-nginx Ingress Controller and staging ClusterIssuer. We also enable TLS for your_domain.com and store the certificate and private key in a secret called polls-tls. Finally, we define a rule to route traffic for the your_domain.com host to the polls Service on port 8000.
When you’re done editing the file, save and close it.
Create the Ingress in your cluster using kubectl apply:
- kubectl apply -f polls-ingress.yaml
Outputingress.networking.k8s.io/polls-ingress created
You can use kubectl describe to track the state of the Ingress you just created:
- kubectl describe ingress polls-ingress
OutputName:             polls-ingress
Namespace:        default
Address:          workaround.your_domain.com
Default backend:  default-http-backend:80 (<error: endpoints "default-http-backend" not found>)
TLS:
  polls-tls terminates your_domain.com
Rules:
  Host        Path  Backends
  ----        ----  --------
  your_domain.com
                 polls:8000 (10.244.0.207:8000,10.244.0.53:8000)
Annotations:  cert-manager.io/cluster-issuer: letsencrypt-staging
              kubernetes.io/ingress.class: nginx
Events:
  Type    Reason             Age   From                      Message
  ----    ------             ----  ----                      -------
  Normal  CREATE             51s   nginx-ingress-controller  Ingress default/polls-ingress
  Normal  CreateCertificate  51s   cert-manager              Successfully created Certificate "polls-tls"
  Normal  UPDATE             25s   nginx-ingress-controller  Ingress default/polls-ingress
You can also run a describe on the polls-tls Certificate to further confirm its successful creation:
- kubectl describe certificate polls-tls
Output. . .
Events:
  Type    Reason     Age    From          Message
  ----    ------     ----   ----          -------
  Normal  Issuing    3m33s  cert-manager  Issuing certificate as Secret does not exist
  Normal  Generated  3m32s  cert-manager  Stored new private key in temporary Secret resource "polls-tls-v9lv9"
  Normal  Requested  3m32s  cert-manager  Created new CertificateRequest resource "polls-tls-drx9c"
  Normal  Issuing    2m58s  cert-manager  The certificate has been successfully issued
This confirms that the TLS certificate was successfully issued and HTTPS encryption is now active for your_domain.com.
Given that we used the staging ClusterIssuer, most web browsers won’t trust the fake Let’s Encrypt certificate that it issued, so navigating to your_domain.com will bring you to an error page.
To send a test request, we’ll use wget from the command-line:
- wget -O - http://your_domain.com/polls
Output. . .
ERROR: cannot verify your_domain.com's certificate, issued by ‘CN=Fake LE Intermediate X1’:
  Unable to locally verify the issuer's authority.
To connect to your_domain.com insecurely, use `--no-check-certificate'.
We’ll use the suggested --no-check-certificate flag to bypass certificate validation:
- wget --no-check-certificate -q -O - http://your_domain.com/polls
Output

<link rel="stylesheet" type="text/css" href="https://your_space.nyc3.digitaloceanspaces.com/django-polls/static/polls/style.css">


    <p>No polls are available.</p>
This output shows the HTML for the /polls interface page, also confirming that the stylesheet is being served from object storage.
Now that you’ve successfully tested certificate issuance using the staging ClusterIssuer, you can modify the Ingress to use the production ClusterIssuer.
Open polls-ingress.yaml for editing once again:
- nano polls-ingress.yaml
Modify the cluster-issuer annotation:
[polls-ingress.yaml]
apiVersion: networking.k8s.io/v1beta1
kind: Ingress
metadata:
  name: polls-ingress
  annotations:
    kubernetes.io/ingress.class: "nginx"
    cert-manager.io/cluster-issuer: "letsencrypt-prod"
spec:
  tls:
  - hosts:
    - your_domain.com
    secretName: polls-tls
  rules:
  - host: your_domain.com
    http:
      paths:
      - backend:
          serviceName: polls
          servicePort: 8000
When you’re done, save and close the file. Update the Ingress using kubectl apply:
- kubectl apply -f polls-ingress.yaml
Outputingress.networking.k8s.io/polls-ingress configured
You can use kubectl describe certificate polls-tls and kubectl describe ingress polls-ingress to track the certificate issuance status:
- kubectl describe ingress polls-ingress
Output. . .
Events:
  Type    Reason             Age                From                      Message
  ----    ------             ----               ----                      -------
  Normal  CREATE             23m                nginx-ingress-controller  Ingress default/polls-ingress
  Normal  CreateCertificate  23m                cert-manager              Successfully created Certificate "polls-tls"
  Normal  UPDATE             76s (x2 over 22m)  nginx-ingress-controller  Ingress default/polls-ingress
  Normal  UpdateCertificate  76s                cert-manager              Successfully updated Certificate "polls-tls"
The above output confirms that the new production certificate was successfully issued and stored in the polls-tls Secret.
Navigate to your_domain.com/polls in your web browser to confirm that HTTPS encryption is enabled and everything is working as expected. You should see the Polls app interface:
Verify that HTTPS encryption is active in your web browser. If you’re using Google Chrome, arriving at the above page without any errors confirms that everything is working correctly. In addition, you should see a padlock in the URL bar. Clicking on the padlock will allow you to inspect the Let’s Encrypt certificate details.
As a final cleanup task, you can optionally switch the polls Service type from NodePort to the internal-only ClusterIP type.
Modify polls-svc.yaml using your editor:
- nano polls-svc.yaml
Change the type from NodePort to ClusterIP:
apiVersion: v1
kind: Service
metadata:
  name: polls
  labels:
    app: polls
spec:
  type: ClusterIP
  selector:
    app: polls
  ports:
    - port: 8000
      targetPort: 8000
When you’re done editing the file, save and close it.
Roll out the changes using kubectl apply:
- kubectl apply -f polls-svc.yaml --force
Outputservice/polls configured
Confirm that your Service was modified using kubectl get svc:
- kubectl get svc polls
OutputNAME    TYPE        CLUSTER-IP       EXTERNAL-IP   PORT(S)    AGE
polls   ClusterIP   10.245.203.186   <none>        8000/TCP   22s
This output shows that the Service type is now ClusterIP. The only way to access it is via your domain and the Ingress created in this step.
Conclusion
In this tutorial you deployed a scalable, HTTPS-secured Django app into a Kubernetes cluster. Static content is served directly from object storage, and the number of running Pods can be quickly scaled up or down using the replicas field in the polls-app Deployment manifest.
If you’re using a DigitalOcean Space, you can also enable delivery of static assets via a content delivery network and create a custom subdomain for your Space. Please consult Enabling CDN from How to Set Up a Scalable Django App with DigitalOcean Managed Databases and Spaces to learn more.
To review the rest of the series, please visit our From Containers to Kubernetes with Django series page.
Thanks for learning with the DigitalOcean Community. Check out our offerings for compute, storage, networking, and managed databases.
Tutorial Series: From Containers to Kubernetes with Django
In this series, you will build and containerize a Django application. The series is designed to introduce you to the fundamentals of migrating an application to Kubernetes, including modernizing your app using the 12FA methodology, containerizing it, and deploying it to Kubernetes. The series also includes information on scaling and securing a containerized app with NGINX and Let’s Encrypt Docker containers.
About the author
DevOps Engineer, Former Technical Writer and Editor at DigitalOcean. Expertise in topics including Ubuntu, Kubernetes, Docker, CentOS.
Still looking for an answer?
This textbox defaults to using Markdown to format your answer.
You can type !ref in this text area to quickly search our full set of tutorials, documentation & marketplace offerings and insert the link!
Since the Django service is behind the ingress controller and only traffic via your domain is routed to the service, would setting ALLOWED_HOSTS to ‘*’ be ok?
There is a typo:
spec:
    replicas: 2
  selector:
There are too many spaces before “replicas:”
I get this error message:
error: error parsing kubernetes/deployment.yaml: error converting YAML to JSON: yaml: line 8: did not find expected key
Hi! I think you might have a small error in the static files setup.
I see in the instructions to set STATIC_ENDPOINT_URL as https://your_space_name.nyc3.digitaloceanspaces.com. I did that (“your_space” being the space name, and the rest of the URL matching). On doing this, when running collectstatic, the assets get uploaded fine and are visible in the bucket, but when requesting them in the application, I’d get 403s with “Signatures don’t match”, similar to this issue: https://www.digitalocean.com/community/questions/signaturedoesnotmatch-django
I changed that environment variable to not include the space name and the issue was resolved.
 This work is licensed under a Creative Commons Attribution-NonCommercial- ShareAlike 4.0 International License.
Become a contributor for community
Get paid to write technical tutorials and select a tech-focused charity to receive a matching donation.

DigitalOcean Documentation
Full documentation for every DigitalOcean product.

Resources for startups and AI-native businesses
The Wave has everything you need to know about building a business, from raising funding to marketing your product.
The developer cloud
Scale up as you grow — whether you're running one virtual machine or ten thousand.

Start building today
From GPU-powered inference and Kubernetes to managed databases and storage, get everything you need to build, scale, and deploy intelligent applications.
