By Hanif Jetha

Introduction
In cloud-based environments, there are multiple ways to scale and secure a Django application. By scaling horizontally, and running several copies of your app, you can build a more fault-tolerant and highly-available system, while also increasing its throughput so that requests can be processed simultaneously. One way to horizontally scale a Django app is to provision additional app servers that run your Django application and its WSGI HTTP server (like Gunicorn or uWSGI). To route and distribute incoming requests across this set of app servers, you can use a load balancer and reverse proxy like Nginx. Nginx can also cache static content and terminate Transport Layer Security (TLS) connections, used to provide HTTPS and secure connections to your app.
Running your Django application and Nginx proxy inside of Docker containers ensures that these components behave the same way regardless of the environment they are deployed into. In addition, containers provide many features that facilitate packaging and configuring your application.
In this tutorial, you’ll horizontally scale a containerized Django and Gunicorn Polls application by provisioning two application servers that will each run a copy of a Django and Gunicorn app container.
You’ll also enable HTTPS by provisioning and configuring a third proxy server that will run an Nginx reverse proxy container and a Certbot client container. Certbot will provision TLS certificates for Nginx from the Let’s Encrypt certificate authority. This will ensure that your site receives a high security rating from SSL Labs. This proxy server will receive all of your app’s external requests and sit in front of the two upstream Django application servers. Finally, you’ll harden this distributed system by restricting external access to only the proxy server.
Prerequisites
To follow this tutorial, you will need:
-
Three Ubuntu 18.04 servers:
- Two servers will be application servers, used to run your Django and Gunicorn app.
- One server will be a proxy server, used to run Nginx and Certbot.
- All should have a non-root user with
sudoprivileges, and an active firewall. For guidance on how to set these up, please see this Initial Server Setup guide.
-
Docker installed on all three servers. For guidance on installing Docker, follow Steps 1 and 2 of How To Install and Use Docker on Ubuntu 18.04.
-
A registered domain name. This tutorial will use
your_domain.comthroughout. You can get one for free at Freenom, or use the domain registrar of your choice. -
An
ADNS record withyour_domain.compointing to your proxy server’s public IP address. You can follow this introduction to DigitalOcean DNS for details on how to add it to a DigitalOcean account, if that’s what you’re using. -
An S3 object storage bucket such as a DigitalOcean Space to store your Django project’s static files and a set of Access Keys for this Space. To learn how to create a Space, consult the How to Create Spaces product documentation. To learn how to create Access Keys for Spaces, consult Sharing Access to Spaces with Access Keys. With minor changes, you can use any object storage service that the django-storages plugin supports.
-
A PostgreSQL server instance, database, and user for your Django app. With minor changes, you can use any database that Django supports.
- The PostgreSQL database should be called polls (or another memorable name to input in your config files below) and in this tutorial the database user will be named sammy. For guidance on creating these, follow Step 1 of How to Build a Django and Gunicorn Application with Docker. You can perform these steps from any of the three servers.
- A DigitalOcean Managed PostgreSQL cluster is used in this tutorial. To learn how to create a cluster, consult the DigitalOcean Managed Databases product documentation.
- You can also install and run your own PostgreSQL instance. For guidance on installing and administering PostgreSQL on an Ubuntu server, please see How To Install and Use PostgreSQL on Ubuntu 18.04.
Step 1 — Configuring the First Django Application Server
To begin, we’ll clone the Django application repository onto the first app server. Then, we’ll configure and build the application Docker image, and test the application by running the Django container.
Note: If you’re continuing from How to Build a Django and Gunicorn Application with Docker, you will have already completed Step 1 and can skip ahead to Step 2 to configure the second app server.
Start by logging in to the first of the two Django application servers and using git to clone the polls-docker branch of the Django Tutorial Polls App GitHub repository. This repo contains code for the Django documentation’s sample Polls application. The polls-docker branch contains a Dockerized version of the Polls app. To learn how the Polls app was modified to work effectively in a containerized environment, please see How to Build a Django and Gunicorn Application with Docker.
- git clone --single-branch --branch polls-docker https://github.com/do-community/django-polls.git
Navigate into the django-polls directory:
cd django-polls
This directory contains the Django application Python code, a Dockerfile that Docker will use to build the container image, as well as an env file that contains a list of environment variables to be passed into the container’s running environment. Inspect the Dockerfile using cat:
cat Dockerfile
OutputFROM python:3.7.4-alpine3.10

ADD django-polls/requirements.txt /app/requirements.txt

RUN set -ex \
    && apk add --no-cache --virtual .build-deps postgresql-dev build-base \
    && python -m venv /env \
    && /env/bin/pip install --upgrade pip \
    && /env/bin/pip install --no-cache-dir -r /app/requirements.txt \
    && runDeps="$(scanelf --needed --nobanner --recursive /env \
        | awk '{ gsub(/,/, "\nso:", $2); print "so:" $2 }' \
        | sort -u \
        | xargs -r apk info --installed \
        | sort -u)" \
    && apk add --virtual rundeps $runDeps \
    && apk del .build-deps

ADD django-polls /app
WORKDIR /app

ENV VIRTUAL_ENV /env
ENV PATH /env/bin:$PATH

EXPOSE 8000

CMD ["gunicorn", "--bind", ":8000", "--workers", "3", "mysite.wsgi"]
This Dockerfile uses the official Python 3.7.4 Docker image as a base, and installs Django and Gunicorn’s Python package requirements, as defined in the django-polls/requirements.txt file. It then removes some unnecessary build files, copies the application code into the image, and sets the execution PATH. Finally, it declares that port 8000 will be used to accept incoming container connections, and runs gunicorn with 3 workers, listening on port 8000.
To learn more about each of the steps in this Dockerfile, please see Step 6 of How to Build a Django and Gunicorn Application with Docker.
Now, build the image using docker build:
- docker build -t polls .
We name the image polls using the -t flag and pass in the current directory as a build context, the set of files to reference when constructing the image.
After Docker builds and tags the image, list available images using docker images:
docker images
You should see the polls image listed:
OutputREPOSITORY          TAG                 IMAGE ID            CREATED             SIZE
polls               latest              80ec4f33aae1        2 weeks ago         197MB
python              3.7.4-alpine3.10    f309434dea3a        8 months ago        98.7MB
Before we run the Django container, we need to configure its running environment using the env file present in the current directory. This file will be passed into the docker run command used to run the container, and Docker will inject the configured environment variables into the container’s running environment.
Open the env file with nano or your favorite editor:
nano env
We’ll be configuring the file like so, and you’ll need to add some additional values as outlined below.
DJANGO_SECRET_KEY=
DEBUG=True
DJANGO_ALLOWED_HOSTS=
DATABASE_ENGINE=postgresql_psycopg2
DATABASE_NAME=polls
DATABASE_USERNAME=
DATABASE_PASSWORD=
DATABASE_HOST=
DATABASE_PORT=
STATIC_ACCESS_KEY_ID=
STATIC_SECRET_KEY=
STATIC_BUCKET_NAME=
STATIC_ENDPOINT_URL=
DJANGO_LOGLEVEL=info
Fill in the missing values for the following keys:
DJANGO_SECRET_KEY: Set this to a unique, unpredictable value, as detailed in the Django docs. One method of generating this key is provided in Adjusting the App Settings of the Scalable Django App tutorial.DJANGO_ALLOWED_HOSTS: This variable secures the app and prevents HTTP Host header attacks. For testing purposes, set this to*, a wildcard that will match all hosts. In production you should set this toyour_domain.com. To learn more about this Django setting, consult Core Settings from the Django docs.DATABASE_USERNAME: Set this to the PostgreSQL database user created in the prerequisite steps.DATABASE_NAME: Set this topollsor the name of the PostgreSQL database created in the prerequisite steps.DATABASE_PASSWORD: Set this to the PostgreSQL user password created in the prerequisite steps.DATABASE_HOST: Set this to your database’s hostname.DATABASE_PORT: Set this to your database’s port.STATIC_ACCESS_KEY_ID: Set this to your S3 bucket or Space’s access key.STATIC_SECRET_KEY: Set this to your S3 bucket or Space’s access key Secret.STATIC_BUCKET_NAME: Set this to your S3 bucket or Space name.STATIC_ENDPOINT_URL: Set this to the appropriate S3 bucket or Space endpoint URL, for examplehttps://space-name.nyc3.digitaloceanspaces.comif your Space is located in thenyc3region.
Once you’ve finished editing, save and close the file.
We’ll now use docker run to override the CMD set in the Dockerfile and create the database schema using the manage.py makemigrations and manage.py migrate commands:
docker run --env-file env polls sh -c "python manage.py makemigrations && python manage.py migrate"
We run the polls:latest container image, pass in the environment variable file we just modified, and override the Dockerfile command with sh -c "python manage.py makemigrations && python manage.py migrate", which will create the database schema defined by the app code. If you’re running this for the first time you should see:
OutputNo changes detected
Operations to perform:
  Apply all migrations: admin, auth, contenttypes, polls, sessions
Running migrations:
  Applying contenttypes.0001_initial... OK
  Applying auth.0001_initial... OK
  Applying admin.0001_initial... OK
  Applying admin.0002_logentry_remove_auto_add... OK
  Applying admin.0003_logentry_add_action_flag_choices... OK
  Applying contenttypes.0002_remove_content_type_name... OK
  Applying auth.0002_alter_permission_name_max_length... OK
  Applying auth.0003_alter_user_email_max_length... OK
  Applying auth.0004_alter_user_username_opts... OK
  Applying auth.0005_alter_user_last_login_null... OK
  Applying auth.0006_require_contenttypes_0002... OK
  Applying auth.0007_alter_validators_add_error_messages... OK
  Applying auth.0008_alter_user_username_max_length... OK
  Applying auth.0009_alter_user_last_name_max_length... OK
  Applying auth.0010_alter_group_name_max_length... OK
  Applying auth.0011_update_proxy_permissions... OK
  Applying polls.0001_initial... OK
  Applying sessions.0001_initial... OK
This indicates that the database schema has successfully been created.
If you’re running migrate a subsequent time, Django will perform a no-op unless the database schema has changed.
Next, we’ll run another instance of the app container and use an interactive shell inside of it to create an administrative user for the Django project.
docker run -i -t --env-file env polls sh
This will provide you with a shell prompt inside of the running container which you can use to create the Django user:
python manage.py createsuperuser
Enter a username, email address, and password for your user, and after creating the user, hit CTRL+D to quit the container and kill it.
Finally, we’ll generate the static files for the app and upload them to the DigitalOcean Space using collectstatic. Note that this may take a bit of time to complete.
docker run --env-file env polls sh -c "python manage.py collectstatic --noinput"
After these files are generated and uploaded, you’ll receive the following output.
Output121 static files copied.
We can now run the app:
docker run --env-file env -p 80:8000 polls
Output[2019-10-17 21:23:36 +0000] [1] [INFO] Starting gunicorn 19.9.0
[2019-10-17 21:23:36 +0000] [1] [INFO] Listening at: http://0.0.0.0:8000 (1)
[2019-10-17 21:23:36 +0000] [1] [INFO] Using worker: sync
[2019-10-17 21:23:36 +0000] [7] [INFO] Booting worker with pid: 7
[2019-10-17 21:23:36 +0000] [8] [INFO] Booting worker with pid: 8
[2019-10-17 21:23:36 +0000] [9] [INFO] Booting worker with pid: 9
Here, we run the default command defined in the Dockerfile, gunicorn --bind :8000 --workers 3 mysite.wsgi:application, and expose container port 8000 so that port 80 on the Ubuntu server gets mapped to port 8000 of the polls container.
You should now be able to navigate to the polls app using your web browser by typing http://APP_SERVER_1_IP in the URL bar. Since there is no route defined for the / path, you’ll likely receive a 404 Page Not Found error, which is expected.
Warning: When using the UFW firewall with Docker, Docker bypasses any configured UFW firewall rules, as documented in this GitHub issue. This explains why you have access to port 80 of your server, even though you haven’t explicitly created a UFW access rule in any prerequisite step. In Step 5 we will address this security hole by patching the UFW configuration. If you are not using UFW and are using DigitalOcean’s Cloud Firewalls, you can safely ignore this warning.
Navigate to http://APP_SERVER_1_IP/polls to see the Polls app interface:

To view the administrative interface, visit http://APP_SERVER_1_IP/admin. You should see the Polls app admin authentication window:
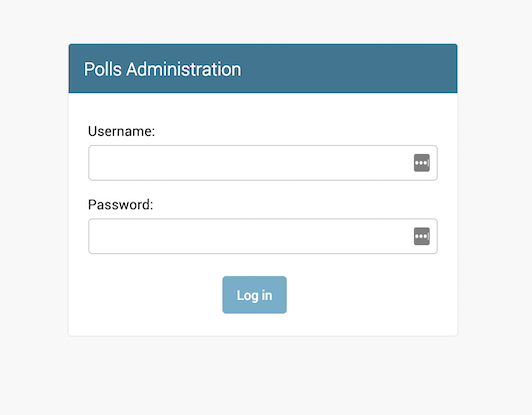
Enter the administrative username and password you created with the createsuperuser command.
After authenticating, you can access the Polls app’s administrative interface:
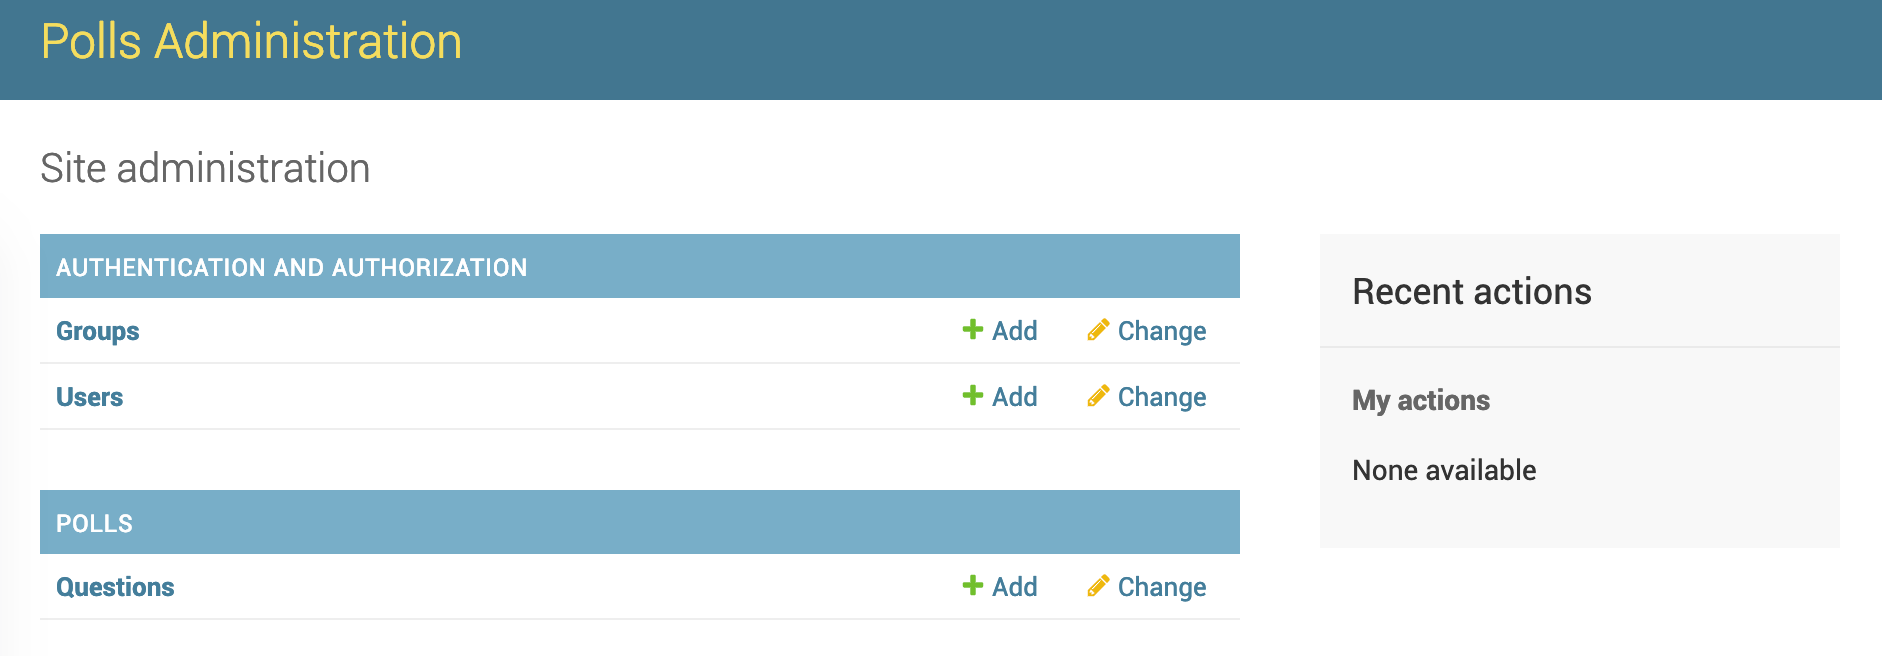
Note that static assets for the admin and polls apps are being delivered directly from object storage. To confirm this, consult Testing Spaces Static File Delivery.
When you are finished exploring, hit CTRL+C in the terminal window running the Docker container to kill the container.
Now that you’ve confirmed that the app container runs as expected, you can run it in detached mode, which will run it in the background and allow you to log out of your SSH session:
docker run -d --rm --name polls --env-file env -p 80:8000 polls
The -d flag instructs Docker to run the container in detached mode, the -rm flag cleans up the container’s filesystem after the container exits, and we name the container polls.
Log out of the first Django app server, and navigate to http://APP_SERVER_1_IP/polls to confirm that the container is running as expected.
Now that your first Django app server is up and running, you can set up your second Django app server.
Step 2 — Configuring the Second Django Application Server
Since many of the commands to set up this server will be the same as those in the previous step, they will be presented here in abbreviated form. Please review Step 1 for more information on any particular command in this step.
Begin by logging in to the second Django application server.
Clone the polls-docker branch of the django-polls GitHub repository:
- git clone --single-branch --branch polls-docker https://github.com/do-community/django-polls.git
Navigate into the django-polls directory:
cd django-polls
Build the image using docker build:
- docker build -t polls .
Open the env file with nano or your favorite editor:
nano env
DJANGO_SECRET_KEY=
DEBUG=True
DJANGO_ALLOWED_HOSTS=
DATABASE_ENGINE=postgresql_psycopg2
DATABASE_NAME=polls
DATABASE_USERNAME=
DATABASE_PASSWORD=
DATABASE_HOST=
DATABASE_PORT=
STATIC_ACCESS_KEY_ID=
STATIC_SECRET_KEY=
STATIC_BUCKET_NAME=
STATIC_ENDPOINT_URL=
DJANGO_LOGLEVEL=info
Fill in the missing values as in Step 1. When you’ve finished editing, save and close the file.
Finally, run the app container in detached mode:
docker run -d --rm --name polls --env-file env -p 80:8000 polls
Navigate to http://APP_SERVER_2_IP/polls to confirm that the container is running as expected. You can safely log out of the second app server without terminating your running container.
With both Django app containers up and running, you can move on to configuring the Nginx reverse proxy container.
Step 3 — Configuring the Nginx Docker Container
Nginx is a versatile web server that offers a number of features including reverse proxying, load balancing, and caching. In this tutorial we’ve offloaded Django’s static assets to object storage, so we won’t use Nginx’s caching capabilities. However, we will use Nginx as a reverse proxy to our two backend Django app servers, and distribute incoming requests between them. In addition, Nginx will perform TLS termination and redirection using a TLS certificate provisioned by Certbot. This means that it will force clients to use HTTPS, redirecting incoming HTTP requests to port 443. It will then decrypt HTTPS requests and proxy them to the upstream Django servers.
In this tutorial we’ve made the design decision to decouple the Nginx containers from the backend servers. Depending on your use case, you may choose to run the Nginx container on one of the Django app servers, proxying requests locally, as well as to the other Django server. Another possible architecture would be running two Nginx containers, one on each backend server, with a cloud load balancer in front. Each architecture presents different security and performance advantages, and you should load test your system to discover bottlenecks. The flexible architecture described in this tutorial allows you to scale both the backend Django app layer, as well as the Nginx proxying layer. Once the single Nginx container becomes a bottleneck, you can scale out to multiple Nginx proxies, and add a cloud load balancer or fast L4 load balancer like HAProxy.
With both Django app servers up and running, we can begin setting up the Nginx proxy server. Log in to your proxy server and create a directory called conf:
mkdir conf
Create a configuration file called nginx.conf using nano or your favorite editor:
nano conf/nginx.conf
Paste in the following Nginx configuration:
upstream django {
	server APP_SERVER_1_IP;
	server APP_SERVER_2_IP;
}

server {
	listen 80 default_server;
	return 444;
}

server {
	listen 80;
	listen [::]:80;
	server_name your_domain.com;
	return 301 https://$server_name$request_uri;
}

server {
	listen 443 ssl http2;
	listen [::]:443 ssl http2;
	server_name your_domain.com;

	# SSL
	ssl_certificate /etc/letsencrypt/live/your_domain.com/fullchain.pem;
	ssl_certificate_key /etc/letsencrypt/live/your_domain.com/privkey.pem;

	ssl_session_cache shared:le_nginx_SSL:10m;
	ssl_session_timeout 1440m;
	ssl_session_tickets off;

	ssl_protocols TLSv1.2 TLSv1.3;
	ssl_prefer_server_ciphers off;

	ssl_ciphers "ECDHE-ECDSA-AES128-GCM-SHA256:ECDHE-RSA-AES128-GCM-SHA256:ECDHE-ECDSA-AES256-GCM-SHA384:ECDHE-RSA-AES256-GCM-SHA384:ECDHE-ECDSA-CHACHA20-POLY1305:ECDHE-RSA-CHACHA20-POLY1305:DHE-RSA-AES128-GCM-SHA256:DHE-RSA-AES256-GCM-SHA384";

	client_max_body_size 4G;
	keepalive_timeout 5;

        location / {
          proxy_set_header X-Forwarded-For $proxy_add_x_forwarded_for;
          proxy_set_header X-Forwarded-Proto $scheme;
          proxy_set_header Host $http_host;
          proxy_redirect off;
          proxy_pass http://django;
        }

	location ^~ /.well-known/acme-challenge/ {
		root /var/www/html;
	}

}
These upstream, server, and location blocks configure Nginx to redirect HTTP requests to HTTPS, and load balance them across the two Django app servers configured in Steps 1 and 2. To learn more about Nginx configuration file structure, please refer to this article on Understanding the Nginx Configuration File Structure and Configuration Contexts. Additionally, this article on Understanding Nginx Server and Location Block Selection Algorithms may be helpful.
This configuration was assembled from sample configuration files provided by Gunicorn, Cerbot, and Nginx and is meant as a minimal Nginx configuration to get this architecture up and running. Tuning this Nginx configuration goes beyond the scope of this article, but you can use a tool like NGINXConfig to generate performant and secure Nginx configuration files for your architecture.
The upstream block defines the group of servers used to proxy requests to using the proxy_pass directive:
upstream django {
	server APP_SERVER_1_IP;
	server APP_SERVER_2_IP;
}
. . .
In this block we name the upstream django and include the IP addresses of both Django app servers. If the app servers are running on DigitalOcean and have VPC Networking enabled, you should use their private IP addresses here. To learn how to enable VPC Networking on DigitalOcean, please see How to Enable VPC Networking on Existing Droplets.
The first server block captures requests that do not match your domain and terminates the connection. For example, a direct HTTP request to your server’s IP address would be handled by this block:
. . .
server {
	listen 80 default_server;
	return 444;
}
. . .
The next server block redirects HTTP requests to your domain to HTTPS using an HTTP 301 redirect. These requests are then handled by the final server block:
. . .
server {
    listen 80;
    listen [::]:80;
    server_name your_domain.com;
    return 301 https://$server_name$request_uri;
}
. . .
These two directives define the paths to the TLS certificate and secret key. These will be provisioned using Certbot and mounted into the Nginx container in the next step.
. . .
ssl_certificate /etc/letsencrypt/live/your_domain.com/fullchain.pem;
ssl_certificate_key /etc/letsencrypt/live/your_domain.com/privkey.pem;
. . .
These parameters are SSL security defaults recommended by Certbot. To learn more about them, please see Module ngx_http_ssl_module from the Nginx docs. Mozilla’s Security/Server Side TLS is another helpful guide that you can use to tune your SSL configuration.
. . .
	ssl_session_cache shared:le_nginx_SSL:10m;
	ssl_session_timeout 1440m;
	ssl_session_tickets off;

	ssl_protocols TLSv1.2 TLSv1.3;
	ssl_prefer_server_ciphers off;

	ssl_ciphers "ECDHE-ECDSA-AES128-GCM-SHA256:ECDHE-RSA-AES128-GCM-SHA256:ECDHE-ECDSA-AES256-GCM-SHA384:ECDHE-RSA-AES256-GCM-SHA384:ECDHE-ECDSA-CHACHA20-POLY1305:ECDHE-RSA-CHACHA20-POLY1305:DHE-RSA-AES128-GCM-SHA256:DHE-RSA-AES256-GCM-SHA384";
. . .
These two directives from Gunicorn’s sample Nginx configuration set the maximum allowed size of the client request body and assign the timeout for keep-alive connections with the client. Nginx will close connections with the client after keepalive_timeout seconds.
. . .
client_max_body_size 4G;
keepalive_timeout 5;
. . .
The first location block instructs Nginx to proxy requests to the upstream django servers over HTTP. It additionally preserves client HTTP headers that capture the originating IP address, protocol used to connect, and target host:
. . .
location / {
    proxy_set_header X-Forwarded-For $proxy_add_x_forwarded_for;
    proxy_set_header X-Forwarded-Proto $scheme;
    proxy_set_header Host $http_host;
    proxy_redirect off;
    proxy_pass http://django;
}
. . .
To learn more about these directives, please see Deploying Gunicorn and Module ngx_http_proxy_module from the Nginx docs.
The final location block captures requests to the /well-known/acme-challenge/ path, used by Certbot for HTTP-01 challenges to verify your domain with Let’s Encrypt and provision or renew TLS certificates. For more information on the HTTP-01 challenge used by Certbot, please see Challenge Types from the Let’s Encrypt docs.
. . .
location ^~ /.well-known/acme-challenge/ {
		root /var/www/html;
}
Once you’ve finished editing, save and close the file.
You can now use this configuration file to run an Nginx Docker container. In this tutorial we’ll use the nginx:1.19.0 image, version 1.19.0 of the official Docker image maintained by Nginx.
When we run the container for the first time, Nginx will throw an error and fail as we haven’t yet provisioned the certificates defined in the configuration file. However, we’ll still run the command to download the Nginx image locally and test that everything else is functioning correctly:
docker run --rm --name nginx -p 80:80 -p 443:443 \
    -v ~/conf/nginx.conf:/etc/nginx/conf.d/nginx.conf:ro \
    -v /var/www/html:/var/www/html \
    nginx:1.19.0
Here we name the container nginx and map the host ports 80 and 443 to the respective container ports. The -v flag mounts the config file into the Nginx container at /etc/nginx/conf.d/nginx.conf, which the Nginx image is preconfigured to load. It is mounted in ro or “read only” mode, so the container cannot modify the file. The web root directory /var/www/html is also mounted into the container. Finally nginx:1.19.0 instructs Docker to pull and run the nginx:1.19.0 image from Dockerhub.
Docker will pull and run the image, then Nginx will throw an error when it doesn’t find the configured TLS certificate and secret key. In the next step we’ll provision these using a Dockerized Certbot client and the Let’s Encrypt certificate authority.
Step 4 — Configuring Certbot and Let’s Encrypt Certificate Renewal
Certbot is a Let’s Encrypt client developed by the Electronic Frontier Foundation. It provisions free TLS certificates from the Let’s Encrypt certificate authority which allow browsers to verify the identity of your web servers. Given that we have Docker installed on our Nginx proxy server, we’ll use the Certbot Docker image to provision and renew the TLS certificates.
Begin by ensuring that you have a DNS A record mapped to the proxy server’s public IP address. Then, on your proxy server, provision a staging version of the certificates using the certbot Docker image:
docker run -it --rm -p 80:80 --name certbot \
         -v "/etc/letsencrypt:/etc/letsencrypt" \
         -v "/var/lib/letsencrypt:/var/lib/letsencrypt" \
         certbot/certbot certonly --standalone --staging -d your_domain.com
This command runs the certbot Docker image in interactive mode, and forwards port 80 on the host to container port 80. It creates and mounts two host directories into the container: /etc/letsencrypt/ and /var/lib/letsencrypt/. certbot is run in standalone mode, without Nginx, and will use the Let’s Encrypt staging servers to perform domain validation.
When prompted, enter your email address and agree to the Terms of Service. If domain validation was successful, you should see the following output:
OutputObtaining a new certificate
Performing the following challenges:
http-01 challenge for stubb.dev
Waiting for verification...
Cleaning up challenges

IMPORTANT NOTES:
 - Congratulations! Your certificate and chain have been saved at:
   /etc/letsencrypt/live/your_domain.com/fullchain.pem
   Your key file has been saved at:
   /etc/letsencrypt/live/your_domain.com/privkey.pem
   Your cert will expire on 2020-09-15. To obtain a new or tweaked
   version of this certificate in the future, simply run certbot
   again. To non-interactively renew *all* of your certificates, run
   "certbot renew"
 - Your account credentials have been saved in your Certbot
   configuration directory at /etc/letsencrypt. You should make a
   secure backup of this folder now. This configuration directory will
   also contain certificates and private keys obtained by Certbot so
   making regular backups of this folder is ideal.
You can inspect the certificate using cat:
sudo cat /etc/letsencrypt/live/your_domain.com/fullchain.pem
With the TLS certificate provisioned, we can test the Nginx configuration assembled in the previous step:
docker run --rm --name nginx -p 80:80 -p 443:443 \
    -v ~/conf/nginx.conf:/etc/nginx/conf.d/nginx.conf:ro \
    -v /etc/letsencrypt:/etc/letsencrypt \
    -v /var/lib/letsencrypt:/var/lib/letsencrypt \
    -v /var/www/html:/var/www/html \
    nginx:1.19.0
This is the same command run in Step 3, with the addition of both recently created Let’s Encrypt directories.
Once Nginx is up and running, navigate to http://your_domain.com. You may receive a warning in your browser that the certificate authority is invalid. This is expected as we’ve provisioned staging certificates and not production Let’s Encrypt certificates. Check the URL bar of your browser to confirm that your HTTP request was redirected to HTTPS.
Hit CTRL+C in your terminal to quit Nginx, and run the certbot client again, this time omitting the --staging flag:
docker run -it --rm -p 80:80 --name certbot \
         -v "/etc/letsencrypt:/etc/letsencrypt" \
         -v "/var/lib/letsencrypt:/var/lib/letsencrypt" \
         certbot/certbot certonly --standalone -d your_domain.com
When prompted to either keep the existing certificate or renew and replace it, hit 2 to renew it and then ENTER to confirm your choice.
With the production TLS certificate provisioned, run the Nginx server once again:
docker run --rm --name nginx -p 80:80 -p 443:443 \
    -v ~/conf/nginx.conf:/etc/nginx/conf.d/nginx.conf:ro \
    -v /etc/letsencrypt:/etc/letsencrypt \
    -v /var/lib/letsencrypt:/var/lib/letsencrypt \
    -v /var/www/html:/var/www/html \
    nginx:1.19.0
In your browser, navigate to http://your_domain.com. In the URL bar, confirm that the HTTP request has been redirected to HTTPS. Given that the Polls app has no default route configured, you should see a Django Page not found error. Navigate to https://your_domain.com/polls and you’ll see the standard Polls app interface:
At this point you’ve provisioned a production TLS certificate using the Certbot Docker client, and are reverse proxying and load balancing external requests to the two Django app servers.
Let’s Encrypt certificates expire every 90 days. To ensure that your certificate remains valid, you should renew it regularly before its scheduled expiry. With Nginx running, you should use the Certbot client in webroot mode instead of standalone mode. This means that Certbot will perform validation by creating a file in the /var/www/html/.well-known/acme-challenge/ directory, and the Let’s Encrypt validation requests to this path will be captured by the location rule defined in the Nginx config in Step 3. Certbot will then rotate certificates, and you can reload Nginx so that it uses this newly provisioned certificate.
There are multiple ways to automate this procedure and the automatic renewal of TLS certificates goes beyond the scope of this tutorial. For a similar process using the cron scheduling utility, please see Step 6 of How To Secure a Containerized Node.js Application with Nginx, Let’s Encrypt, and Docker Compose.
In your terminal, hit CTRL+C to kill the Nginx container. Run it again in detached mode by appending the -d flag:
docker run --rm --name nginx -d -p 80:80 -p 443:443 \
	-v ~/conf/nginx.conf:/etc/nginx/conf.d/nginx.conf:ro \
	-v /etc/letsencrypt:/etc/letsencrypt \
	-v /var/lib/letsencrypt:/var/lib/letsencrypt \
  -v /var/www/html:/var/www/html \
	nginx:1.19.0
With Nginx running in the background, use the following command to perform a dry run of the certificate renewal procedure:
docker run -it --rm --name certbot \
	-v "/etc/letsencrypt:/etc/letsencrypt" \
  -v "/var/lib/letsencrypt:/var/lib/letsencrypt" \
  -v "/var/www/html:/var/www/html" \
  certbot/certbot renew --webroot -w /var/www/html --dry-run
We use the --webroot plugin, specify the web root path, and use the --dry-run flag to verify that everything is working correctly without actually performing the certificate renewal.
If the renewal simulation succeeds, you should see the following output:
OutputCert not due for renewal, but simulating renewal for dry run
Plugins selected: Authenticator webroot, Installer None
Renewing an existing certificate
Performing the following challenges:
http-01 challenge for your_domain.com
Using the webroot path /var/www/html for all unmatched domains.
Waiting for verification...
Cleaning up challenges

- - - - - - - - - - - - - - - - - - - - - - - - - - - - - - - - - - - - - - - -
new certificate deployed without reload, fullchain is
/etc/letsencrypt/live/your_domain.com/fullchain.pem
- - - - - - - - - - - - - - - - - - - - - - - - - - - - - - - - - - - - - - - -

- - - - - - - - - - - - - - - - - - - - - - - - - - - - - - - - - - - - - - - -
** DRY RUN: simulating 'certbot renew' close to cert expiry
**          (The test certificates below have not been saved.)

Congratulations, all renewals succeeded. The following certs have been renewed:
  /etc/letsencrypt/live/your_domain.com/fullchain.pem (success)
** DRY RUN: simulating 'certbot renew' close to cert expiry
**          (The test certificates above have not been saved.)
- - - - - - - - - - - - - - - - - - - - - - - - - - - - - - - - - - - - - - - -
In a production setting, after renewing certificates, you should reload Nginx so that the changes take effect. To reload Nginx, run the following command:
docker kill -s HUP nginx
This command will send a HUP Unix signal to the Nginx process running inside of the nginx Docker container. Upon receiving this signal, Nginx will reload its configuration and renewed certificates.
With HTTPS enabled and all the components of this architecture up and running, the final step is to lock down the setup by preventing external access to the two backend app servers; all HTTP requests should flow through the Nginx proxy.
Step 5 — Preventing External Access to Django App Servers
In the architecture described in this tutorial, SSL termination occurs at the Nginx proxy. This means that Nginx decrypts the SSL connection, and packets are proxied to the Django app servers unencrypted. For many use cases, this level of security is sufficient. For applications involving financial or health data, you may want to implement end-to-end encryption. You can do this by forwarding encrypted packets through the load balancer and decrypting on the app servers, or re encrypting at the proxy and once again decrypting on the Django app servers. These techniques go beyond the scope of this article, but to learn more please consult End-to-end encryption.
The Nginx proxy acts as a gateway between external traffic and the internal network. Theoretically no external clients should have direct access to the internal app servers, and all requests should flow through the Nginx server. The note in Step 1 briefly describes an open issue with Docker where Docker bypasses ufw firewall settings by default and opens ports externally, which may be insecure. To address this security concern, it’s recommended to use cloud firewalls when working with Docker-enabled servers. To get more information on creating Cloud Firewalls with DigitalOcean, consult How to Create Firewalls. You can also manipulate iptables directly instead of using ufw. To learn more about using iptables with Docker, please see Docker and iptables.
In this step we’ll modify UFW’s configuration to block external access to host ports opened by Docker. When running Django on the app servers, we passed the -p 80:8000 flag to docker, which forwards port 80 on the host to container port 8000. This also opened up port 80 to external clients, which you can verify by visiting http://your_app_server_1_IP. To prevent direct access, we’ll modify UFW’s configuration using the method described in the ufw-docker GitHub repository.
Begin by logging in to the first Django app server. Then, open the /etc/ufw/after.rules file with superuser privileges, using nano or your favorite editor:
sudo nano /etc/ufw/after.rules
Enter your password when prompted, and hit ENTER to confirm.
You should see the following ufw rules:
#
# rules.input-after
#
# Rules that should be run after the ufw command line added rules. Custom
# rules should be added to one of these chains:
#   ufw-after-input
#   ufw-after-output
#   ufw-after-forward
#

# Don't delete these required lines, otherwise there will be errors
*filter
:ufw-after-input - [0:0]
:ufw-after-output - [0:0]
:ufw-after-forward - [0:0]
# End required lines

# don't log noisy services by default
-A ufw-after-input -p udp --dport 137 -j ufw-skip-to-policy-input
-A ufw-after-input -p udp --dport 138 -j ufw-skip-to-policy-input
-A ufw-after-input -p tcp --dport 139 -j ufw-skip-to-policy-input
-A ufw-after-input -p tcp --dport 445 -j ufw-skip-to-policy-input
-A ufw-after-input -p udp --dport 67 -j ufw-skip-to-policy-input
-A ufw-after-input -p udp --dport 68 -j ufw-skip-to-policy-input

# don't log noisy broadcast
-A ufw-after-input -m addrtype --dst-type BROADCAST -j ufw-skip-to-policy-input

# don't delete the 'COMMIT' line or these rules won't be processed
COMMIT
Scroll to the bottom, and paste in the following block of UFW configuration rules:
. . .

# BEGIN UFW AND DOCKER
*filter
:ufw-user-forward - [0:0]
:DOCKER-USER - [0:0]
-A DOCKER-USER -j RETURN -s 10.0.0.0/8
-A DOCKER-USER -j RETURN -s 172.16.0.0/12
-A DOCKER-USER -j RETURN -s 192.168.0.0/16

-A DOCKER-USER -p udp -m udp --sport 53 --dport 1024:65535 -j RETURN

-A DOCKER-USER -j ufw-user-forward

-A DOCKER-USER -j DROP -p tcp -m tcp --tcp-flags FIN,SYN,RST,ACK SYN -d 192.168.0.0/16
-A DOCKER-USER -j DROP -p tcp -m tcp --tcp-flags FIN,SYN,RST,ACK SYN -d 10.0.0.0/8
-A DOCKER-USER -j DROP -p tcp -m tcp --tcp-flags FIN,SYN,RST,ACK SYN -d 172.16.0.0/12
-A DOCKER-USER -j DROP -p udp -m udp --dport 0:32767 -d 192.168.0.0/16
-A DOCKER-USER -j DROP -p udp -m udp --dport 0:32767 -d 10.0.0.0/8
-A DOCKER-USER -j DROP -p udp -m udp --dport 0:32767 -d 172.16.0.0/12

-A DOCKER-USER -j RETURN
COMMIT
# END UFW AND DOCKER
These rules restrict public access to ports opened by Docker, and enable access from the 10.0.0.0/8, 172.16.0.0/12, and 192.168.0.0/16 private IP ranges. If you are using VPC with DigitalOcean, then Droplets in your VPC network will have access to the open port over the private network interface, but external clients will not. For more information about VPC, please see the VPC official documentation. To learn more about the rules implemented in this snippet, please see How it works? from the ufw-docker README.
If you are not using VPC with DigitalOcean, and have entered the public IP addresses of the app servers in the upstream block of your Nginx config, you will have to explicitly modify the UFW firewall to allow traffic from the Nginx server through port 80 on the Django app servers. For guidance on creating allow rules with the UFW firewall, please see UFW Essentials: Common Firewall Rules and Commands.
When you’ve finished editing, save and close the file.
Restart ufw so that it picks up the new configuration:
sudo systemctl restart ufw
Navigate to http://APP_SERVER_1_IP in your web browser to confirm that you can no longer access the app server over port 80.
Repeat this process on the second Django app server.
Log out of the first app server or open another terminal window, and log in to the second Django app server. Then, open the /etc/ufw/after.rules file with superuser privileges, using nano or your favorite editor:
sudo nano /etc/ufw/after.rules
Enter your password when prompted, and hit ENTER to confirm.
Scroll to the bottom, and paste in the following block of UFW configuration rules:
. . .

# BEGIN UFW AND DOCKER
*filter
:ufw-user-forward - [0:0]
:DOCKER-USER - [0:0]
-A DOCKER-USER -j RETURN -s 10.0.0.0/8
-A DOCKER-USER -j RETURN -s 172.16.0.0/12
-A DOCKER-USER -j RETURN -s 192.168.0.0/16

-A DOCKER-USER -p udp -m udp --sport 53 --dport 1024:65535 -j RETURN

-A DOCKER-USER -j ufw-user-forward

-A DOCKER-USER -j DROP -p tcp -m tcp --tcp-flags FIN,SYN,RST,ACK SYN -d 192.168.0.0/16
-A DOCKER-USER -j DROP -p tcp -m tcp --tcp-flags FIN,SYN,RST,ACK SYN -d 10.0.0.0/8
-A DOCKER-USER -j DROP -p tcp -m tcp --tcp-flags FIN,SYN,RST,ACK SYN -d 172.16.0.0/12
-A DOCKER-USER -j DROP -p udp -m udp --dport 0:32767 -d 192.168.0.0/16
-A DOCKER-USER -j DROP -p udp -m udp --dport 0:32767 -d 10.0.0.0/8
-A DOCKER-USER -j DROP -p udp -m udp --dport 0:32767 -d 172.16.0.0/12

-A DOCKER-USER -j RETURN
COMMIT
# END UFW AND DOCKER
When you’ve finished editing, save and close the file.
Restart ufw so that it picks up the new configuration:
sudo systemctl restart ufw
Navigate to http://APP_SERVER_2_IP in your web browser to confirm that you can no longer access the app server over port 80.
Finally, navigate to https://your_domain_here/polls to confirm that the Nginx proxy still has access to the upstream Django servers. You should see the default Polls app interface.
Conclusion
In this tutorial, you’ve set up a scalable Django Polls application using Docker containers. As your traffic grows and load on the system increases, you can scale each layer separately: the Nginx proxying layer, the Django backend app layer, and the PostgreSQL database layer.
When building a distributed system, there are often multiple design decisions you must face, and several architectures may satisfy your use case. The architecture described in this tutorial is meant as a flexible blueprint for designing scalable apps with Django and Docker.
You may wish to control the behavior of your containers when they encounter errors, or run containers automatically when your system boots. To do this, you can use a process manager like Systemd or implement restart policies. For more information about these, please see Start containers automatically from the Docker documentation.
When working at scale with multiple hosts running the same Docker image, it can be more efficient to automate steps using a configuration management tool like Ansible or Chef. To learn more about configuration management, please consult An Introduction to Configuration Management and Automating Server Setup with Ansible: A DigitalOcean Workshop Kit.
Instead of building the same image on every host, you can also streamline deployment using an image registry like Docker Hub, which centrally builds, stores, and distributes Docker images to multiple servers. Along with an image registry, a continuous integration and deployment pipeline can help you build, test, and deploy images to your app servers. For more information on CI/CD, please consult An Introduction to CI/CD Best Practices.
Thanks for learning with the DigitalOcean Community. Check out our offerings for compute, storage, networking, and managed databases.
Tutorial Series: From Containers to Kubernetes with Django
In this series, you will build and containerize a Django application. The series is designed to introduce you to the fundamentals of migrating an application to Kubernetes, including modernizing your app using the 12FA methodology, containerizing it, and deploying it to Kubernetes. The series also includes information on scaling and securing a containerized app with NGINX and Let’s Encrypt Docker containers.
About the author
DevOps Engineer, Former Technical Writer and Editor at DigitalOcean. Expertise in topics including Ubuntu, Kubernetes, Docker, CentOS.
Still looking for an answer?
This textbox defaults to using Markdown to format your answer.
You can type !ref in this text area to quickly search our full set of tutorials, documentation & marketplace offerings and insert the link!
Thanks for the tutorial Hanif! A question - we have our domain hosted on Wix: example.com. I’d like to redirect traffic from our two Django app servers to a subdomain, api.example.com. Could this be achieved by changing your_domain.com everywhere to api.example.com? Or is there a different way that we would need to go about this?
Thanks again for your help!
I have absolutely no fucking idea what I just did but I now have a Dockerized website with a valid TLS certificate. Thanks mate.
This is great, but it would be even better if you also provided a docker-compose.yml file so we didn’t have to do all that stuff on the command line ;-)
sorry, i have problem.
until step 4 is fine all works. i can access to my django app.
but from step 5, when i change ufw settings like /etc/ufw/after.rules, i cant not access to django app suddenly.
cloud you help me out?
I have just joined Digital Ocean and I find the terminology very confusing. How do I spwan the 3 servers required for this guide? There is no “Create a server” afaict. Should I use the “Kubernetes” menu item? Or Apps? Or Droplet?
 This work is licensed under a Creative Commons Attribution-NonCommercial- ShareAlike 4.0 International License.
Become a contributor for community
Get paid to write technical tutorials and select a tech-focused charity to receive a matching donation.

DigitalOcean Documentation
Full documentation for every DigitalOcean product.

Resources for startups and AI-native businesses
The Wave has everything you need to know about building a business, from raising funding to marketing your product.
The developer cloud
Scale up as you grow — whether you're running one virtual machine or ten thousand.

Start building today
From GPU-powered inference and Kubernetes to managed databases and storage, get everything you need to build, scale, and deploy intelligent applications.
