By Ari Birnbaum and Brian MacDonald

The author selected the Mozilla Foundation to receive a donation as part of the Write for DOnations program.
Introduction
As demand for full-stack development continues to grow, web frameworks are making development workflows less cumbersome and more efficient; Django is one of those frameworks. Django has been used in major websites such as Mozilla, Pinterest, and Instagram. Unlike Flask, which is a neutral micro-framework, the Django PyPI package includes everything you would need for full-stack development; no need to set up a database or control panel for development.
One common use-case for Django is to use it to display information from APIs (such as Instagram posts or GitHub repositories) in your own websites and web apps. While this is possible with other frameworks, Django’s “batteries included” philosphy means there will be less hassle and fewer packages required to create the same result.
In this tutorial you will build a Django project that will display your DigitalOcean account’s Droplet information using the DigitalOcean v2 API. Specifically, you will be creating a website that will display a table of Droplets listing each of their IP addresses, IDs, hosting regions, and resources. Your website will use BulmaCSS to style the page so you can focus on development while also having something nice to look at in the end.
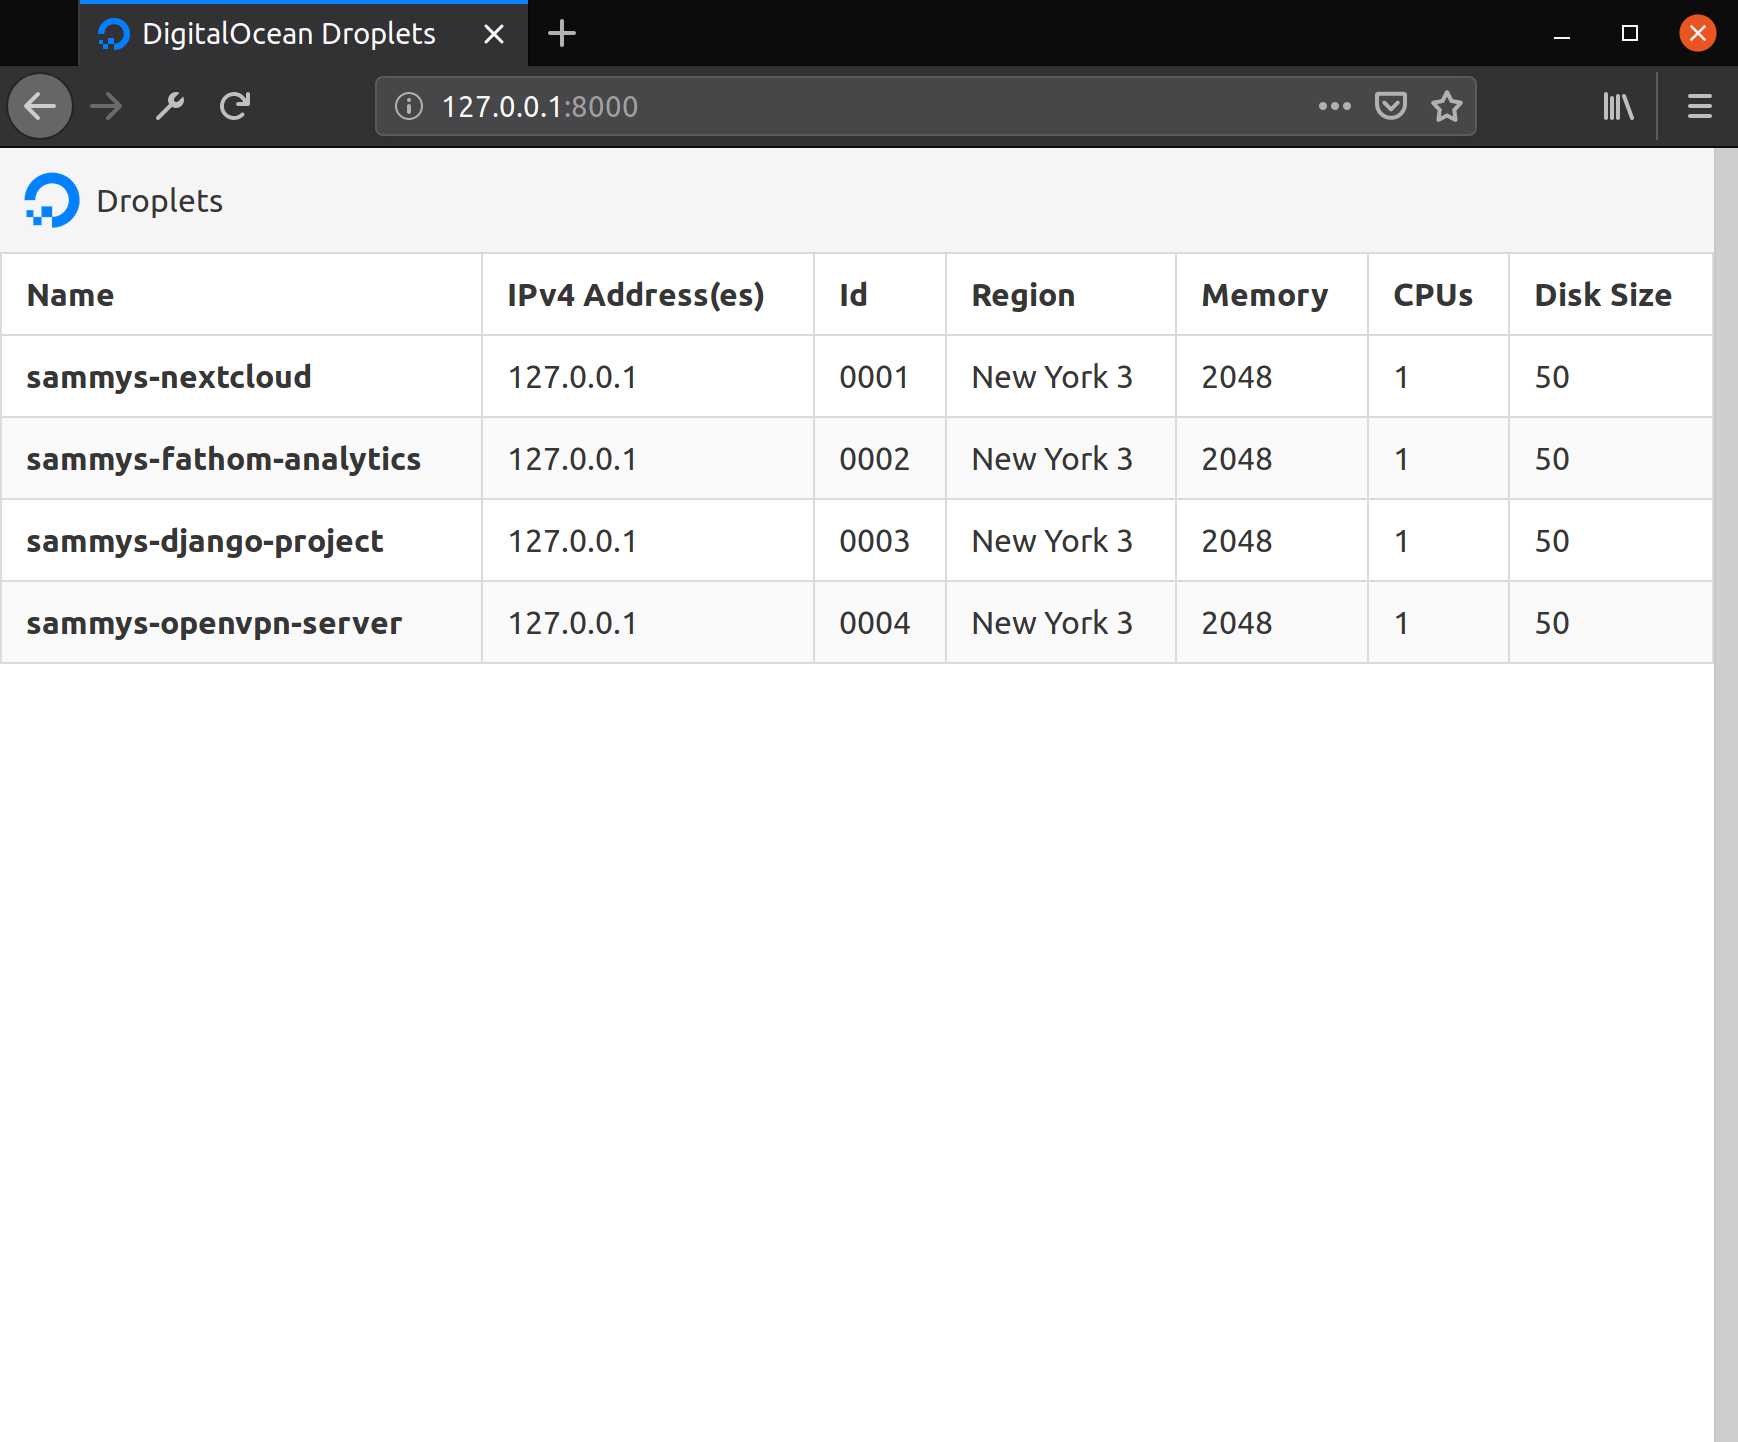
Once you complete this tutorial, you will have a Django project that can produce a webpage that looks like this:
Prerequisites
Before you begin this guide you’ll need the following:
- A DigitalOcean account with at least one Droplet, and a personal access token. Make sure to record the token in a safe place; you’ll need it later on in this tutorial.
- Familiarity in making requests to APIs. For a comprehensive tutorial on working with APIs, take a look at How to Use Web APIs in Python3.
- A local virtual environment for Python for maintaining dependencies. In this tutorial we’ll use the name
do_django_apifor our project directory andenvfor our virtual environment. - Familiarity with Django’s template logic for rendering pages with API data.
- Familiarity with Django’s view logic for handling data recieved from the API and giving it to a template for rendering.
Step 1 — Making a Basic Django Project
From within the virtual environment env, install Django:
- pip install Django
Now you can start a Django project and run some initial setup commands.
Use django-admin startproject <name> to create a subdirectory in the project folder named after your Django project, then switch to that directory.
- django-admin startproject do_django_project
- cd do_django_project
Once it’s created, inside this subdirectory, you will find manage.py, which is the usual way to interact with Django and run your project. Use migrate to update Django’s development database:
- python3 manage.py migrate
You’ll see output that looks like this as the database updates:
OutputOperations to perform:
  Apply all migrations: admin, auth, contenttypes, sessions
Running migrations:
  Applying contenttypes.0001_initial... OK
  Applying auth.0001_initial... OK
  Applying admin.0001_initial... OK
  Applying admin.0002_logentry_remove_auto_add... OK
  Applying admin.0003_logentry_add_action_flag_choices... OK
  Applying contenttypes.0002_remove_content_type_name... OK
  Applying auth.0002_alter_permission_name_max_length... OK
  Applying auth.0003_alter_user_email_max_length... OK
  Applying auth.0004_alter_user_username_opts... OK
  Applying auth.0005_alter_user_last_login_null... OK
  Applying auth.0006_require_contenttypes_0002... OK
  Applying auth.0007_alter_validators_add_error_messages... OK
  Applying auth.0008_alter_user_username_max_length... OK
  Applying auth.0009_alter_user_last_name_max_length... OK
  Applying auth.0010_alter_group_name_max_length... OK
  Applying auth.0011_update_proxy_permissions... OK
  Applying sessions.0001_initial... OK
Next, use the runserver command to run the project so you can test it out:
- python3 manage.py runserver
The output will look like this as the server starts:
OutputWatching for file changes with StatReloader
Performing system checks...

System check identified no issues (0 silenced).
September 22, 2019 - 22:57:07
Django version 2.2.5, using settings 'do_django_project.settings'
Starting development server at http://127.0.0.1:8000/
Quit the server with CONTROL-C.
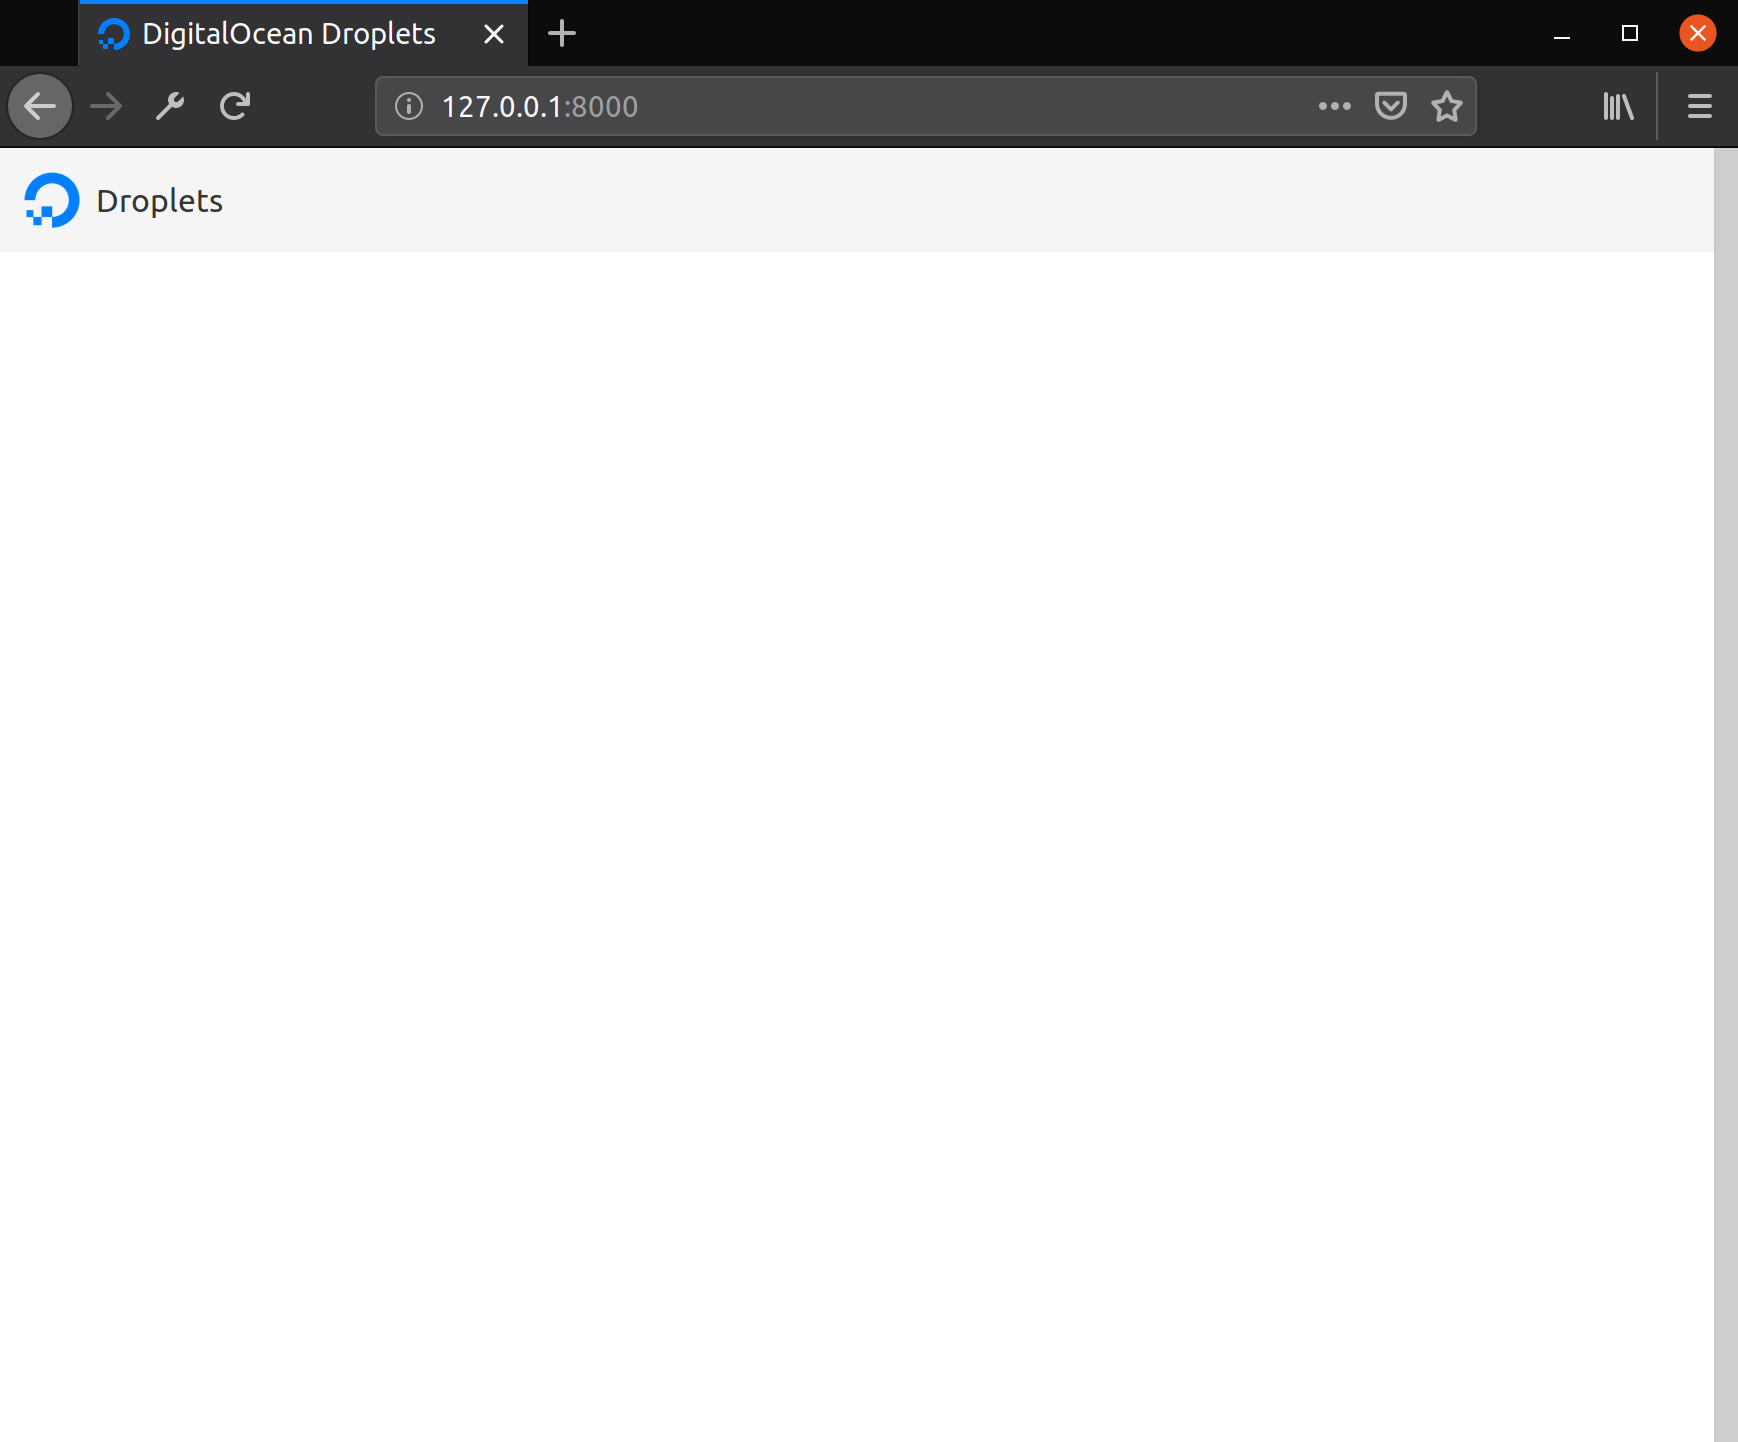
You now have a basic Django project and a development server running. To view your running development server, visit 127.0.0.1:8000 in a browser. It will display the Django startup page:

Next you’ll create a Django app and configure your project to run a view from that app so you’ll see something more interesting than the default page.
Step 2 — Making a Basic Django App
In this step, you’ll create the skeleton of the app that will hold your Droplet results. You’ll come back to this app later once you’ve set up the API call to populate it with data.
Make sure you’re in the do_django_project directory, and create a Django app using the following command:
- python3 manage.py startapp display_droplets
Now you need to add the new app to INSTALLED_APPS in the settings.py file, so Django will recognize it. settings.py is a Django configuration file that’s located inside another subdirectory in the Django project and has the same name as the project folder (do_django_project). Django created both folders for you. Switch to the do_django_project directory:
- cd do_django_project
Edit settings.py in the editor of your choice:
- nano settings.py
Add your new app to the INSTALLED_APPS section of the file:
INSTALLED_APPS = [
    'django.contrib.admin',
    'django.contrib.auth',
    'django.contrib.contenttypes',
    'django.contrib.sessions',
    'django.contrib.messages',
    'django.contrib.staticfiles',
    # The new app
    'display_droplets',
]
Save and close the file when you’re done.
GetDroplets View Function
Next you’ll create a function, GetDroplets, inside the display_droplets app’s views.py file. This function will render the template you’ll use to display Droplet data, as context, from the API. context is a dictionary that is used to take data from Python code and send it to an HTML template so it can be displayed in a web page.
Switch to the display_droplets directory:
- cd ..
- cd display_droplets
Open views.py for editing:
- nano views.py
Add the following code to the file:
from django.views.generic import TemplateView

class GetDroplets(TemplateView):
    template_name = 'droplets.html'
    def get_context_data(self, *args, **kwargs):
        pass
Save and close the file.
Later you will populate this function and create the droplets.html file, but first let’s configure urls.py to call this function when you visit the development server root directory (127.0.0.1:8000).
Switch back to the do_django_project directory:
- cd ..
- cd do_django_project
Open urls.py for editing:
- nano urls.py
Add an import statement for GetDroplets, then add an additional path to urlpatterns that will point to the new view.
from django.contrib import admin
from django.urls import path
from display_droplets.views import GetDroplets

urlpatterns = [
    path('admin/', admin.site.urls),
    path('', GetDroplets.as_view(template_name='droplets.html'), name='Droplet View'),
]
If you want to make your own custom paths, the first parameter is the URL (such as example.com/**admin**), the second parameter is the function to call to produce the web page, and the third is just a name for the path.
Save and close the file.
Droplets Template
Next you’ll be working with templates. Templates are HTML files that Django uses to create web pages. In this case, you’ll use a template to construct an HTML page that displays the API data.
Switch back to the display_droplets directory:
- cd ..
- cd display_droplets
Inside this directory, create a template folder and switch to that directory:
- mkdir templates
- cd templates
Create droplets.html and open it for editing:
- nano droplets.html
To avoid having to write any sort of CSS for this project, we’ll use Bulma CSS because it’s a free and lightweight CSS framework that allows you to create clean-looking web pages just by adding a few class attributes to the HTML.
Now let’s create a template with a basic navigation bar. Add the following code to the droplets.html file.
<!DOCTYPE html>
<html lang="en">
<head>
    <meta charset="UTF-8">
    <title>DigitalOcean Droplets</title>
    <link crossorigin="anonymous"
          href="https://cdnjs.cloudflare.com/ajax/libs/bulma/0.7.4/css/bulma.min.css"
          integrity="sha256-8B1OaG0zT7uYA572S2xOxWACq9NXYPQ+U5kHPV1bJN4="
          rel="stylesheet"/>
    <link rel="shortcut icon" type="image/png" href="https://assets.digitalocean.com/logos/favicon.png"/>
</head>
<body>
<nav aria-label="main navigation" class="navbar is-light" role="navigation">
    <div class="navbar-brand">
        <div class="navbar-item">
            <img atl="DigitalOcean" src="https://assets.digitalocean.com/logos/DO_Logo_icon_blue.png"
                 style="margin-right: 0.5em;">Droplets
        </div>
    </div>
</nav>
</body>
</html>
Save and close the file.
This code imports Bulma into boilerplate HTML and creates a nav bar displaying “Droplets.”
Refresh your browser tab to view the changes you made to the template.
So far you haven’t touched anything related to APIs; you’ve created a foundation for the project. Next you’ll put this page to good use by making an API call and presenting the Droplet data.
Step 3 — Making The API Call
In this step, you’ll set up an API call and send the Droplet data as context to the template to display in a table.
Getting Droplet Data
Navigate back to the display_droplets app directory:
- cd ..
Install the requests library so you can talk to the API:
- pip install requests
The requests library enables your code to request data from APIs and add headers (additional data sent along with our request).
Next, you’ll create a services.py file, which is where you’ll make the API call. This function will use requests to talk to https://api.digitalocean.com/v2/droplets and append each Droplet in the JSON file returned to a list.
Open services.py for editing:
- nano services.py
Add the following code to the file:
import os
import requests

def get_droplets():
    url = 'https://api.digitalocean.com/v2/droplets'
    r = requests.get(url, headers={'Authorization':'Bearer %s' % 'access_token'})
    droplets = r.json()
    droplet_list = []
    for i in range(len(droplets['droplets'])):
        droplet_list.append(droplets['droplets'][i])
    return droplet_list
Inside the get_droplets function, two things occur: a request is made and data is parsed. url contains the URL requesting Droplet data from the DigitalOcean API. r stores the requested data.
requests takes two parameters in this case: url and headers. If you want data from a different API, you’d replace the url value with the appropriate URL. headers sends DigitalOcean your access token, so they know you’re allowed to make the request and for what account the request is being made.
droplets contains the information from the r variable, but now it has been converted from JSON, the format the API sends information in, into a dictionary which is easy to use in a for loop.
The next three lines create an array, droplet_list[]. Then a for loop iterates over the information in droplets, and adds each item to the list. All of the information taken from the API and stored in droplets can be found in DigitalOcean’s Developer Docs.
Note: Don’t forget to replace access_token with your access token. Also, keep it safe and never publish that token online.
Save and close the file.
Protecting Your Access Token
You should always hide your access token, but if someone ever wanted to run your project, you should have an easy way for them to add their own access token without having to edit Python code. DotENV is the solution as variables are kept in a .env file that can be conveniently edited.
Navigate back to the do_django_project directory:
- cd ..
To start working with environment variables, install python-dotenv:
- pip install python-dotenv
Once it’s installed, you need to configure Django to handle environment variables, so you can reference them in code. To do that, you need to add a few lines of code to manage.py and wsgi.py.
Open manage.py for editing:
- nano manage.py
Add the following code:
"""Django's command-line utility for administrative tasks."""
import os
import sys
import dotenv

def main():
    os.environ.setdefault('DJANGO_SETTINGS_MODULE', 'do_django_project.settings')
    try:
        from django.core.management import execute_from_command_line
    except ImportError as exc:
        raise ImportError(
            "Couldn't import Django. Are you sure it's installed and "
            "available on your PYTHONPATH environment variable? Did you "
            "forget to activate a virtual environment?"
        ) from exc
    execute_from_command_line(sys.argv)

if __name__ == '__main__':
    main()

dotenv.load_dotenv(
    os.path.join(os.path.dirname(__file__), '.env')
)
Adding this in manage.py means that when you issue commands to Django in development it will handle environment variables from your .env file.
Save and close the file.
If you ever need to handle environment variables in your production projects, you can do that from the wsgi.py file. Change to the do_django_project directory:
- cd do_django_project
And open wsgi.py for editing:
- nano wsgi.py
Add the following code to wsgi.py:
import os
import dotenv

from django.core.wsgi import get_wsgi_application

os.environ.setdefault('DJANGO_SETTINGS_MODULE', 'do_django_project.settings')

dotenv.load_dotenv(
    os.path.join(os.path.dirname(os.path.dirname(__file__)), '.env')
)

application = get_wsgi_application()
This code snippet has an additional os.path.dirname() because wsgi.py needs to look two directories back to find the .env file. This snippet is not the same as the one used for manage.py.
Save and close the file.
Now you can use an environment variable in services.py instead of your access token. Switch back to the display_droplets directory:
- cd ..
- cd display_droplets
Open services.py for editing:
- nano services.py
Now replace your access token with an environment variable:
import os
import requests

def get_droplets():
    url = "https://api.digitalocean.com/v2/droplets"
    r = requests.get(url, headers={'Authorization':'Bearer %s' % os.getenv('DO_ACCESS_TOKEN')})
    droplets = r.json()
    droplet_list = []
    for i in range(len(droplets['droplets'])):
        droplet_list.append(droplets['droplets'][i])
    return droplet_list
Save and close the file.
The next step is to create a .env file. Switch back to the do_django_project directory:
- cd ..
Create a .env file and pen the file for editing:
- nano .env
In .env, add your token as the variable DO_ACCESS_TOKEN:
DO_ACCESS_TOKEN=access_token
Save and close the file.
Note: Add .env to your .gitignore file so it is never included in your commits.
The API connection is now set up and configured, and you’ve protected your access token as well. It’s time to present the information you retrieved to the user.
Step 4 — Handling Droplet Data in Views and Templates
Now that you can make API calls, you need to send the Droplet data to the template for rendering. Let’s return to the stub of the function, GetDroplets you created earlier in views.py. In the function you’ll send droplet_list as context to the droplets.html template.
Switch to the display_droplets directory:
- cd display_droplets
Open views.py for editing:
- nano views.py
Add the following code to views.py:
from django.shortcuts import render
from django.views.generic import TemplateView
from .services import get_droplets

class GetDroplets(TemplateView):
    template_name = 'droplets.html'
    def get_context_data(self, *args, **kwargs):
        context = {
            'droplets' : get_droplets(),
        }
        return context
Information sent to the droplets.html template is handled via the context dictionary. This is why droplets acts as a key and the array returned from get_droplets() acts as a value.
Save and close the file.
Presenting the Data in the Template
Inside the droplets.html template you’ll create a table and populate it with the droplet data.
Switch to the templates directory:
- cd templates
Open droplets.html for editing:
- nano droplets.html
Add the following code after the nav element in droplets.html:
<table class="table is-fullwidth is-striped is-bordered">
    <thead>
    <tr>
        <th>Name</th>
        <th>IPv4 Address(es)</th>
        <th>Id</th>
        <th>Region</th>
        <th>Memory</th>
        <th>CPUs</th>
        <th>Disk Size</th>
    </tr>
    </thead>
    <tbody>
    {% for droplet in droplets %}
    <tr>
        <th>{{ droplet.name }}</th>
        {% for ip in droplet.networks.v4 %}
        <td>{{ ip.ip_address }}</td>
        {% endfor %}
        <td>{{ droplet.id }}</td>
        <td>{{ droplet.region.name }}</td>
        <td>{{ droplet.memory }}</td>
        <td>{{ droplet.vcpus }}</td>
        <td>{{ droplet.disk }}</td>
    </tr>
    {% endfor %}
    </tbody>
</table>
{% for droplet in droplets %} ... {% endfor %} is a loop that iterates through the array of Droplets retrieved from views.py. Each Droplet is inserted in a table row. The various {{ droplet.<attribute> }} lines retrieve that attribute for each Droplet in the loop, and inserts it in a table cell.
Save and close the file.
Refresh your browser and you will see a list of Droplets.
You can now handle the DigitalOcean API inside your Django projects. You’ve taken the data retrieved from the API and plugged it into the template you created earlier, to display the information in a readable and flexible manner.
Conclusion
In this article you built a Django project that can display Droplet information from the DigitalOcean API with Bulma CSS styling. You’ve learned three important skills by following this tutorial:
- How to handle API requests in Python using the
requestsandjsonmodules. - How to display API data in a Django project using
viewandtemplatelogic. - How to safely handle your API tokens using
dotenvin Django.
Now that you’ve gotten an introduction to handling APIs in Django, you can create a project of your own using either another feature from the DigitalOcean API or another API altogether. You can also check out other Django tutorials or a similar tutorial with the React framework.
Thanks for learning with the DigitalOcean Community. Check out our offerings for compute, storage, networking, and managed databases.
About the author(s)
CS Student at Stevens Institute of Technology.
Editor at DigitalOcean, former book editor at Pragmatic, O'Reilly, and others. Occasional conference speaker. Highly nerdy.
Still looking for an answer?
This textbox defaults to using Markdown to format your answer.
You can type !ref in this text area to quickly search our full set of tutorials, documentation & marketplace offerings and insert the link!
 This work is licensed under a Creative Commons Attribution-NonCommercial- ShareAlike 4.0 International License.
Become a contributor for community
Get paid to write technical tutorials and select a tech-focused charity to receive a matching donation.

DigitalOcean Documentation
Full documentation for every DigitalOcean product.

Resources for startups and AI-native businesses
The Wave has everything you need to know about building a business, from raising funding to marketing your product.
The developer cloud
Scale up as you grow — whether you're running one virtual machine or ten thousand.

Start building today
From GPU-powered inference and Kubernetes to managed databases and storage, get everything you need to build, scale, and deploy intelligent applications.
